Staff User Setup
- 28 Apr 2023
- 3 Minutes to read
- Print
- PDF
Staff User Setup
- Updated on 28 Apr 2023
- 3 Minutes to read
- Print
- PDF
Article Summary
Share feedback
Thanks for sharing your feedback!
Introduction
The Joblogic system allows the users with the relevant permissions to Add New Users, Manage Existing Users, Create/Manage User Roles, and more, via the ‘Staff’ section of the system. This user manual details a step-by-step breakdown of how to view and manage staff information, for convenient use of the system by the back office and field engineers.
Accessing the Staff Section
To access the Staff section, click ‘Settings’ within the left navigation pane and select ‘Staff’.

This will direct you to the Users page, where a Staff list, along with their details can be viewed.
The list can be filtered by using the ‘Search Filter’ at the top of the page. You can also ‘Print’ and ‘Export’ the list by clicking the relevant options at the top of the page.

Manage User Roles
Users with the relevant permissions have the option to create and manage ‘User Roles’ within the Joblogic back-office system, which can then be assigned to any new users that are added.
To access this section, click the ‘Manage User Roles’ tab in the top right of the Users page.

The system currently consists of 4 pre-made user roles with preset permissions, which can be assigned to new users. However, if you wish to add more user roles, you may do so by clicking the ‘Add Role’ button OR to delete a user role, simply click the red ‘Bin icon’ against the User Role, and select ‘Yes’ to confirm.

Clicking the ‘Add Role’ button directs you to the main page, where you can enter the ‘Role Details’ and set ‘Role Permissions’.
Start adding the role details such as the ‘Role Name’ and ‘Role Description’, tick the appropriate ‘Role Permission’ such as Business, User/Staff, Libraries, etc, and Grant/Deny the privileges that are relevant to the role.

Upon adding the required information, click the ‘Save’ button, and the new User Role will be created.
Adding a New User
Once the required user roles have been added to the system, a ‘New User’ can be added by clicking the ‘Add User’ button from within the ‘Users’ page.

Clicking the ‘Add User’ button will direct you to a new page where you can enter the new users' details, including, User Type, Name, Email and User Role.
The fields with a red asterisk are mandatory and will need to be filled in before you can save the new user.

Upon adding the required information, click the ‘Save’ button.
The newly created user will then receive an email to activate their account. They will receive a link to set their own password and then to log in.

Deactivation and Deletion of a User Account
Users cannot be deleted if there are jobs/visits recorded against them, but can be deactivated instead, to ensure no job records are lost.
In order to delete/deactivate a User, navigate to the ‘User Details’ page by clicking on the specific user’s name from the ‘Staff List’.
Within the user details page, click the (︙) button at the top right and select ‘Deactivate User’.

User Access Log
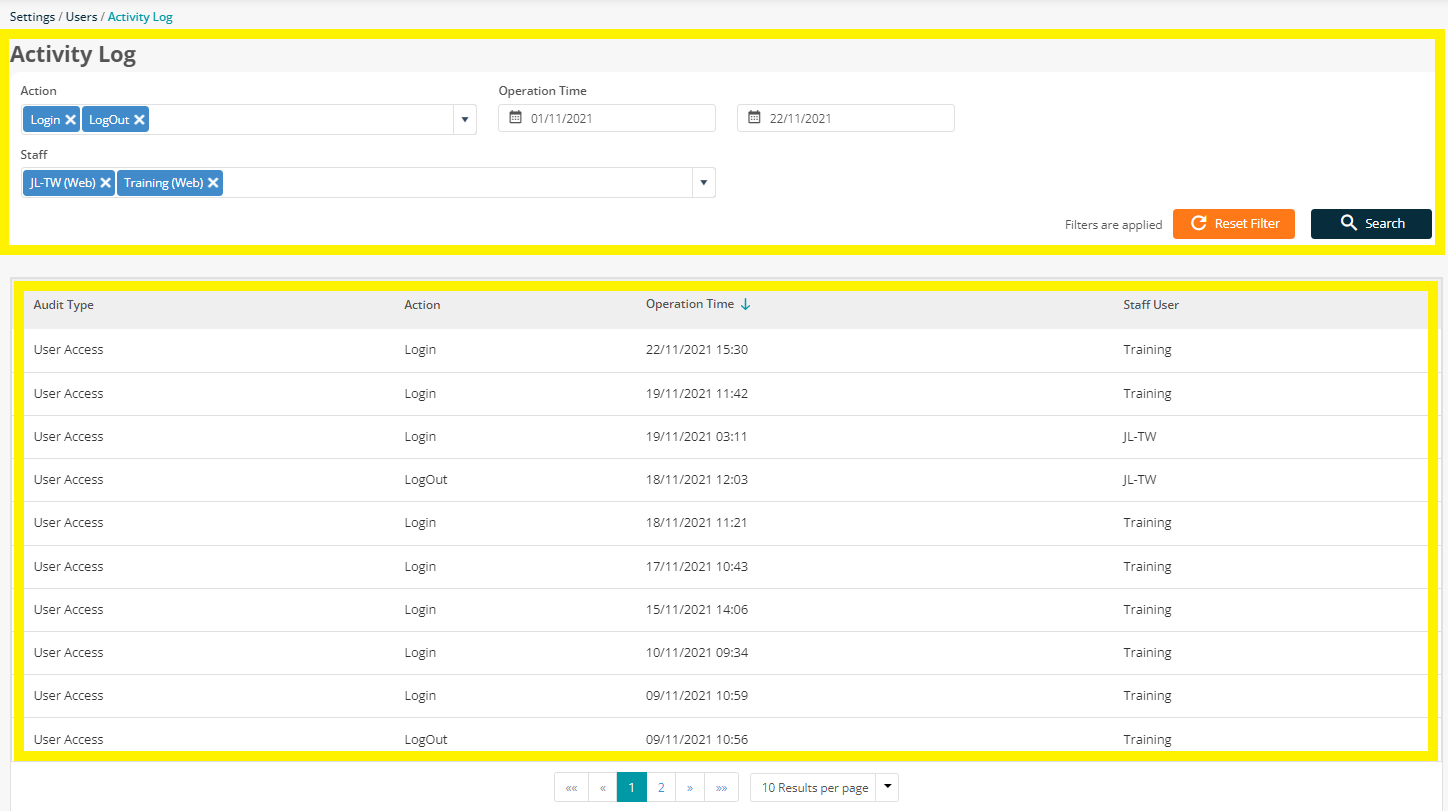
The ‘Activity Logs’ of all the back-office users can be viewed within the Staff section by clicking the ‘User Access Log’ tab.
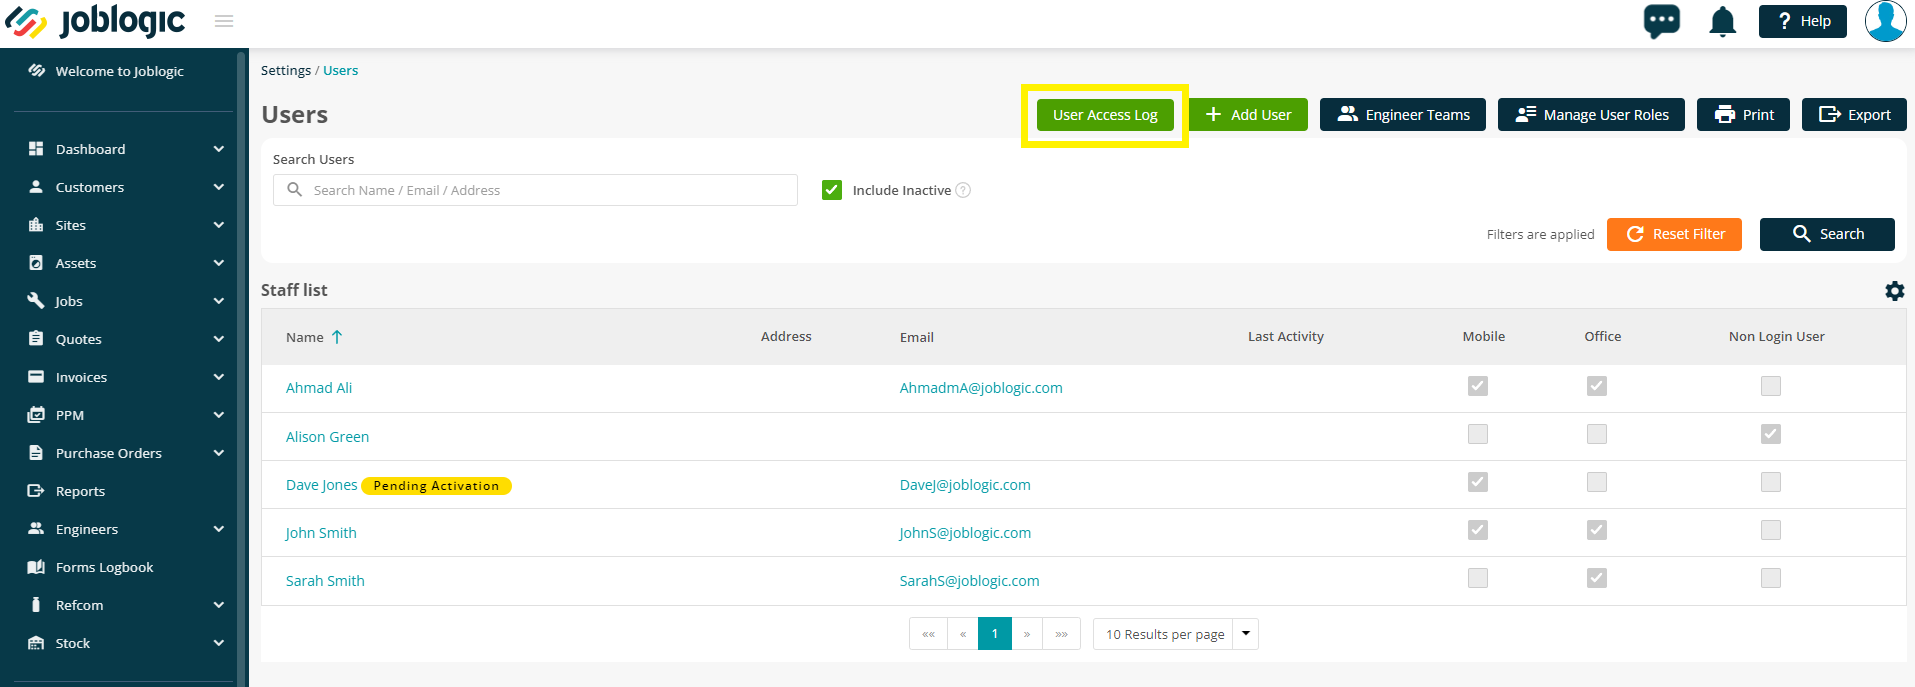
The Activity Log displays information such as the Audit Type, Login/Logout Actions, Time & Date of the Action, and the Staff Name. This log can also be filtered using the ‘Search Filter’ at the top of the page.
Further Support
For further information or assistance on the above, contact our Support Team on 0800 326 5561 or email support@joblogic.com. Alternatively, our Customer Success Managers team can be reached by emailing accountmanager@joblogic.com
Publishing Details
This document was written and produced by Joblogic’s Technical Writing team and was last updated on the date specified above. Be aware that the information provided may be subject to change following further updates on the matter becoming available. Additionally, details within the guide may vary depending on your Joblogic account’s user permissions.
Was this article helpful?