Introduction
The Projects module enables you to manage project-based work within Joblogic, from smaller jobs to large-scale projects delivered across multiple phases and extended timeframes.
It provides greater visibility and control by allowing you to manage project budgets, track progress, monitor costs, and handle project billing through payment applications, staged payments, and retention invoices.
This guide explains how to create a new project and describes the key information required during the setup process.
Adding a New Project
To add a Project, navigate to the ‘Projects’ dropdown on the main menu and select ‘Add Project’.
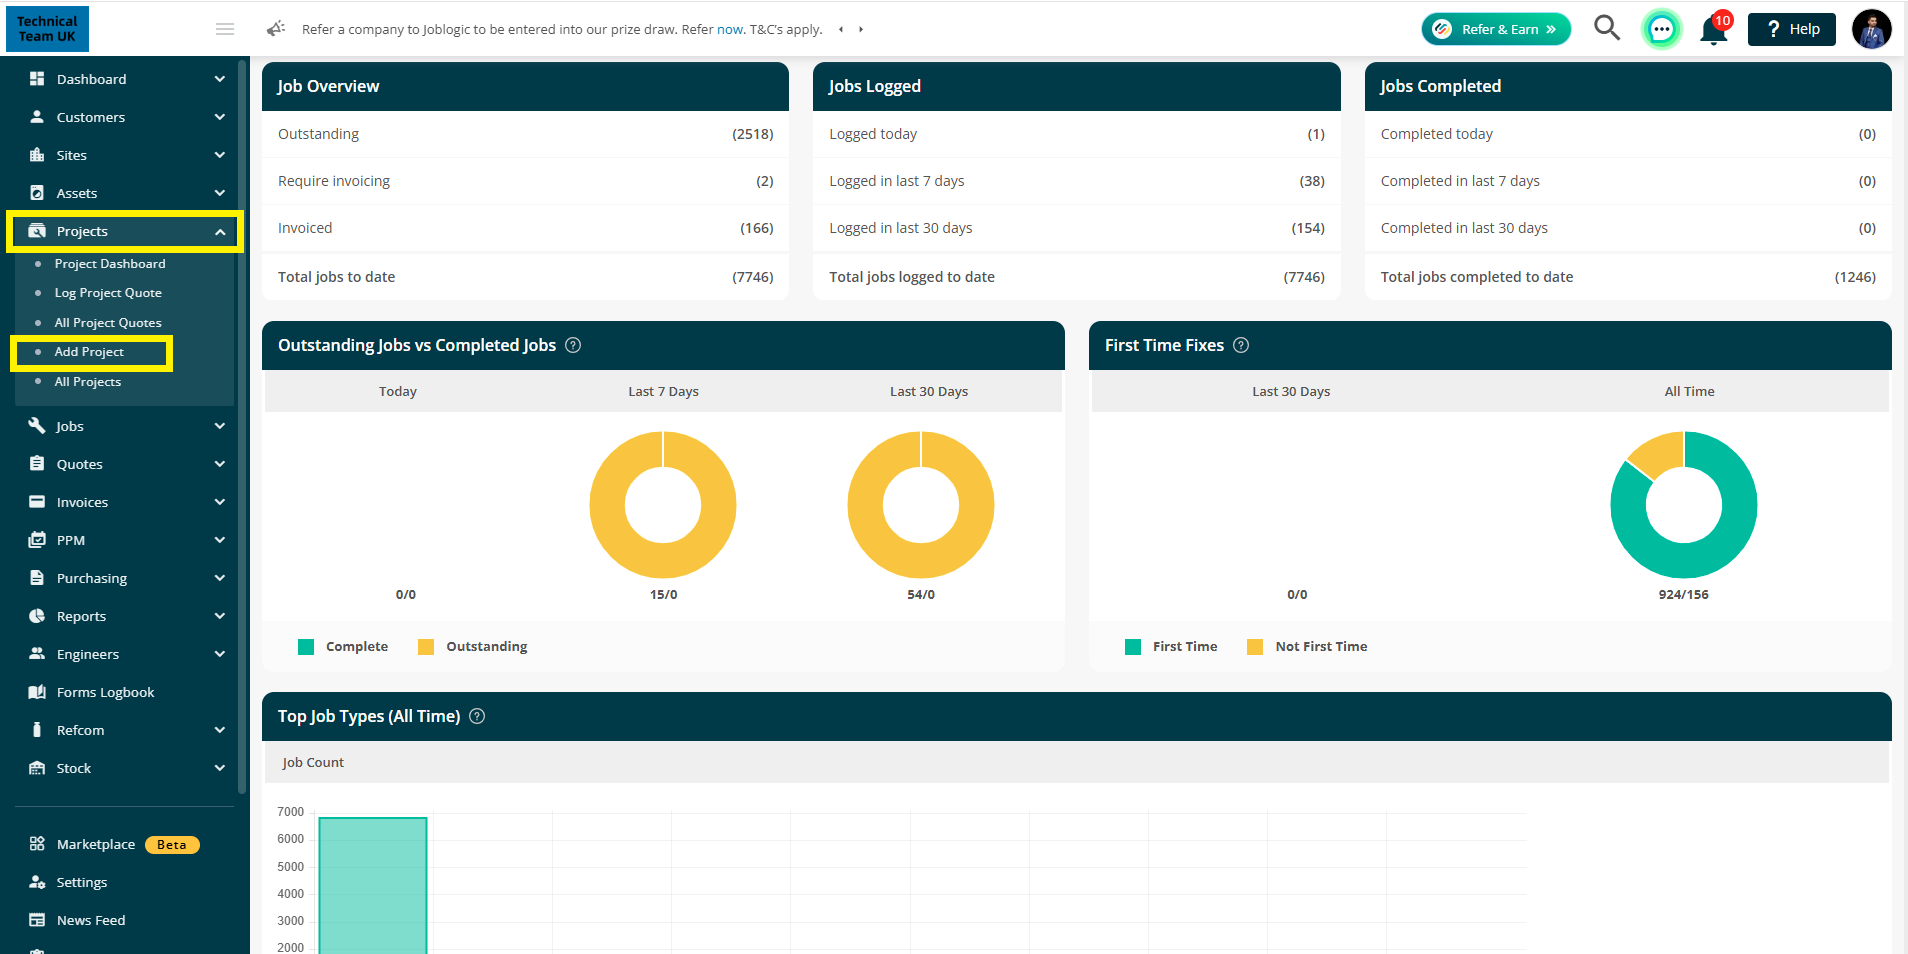
This opens the Add Project page, where you'll complete the information required to create a new project.
Fields marked with a red asterisk (*) are mandatory and must be completed before the project can be created.
.png)
Customer & Site selection
You'll firstly need to select the customer that the project is for and the site where the project work will take place.
Note: If the selected site is associated with multiple customers, enable Show Associated Only to display only customers linked to that site. This helps you select the correct customer more easily.
.jpg)
If the project will be carried out across more than one site, you can associate additional sites during project creation*
Once you've selected the primary Customer and Site, select Add Sites.
.png)
Tick any sites you wish to add, then click Apply.
.png)
*this is Setting dependent. Check the project settings guide for more information.
Project details
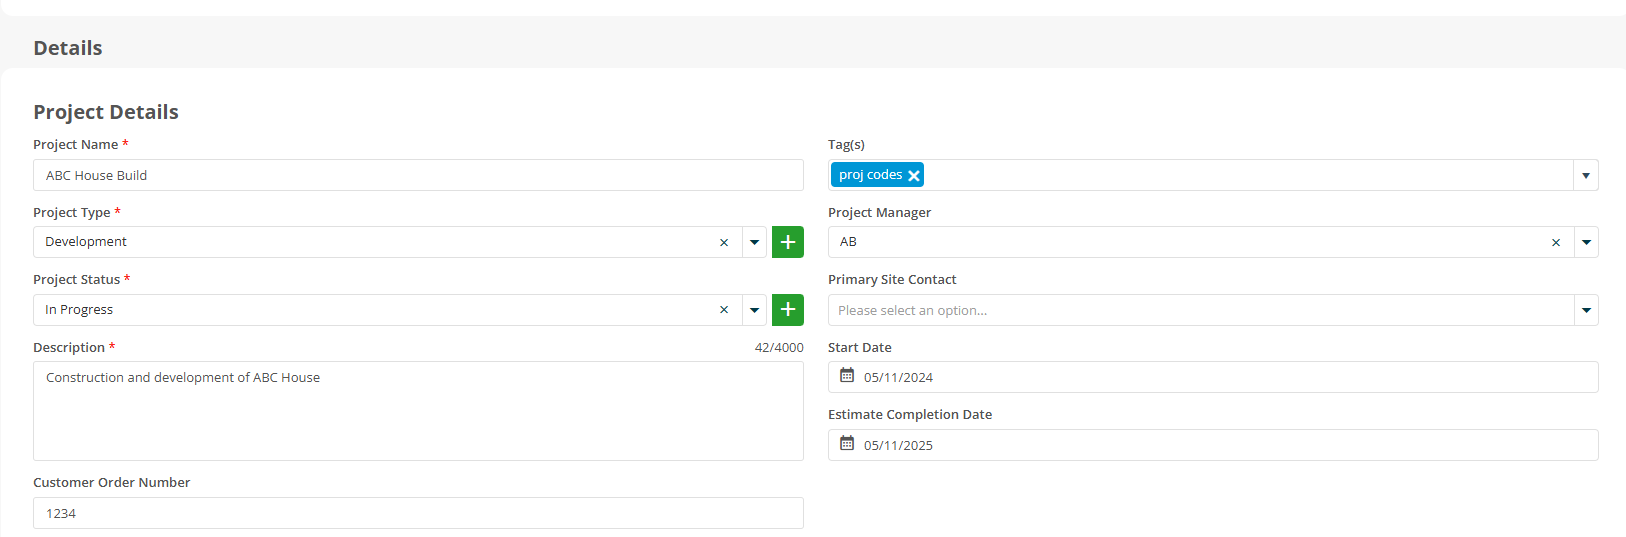
Enter a Project Name and Description to identify the work being carried out.
Project Type categorises the project, while Project Status records its current stage (for example, In Progress, Paused or Cancelled). Both are configured in the Projects Settings library.
You can also complete a range of optional fields.
Tags are custom labels that can be used for searching, filtering and reporting. They're useful when you need to classify projects using criteria that aren't covered by the standard fields.
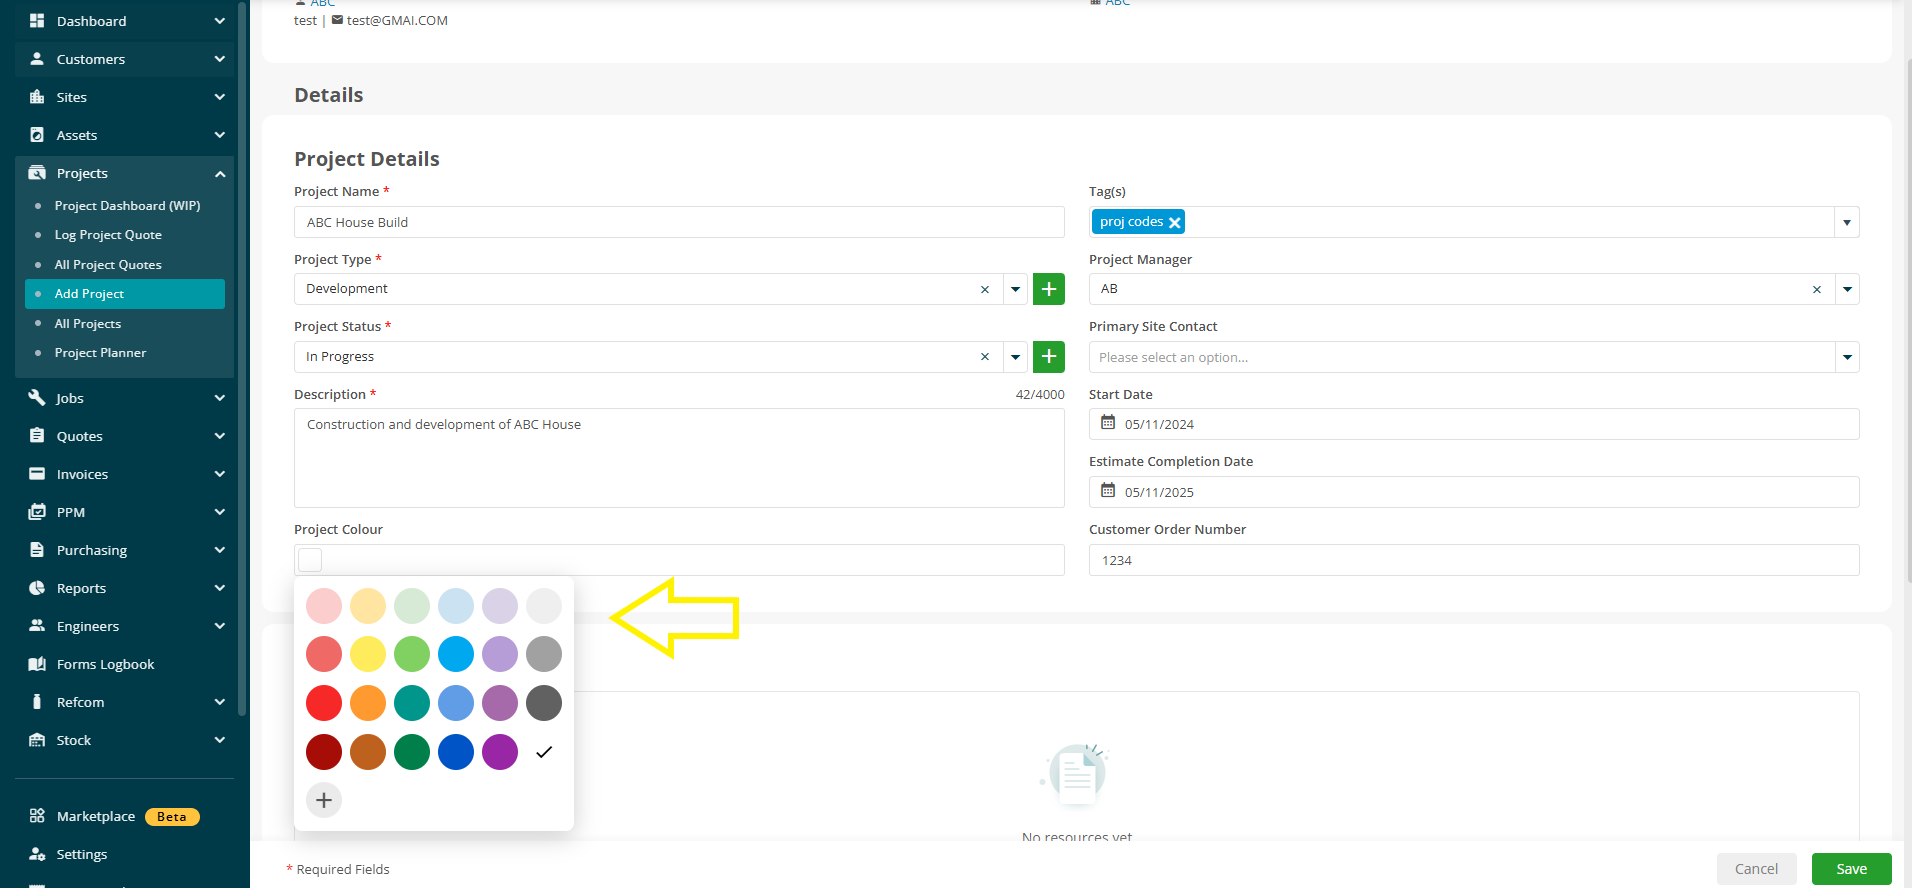
You can assign a project colour to help identify related jobs in the Planner. Select the Project Colour field and choose a colour from the palette. All jobs created under the project will display using this colour.
Project Resources
The Project Resources section defines the engineers, engineer teams and subcontractors who can work on the project.
Select Add Resources, choose the required resources from the available lists, then select Save.
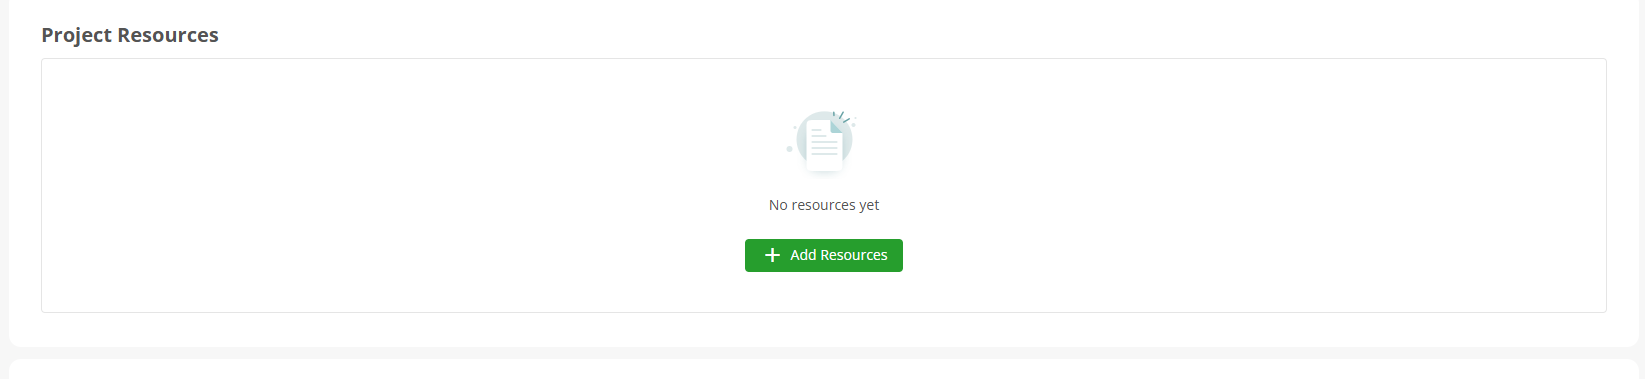
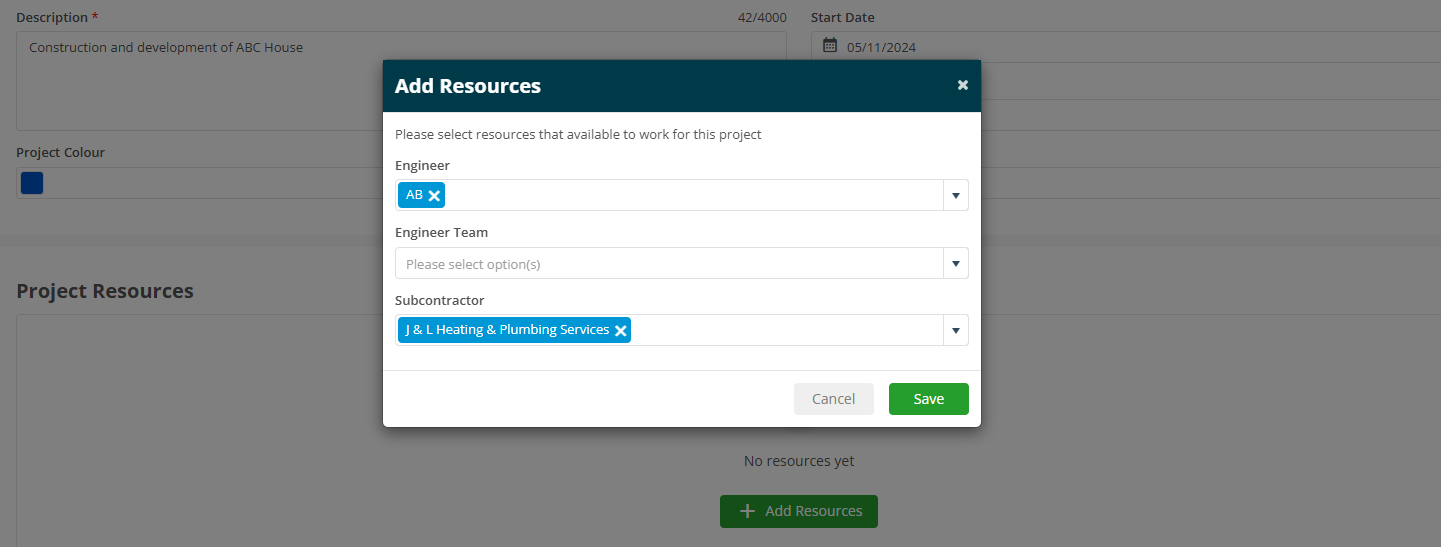
Note: These resources are used to filter the available resource list when assigning work to project jobs. Resources can be updated later using Edit Resource.

Project Value
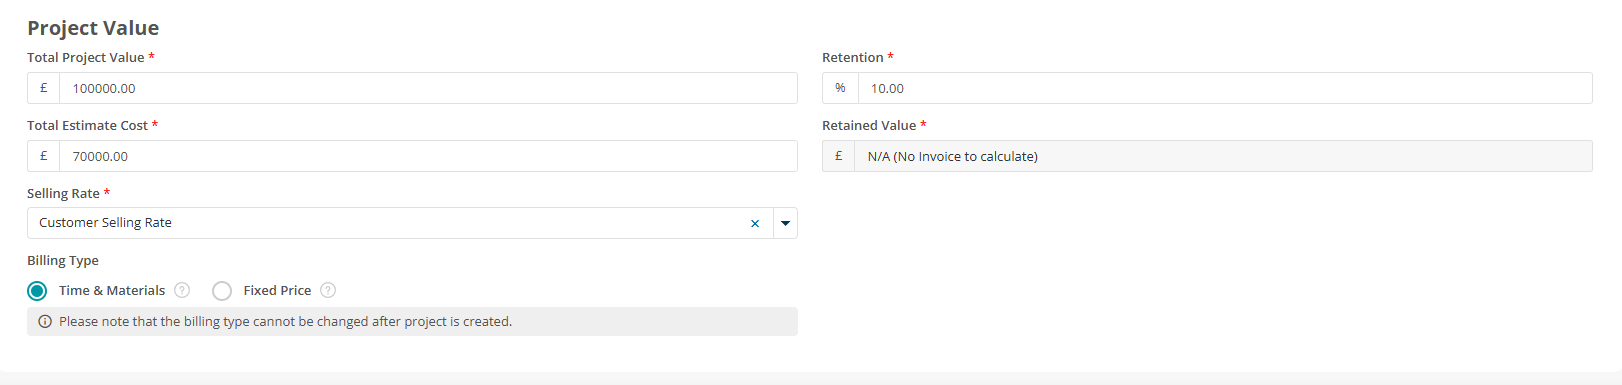
The Project Value section records the project's financial information.
- Total Project Value – The total value of the project.
- Retention Percentage – The percentage withheld from invoices until the agreed retention release date.
- Total Estimated Cost – Your estimated cost to deliver the project.
- Retained Value – Automatically calculated once invoices are raised. This initially displays as N/A.

Billing Types
The section then provides a selling rate field and one of two invoicing/billing type options to select from:
Time and Materials
Time and Materials invoices are generated from the individual charge lines recorded against jobs within the project. In this scenario, you should select the appropriate selling rate.
Fixed Price
Fixed Price billing invoices the project as a whole, regardless of the costs recorded against individual jobs.
In most cases, the selling rate should be set to Non-Chargeable, as selling rates are not used for fixed-price projects.
Selecting Fixed Price displays an Invoice Schedule, allowing you to create planned invoices for the project. For each scheduled invoice, enter:
- Invoice Date
- Description
- VAT/Tax Rate
- Charge Percentage (the percentage of the total project value to invoice)
Use the green + icon to add additional scheduled invoices or tax rates.

Important: The billing type cannot be changed after the project has been created.
Saving the Project
Once you've entered the required information, select Save.
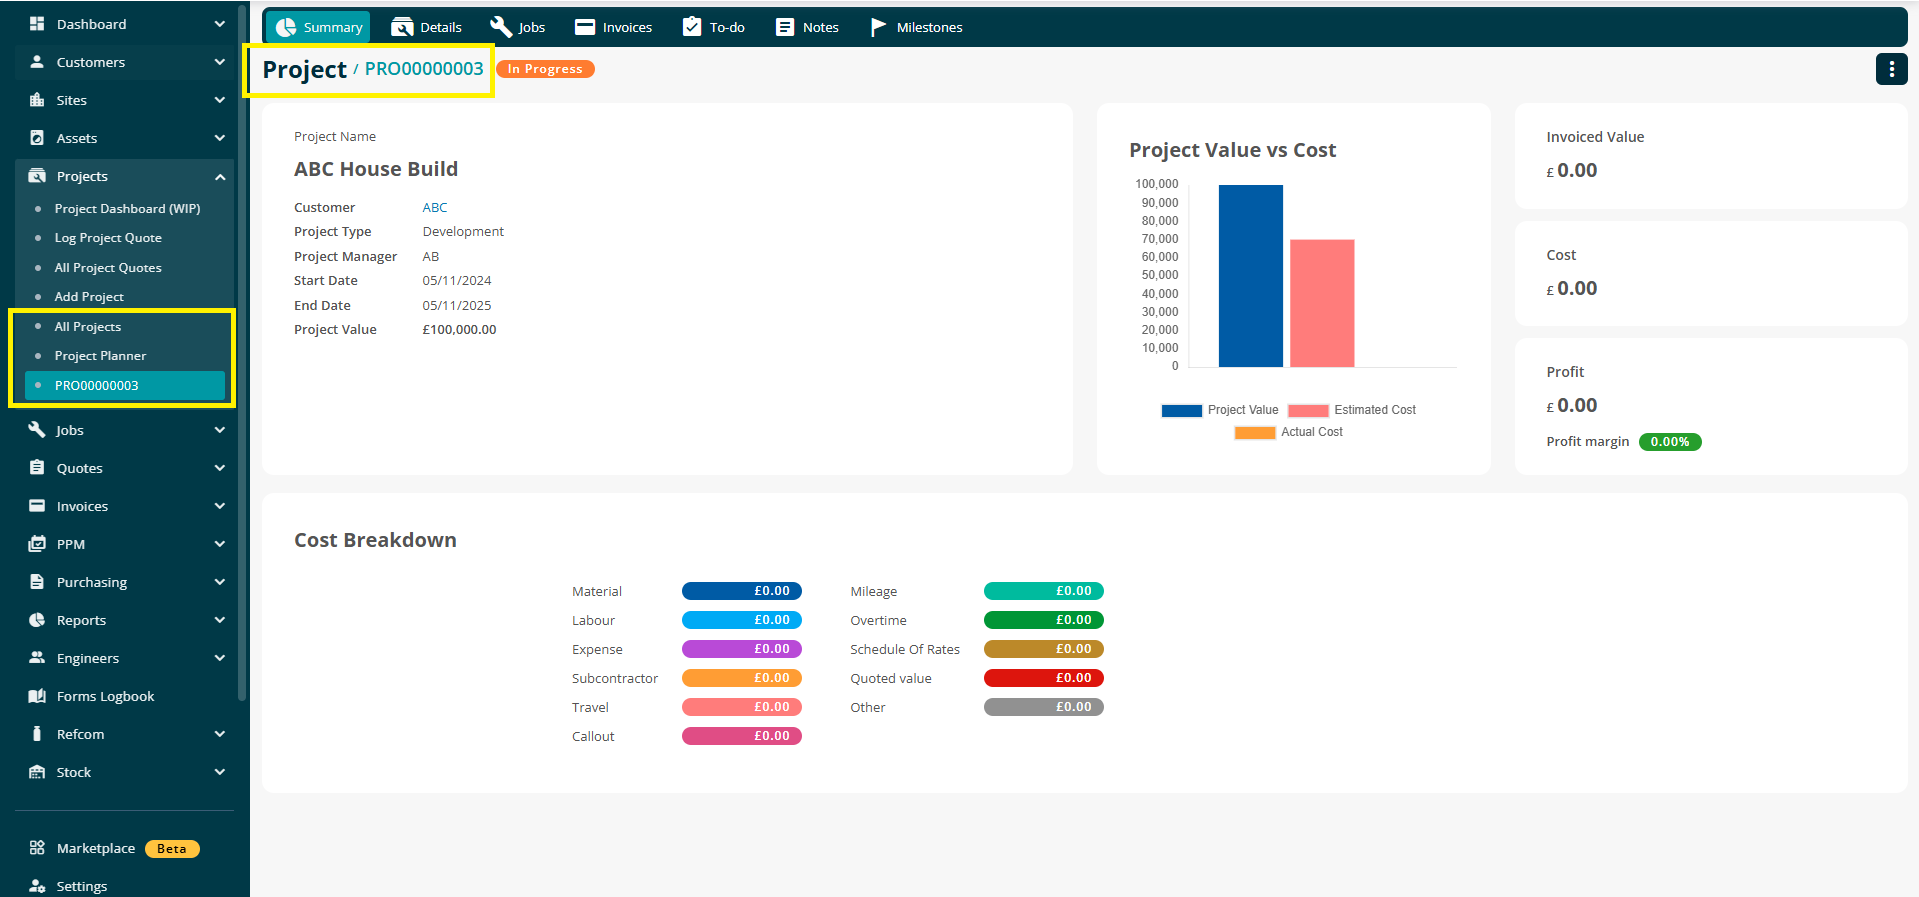
Joblogic generates a unique project number and adds the project to the All Projects list, where it can be managed and updated.
Further Support
For further information or assistance with the above, contact our Support Team on 0800 326 5561 or email support@joblogic.com. Alternatively, our Customer Success Management team can be reached by emailing customersuccess@joblogic.com
Publishing Details
This document was written and produced by Joblogic’s Technical Writing team and was last updated on the date stated above. Be aware that the information provided may be subject to change following further updates on the matter becoming available or new releases within the system. Additionally, details within the guide may vary depending on your Joblogic account’s user permissions and settings or the electronic device being used.