- 30 Apr 2024
- 4 Minutes to read
- Print
- PDF
Adding an Asset Individually
- Updated on 30 Apr 2024
- 4 Minutes to read
- Print
- PDF
Introduction
This user guide will detail how to log an asset individually within your Joblogic account. For general details on customer, site and asset structure in Joblogic, see here.
Adding an Asset Individually
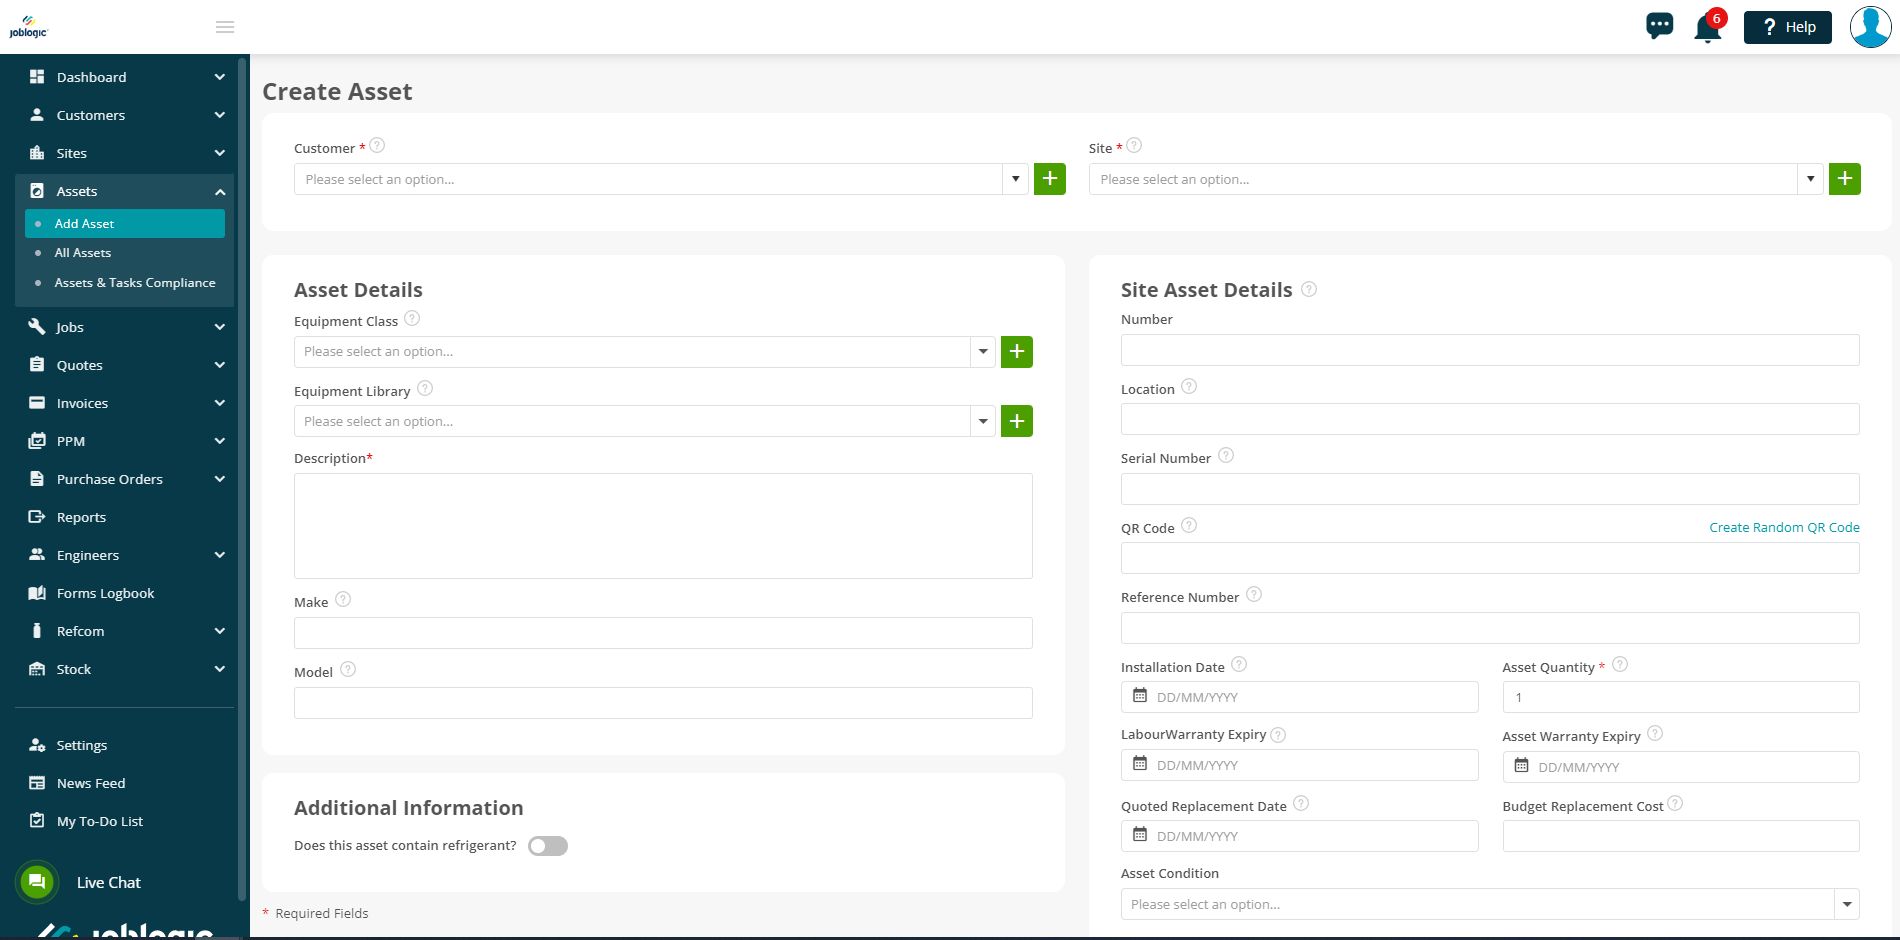
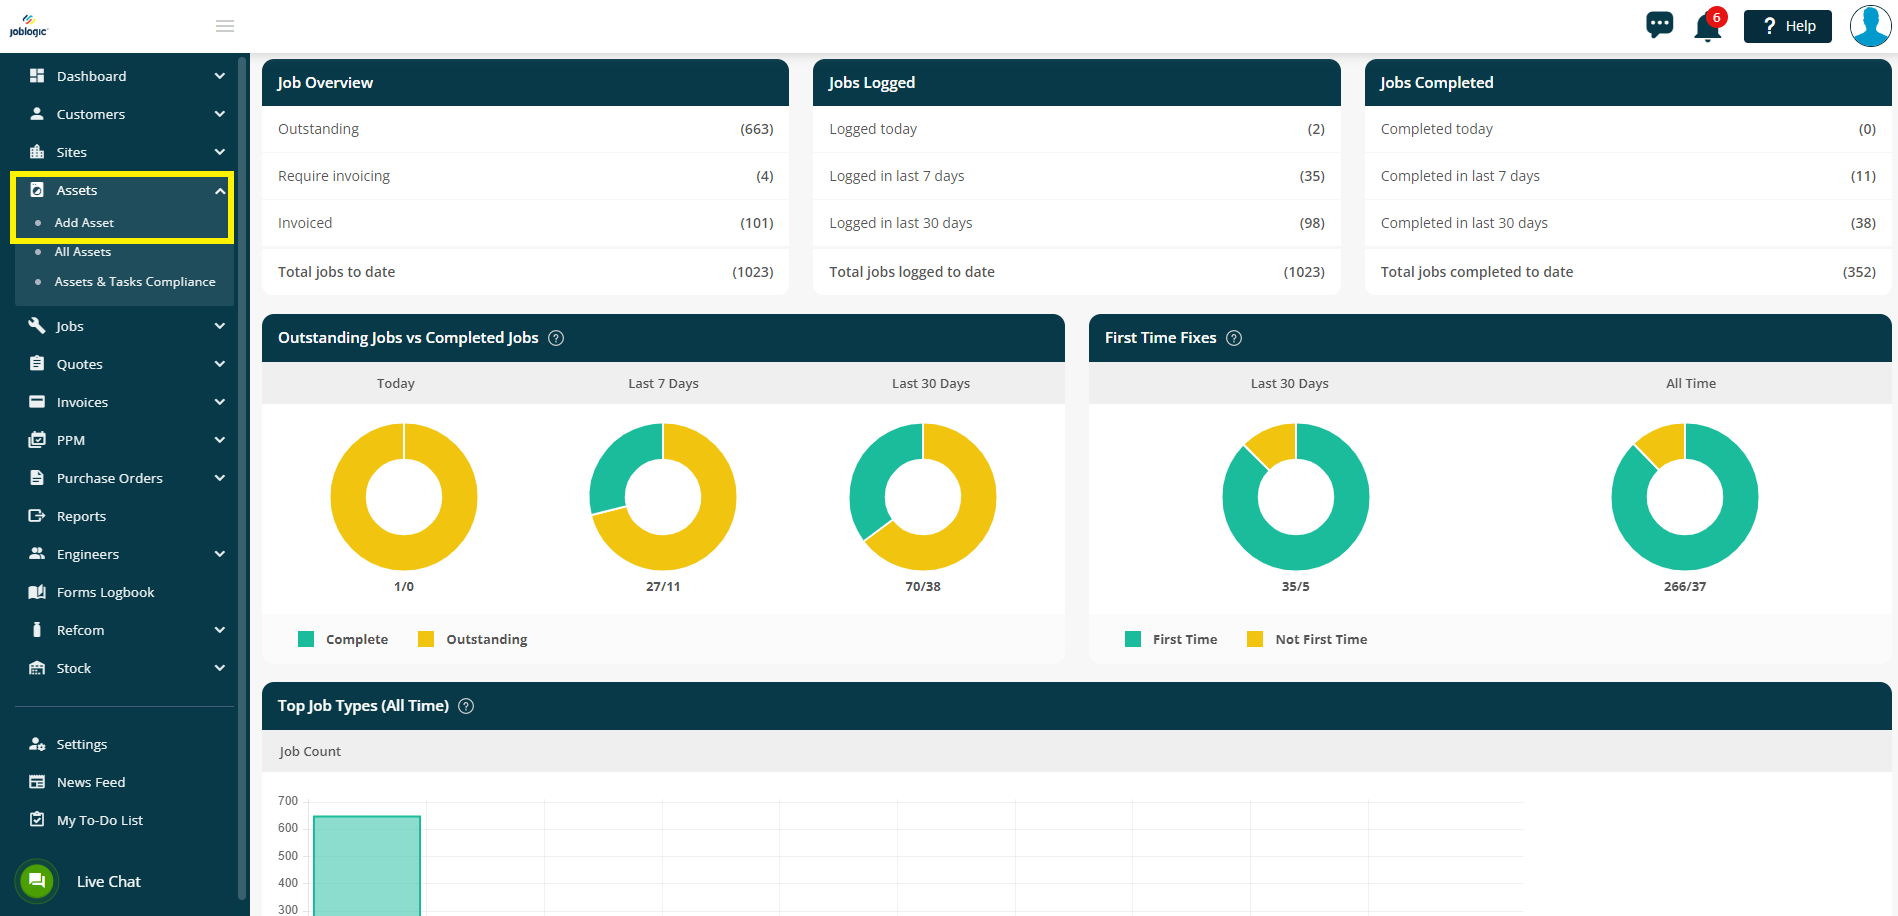
In order to add an asset in Joblogic, navigate to the ‘Assets’ area via the left side menu and select ‘Add Asset’ (select the dropdown arrow to expand the asset options).
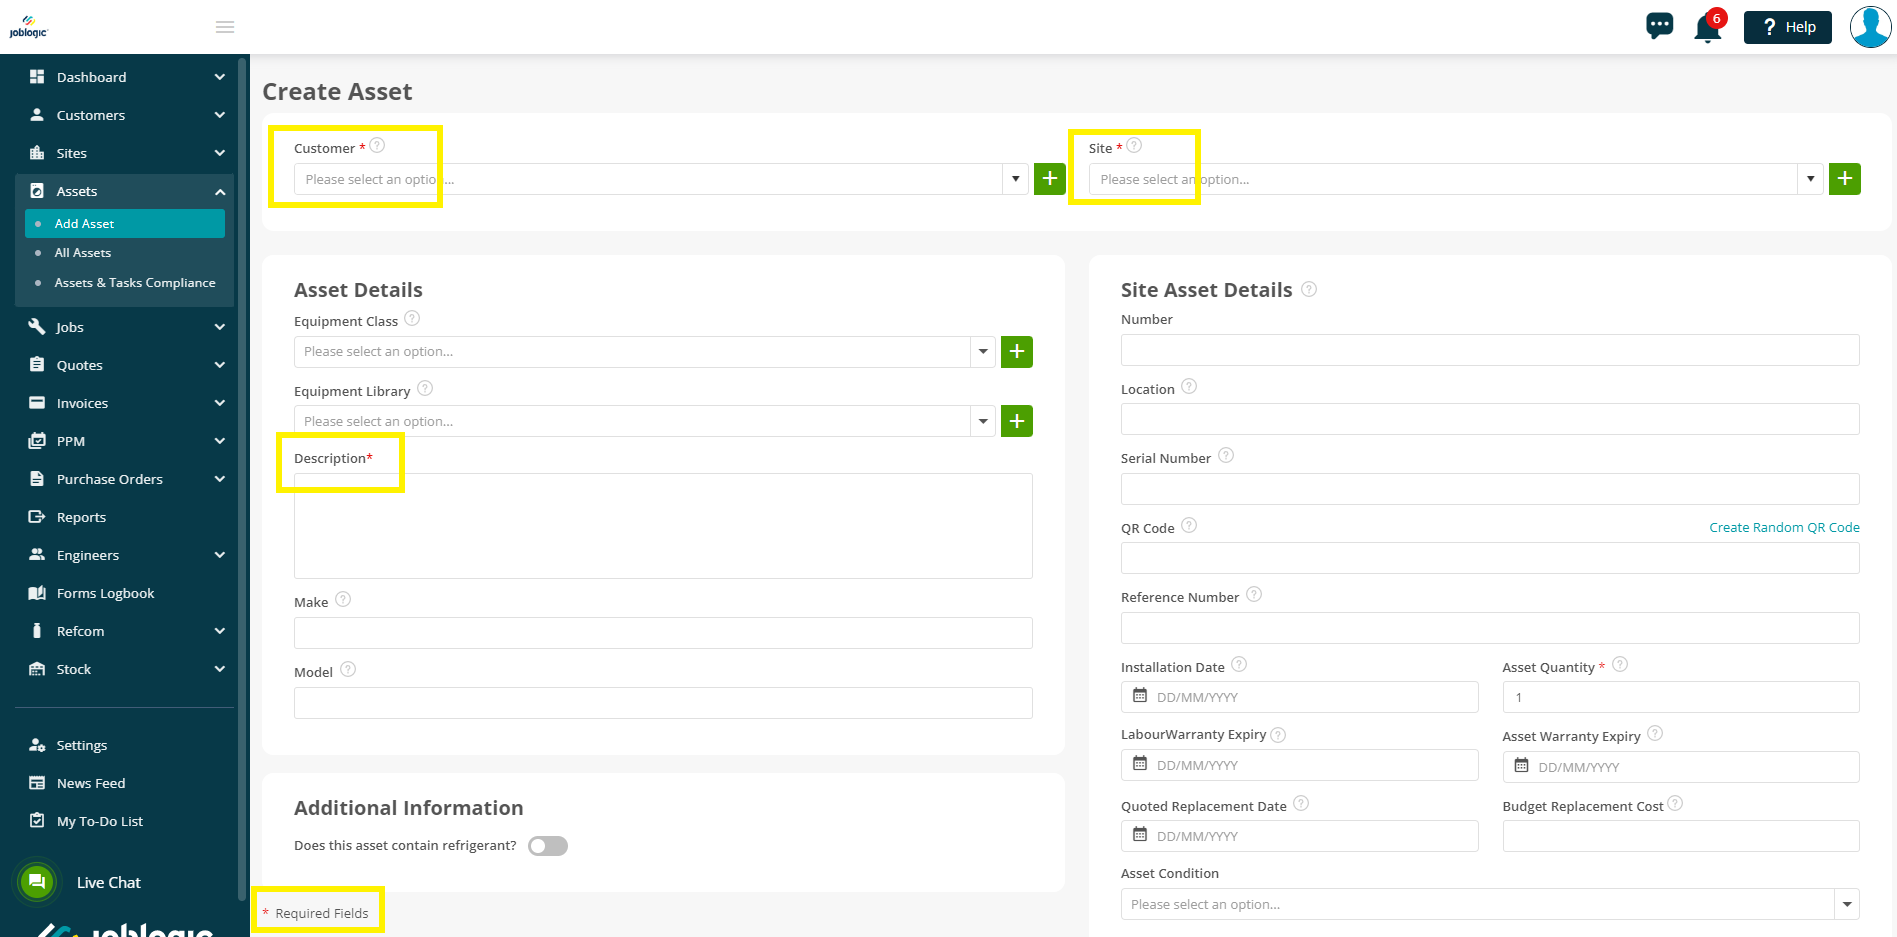
You will then be directed to a ‘Create Asset’ page whereby you can fill in the asset’s details.
When adding a new asset, some fields will be mandatory. These are determined by the red asterisk against a field name.
In this case, the customer and site that the asset belongs to and an asset description are mandatory fields.
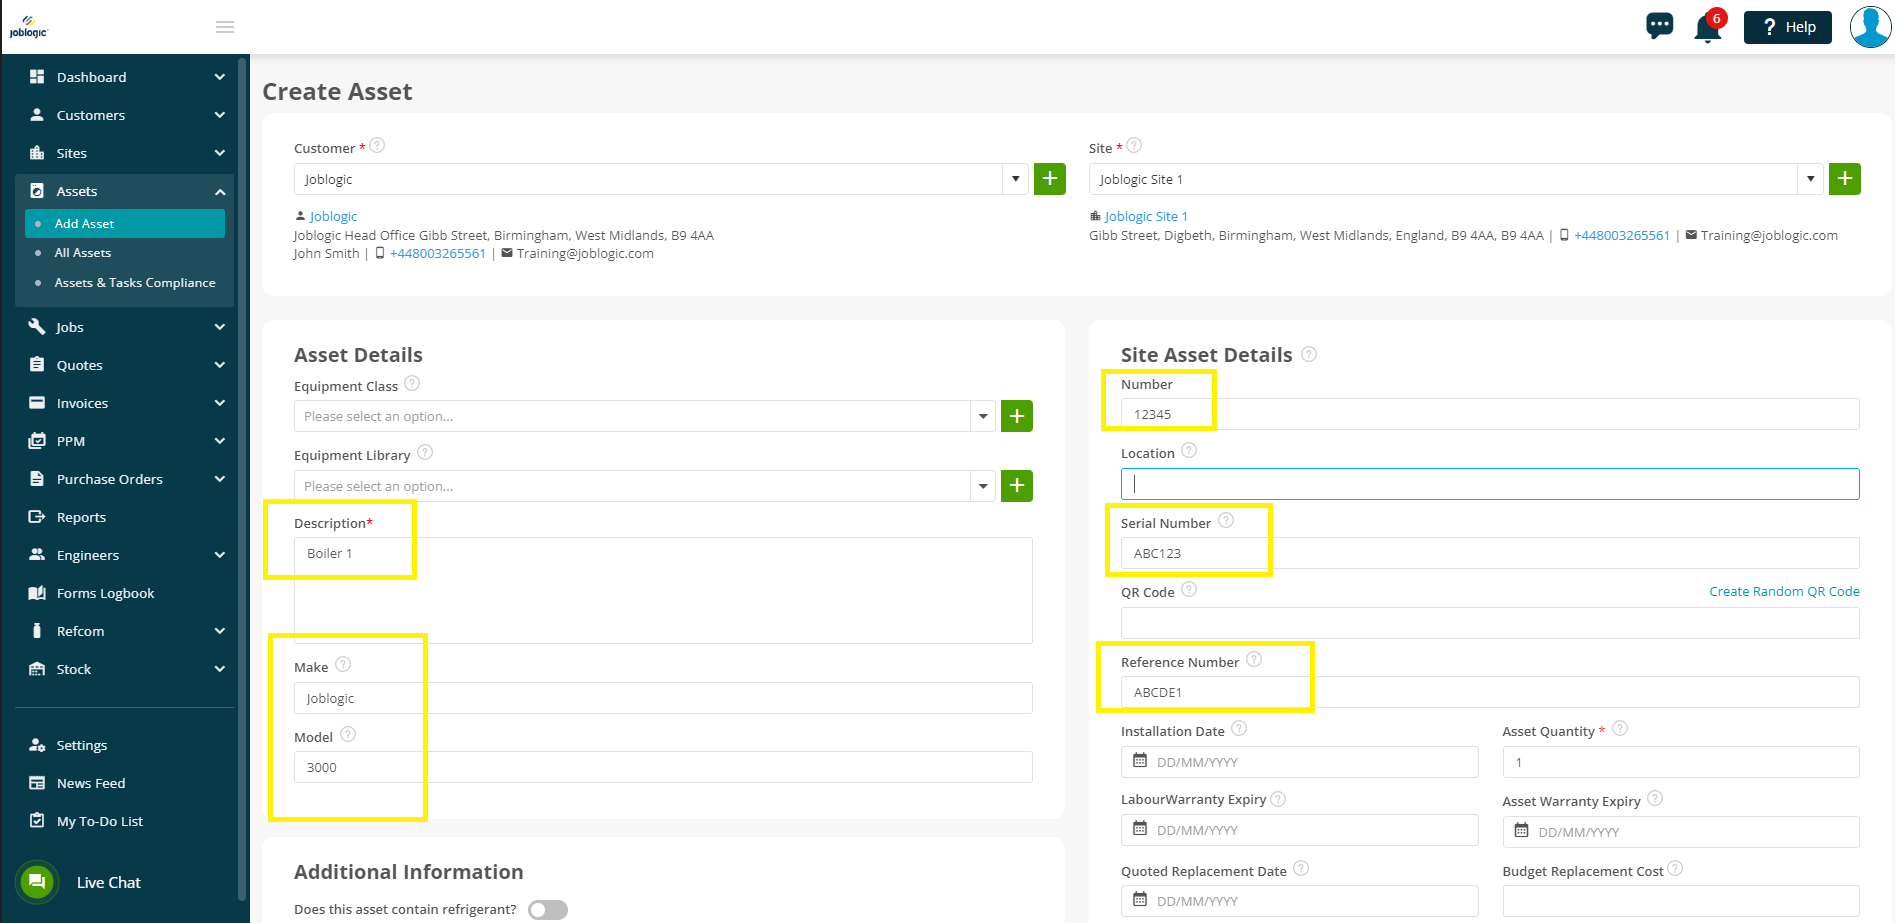
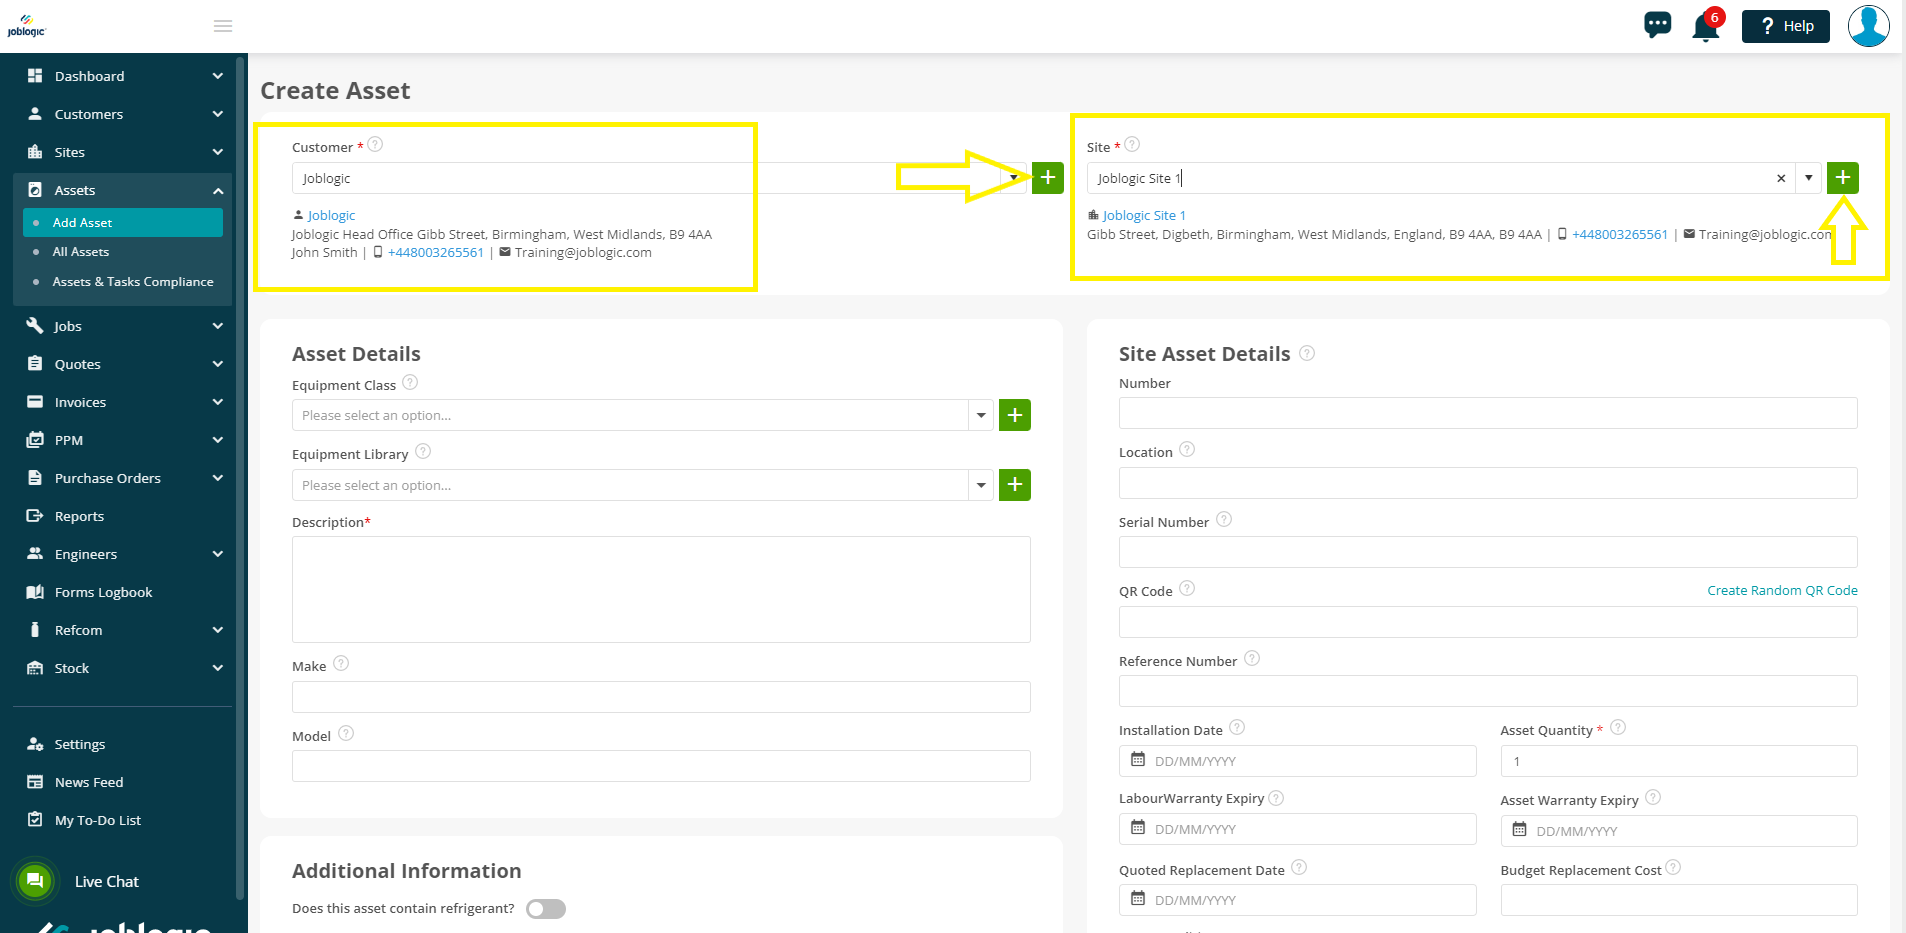
Select the customer and site that the asset belongs to from the dropdown lists (the sites dropdown list will be filtered to just the relevant sites for the customer once the customer has been selected). See here for how to log a customer and here for how to log a site. If the customer or site does not yet exist in the system they can be created via the ‘quick add’ plus icons.
Enter a ‘Description’ of the asset. This can be a general description such as ‘boiler’ or ‘air conditioner’ or you can list more specific details like ‘boiler 1’. Further free type fields can then also be filled in to act as unique identifiers of the asset such as make, model, the asset’s specific serial number, a reference number (this may be an internal, custom number or a secondary identifier provided by your customer) or a general ‘Number’ field (which provides an additional area for custom or internal reference numbers).
Further details can then be entered for the asset such as a location (where the asset is housed on the site such as a storeroom or airing cupboard) and date details including installation, warranty expiry and quoted replacement dates.
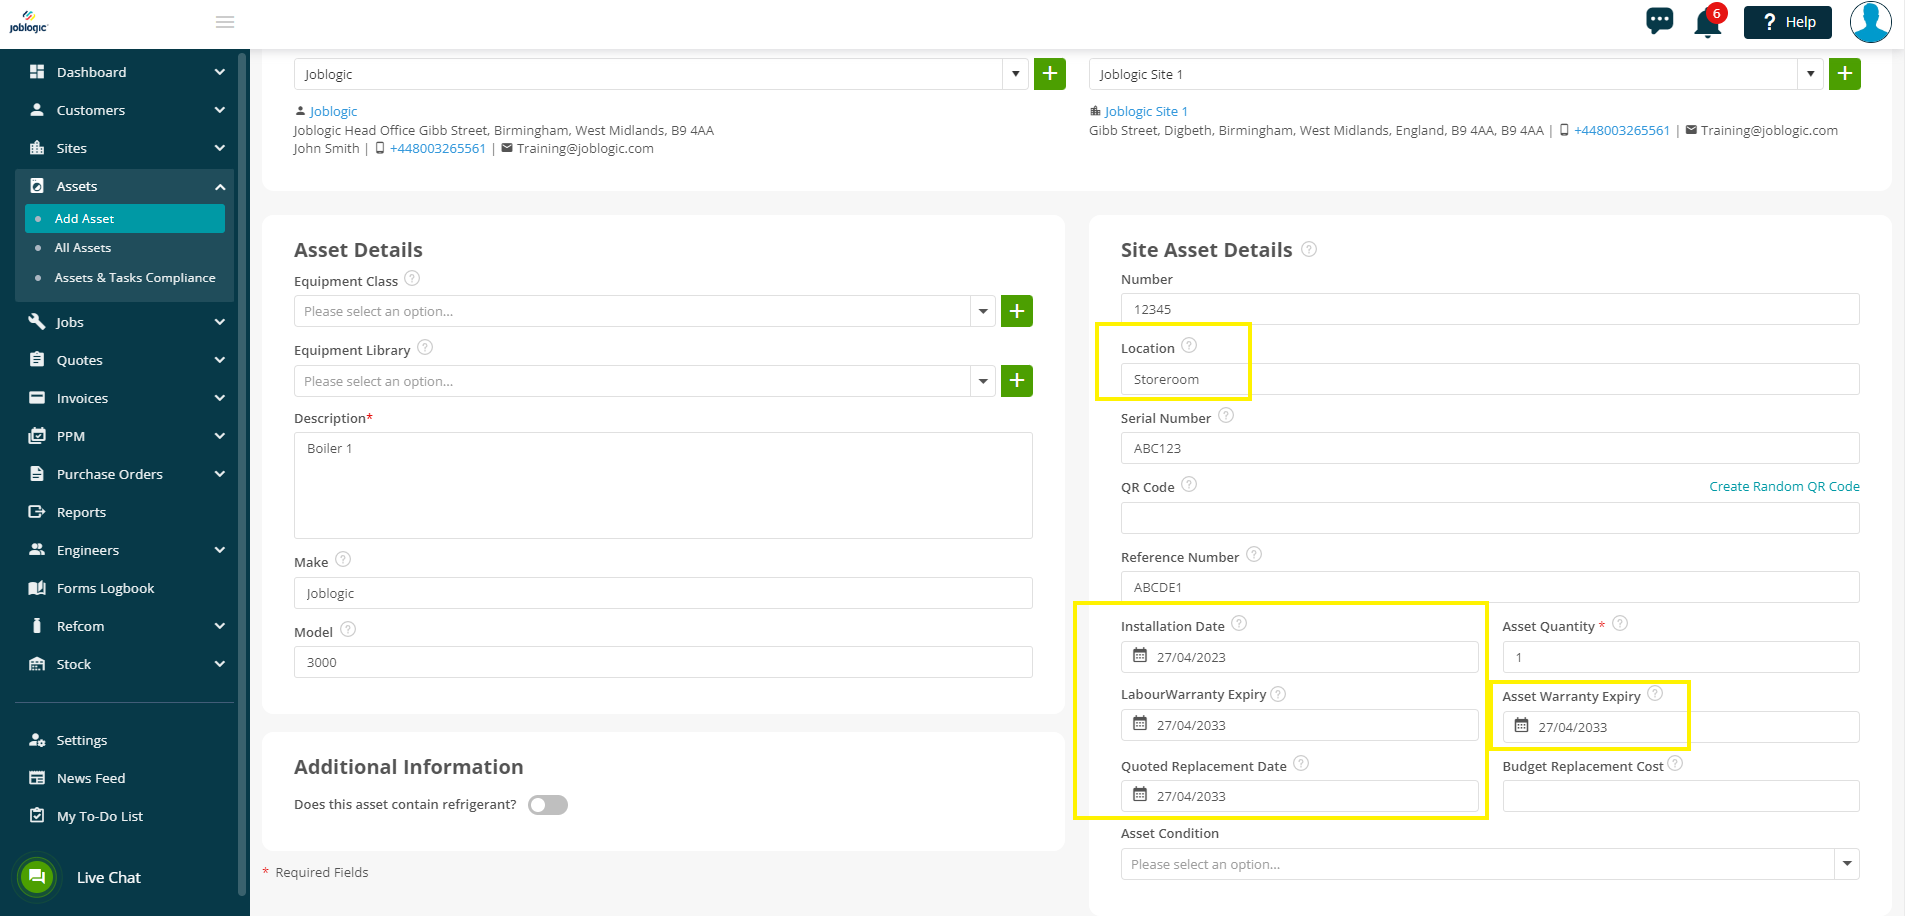
An ‘Asset Quantity’ (if the asset’s details comprise multiple pieces of equipment, combined under one asset’s serial number/description) and a ‘Budget Replacement Cost’ (the cost to your customer to replace the asset) can be filled in, if required. Additionally, ‘Asset Condition’ can be assigned by selecting the applicable options from the dropdown. See here for details on populating the dropdown options in the settings library.
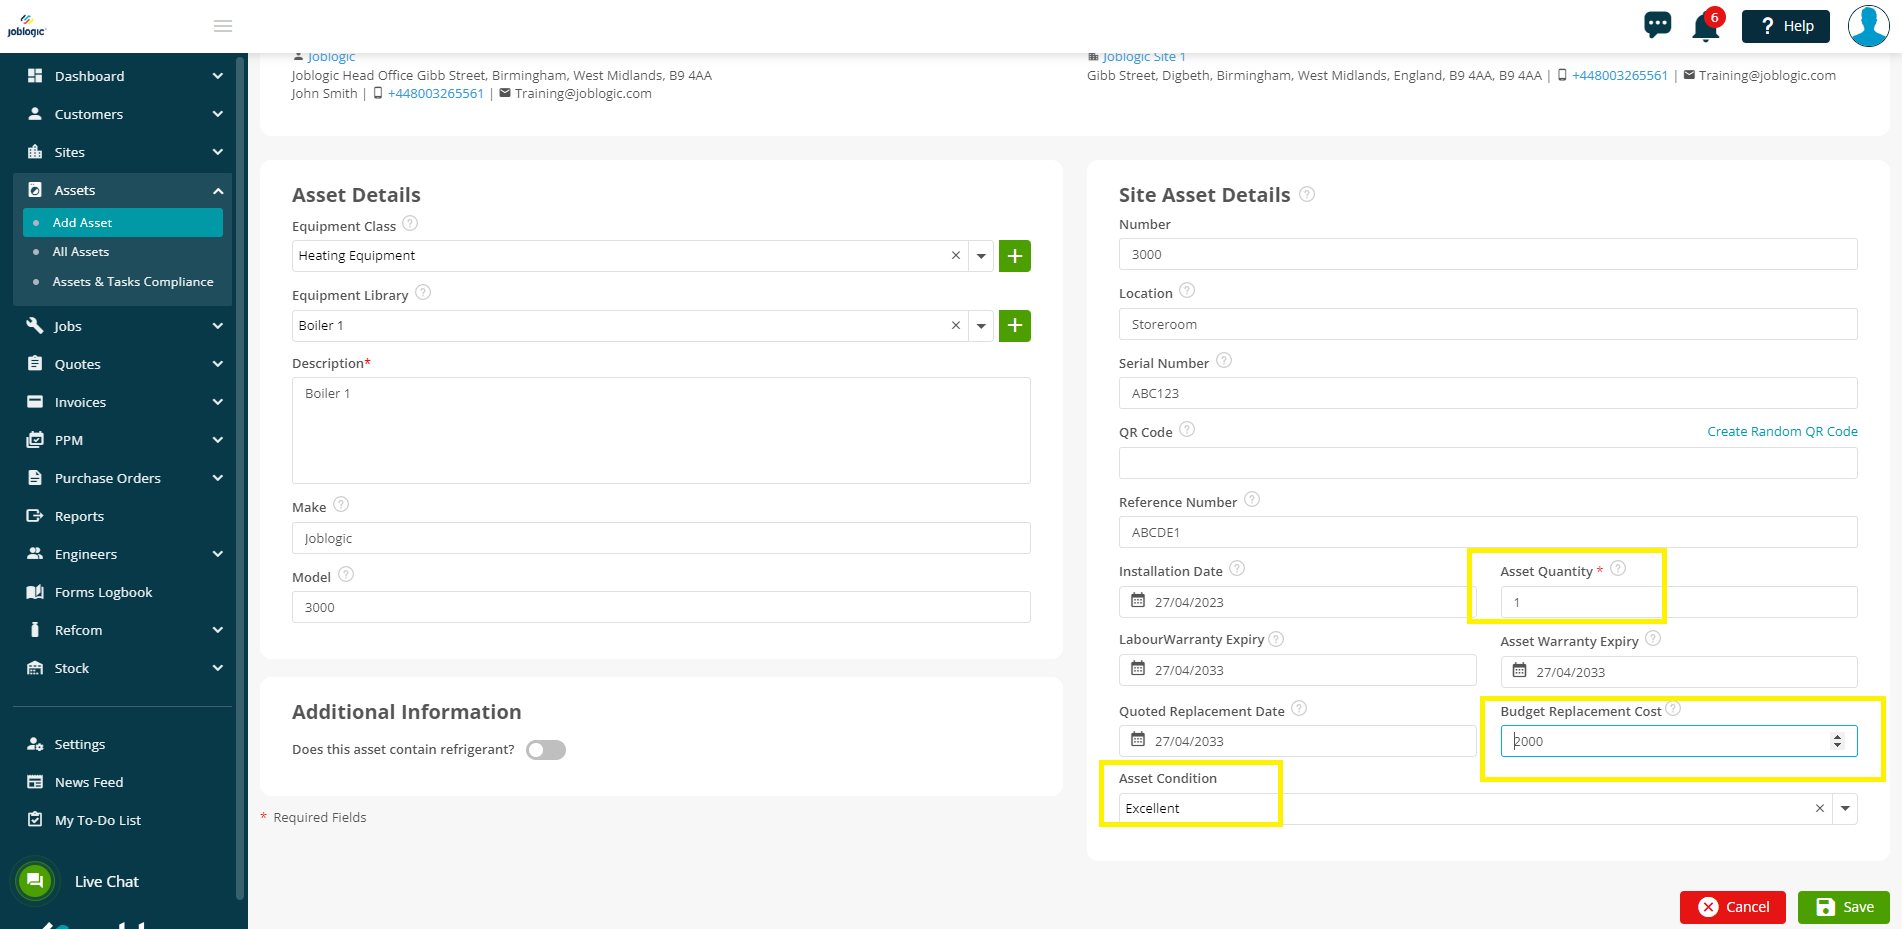
The page also provides you with a QR code generation area where you can create a QR Code for the asset. To do this, click the ‘Create Random QR Code’ button and the code will generate.
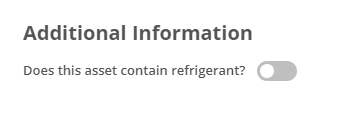
There is an ‘Additional Information’ area which contains a ‘Does this asset contain refrigerant?’ option. This option is only available if your Joblogic account is used in conjunction with Refcom and you use Joblogic for Fgas monitoring. See here for further details on the Refcom module within Joblogic.
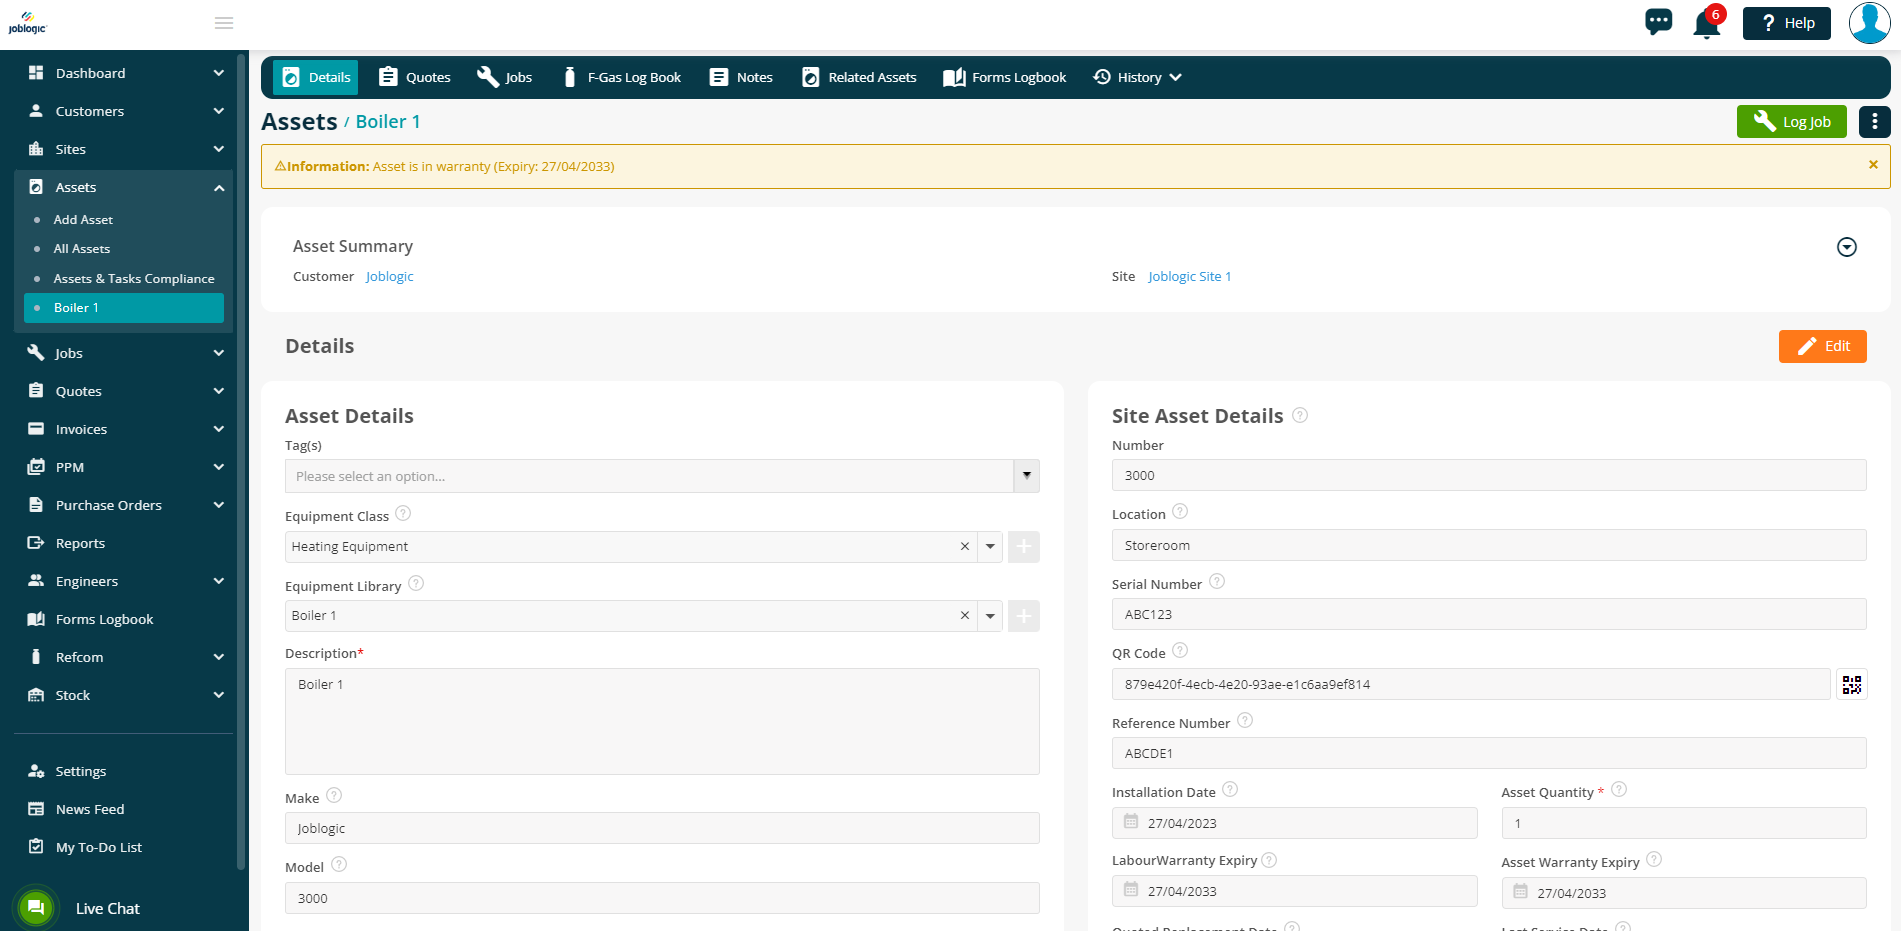
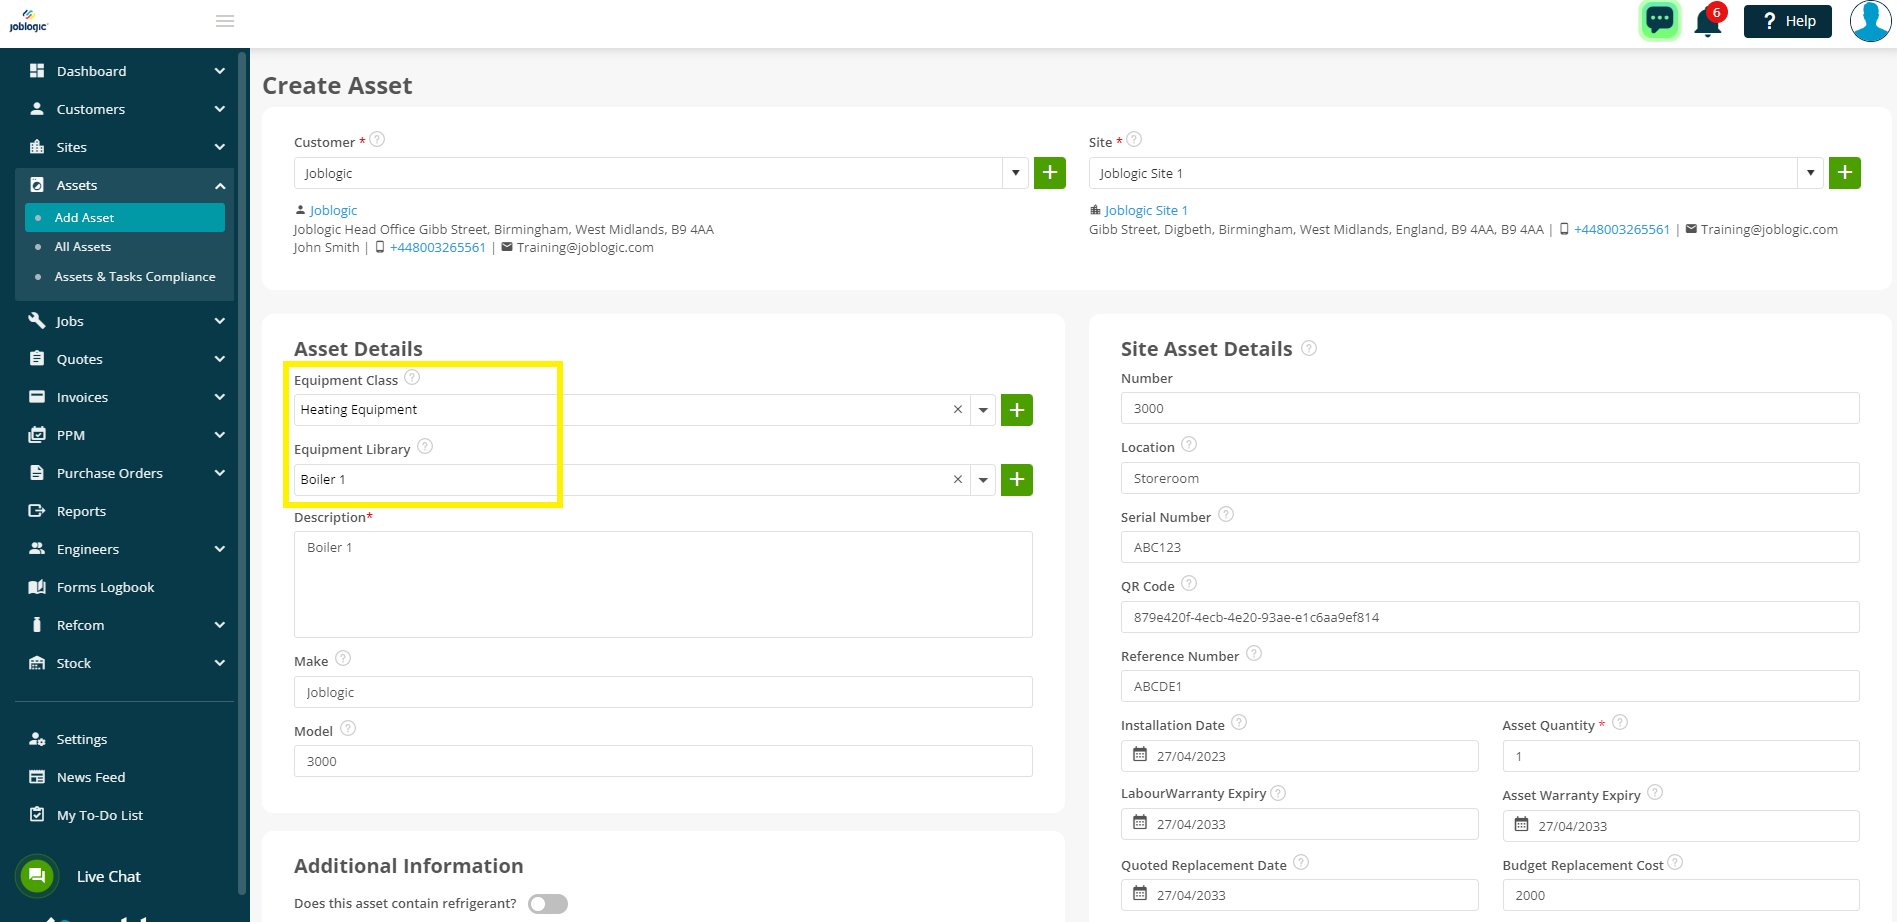
There are two more dropdown list named Equipment Class and Library.
Joblogic distinguishes between assets and equipment as below.
An asset is defined as a piece of equipment, typically fixed at your customer’s site which you maintain, repair and service for them.
Equipment is defined as a machine or piece of equipment to be installed at your customer’s site.
Within Joblogic, a piece of equipment may be installed (this piece of equipment will likely have generic details in common with other pieces of equipment of the same model and make but have it’s own unique serial number for that specific piece). This individual piece of equipment then converts into a specific, individual customer asset once installed on their site, with it’s own individual identifiers such as the unique serial number being logged against it.
Equipment classes are labels that can be used to categorise the different assets that you maintain and equipment that you install. For example, you may categorise equipment and assets with ‘heating equipment’ being one category and ‘air conditioners’ being another. Individual pieces of equipment can then be assigned to an equipment class meaning that the equipment library dropdown list will be filtered to just the relevant pieces of equipment for the class once an equipment class has been selected.
When first adding an asset, if the applicable details have been populated for the item in your equipment and equipment class libraries (see here for details on populating the dropdown options in the settings library), the asset’s generic details (description, make, model) will automatically populate for you when selected to save you having to free type out this generic asset information.
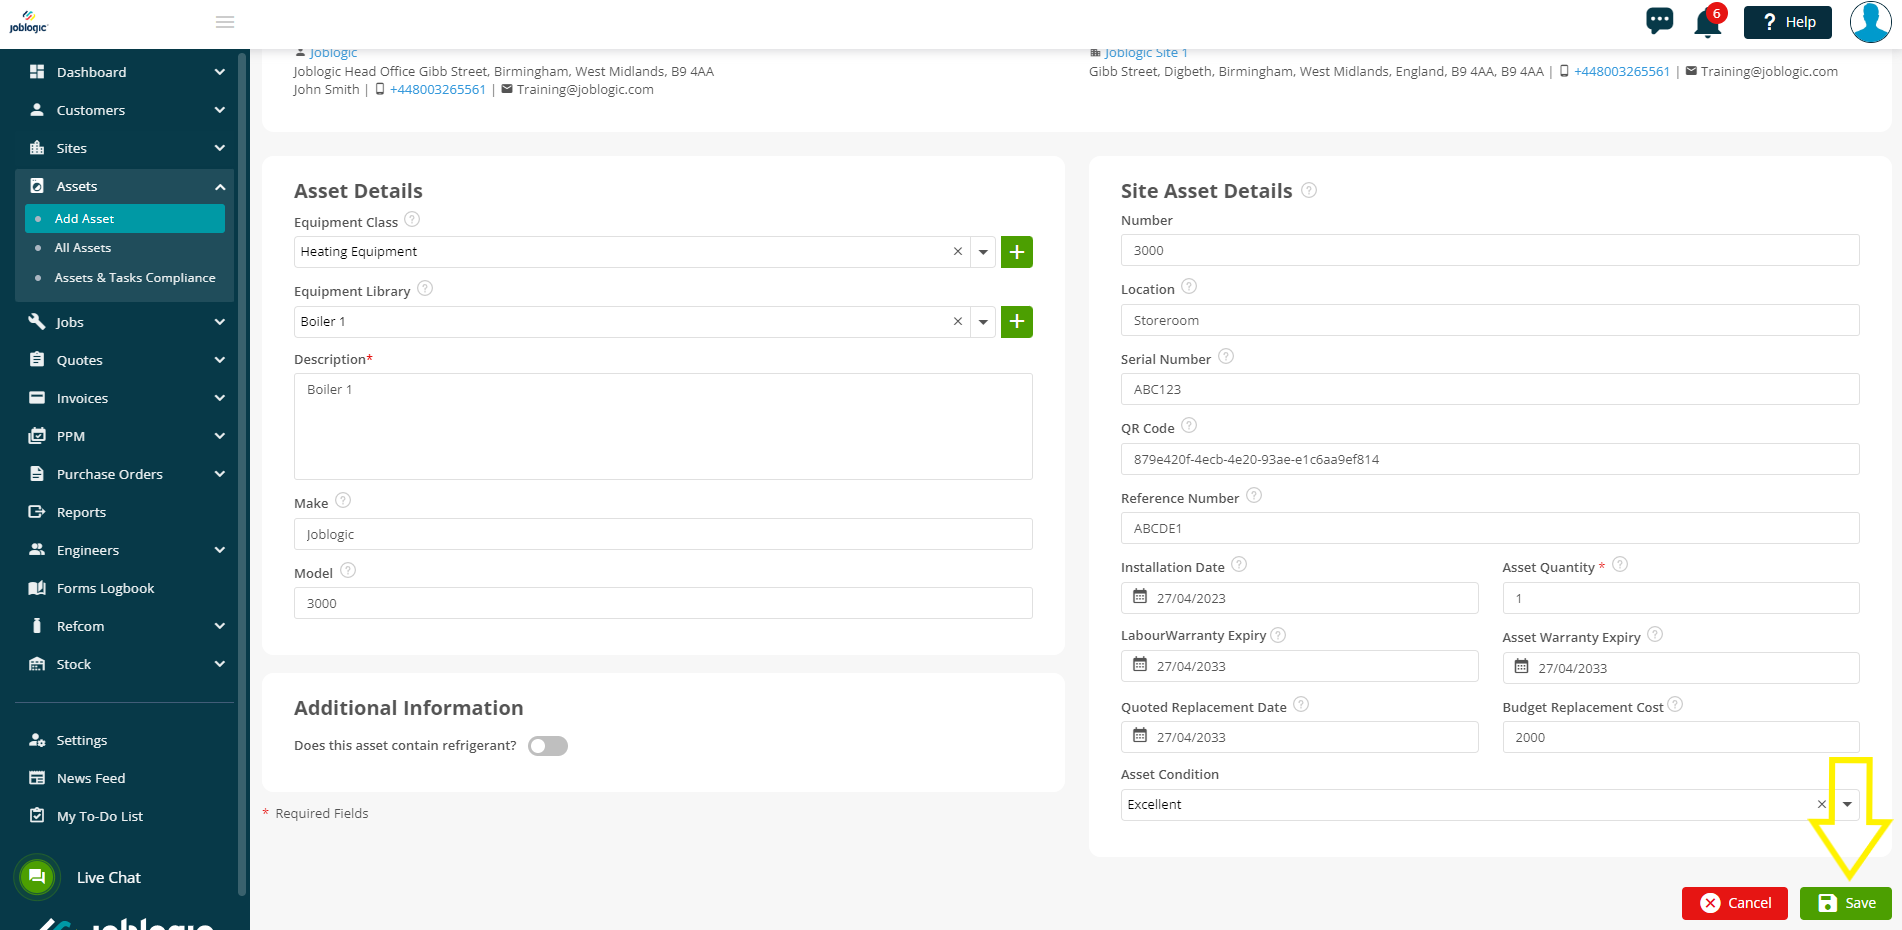
Once you are happy with the details that you have entered, select the ‘Save’ option and the asset will be added to your Joblogic system with the submitted details.
Further Support
For further information or assistance with the above, contact our Support Team on 0800 326 5561 or email support@joblogic.com. Alternatively, our Customer Success Management team can be reached by emailing customersuccess@joblogic.com
Publishing Details
This document was written and produced by Joblogic’s Technical Writing team and was last updated on the date specified above. Be aware that the information provided may be subject to change following further updates on the matter becoming available or new releases within the system. Additionally, details within the guide may vary depending on your Joblogic account’s user permissions and settings or the electronic device being used.


