Introduction
Joblogic allows a user to individually create an asset for a site. This guide will detail the alternative ways that this can be achieved within the back office of the system.
Steps for adding an individual asset to a site
Option 1: Adding against a Site Record
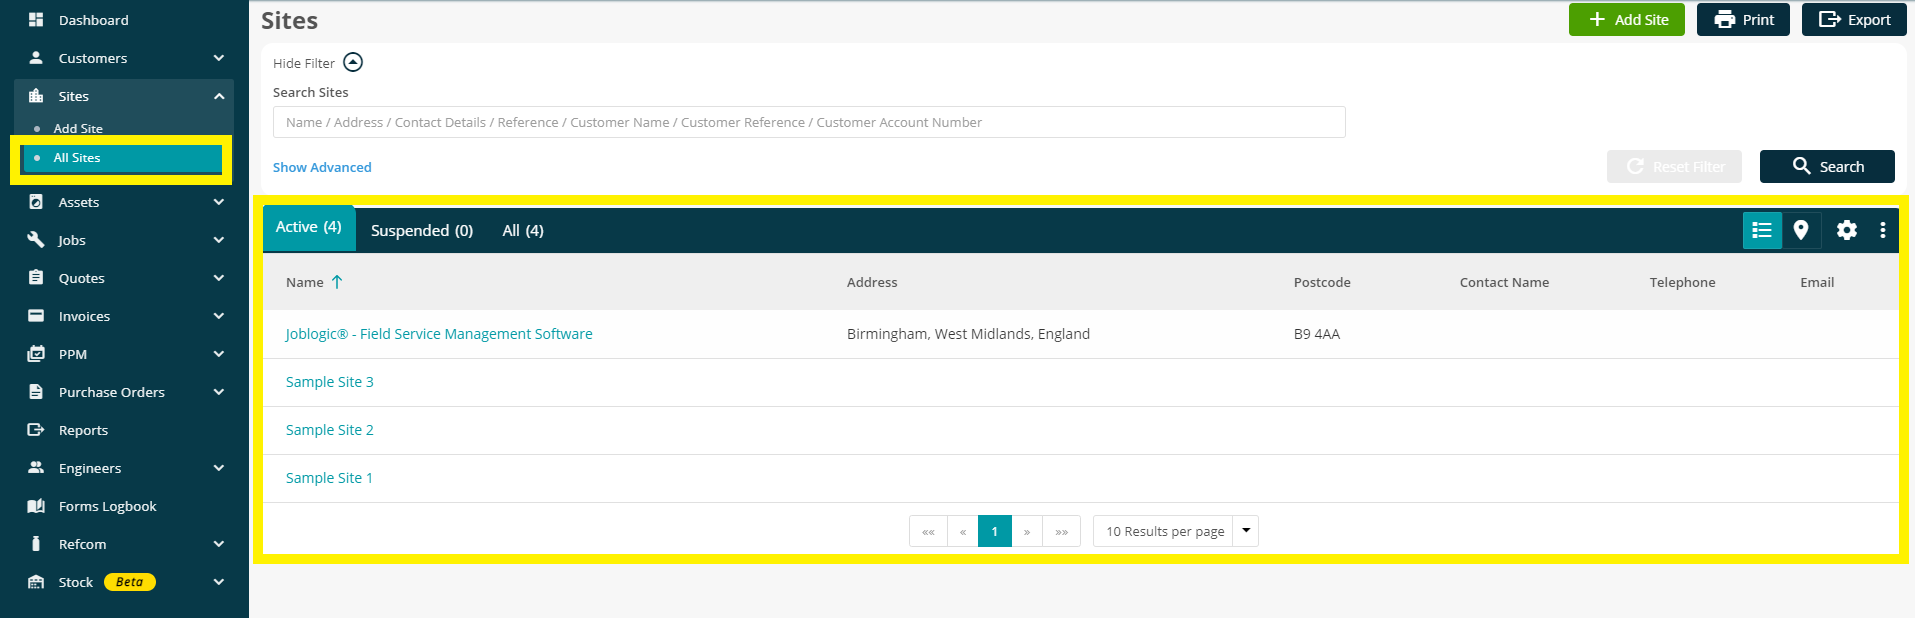
- Within the Joblogic back office, click 'Sites' and select ‘All Sites’ from the left side navigation menu. Then select the site you wish to add the asset to.
- You will then be directed to the Site’s details screen. Select the 'Assets' tab from the top navigation bar and you will be directed to the assets page for that site.
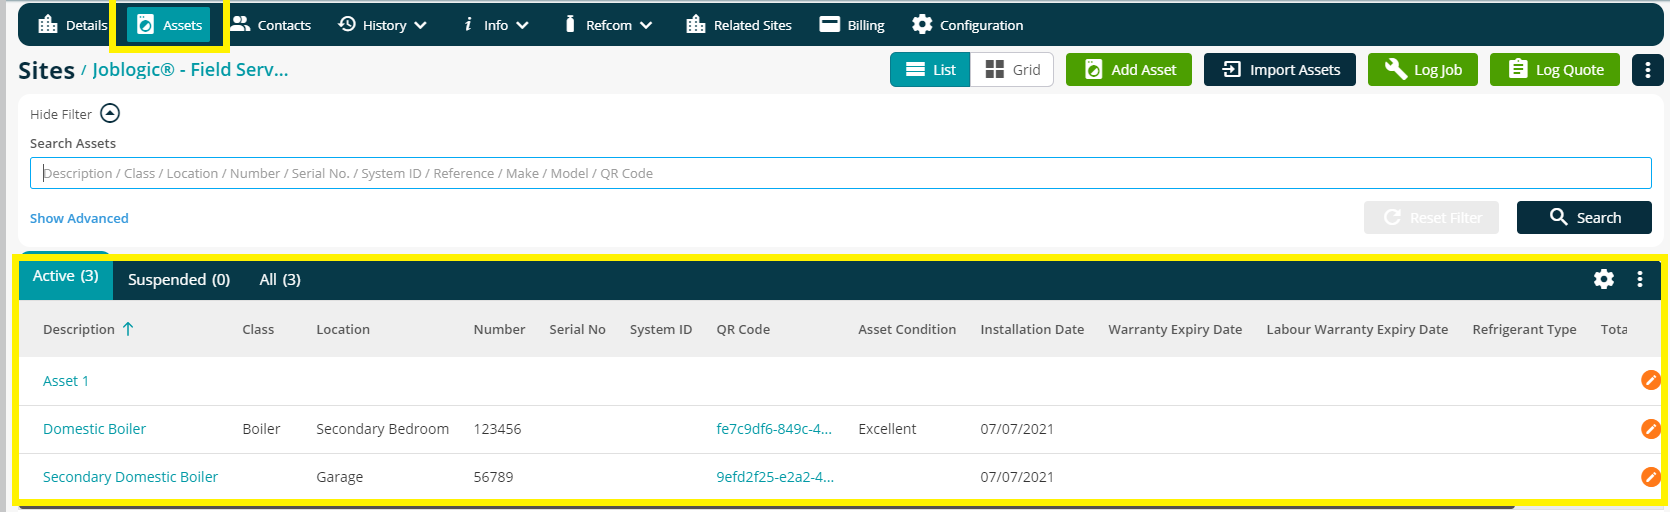
- Select the ‘Add Asset’ button from the available options towards the top right of the screen.

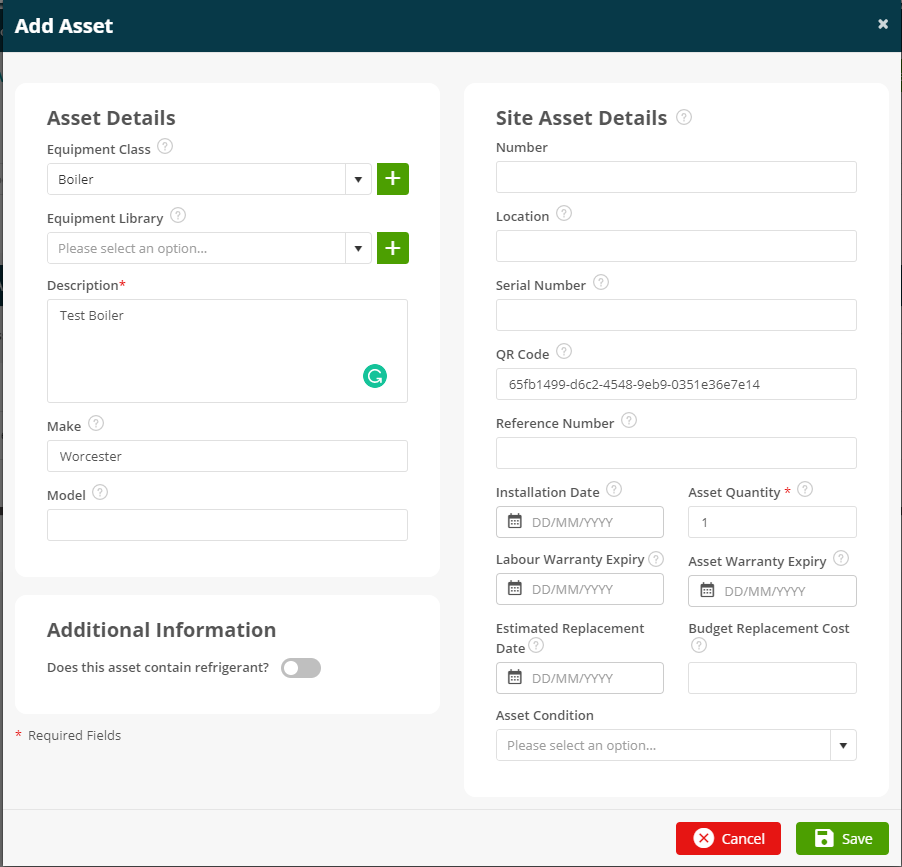
- You will then be presented with an ‘Add Asset’ screen to fill in the applicable details of the asset in question, such as a description, reference number and an installation date. You can also generate a QR code for this asset by selecting ‘Create Random QR Code’. Note that any fields marked with an asterisk (*) are mandatory fields which must be filled in.
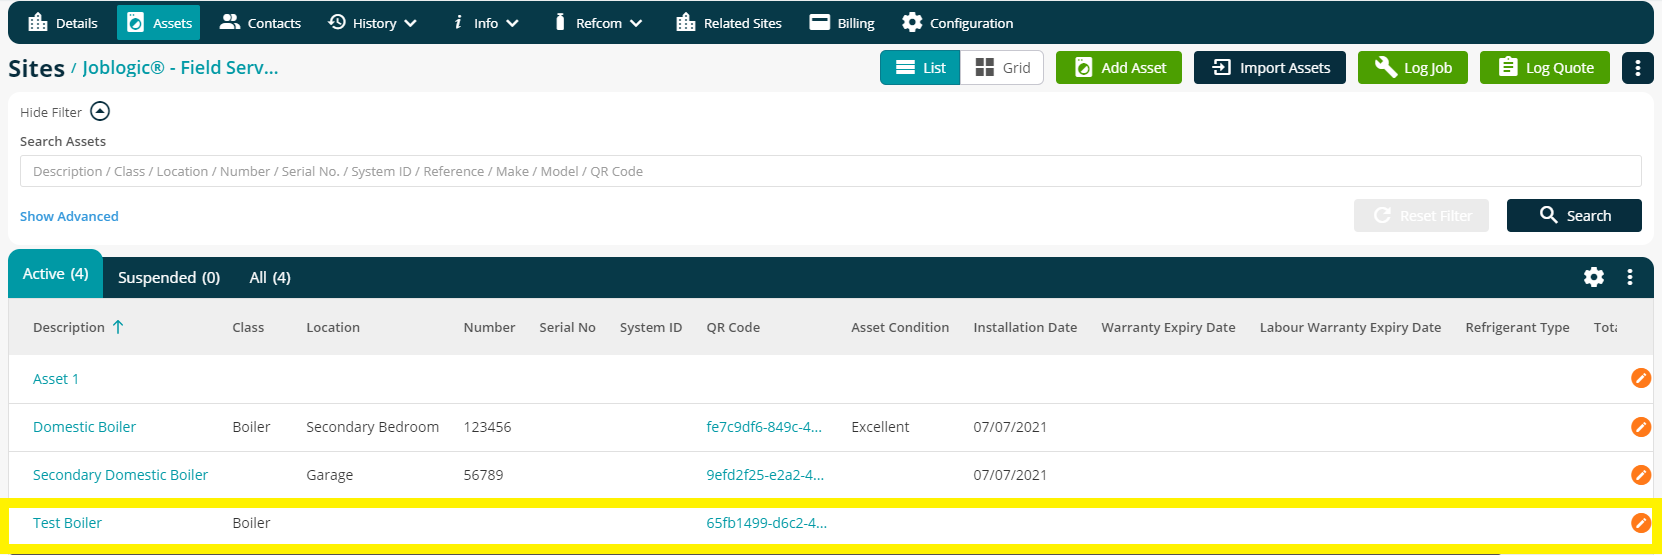
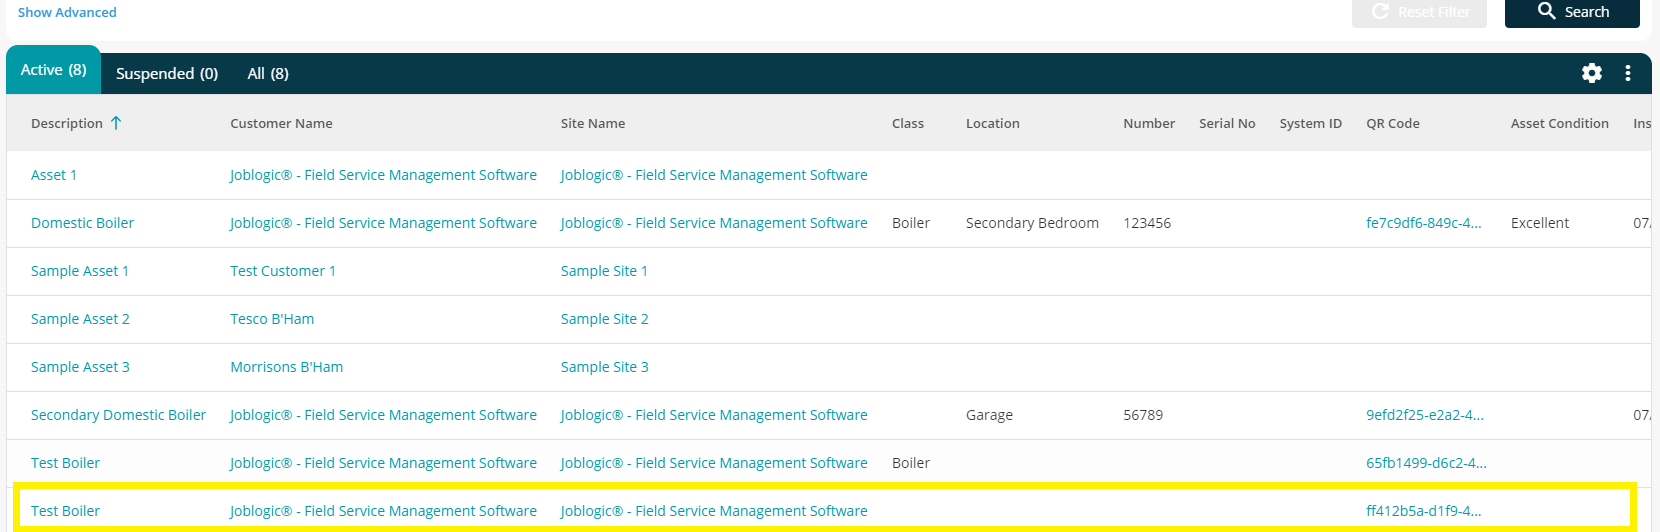
- Once the details have been filled in as applicable, select the ‘Save’ button and the asset will now be created against the relevant site and within the ‘All Assets’ area.
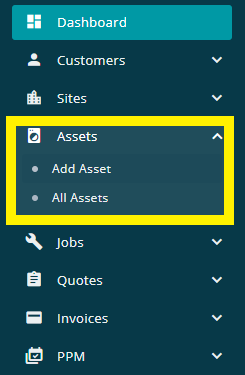
Option 2: Adding from the Assets area
- Within the Joblogic back office, select Assets > Add Asset from the side navigation menu.
Alternatively, you can also select Assets > All Assets from this left side navigation menu and select the ‘Add Asset’ button from the available options towards the top right of the screen.
- Either of these options will then direct you to a ‘Create Asset’ page to fill in the applicable details of the asset in question such as a description, reference number and installation date (similarly to the above method of adding against a Site Record). However, you will now need to specify the Customer and Site which the asset is being added to.
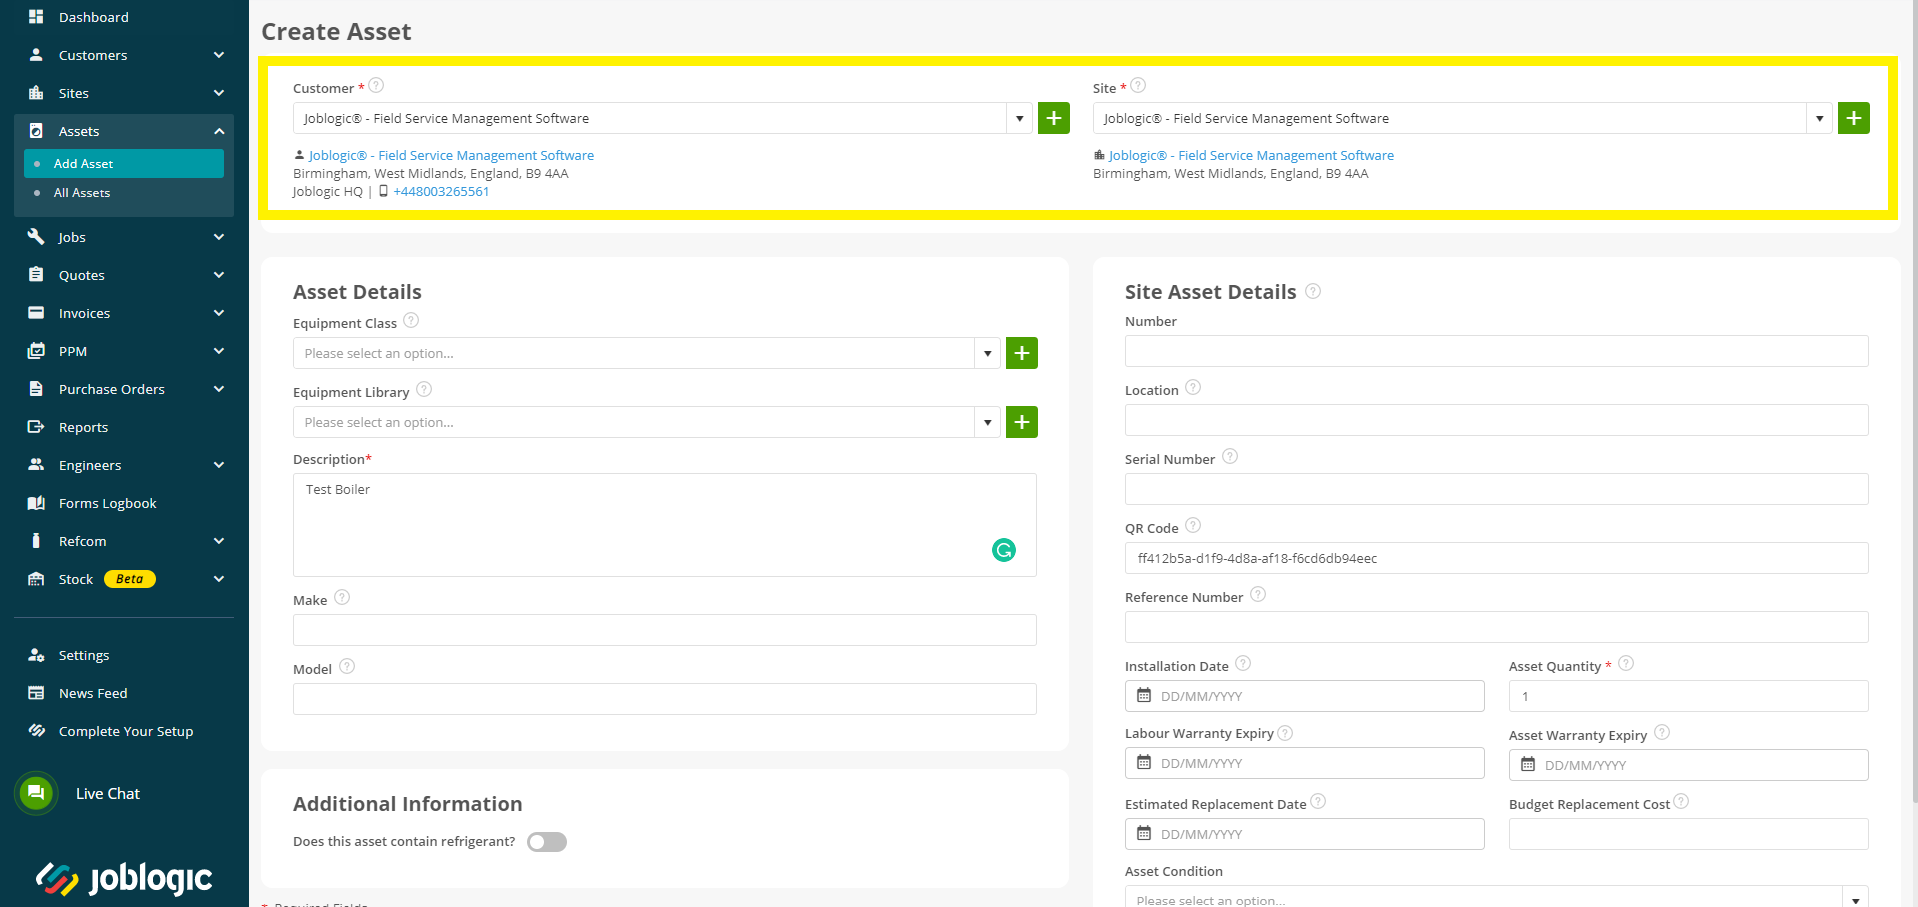
- Once the details have been filled in as applicable, select the ‘Save’ button and your asset will now be created against the specified site and within the ‘All Assets’ area.
Further Support
For further information or assistance with the above, contact our Support Team on 0800 326 5561 or email support@joblogic.com. Alternatively, our Customer Success Management team can be reached by emailing customersuccess@joblogic.com
## Publishing Details
This document was written and produced by Joblogic’s Technical Writing team and was last updated on the date specified above. Be aware that the information provided may be subject to change following further updates on the matter becoming available or new releases within the system. Additionally, details within the guide may vary depending on your Joblogic account’s user permissions and settings or the electronic device being used.