Introduction
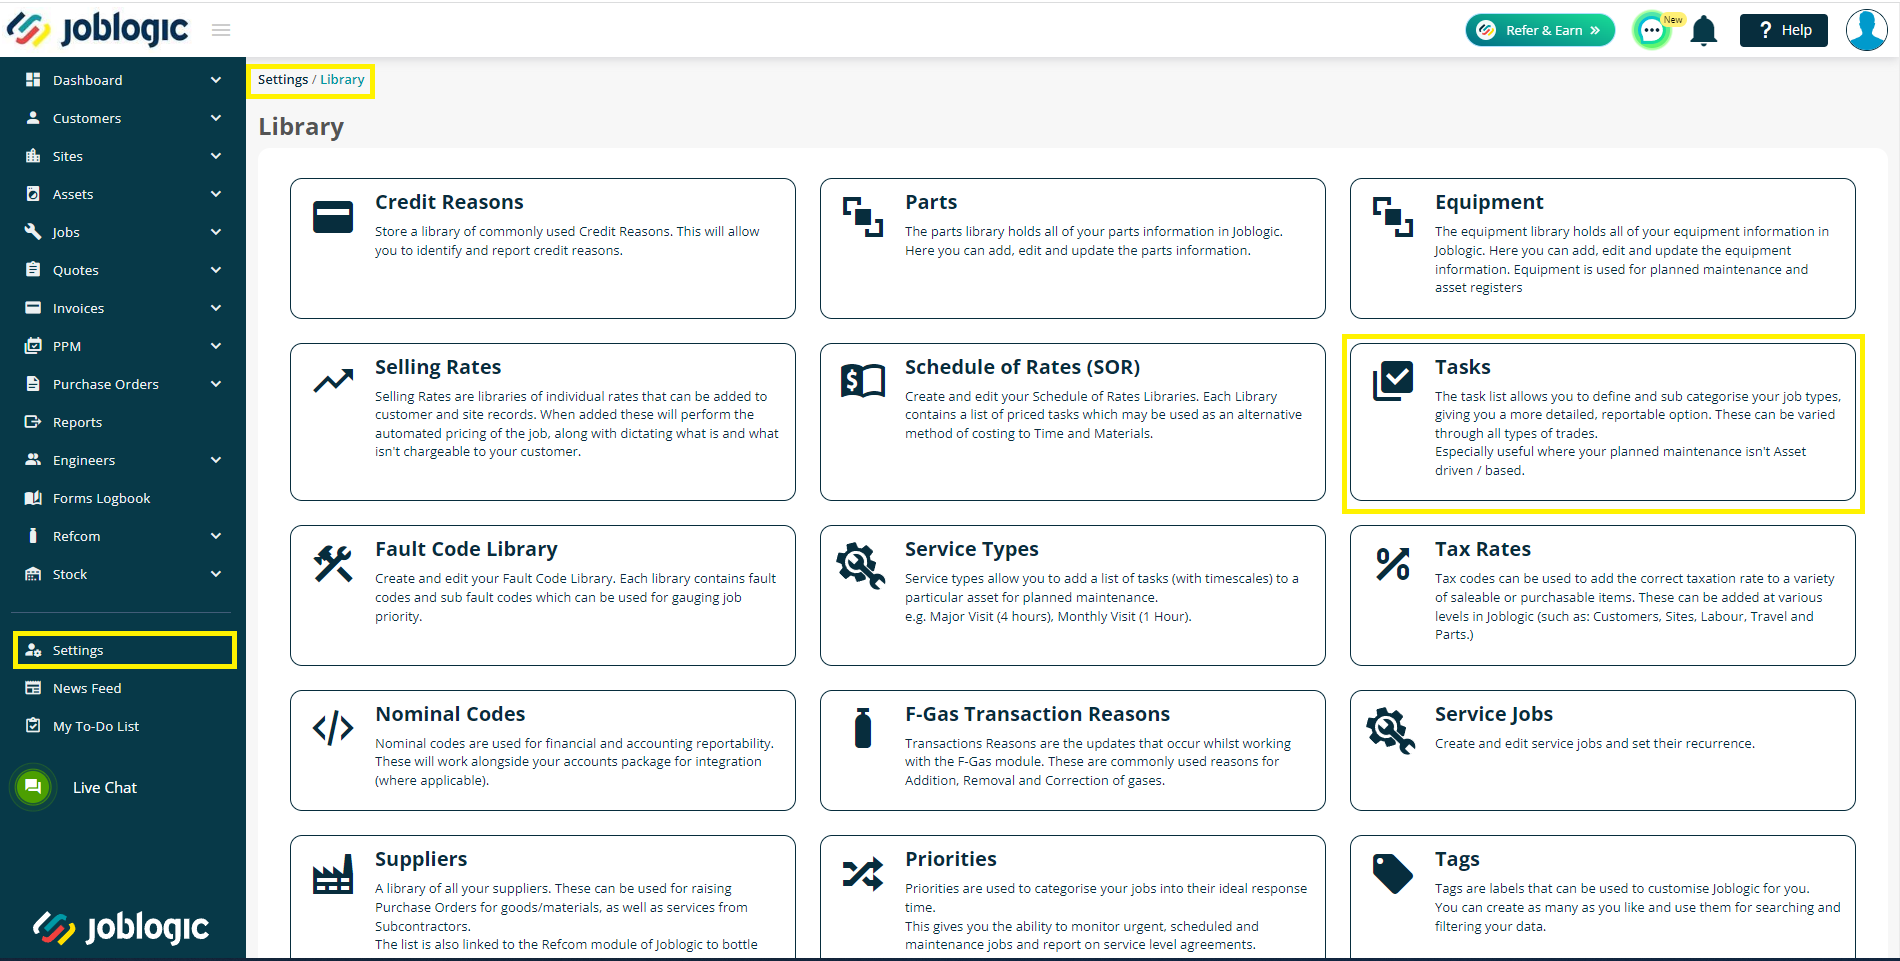
The Tasks option against Jobs allows you to add any tasks and associated subtasks, set up in the task’s library (Settings > Library > Tasks) to the job.
This user guide details how to assign tasks to jobs within the back office.
Adding Tasks to Jobs
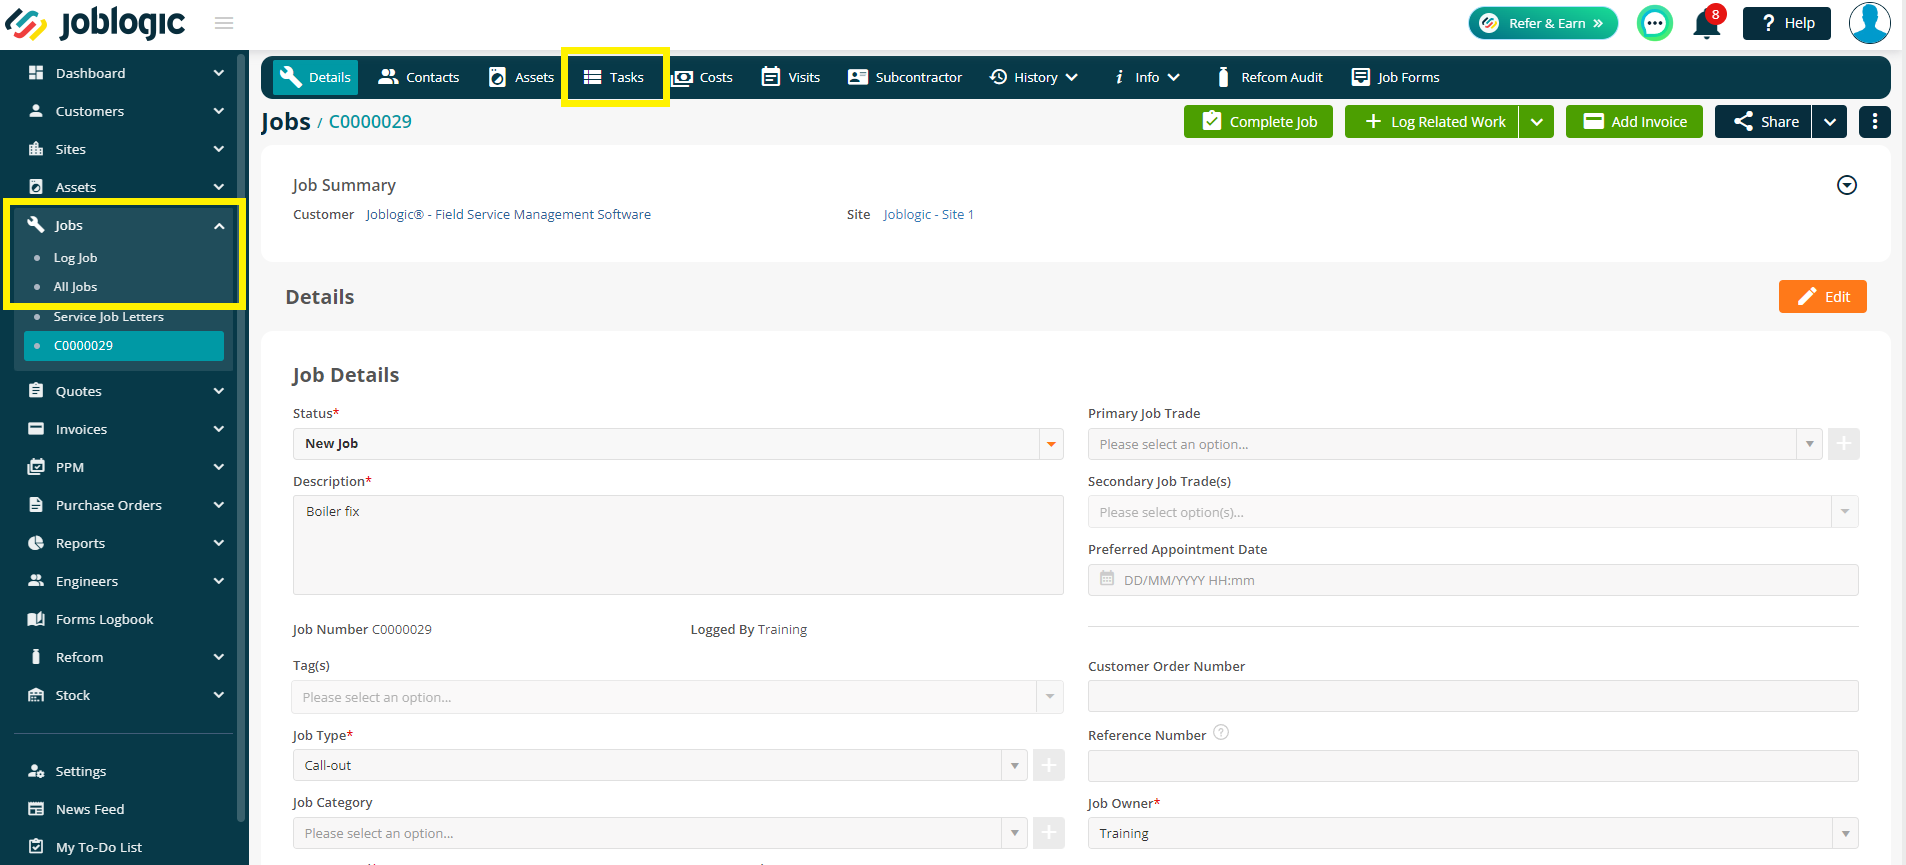
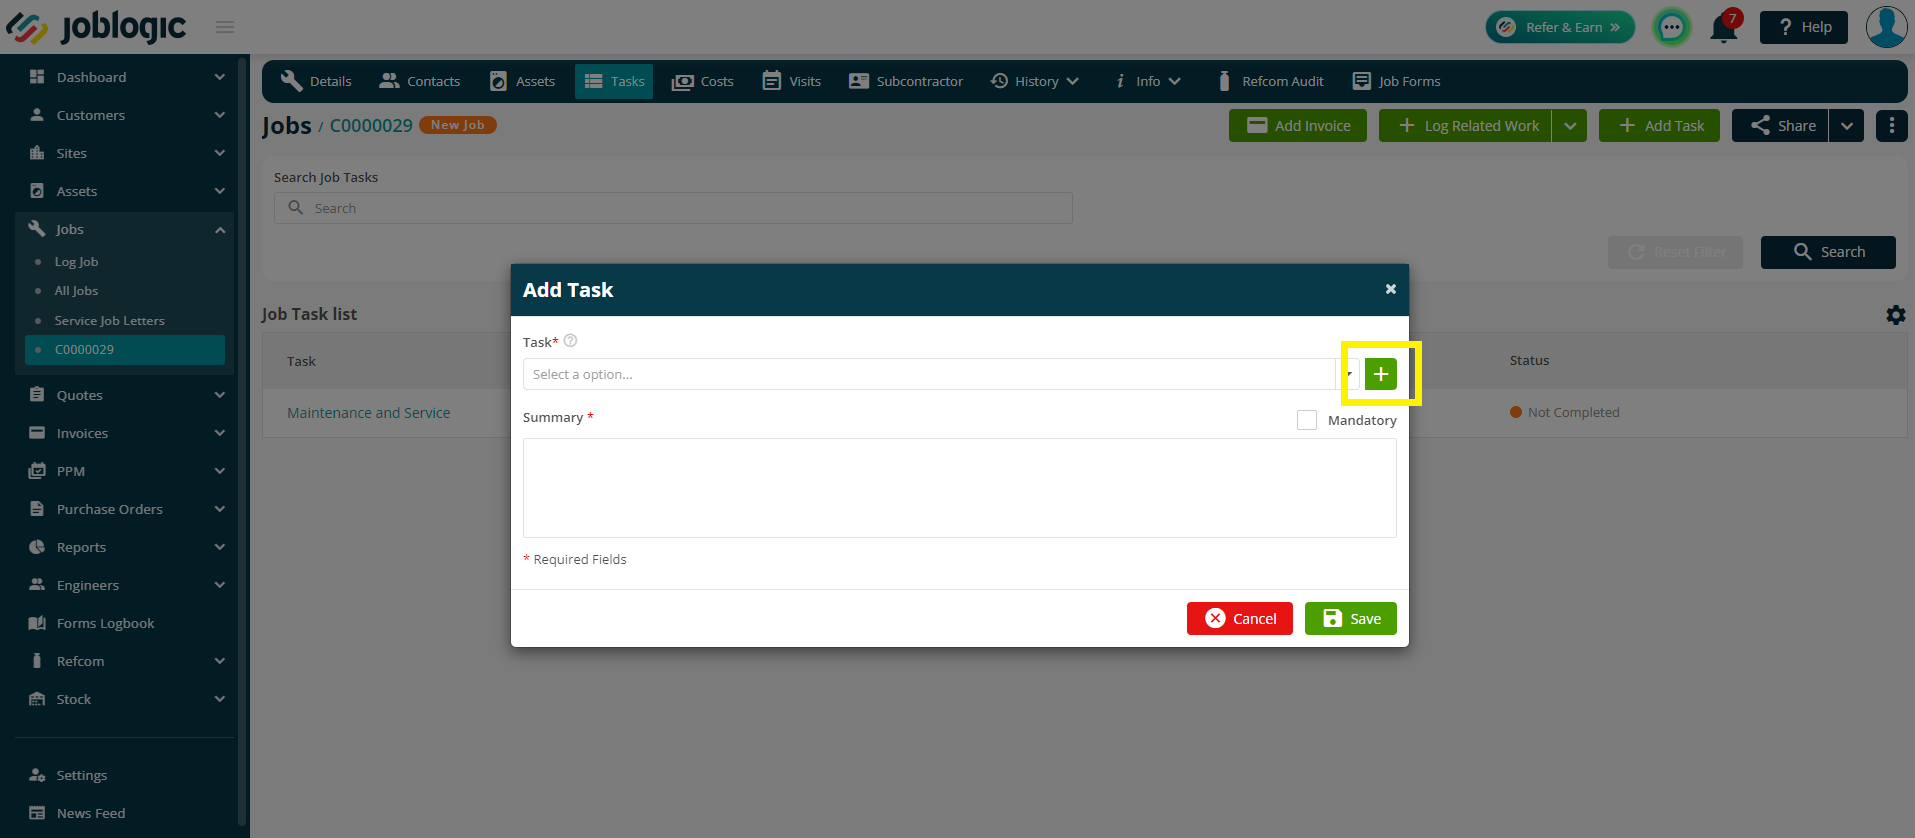
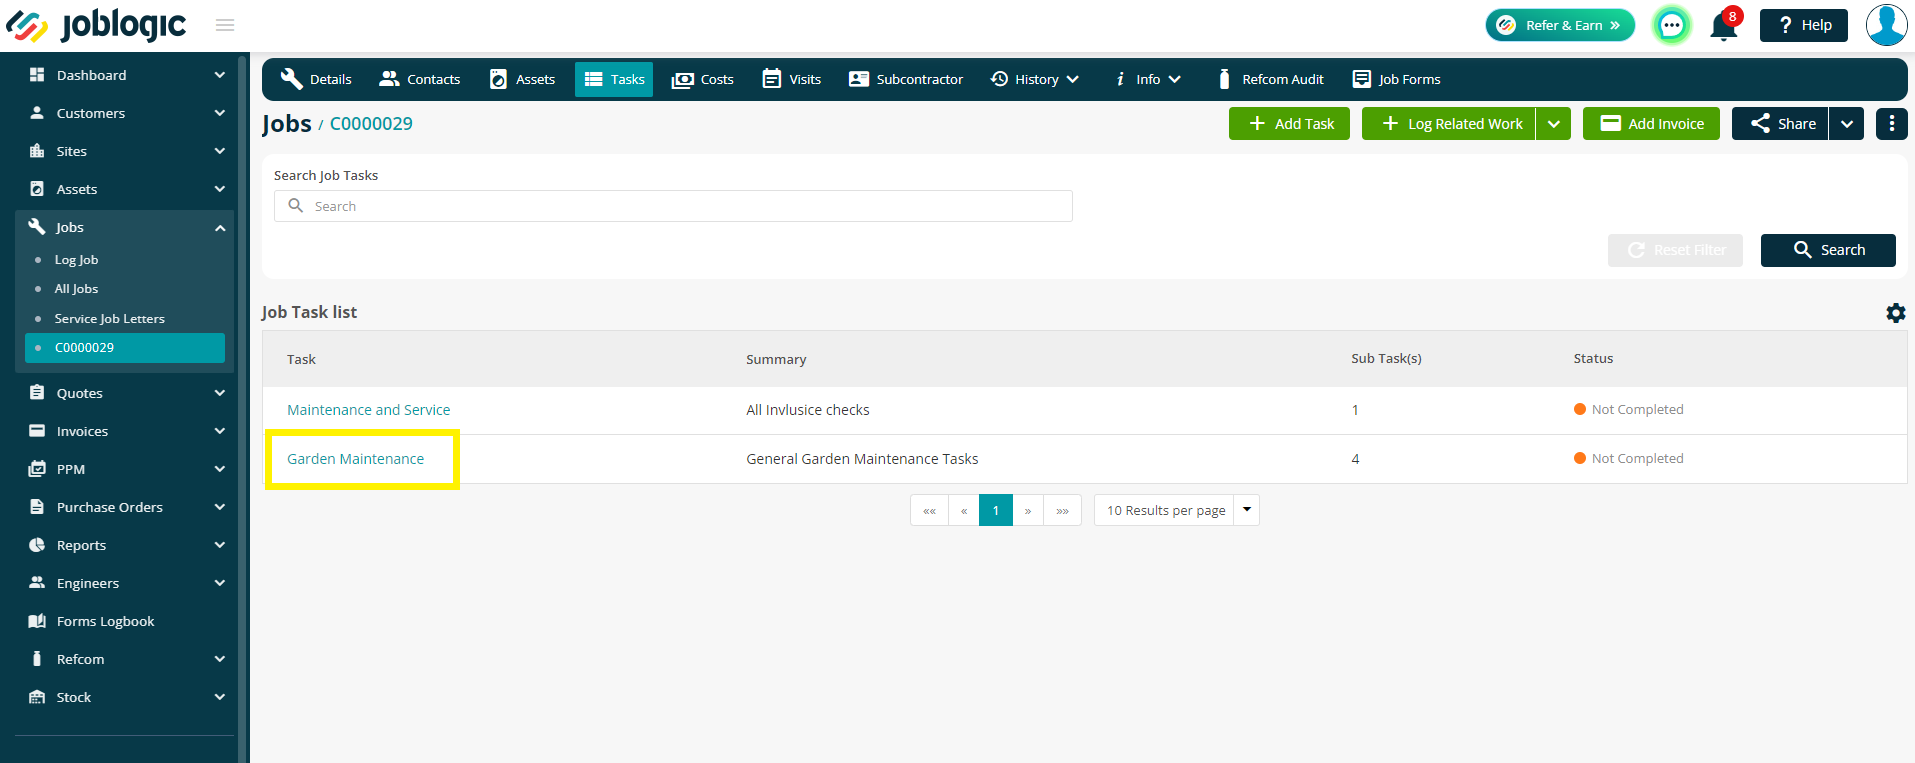
In order to assign tasks to a job, navigate to Jobs > All Jobs > choose job > Tasks tab.
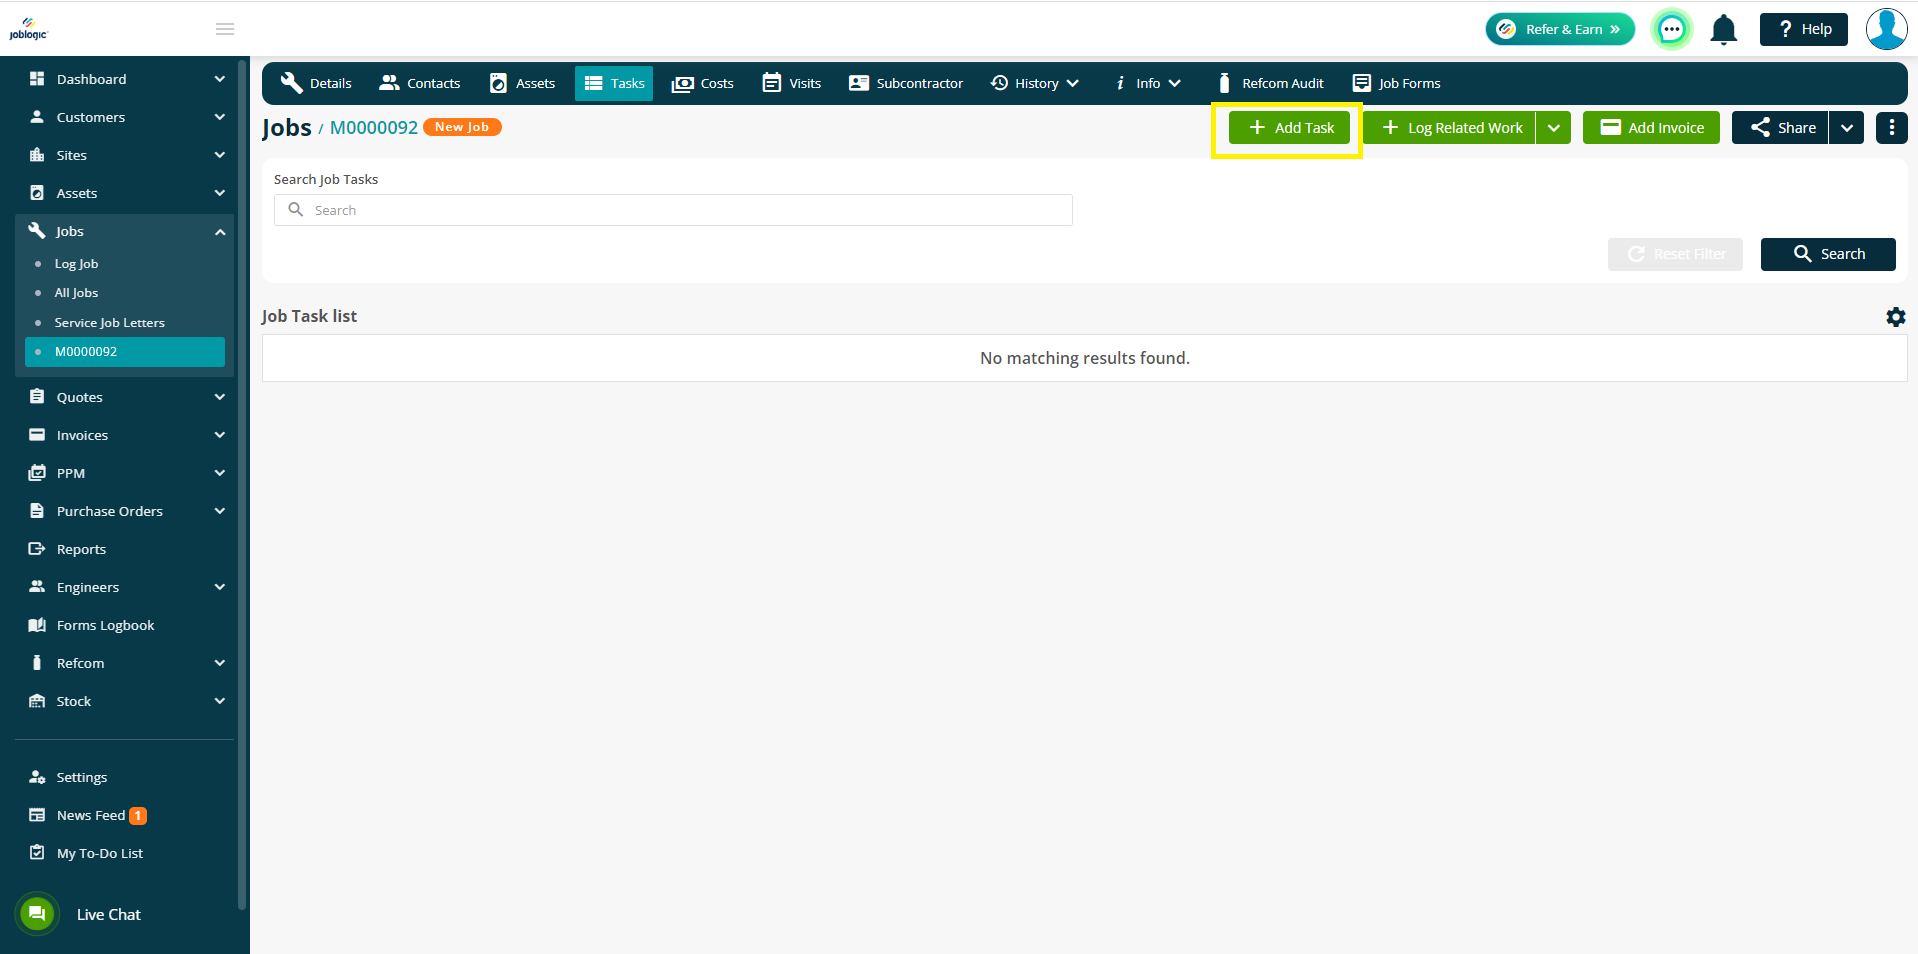
Next, select the ‘Add Task’ button.
Tasks need to be set up within the settings library before they can be assigned to jobs. If they are already set up, they can be selected from the dropdown menu.
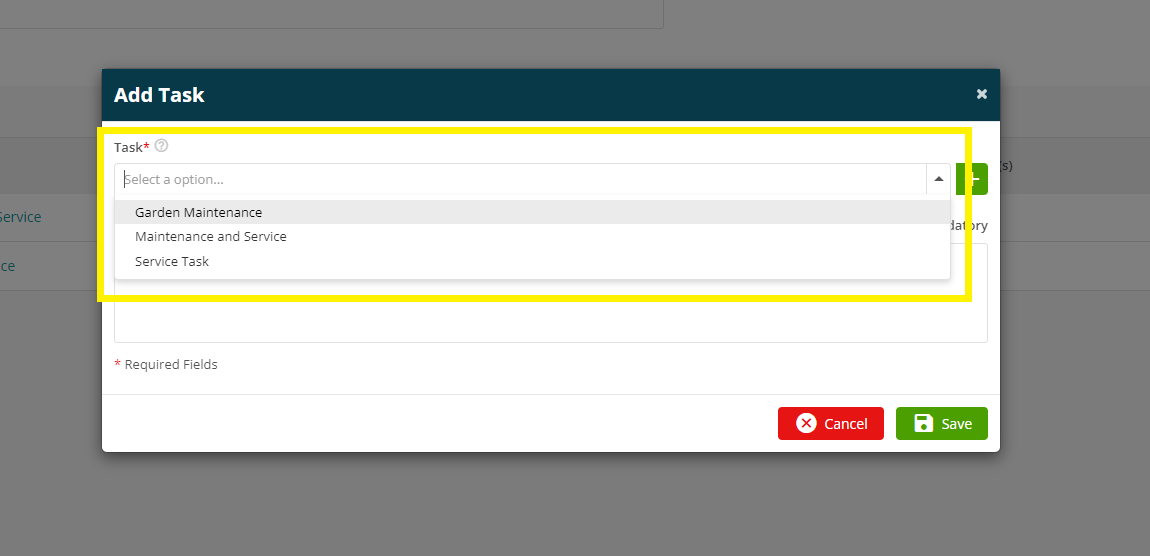
If you do not have any tasks set up, or you need to create a new task, you can use the Green Plus button to add one to your library.
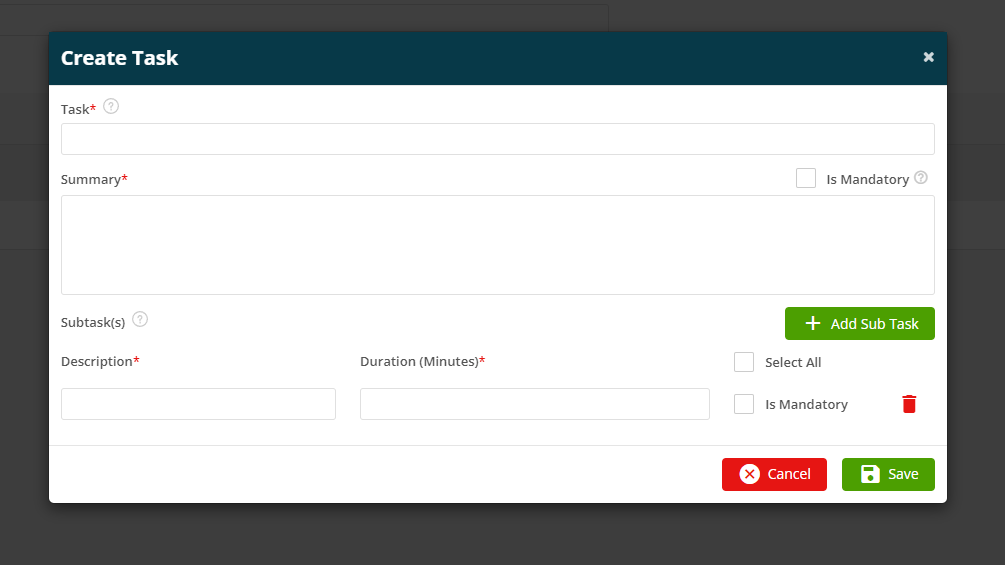
Fill in the details of the ‘Create Task’ window and add any subtasks via the green Add Sub Task button. You can also decide if you would like the tasks to be mandatory or not. This will feed into the Mobile App and force the engineer to complete the tasks before the job can be finalised.
Select ‘Save’ and this task will save in the system library. You will be redirected back to the ‘Add Task’ window whereby the newly set up task and details will prepopulate.
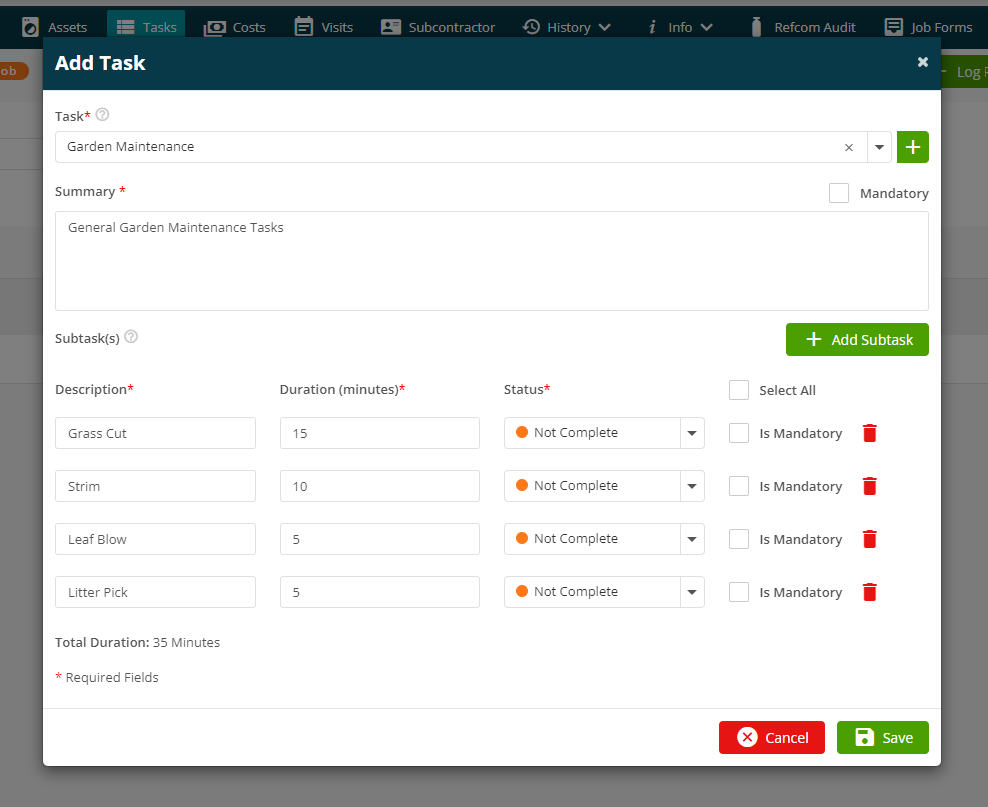
Select the ‘Save’ option once the required task has been selected and the task will log within the ‘Job Task List’.
Deleting Tasks and Marking as Complete
Tasks can be deleted from the job if no longer required or if they were entered in error. Additionally, they can be marked as completed via the back office if interaction from the mobile is not used or required.
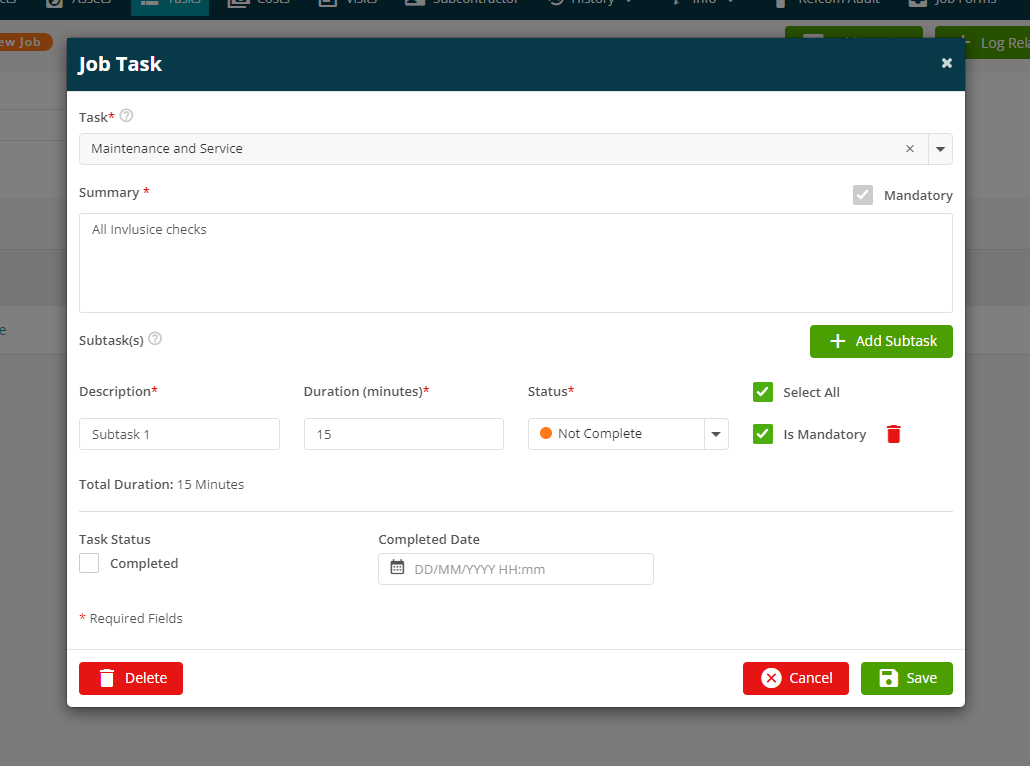
In order to delete the task from the job or mark it as completed, select the blue hyperlink of the Task.
The task can be deleted via the ‘Delete’ button (providing that the user account being used has deleting permissions granted).

To mark the whole task as completed, tick the Completed box.
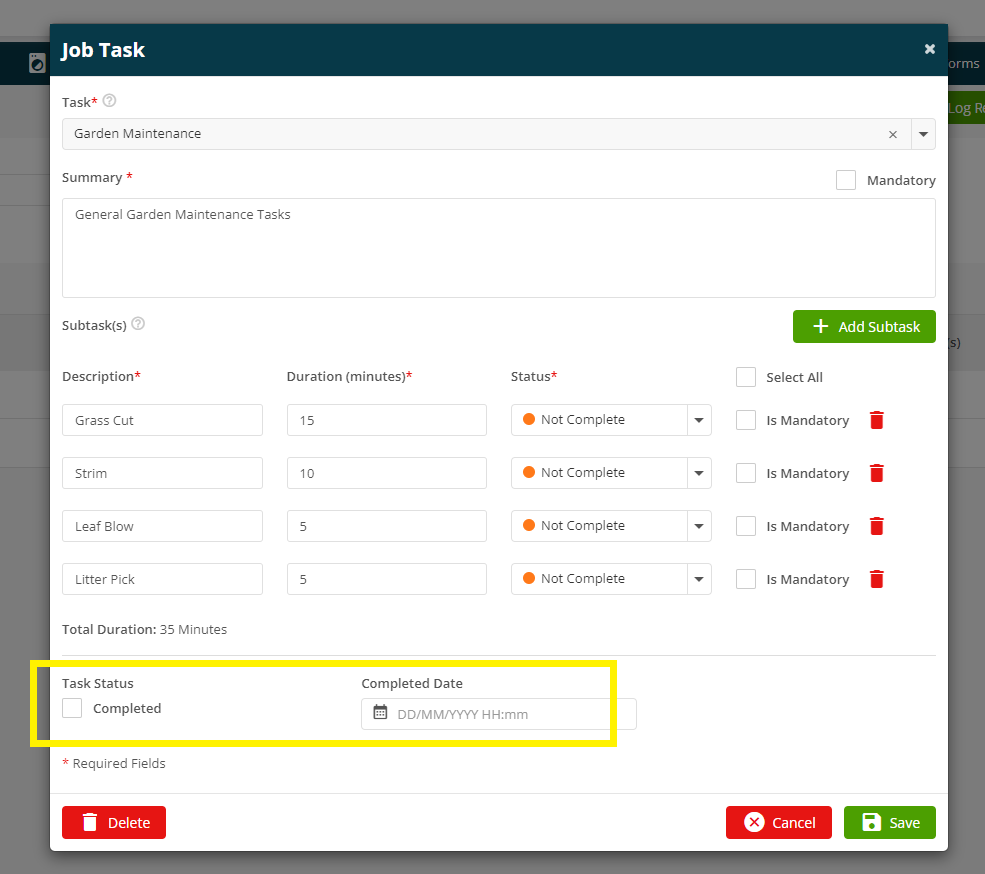
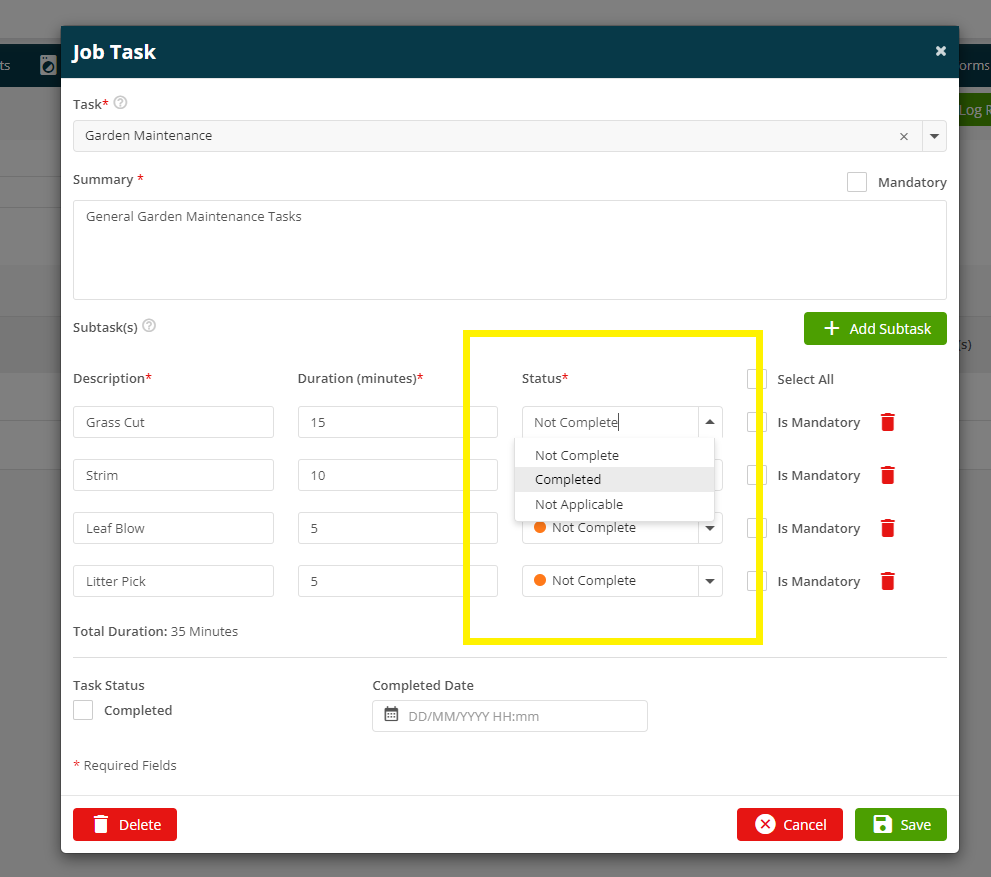
To mark only individual Sub Tasks as Completed, choose the relevant Status from the dropdowns.
Further Support
For further information or assistance with the above, contact our Support Team on 0800 326 5561 or email support@joblogic.com. Alternatively, our Customer Success Management team can be reached by emailing customersuccess@joblogic.com
Publishing Details
This document was written and produced by Joblogic’s Technical Writing team and was last updated on the date specified above. Be aware that the information provided may be subject to change following further updates on the matter becoming available or new releases within the system. Additionally, details within the guide may vary depending on your Joblogic account’s user permissions and settings.