Introduction
A site is a location you can set up within Joblogic under a customer record. Each Customer can have multiple Sites. The sites are essentially where the work will be taking place.
This guide will show you how to find site records in your system and how to integrate the record to find history behind a specific site and make updates to the record itself.
Your Sites can be added to the system in a few ways:
- Create them individually using the ‘Add Site’ function, via All Sites or via the Customer record.
- Import via an Excel CSV
Now that your sites are loaded onto Joblogic, you are ready to search for them and look into the records.
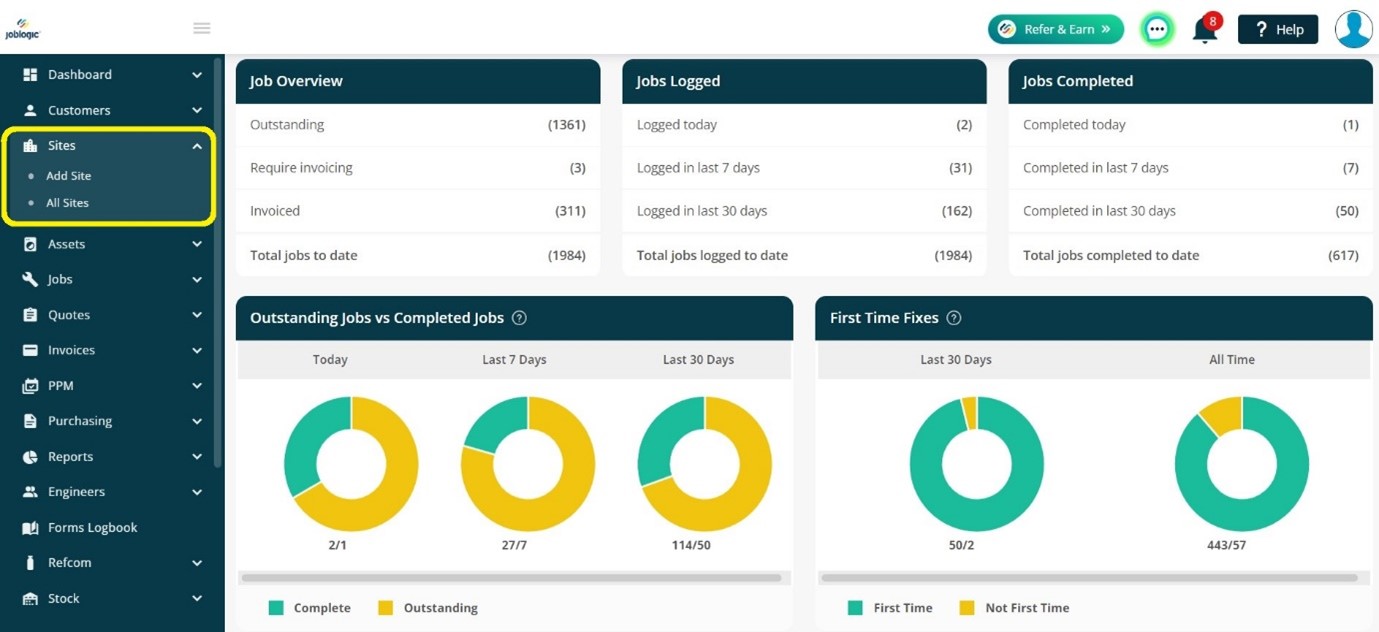
Accessing the Site Desk
To search for the list of sites, click on Sites > All sites.
Navigating the Site Desk
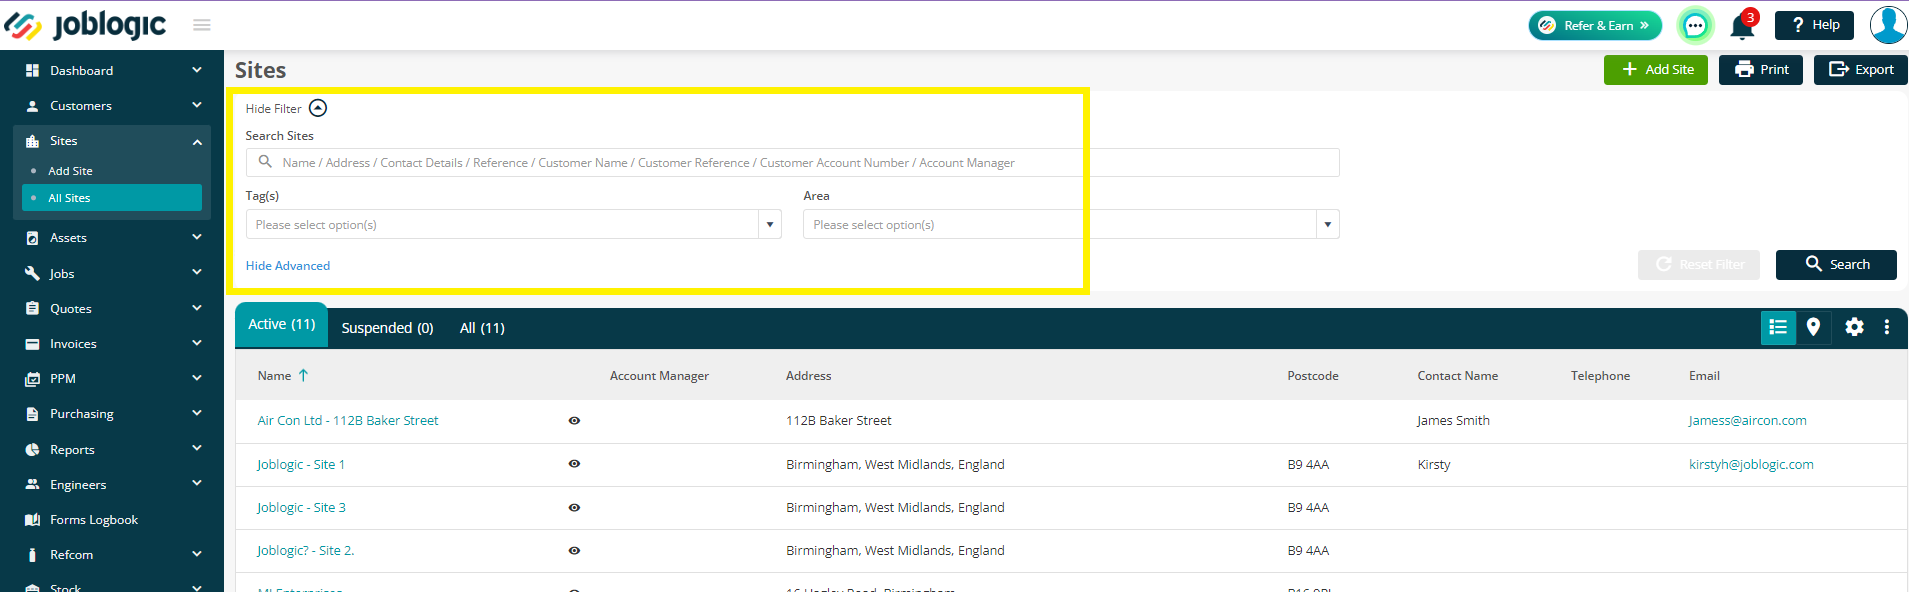
Filters
You can search for your sites via Name of site, Address of site, Contact details, reference of site, customer name, Customer reference and customer account number. This will refine your search and display results in the below table.
You can also filter further using Tags or Areas which have been added to the site. These can be found under the show advanced link.
Action buttons
- Add Site – This is one way you can create a new site in your system. Simply click on it and fill out the form. Once saved it will be a record in your system.
- Print – Allows you to Print your search results to paper or to a PDF.
- Export – This button, similar to print, allows you to export your results into a CSV (Excel) file.

Results Table
The main part of the page is your results table. This will update based on the filters you have applied.
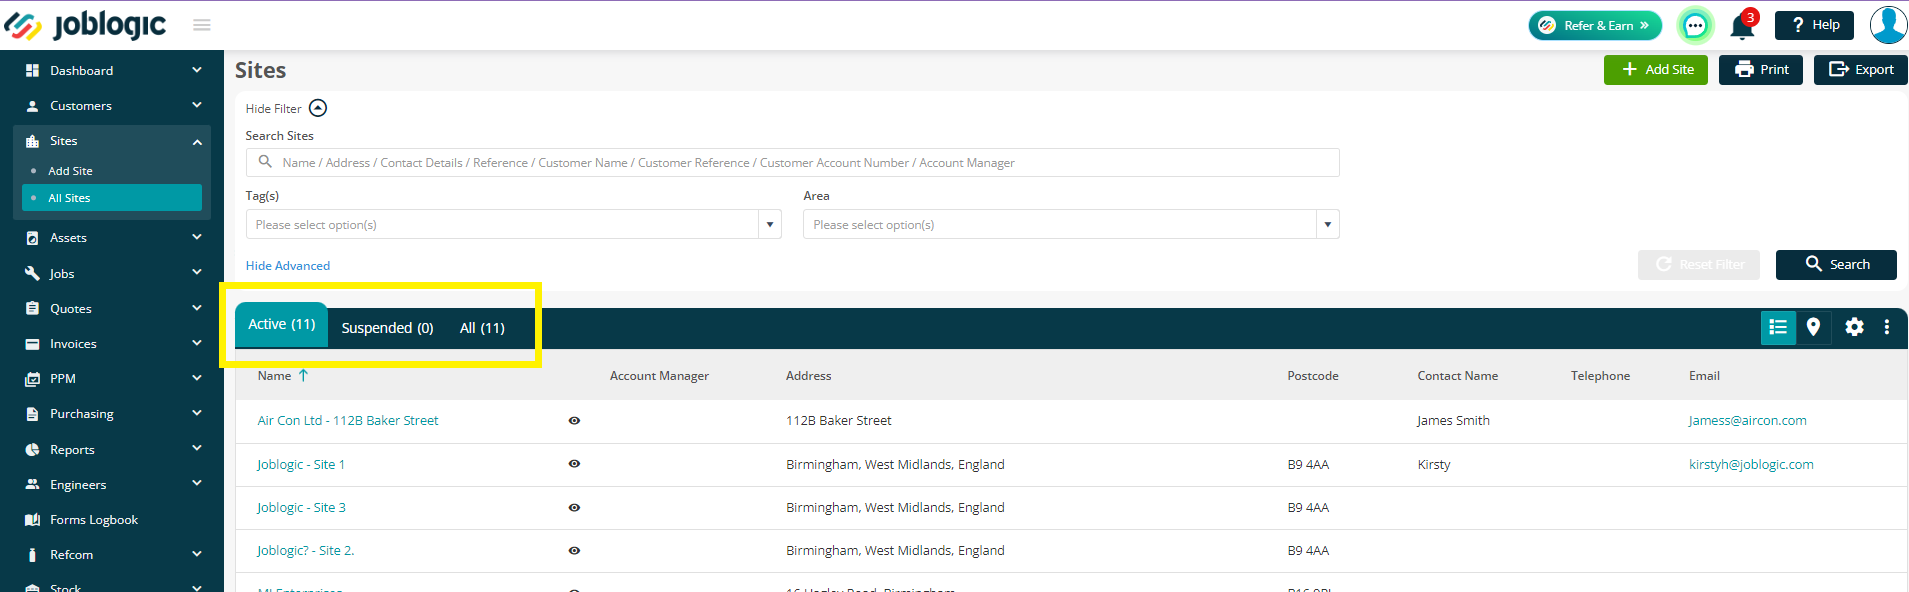
Tabs
There are three tabs to help you view your data more easily.
- Active – This will show you all of your sites marked as ACTIVE.
- Suspended – Will show you any sites you have marked as INACTIVE
- All – Will show you both active and inactive sites.
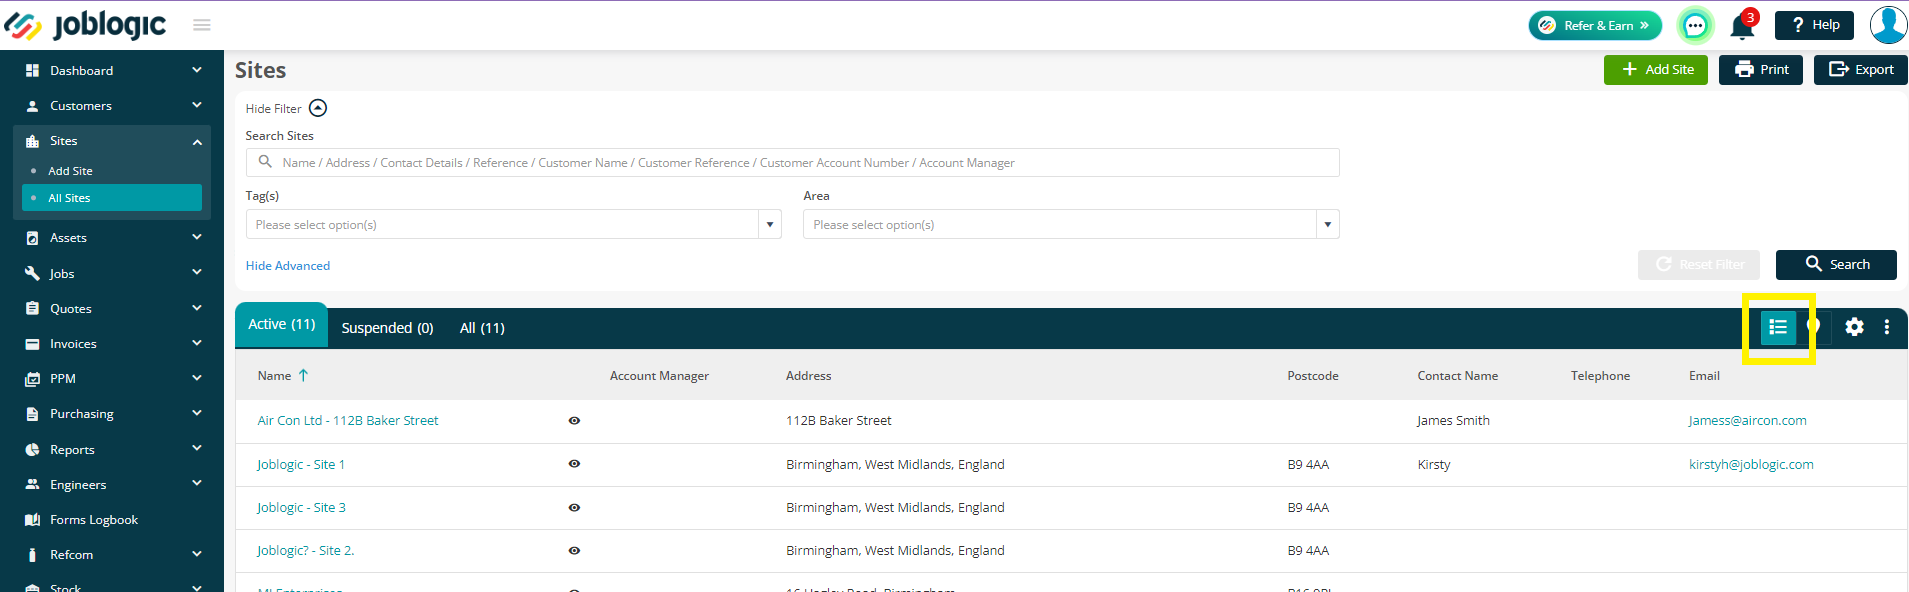
Further Actions
We also have 4 more buttons to the right of the screen which include 2 different view functions, a settings cog and a menu button.
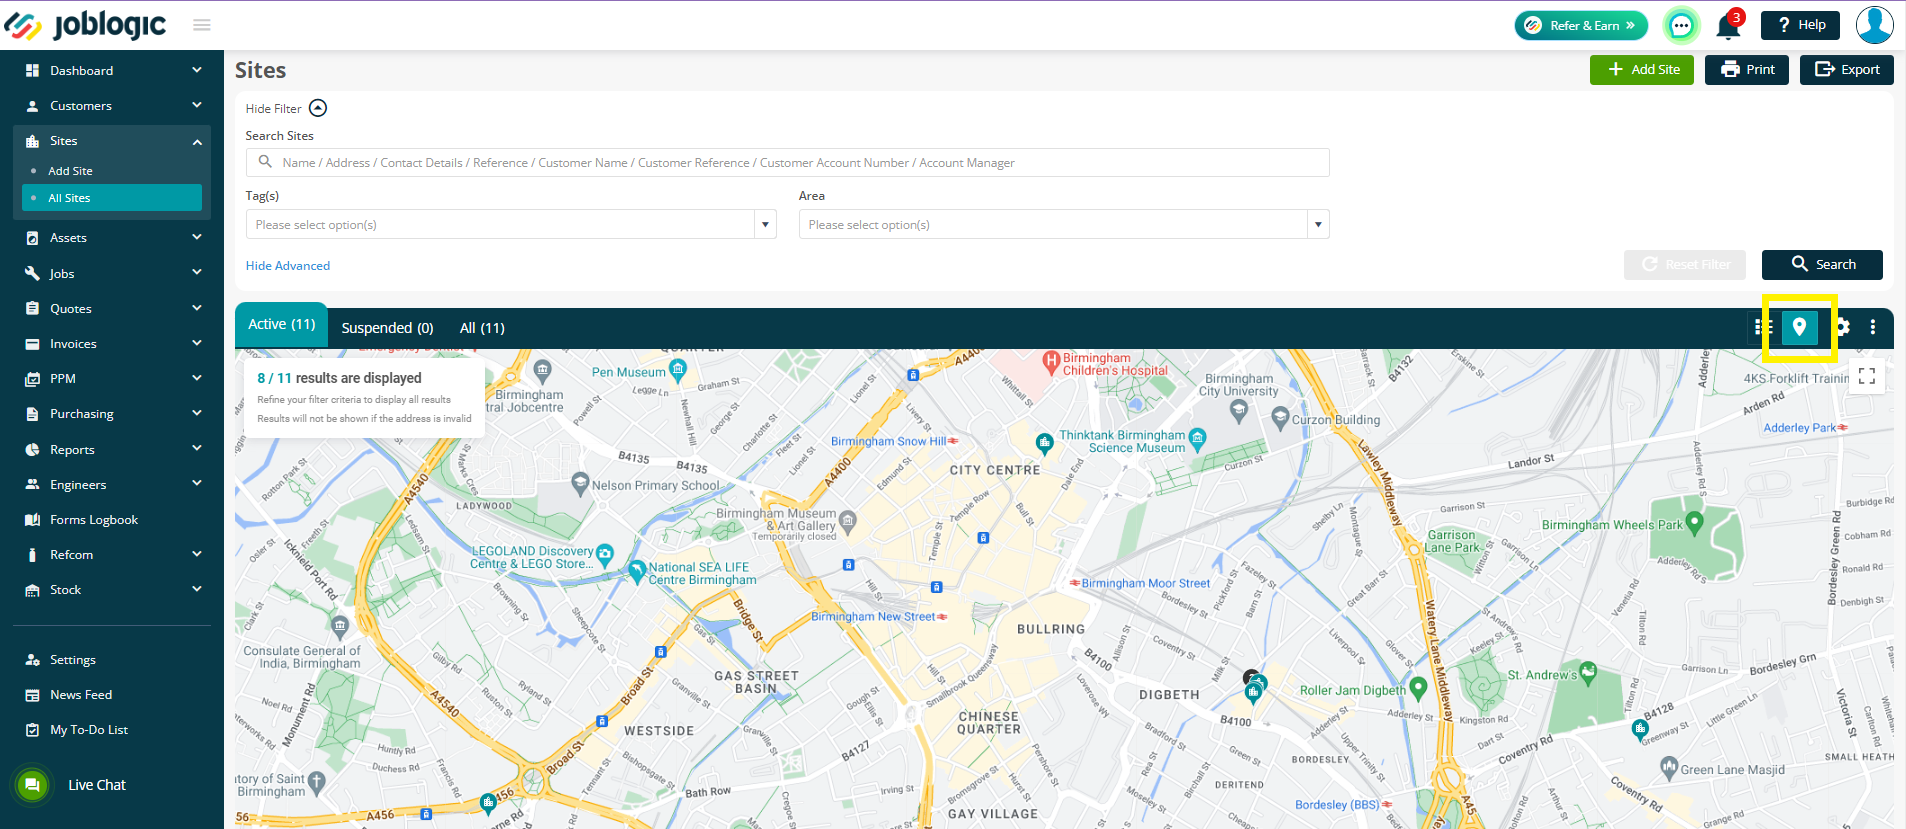
- List view – This is the default view when you open up the site desk. It simply shows you all sites based on your filters, in a list view.
- Map view – Allows you to view your site records on a map. Joblogic uses the address you have assigned to the site to show it on a map. If the address is incomplete or incorrect it will now show.
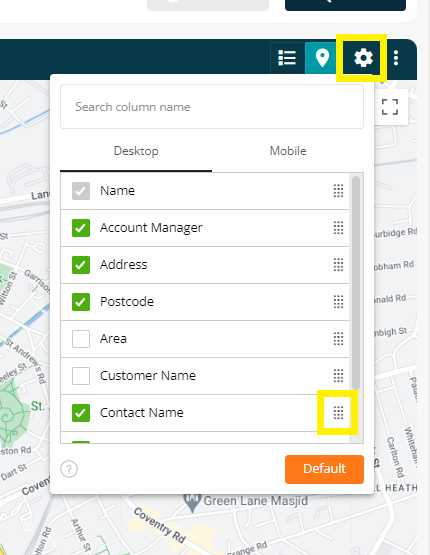
- Settings cog – Here you can pick and choose what headers you see in your results table. As an example, if you’re not interested in the Account Manager field, you can untick this and it will not show in the table.
Please note that these are user specific, so any changes you make in the cog will only update your profile.
You can also choose the order in which your headers show by dragging and dropping them into different orders.
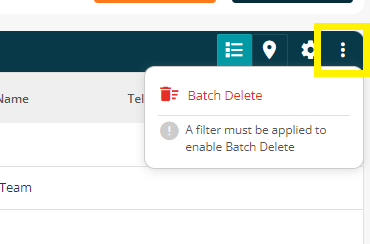
- Menu – This is where you can Batch delete sites. You will notice that this is greyed out with no selection. To use this tool you need to apply either a tag or a search filter to batch delete.
Main Table
The results table itself will show you key client information at a glance. You will notice a few of the columns are hyperlinked (show in blue), this means that they are interactive:
- Name – Clicking on the Site name will take you to the Site Details page.
- Telephone – Clicking on the phone number allows you to call that number directly from your Joblogic system (Note that you need a soft phone application to do this)
- Email – Clicking on the email address will open a new email window to email that contact.
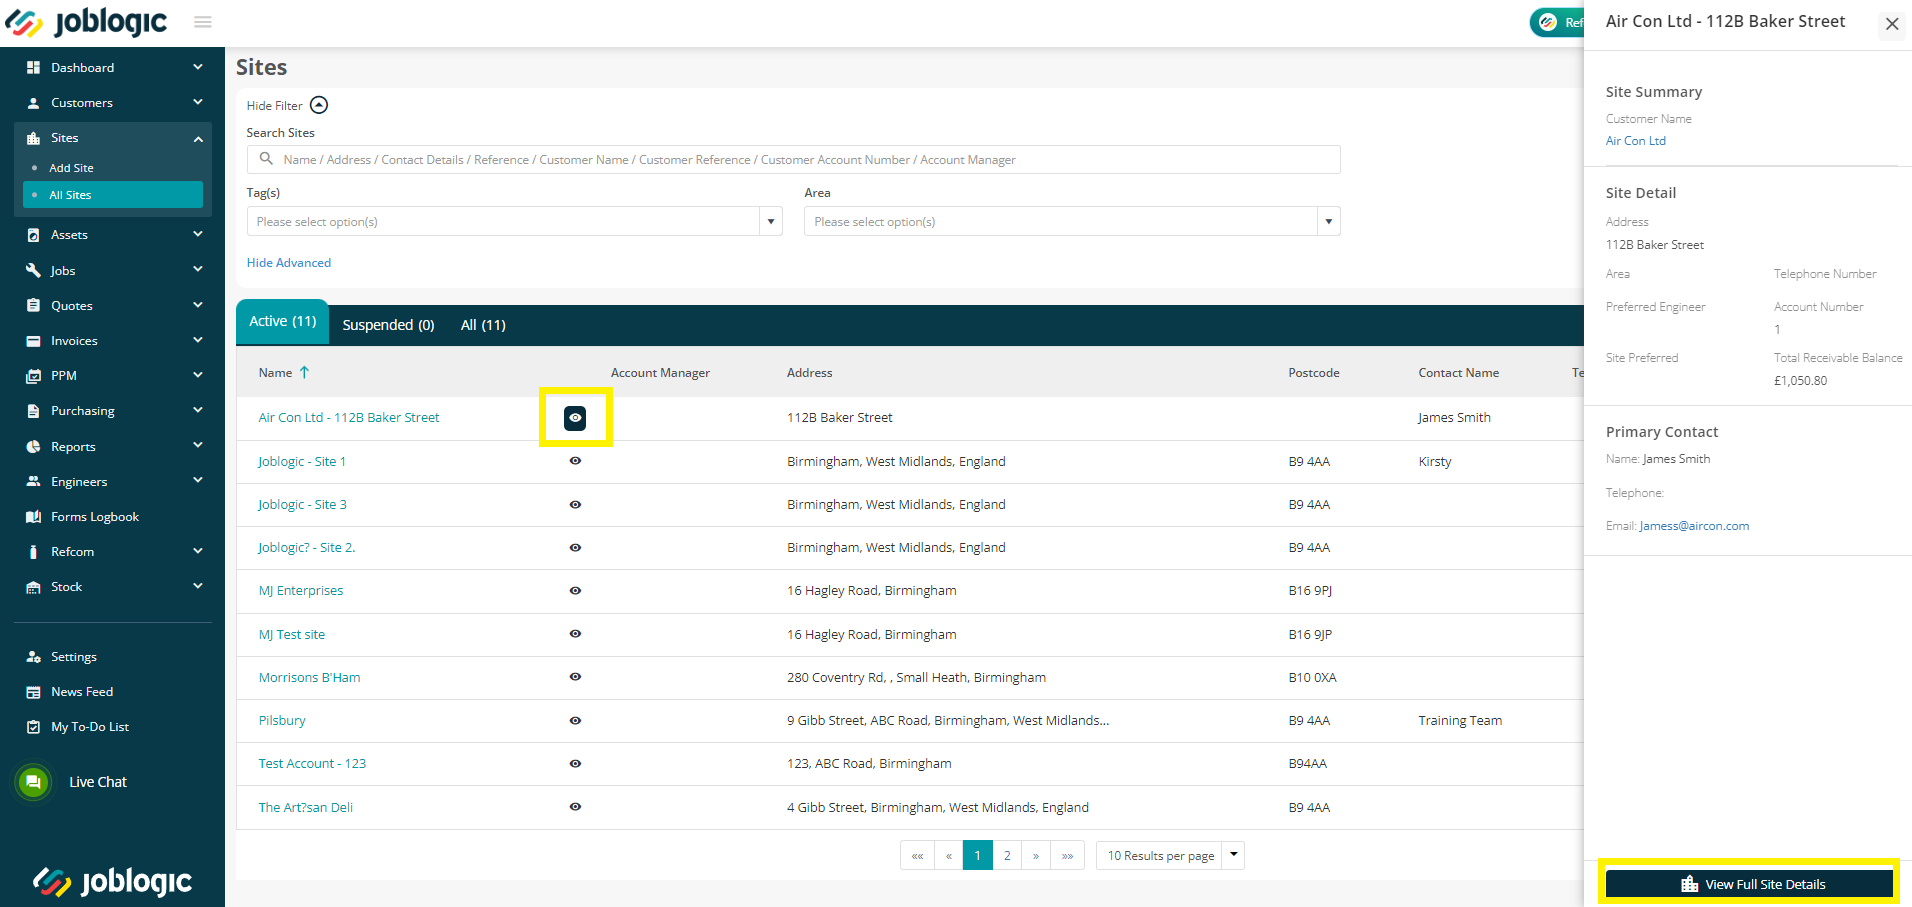
You will also find an eye icon next to the Site name. This will open up a quick view screen, on the right-hand side, to show you some more key data without having to go into the record itself.
The Site Record
As above, click the Site Name to view an individual Site account.
Once you have selected a site, you will see site information under the details tab. You can also navigate across the top tabs to view and/or edit various information regarding the site. We’ll explore this below:
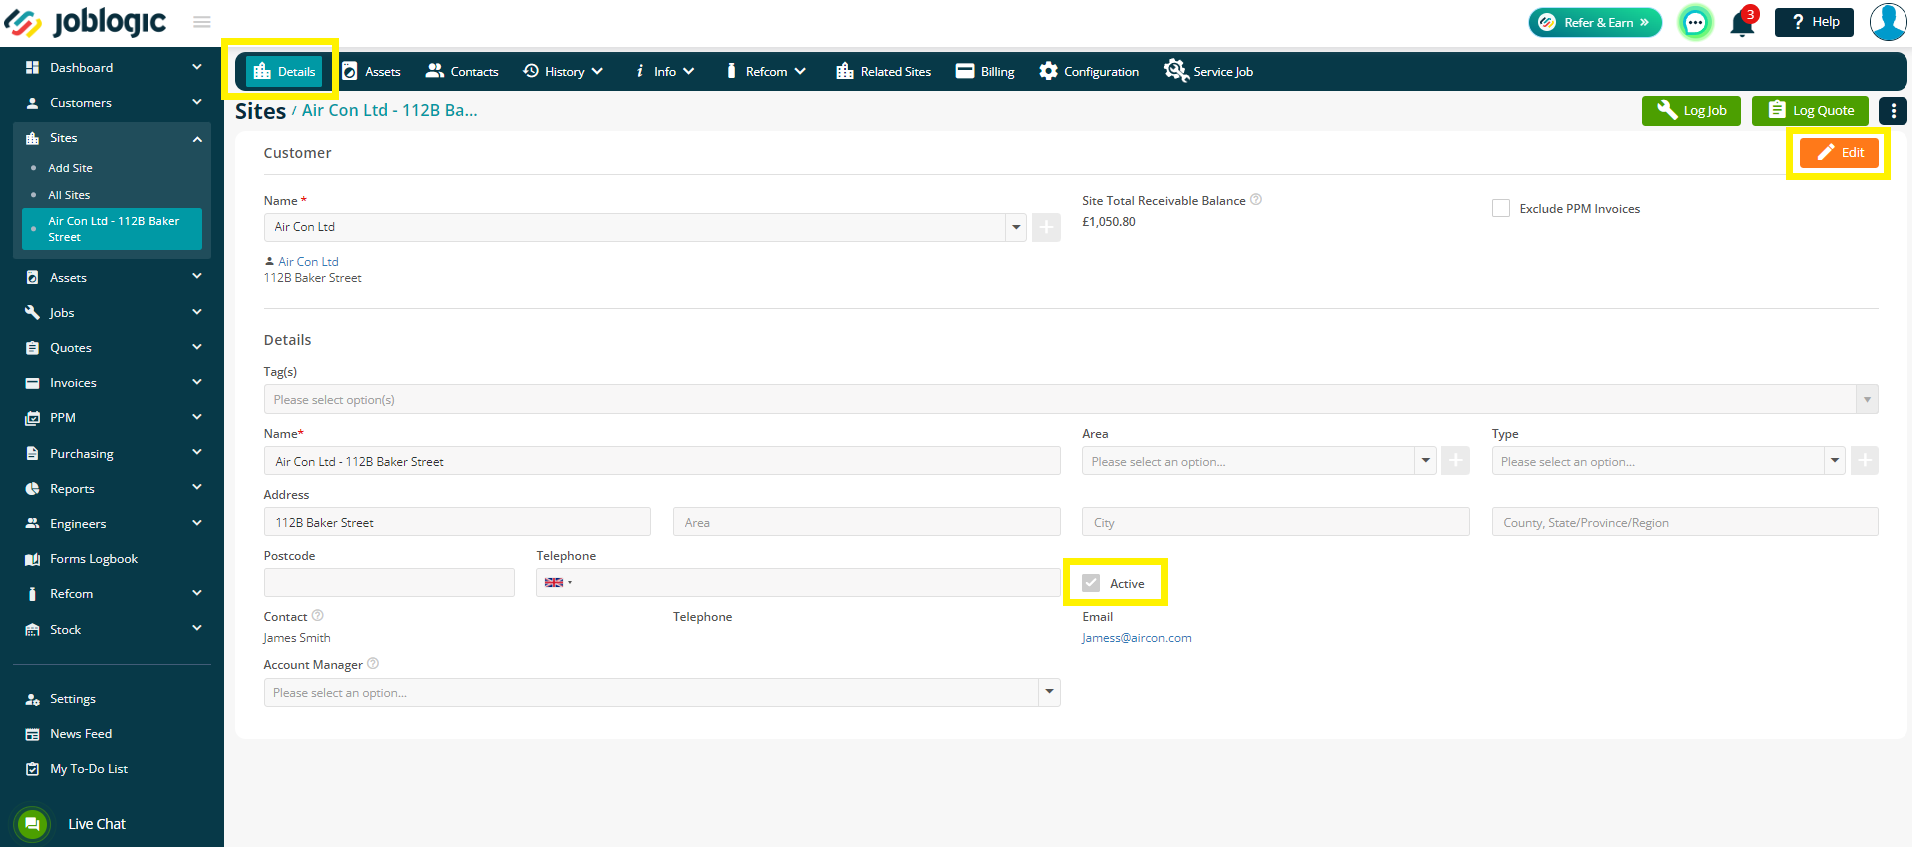
Details
The details tab will give you access to all standard information regarding your site including Name, Address, Postcode etc.
You can also edit all this information using the edit button. Just remember to save once you have made all edits required.
You also have a button to select as “Active”. Unchecking the button will then suspend your site.
If the site requires to be deleted, you can do this by clicking on the ellipsis (three vertical dots) and selecting Delete Site.
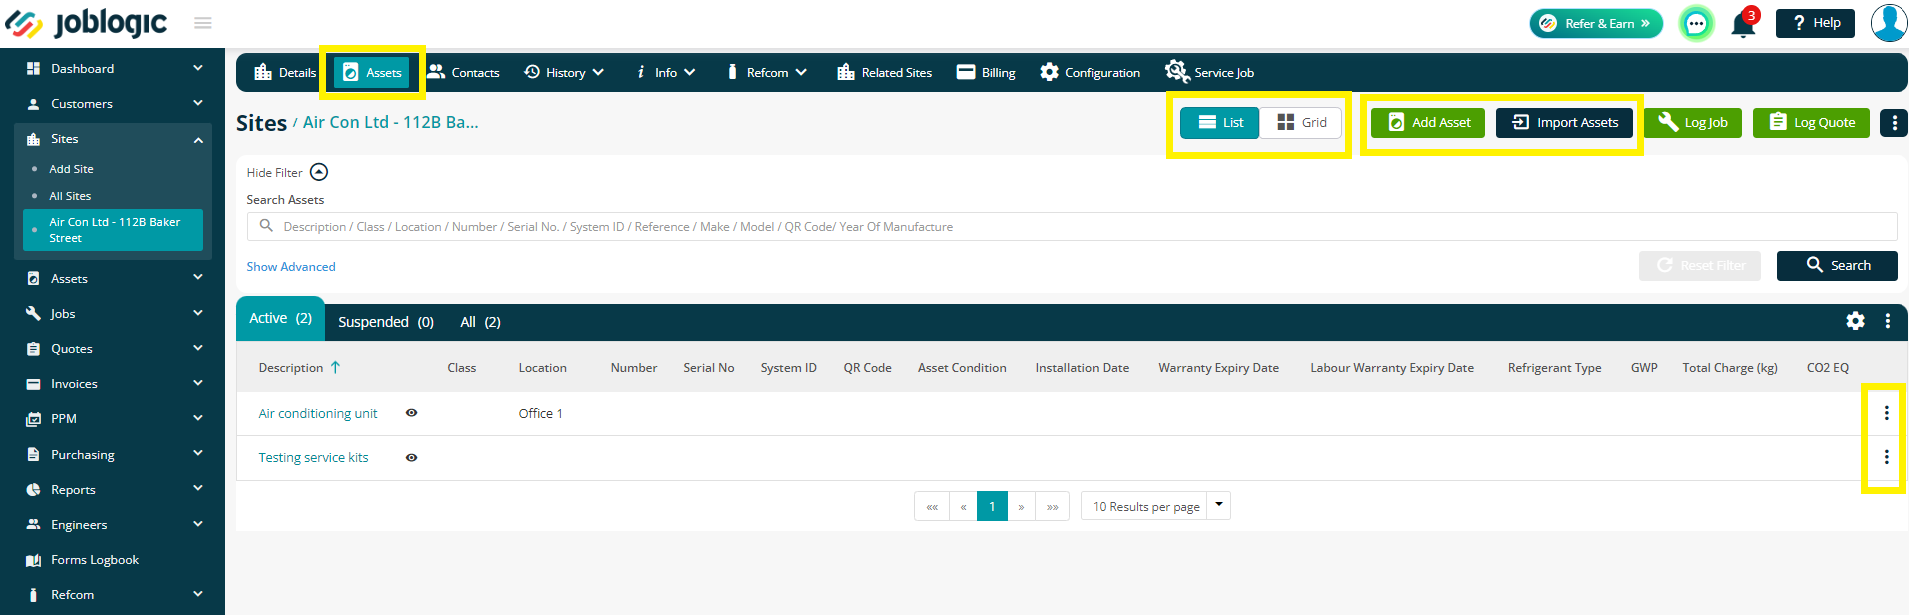
Assets
Within the assts tab, you will see a list of all assets that have been allocated to that site.
You can search your asset listing using the search bar and also utilise the grid view if you have attachments for your assets.
You can add additional assets onto this site and import a list of assets (via a spreadsheet)
If you need to edit or move the asset, click the three dots on the right, or click the Asset Description to go into the Asset detail for further options.
Contacts
You can hold contacts on a site level, the contact tab is where we can go to not only view pre-existing contacts assigned to the site but also where we can go to add more. Contacts added at a site level will be selectable when raising jobs/quotes for the site.

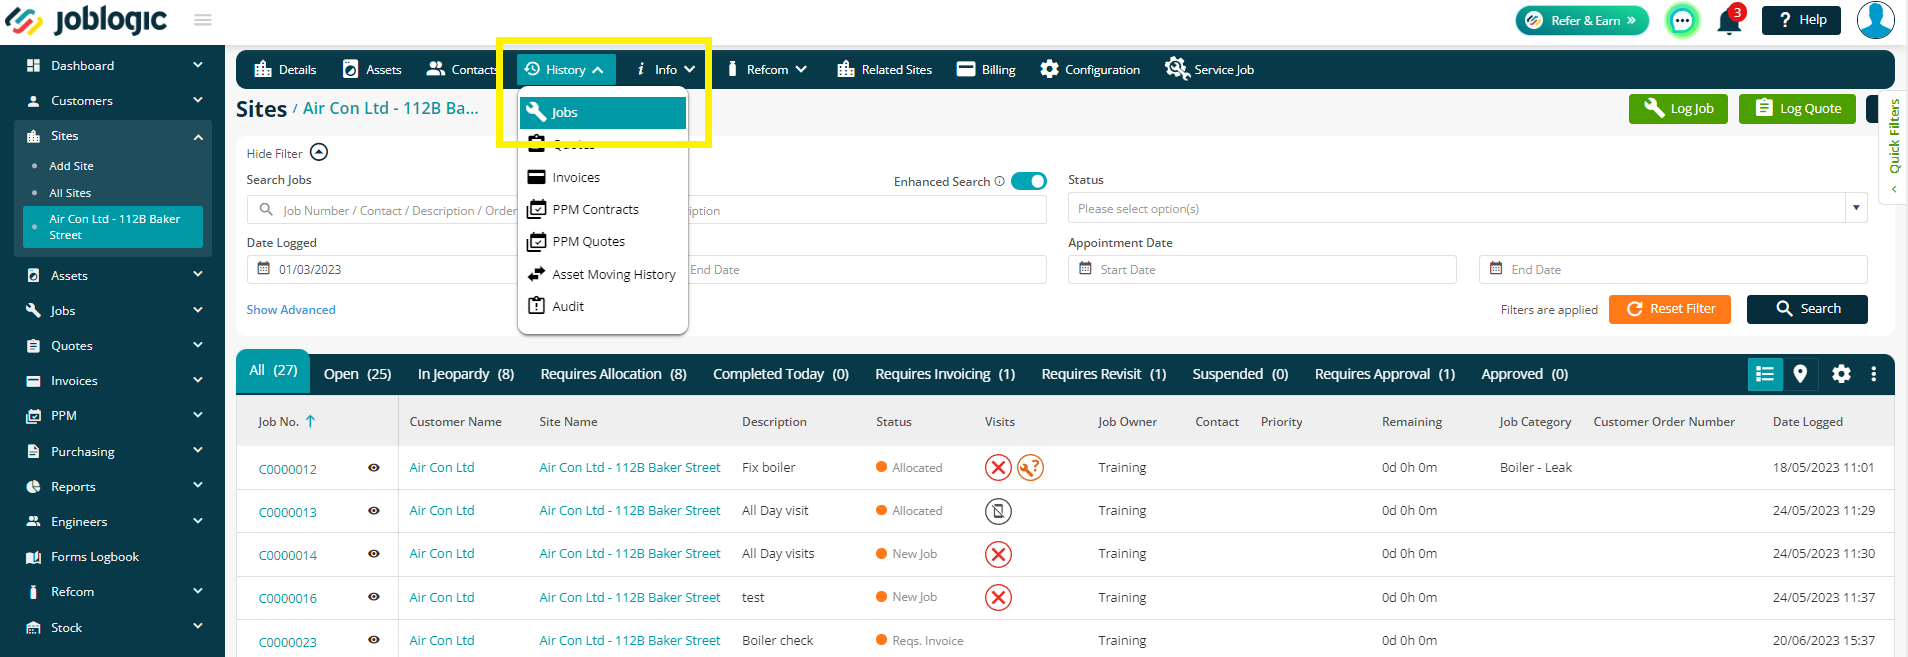
History
The history is broken down into multiple sections that we will explore below.
History - Jobs
Within this section of the History tab, Joblogic will show you every job you have created for this site only. It’s a great place to come if you need to quickly find a job relating to this site.
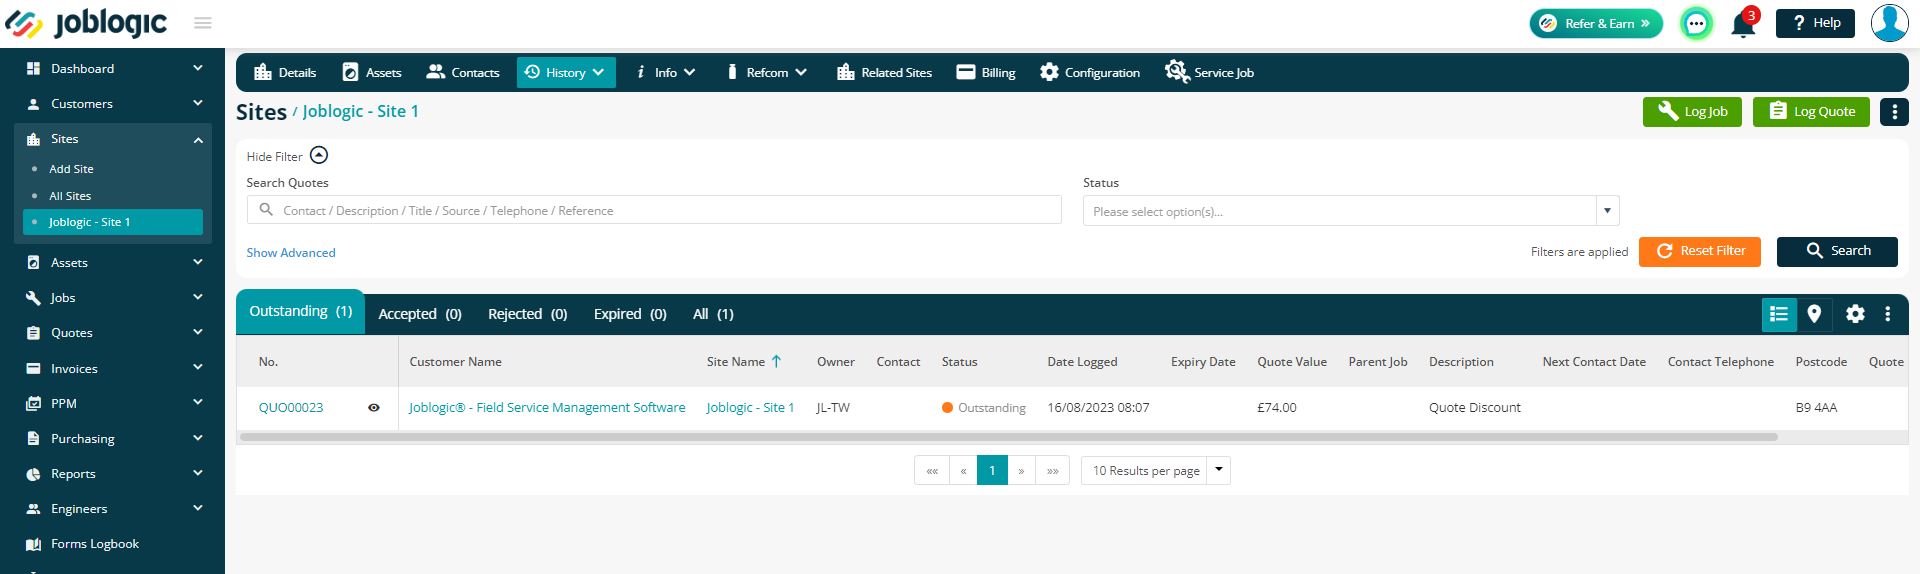
History - Quotes
Here you will find all quotes you have raised for this site. Similar to Jobs, it’s a nice easy place to get the full list of quotes for this site only.
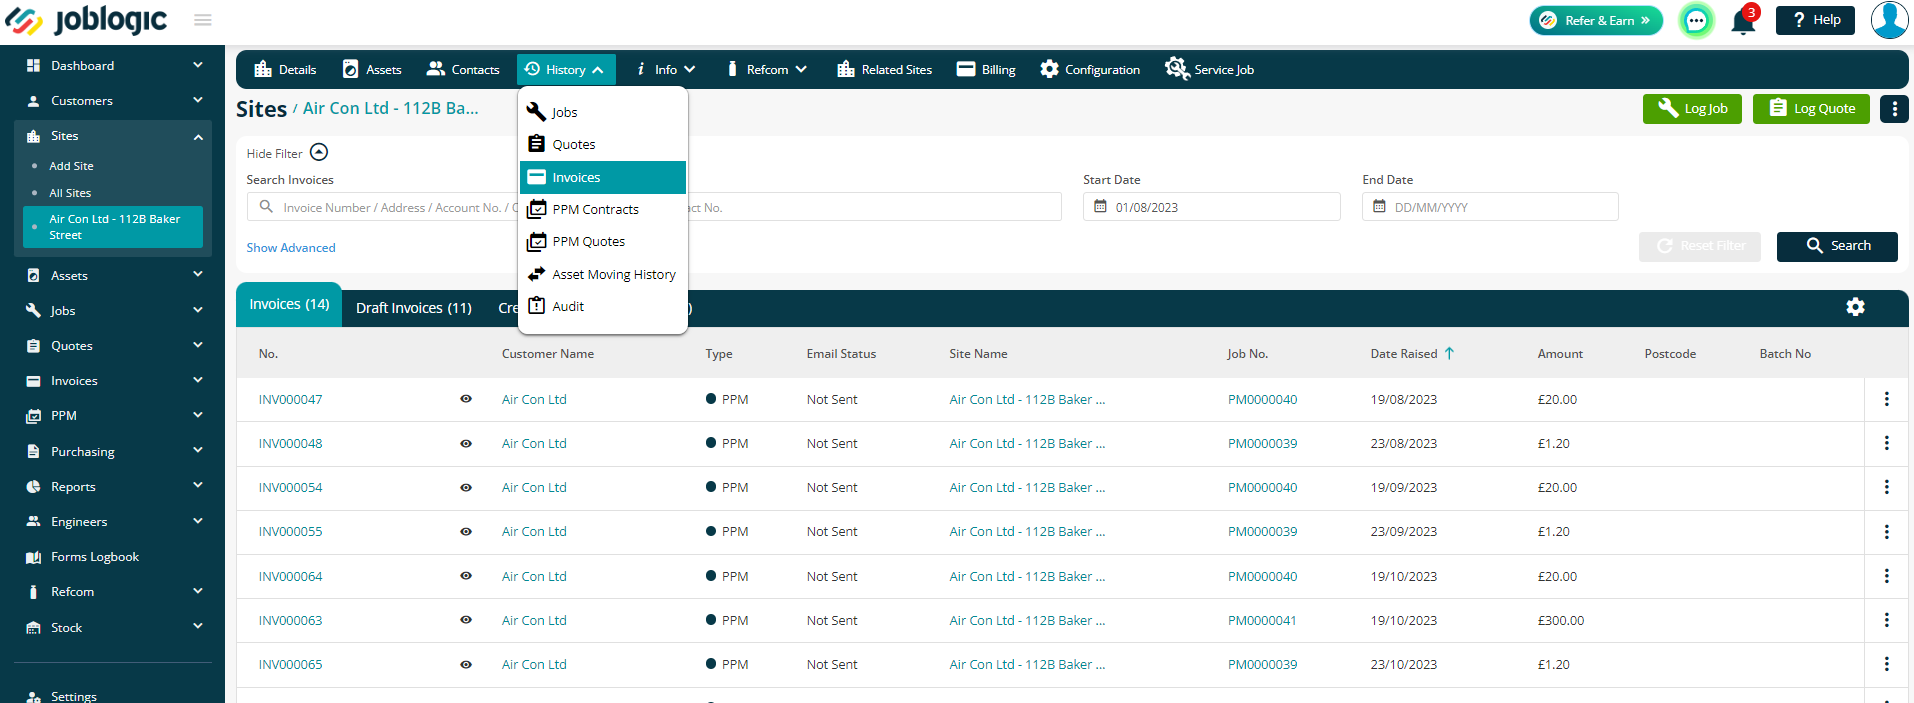
History - Invoices
This screen will show you all Invoices raised against this Site.
History - PPM Contracts
Here you will find all Contracts for this site, including In Progress, Completed & Suspended.

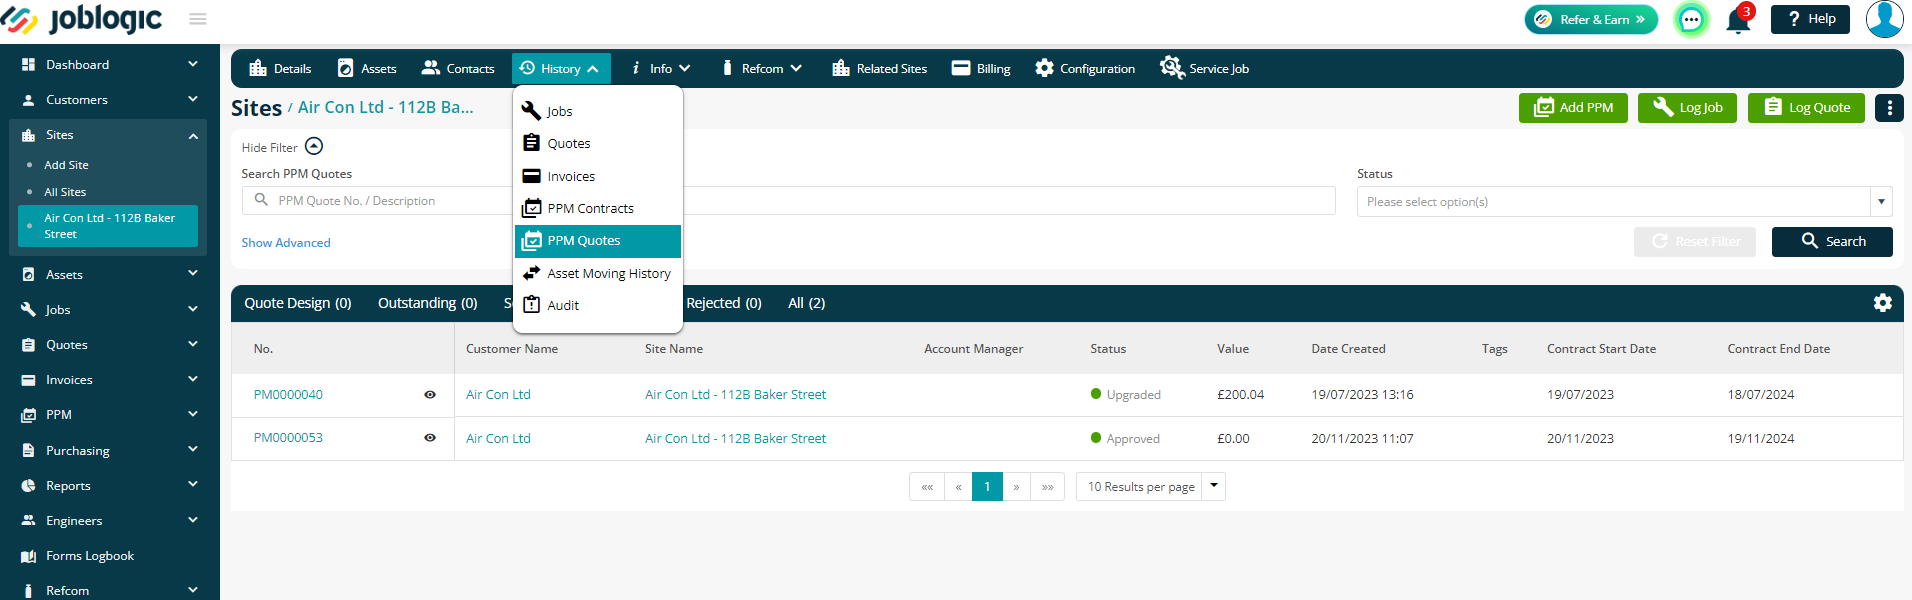
History - PPM Quotes
A place to come to quickly find all PPM Quotes you have raised for this Site.
History - Asset Moving History
Here, you will see the history of all assets which have moved across from and to other sites.

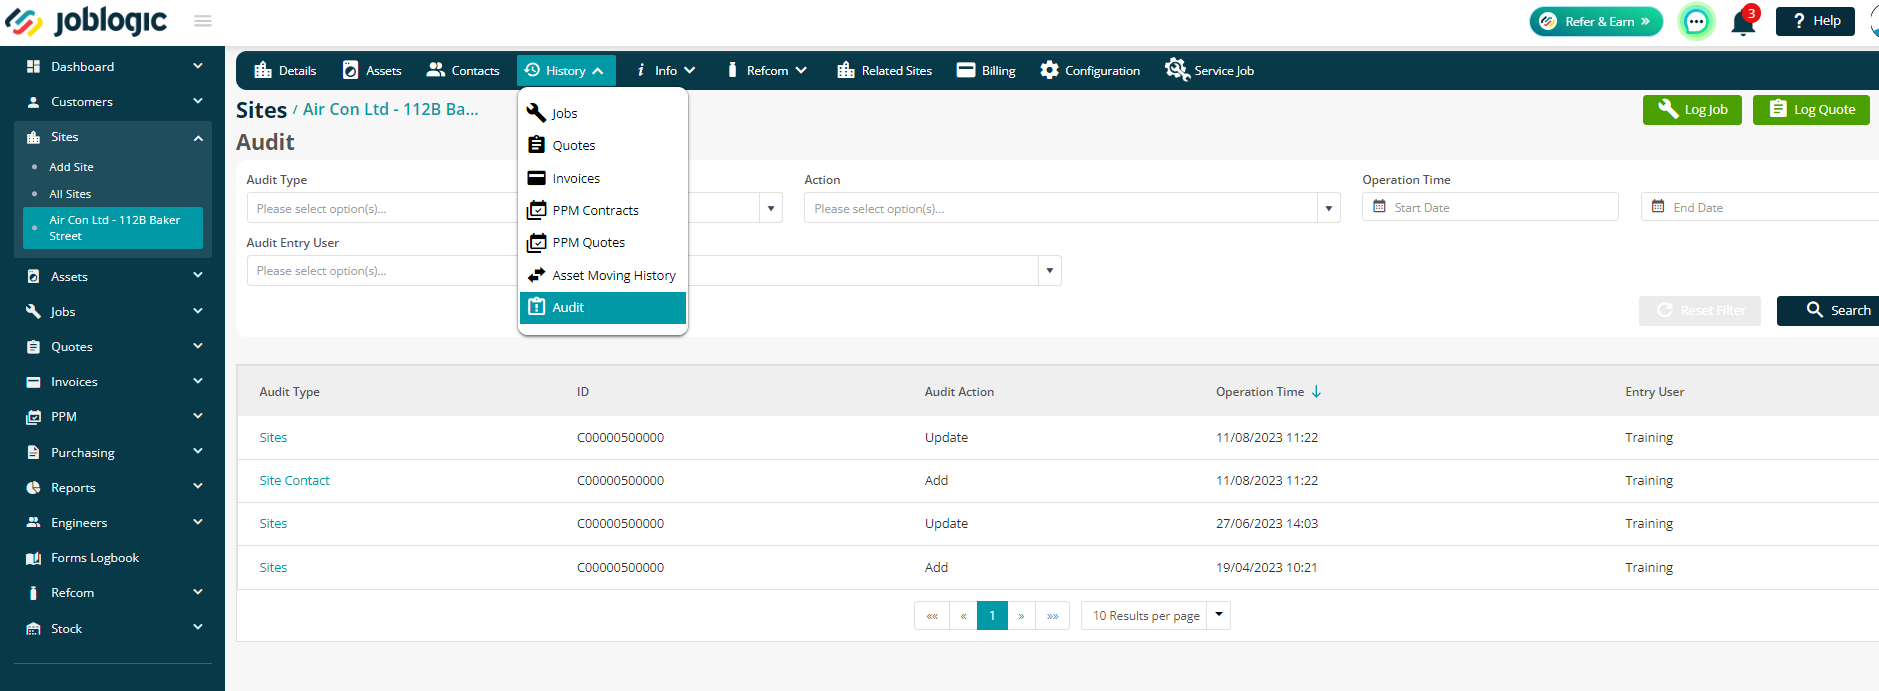
History - Audit
Any changes you make to a site record are tracked. In this section of the site record you will find a list of all changes that have been made with a name, a time stamp and details of what was changed.
To see the details of what was changed, click the Audit Type description.
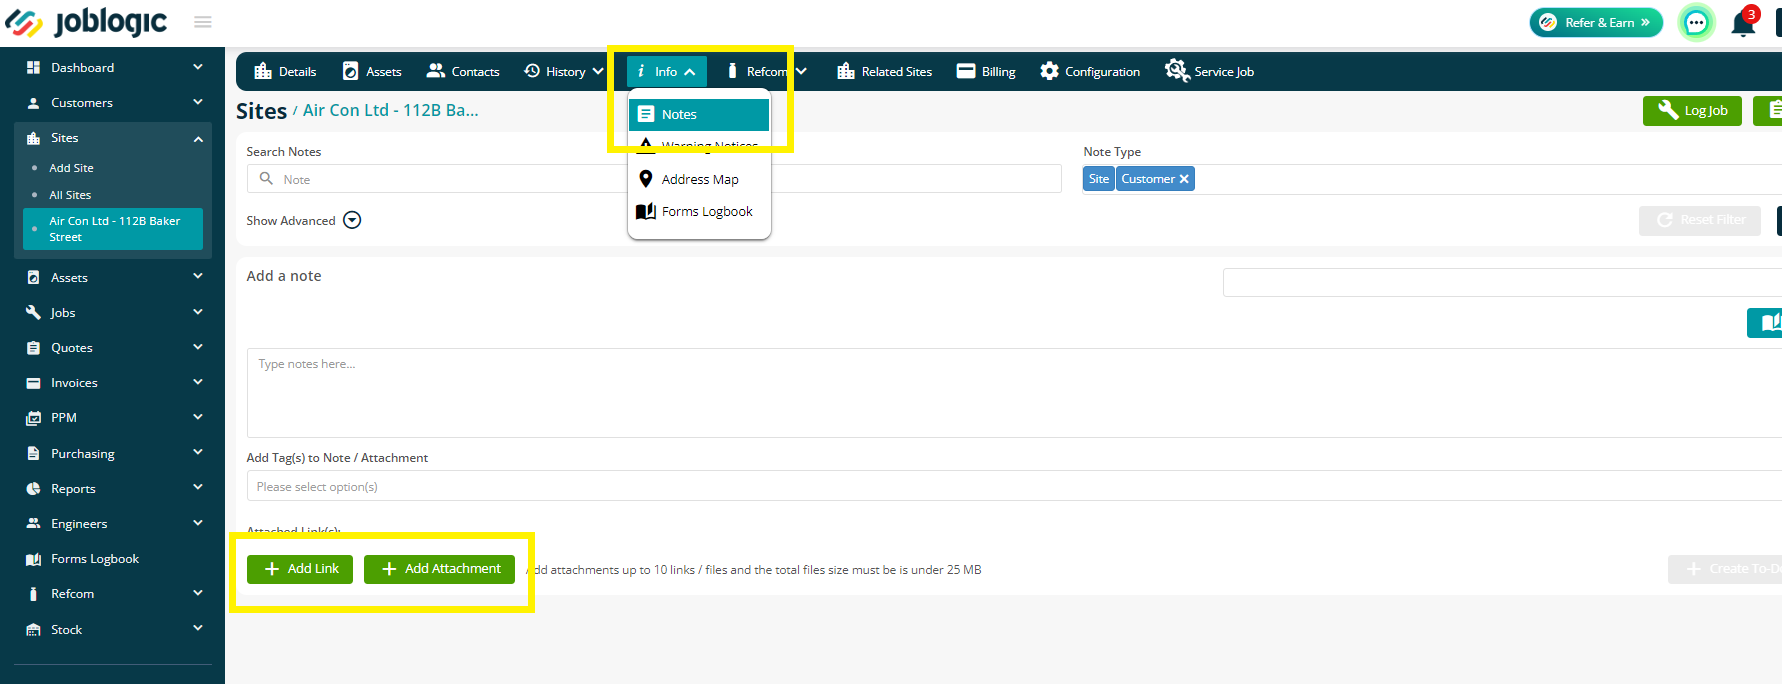
Info - Notes
Here, you can view or add Notes, Attachments and Links that are specific to the Site account.
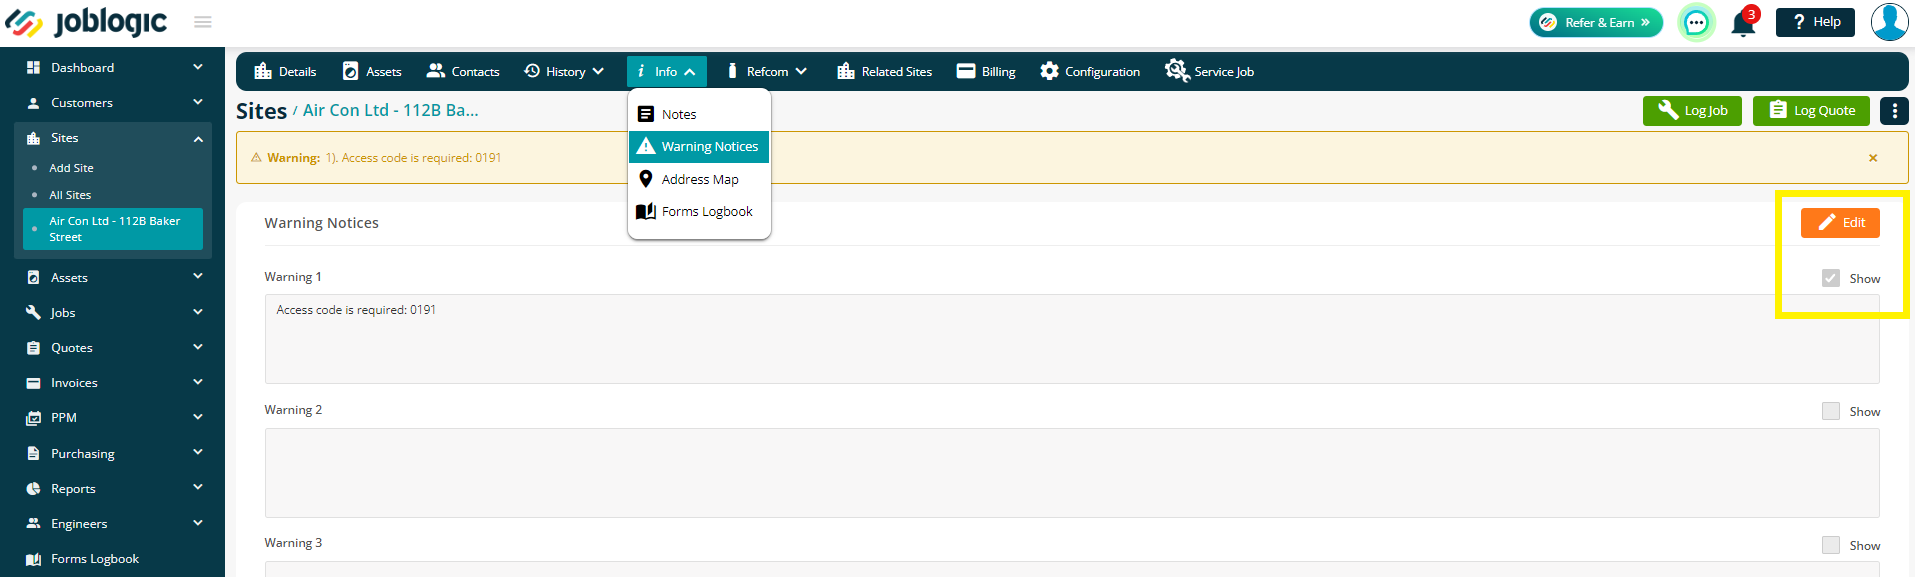
Info - Warning Notices
Warning Notices can be added to a Site Record to inform yourself, or other colleagues, including your engineers, about anything important.
The notices will show up anytime you look at this site record and anything relating to the site, such as jobs or quotes.
To add the details, click Edit and then tick the Show button to make sure it pops up on all relevant pages.
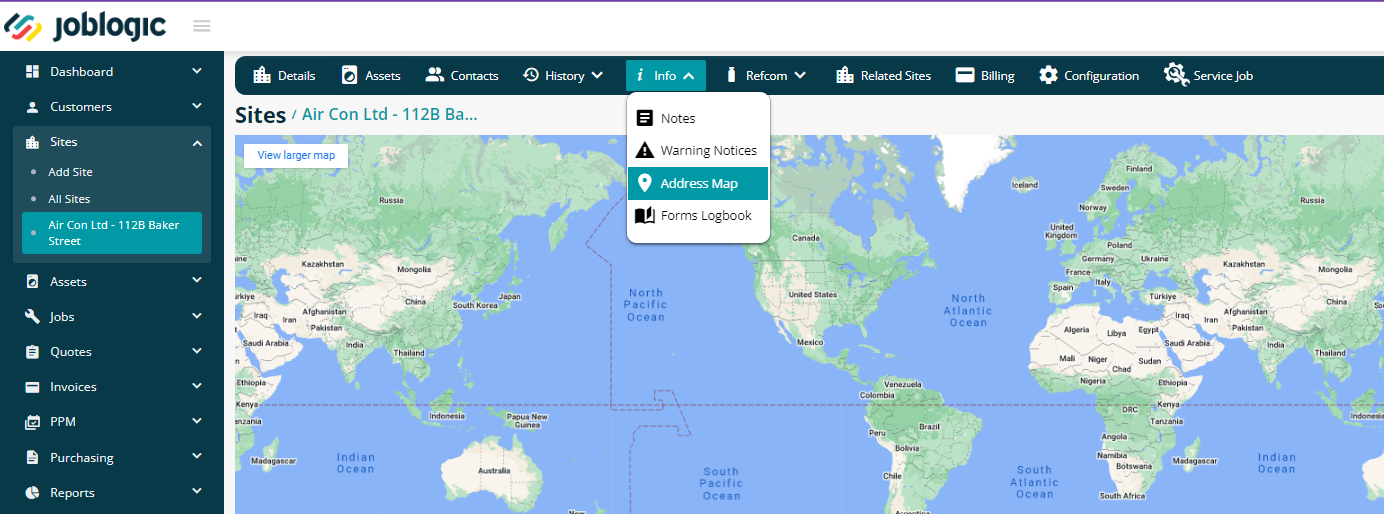
Info - Address Map
This will show you a Map view of your Site Address, if the address details are complete and correct.
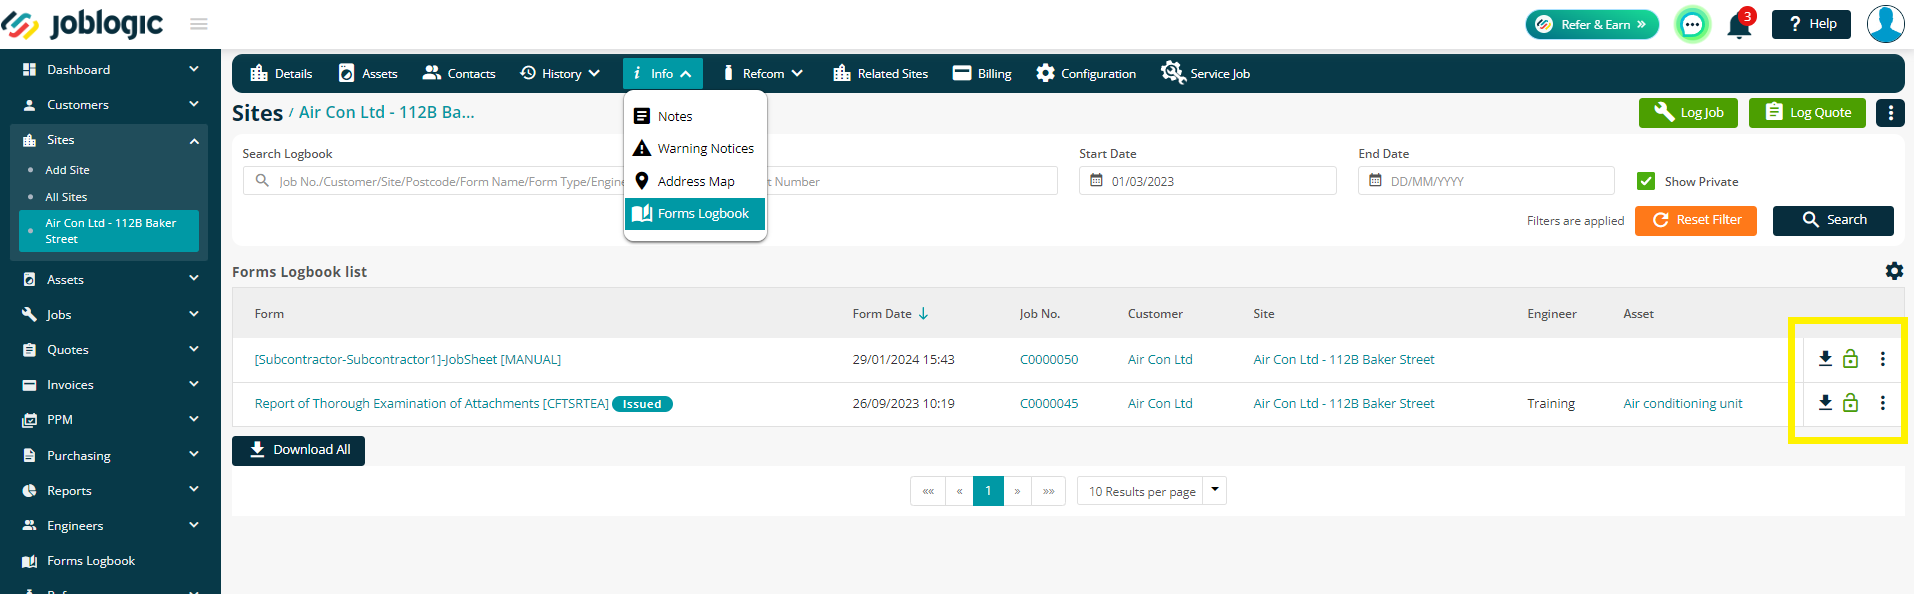
Info - Forms Logbook
This page is a handy list of all forms completed by your engineers, for this site.
You can easily view, download or mark forms as Private.
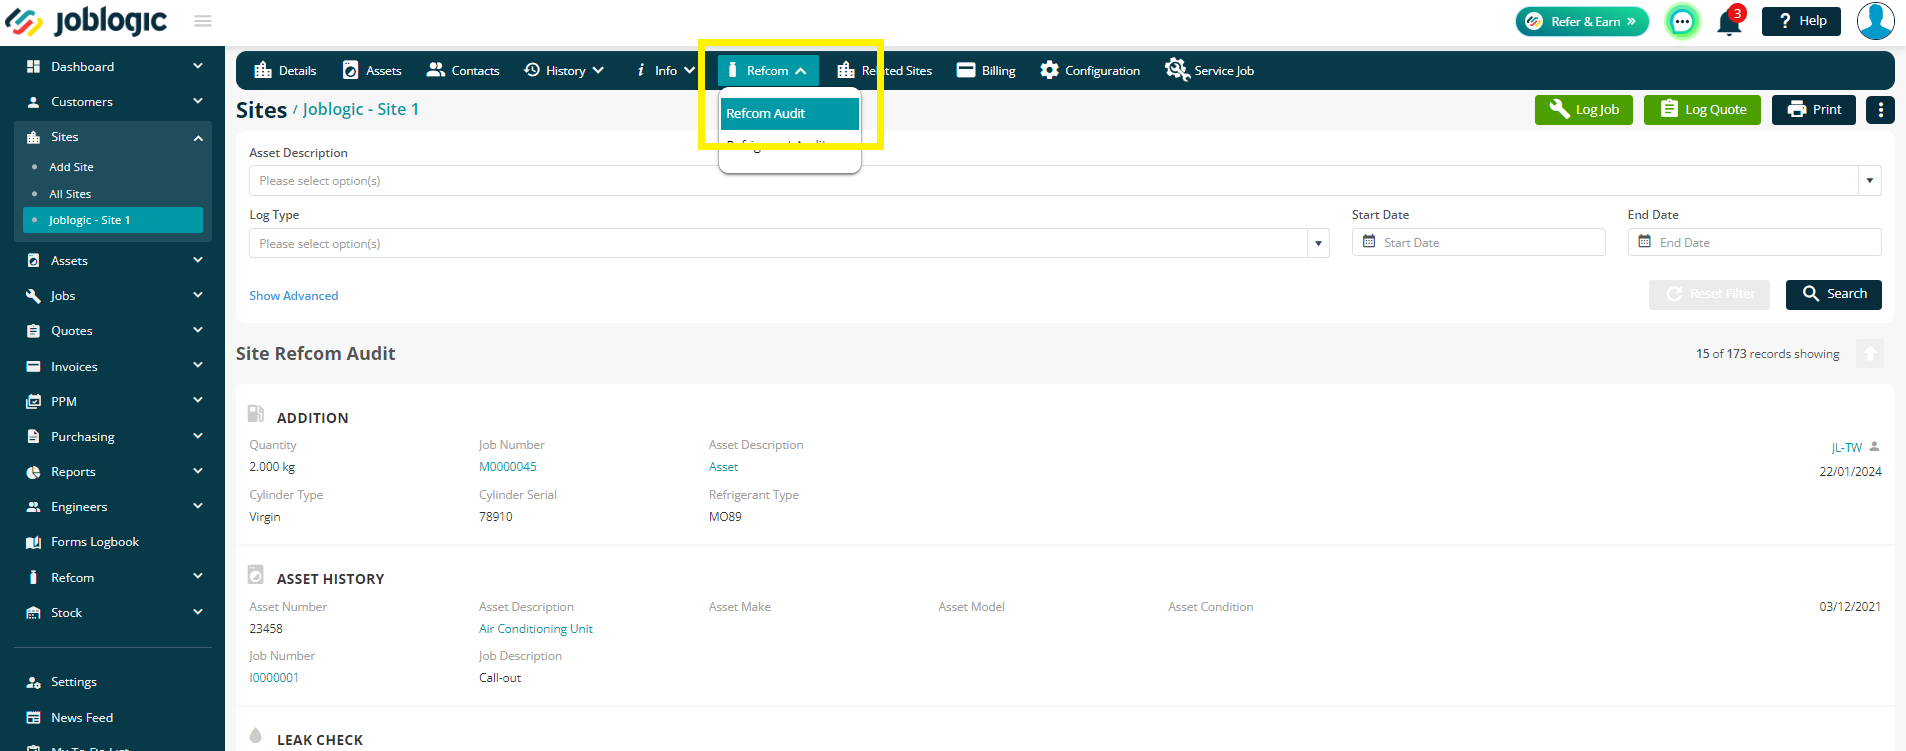
Refcom - Refcom Audit
If you are using the Refcom module within Joblogic, you can come here to see the full audit for this site only, rather than going job by job.
This will include any actions that have been completed such as, additions, leak checks, corrections, etc.
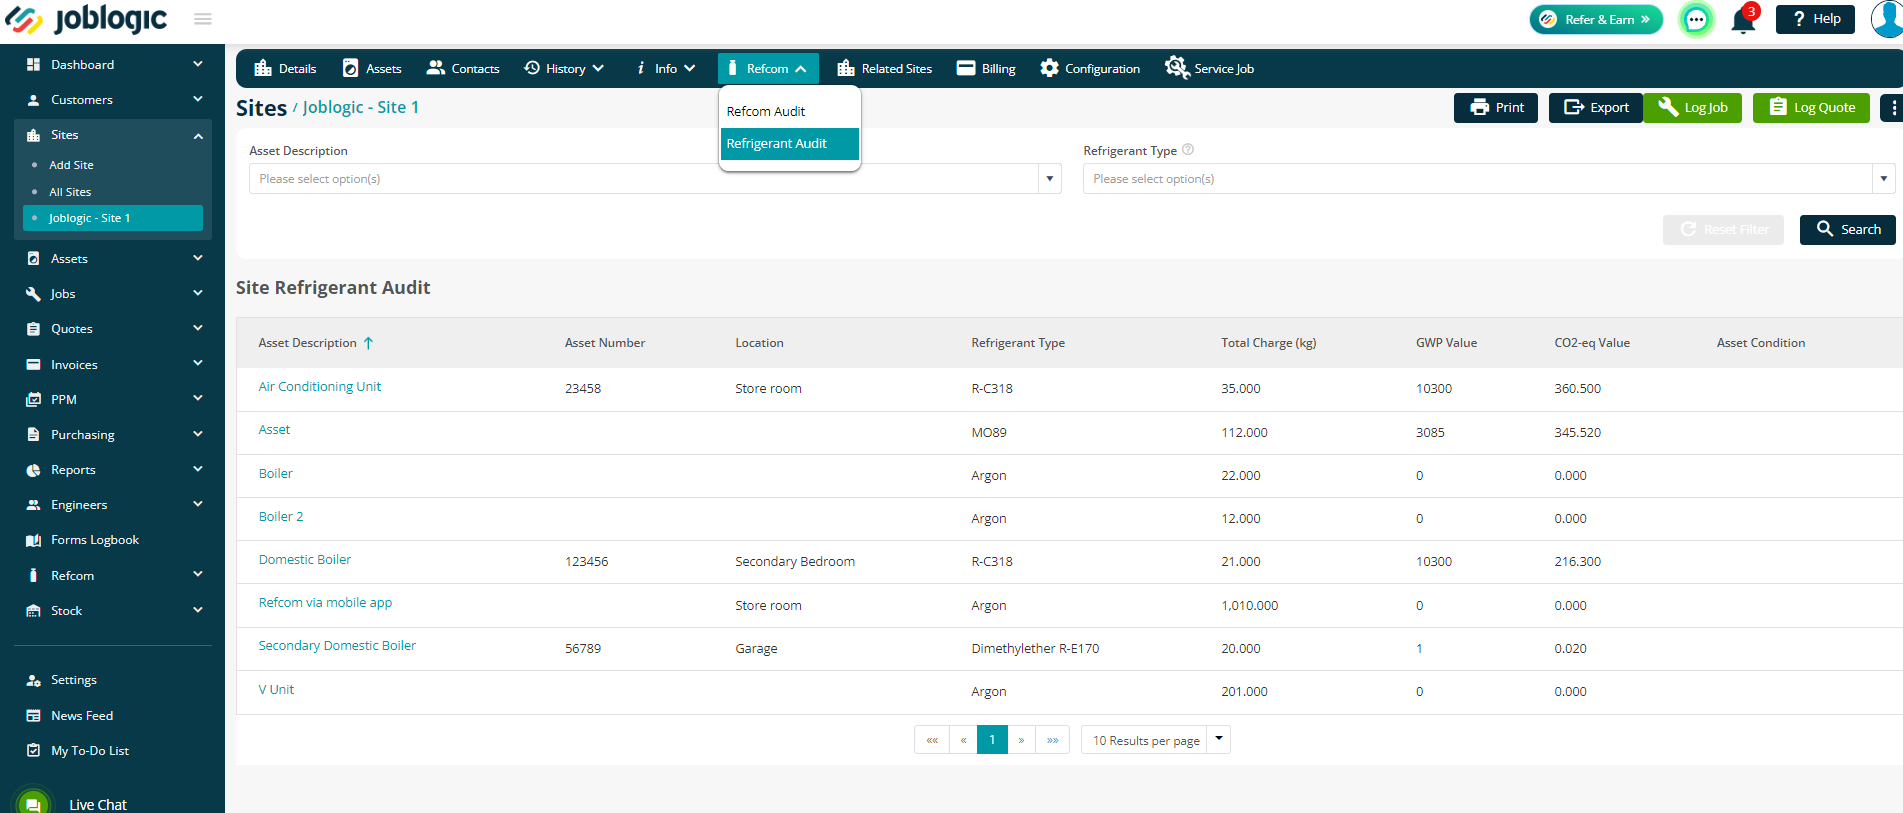
Refcom - Refrigerant Audit
Come here to view all of this site’s audit details on refrigerant.
This will show you an audit specific to your refrigerant types and their total charges, etc.
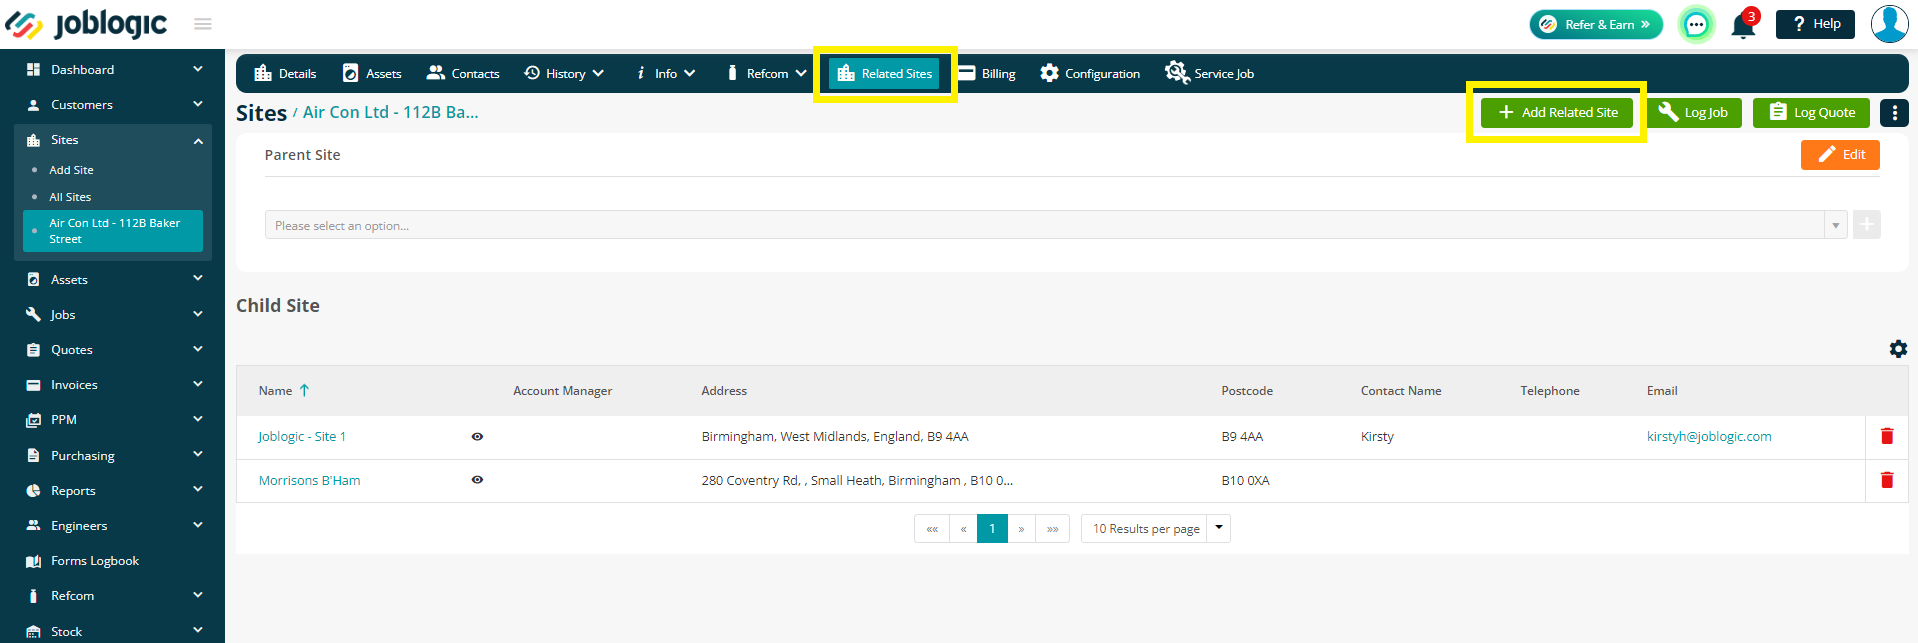
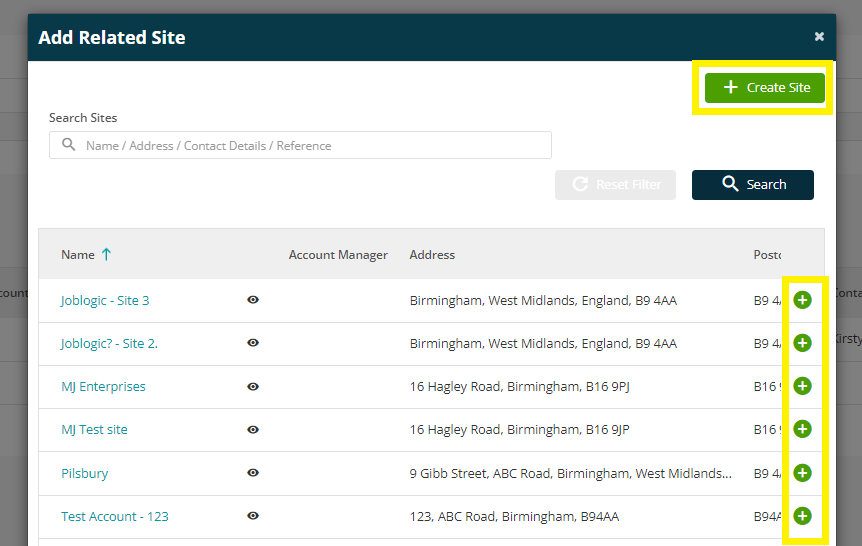
Related Sites
You can link sites together via a Parent/Child relationship here. By adding a related site you can include a list of child sites to your existing site for better management in your hierarchy of sites.
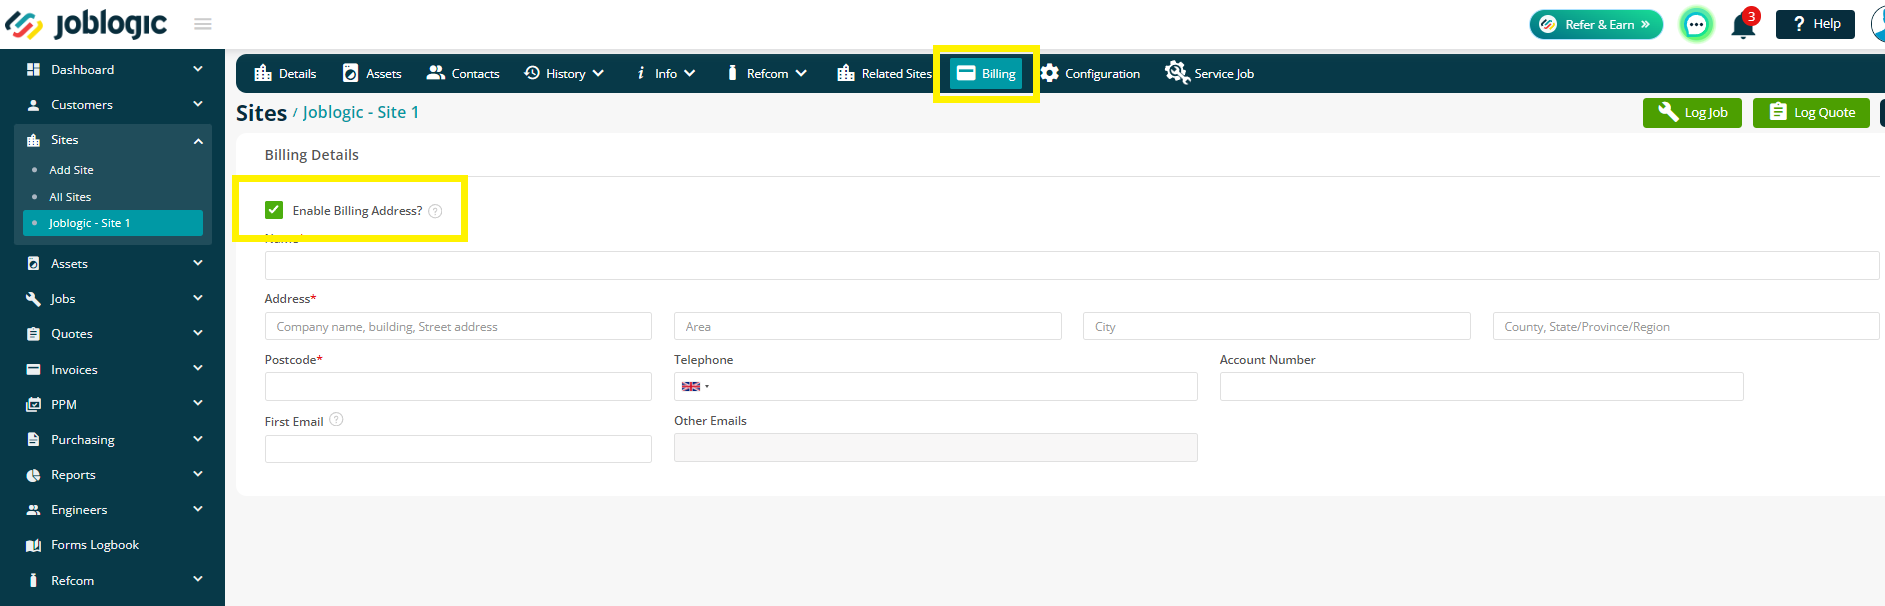
Billing
Joblogic will assume that the customer address is the billable address. If for whatever reason the customer address is NOT the billable address, then this is where you come to add and enable a separate billing address for this site only.
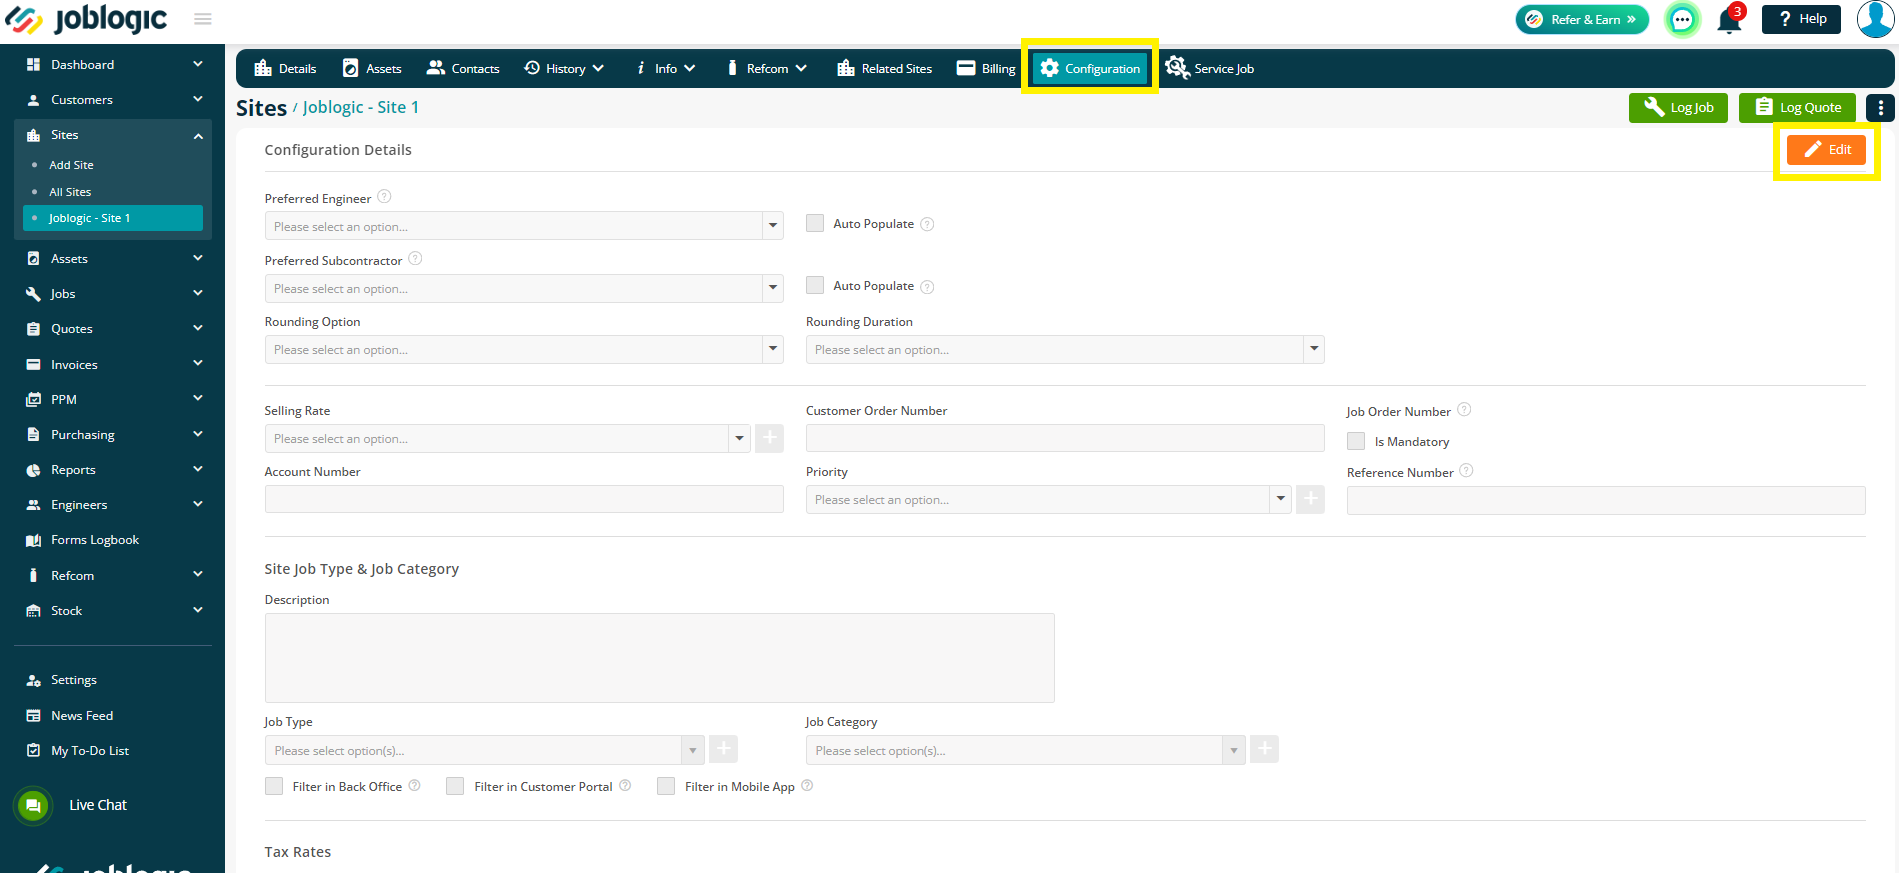
Configuration
Joblogic will use all of your default set up configurations within system settings if this section is left blank.
Within the configuration section of the site record you can arm this site with its own defaults, saving time when raising jobs/invoicing/quoting.
You will find there are many defaults you can apply at a site record on this page so spend time going through these and telling Joblogic exactly how this site should work to save you time when using the system.
Service Job
Service Jobs allow you establish services according to asset compliance.
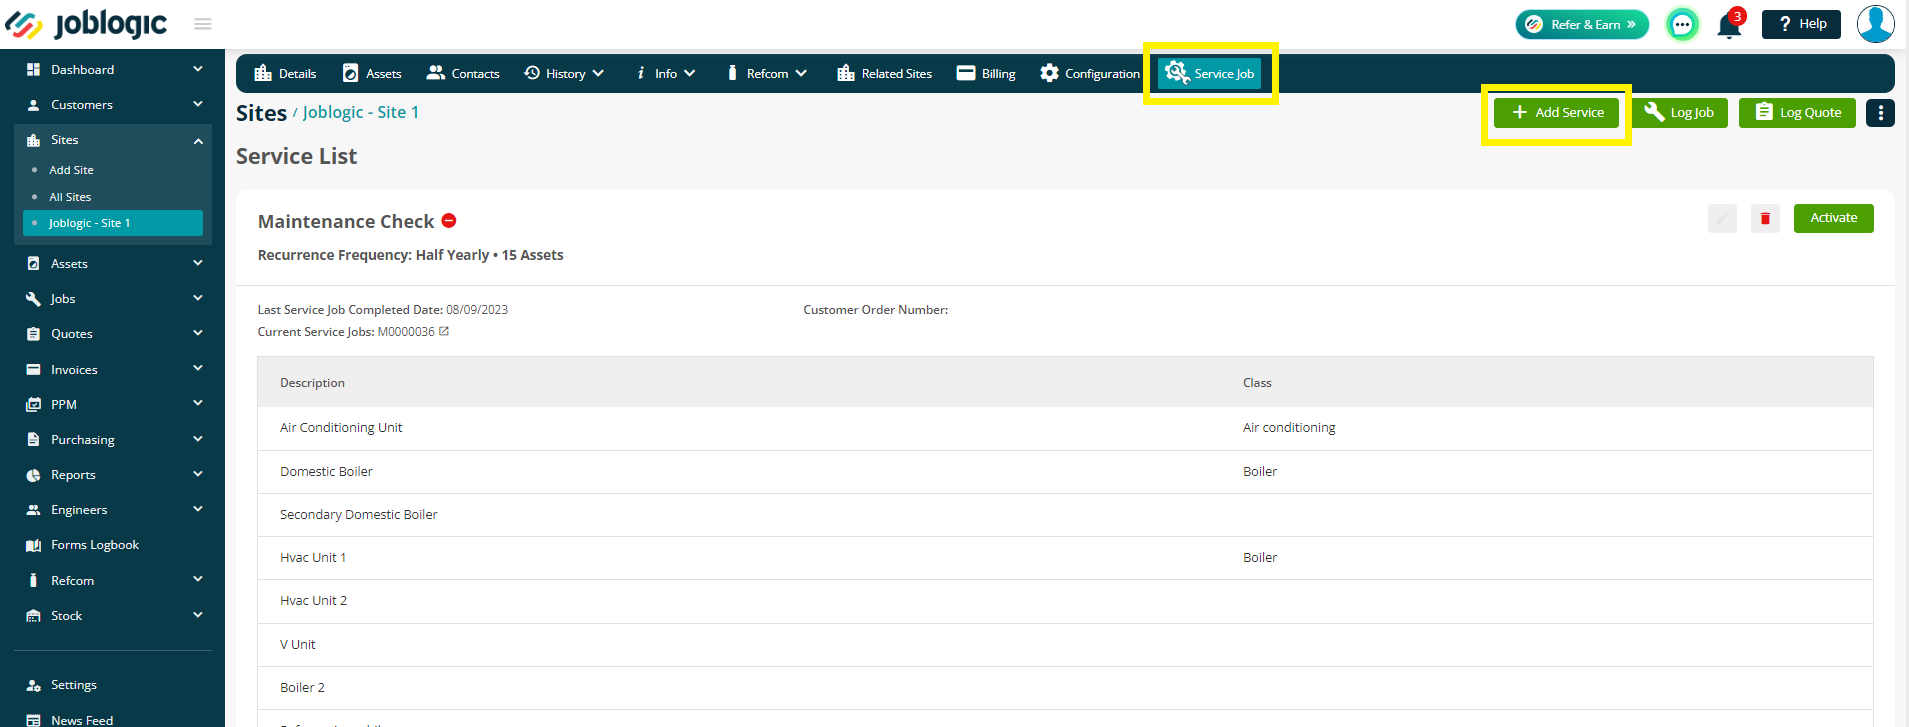
You will need to do some further set up before adding any jobs here.
To read more about Service Jobs against your sites, please click here.
Further Support
For further information or assistance with the above, contact our Support Team on 0800 326 5561 or email support@joblogic.com. Alternatively, our Customer Success Management team can be reached by emailing customersuccess@joblogic.com
Publishing Details
This document was written and produced by Joblogic’s Technical Writing team and was last updated on the date specified above. Be aware that the information provided may be subject to change following further updates on the matter becoming available. Additionally, details within the guide may vary depending on your Joblogic account’s user permissions.