Introduction
The Asset PPM feature enables you to manage Planned Preventative Maintenance contracts for individual assets, providing greater flexibility when configuring sites, billing, scheduling and invoicing.
With tools to set up Annual Service Fees, configure flexible billing types, and manage asset-specific maintenance contracts, this feature ensures clarity and automation throughout the process.
In this guide, we’ll walk you through configuring your Asset PPM settings, adding Asset PPMs, and navigating your schedules, helping you manage maintenance operations seamlessly and with confidence.
Setting up your Asset Annual Service Fee
The first step is to configure the Annual Service Fees for your assets. This ensures that any future invoicing for contracts is calculated accurately and handled more efficiently through automation.
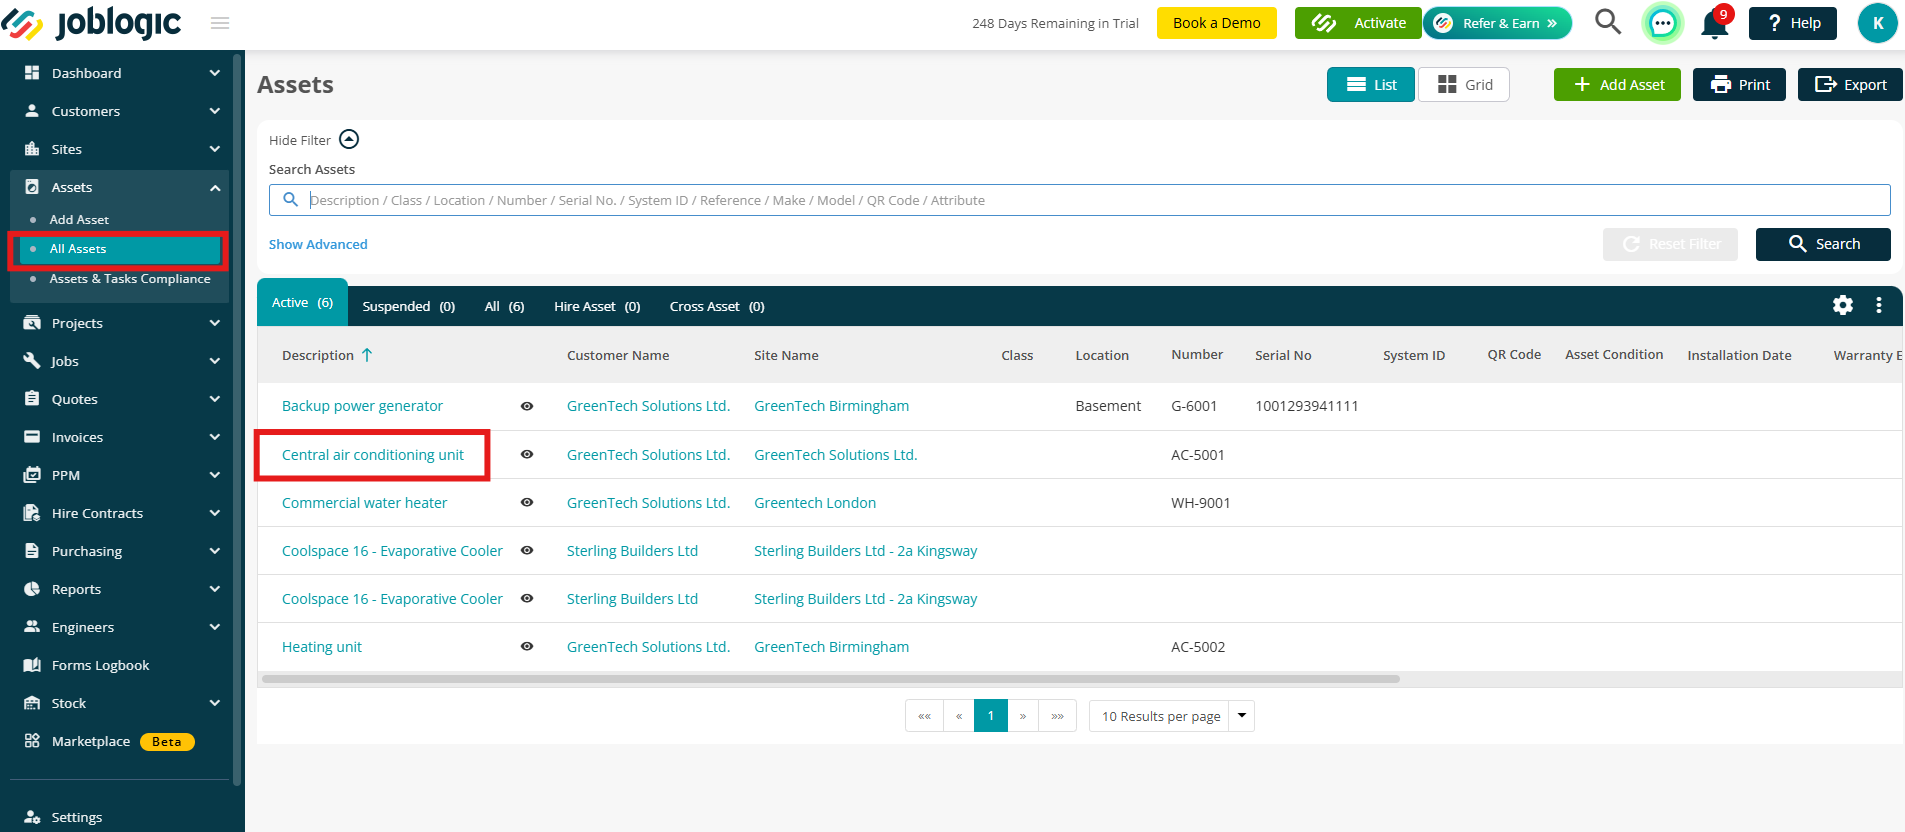
Navigate to Assets > All Assets and select the desired asset.
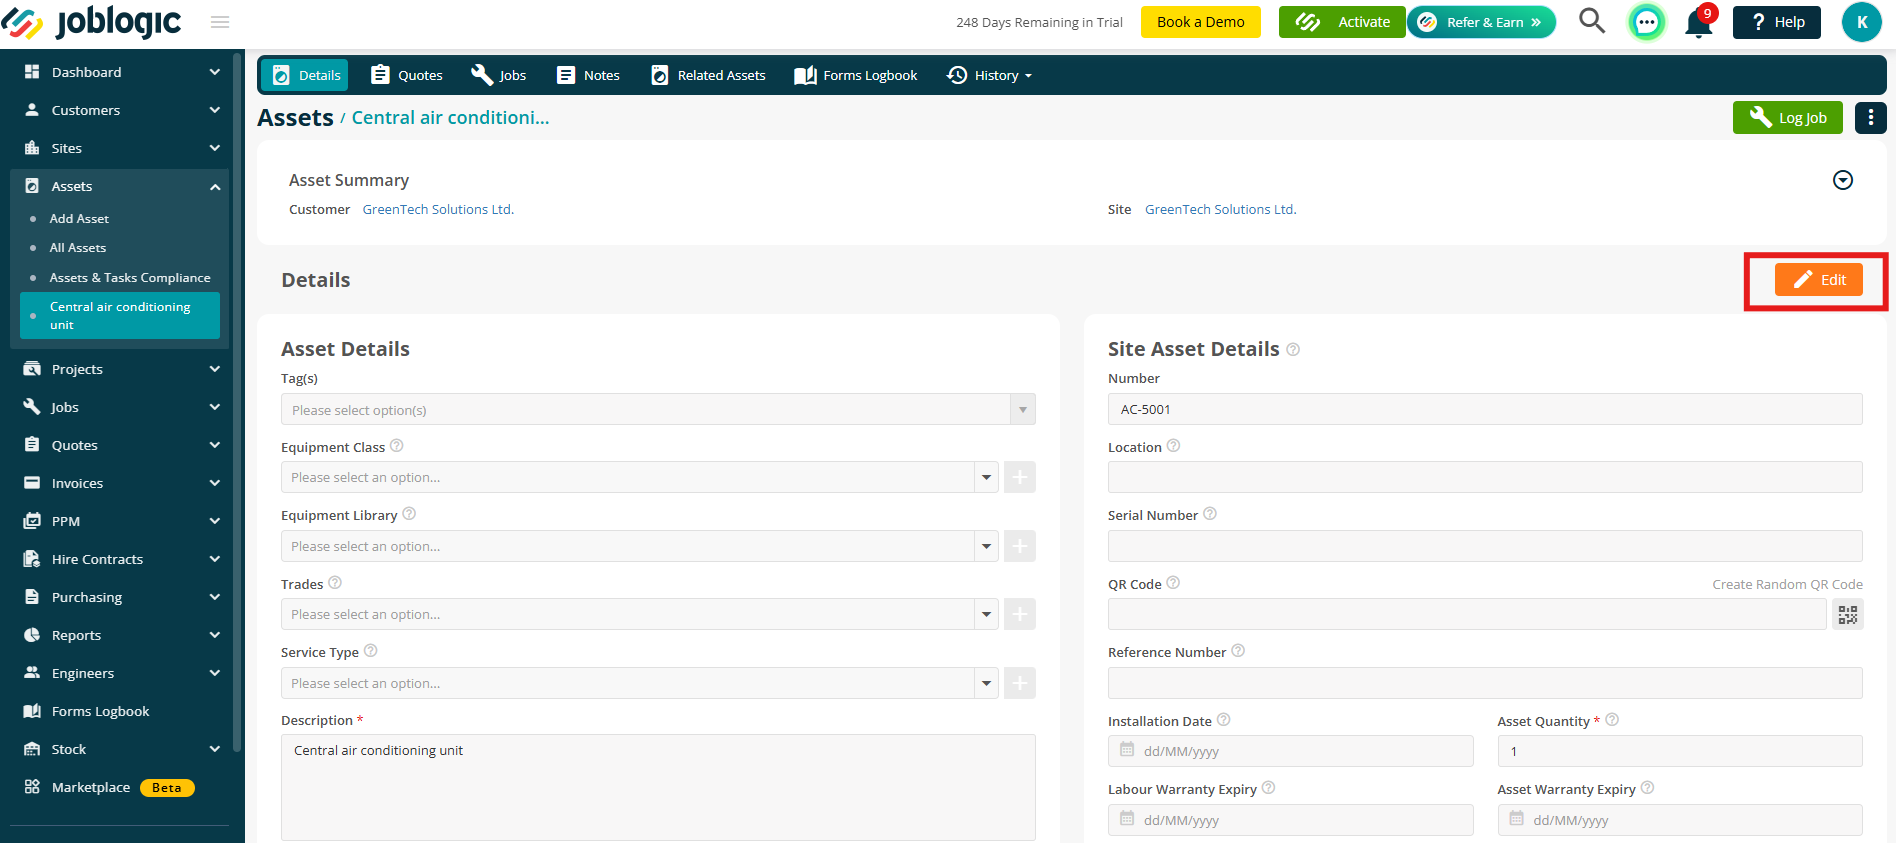
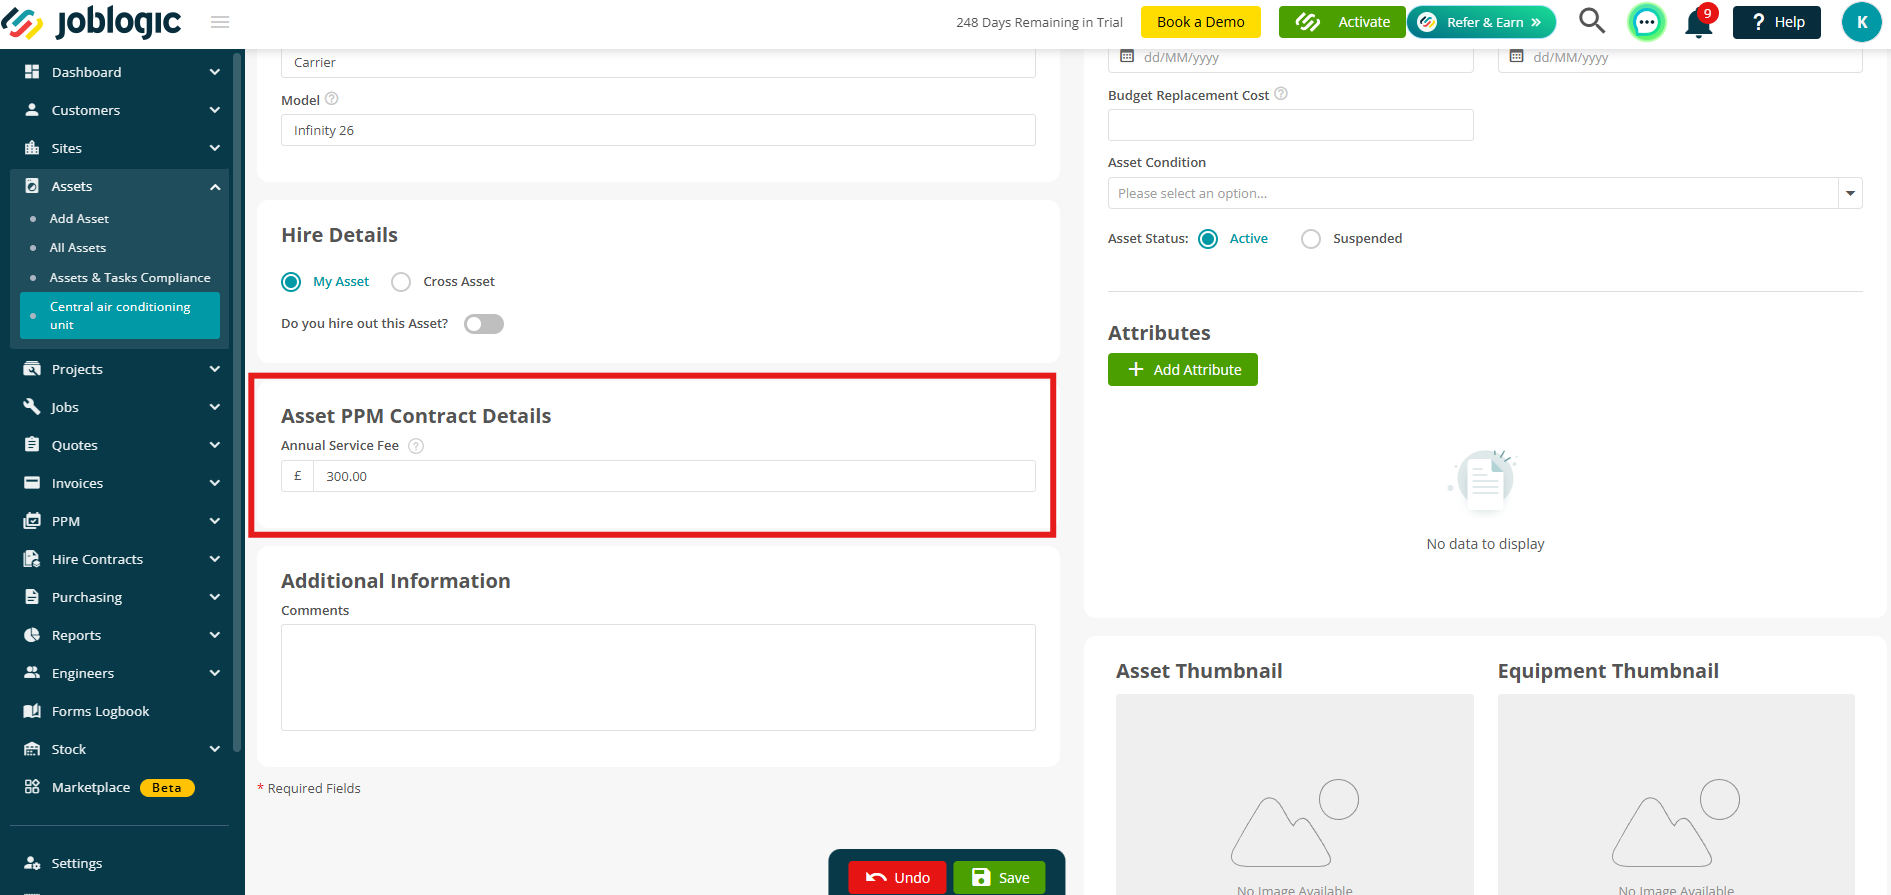
Click Edit and scroll to the Asset PPM Contract Details section.
Enter your fee here. This fee will serve as the default total service price for a PPM for this asset, over one year.
Adding an Asset PPM
PPM Description page
To add an Asset PPM, navigate to PPM > Add Asset PPM
As with the general PPM process, you can choose to add either a PPM Quote or a PPM Contract.
.png)
Select your Customer.
- Note: Unlike other parts of the system, you do not need to select a Site here.
- If left blank, sites will automatically be selected based on the assets you choose in the Assets step later.
.png)
If you do wish to add site(s) at this stage, you can either click Add Sites to select the relevant sites from your Joblogic Site library,
.png)
or click Import to upload a file containing the sites you want to add.
.png)
Fill in any additional details if desired. These fields are optional and can be left blank.
Click Next to proceed when you are ready.
.png)
Selling & Billing page
On this page, you can configure your billing criteria. Start by selecting the Start Date and End Date for your contract.
.png)
Next, choose a billing type. You have a number of options:
- Per Asset (PPV) - Billed based on the price per visit for each asset. Ideal for pay-as-you-go arrangements.
- Per Asset (Periodic) - Billed at regular intervals (e.g., monthly or annually) for each asset, regardless of the number of visits.
- No Billing - A contract value is set and stored, but no invoices are generated from the contract. Typically used for warranty periods, inclusive service bundles, or pre-paid agreements. Asset selection is optional at quote stage.
- Per Contract - A single fixed contract value is set at the quote stage. Pricing is not dependent on asset count or individual asset pricing. Asset selection is optional at quote stage.
Note: If you create an Asset PPM Quote, the selected Billing Type is carried through when the Quote is upgraded into a Contract. Before completing the upgrade, you can change the Billing Type if required. Once the Contract has been created, the Billing Type becomes fixed.
.png)
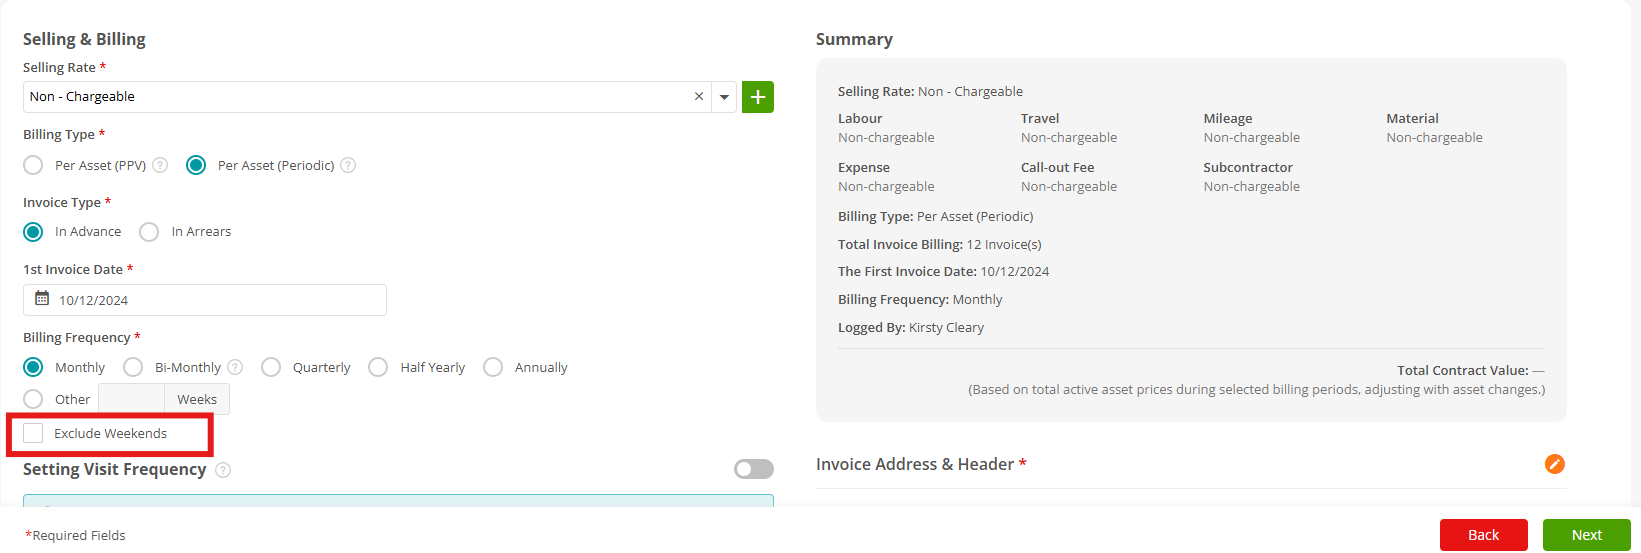
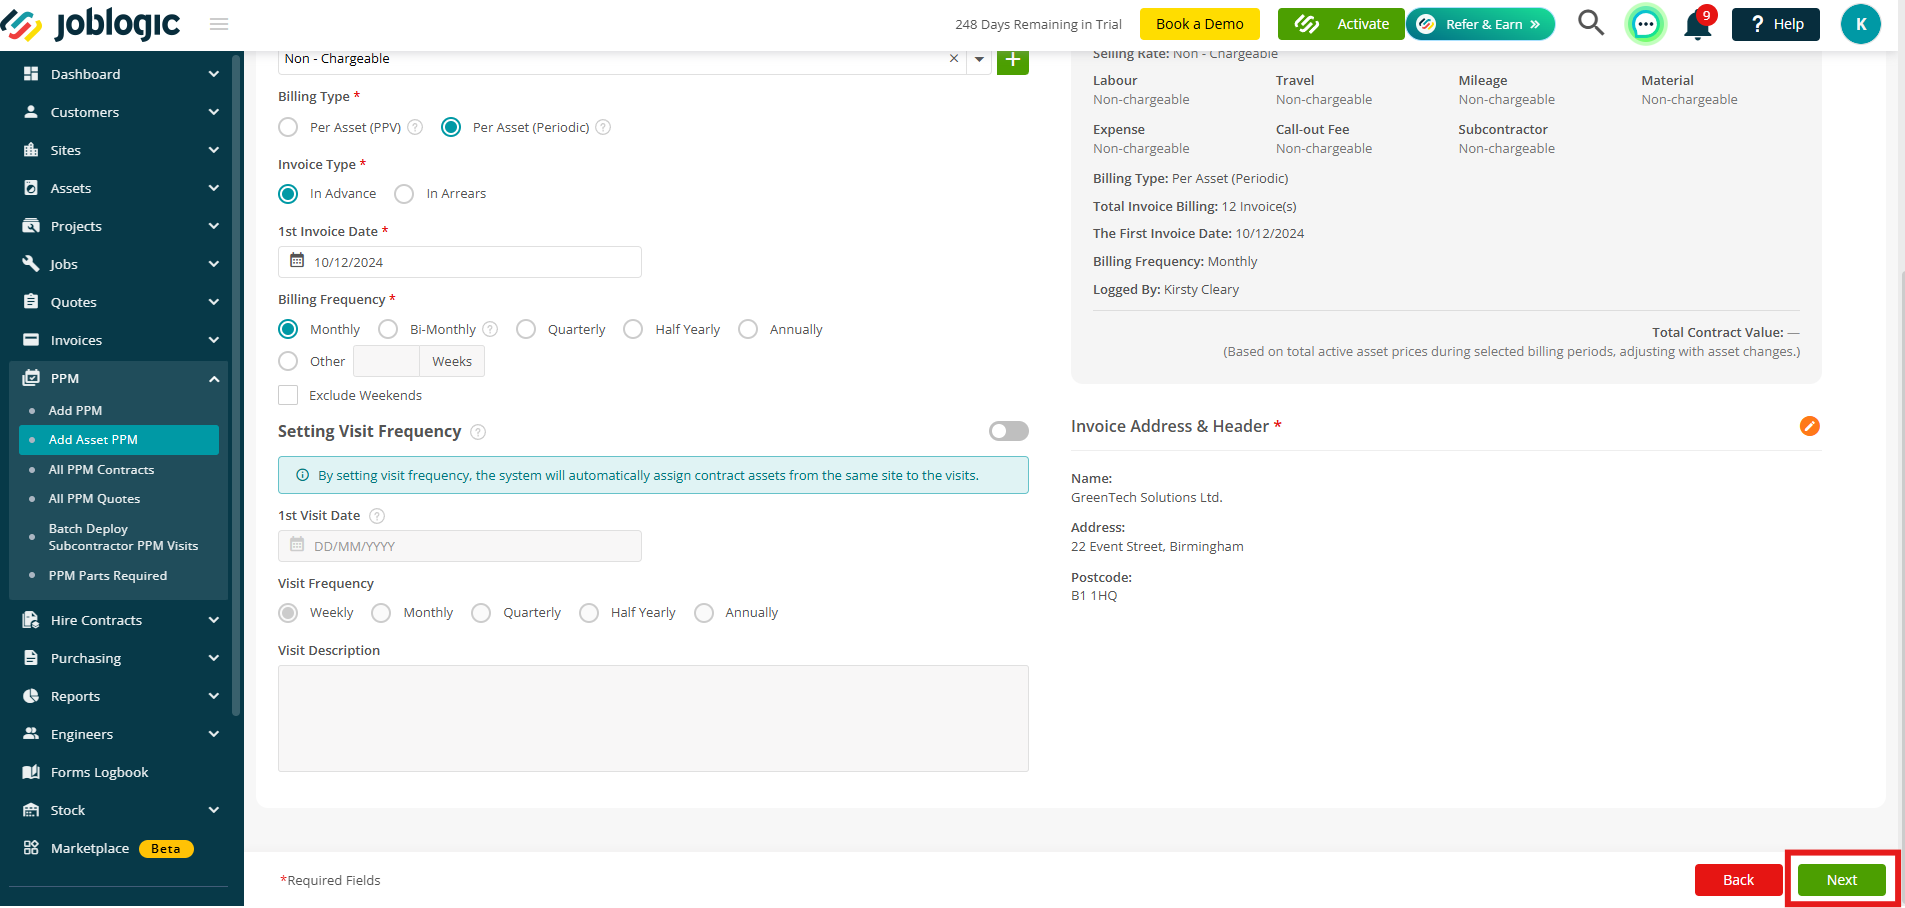
If you select the Periodic or Contract billing option, additional fields will appear for you to complete, including, Invoice Type, 1st Invoice Date, Billing Frequency.
You can also choose to exclude weekends from this arrangement by enabling the relevant option.
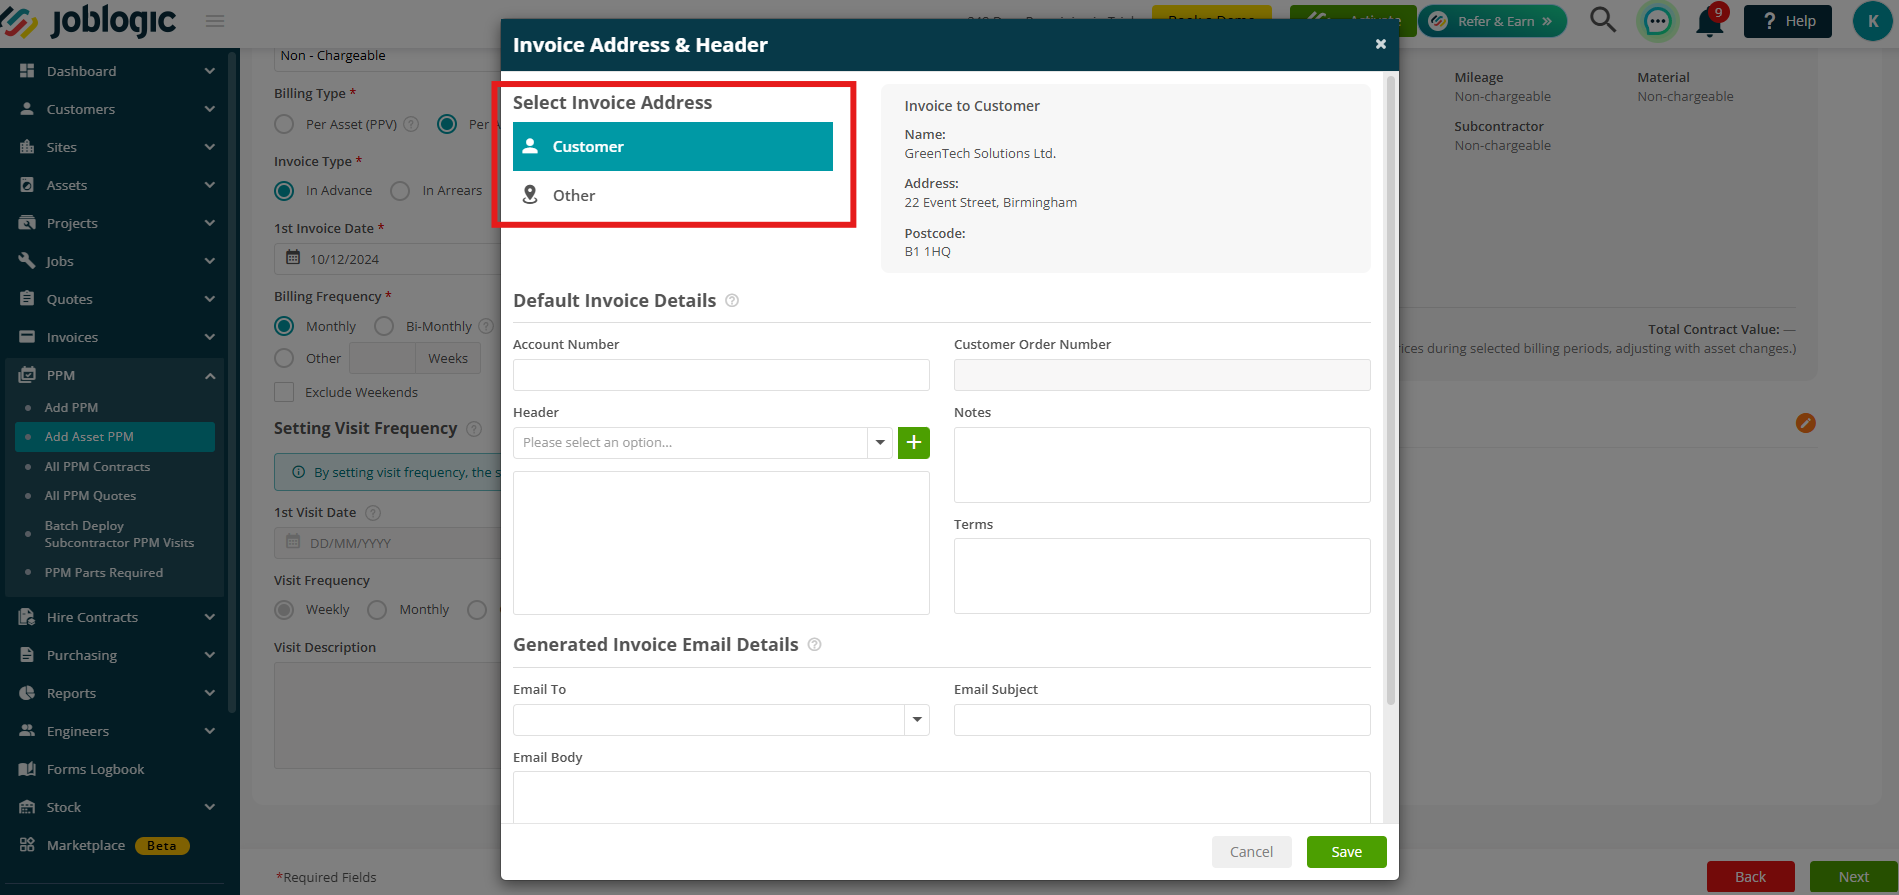
Note: When selecting your Invoice Address, the options will be limited to Customer and Other if you did not select a Site in the first section.
Once all the necessary details are filled in, click Next to proceed.
Assets page
This page allows you to select the Assets to include in the Quote or Contract.
Note: Asset selection will be mandatory if you chose either of the following billing types: Per Asset (PPV) or Per Asset (Periodic).
Click Add Contract Assets to select assets from your Library.
.png)
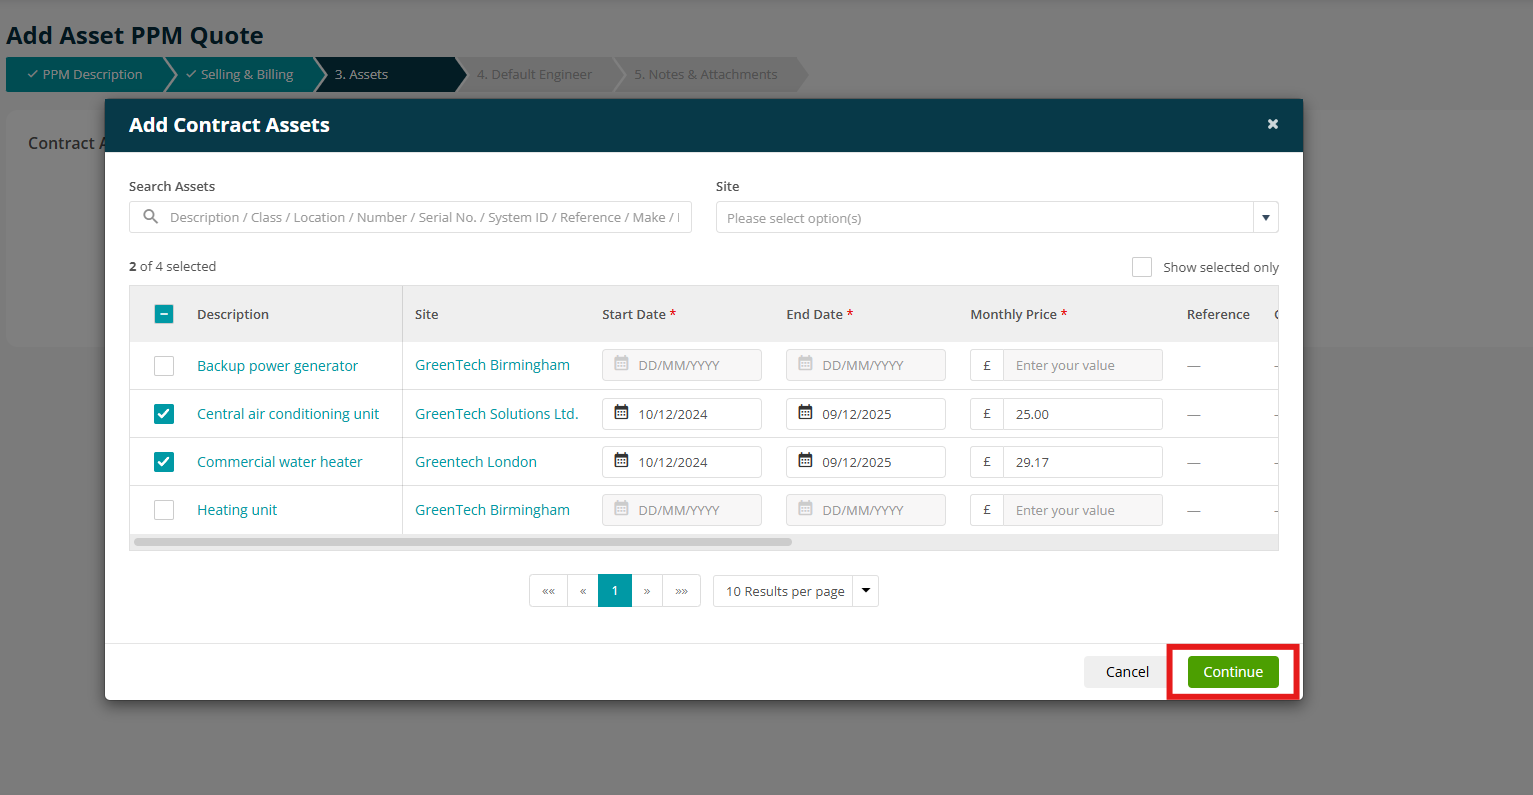
A list of all assets associated with all sites for the customer you selected will appear.
If you selected specific sites in the previous step, only assets linked to those sites will be shown.
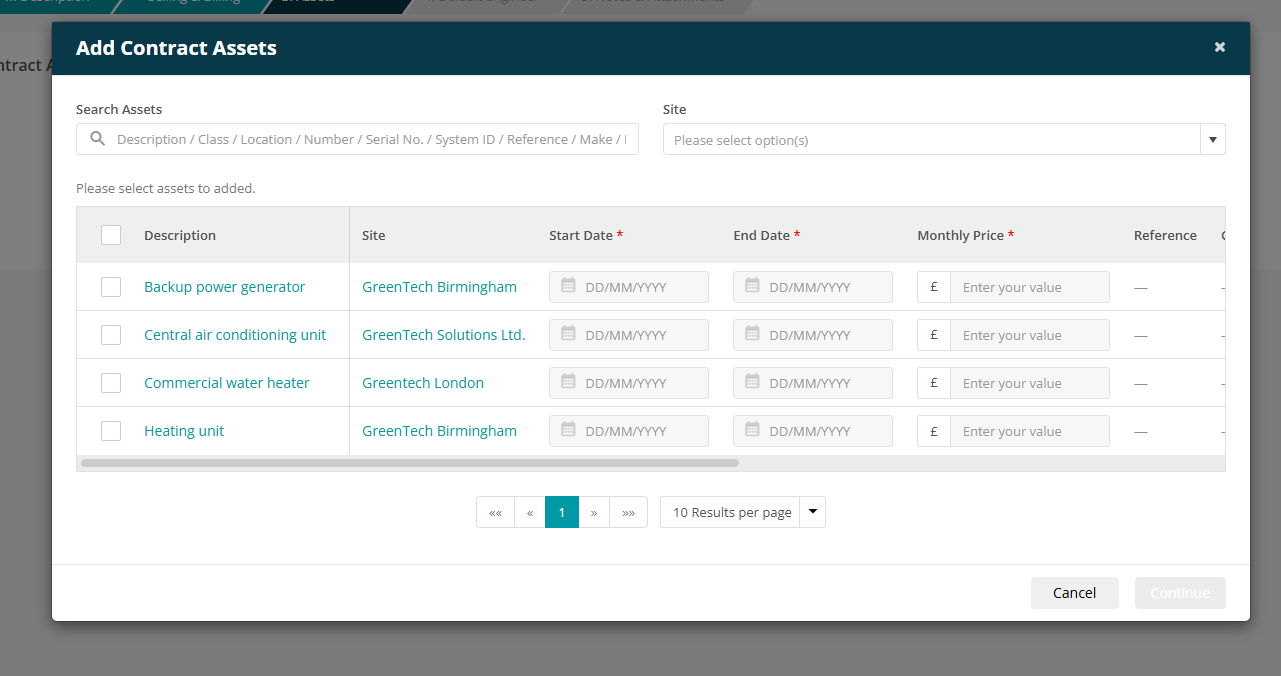
Tick the assets you want to include in the contract. As you select them, the Start Date, End Date and Annual Service Fee fields will become editable.
If an Annual Service Fee has been set for the asset, it will be pulled through automatically.
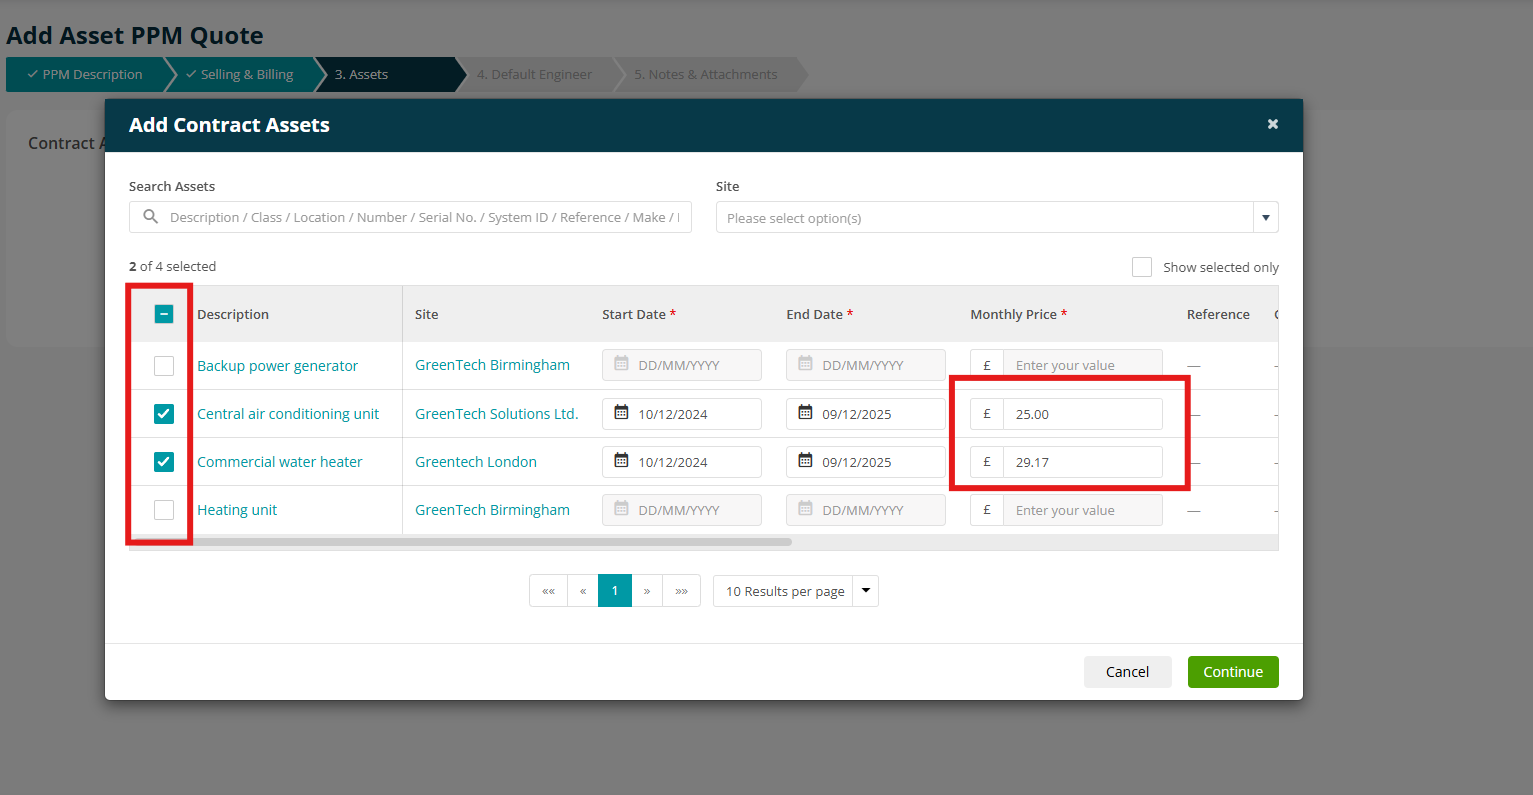
Make any amendments to the details as needed, then click Continue.
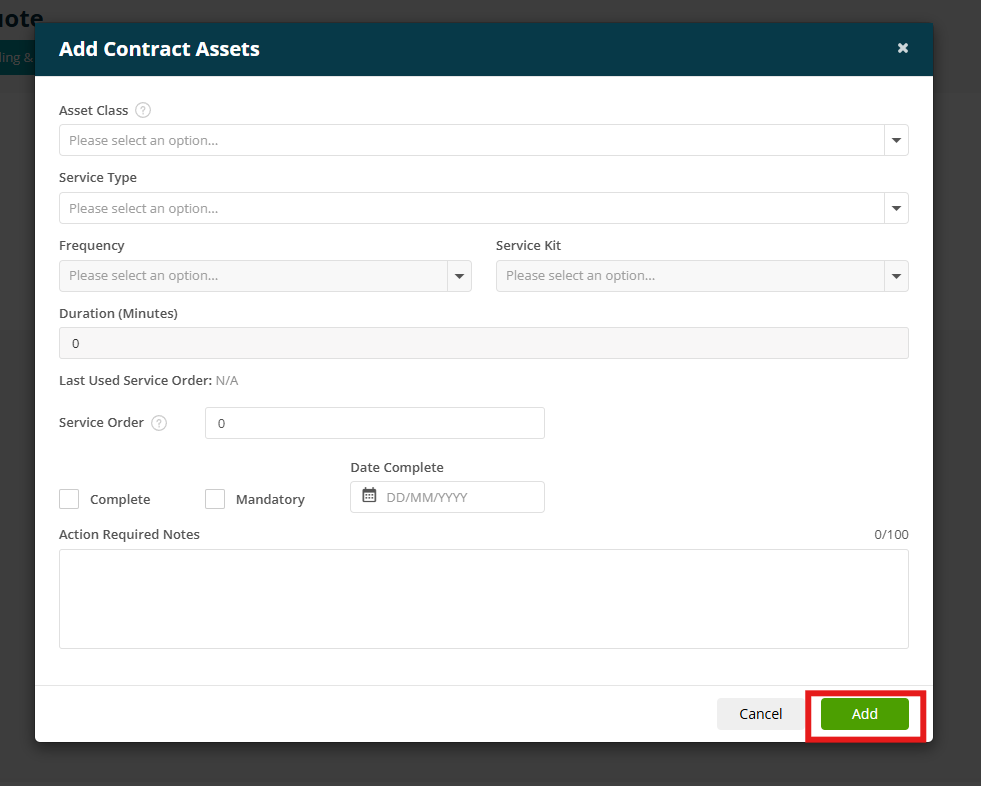
On this page, you can enter additional details, including Asset Class, Service Type, and Notes.
These are optional fields and can be left blank, if required.
Click Add to complete the process.
Alternatively, you can import a list of assets at this stage by clicking the Import button.
Download the template, enter your data and then come back to this screen to upload your file.
If an imported asset belongs to a Site that has not already been added to the Quote or Contract, Joblogic will automatically add that Site for you.
.png)
.png)
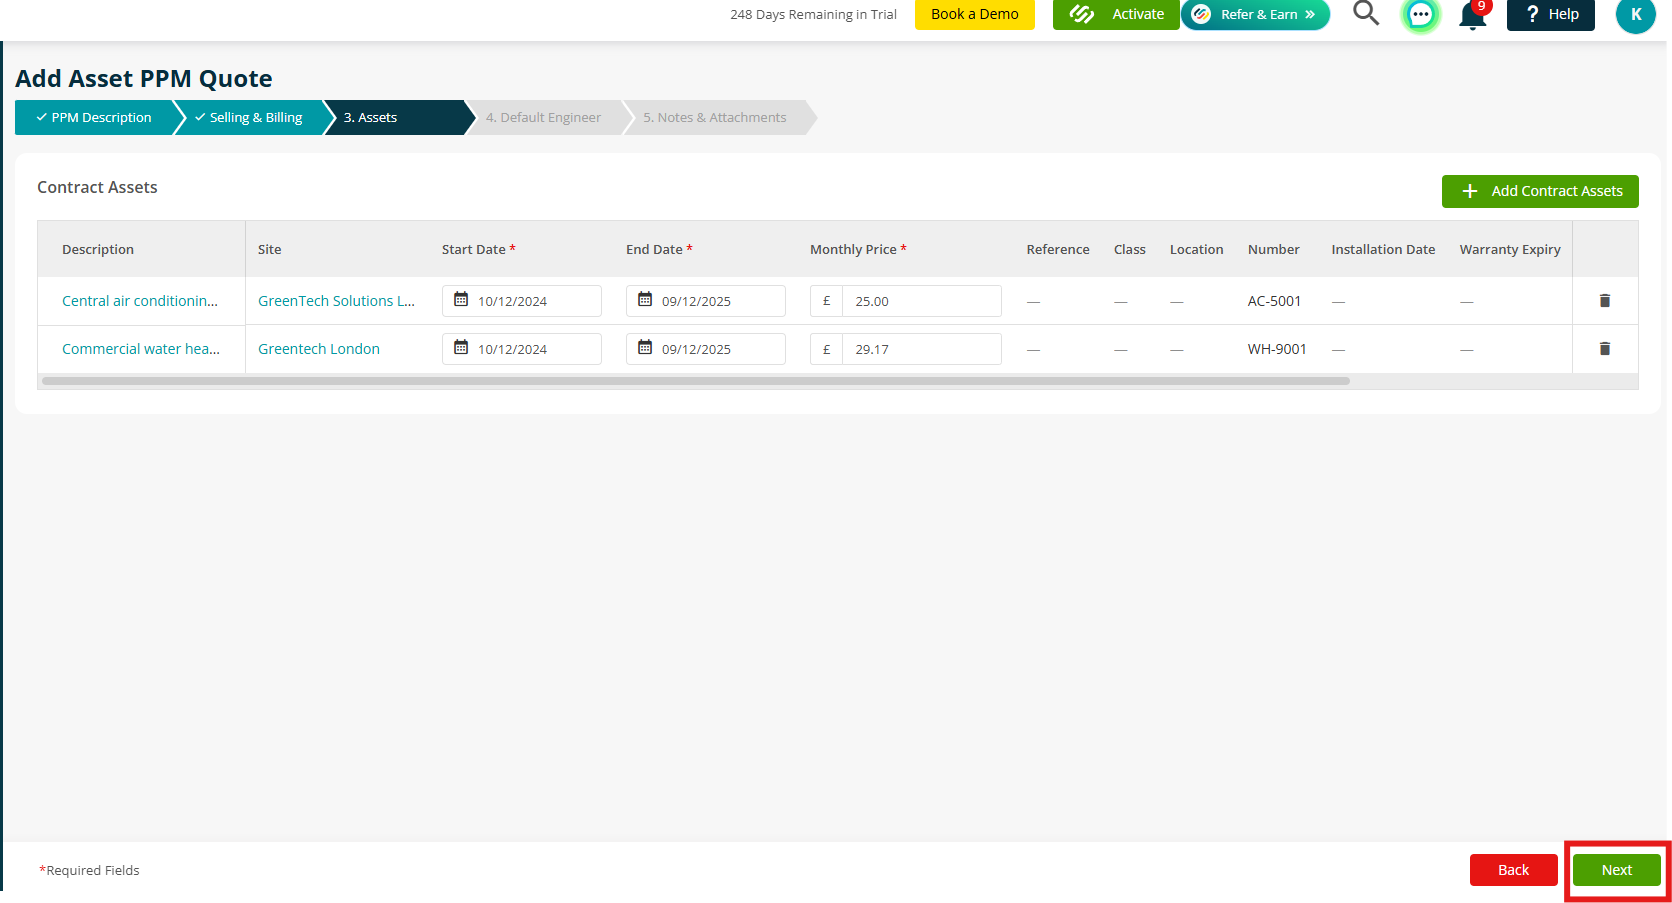
Once you are satisfied with your asset list, click Next.
Asset Schedules
If you've chosen the No Billing or Per Contract billing type, you'll be able to set up the Service Trigger and Service Detail when selecting assets.
Schedule Configuration
Once your Assets have been added, the next step is to configure how each Asset will be serviced.
.png)
Click the edit icon to make your changes to an individual asset.
.png)
Here you can still make changes to the Start Date, End Date and Annual Service Fee if needed.
Next, you can choose your Service Trigger:
- Service Type - based: Uses scheduled maintenance intervals such as Monthly, Quarterly or Annual.
- Meter - based: Creates maintenance visits when a specified meter reading has been reached rather than on a calendar schedule.
.png)
For Service Type - based, you'll be able to select a Service Type and Frequency
.png)
Click Add Item to add further service types if required.
.png)
For Meter - based, enter the Due Meter Reading in hours and click Save.
.png)
Alternatively, you can bulk edit by ticking the relevant assets and then selecting the Bulk Edit option.
.png)
Here you can select a field and make a bulk change to Start Date, End Date, Service Trigger, etc
Click Apply to Selected when you are happy.
.png)
At this stage of a quote, you can click Next and ignore the 'missing required fields'.
.png)
However you will need to enter this information later. Either in the Contract Assets tab of the Quote or during the Upgrade process.
.png)
Scheduler Planner
To schedule your assets in head to the Schedule Planner page of your quote.
If you are creating a Contract, you will be prompted to enter the schedule information when adding the assets to the Contract.
From here click Schedule Asset Services.
.png)
Your assets are separated out between Service Type and Meter, so click between the two to update the relevant schedules.
Note: If any assets have missing service information, they will not show up in the lists here.
.png)
Tick an asset to make any relevant changes / updates to Start Date, Job Category, Job Trade or Allocation.
.png)
Click Apply to PPM Schedule when you are happy. The fields above are not mandatory and can be left blank if required.
.png)
Alternatively, you can bulk update / add the assets.
Simply tick all relevant assets and then click Bulk Update to make changes to all selected assets.
.png)
.png)
Again click Apply to PPM Schedule when you are happy with the updates.
Your Schedule Planner has now been set up.
.png)
Click the edit icon against an asset to make any changes.
.png)
You'll also see some optimisation suggestions to help with fewer visits and reduced costs.
Click Review Suggestions to see more.
.png)
If you are happy with the suggestions, tick the checkbox against the relevant assets and then select Apply.
.png)
Upgrading an Asset PPM Quote
Once you are happy with the quote details, you can click Complete Quote. This will create a live quote which can be sent to your customer, rejected, upgraded etc.
image
.png)
Once your Asset PPM Quote has been approved, click Upgrade to convert it into an Asset PPM Contract.
.png)
Depending on how the Quote was configured, Joblogic may guide you through additional configuration before the Contract can be created.
If all mandatory information has already been completed, the Contract can be created immediately.
If any required information is missing, an Upgrade Configuration screen will open where you can review billing types, sites and assets.
.png)
NOTE:
-
Once the Contract has been created, the Billing Type can no longer be changed.
-
When a new asset is added to the contract, the system automatically updates invoicing details and adjusts the contract period to include the new asset. This integration ensures seamless adaptation of contract terms and accurate financial tracking.
-
Pricing adjustments are instantly reflected in the contract value, ensuring transparency and accuracy in financial reporting and invoicing.
-
If the contract period is modified, the system automatically reflects the adjustments. This guarantees accurate contract durations and ensures that all associated details, such as invoicing and visit schedules, are updated.
Further Support
For further information or assistance with the above, contact our Support Team on 0800 326 5561 or email support@joblogic.com. Alternatively, our Customer Success Management team can be reached by emailing customersuccess@joblogic.com
Publishing Details
This document was written and produced by Joblogic’s Technical Writing team and was last updated on the date specified above. Be aware that the information provided may be subject to change following further updates on the matter becoming available. Additionally, details within the guide may vary depending on your Joblogic account’s user permissions.