Introduction
The Joblogic Planner allows users to schedule and keep an overview of their engineer’s day, week and month. This guide will help you to understand how to log a new job and visit via the Planner within the Joblogic back office. It’ll also explain how to assign an already existing job visit via the planner.
Logging a new job and visit via Planner
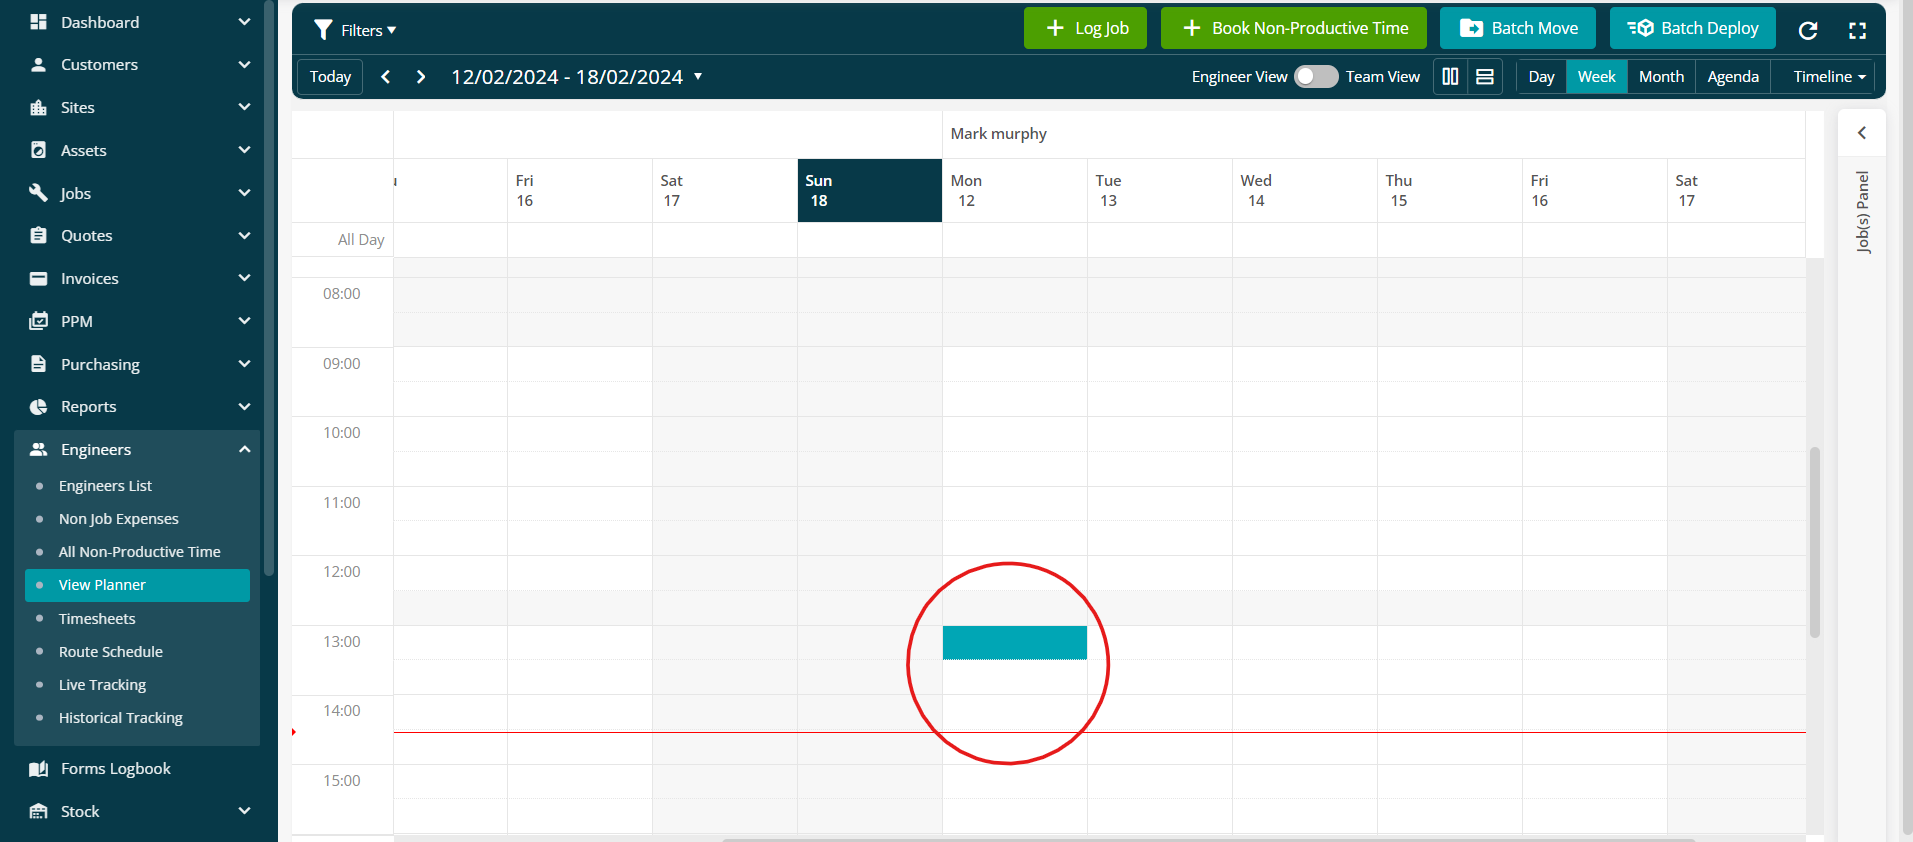
To log a new job and visit via Planner, select the required time slot under the applicable date and engineer of the planner calendar.
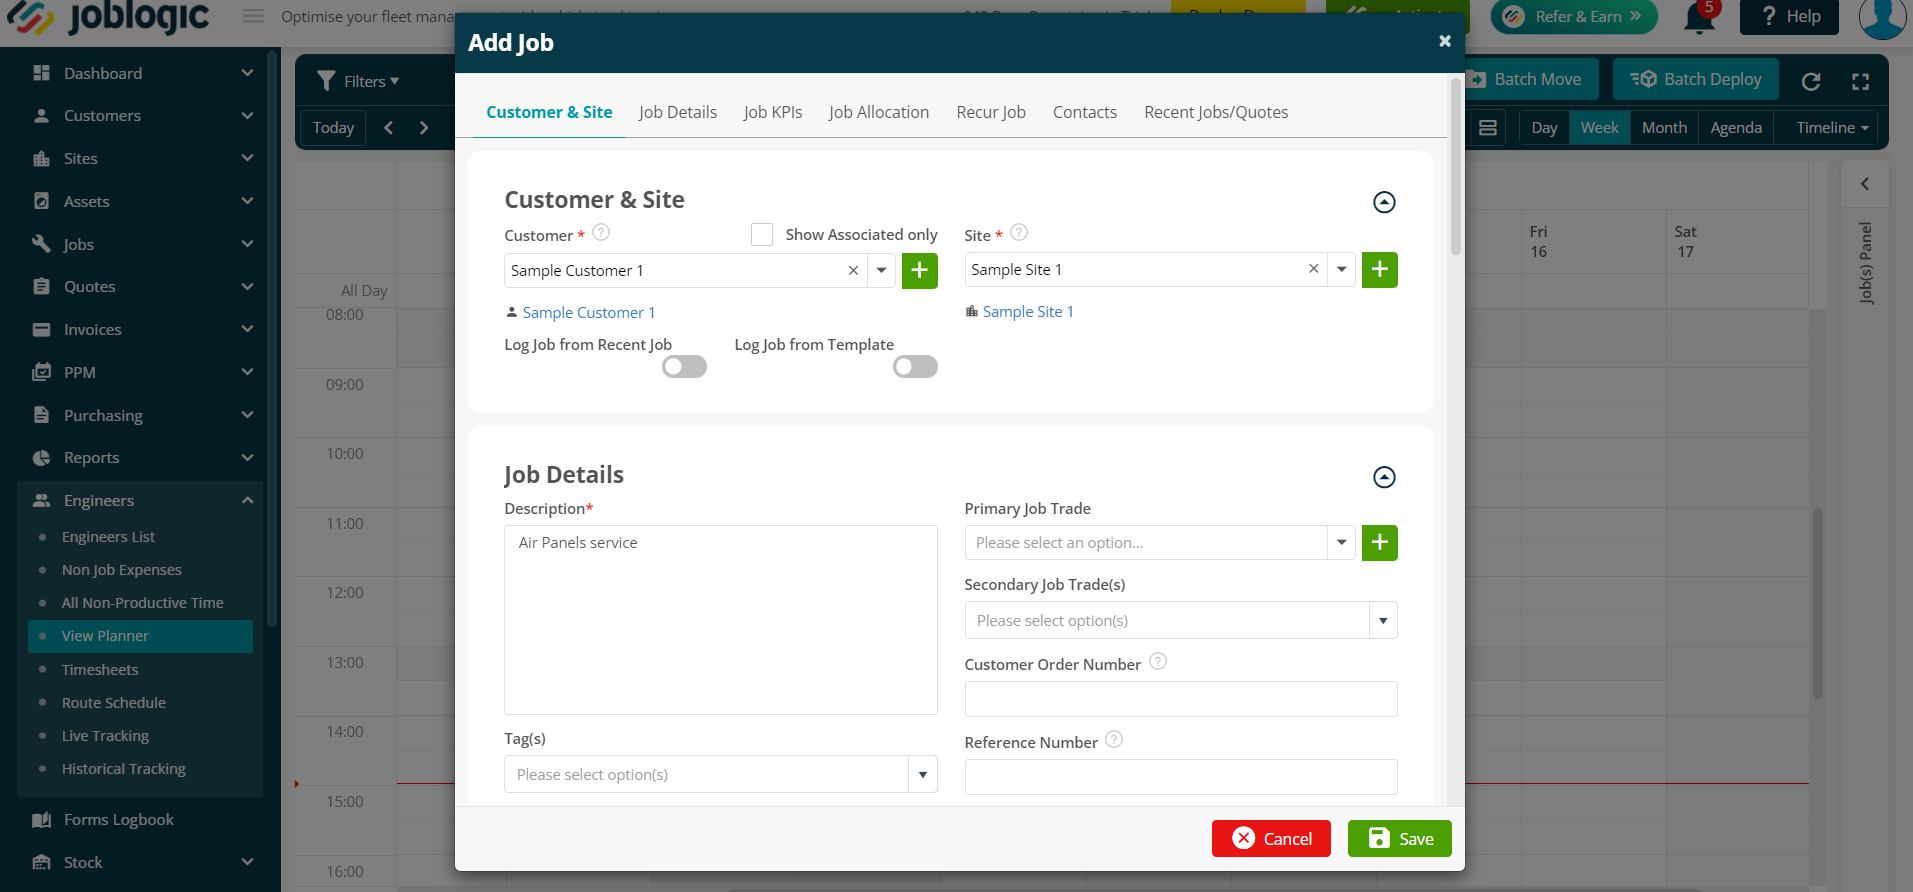
Once you have clicked the time slot an ‘Add Job’ window will appear where the job’s details can be filled in.
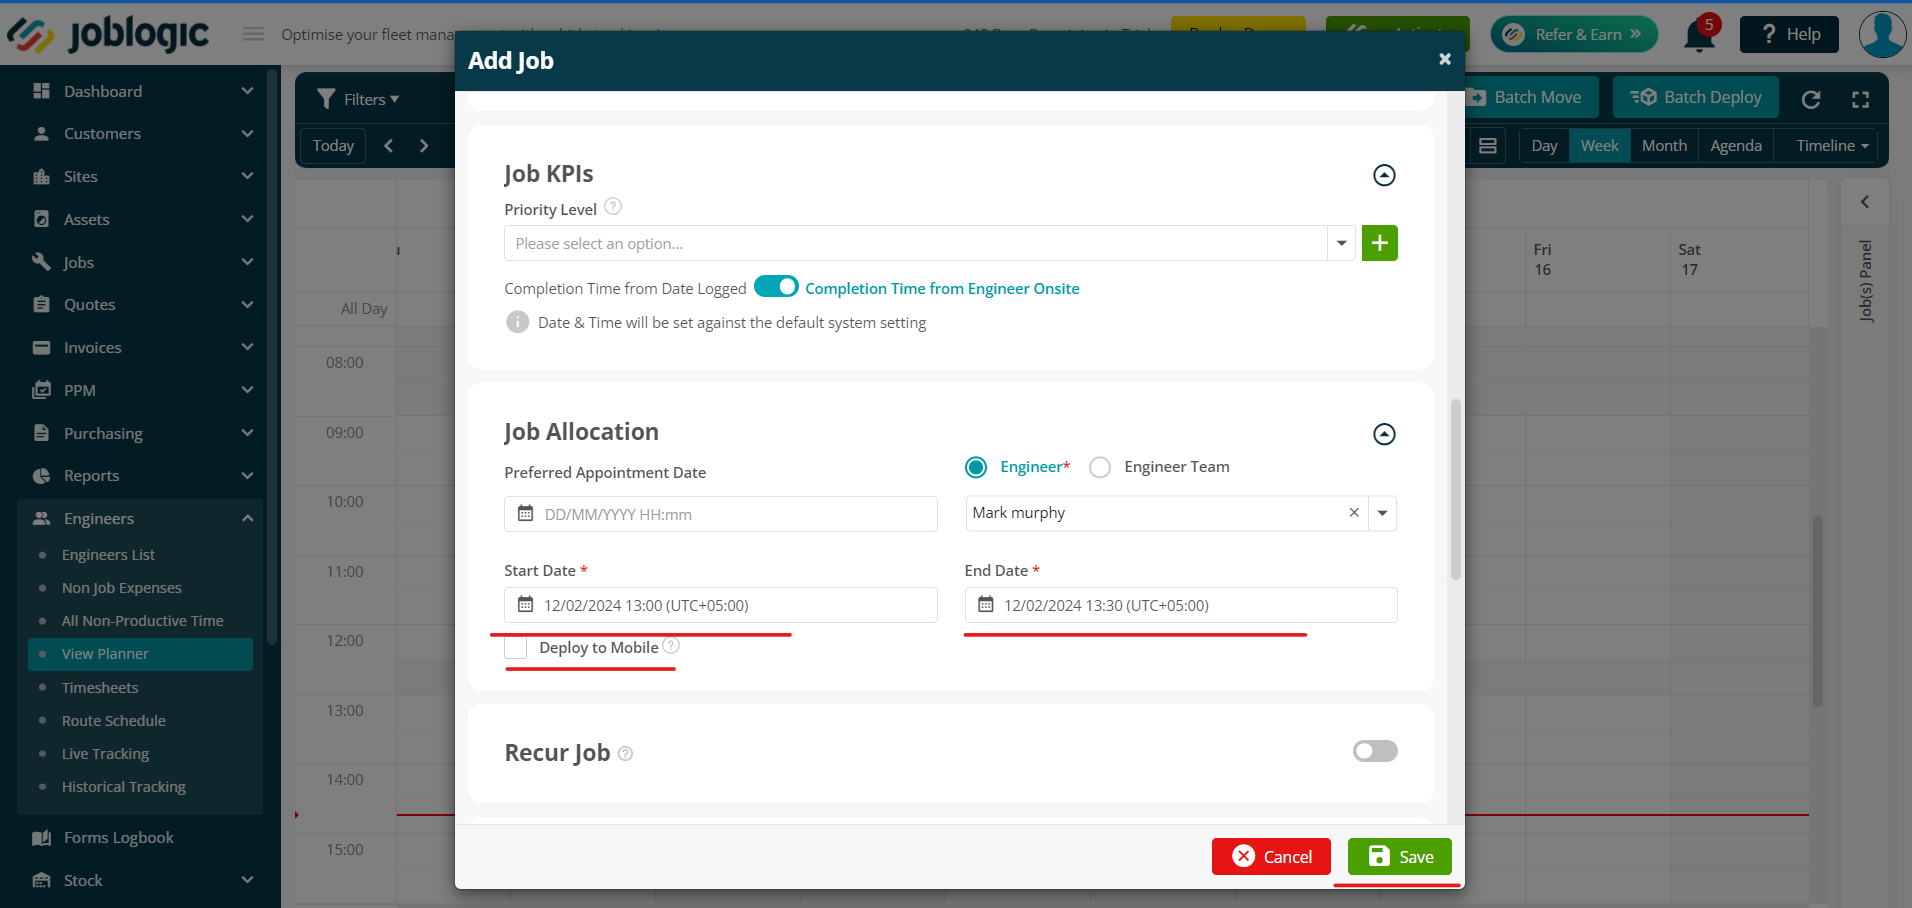
Once you have filled out the required information regarding the job, scroll down to the Job allocation section to assign the engineer's visit. The engineer and visit time will already be populated for you (based on the time and engineer selected when first selecting via the planner calendar) but you can edit the Start and End date, if needed. The “Deploy to Mobile” option can be marked if you want to immediately send the visit to your engineer. Press the ‘Save’ option once you are happy with the entry.
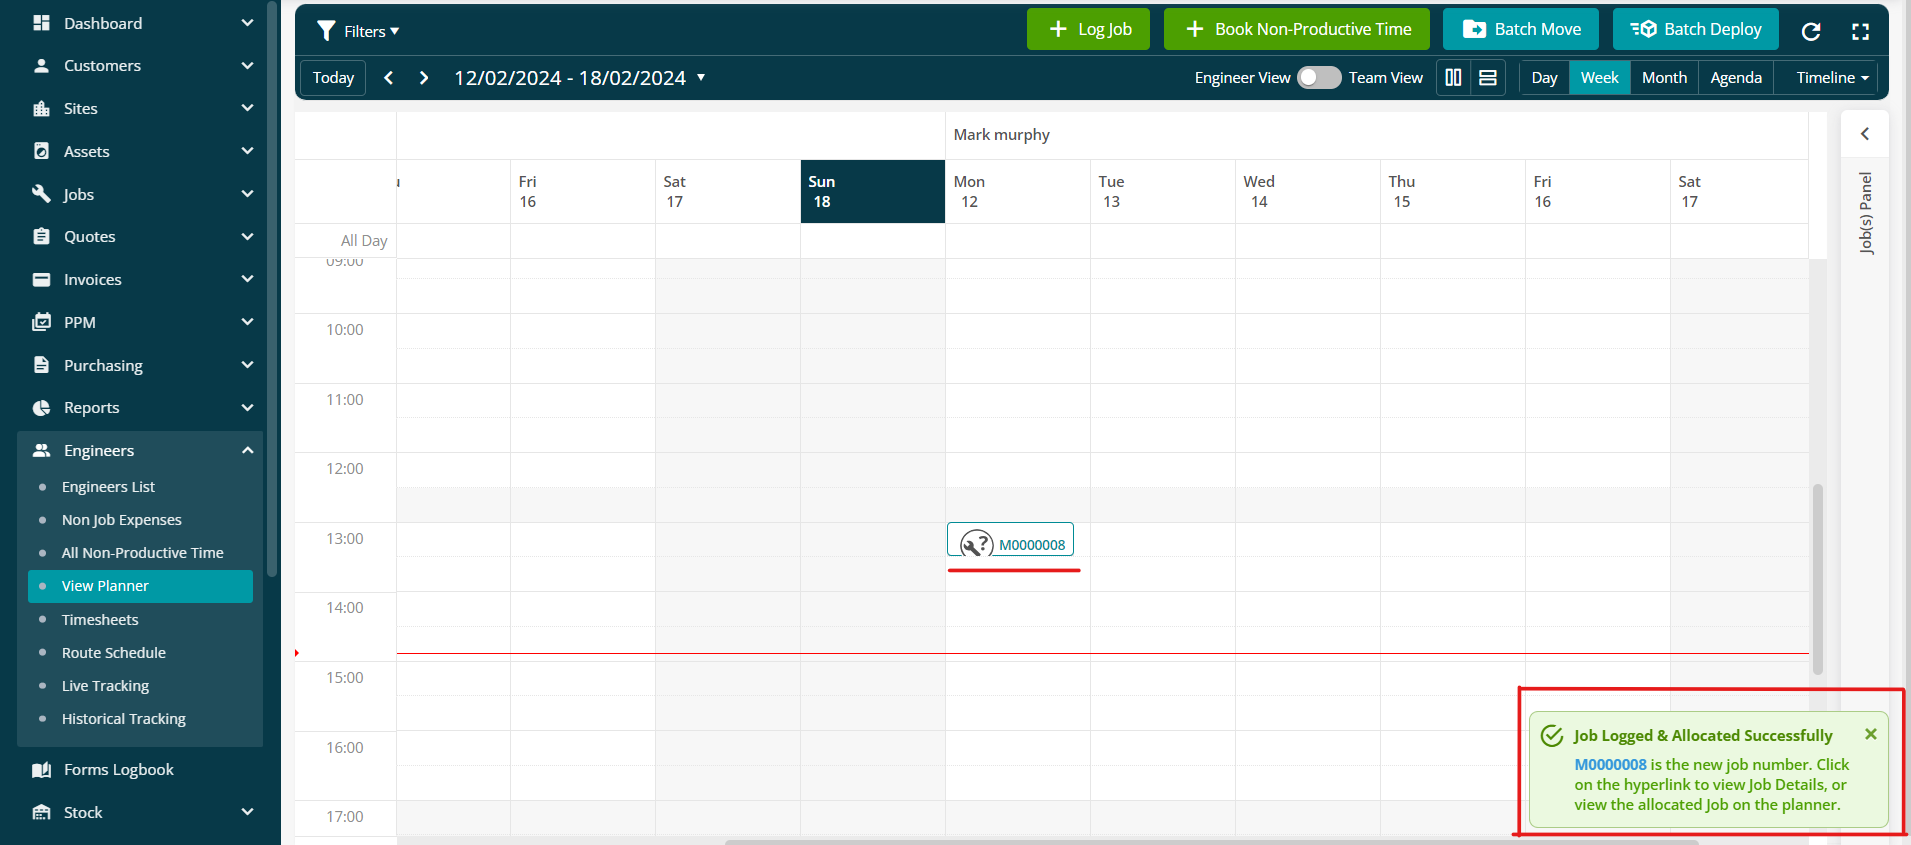
The job will then be created and a visit to the job will be allocated to the chosen engineer on the planner. A pop-up notification will also display confirming this.
Assigning a job visit for an existing job
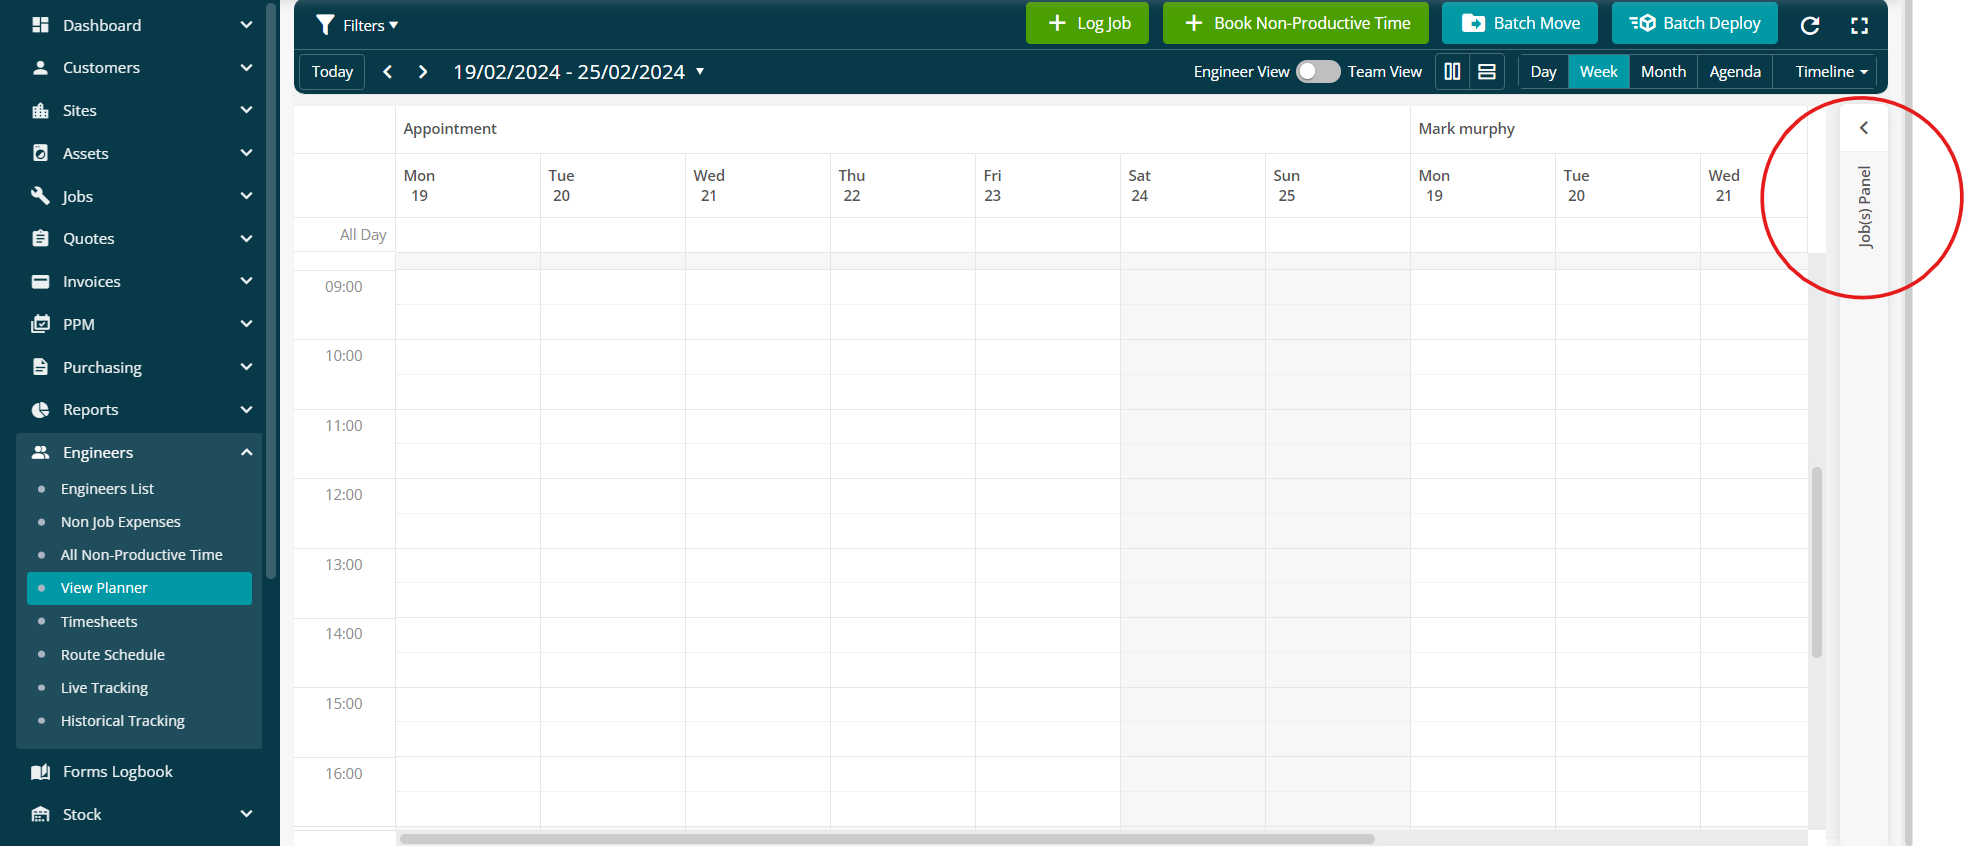
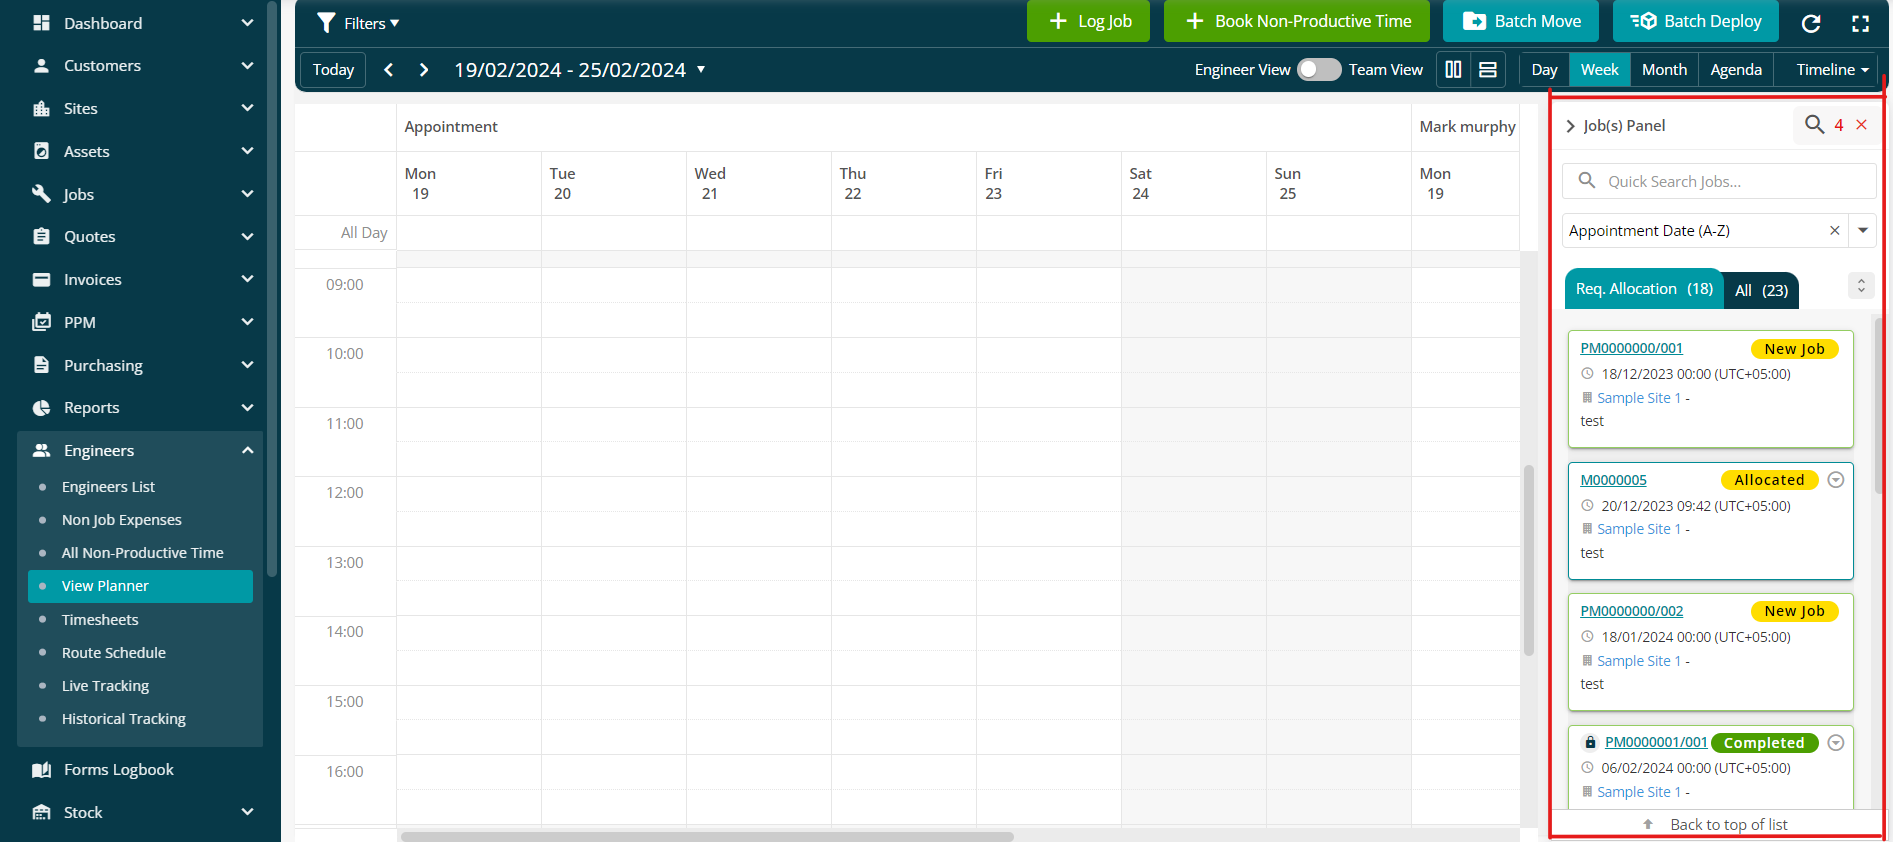
To assign a visit to an already existing job via planner, click on the ‘Jobs Panel’ on the right-hand side of the planner screen.
The Jobs panel shows a list of jobs in two different tabs; Requires (Req.) allocation and All.
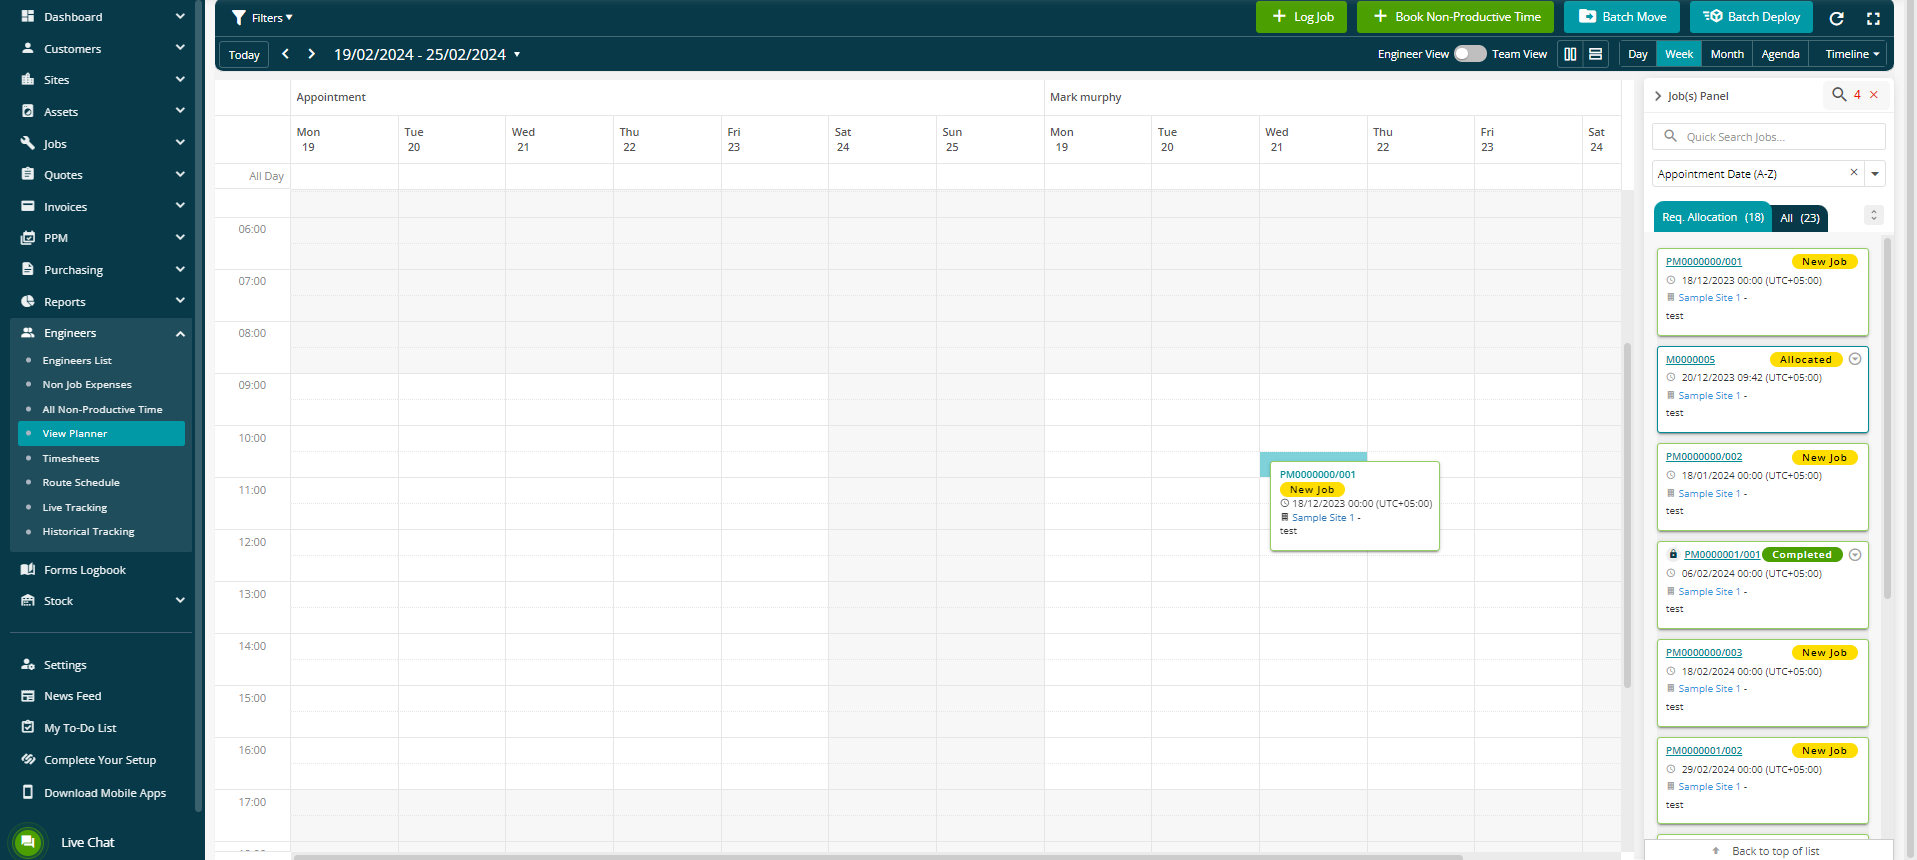
Click and drag the job that you wish to assign a visit for to the planner and drop it on the required time slot under the applicable date and engineer of the planner calendar.
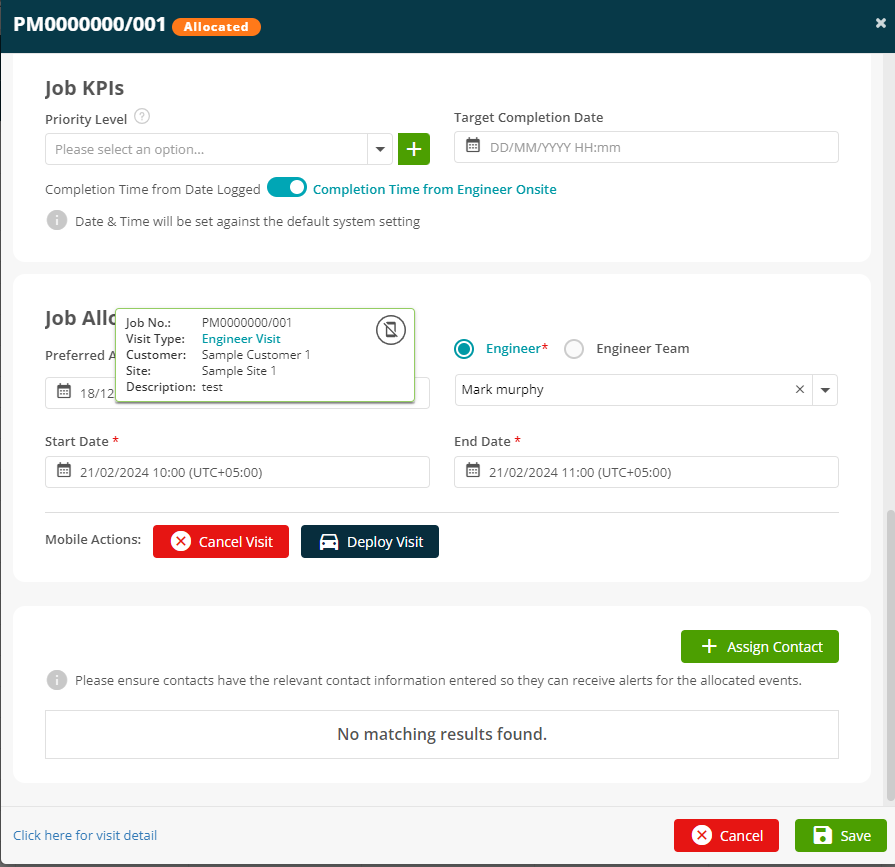
The visit can then be deployed (sent to the engineer's mobile). To do this, click on the visit within the planner and a pop-up window showing the job’s details will appear. Scroll down to the ‘Deploy Visit’ button. The visit will then be deployed to the engineer’s mobile device once saved.
Further Support
For further information or assistance with the above, contact our Support Team on 0800 326 5561 or email support@joblogic.com. Alternatively, our Customer Success Management team can be reached by emailing customersuccess@joblogic.com
Publishing Details
This document was written and produced by Joblogic’s Technical Writing team and was last updated on the date specified above. Be aware that the information provided may be subject to change following further updates on the matter becoming available or new releases within the system. Additionally, details within the guide may vary depending on your Joblogic account’s user permissions and settings or the electronic device being used.