Introduction
Joblogic allows you to allocate and deploy visits to your engineers. This can be achieved via the Planner feature but can also be actioned against the individual job.
This user guide details how to assign a visit against an individual job within Joblogic.
Allocating a Visit to a Job
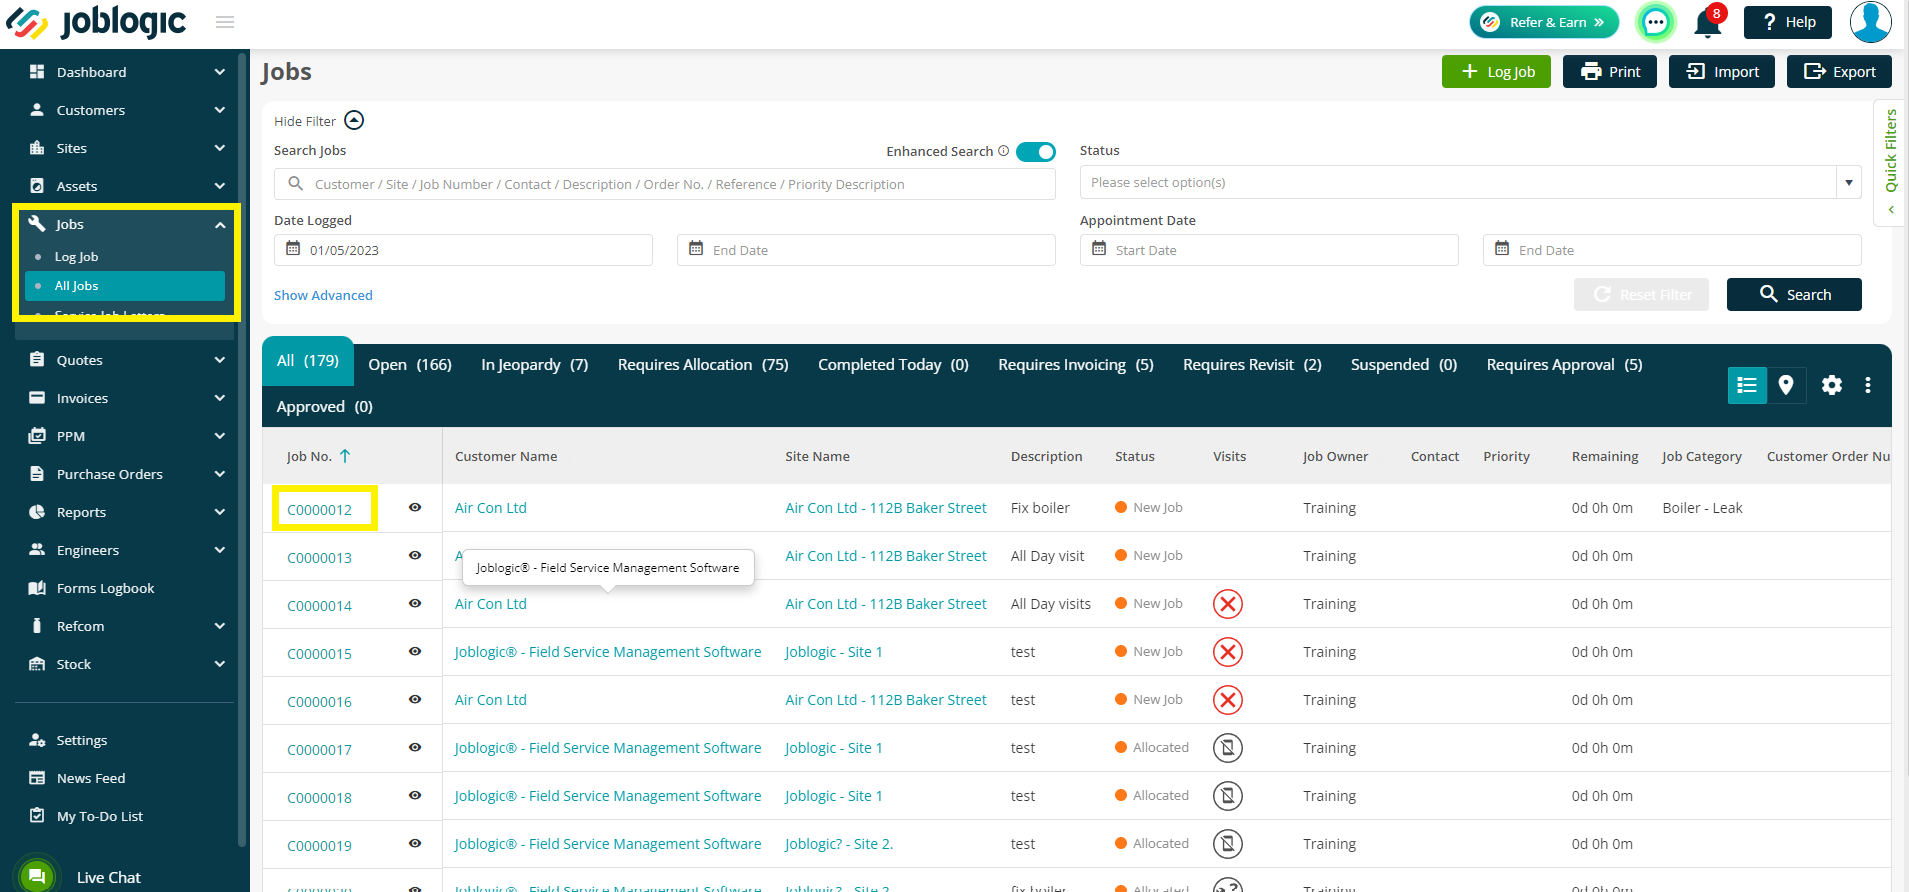
In order to allocate a visit to a job without using the Planner, navigate to the relevant job via Jobs > All Jobs > choose your job number by searching or choosing from the list.
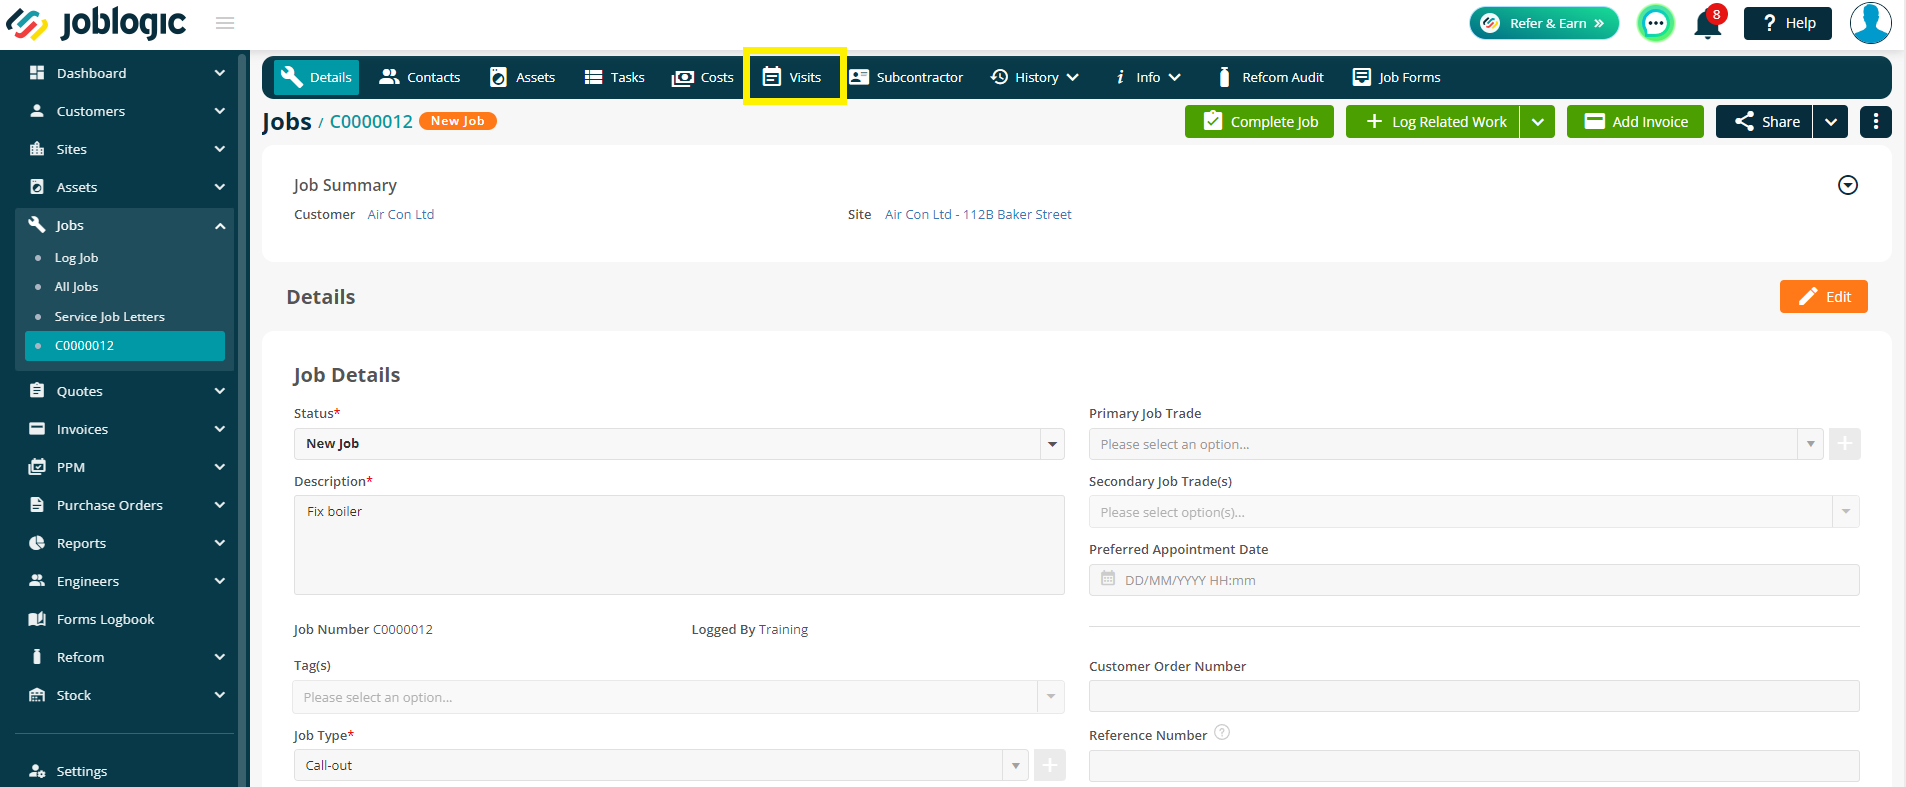
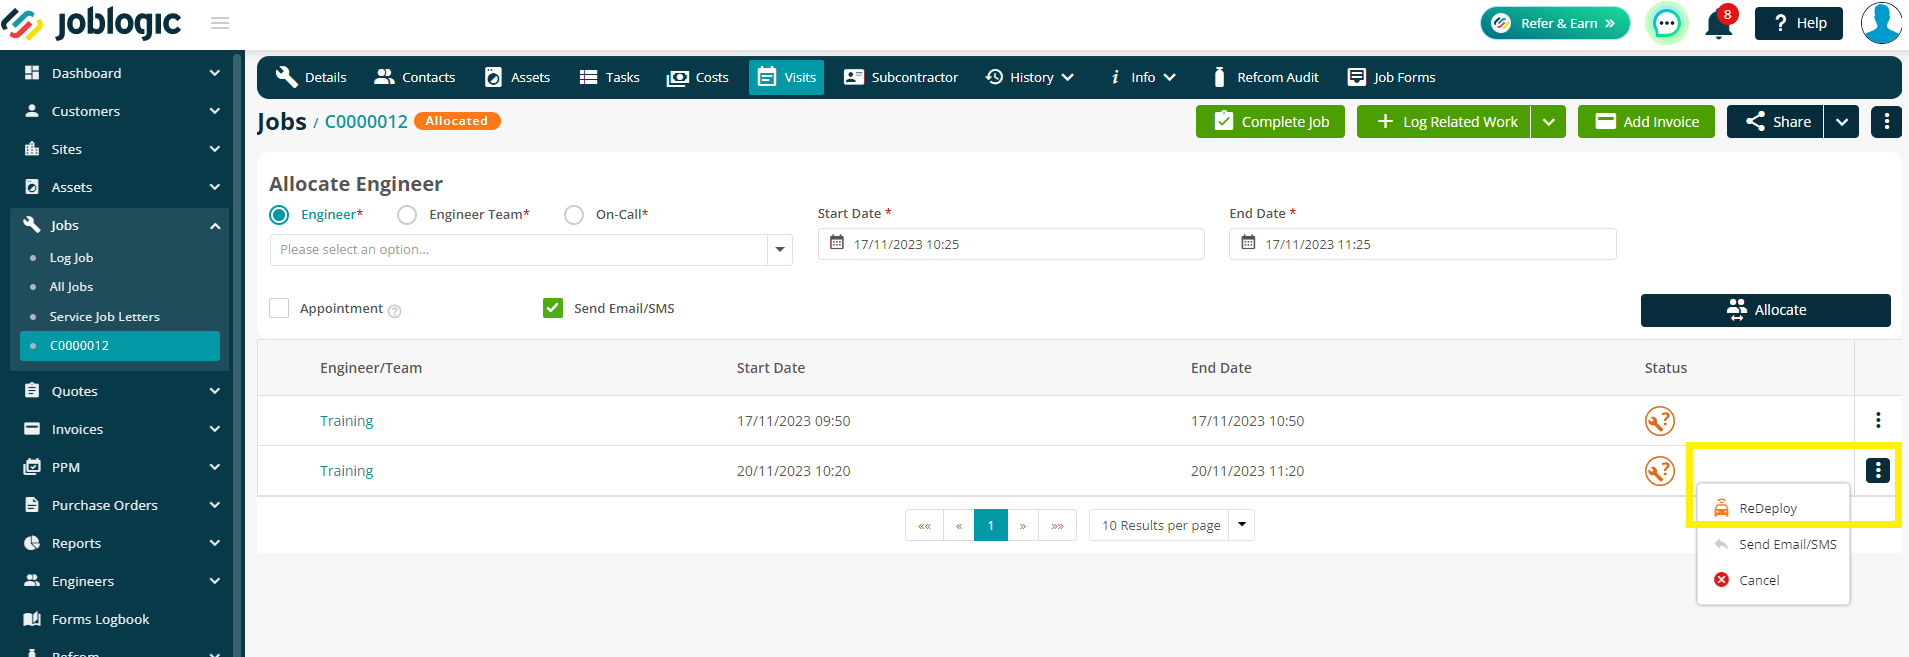
Next, click the Visits tab at the top of the page.
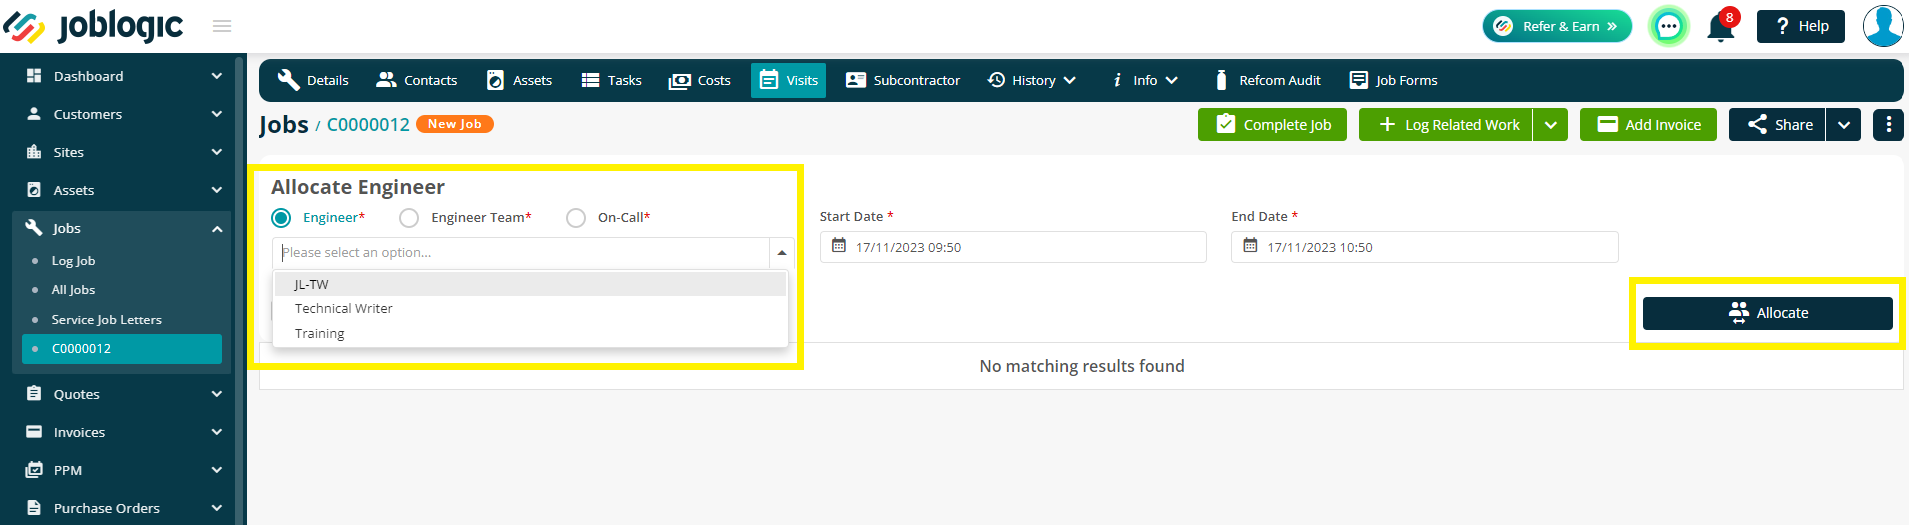
To allocate a new visit, select the Engineer, Engineer Team or On-Call from the relevant dropdown list and enter the scheduled Start and End date/time of the visit. Click Allocate once you are happy with the details.
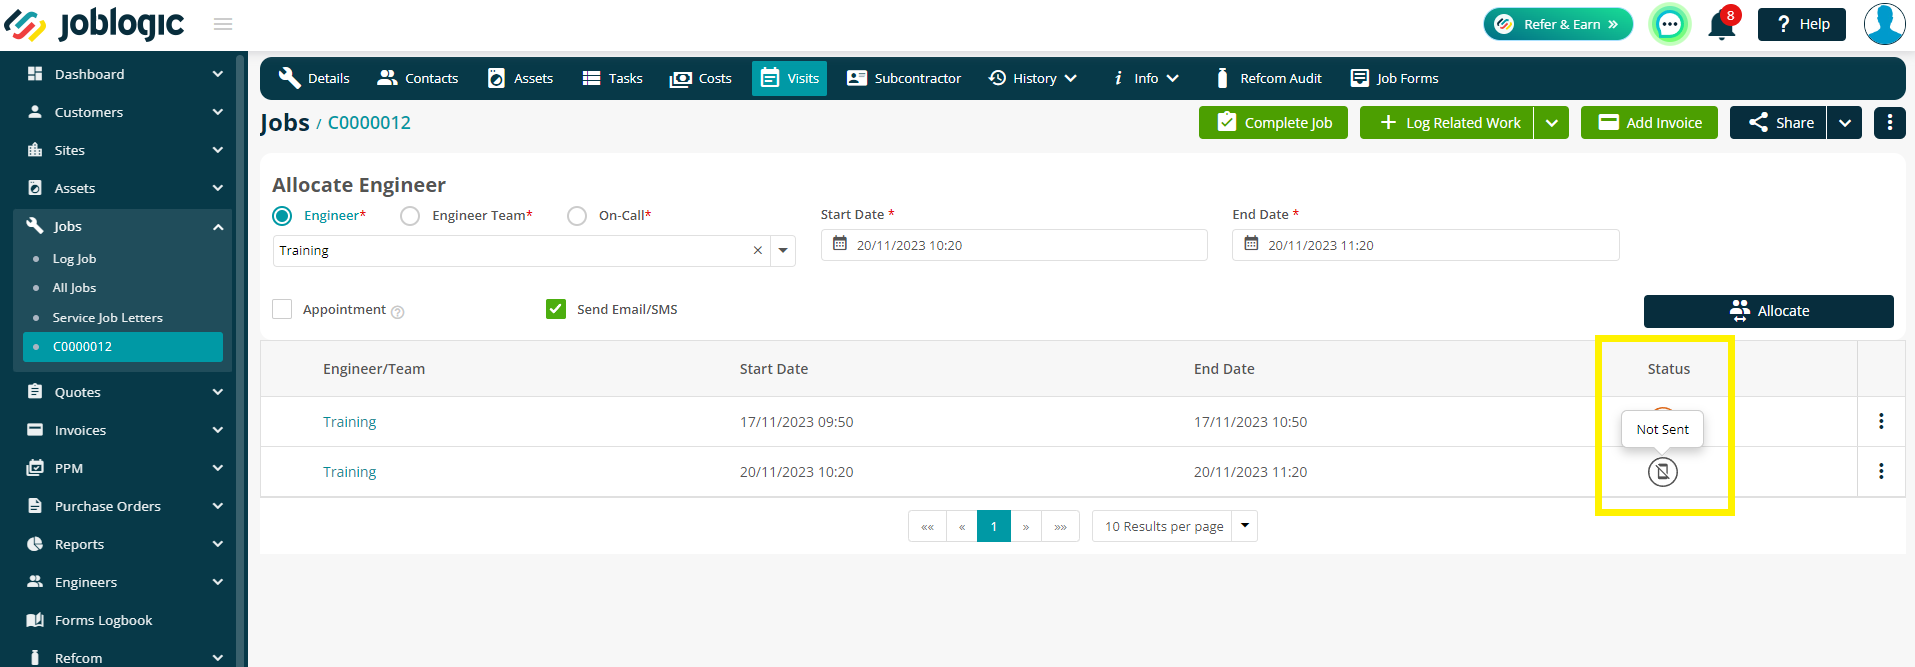
If you wish to automatically confirm the visit, tick the Appointment box. Leaving this unticked will allow your customer to confirm the appointment themselves via the portal.
If Send Email/SMS is ticked, an Email/SMS will automatically go out to the engineer to inform them of the visit, once it is deployed. The email settings and template can be set up via Settings > Email Notifications > Visit Deployed.
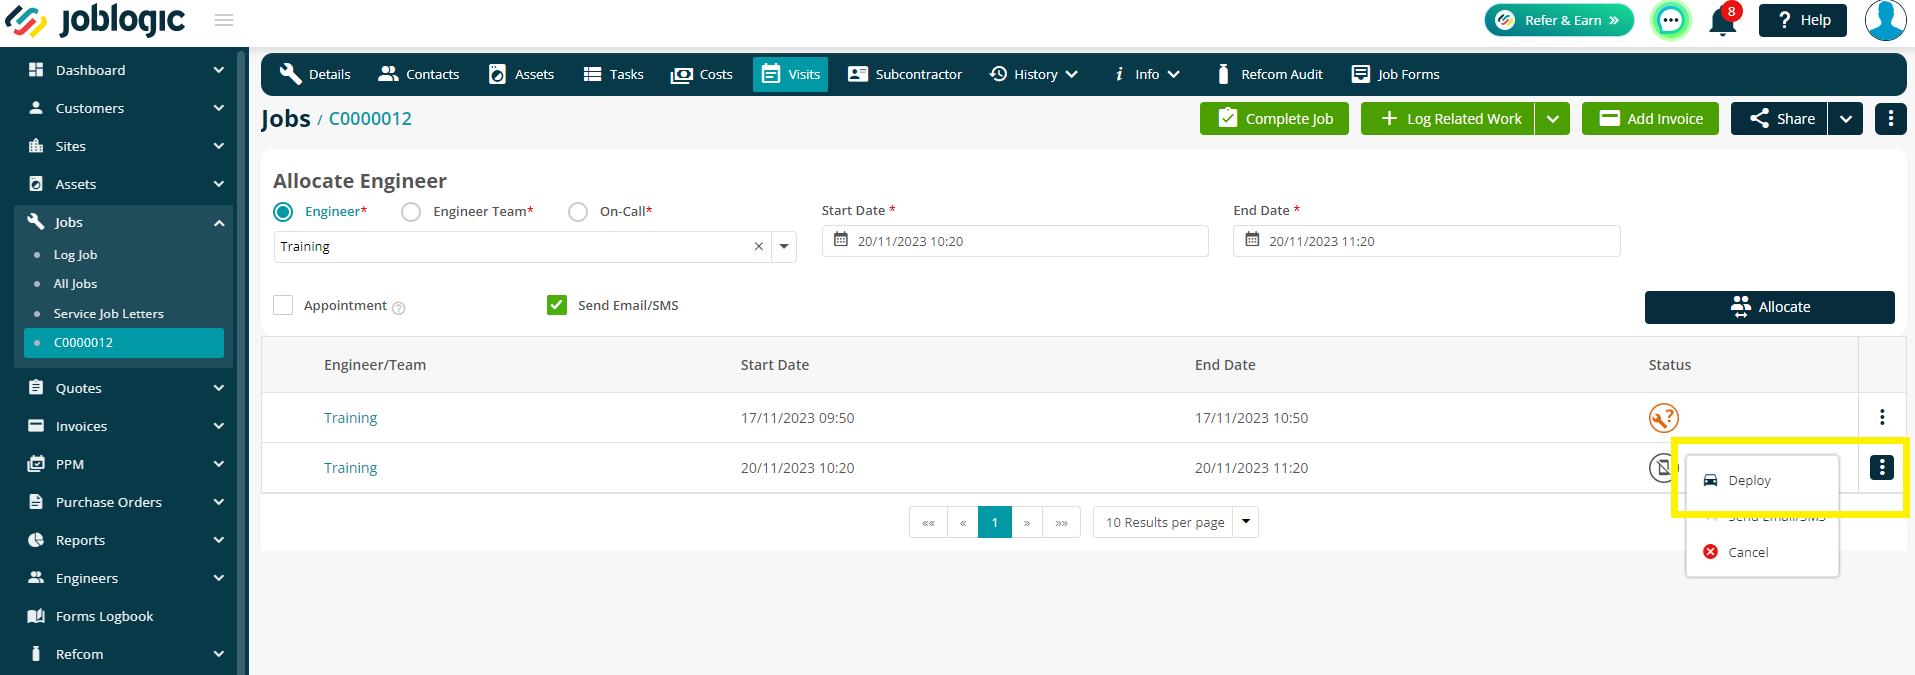
This Visit will now appear in the main list. It is currently allocated to the job, but not yet deployed to the engineer's mobile app. The mobile Status icon indicates 'Not Sent'
Deploying Visits to Engineers
To Deploy the visit to the engineer, click the three dots to the right of the page. Next, click Deploy.
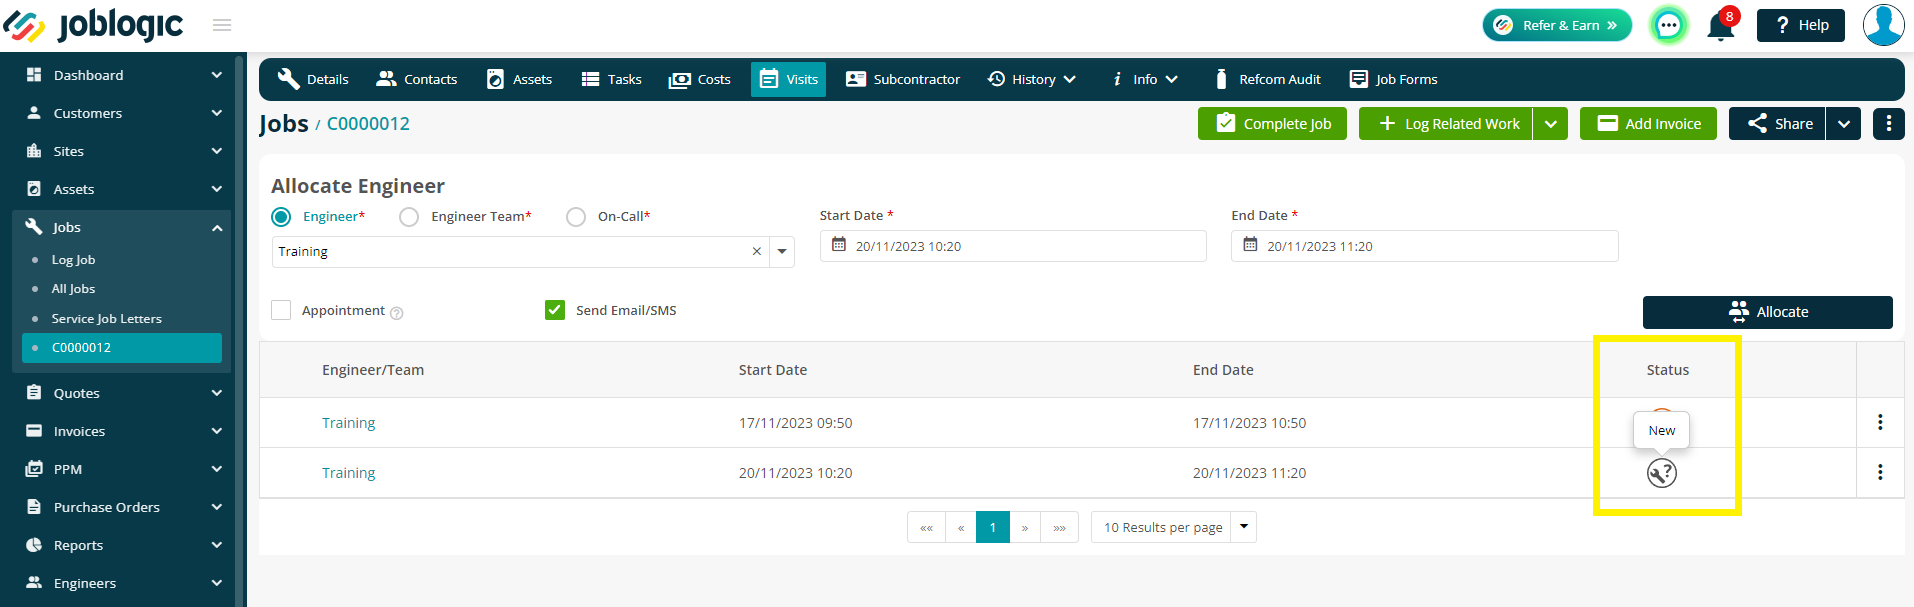
The visit is then sent to the engineer's mobile app, where they can view the details and start work when necessary.
The Status icon will change to New once it has been deployed, and then Read when it has registered on the device.
The status icons will update throughout the engineer journey. To read more about the different icon statuses and what they mean, click here.
Cancelling and Redeploying Visits
Cancel
A visit can be cancelled before it has been deployed, or after. If the visit is cancelled after it has been deployed, the engineer should receive a notification on their app to inform them of the cancellation.
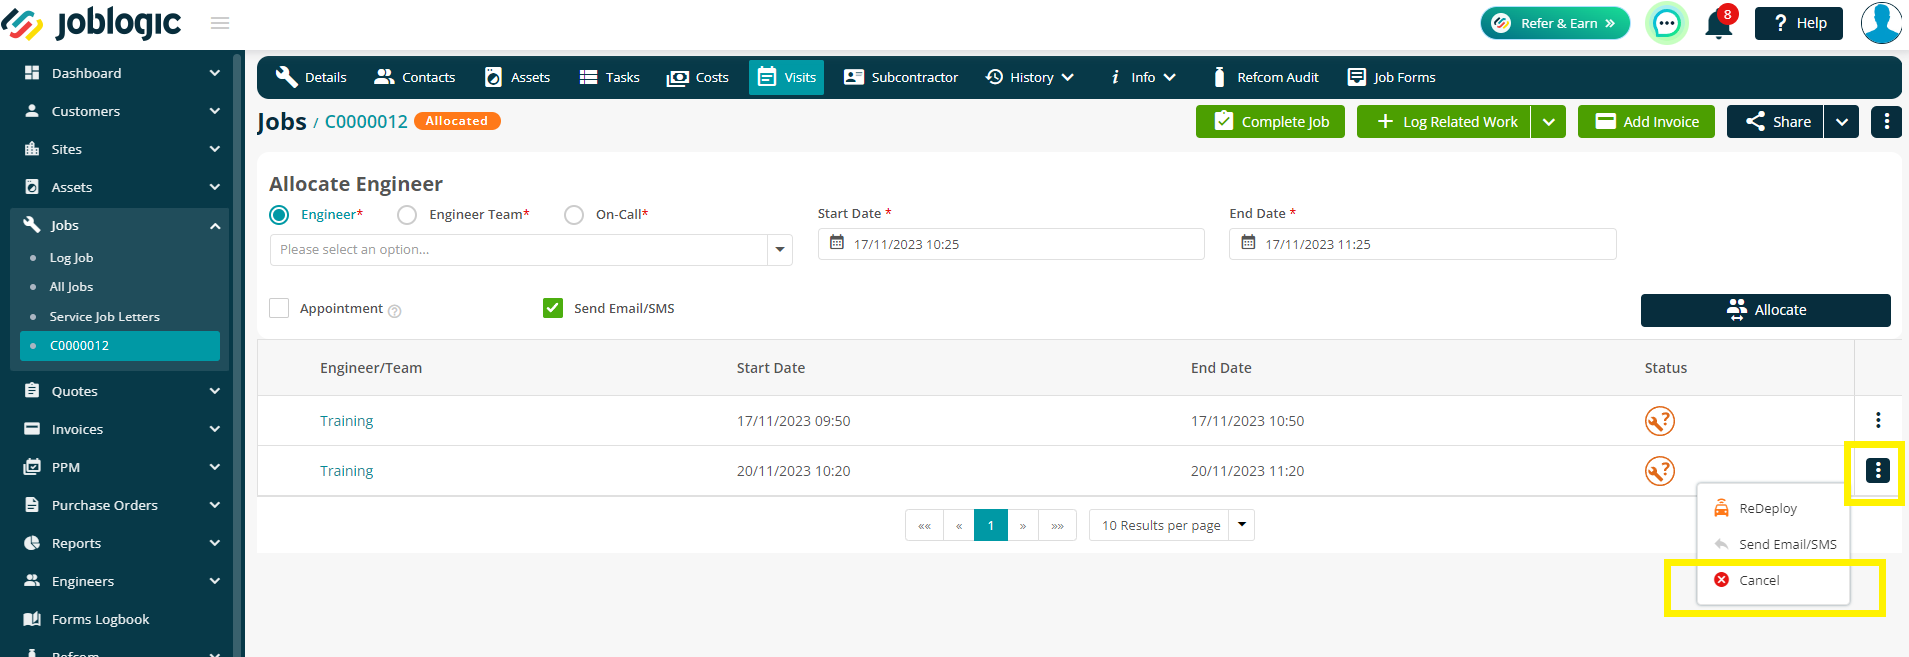
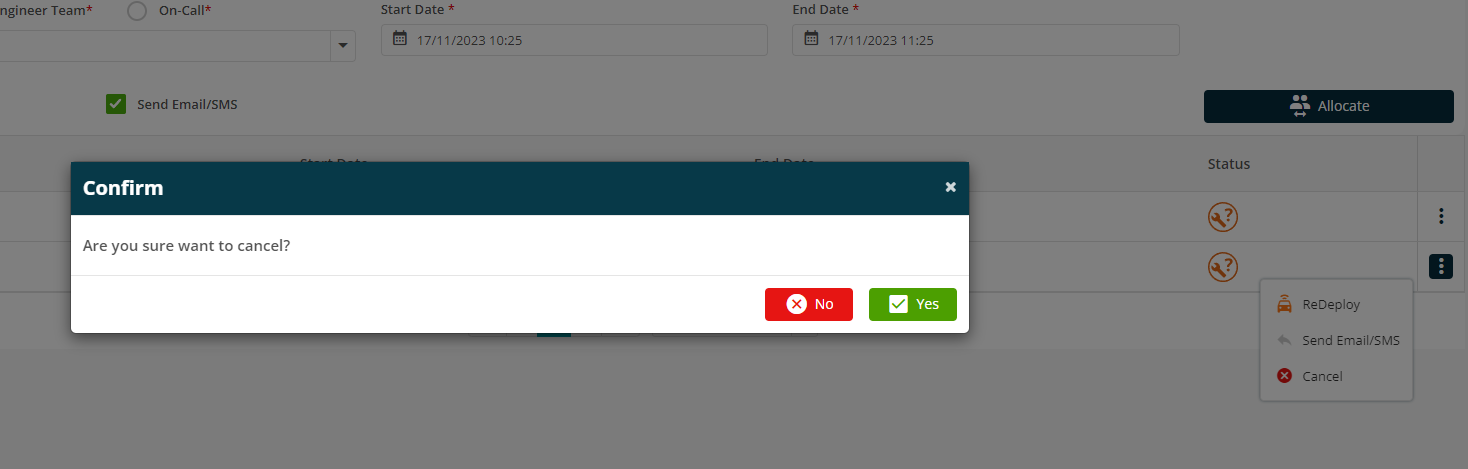
To cancel the visit, click the three dots on the right, and then click Cancel. You will then have to confirm this before proceeding. The Status icon will change to a red X.
Redeploy
You may need to Redeploy a visit if the engineer has switched devices or hasn't received the job for any reason.
To do this, again, click the three dots. Next, choose Redeploy and the system will automatically send the job to the app once again.
Further Support
For further information or assistance with the above, contact our Support Team on 0800 326 5561 or email support@joblogic.com. Alternatively, our Customer Success Management team can be reached by emailing customersuccess@joblogic.com
Publishing Details
This document was written and produced by Joblogic’s Technical Writing team and was last updated on the date specified above. Be aware that the information provided may be subject to change following further updates on the matter becoming available. Additionally, details within the guide may vary depending on your Joblogic account’s user permissions.