- 21 Oct 2025
- 2 Minutes to read
- Print
- PDF
Assisted Form Deployment
- Updated on 21 Oct 2025
- 2 Minutes to read
- Print
- PDF
Introduction
The Assisted Form Deployment app is designed to simplify and automate the process of assigning job-specific forms, boosting compliance and operational efficiency for your team. This smart deployment tool allows you to create and manage rules tailored to each job's criteria, like job type, trade, and asset class, ensuring the right forms are effortlessly deployed.
This guide will walk you through setting up and using the Assisted Form Deployment feature, helping you automate form assignments, reduce administrative work, and maintain compliance across all jobs.
Accessing the Assisted Form Deployment app
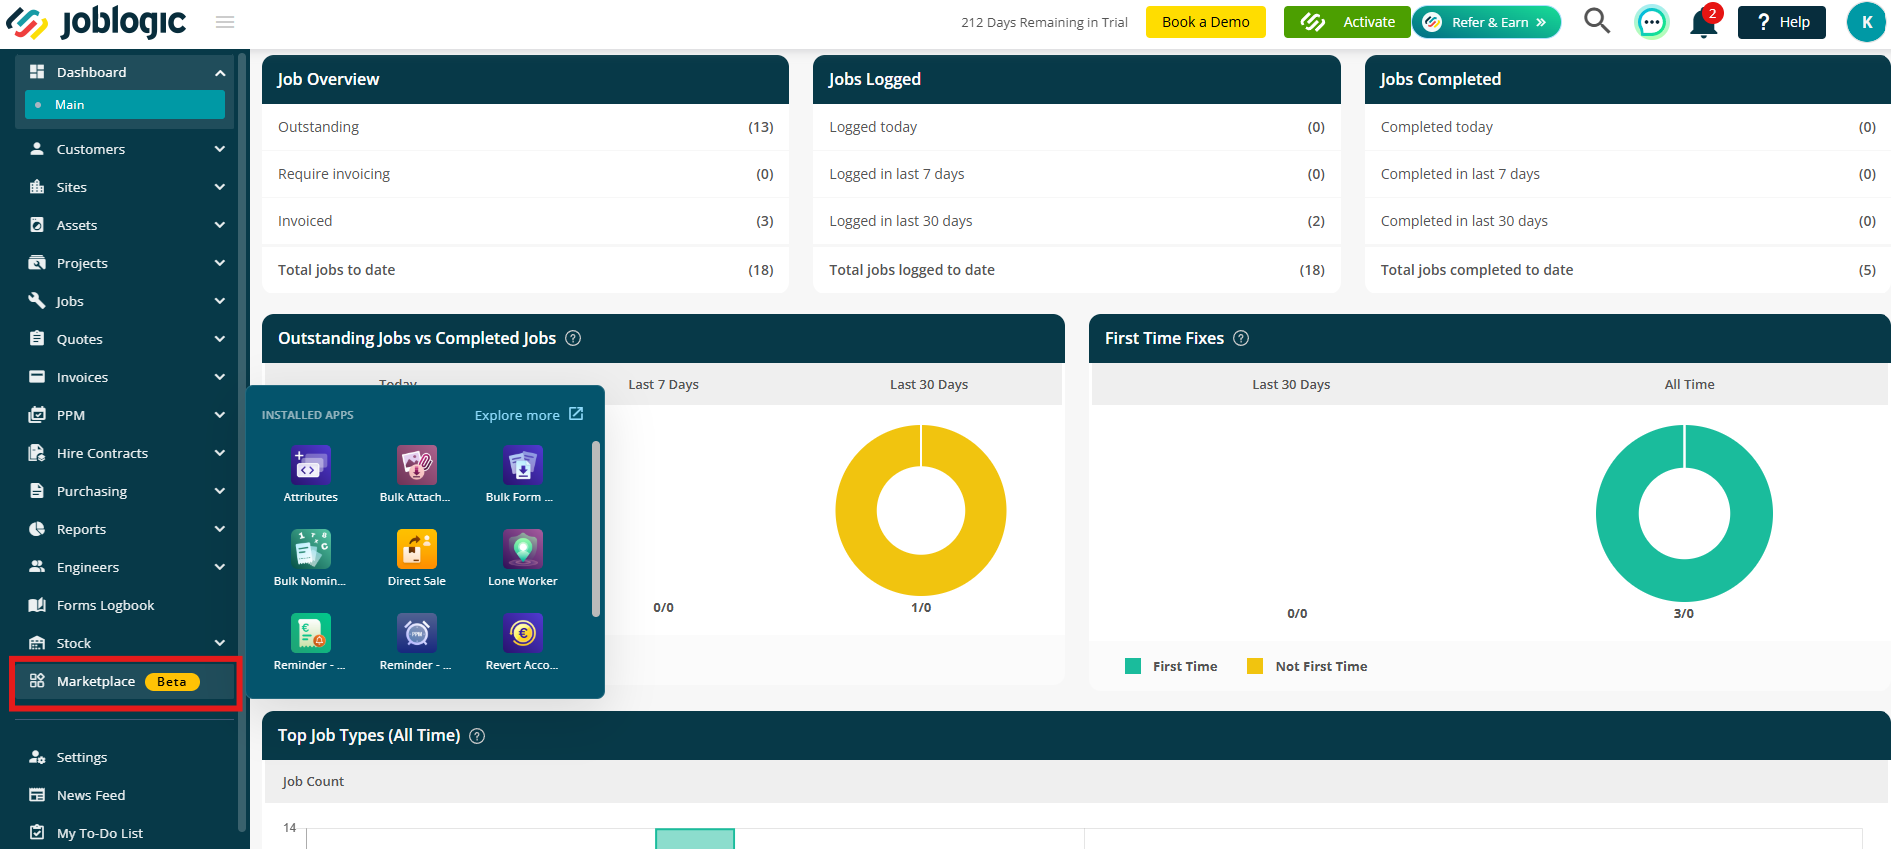
Click into the Marketplace header on your menu and click the Assisted Form Deployment app
Adding a form Rule
Note: Once this app is subscribed, only the forms defined in the rules below will appear for new jobs. Other deployed forms will remain available in the system but won’t display in the app.
When you’ve clicked into the app, you’ll land on the Add Rule page
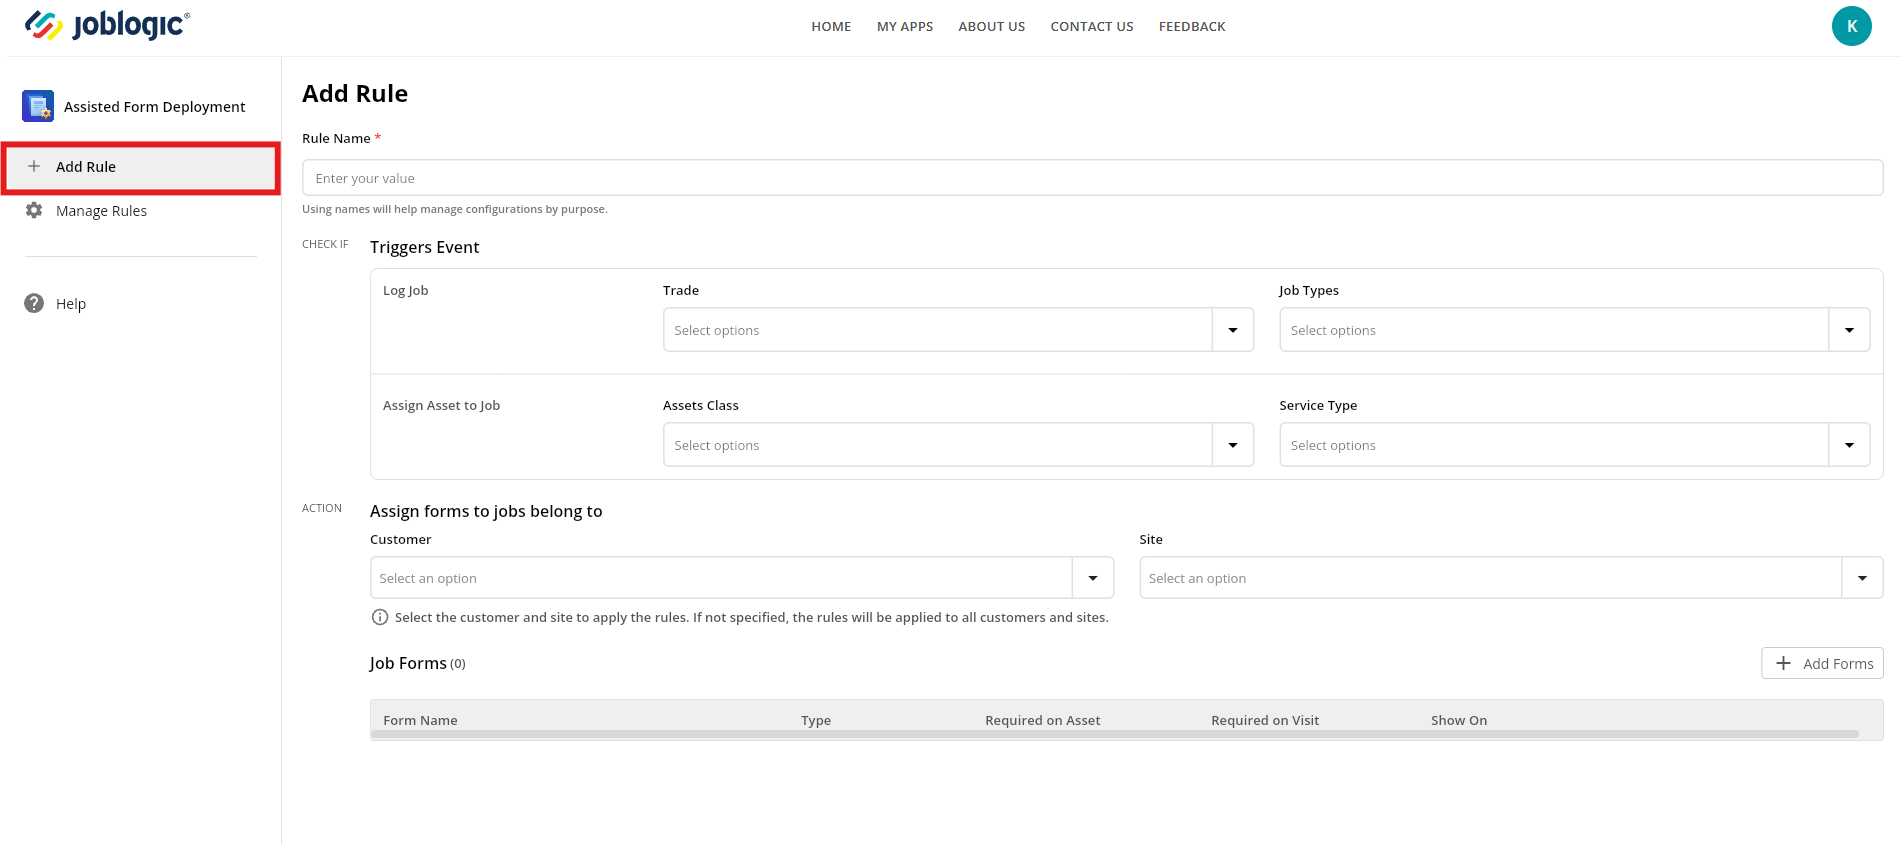
Give your rule a Name, and then select your Trigger events
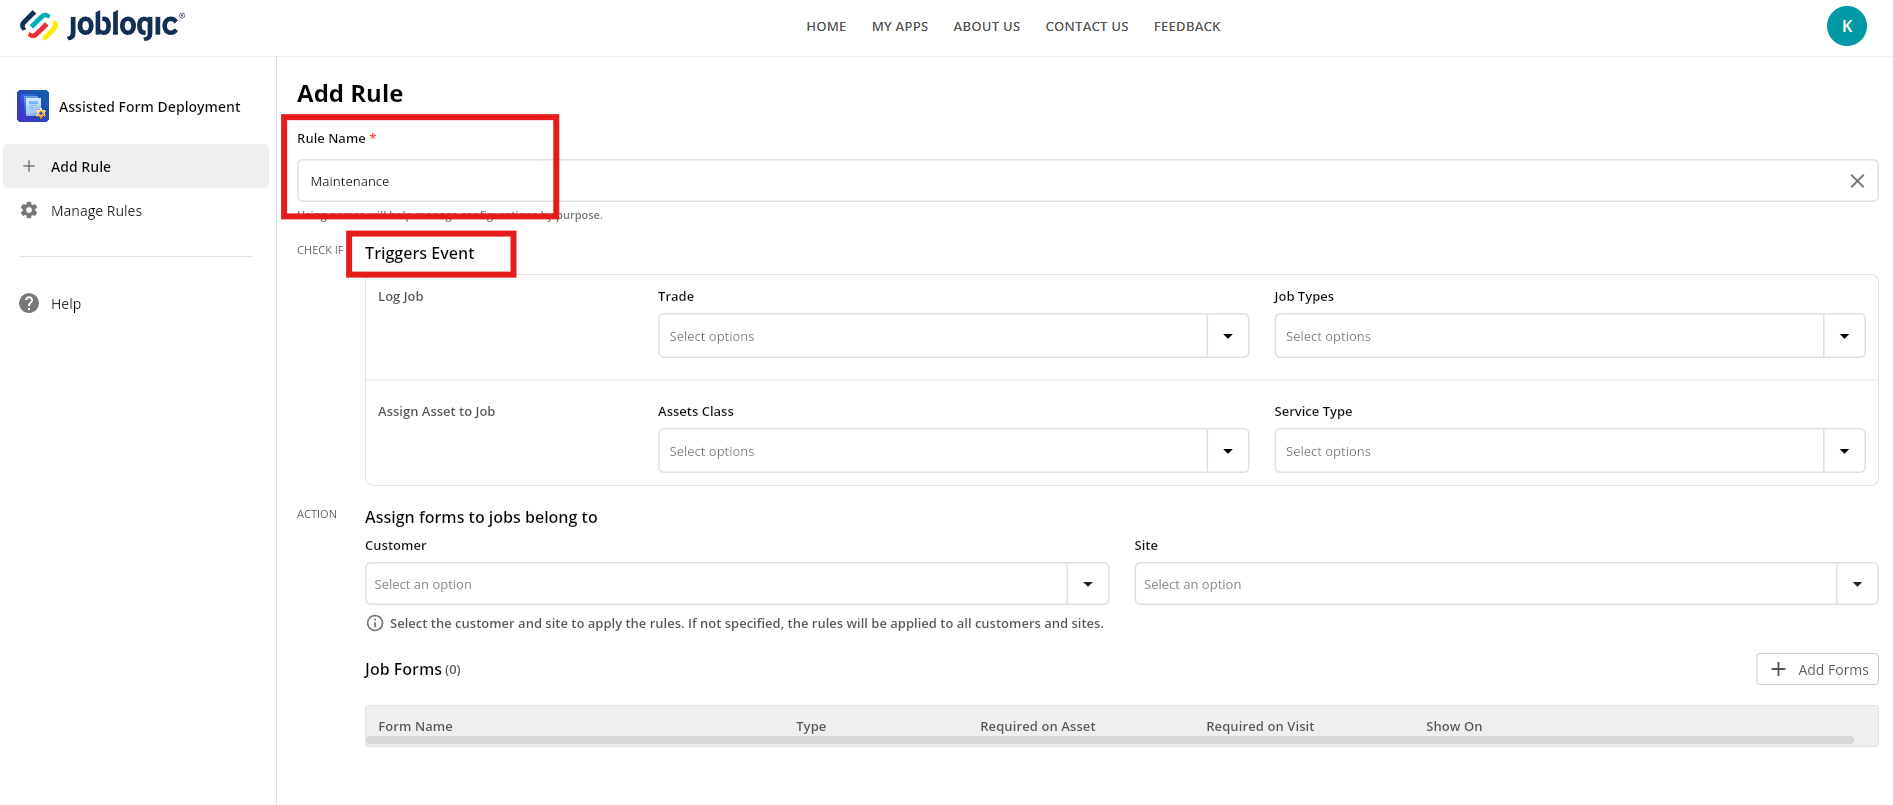
You can select any number of Trades and / or Job Types, meaning if these are chosen at Log Job level, the forms you select in a moment will be automatically added to the job.
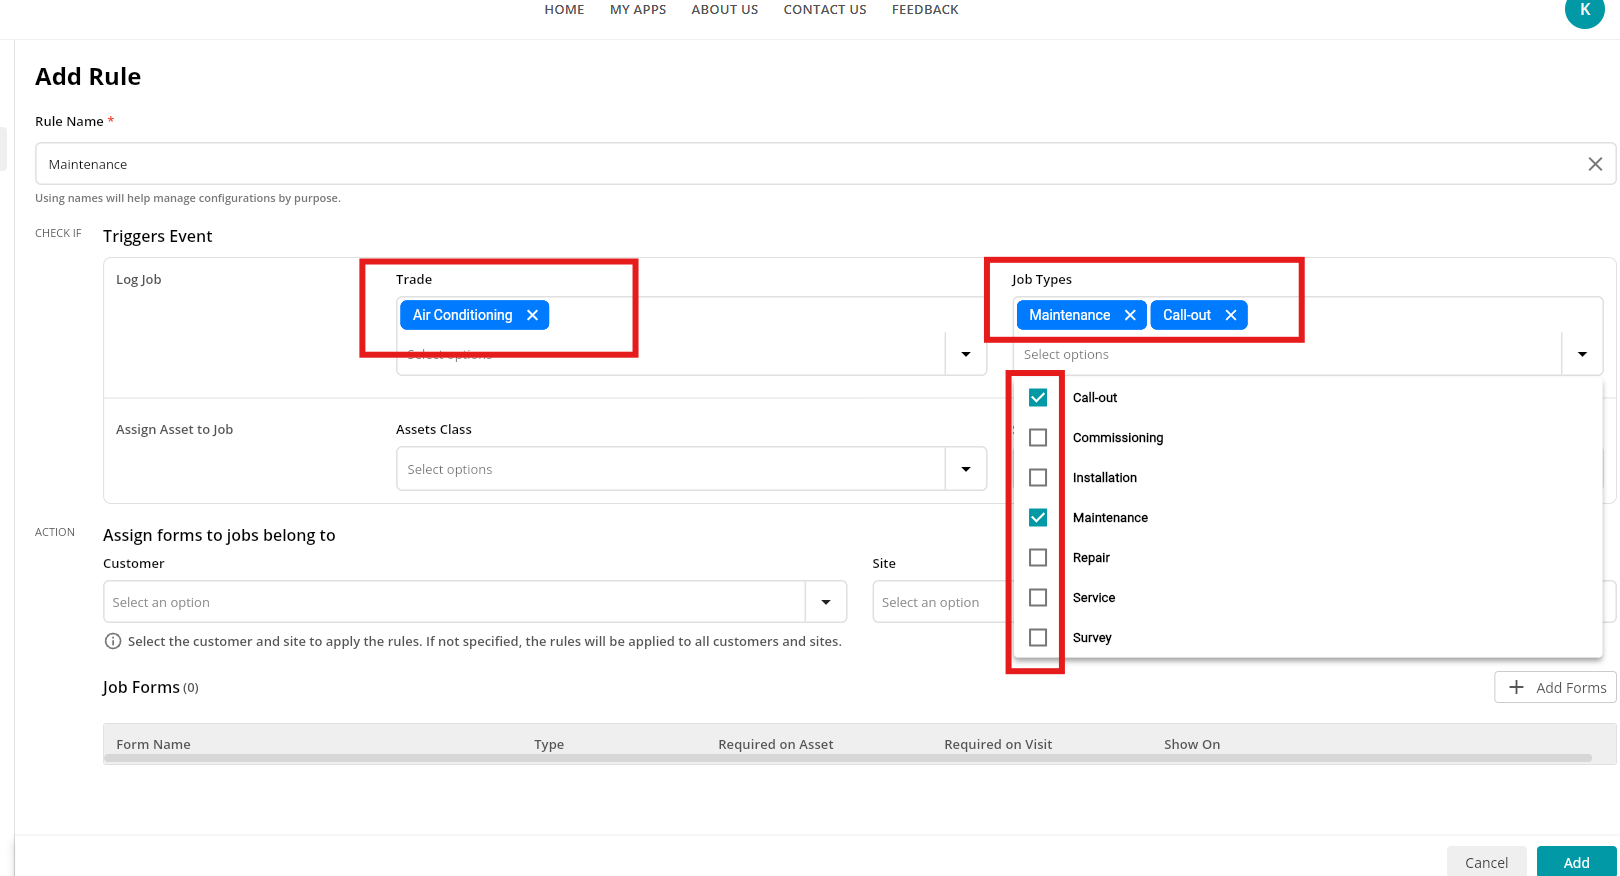
If you wish for forms to be added if Assets are added to a job, you can also add Asset Class triggers
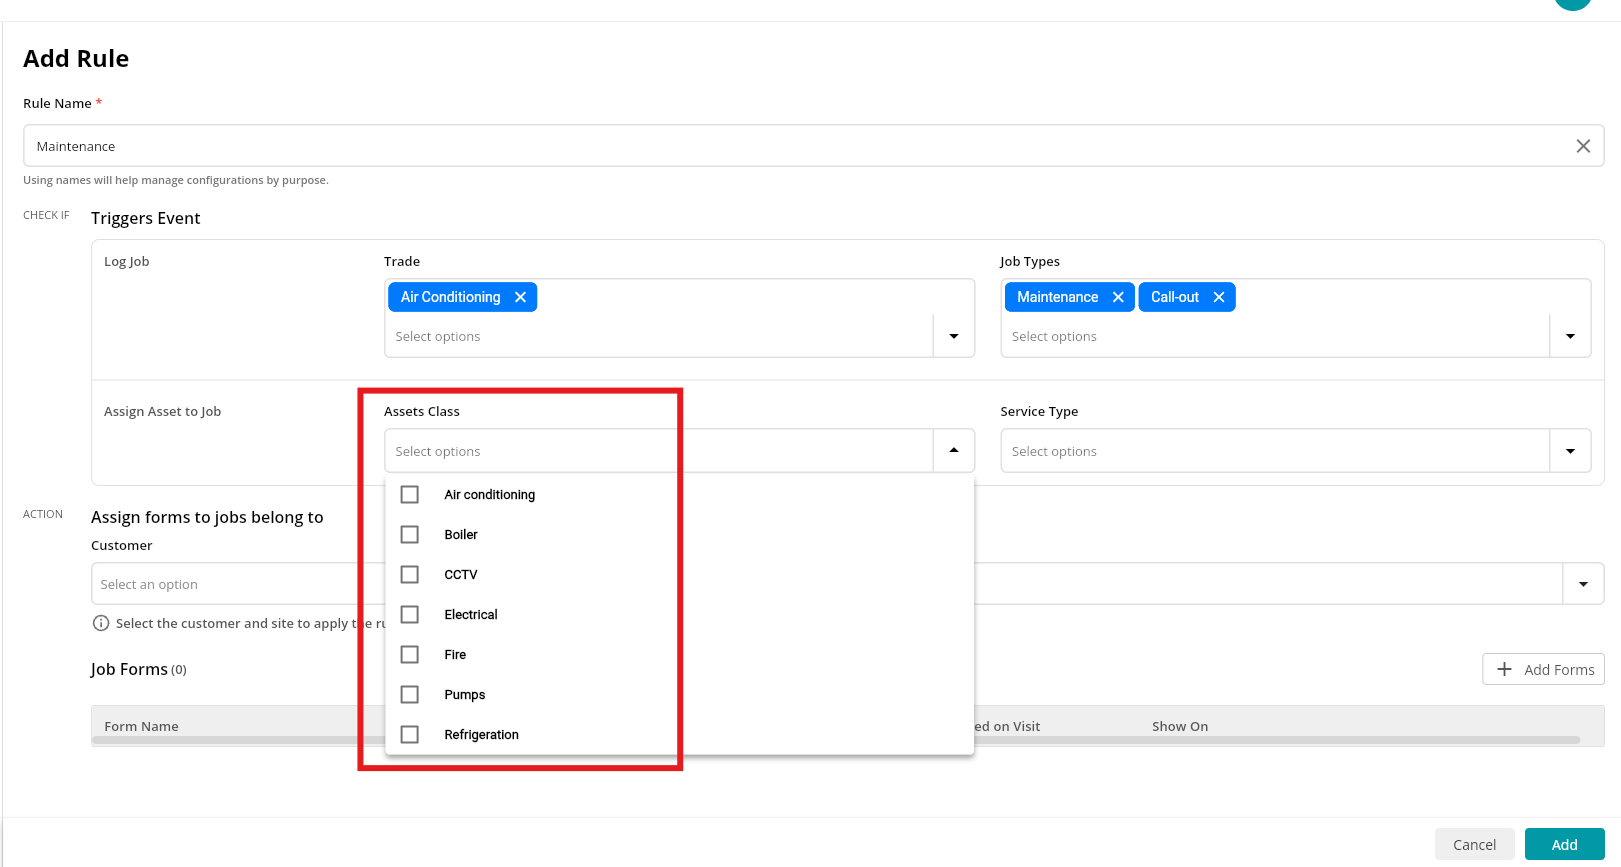
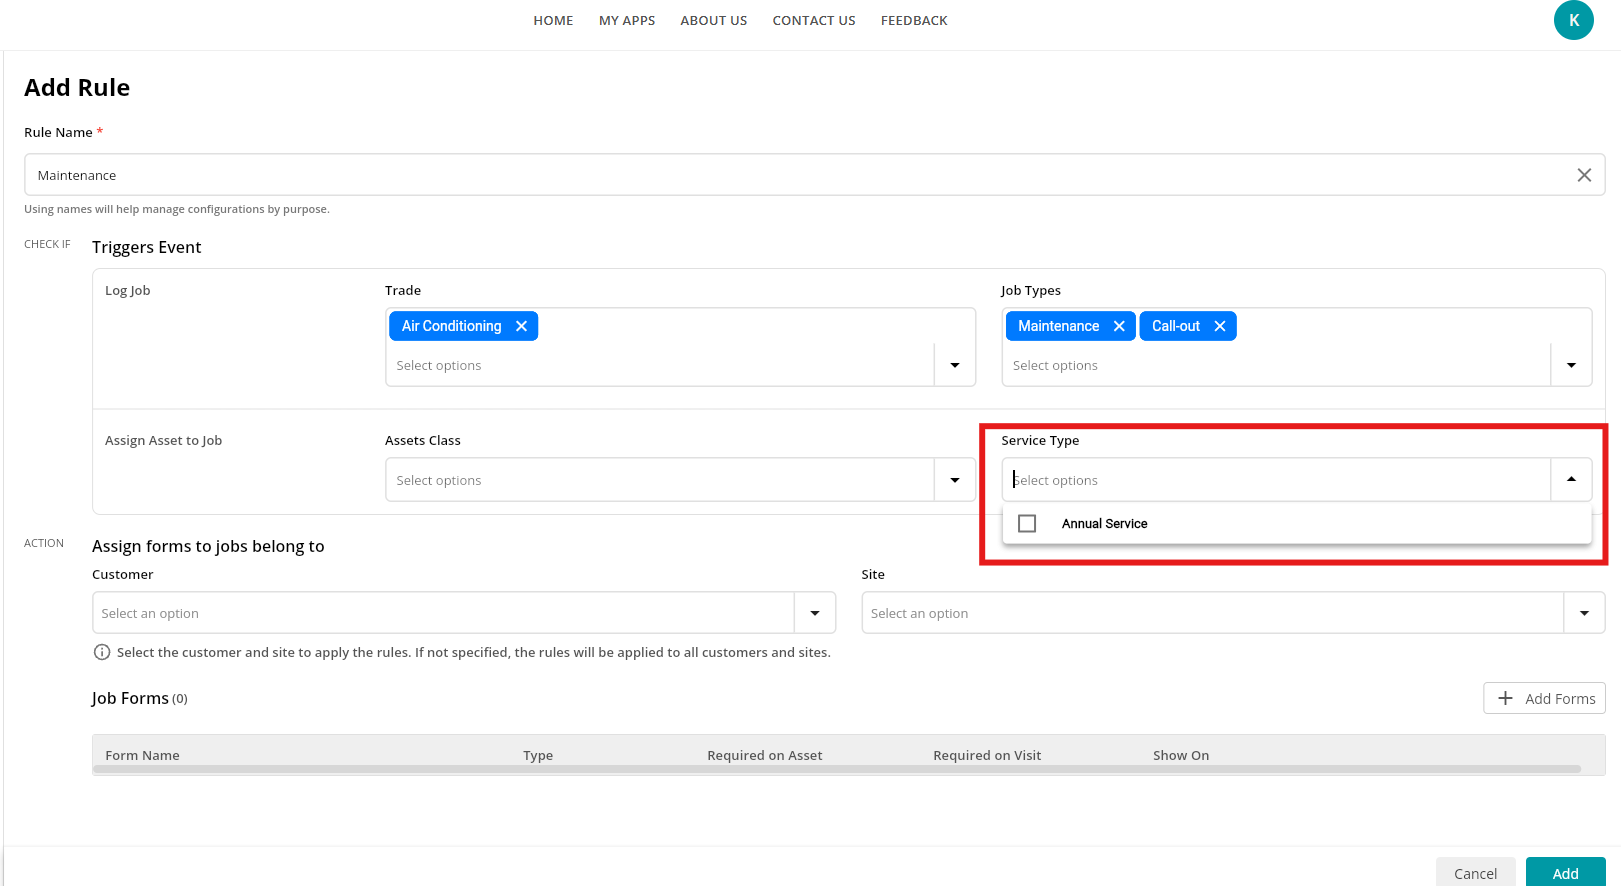
Finally, you can include Service Types too.
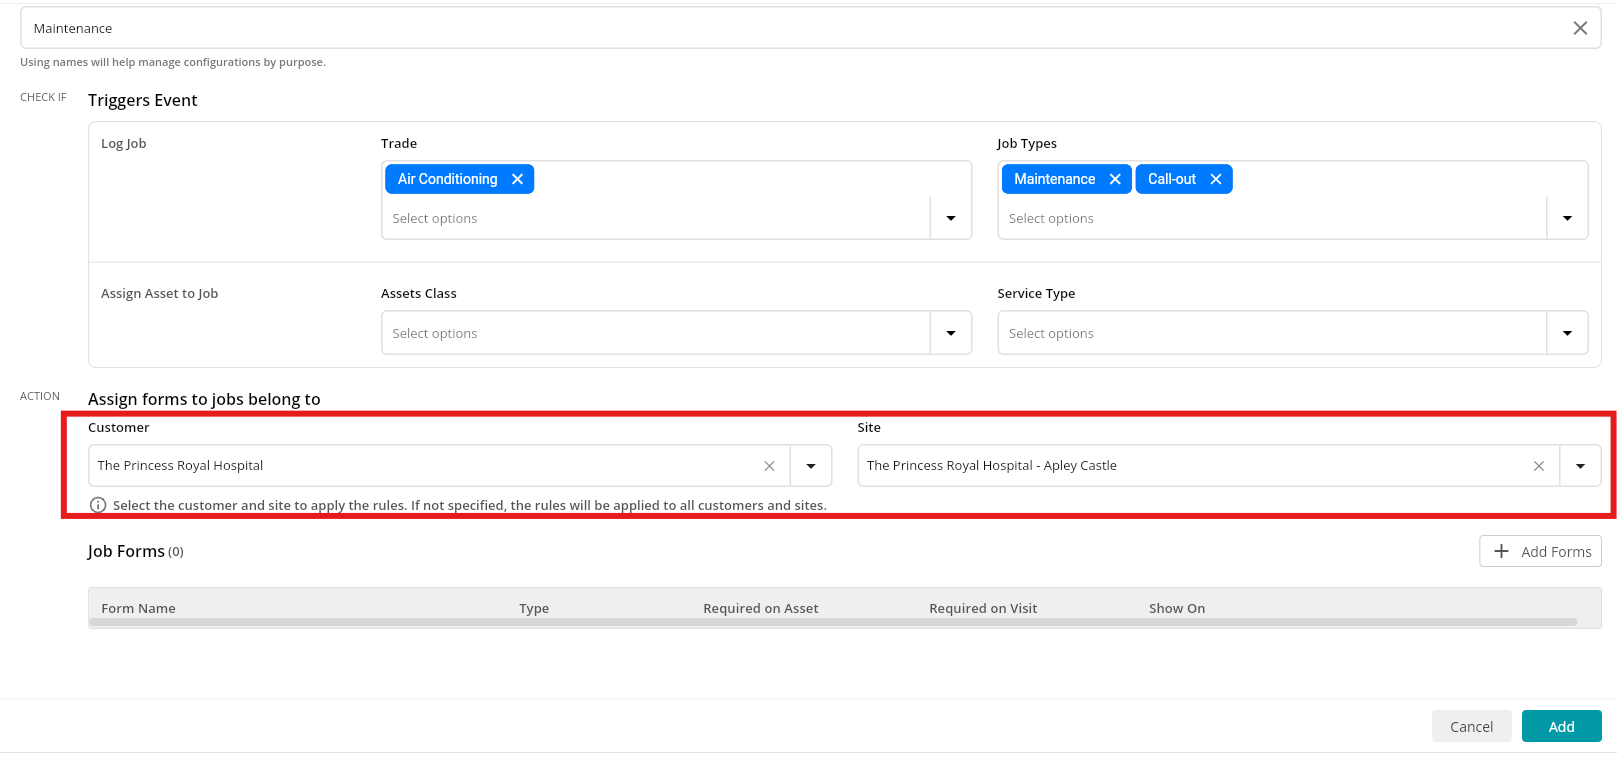
Next, you can specify the Customer & Site, if required. If this is left blank, the rule will apply to all customers and sites.
So, this one can be useful if you have specific forms for a specific site, for example
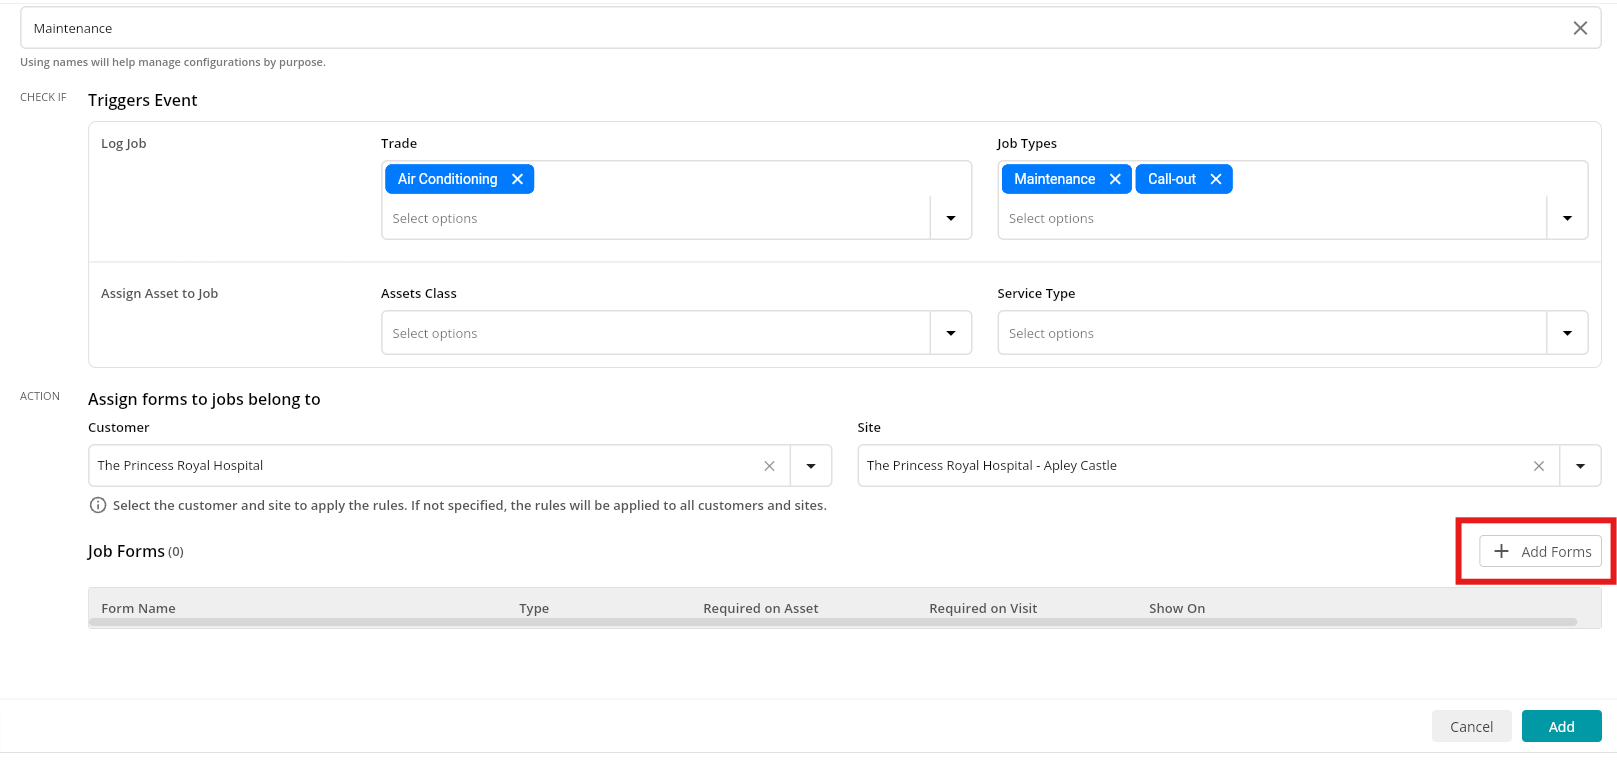
And finally, you can choose your Forms to include in this rule.
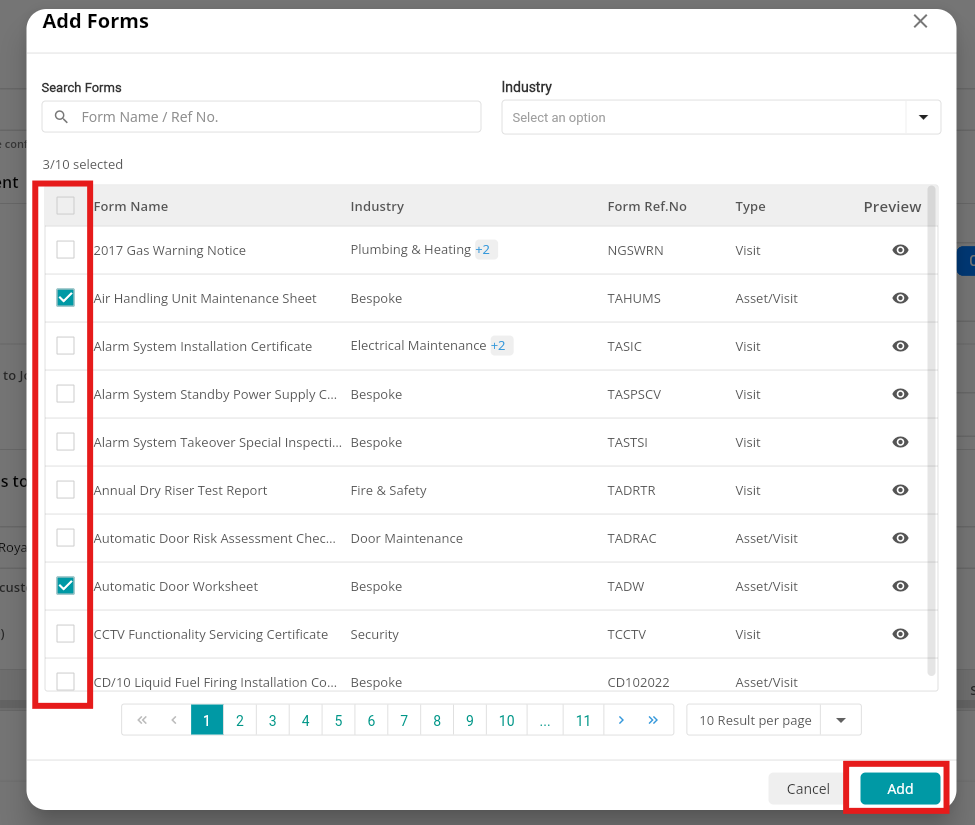
Click Add Forms
Tick any forms you wish to add, and then click Add in the bottom right
Once the forms have been added, you can choose when they show on the job, i.e. when the engineer Accepts a job, Arrives at a job, etc.
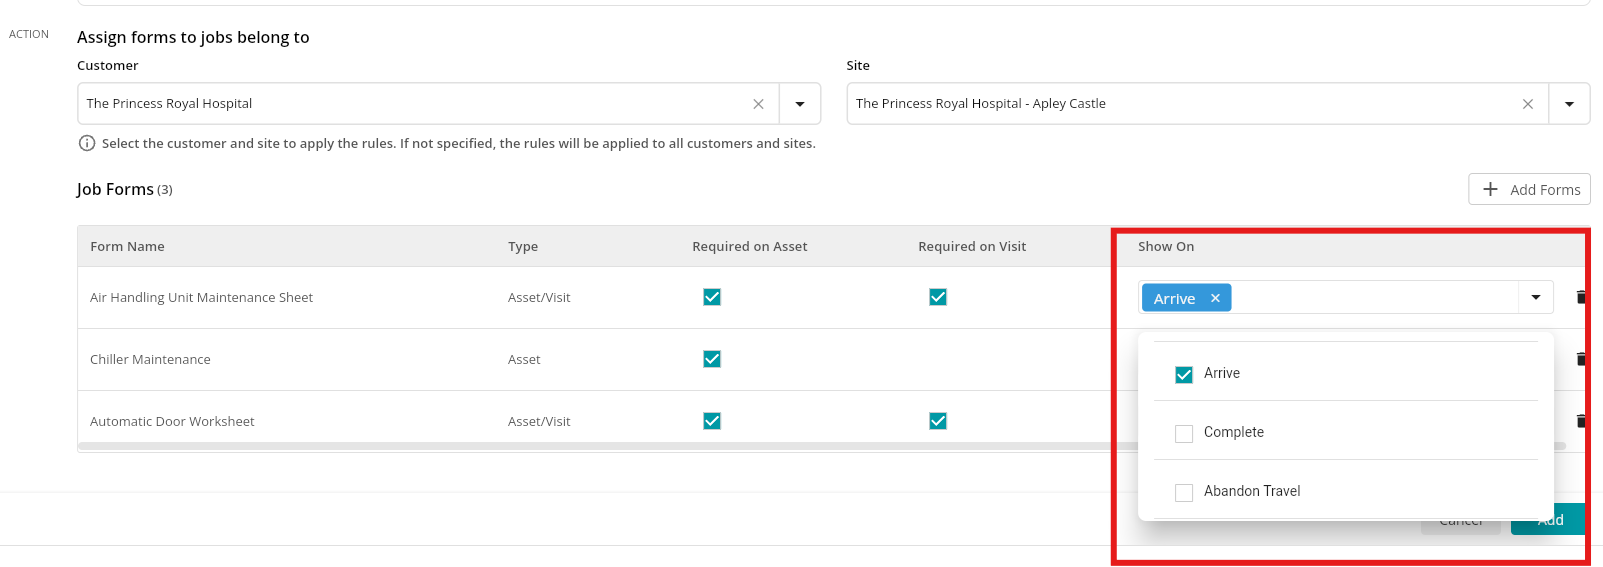
You can also decide whether to make them mandatory or not. By default, the Required on Asset/Visit will be ticked, however you can untick these if needed.

Click Add to finalise the Rule

NOTE:
- Keep in mind, you’ll need to enter at least one criteria to add the rule successfully.
- All the rules you set up must be met for the form to be added.
Manage Rules
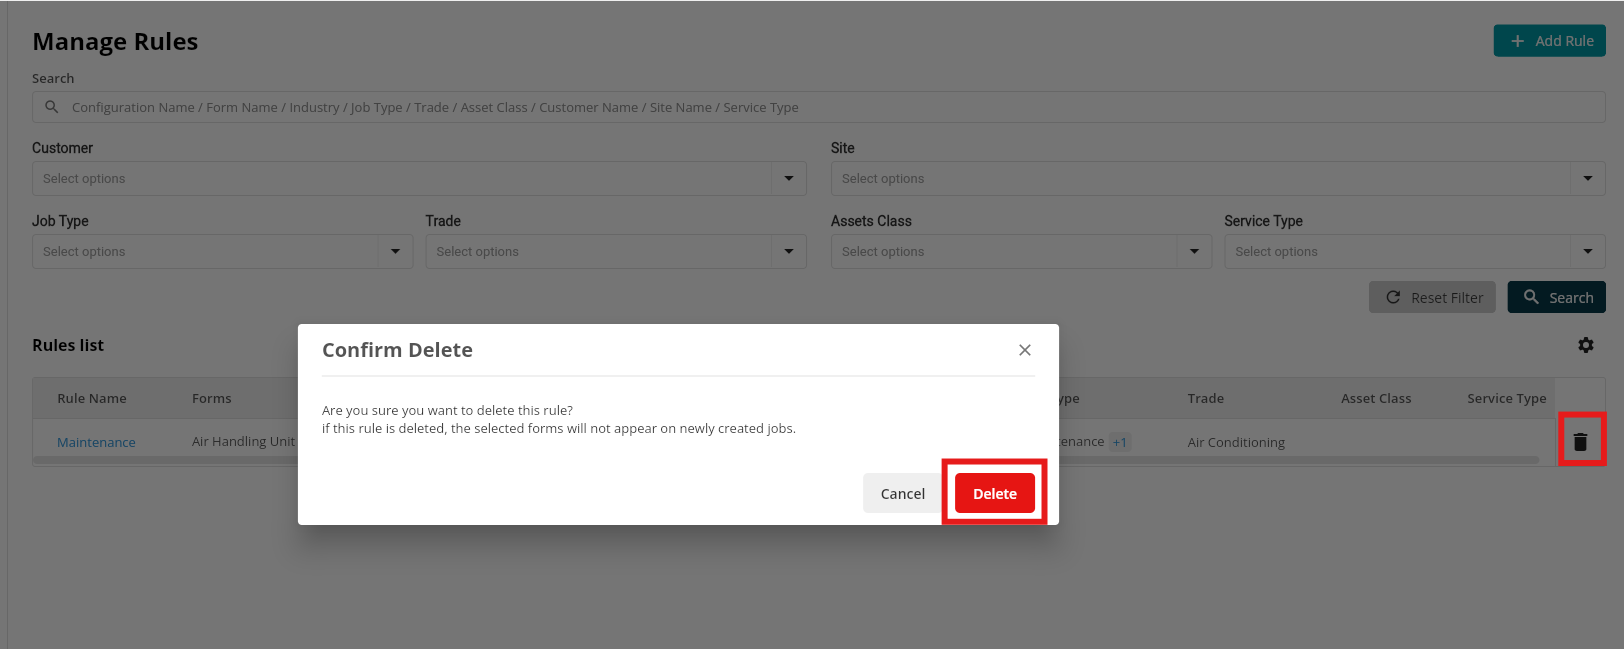
To search, edit or delete rules, you can head over to the Manage Rules tab
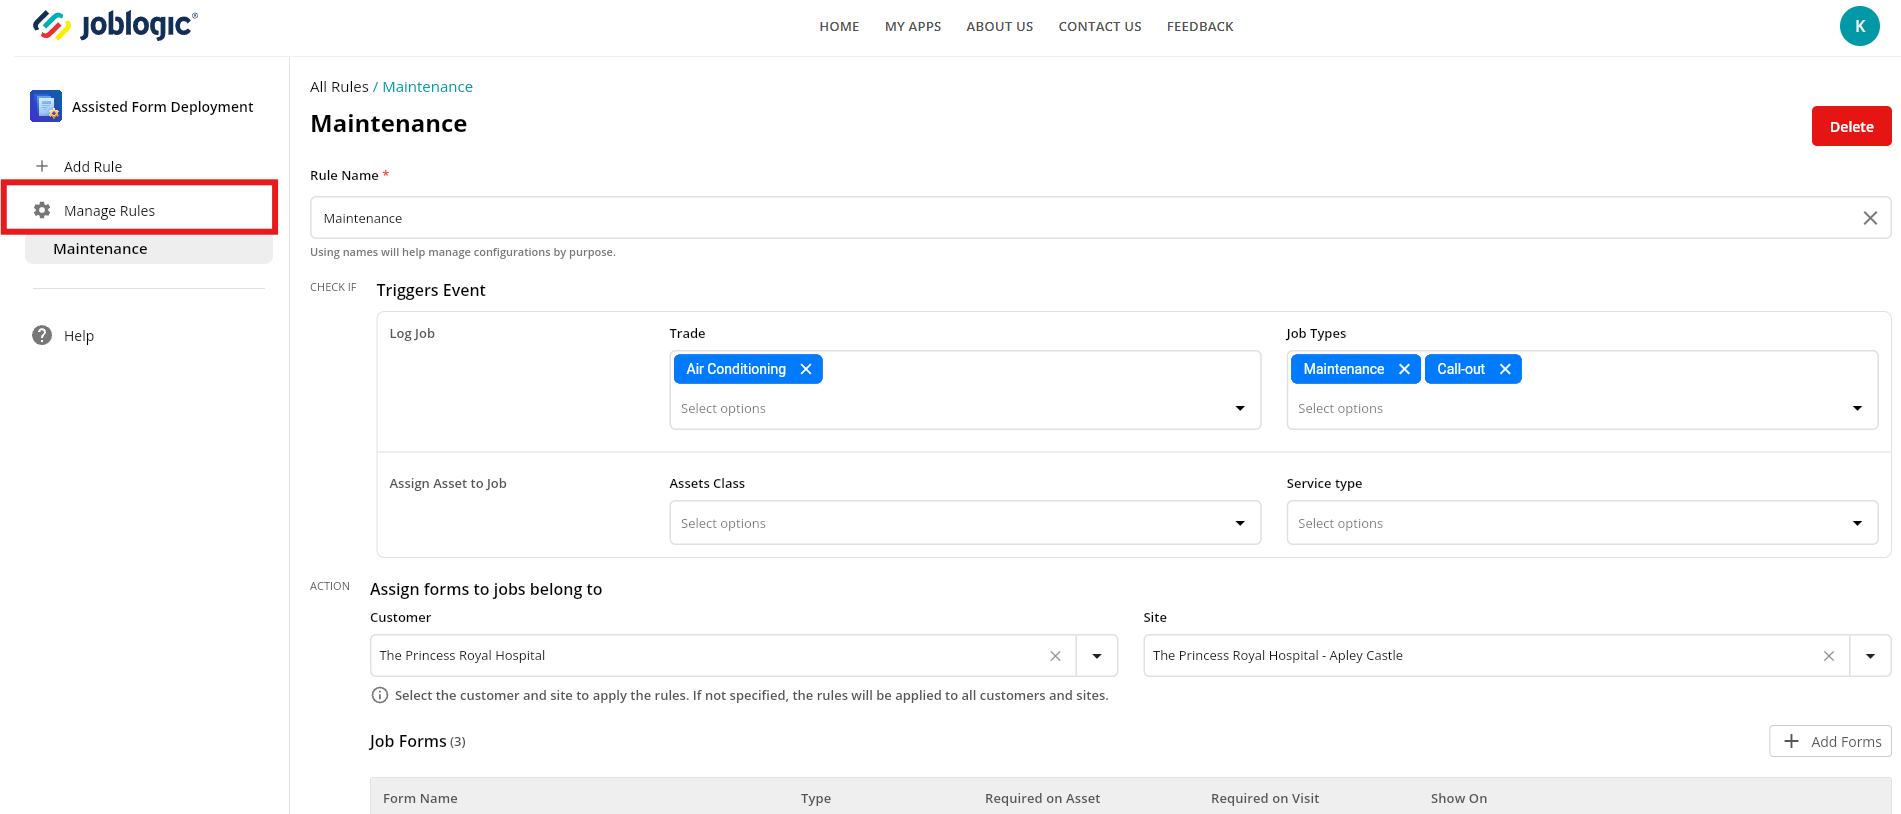
Click the Rule Name to edit the Rule
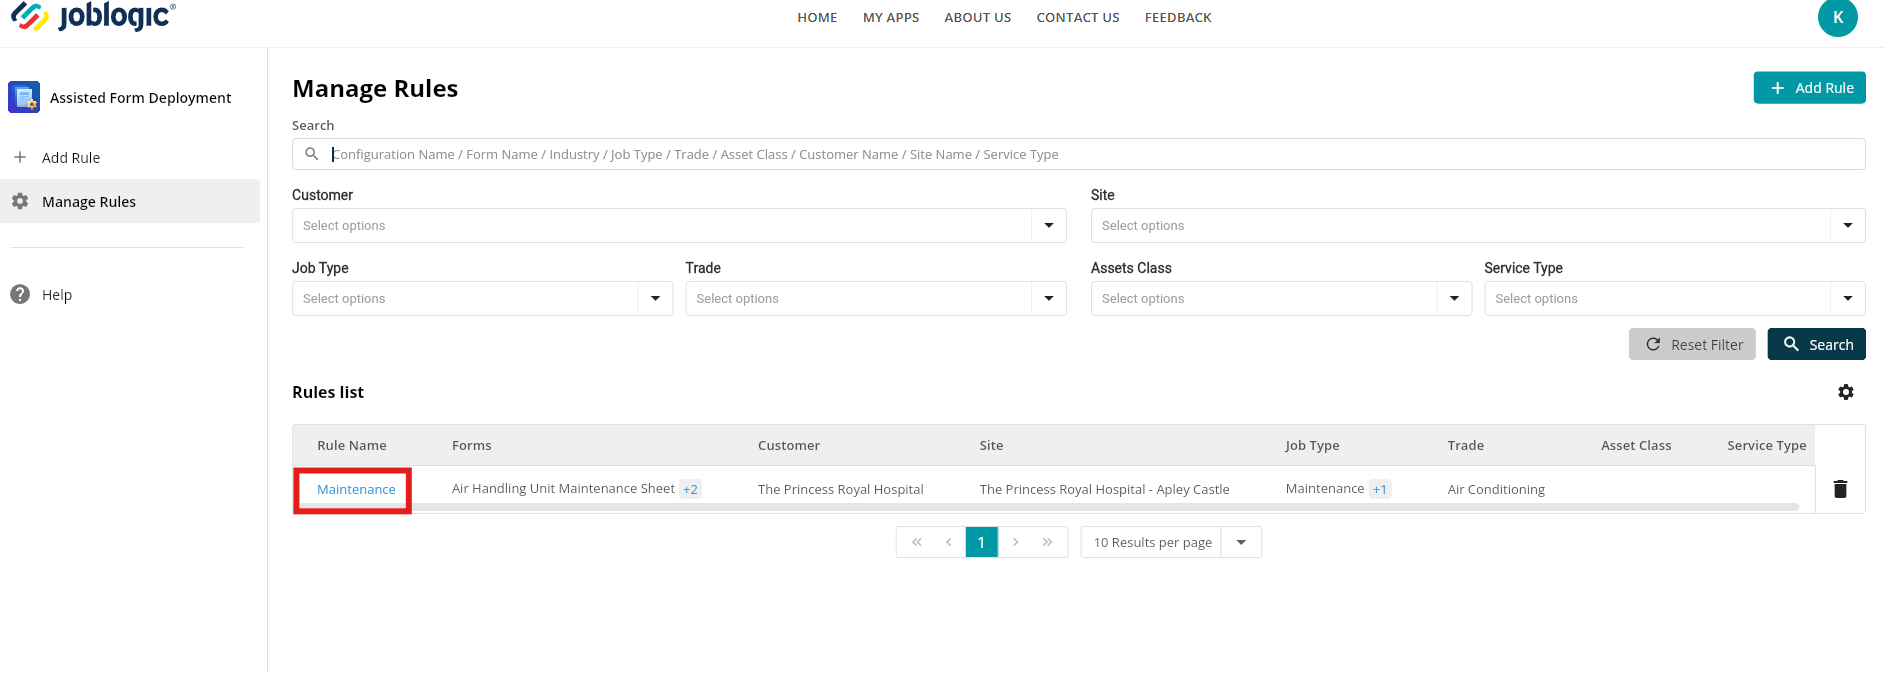
Click the bin icon on the right to remove a rule
Further Support
For further information or assistance with the above, contact our Support Team on 0800 326 5561 or email support@joblogic.com. Alternatively, our Customer Success Management team can be reached by emailing customersuccess@joblogic.com
Publishing Details
This document was written and produced by Joblogic’s Technical Writing team and was last updated on the date specified above. Be aware that the information provided may be subject to change following further updates on the matter becoming available. Additionally, details within the guide may vary depending on your Joblogic account’s user permissions.

