Introduction
The Attributes (Custom Fields) app allows you to define and manage custom fields for various entities such as equipment/assets, customers, sites, jobs, quotes, PPM contracts, projects, suppliers and parts.
By adding attributes, you can enhance the detail and customisation of your Joblogic system.
This guide will outline the steps for setting up custom fields in the system and assigning them to different entities. Whether on the web platform or mobile app, these tools streamline data entry and improve operational efficiency.
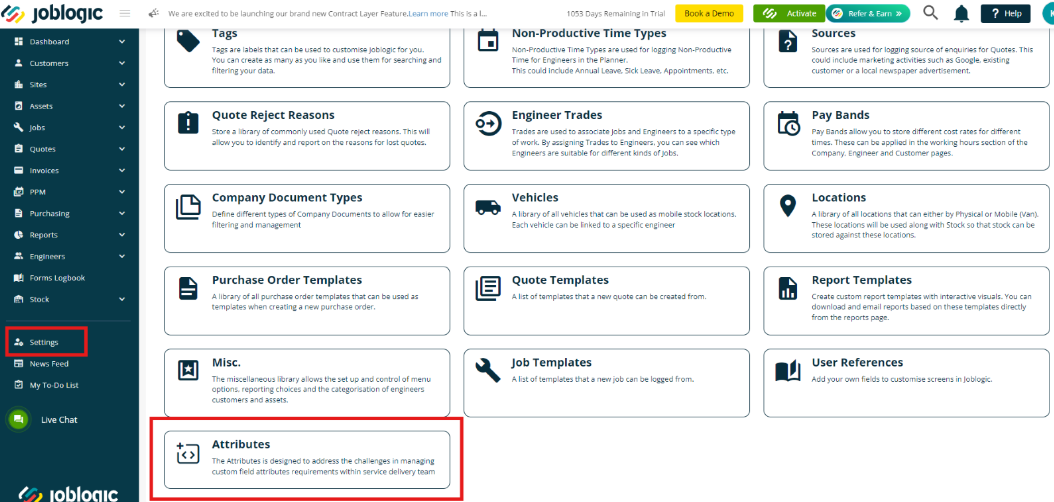
Setting up your Attributes
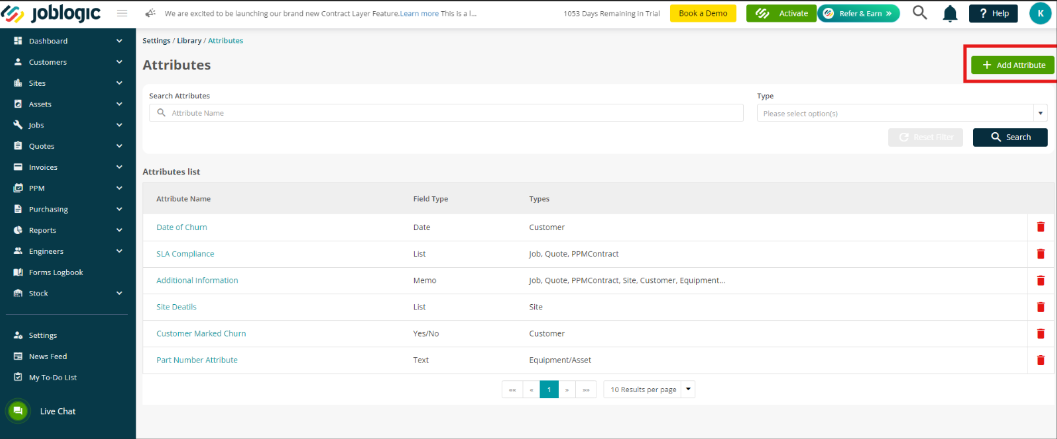
To set up your Attributes, click Settings > Library > Attributes
From here, click the Add Attribute button in the top right
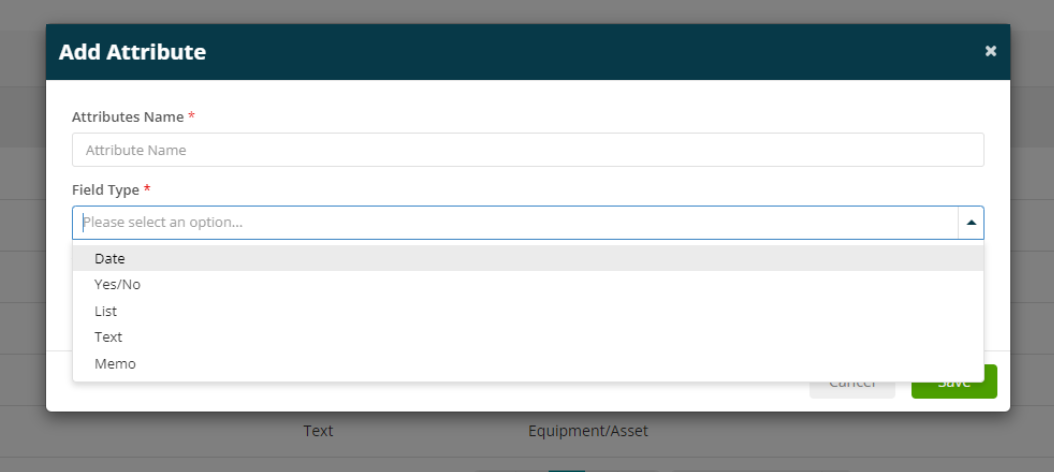
Next you can give your Attribute a name. You can then choose the field type from the dropdown.
- Date: A field that allows you to select a specific date from a date picker
- Yes/No: A simple field for Yes/No choices
- List: A dropdown field that presents your predefined options
- Text: A field for short, single-line inputs
- Memo: A larger, multi-line field for longer text entries
Finally, you can choose the Type (i.e. Customer, Quote, etc).
You can tick more than one type to assign the attribute to multiple entities.
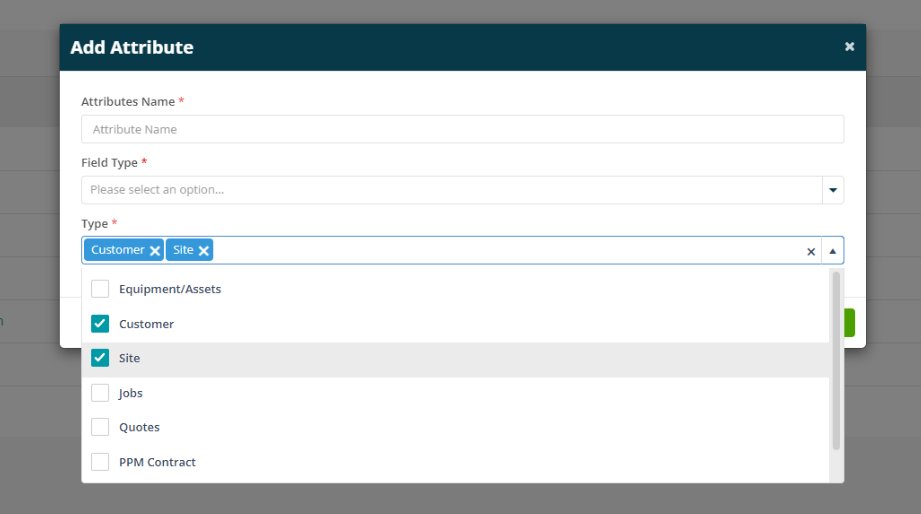
Click Save when you are happy with your selections.
Assigning Attributes
Attributes can be assigned to Equipment/Assets (including Hire), Customers, Sites, Jobs, Quotes, PPM Contracts, Project, Project Quote, Project Invoice, Supplier and Parts.
For this example, we’ll walk through assigning an attribute to a Job.
Firstly, click Jobs > All Jobs and then select the Job Number.
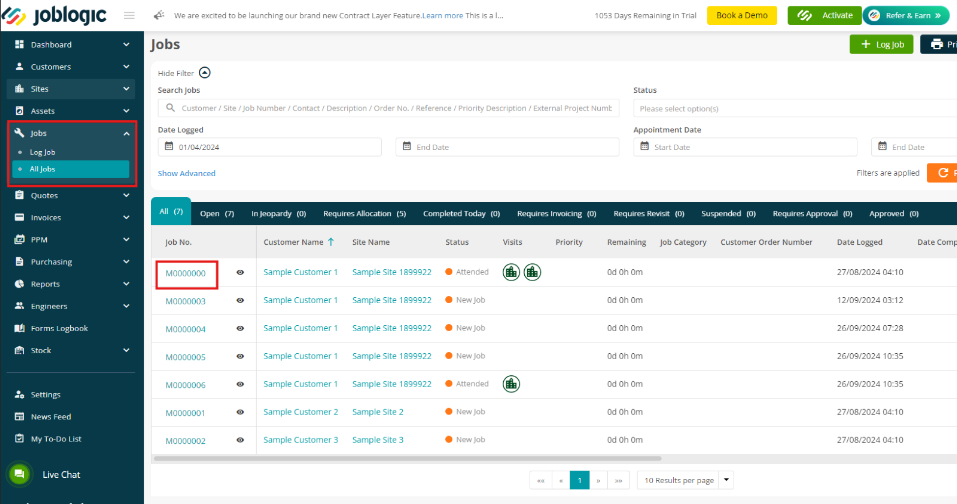
Next, click the Attributes tab at the top of the page
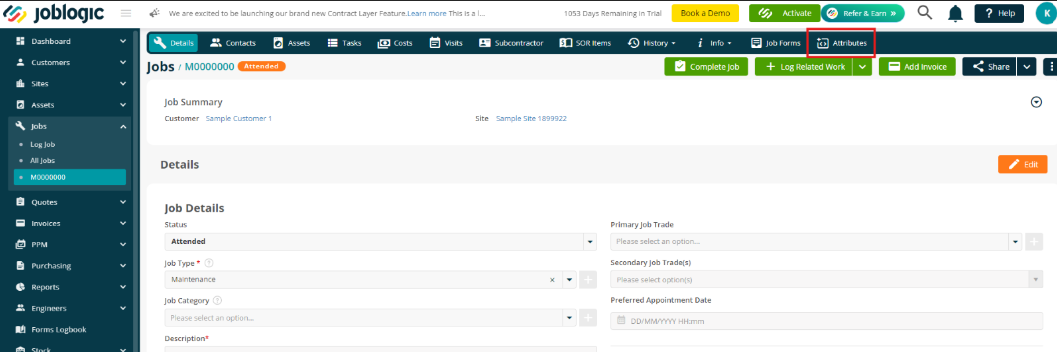
Click Assign Attribute
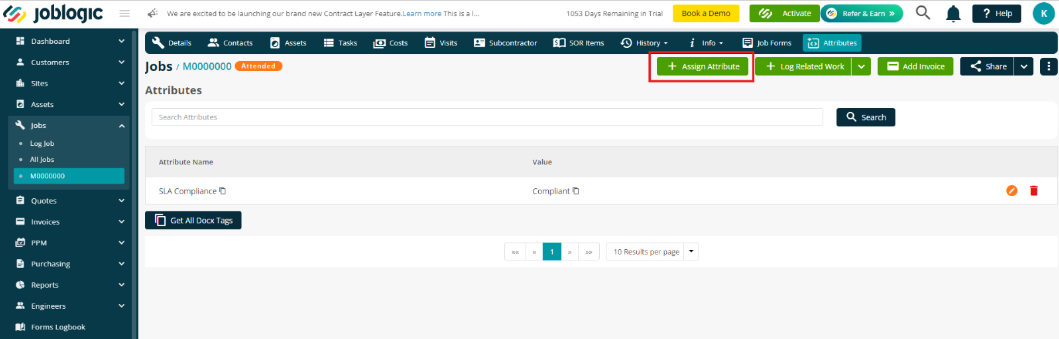
Choose your Attribute from the dropdown. Only attributes that were assigned to Jobs will be visible in this dropdown.
The field type will then be auto populated based on the type you entered in your setup.
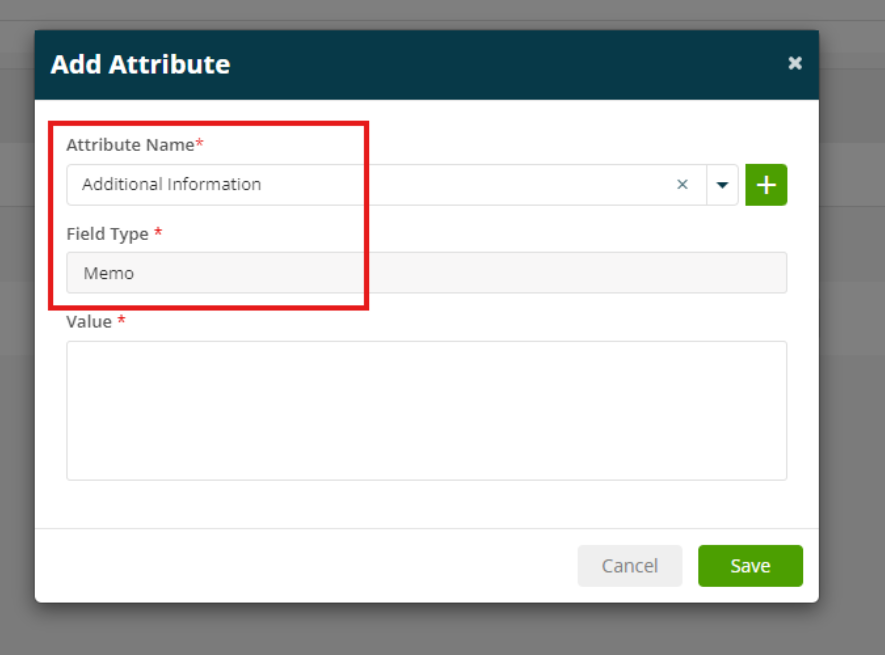
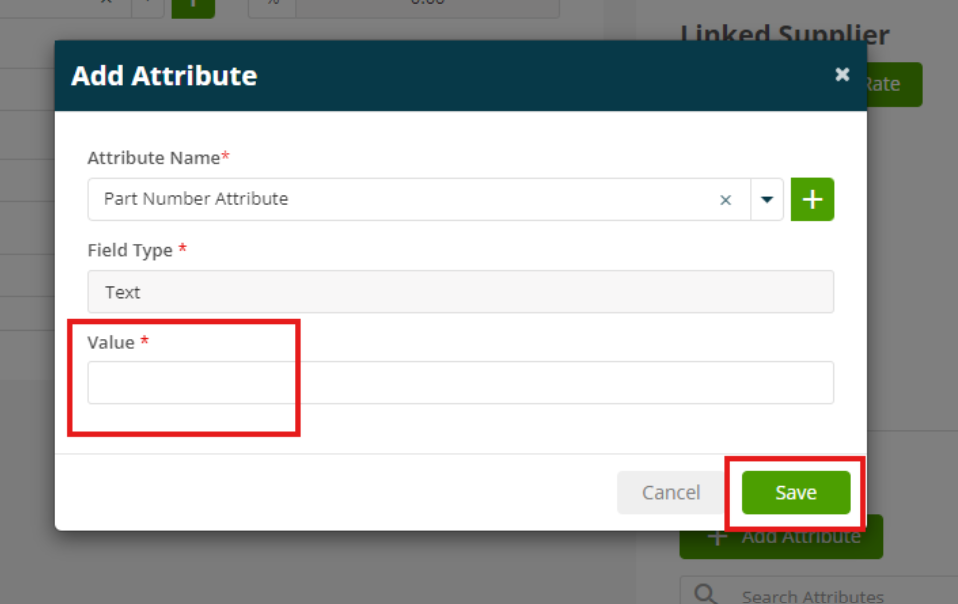
You’ll finally be able to enter your value for this field, against this job.
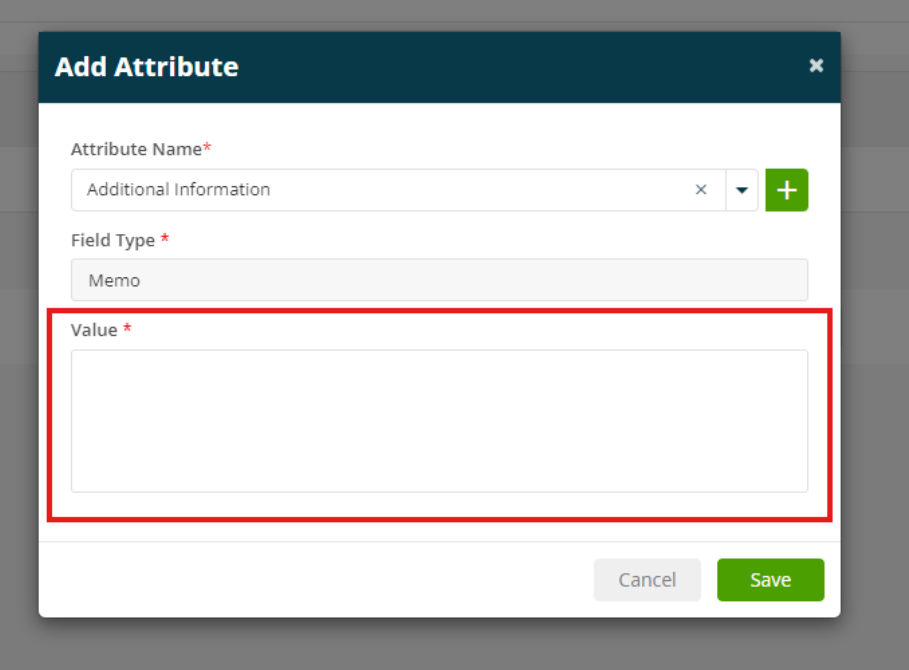
Click Save to finalise the attribute.
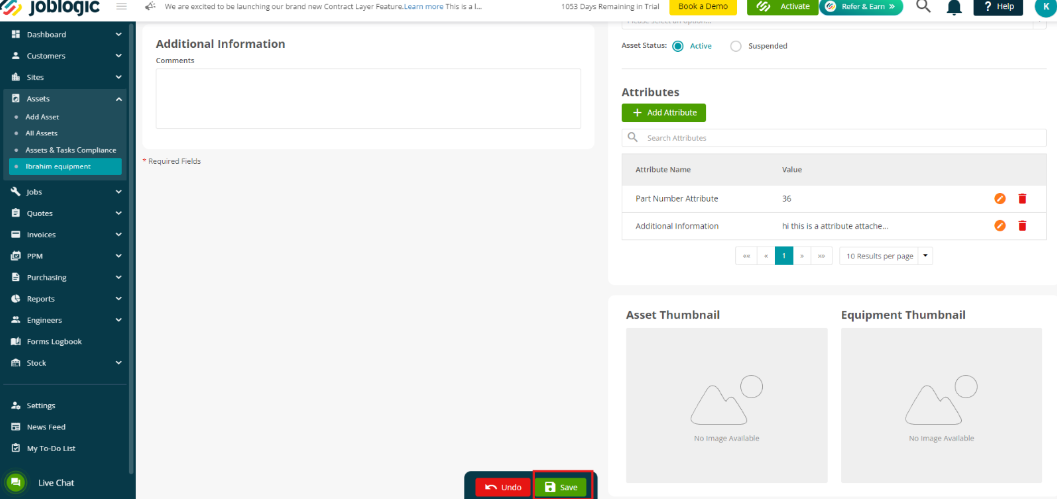
Assigning Attributes to Assets/Equipment & Parts
Assigning an attribute to Assets/Equipment, Hire Assets and Parts is slightly different. While Customer, Site, Job, Quote, PPM Contracts and Suppliers have an extra tab for Attributes, the Asset, Equipment and Parts screens include the attributes on the main details' pages.
Assets
- Assets > All Assets > choose your asset > Edit
Equipment
- Settings > Library > Equipment > choose your Equipment > Edit
Parts
- Settings > Library > Parts > choose your Part > Edit
Hire Assets
- Hire Contracts > Create Hire Asset
Click Add Attribute
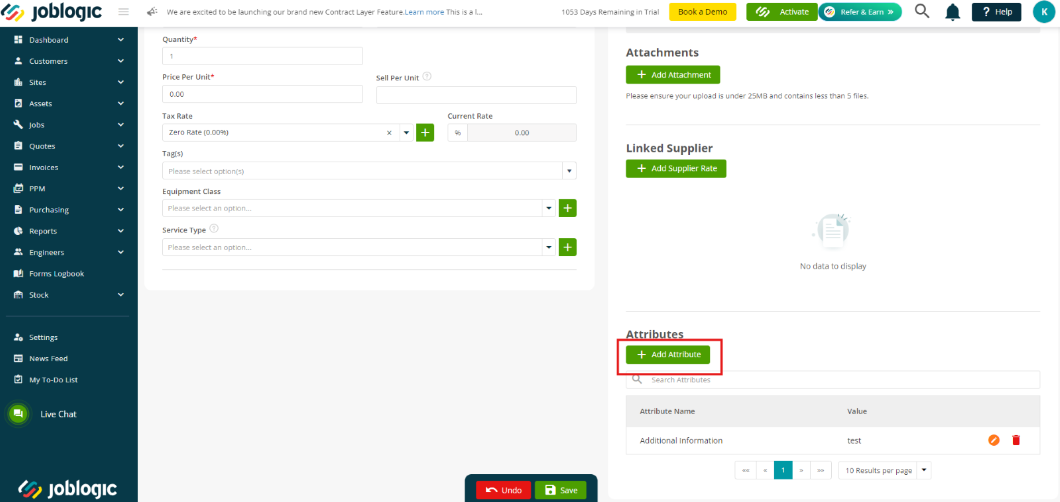
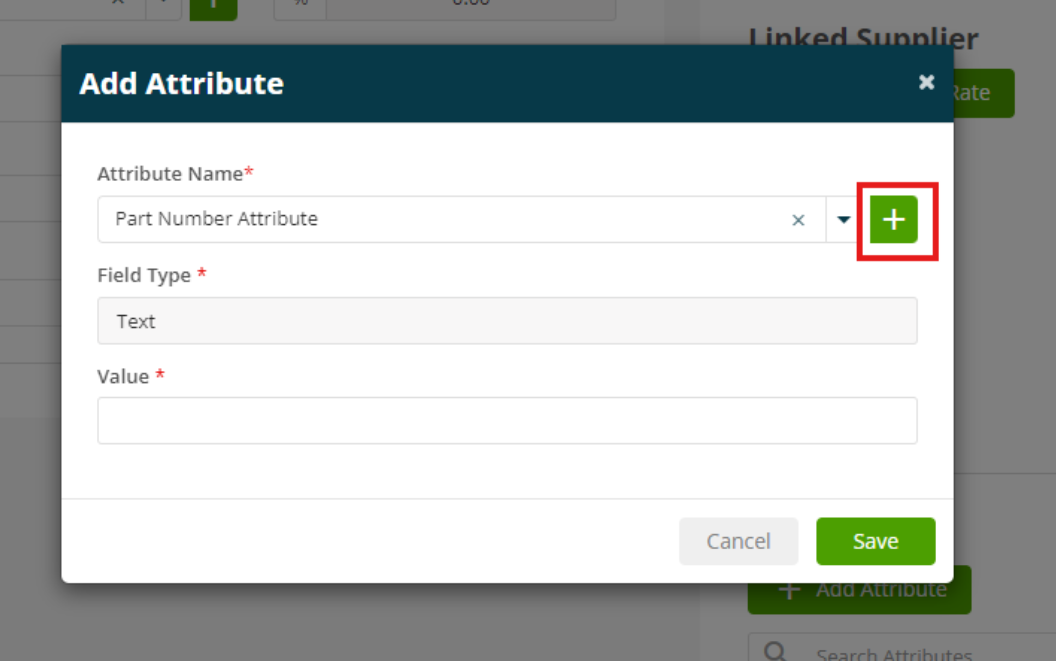
Choose your Attribute Name from the dropdown or click the green + button to add a new attribute to your Library.
Only attributes that were assigned to the relevant entity will be visible in this dropdown.
The field type will then be auto populated based on the type you entered in your setup.
Enter your value for this field and click Save.
Finally, remember to save it to finalise your changes.
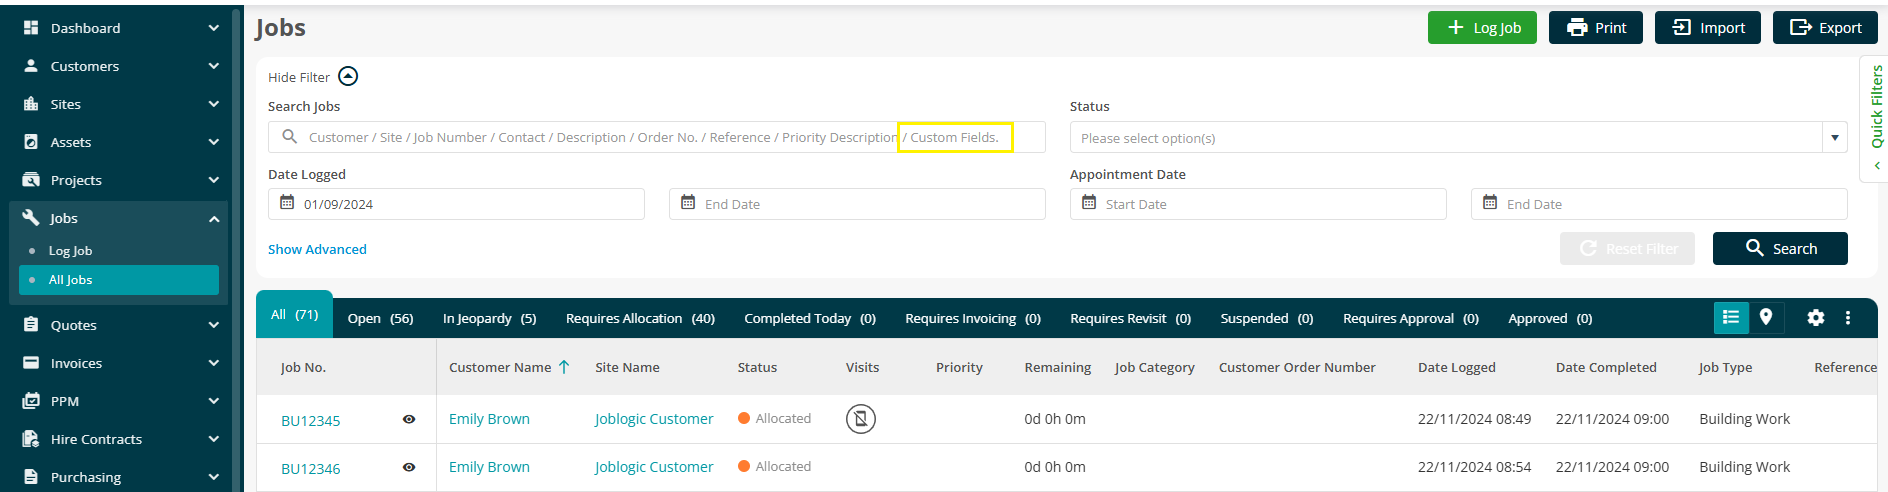
Searching Custom Fields
Searching custom fields is not limited to just descriptions. You can also search by free typing/the text of custom fields for specific attribute types.
Where Can You Search for Custom Field Values?
You can search text on the following list pages:
- Customers
- Sites
- Assets
- Equipment
- Jobs
- Quotes
- PPM Contracts
How to Search by Attribute Text:
Navigate to any of the supported list pages (e.g., Jobs > All Jobs). Use the search bar to enter a keyword related to the custom field value. The system will return results based on Text entered.
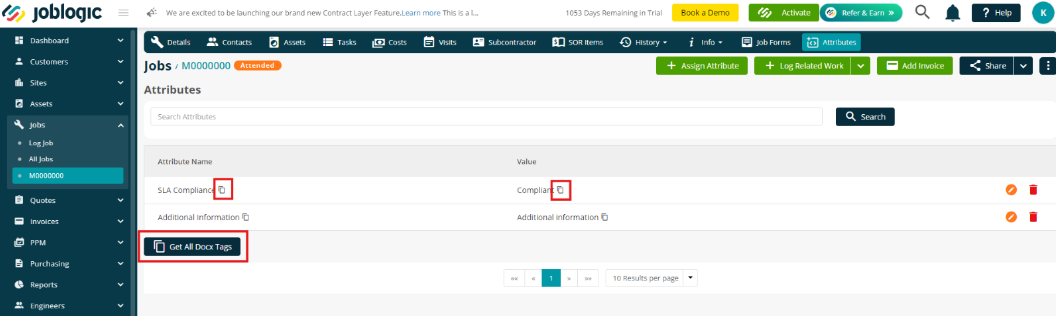
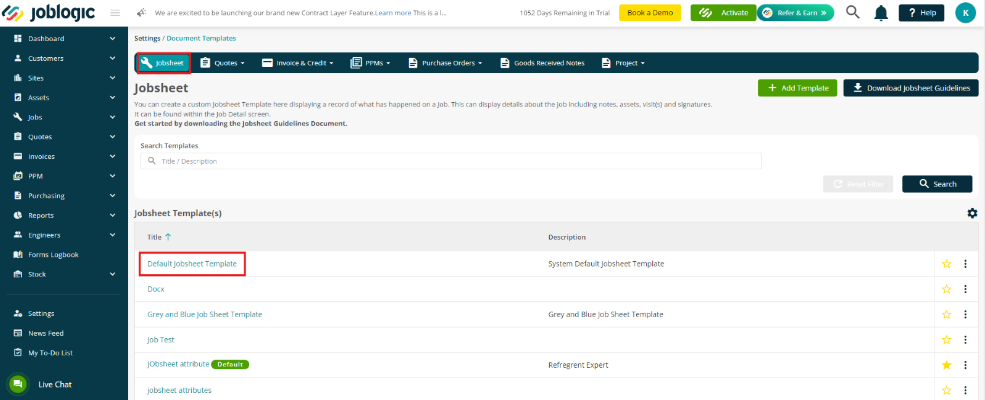
Document Template tags
When you’ve added attributes to Jobs, Quotes, PPM Contracts or Suppliers, you’ll see a ‘Get all Docx Tags’ button and copy icons next to each of your tags. Click this to copy the information.
If you want to add these Attribute details to the relevant document, i.e. Job sheet, Quote, PPM template or Supplier, you can navigate to Settings > Document Templates.
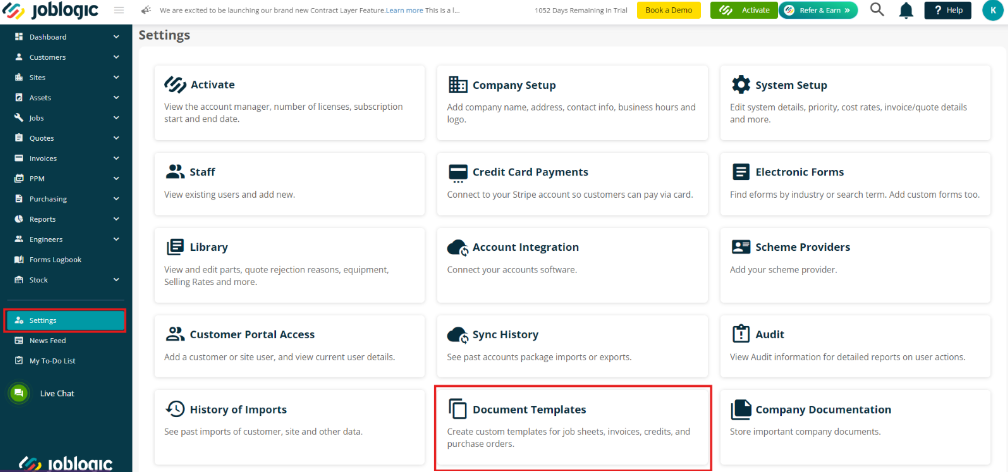
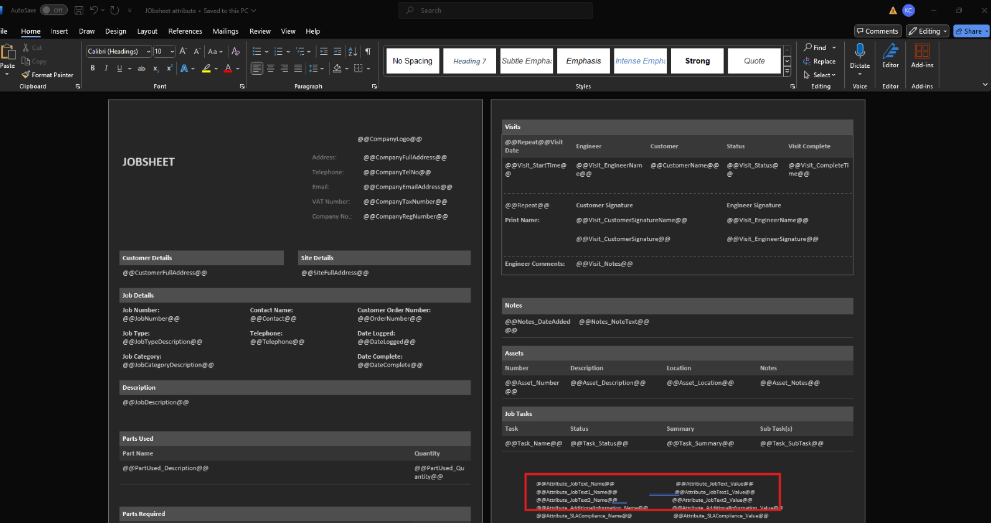
Next, find your template and click the Title to download it.
Once you have opened the file, you can start making changes, including pasting the tags you have just copied.
For more information on setting up your document templates, click here.
Further Support
For further information or assistance with the above, contact our Support Team on 0800 326 5561 or email support@joblogic.com. Alternatively, our Customer Success Management team can be reached by emailing customersuccess@joblogic.com
Publishing Details
This document was written and produced by Joblogic’s Technical Writing team and was last updated on the date specified above. Be aware that the information provided may be subject to change following further updates on the matter becoming available. Additionally, details within the guide may vary depending on your Joblogic account’s user permissions.