Introduction
As an AXA member, you can now view, accept/decline and complete jobs on the mobile app! This will reduce your SLA times and allow engineers to access jobs on the go for quicker turnarounds and more efficient workdays.
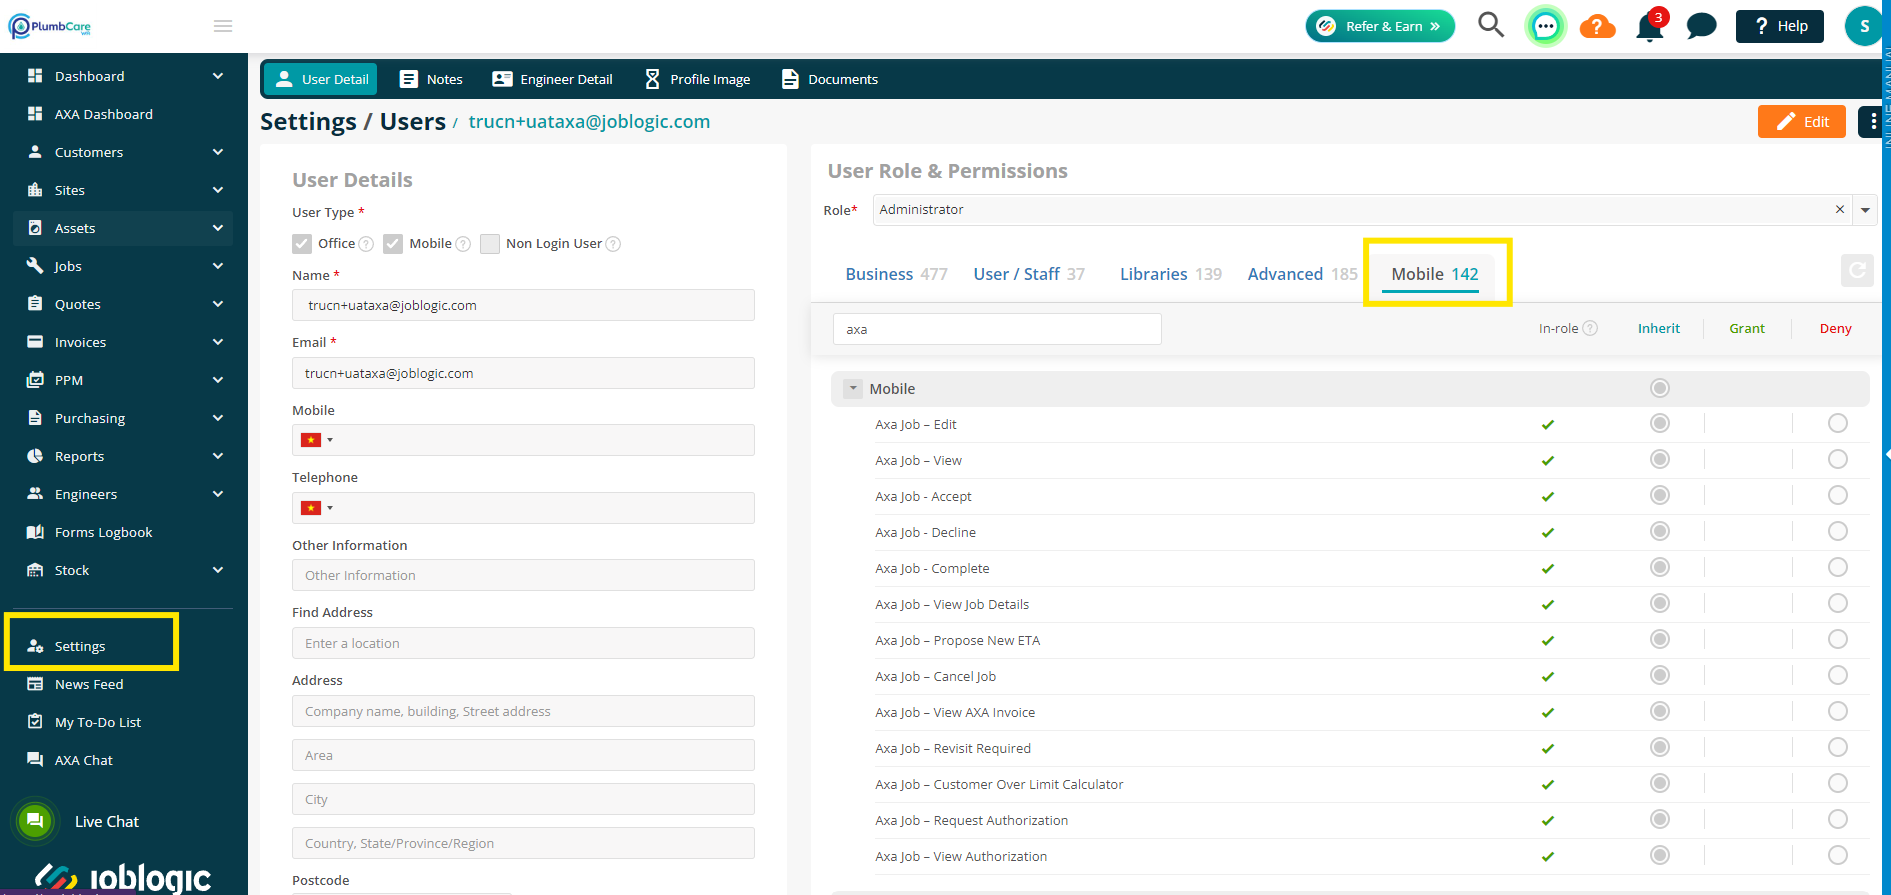
Permissions
There are a few permissions that can be set in the back office to grant/restrict access as needed.
Navigate to Settings > Staff > click staff name > Mobile Tab. Search for AXA to filter the results.
You’ll have the option to amend permissions for various areas of the AXA module. See below for full details.
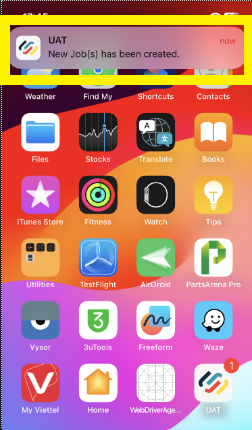
Notifications for New Jobs
You’ll receive a notification when a job has been sent from AXA.
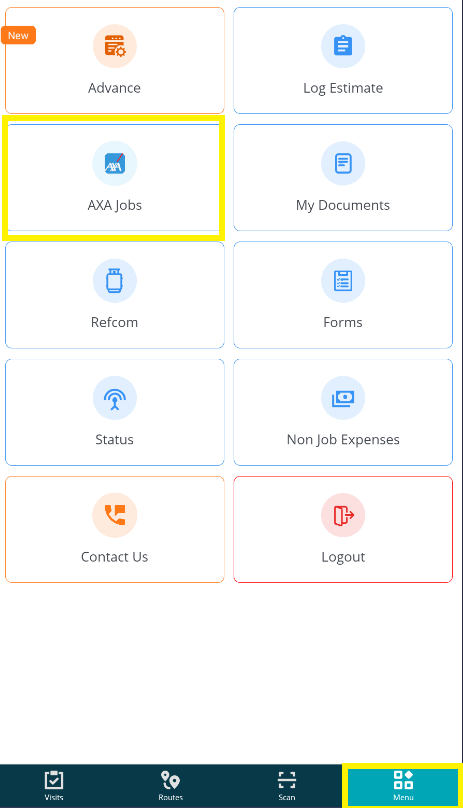
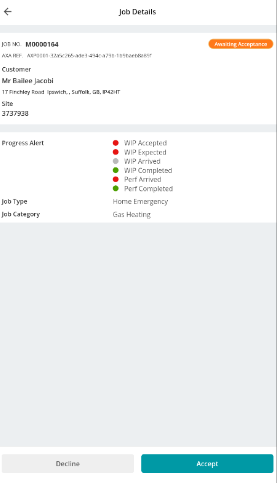
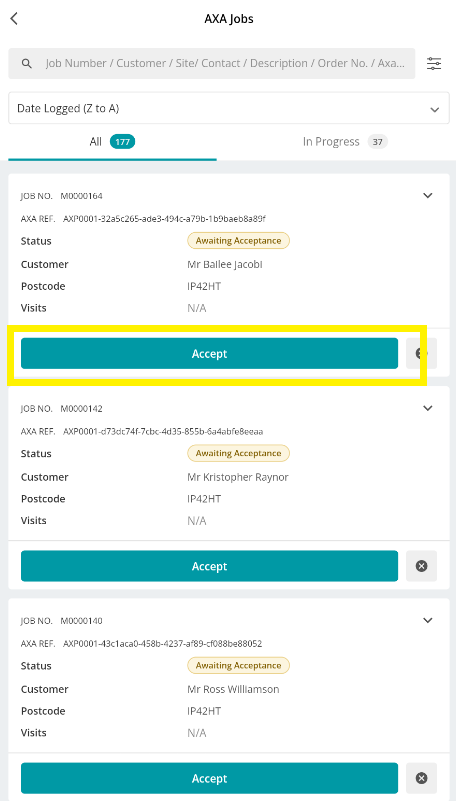
AXA Jobs List and Job Details
A new icon will be available for your AXA Jobs within the Menu tab of the app
Click this to view your AXA jobs list, including status and address details
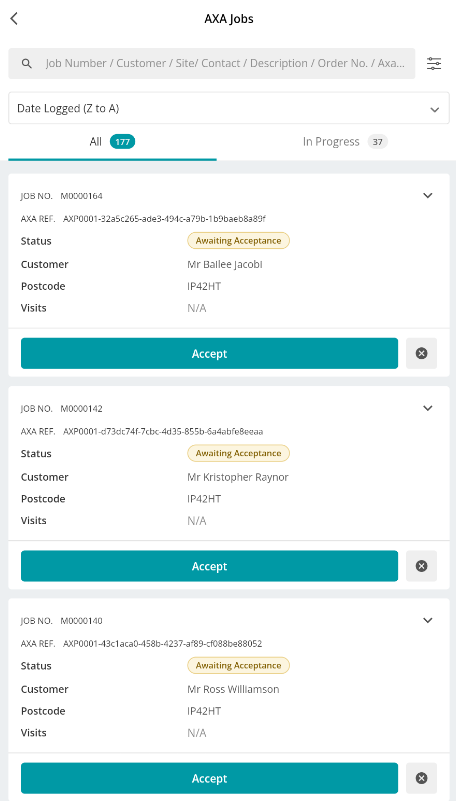
Click on a job card to view further details
AXA Job process
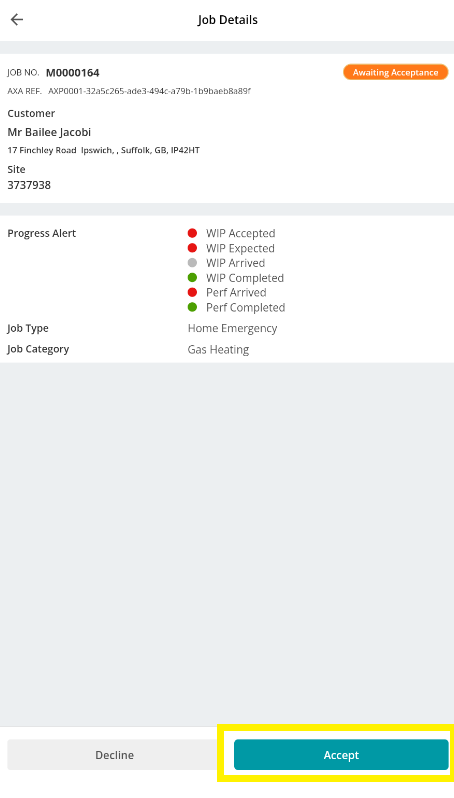
Accept
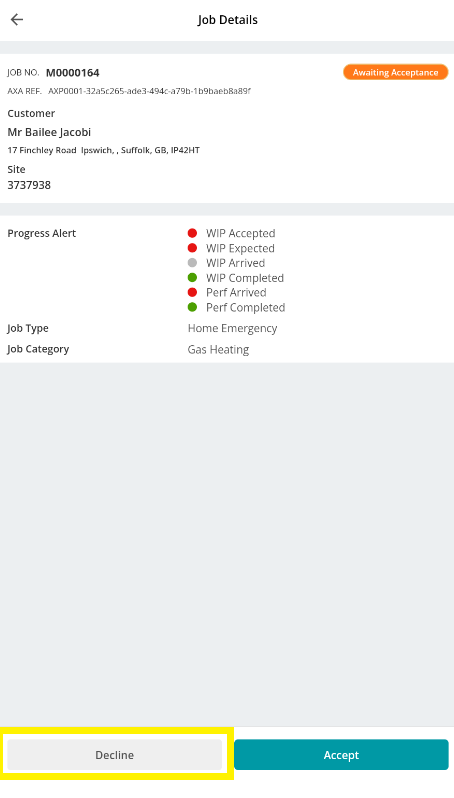
To accept a job, click Accept under the job details
Alternatively, if you click into job, you can Accept from here too
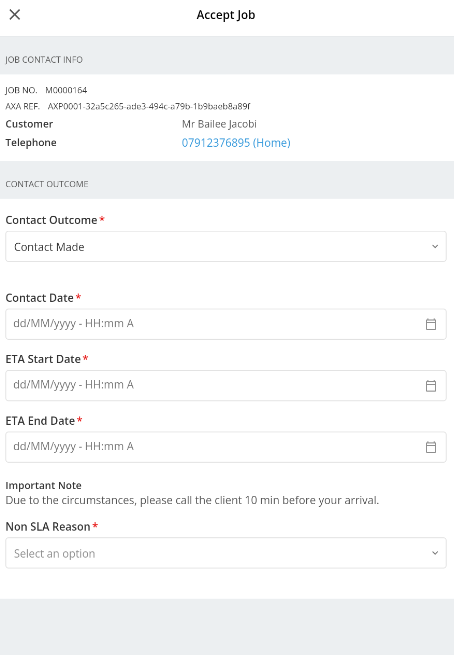
You’ll then need to fill in the Contact Outcome, Contact Date and if necessary, a Contact Note.
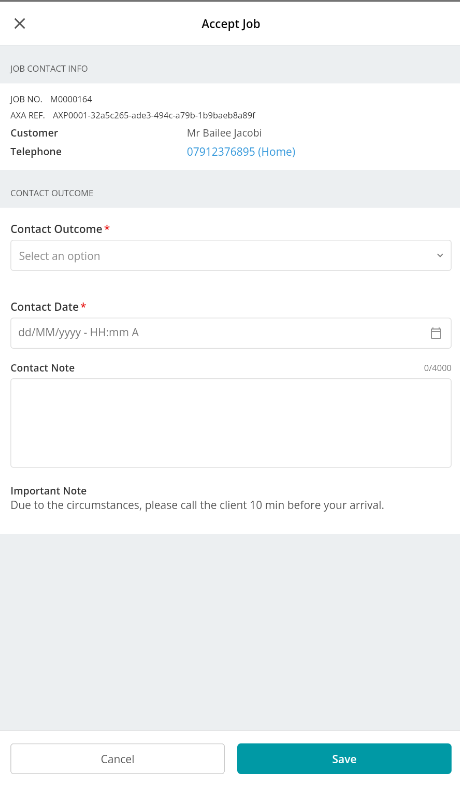
If you choose ‘Contact Made’ under Contract Outcome, a couple more fields will appear: ETA Start Date and ETA End Date.
Job Allocation
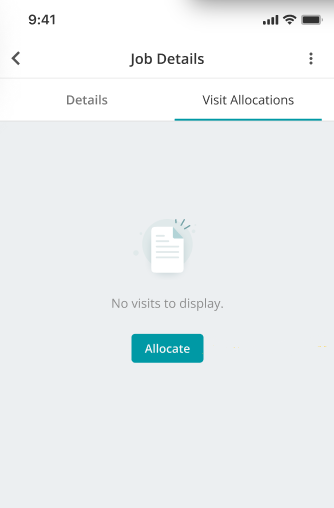
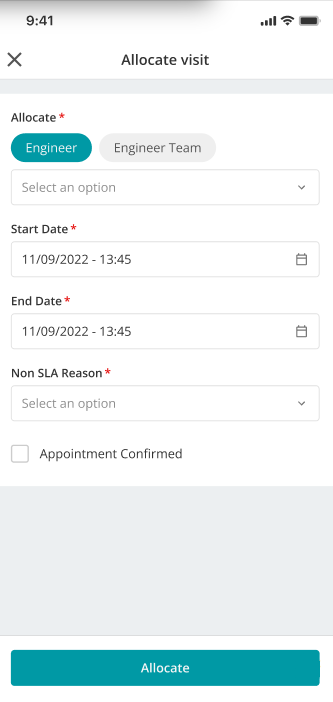
To allocate jobs or manage your allocations navigate to the Job Details page of your In Progress AXA job, and then click the Visit Allocations tab. Click Allocate to be transferred to a new screen.
Here you can assign an engineer, and update start and end dates, if needed.
Click Allocate when you have entered all relevant details.
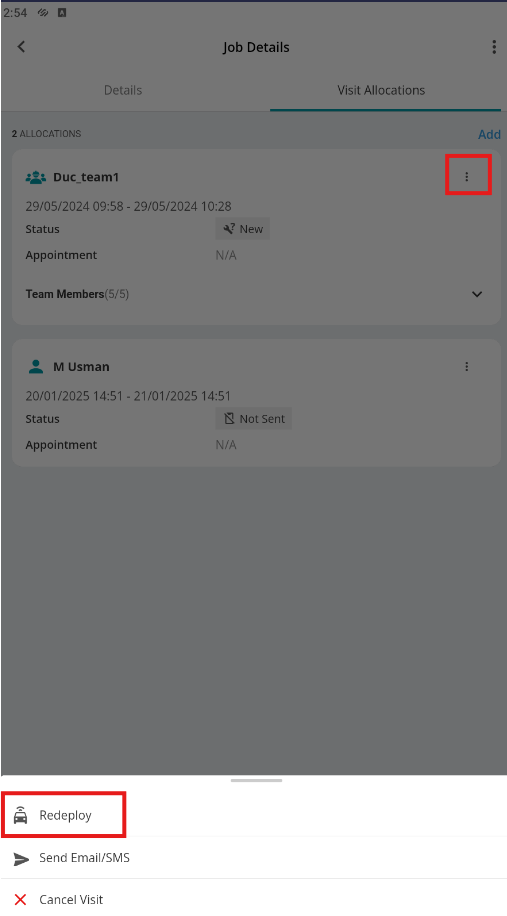
To Deploy the visit or to Cancel the visit, click the three dots in the top right of the allocated visit.
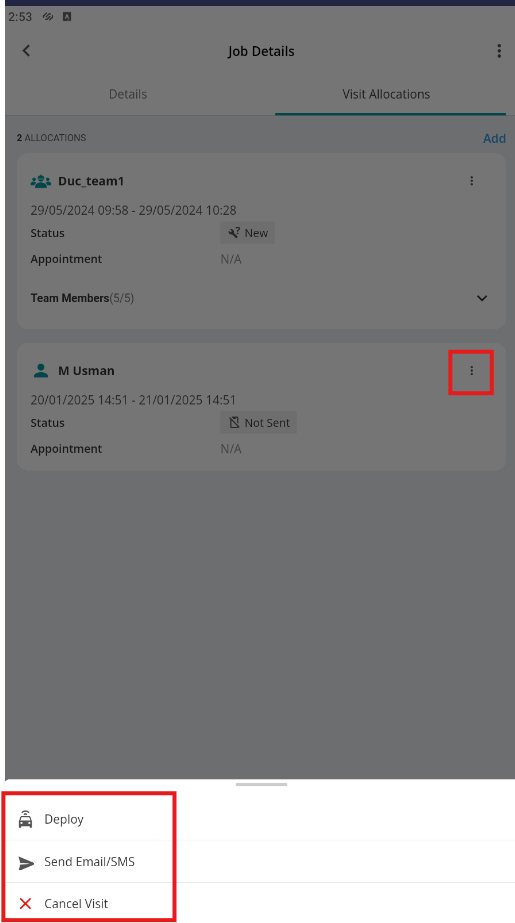
You can also Redeploy by clicking the three dots in the top right of the visit and choosing Redeploy.
Decline
To Decline the job, click the X box next to the Accept button
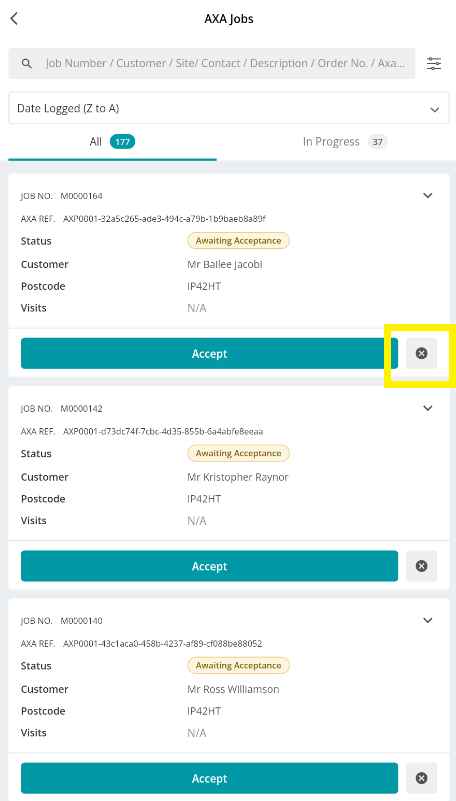
Alternatively, if you click into job, you can Decline from here too
You’ll be asked to provide a Reason and then click Decline in the bottom right
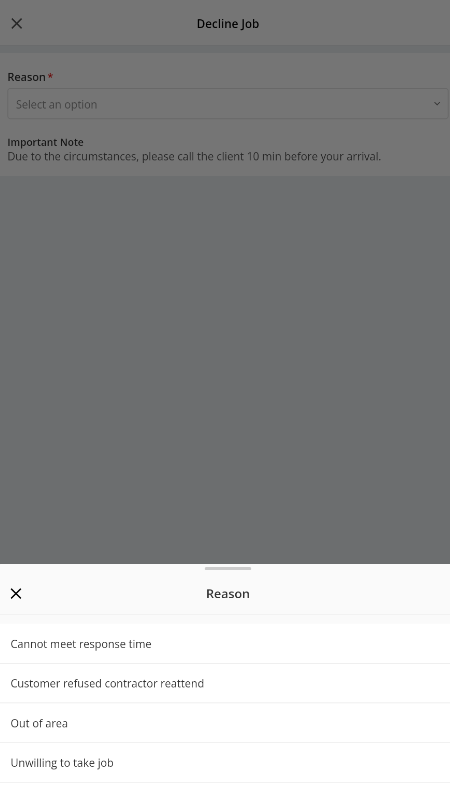
If you choose ‘’Cannot meet response time’’, you’ll have an option to choose an Alternative Time Slot

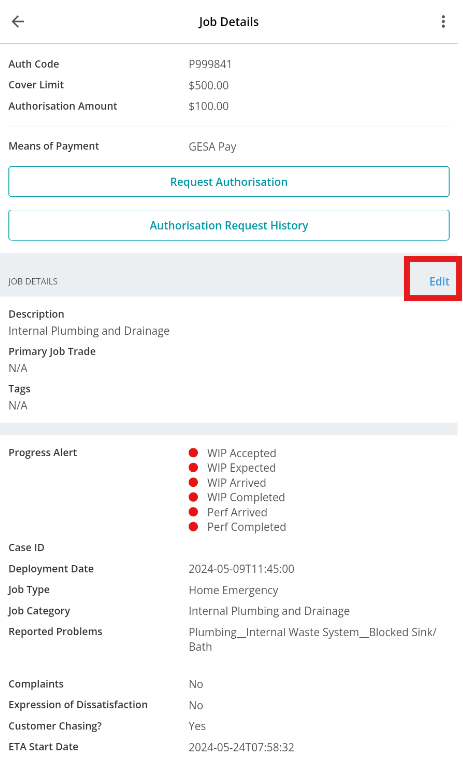
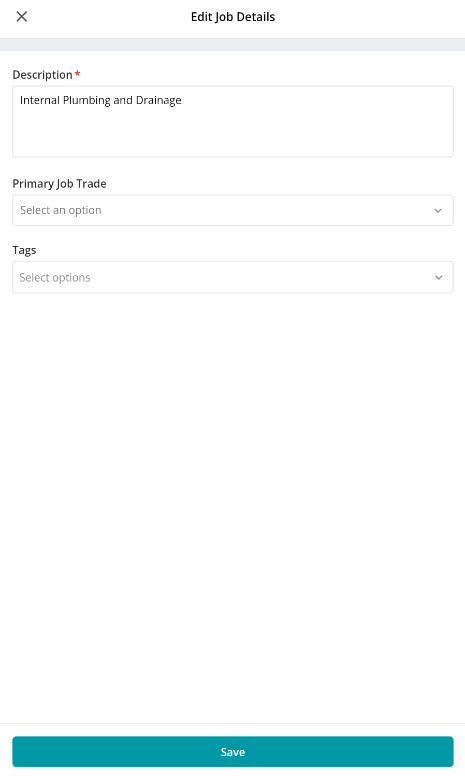
Edit Job details
Once the job has been accepted, you can make amendments to the Description, Primary Job Trade and Tags by clicking into the Job details, and then clicking the Edit button.
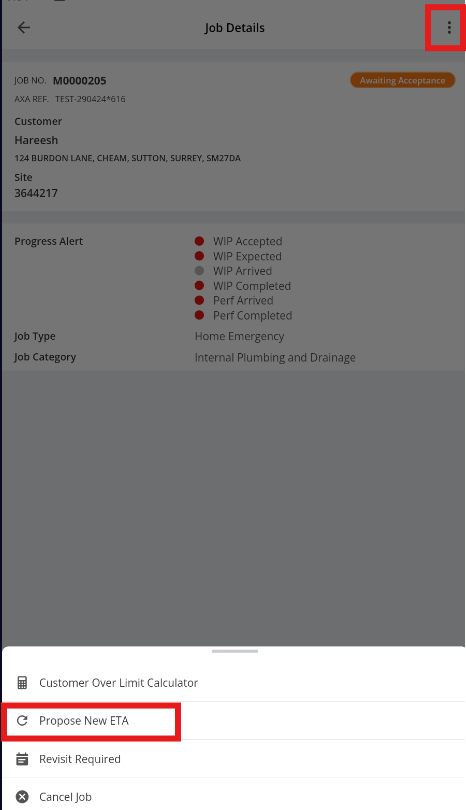
Propose New ETA
To select the new ETA for job completion, click into your Job, and then choose the three dots at the top of the page.
Next, click Propose New ETA from the menu at the bottom
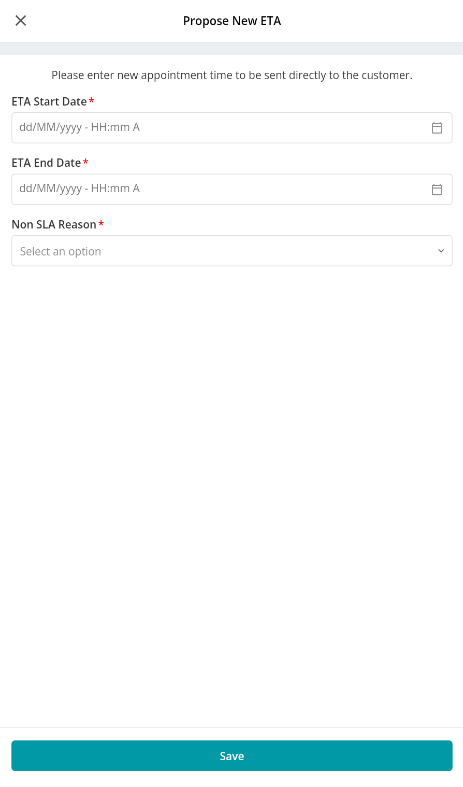
On the next screen you’ll be able to enter the new ETA start and end dates, plus a non-SLA reason.
Click Save when you are happy with the new details
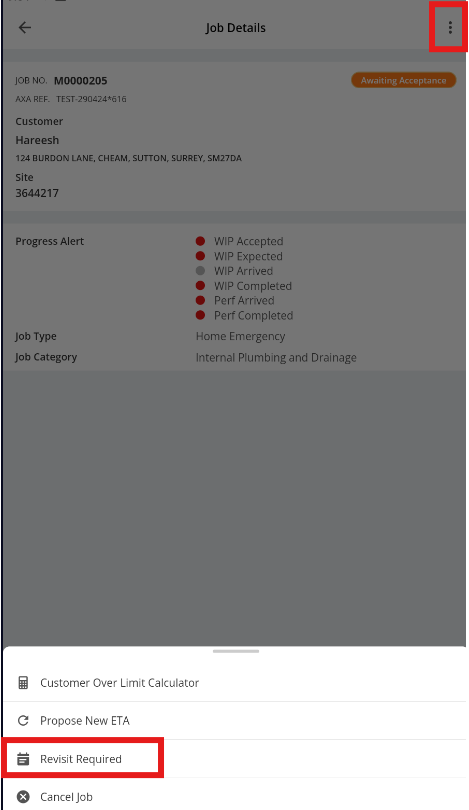
Revisit Required
If you need come back to this visit another time, you can mark the job as ‘Revisit Required’.
To do this, click the three dots in the top right of your Job Details page.
Next, choose Revisit Required from the pop-up list at the bottom of your screen
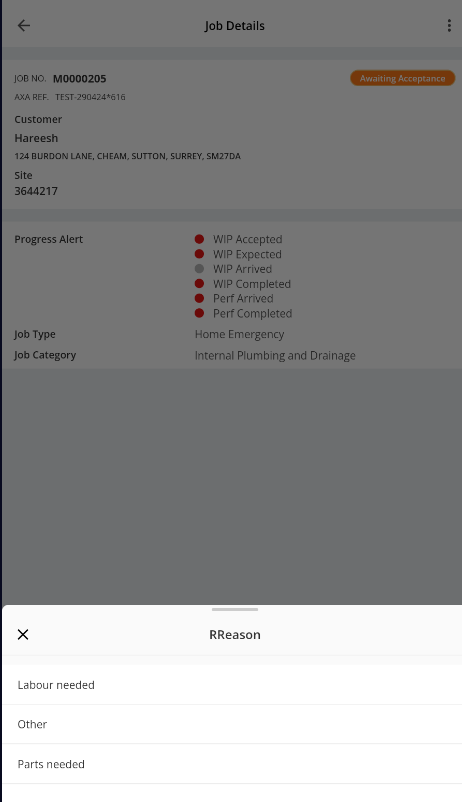
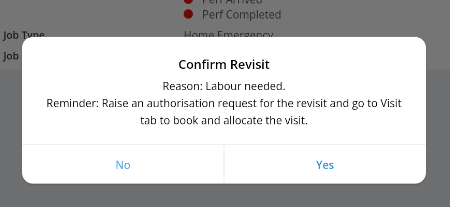
You’ll then be able to select a Reason. Confirm your Revisit by clicking Yes.
Cancel
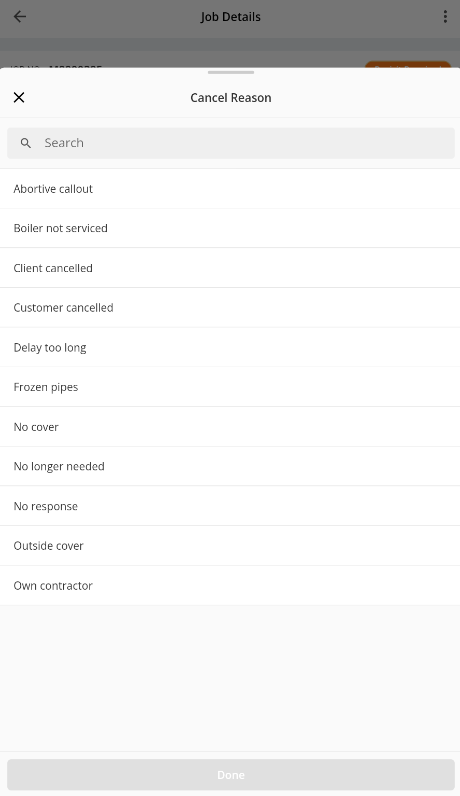
To cancel a Job, click the three dots in the top right of your Job Details screen, and then click Cancel Job.
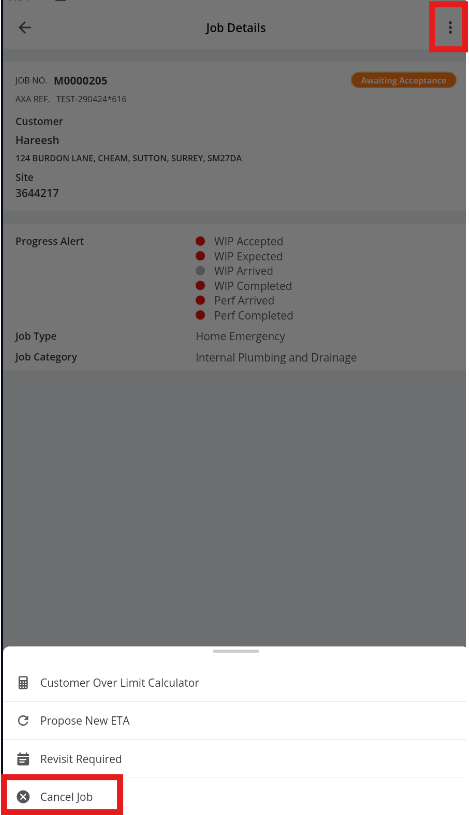
Choose your cancellation reason from the list and click Done.
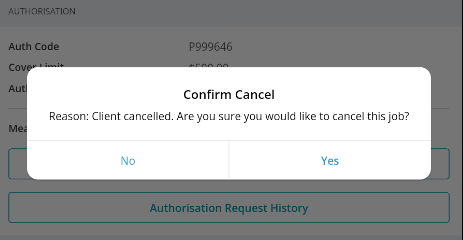
Finally, confirm the cancellation via the pop-up
Complete
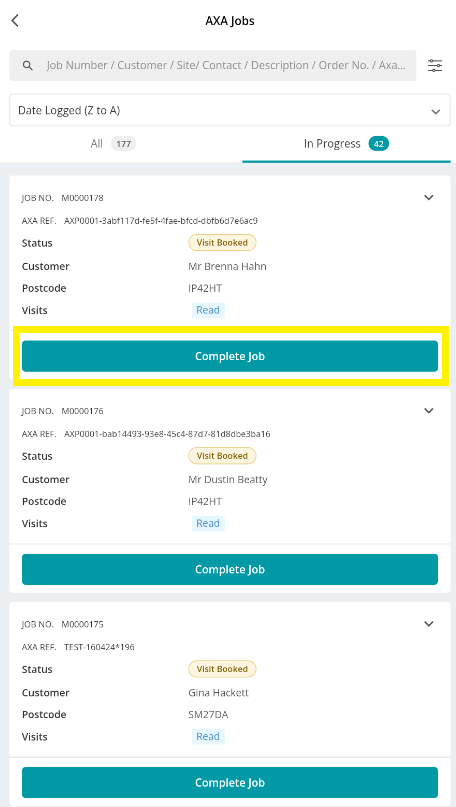
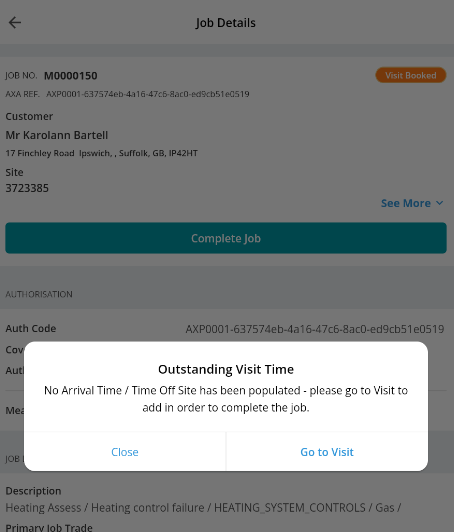
Once the visit is complete, you can come back to the AXA Jobs page and find your job.
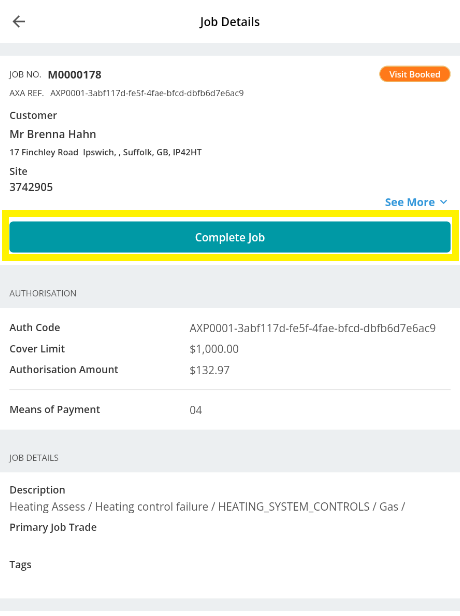
Click Complete Job to be taken to the Invoice Details page. Again this can be done on the main job list, or within the job details page.
If the visit has not yet been completed, you will be presented with the following warning:
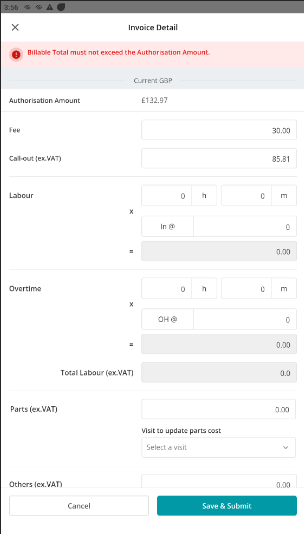
When you have completed the visit, and click to Complete your AXA job, Enter the cost details for the invoice, and then click Save & Submit
Choose which Service was undertaken and the outcomes
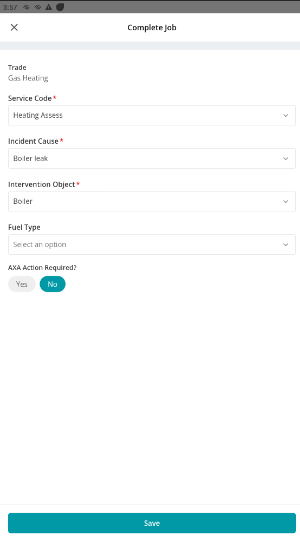
Specify if further AXA Action is Required and click Save
Once the job is completed, go to the visit and create an invoice, if required.
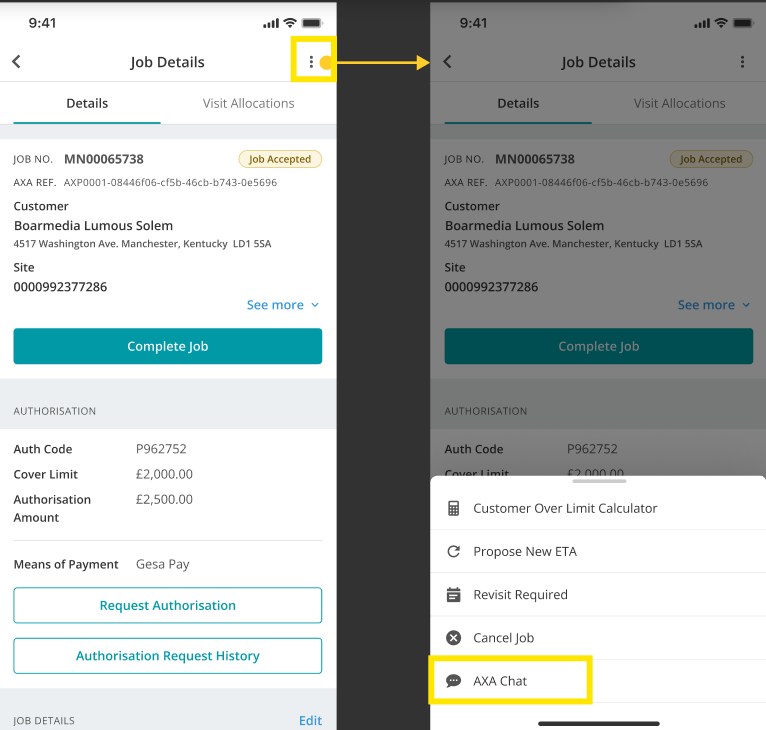
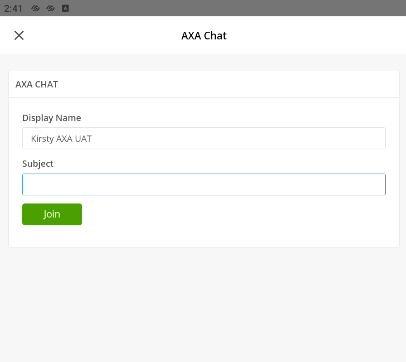
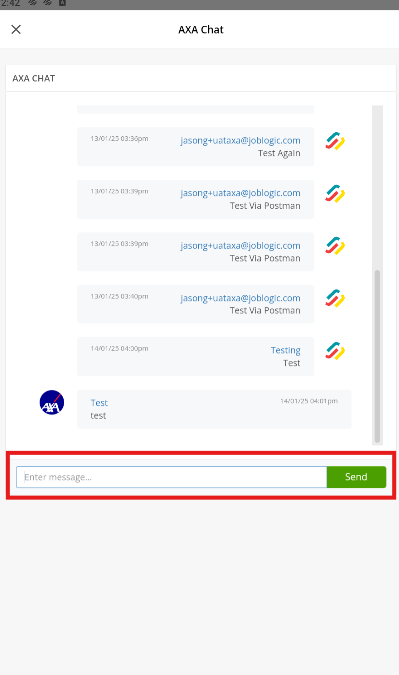
AXA Chat
There are two ways to access the AXA chat on the mobile app.
- Click the chat icon next to your Visit on your AXA Jobs list.

- Within the Job Details, click the 3 dots in the top right, and then click AXA Chat.
When you have selected the chat option, you'll be able to enter your Name, and subject if required, before clicking Join.
Enter your message and click Send here.
Further Support
For further information or assistance with the above, contact our Support Team on 0800 326 5561 or email support@joblogic.com. Alternatively, our Customer Success Management team can be reached by emailing customersuccess@joblogic.com
Publishing Details
This document was written and produced by Joblogic’s Technical Writing team and was last updated on the date specified above. Be aware that the information provided may be subject to change following further updates on the matter becoming available or new releases within the system. Additionally, details within the guide may vary depending on your Joblogic account’s user permissions and settings or the electronic device being used