Introduction
The Customer Contracts (also known as Contract Layers) module simplifies managing multiple contracts for a single customer, covering both maintenance contracts and reactive works.
It enables you to link contracts to specific jobs, ensuring accurate and streamlined service management across various customer sites.
This guide provides step-by-step instructions for setting up contracts, assigning permissions, linking contracts to jobs, and searching for contracts within the system.
It also covers important features like user group management, contract renewals, and linking PPM (Planned Preventative Maintenance) contracts.
Initial set up
This is a paid feature, so you will need to firstly contact your customer success manager to get this turned on.
- 0800 326 5561
- Customersuccess@joblogic.com
- Or individual email/contact details for your assigned customer success manager, if you have them
Once you have activated the feature, you’ll be able to start adding your contracts.
Permissions
To set permissions on a user-by-user basis, navigate to Settings > Staff > click staff name

Next, click Edit in the top right and then choose the Business tab and search for Customer contract, to filter down the list.
Amend permissions as needed, and then click Save.
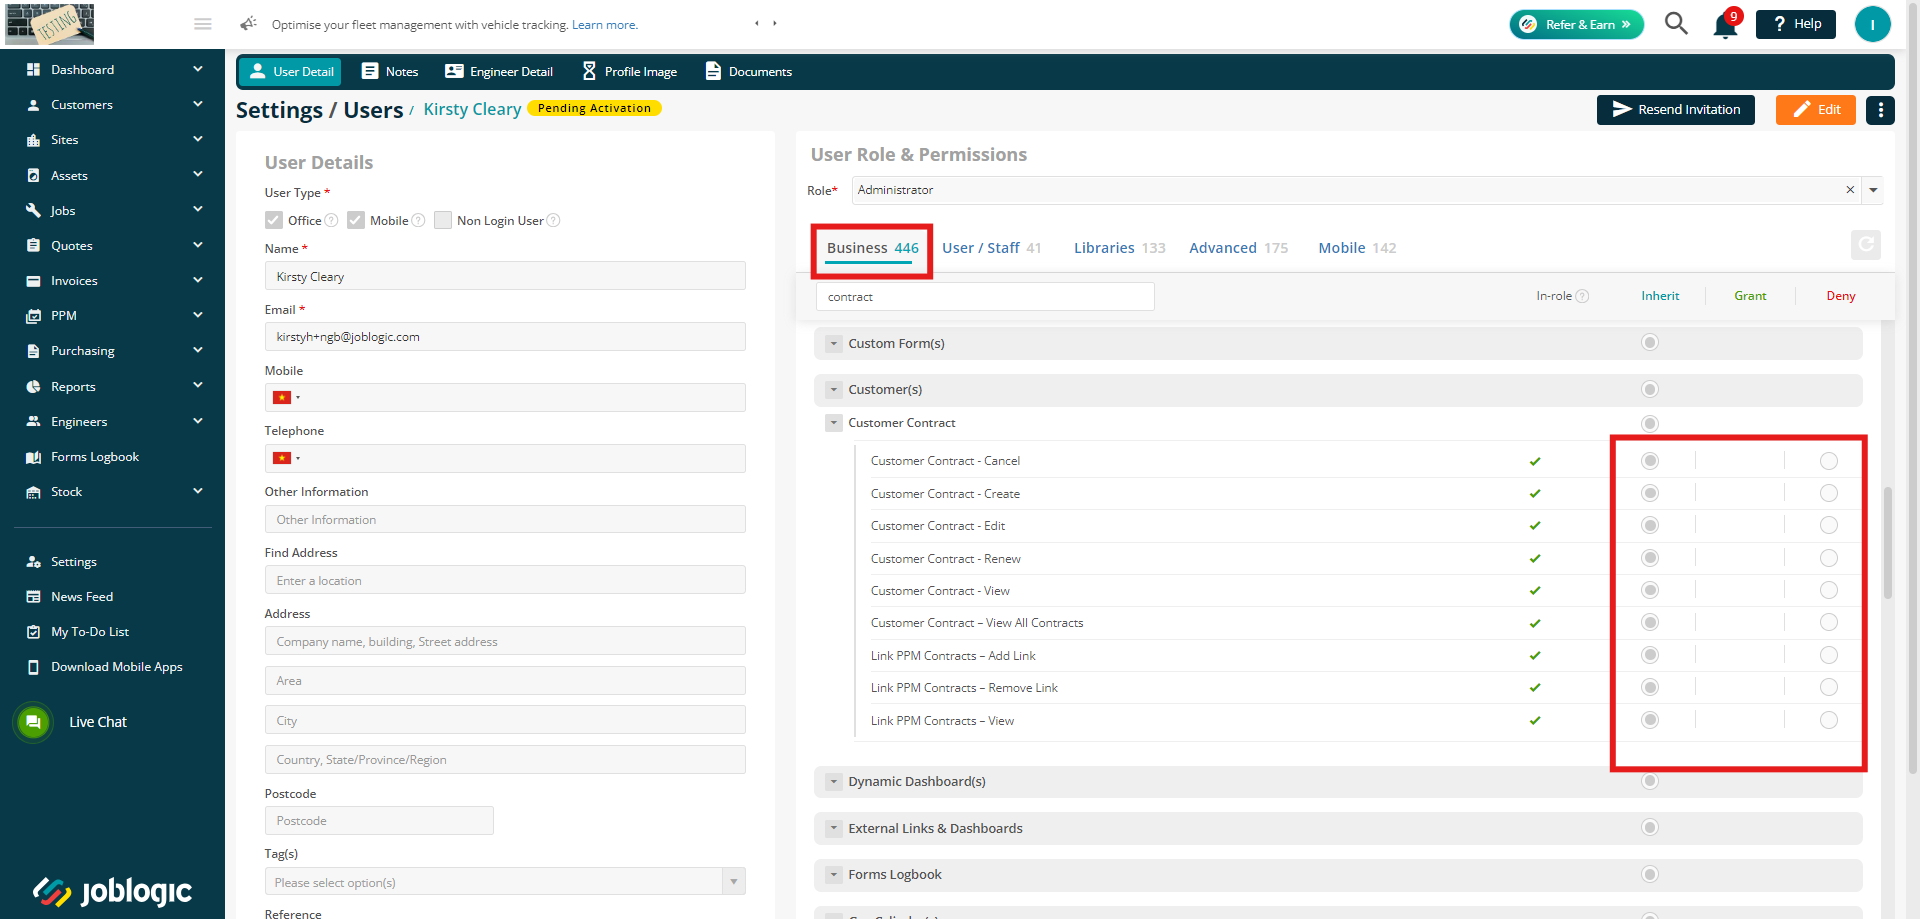
The Customer Contract - View All Contracts permission simply means this user will be able to view all customer contracts.
If this is not enabled, they will only be able to view contracts assigned to them (this will be discussed further during the 'Adding a Contract' section)
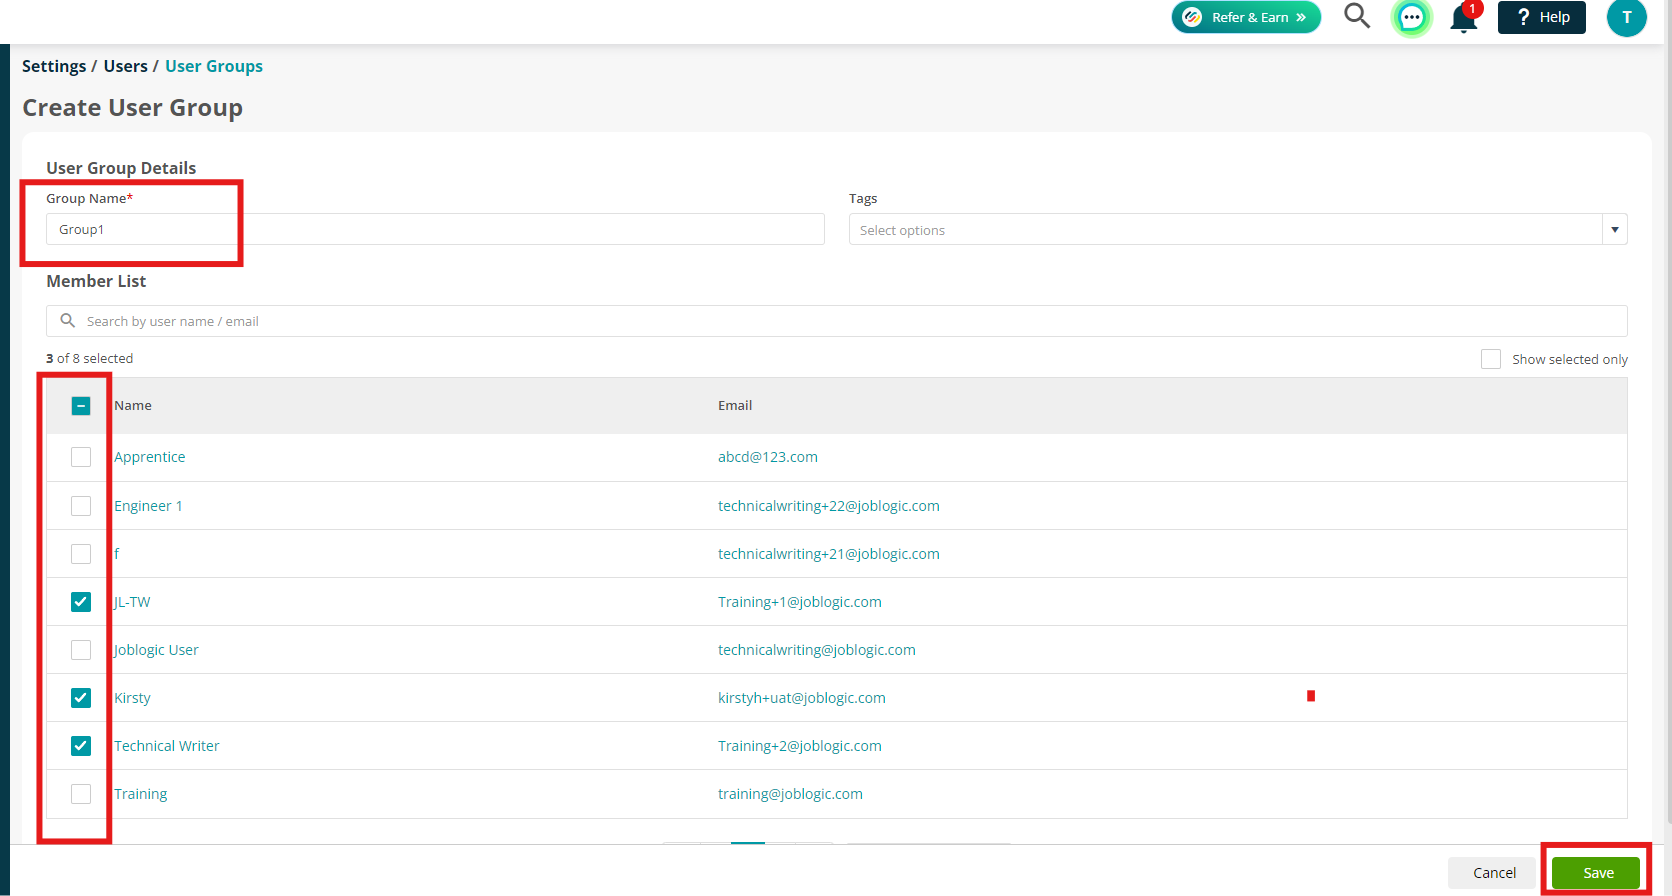
Setting up User Groups
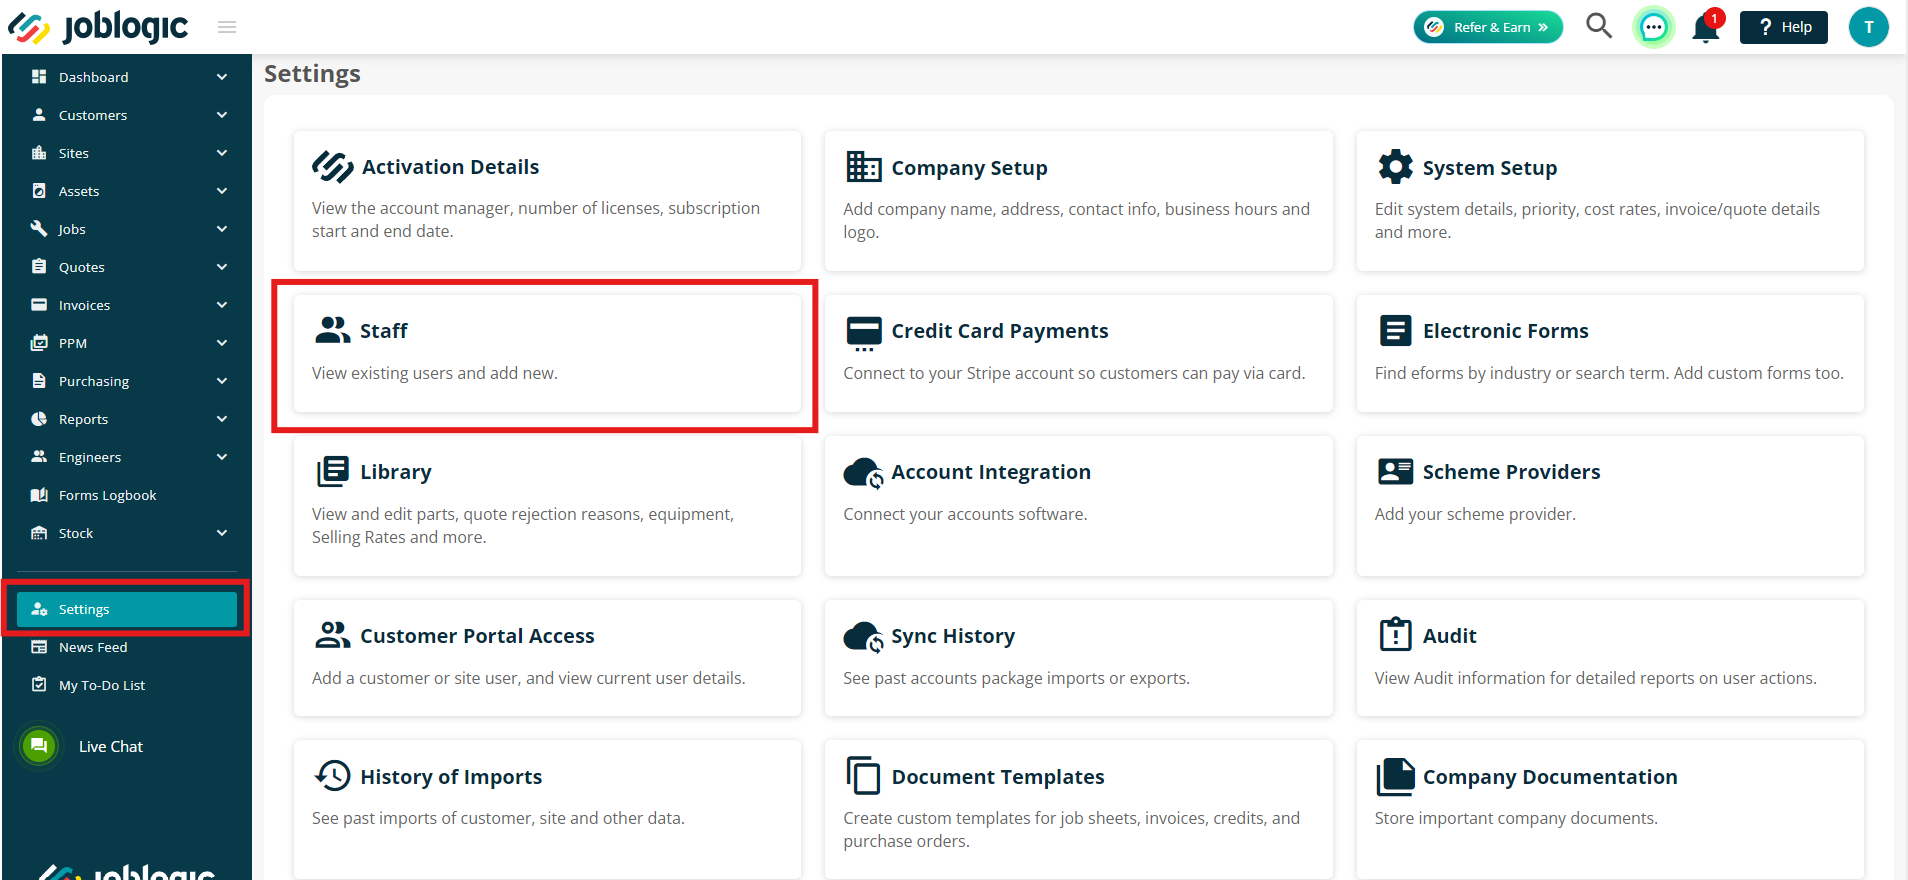
When assigning a Contract, you can assign it to an individual user, or a group. To set these groups up, firstly navigate to Settings > Staff
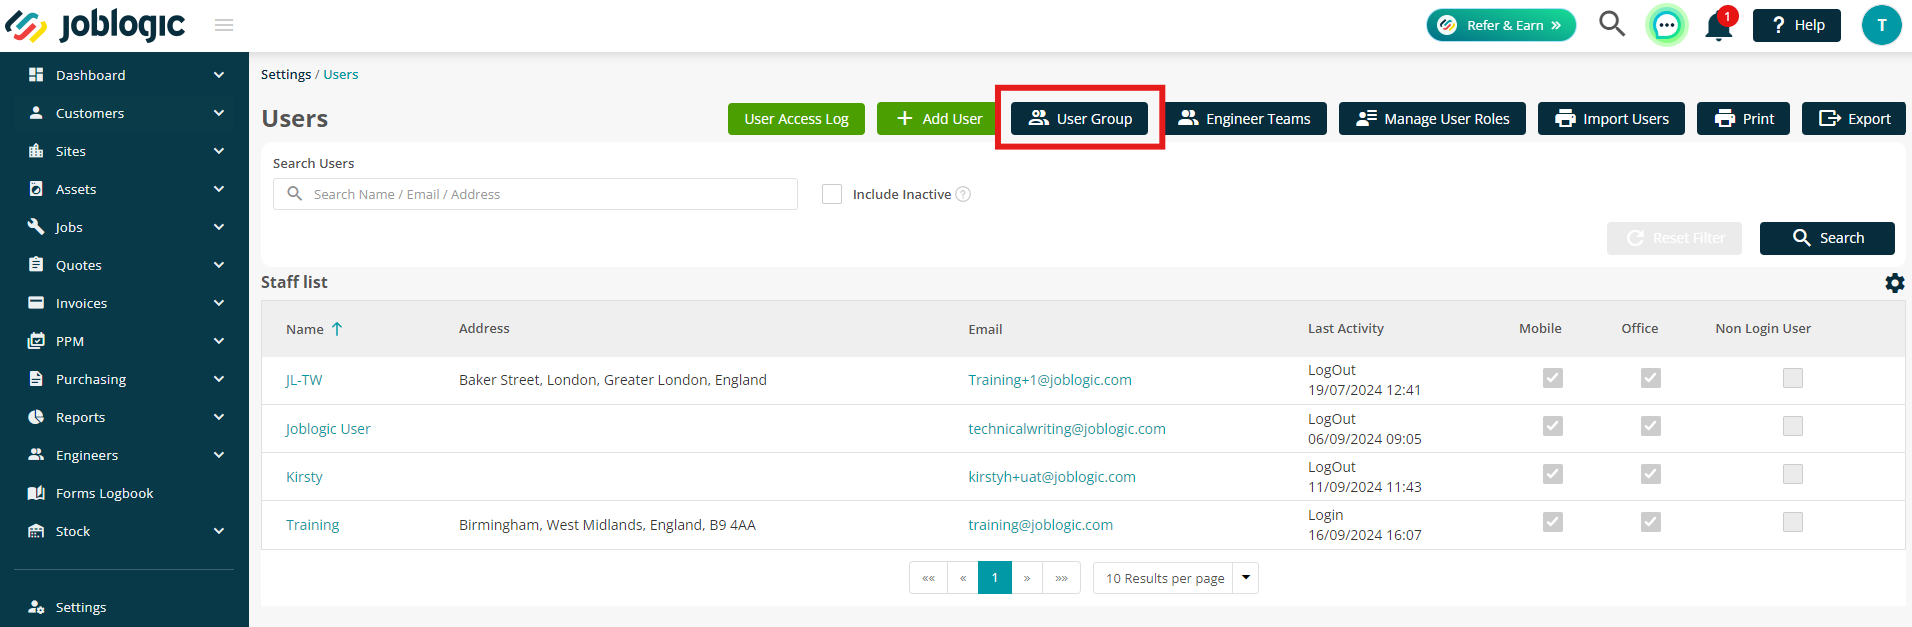
Next, click the User Group button at the top of the page
Click Create User Group
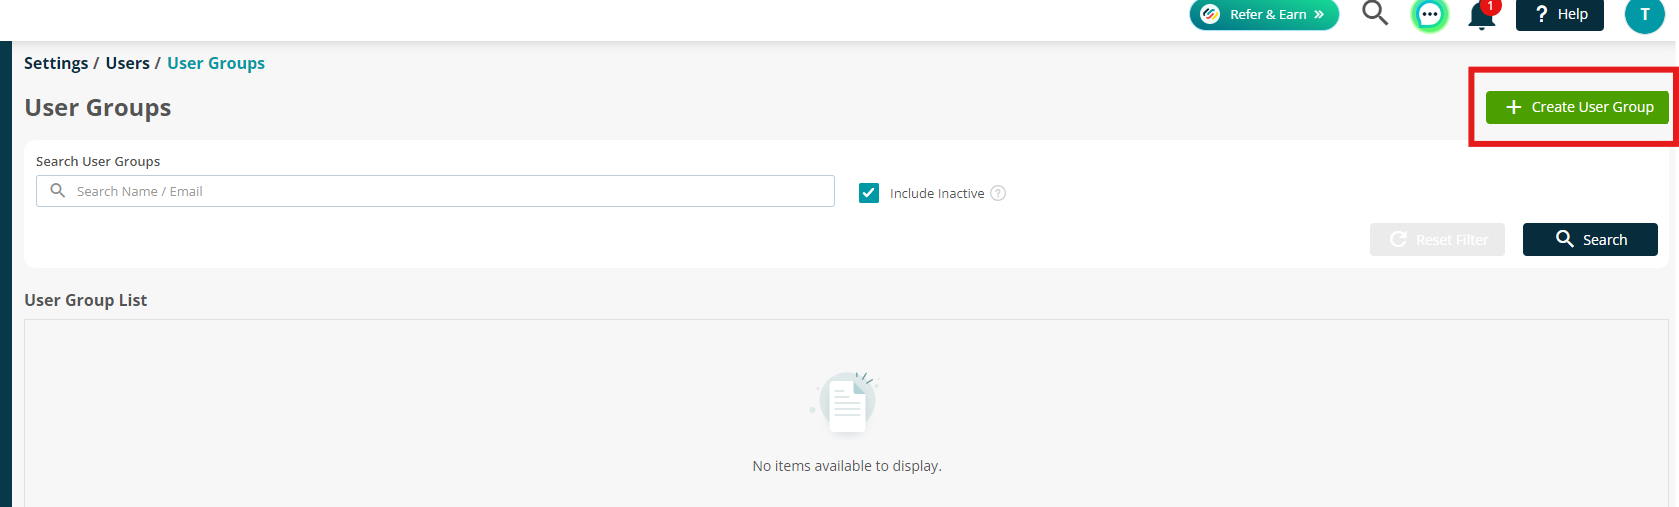
Give the Group a name, and then tick the users you'd like to add to this group.
Click Save.
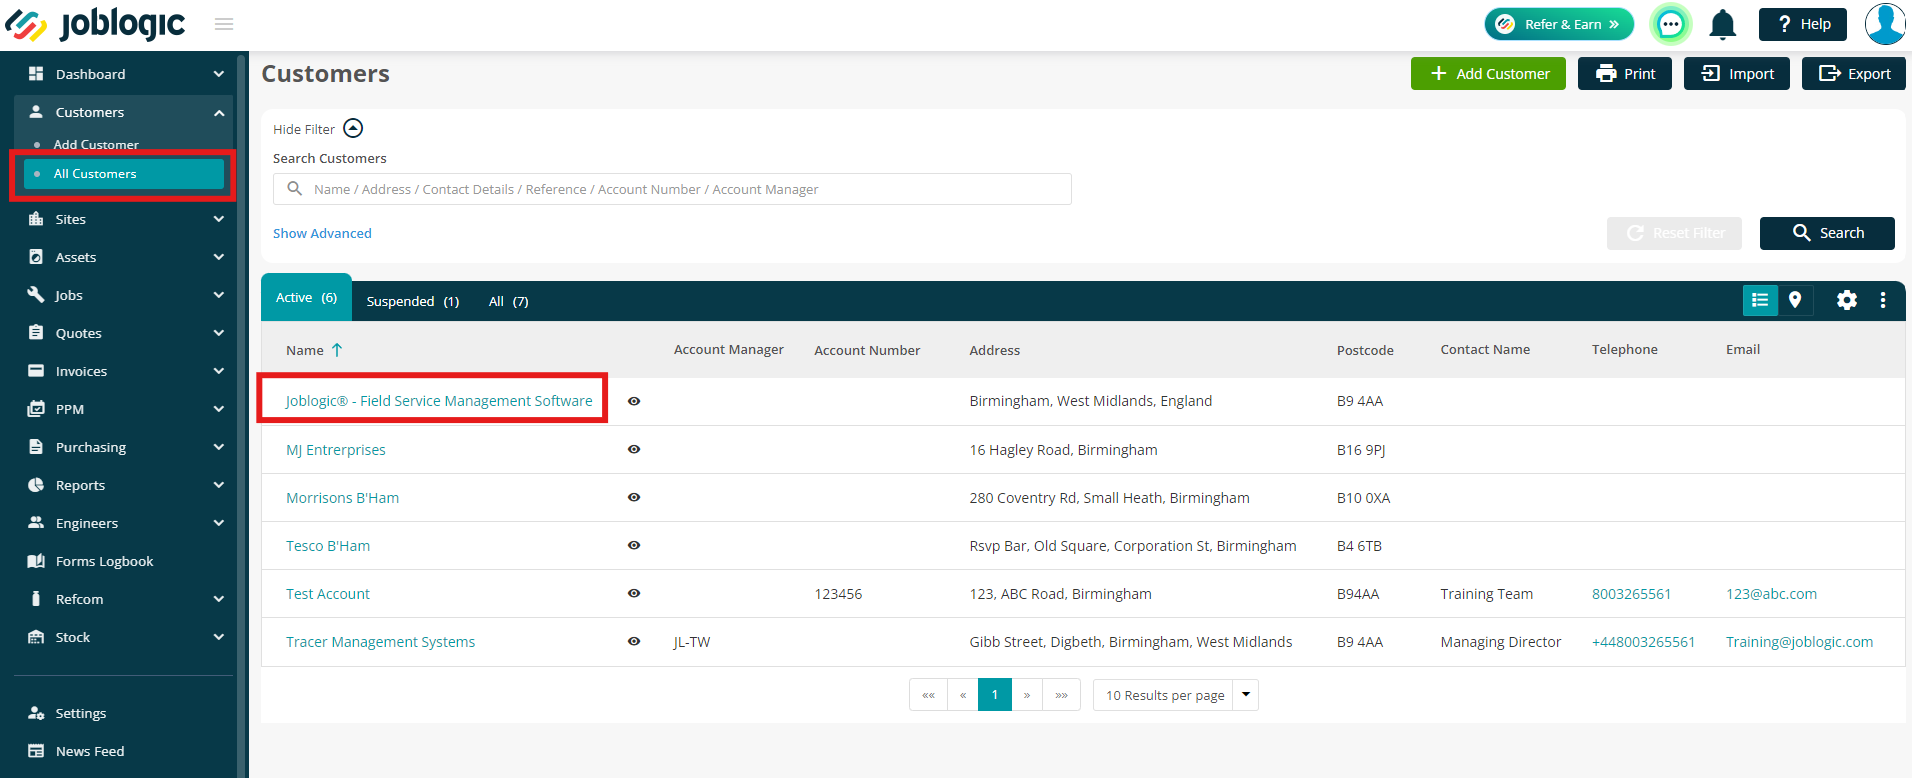
Adding a Contract
To add a contract, navigate to your Customer via Customer > All Customers > click Customer Name
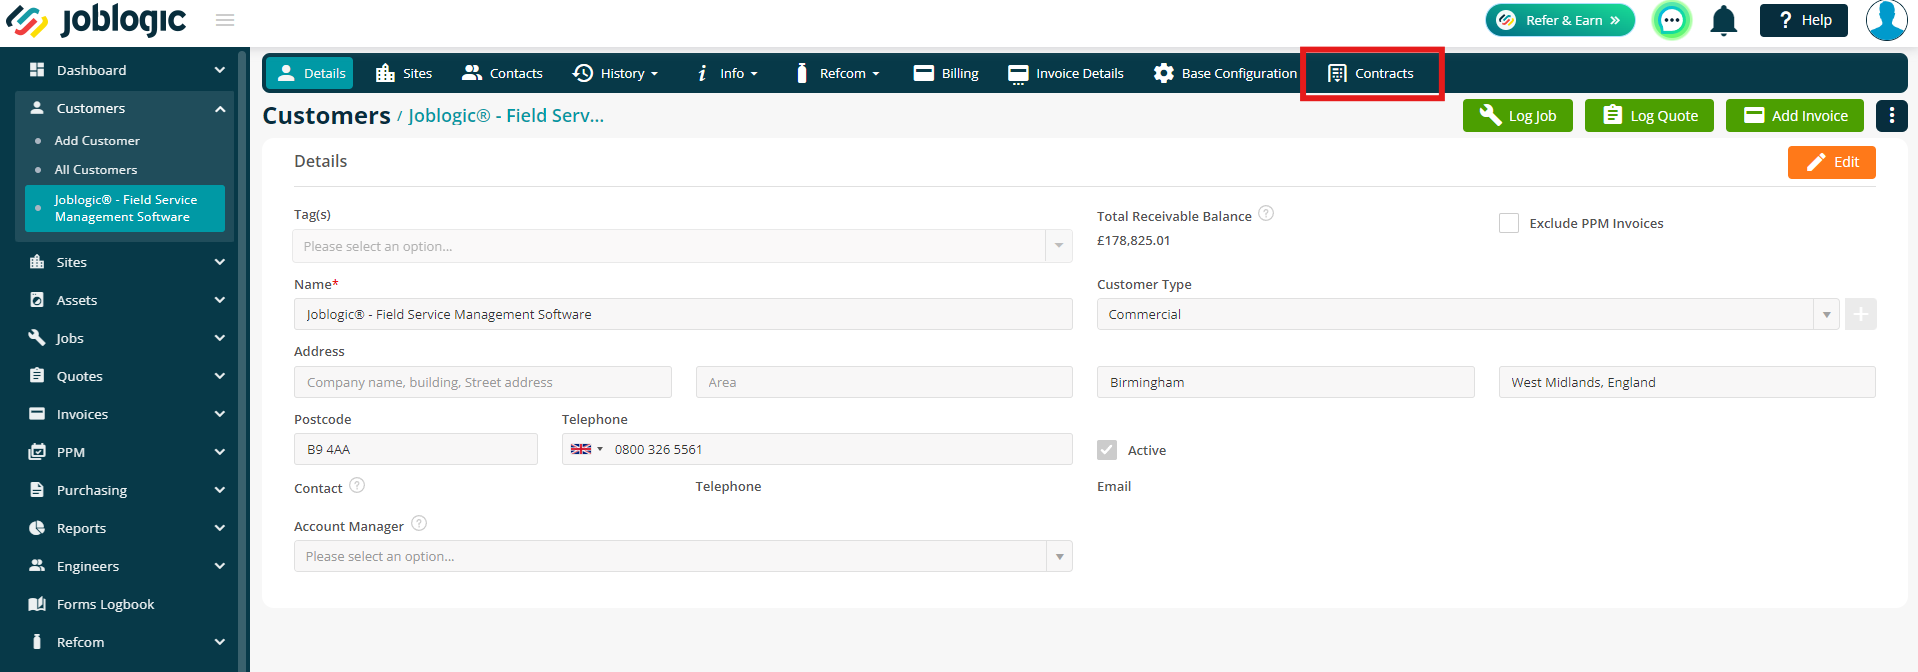
Next, click the Contracts tab
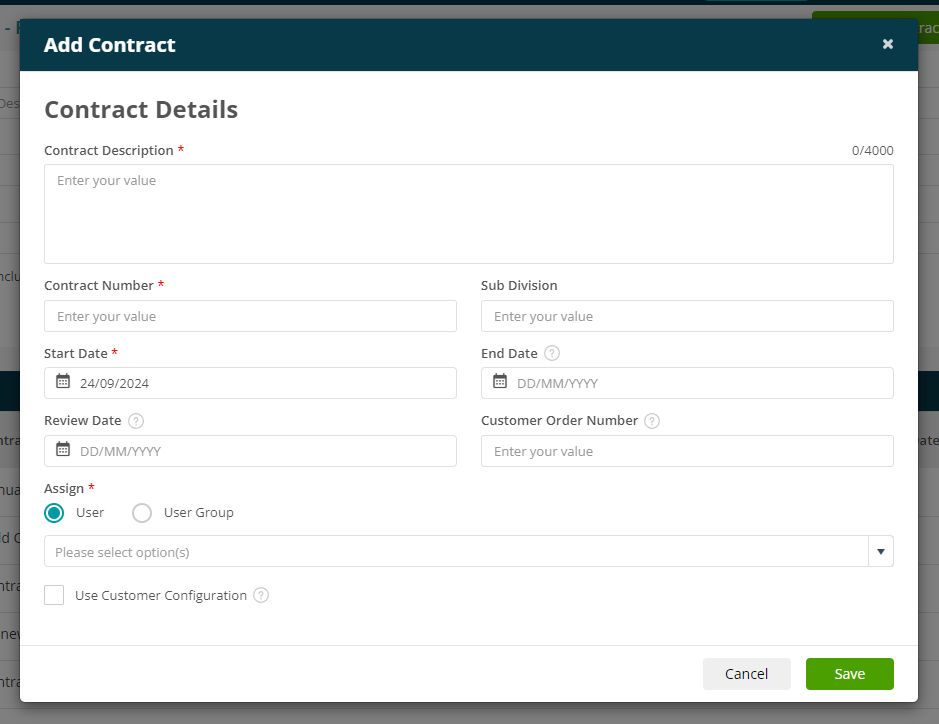
Click Add Contract
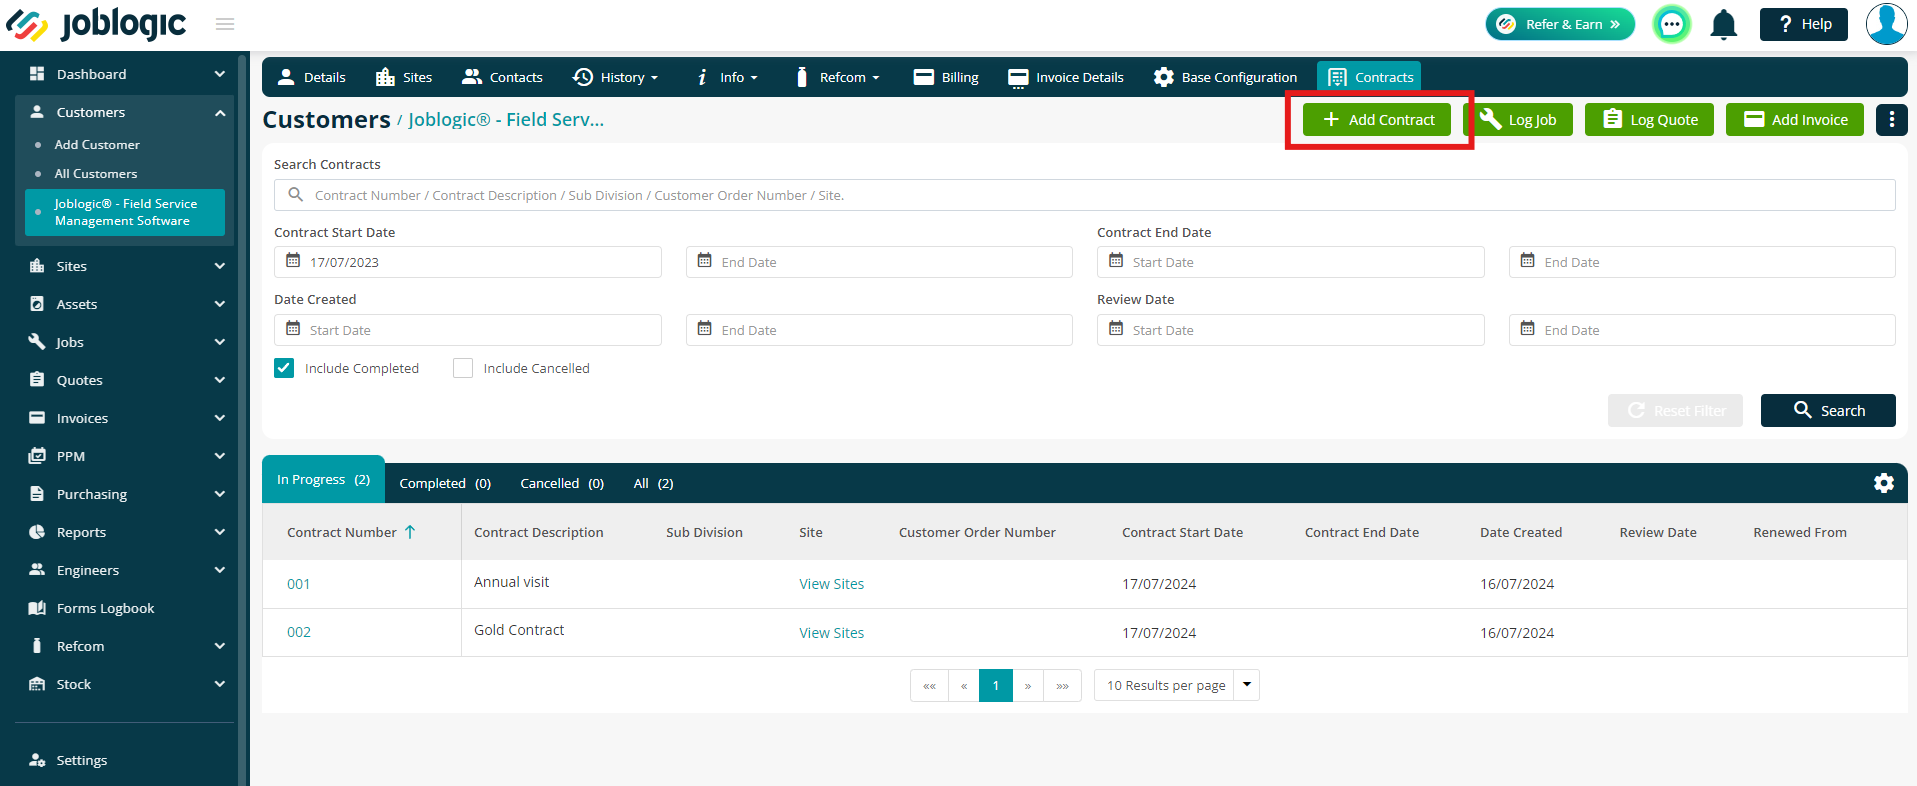
Here you can enter your contract details, including the Description, Contract Number and Start Date.
You can add a Review Date if you wish to receive a notification for the scheduled review of your customer contract.
You will also be able to assign the contract to an individual user, or a user group. This will specify who can view the contract.
Unless the user has the Customer Contract - View All Contracts permission, they will only be able to view contracts assigned to them specifically.
Fields with a red * are mandatory and will need to be filled in before you can Save the contract.
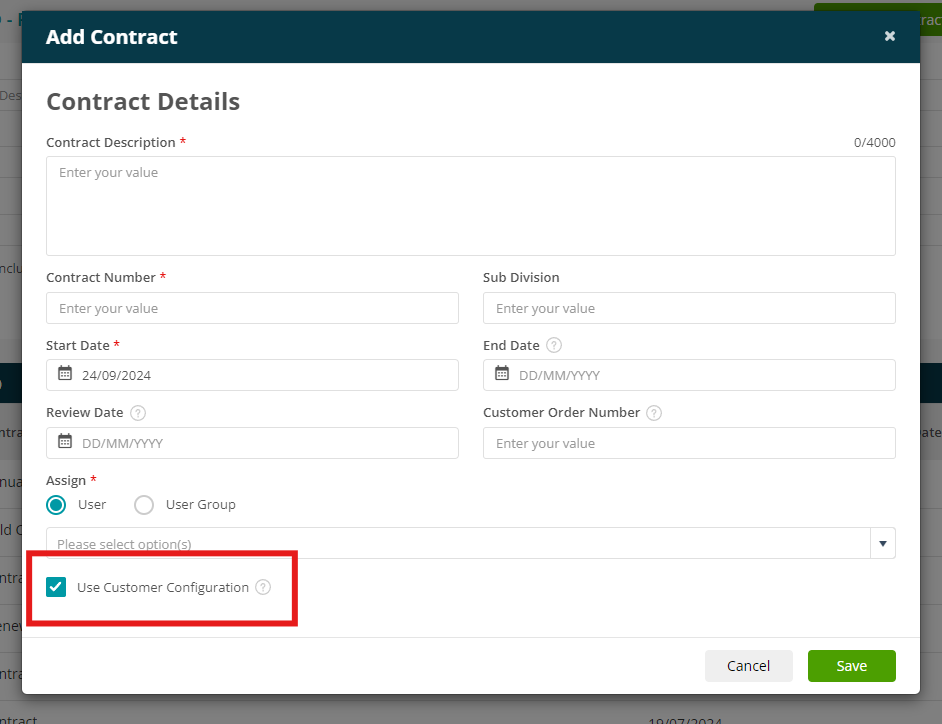
If you tick the ‘Use Customer Configuration’ option, the details from your Customer’s Base Configuration will auto populate the Contract details.
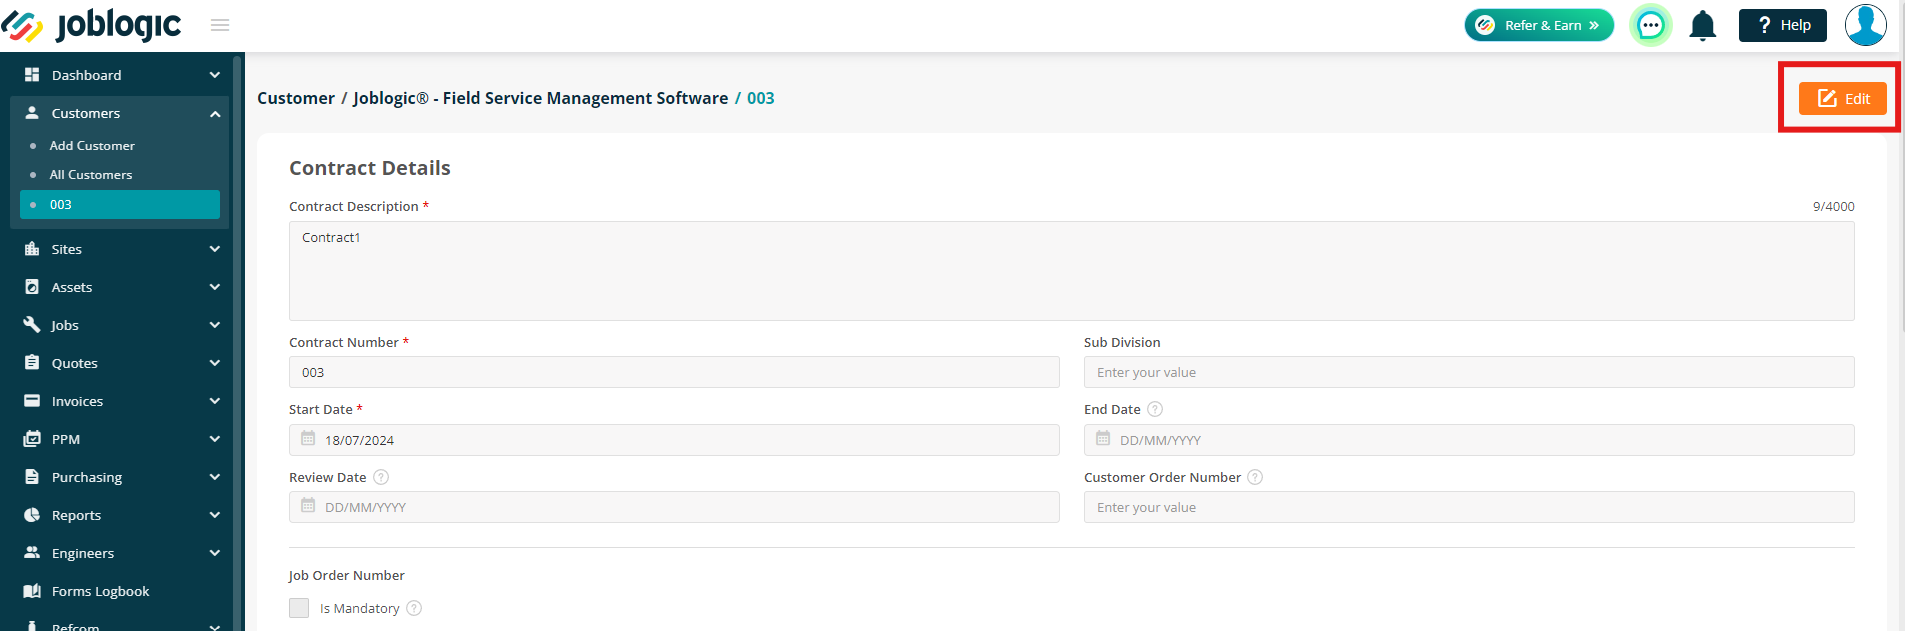
When you have saved your contract, you’ll be able to edit the contract further, and add more information where required.
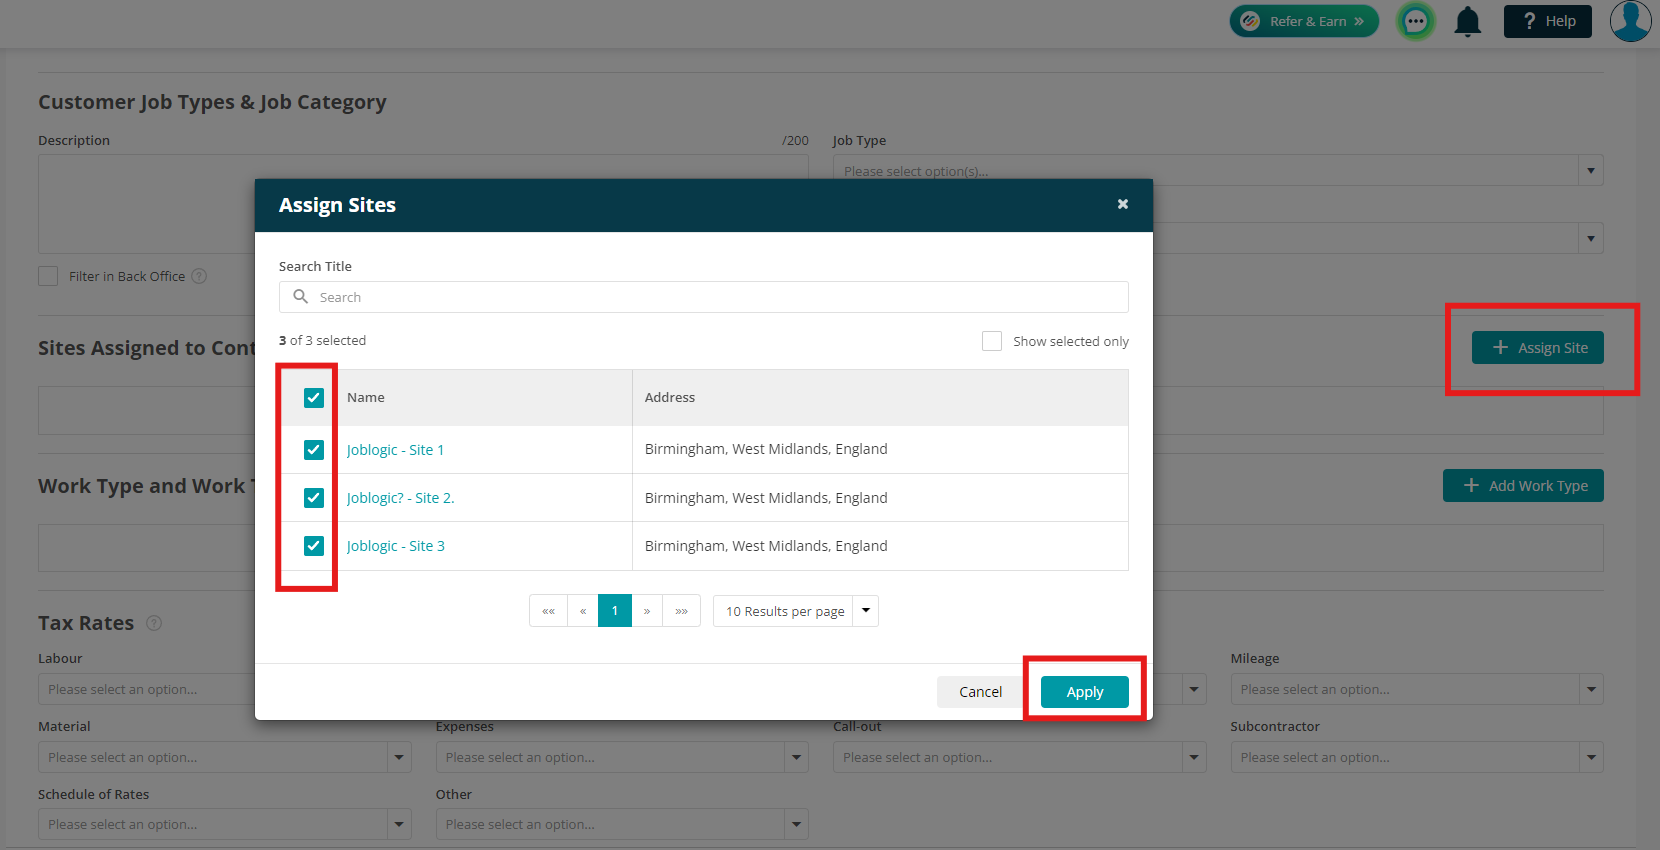
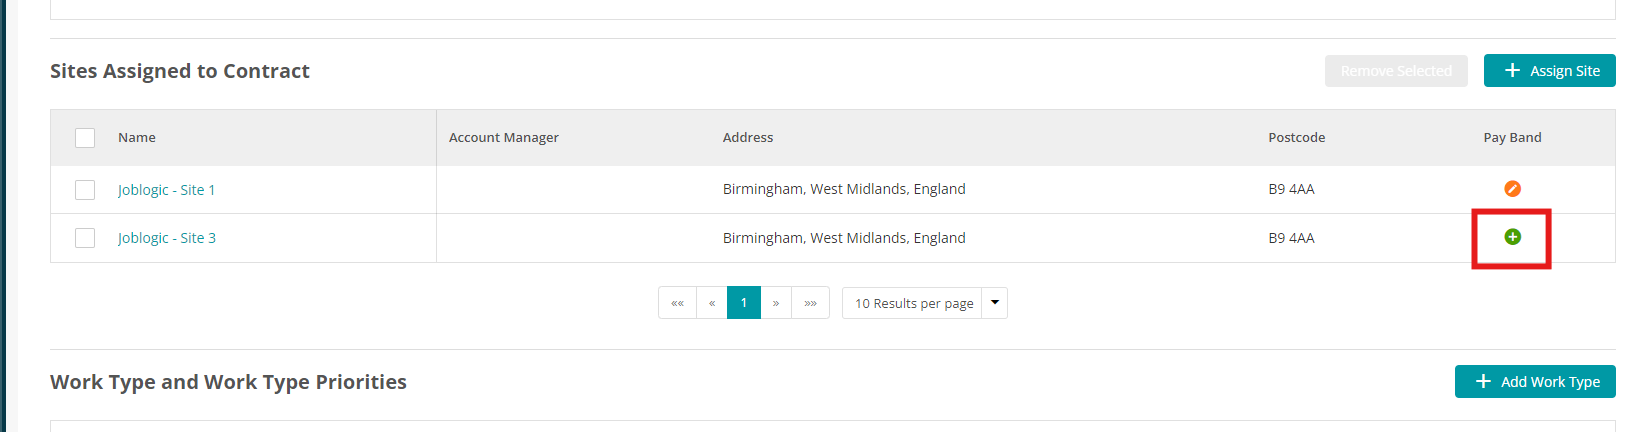
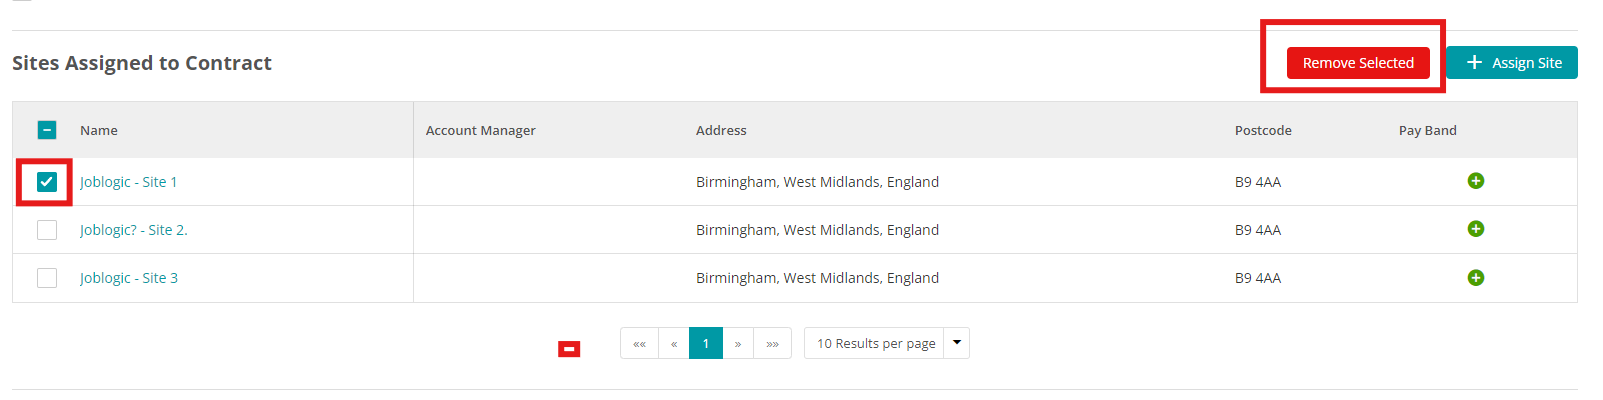
Here, you can assign your chosen sites to your contract. The contract will only be visible for these selected sites.
Click Assign Sites, and then tick the relevant sites before clicking Apply.
Once you have added the Site(s), you'll have the option to add a Payband against each site.
Click the green + button to get started.
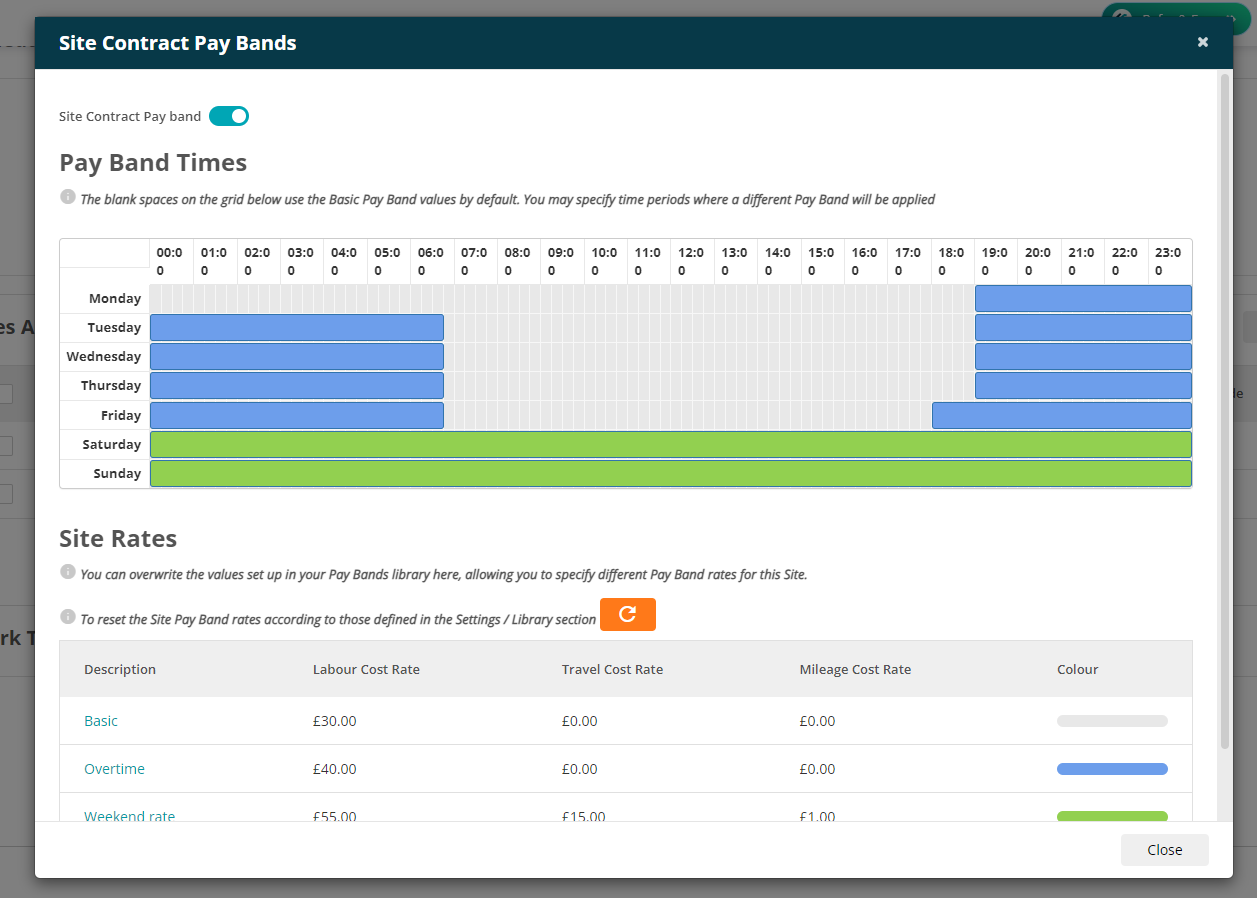
Toggle Site Contract Pay band
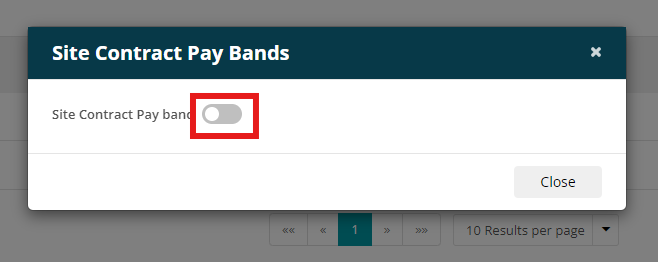
You'll be shown your System default payband settings. You can make amendments to the table as required and the changes will be applied for this site only.
To look at updating your paybands, click here.
If you need to remove any sites from the contract, simply tick the box and then select Remove Selected.
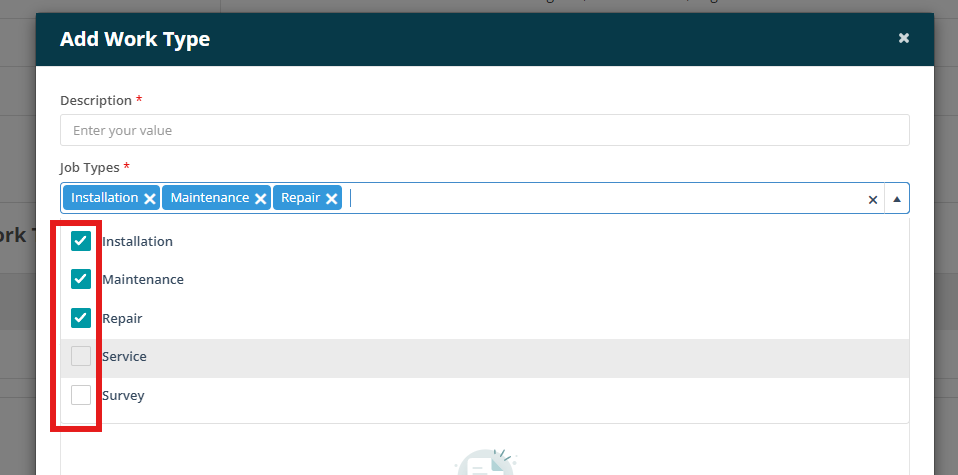
Next, you can assign your Work Types. Add your Description and assign your Job Types and Selling Rates.
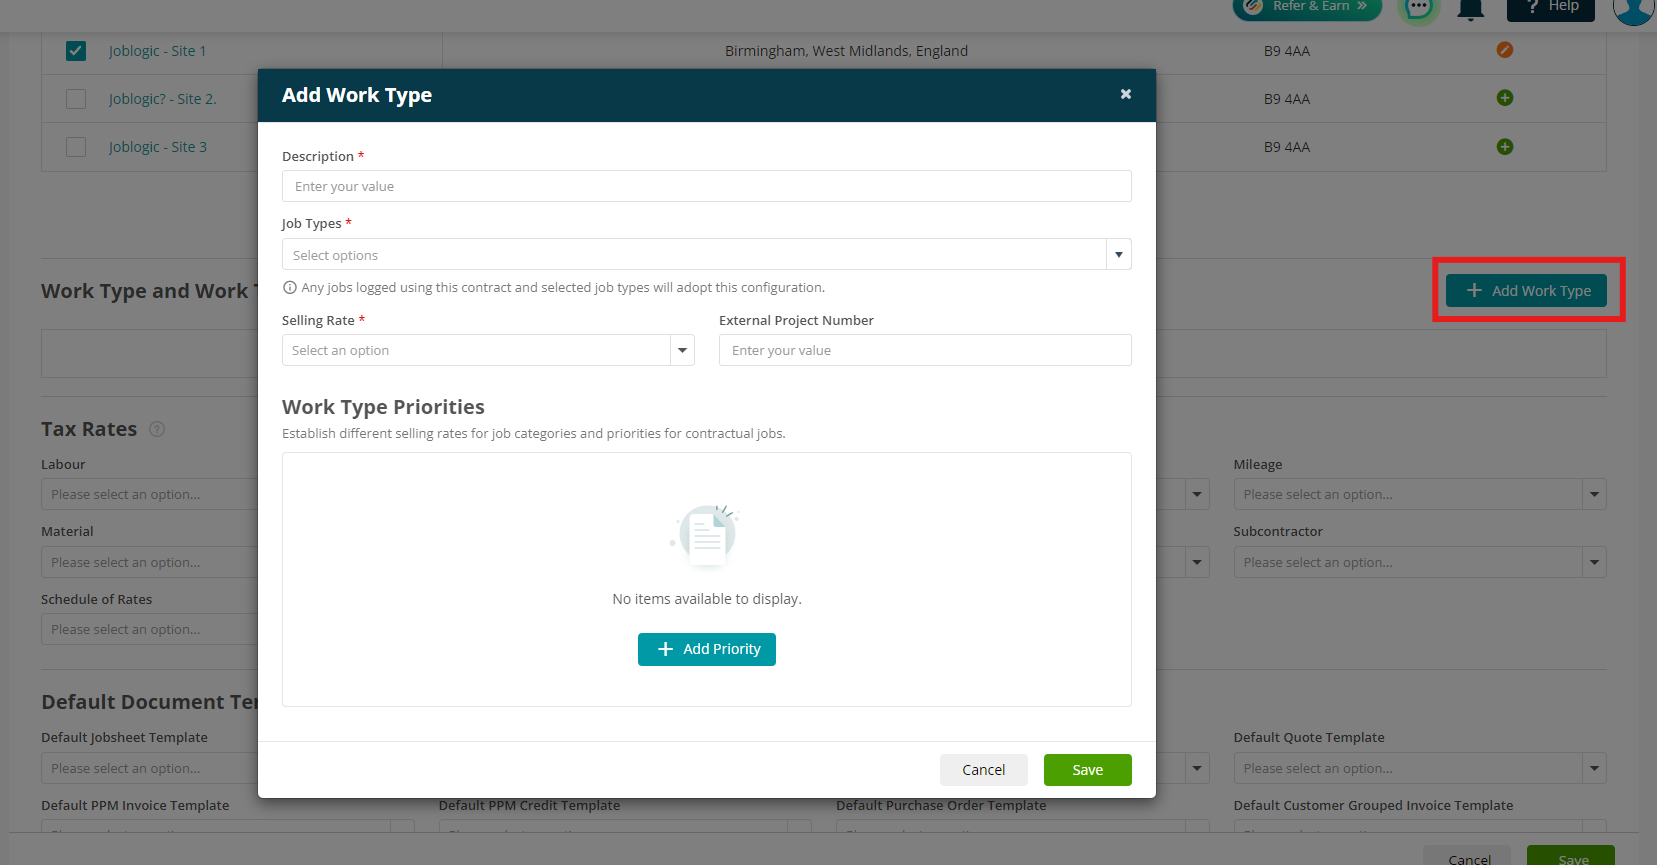
You can add multiple Job Types by ticking as many as required.
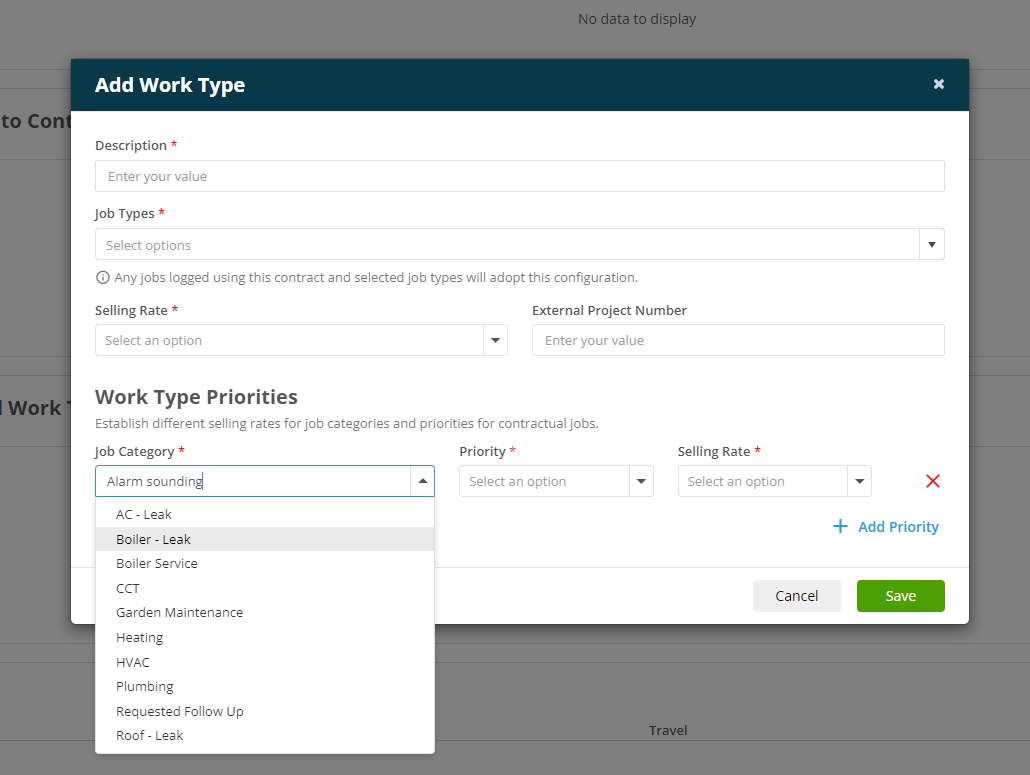
If you wish to, you can also add a Project Number and Work Type Priorities. These are not mandatory and can be left blank if required.
When adding a Work Type Priority, you can choose your Job Category, and then select the Priority and Selling Rate to go along with it.
Logging your Contracts across the system
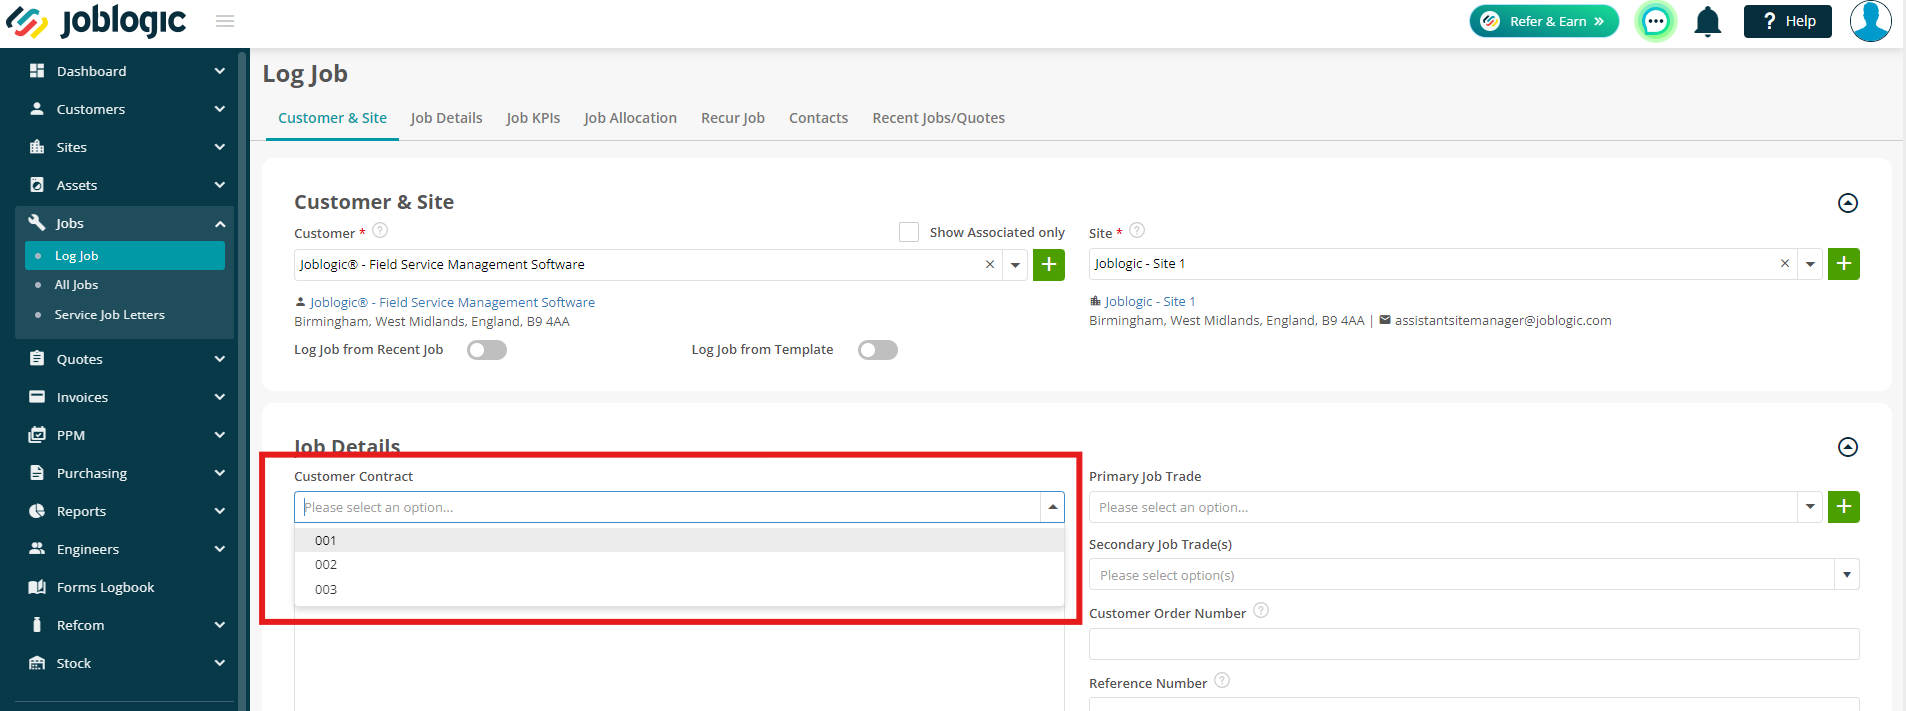
You can then log Jobs, Quotes, PPM Contracts or PPM Quotes to your Customer Contract.
This will automatically pull through the selling rates you have set up against your contract for your various job types/categories, saving you time and effort.
- Jobs > Log Job
- Quotes > Log Quote
- PPM > Add PPM > PPM Quote
- PPM > Add PPM > PPM Contract
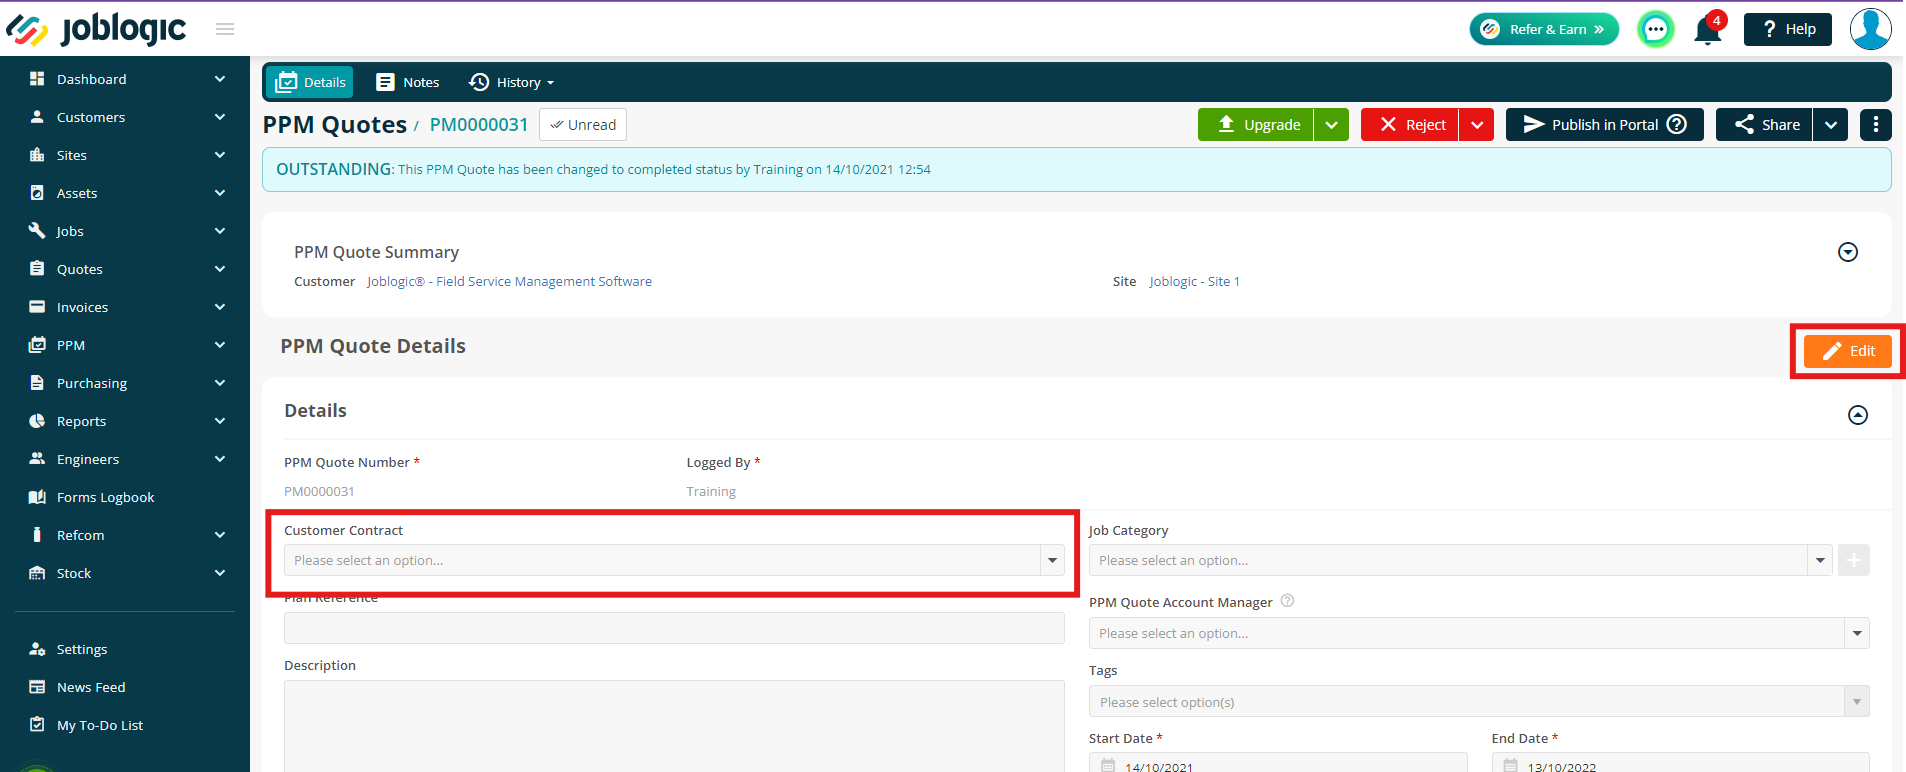
This field will be greyed out until a relevant Site is selected. Once the site is selected, the Customer Contract dropdown will populate with any contracts associated to the site.
The Customer Contracts can also be added retrospectively. If you click into a Job, Quote, PPM Quote or PPM Contract, you'll be able to click Edit and choose a contract from the dropdown.
- Jobs > All Jobs > click a job number > Edit
- Quotes > All Quotes > click a quote number > Edit
- PPM > All PPM Quotes > click PM Number > Edit
- PPM > All PPM Contracts > click PM Number > Edit
Linking PPM Contracts
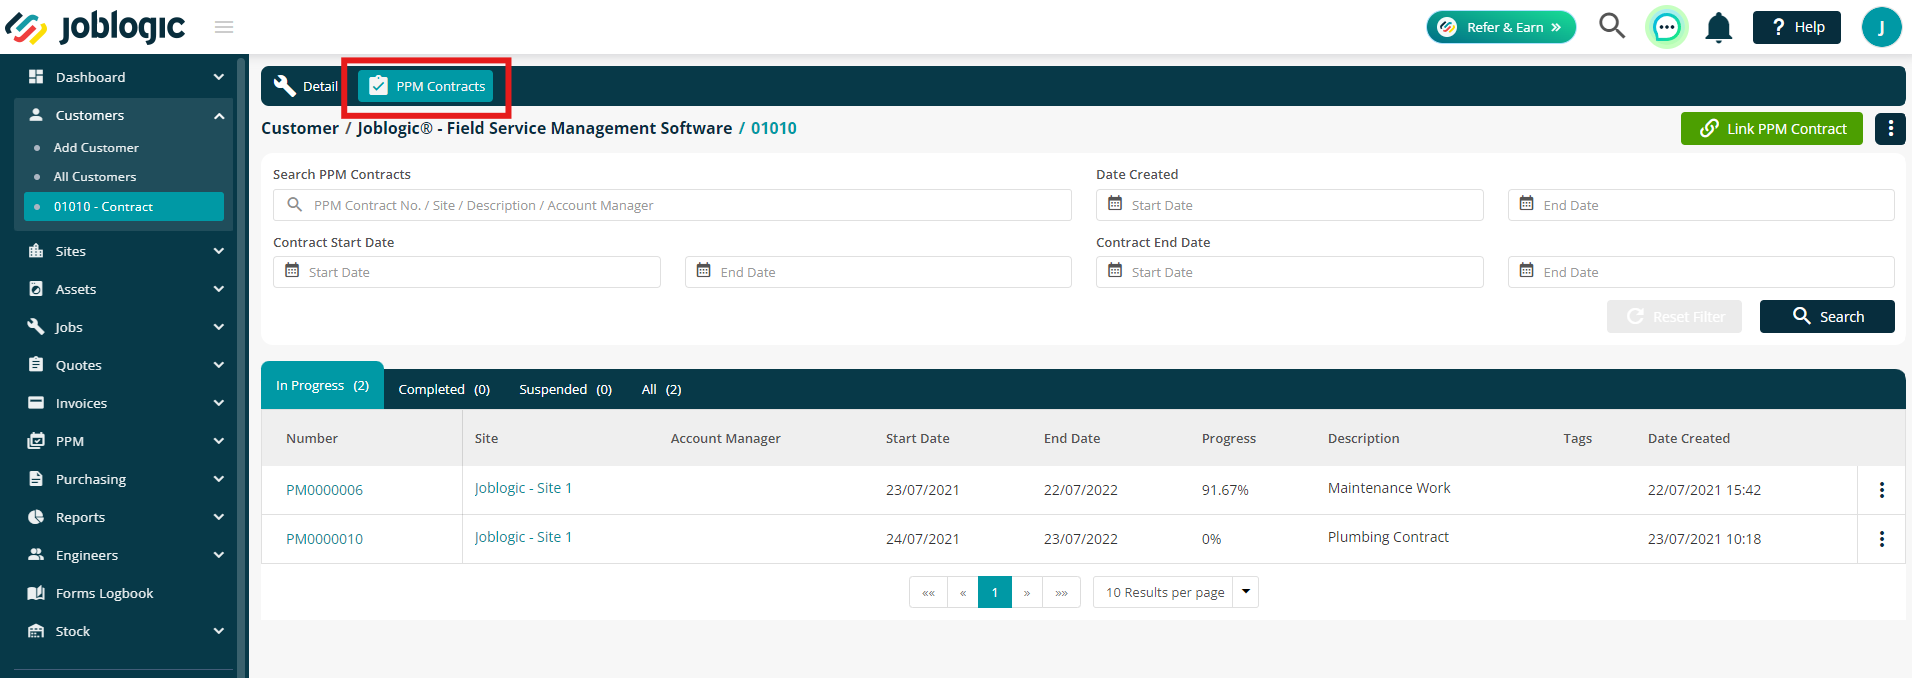
Alternatively, you can view or link your PPM contracts within the Contracts page.
Customer > All Customers > select your customer > Contracts tab > select your contract > PPM Contracts tab
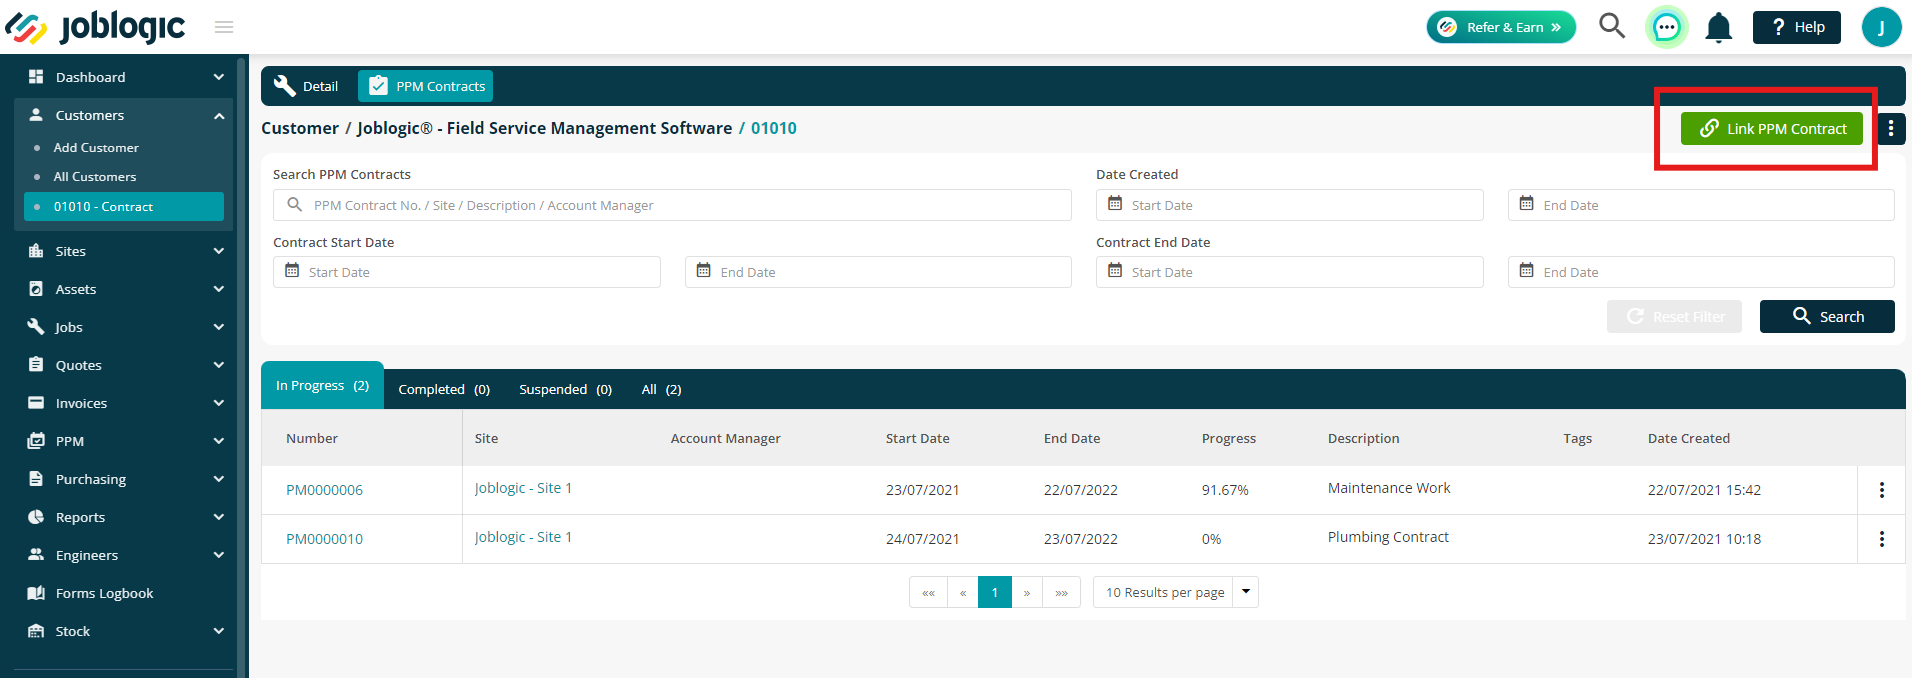
Click Link PPM Contract
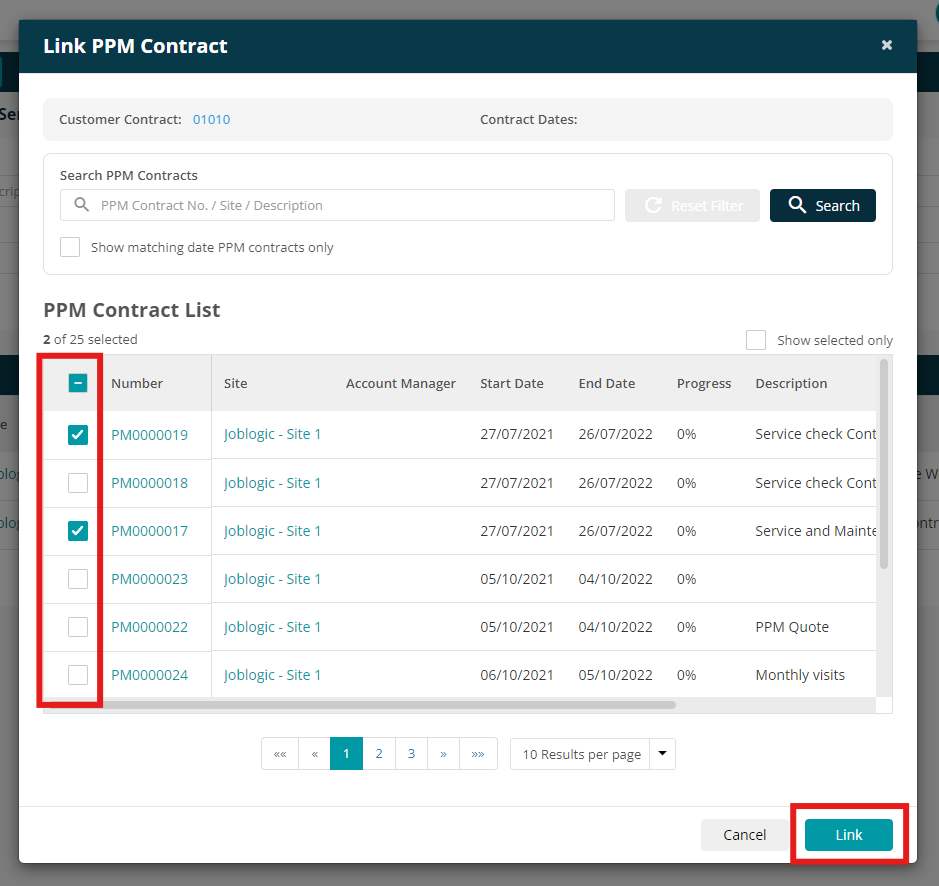
Tick the PPM contracts that you'd like to link to your Customer Contract, and then click Link.
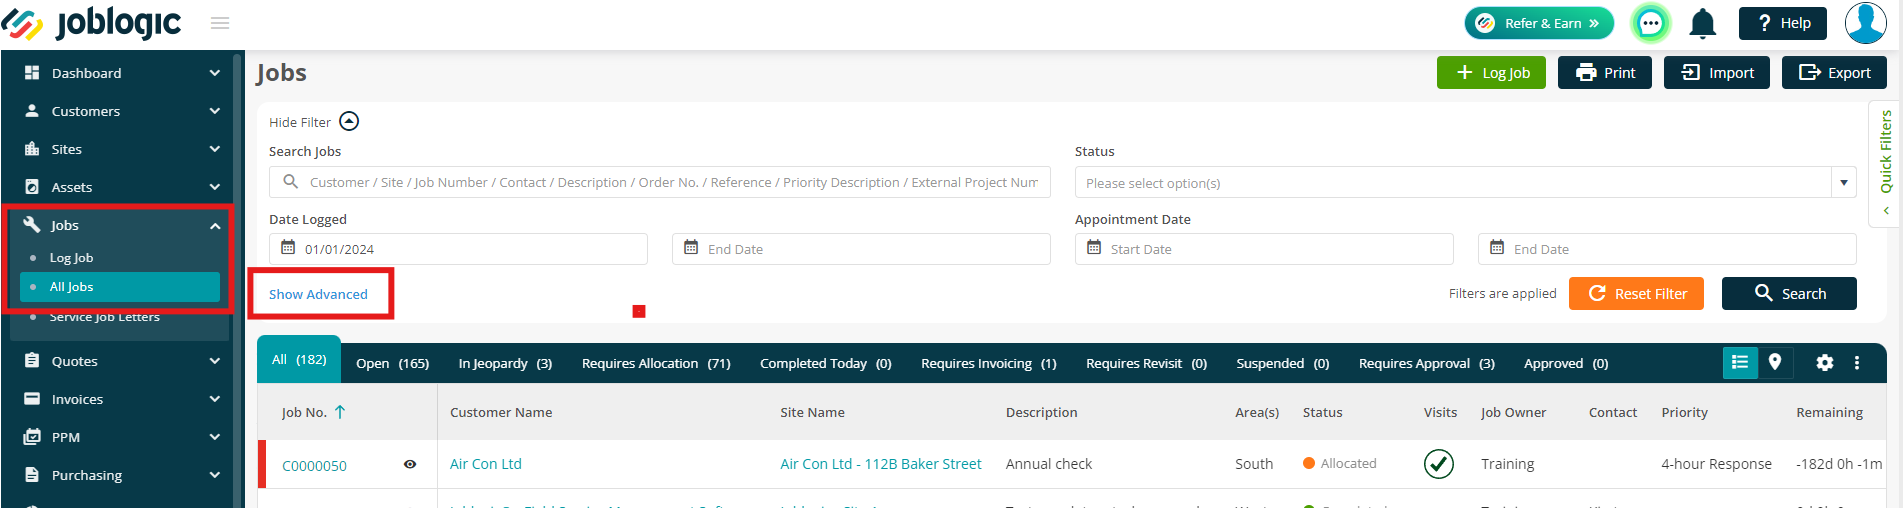
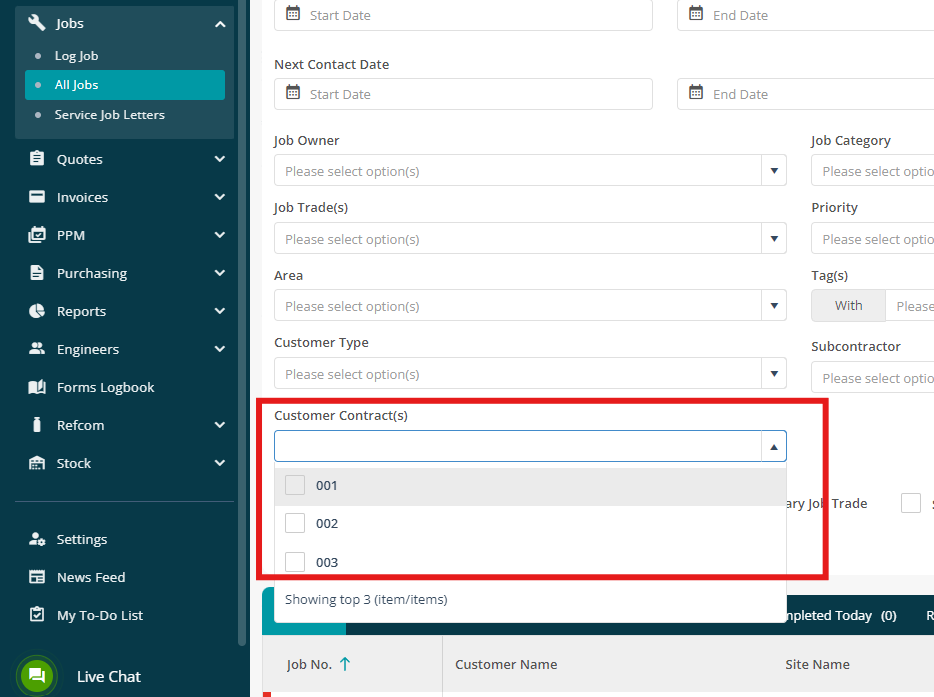
Searching for your Contracts
You can easily search for any Jobs, Quotes and PPMs that are assigned to a Customer Contract, by using the filters on the following screens:
- Jobs > All Jobs
- Quotes > All Quotes
- PPM > All PPM Contracts
The Customer Contract dropdown will be available under the Show Advanced option.
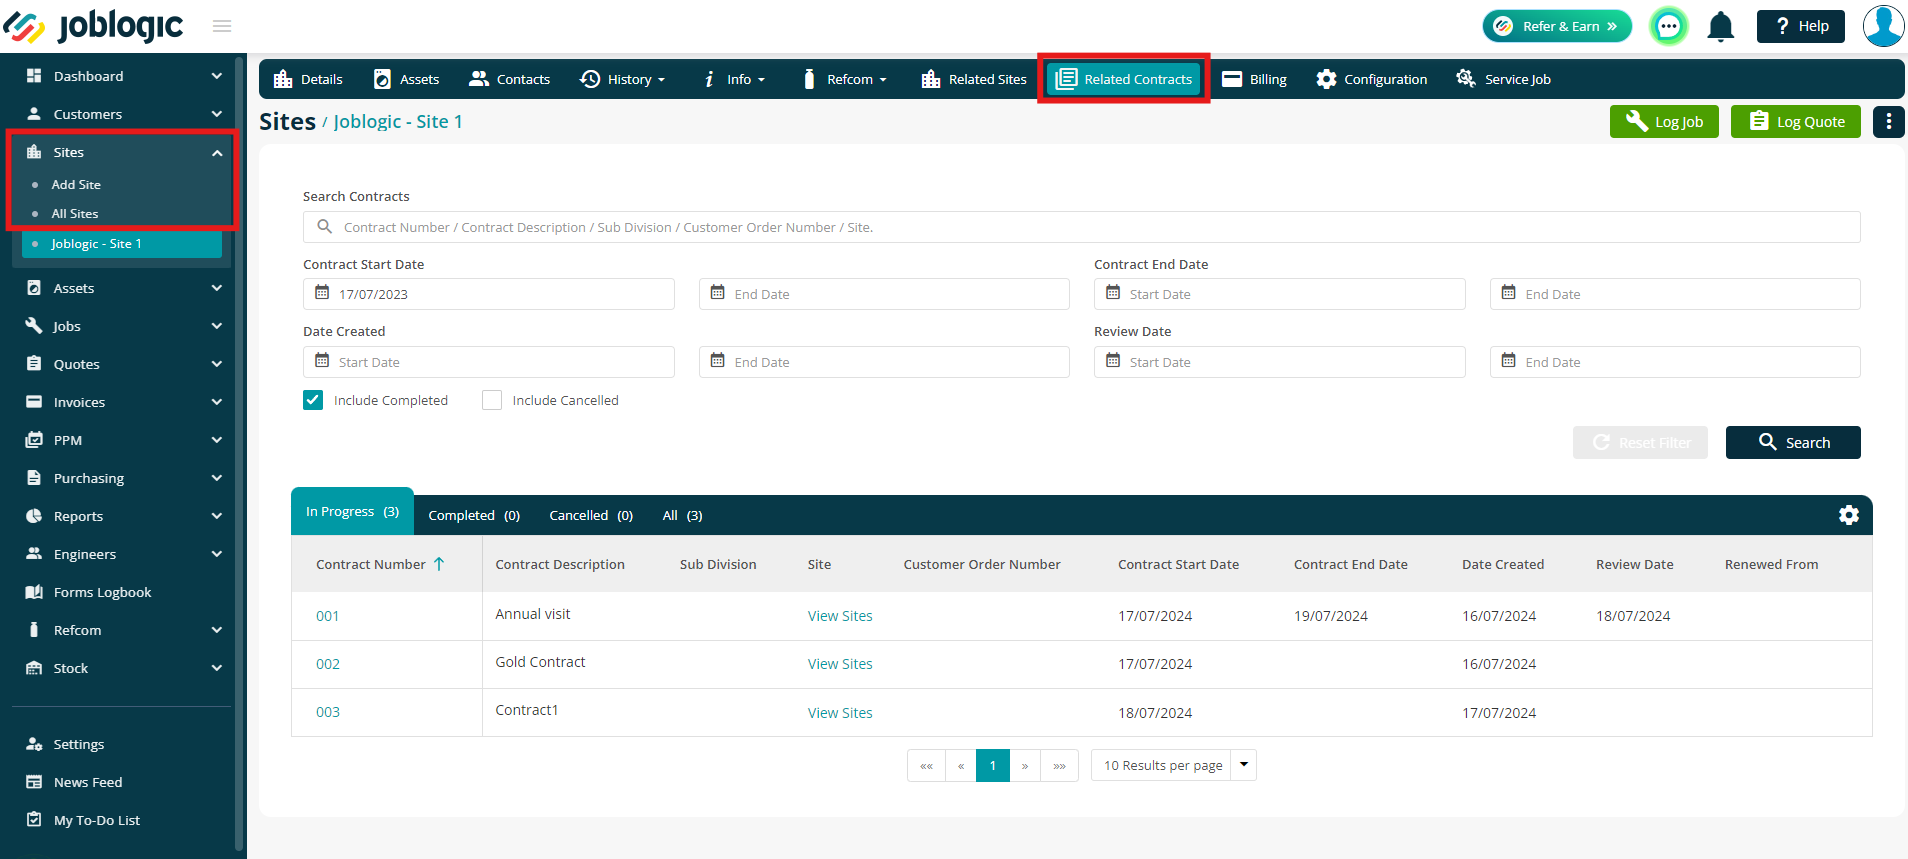
You will also be able to view your Contracts via Sites > All Sites > click Site Name > Related Contracts tab
Renewing your Contract
If you leave the End date blank, corresponding 1-year PPM Contracts will automatically renew upon expiration.
If a Review Date is entered for contracts, the system will generate a review notification. You can search your contracts by Review Date to check for any upcoming reviews, if needed. The one year contracts with no end date will automatically renew at the end of the specified review date to ensure continuity of the overarching contracts.
If an End Date is entered, you’ll then see an option to Renew Contract in the top right of your main Contract screen.
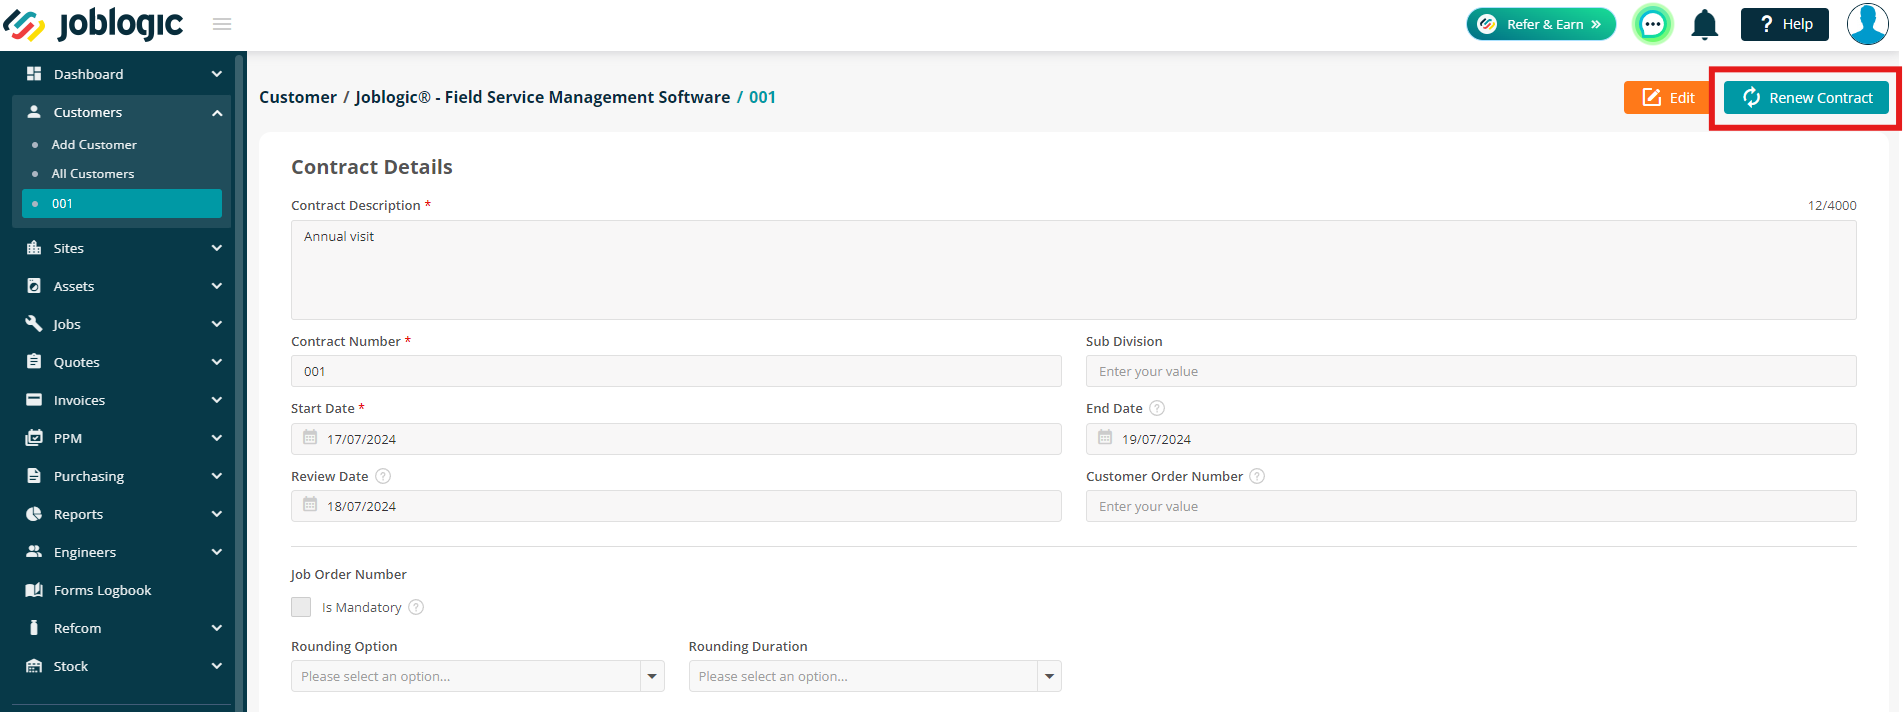
When you click this, you’ll be able to enter a new Contract Number, and amend other details as needed.
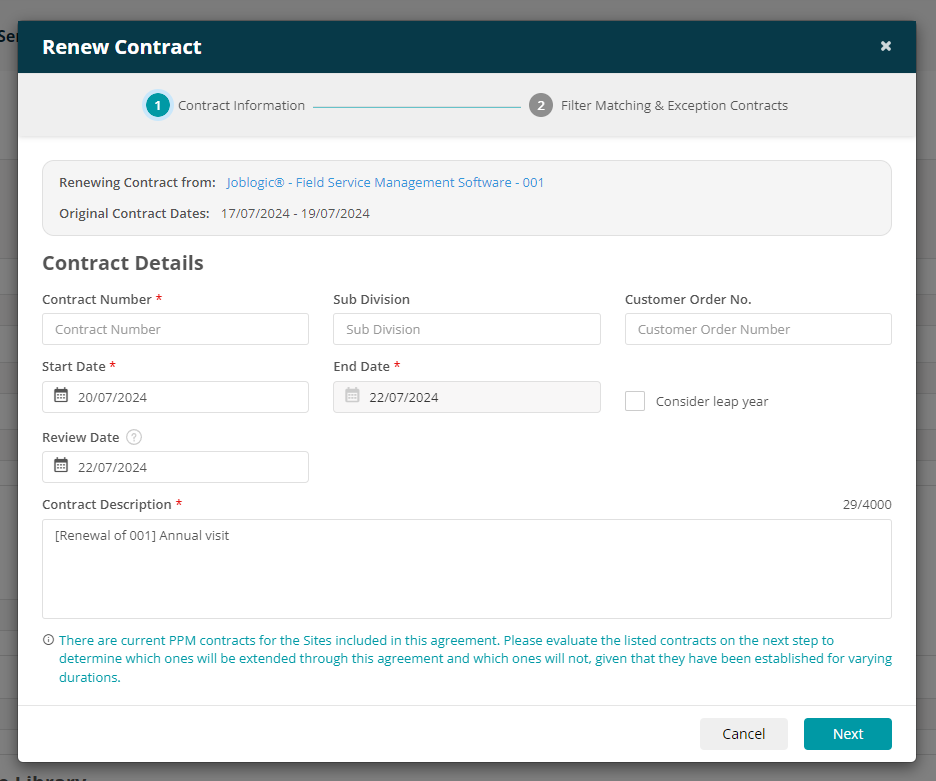
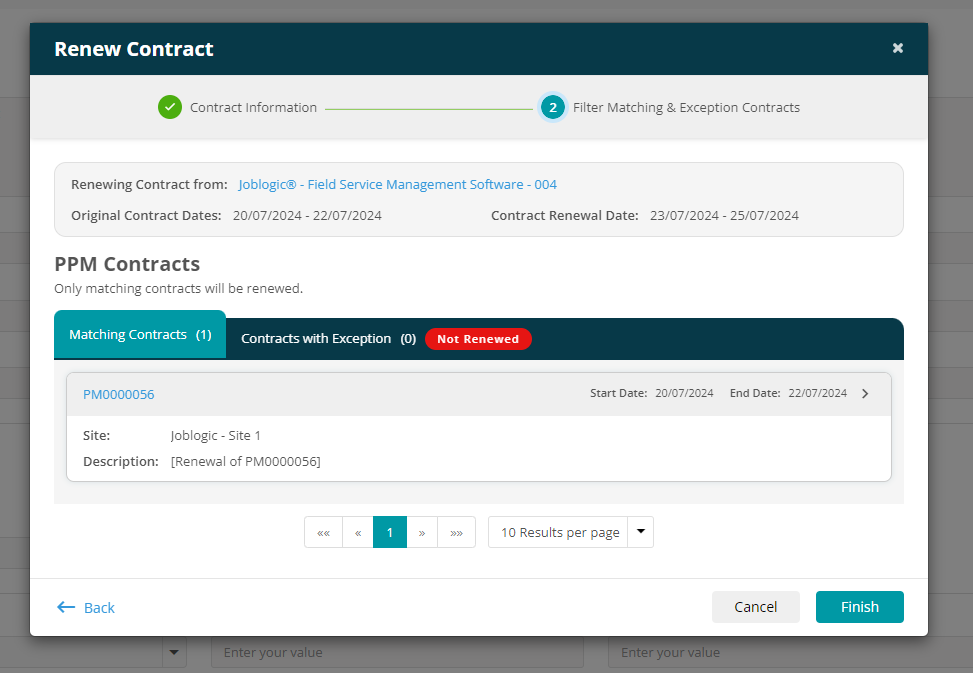
On the next screen you’ll be able to see which PPM Contracts will be renewed too.
Only PPM contracts with the same dates as the Customer Contract will show in the Matching Contracts list, and be renewed.
Any other PPM Contracts will show in the Contracts with Exception tab, and won't be renewed.
Click Finish to start the renewal
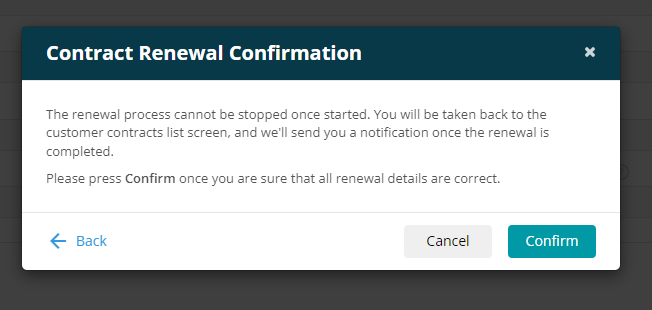
You’ll then be asked to confirm your renewal. You will not be able to make changes once you click Confirm
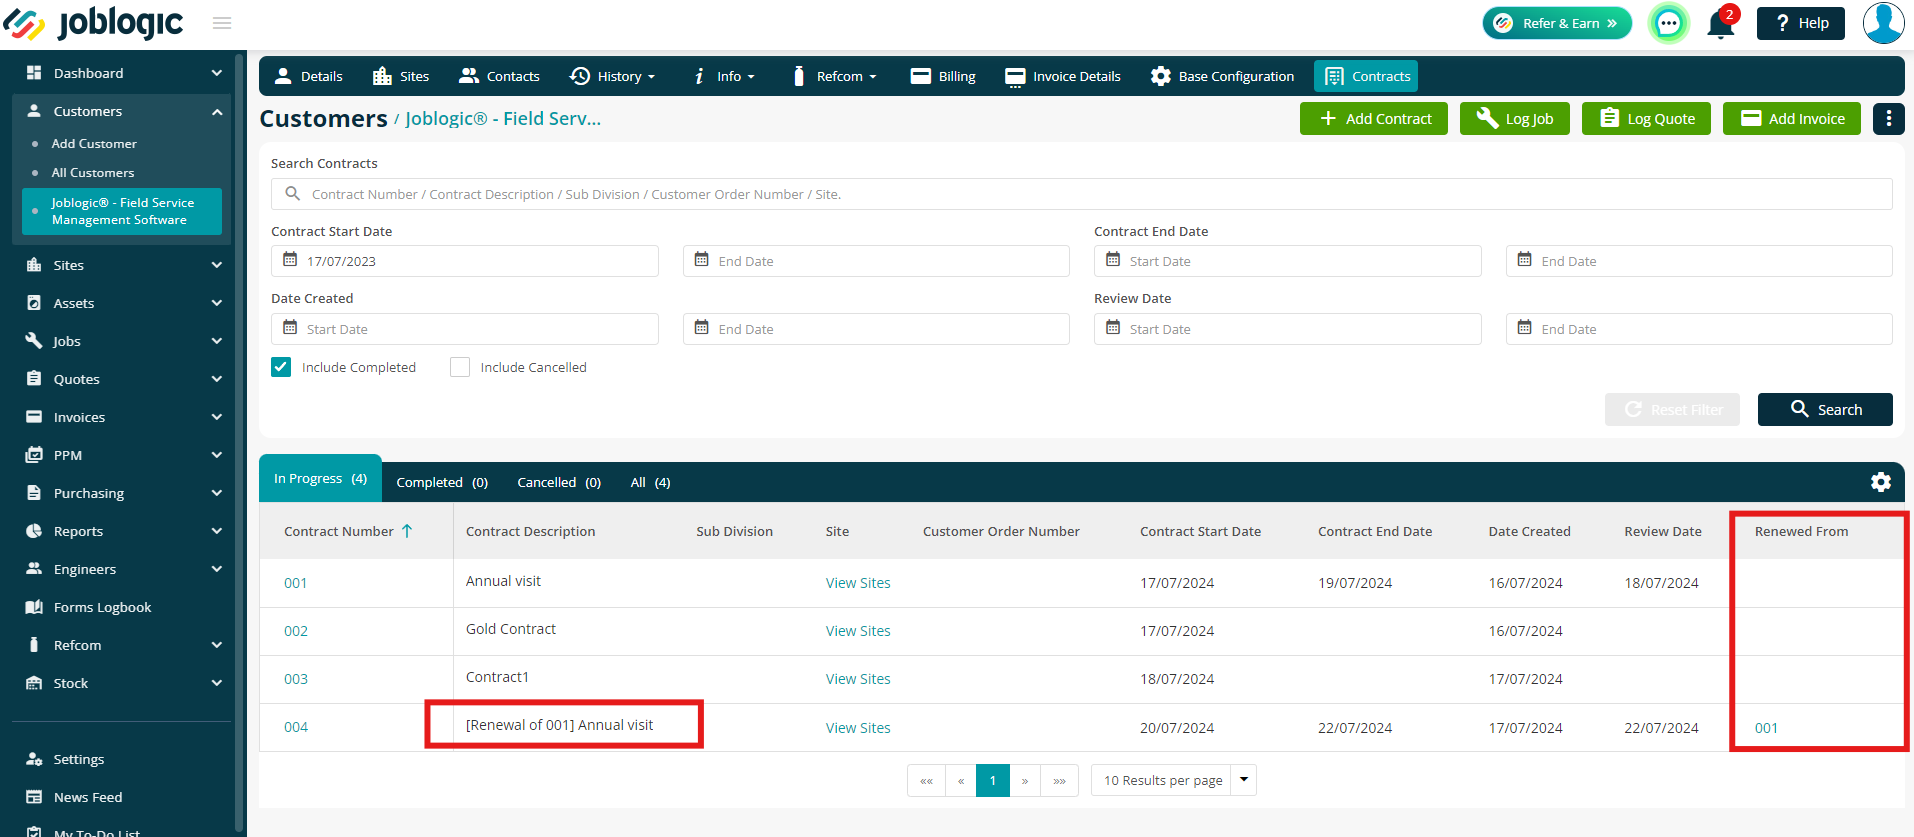
Once the renewal has been completed, the Renewed From field will be populated so you can easily see which contract is linked to the current contract, for historical purposes.
Cancelling your Contract
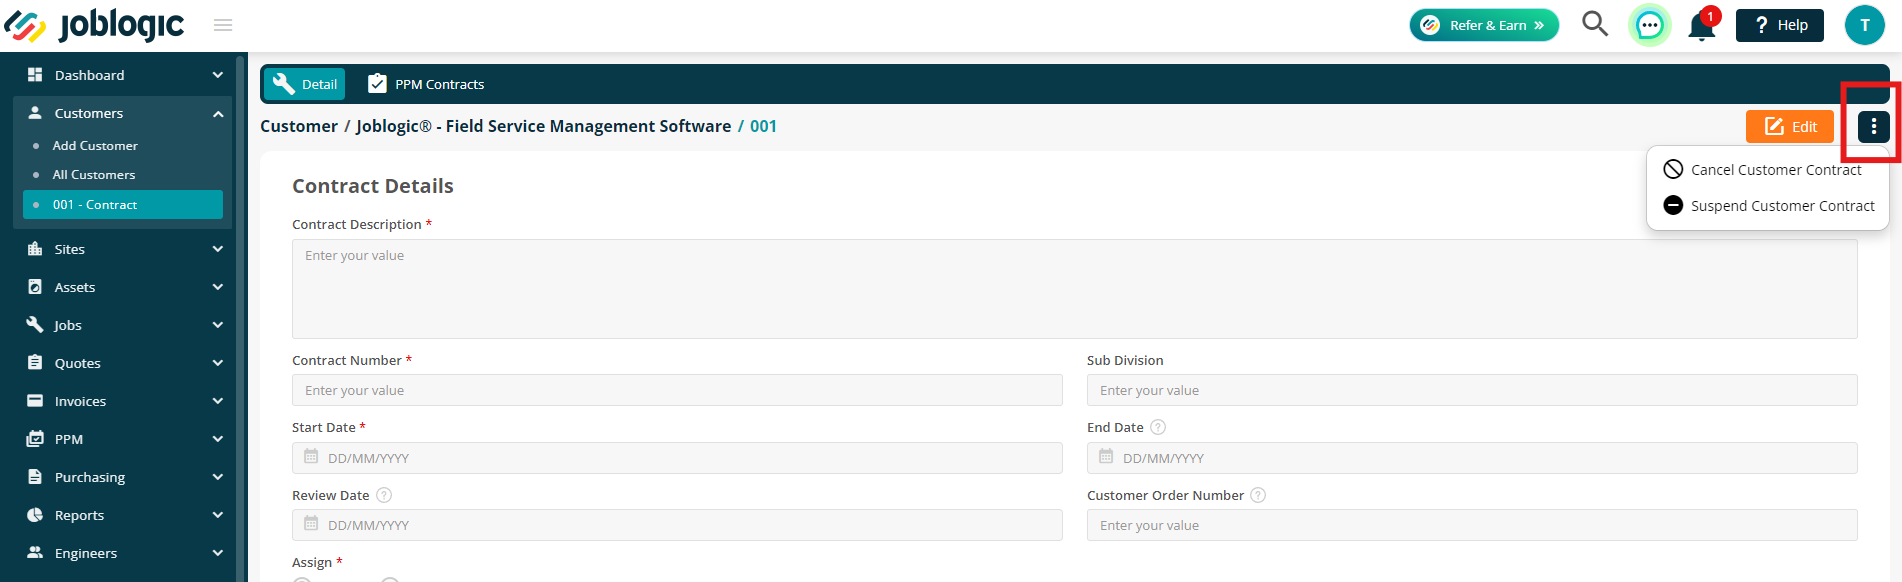
Navigate to your Customer Contract (Customer > All Customers > select customer > Contracts tab > select Contract)
Click the 3 dots in the top right corner and select Cancel Customer Contract
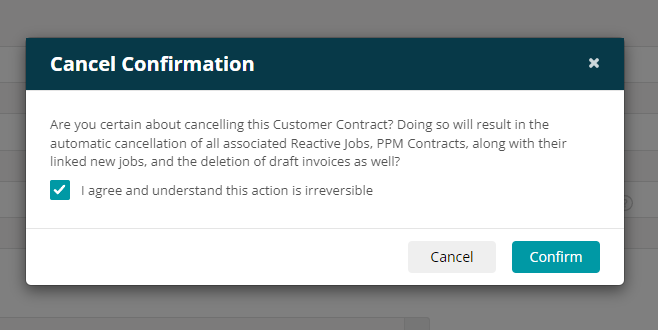
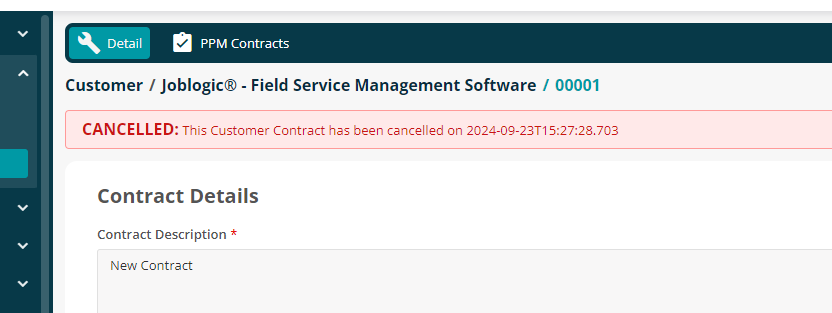
You will need to confirm the cancellation. Read through the text, tick to agree, and then click Confirm.
Suspending/Reactivating your Contract
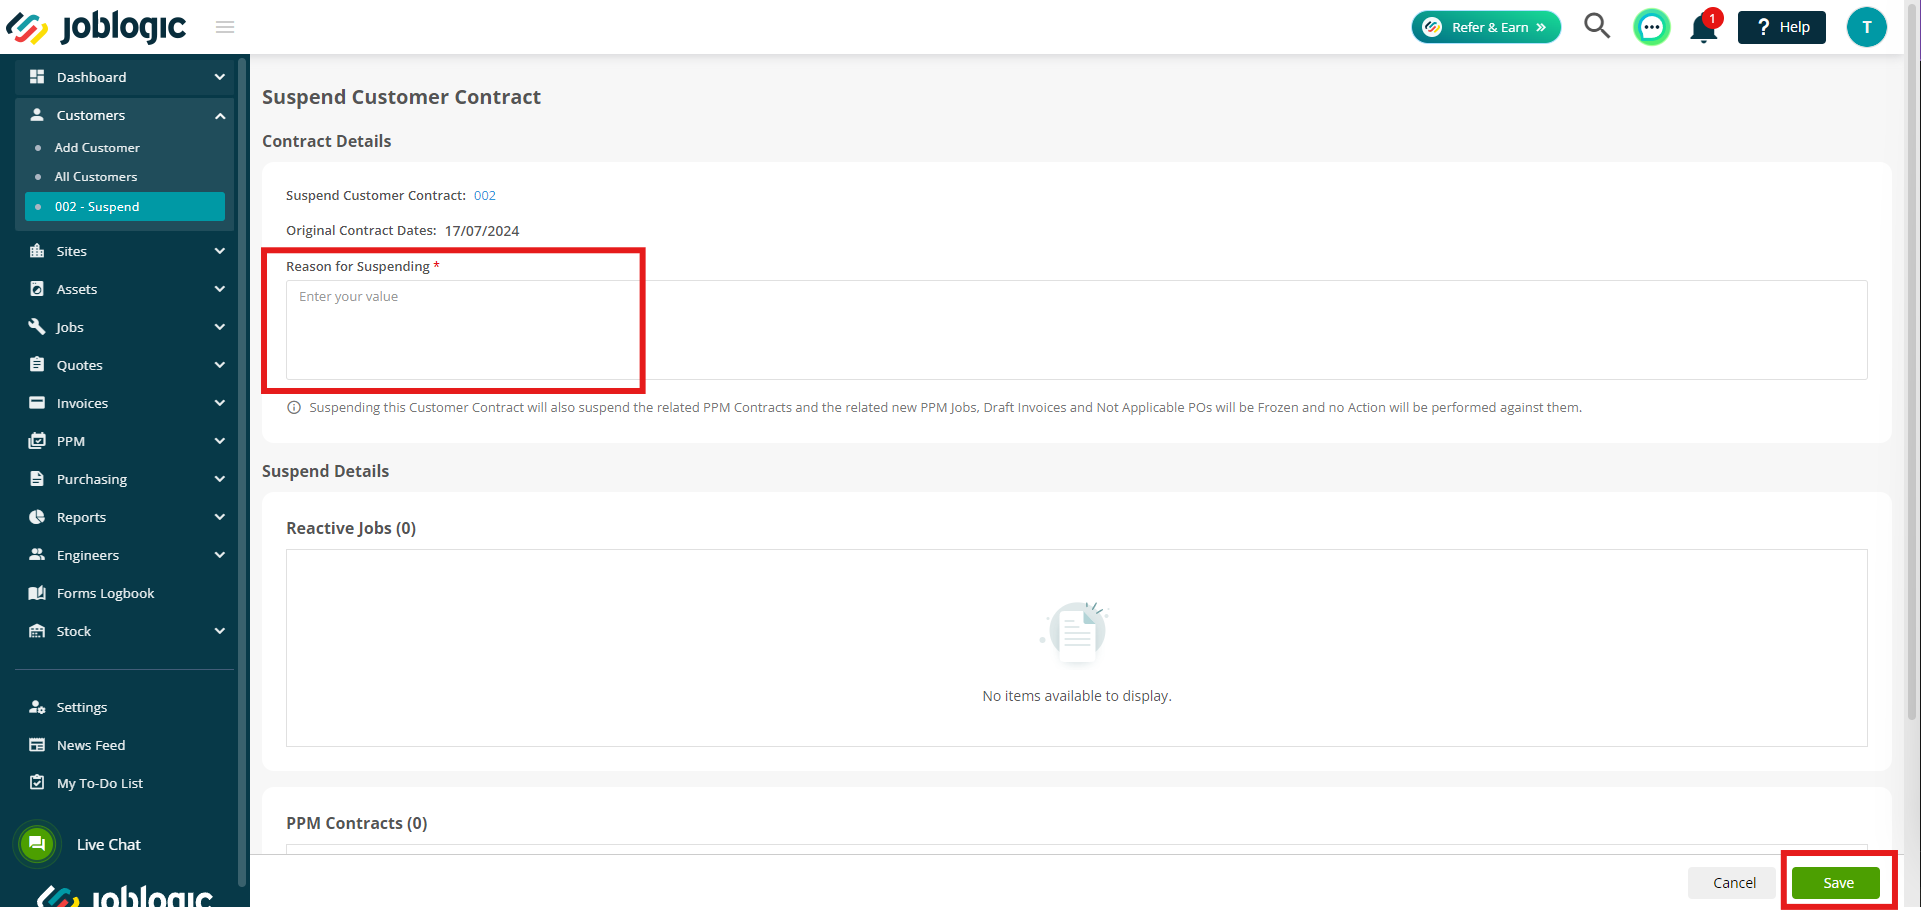
Navigate to your Customer Contract (Customer > All Customers > select customer > Contracts tab > select Contract)
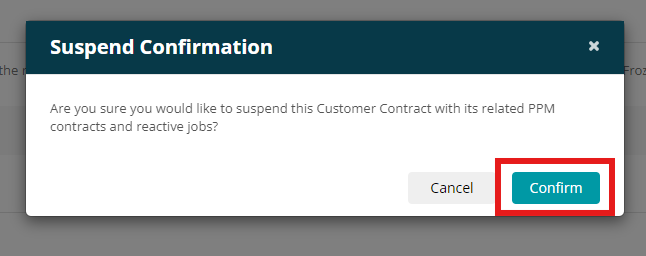
Click the 3 dots in the top right corner and select Suspend Customer Contract
You'll be transferred to a new page where you can enter your Reason for Suspending.
Click Save.
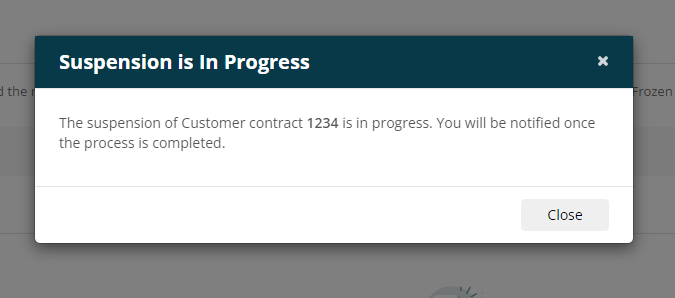
Confirm the suspension, by clicking Confirm on the pop up box.
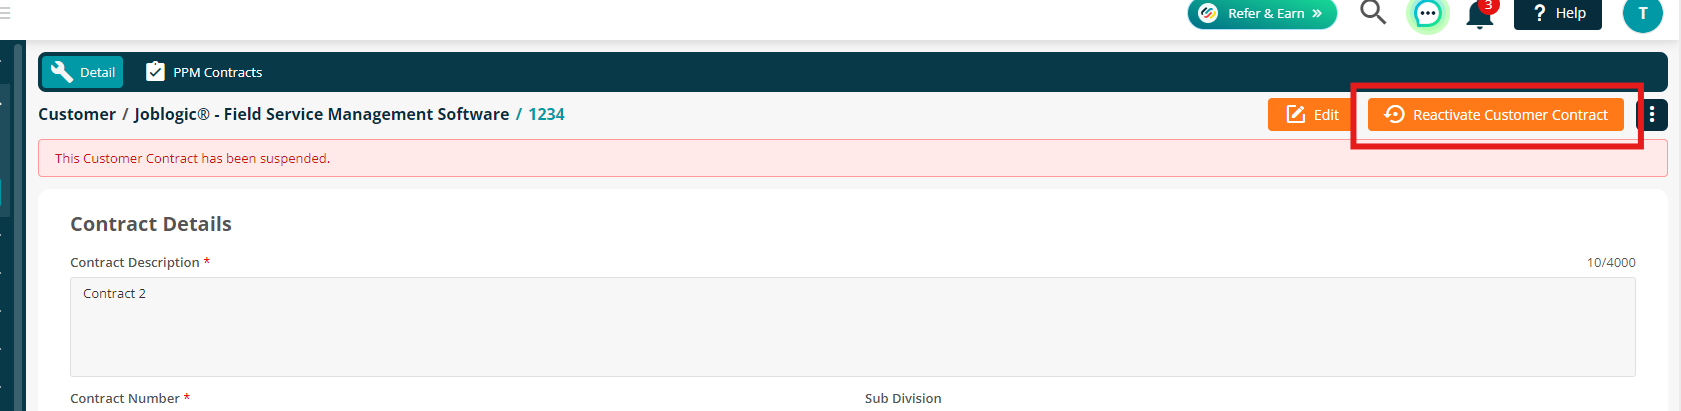
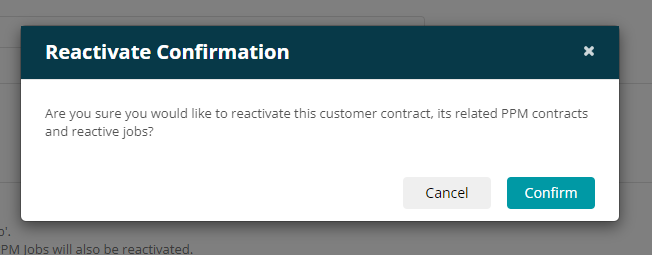
To reactivate this contract, click Reactivate Customer Contract
Check over your details, and make any amendments as needed before clicking the Save button in the bottom right.
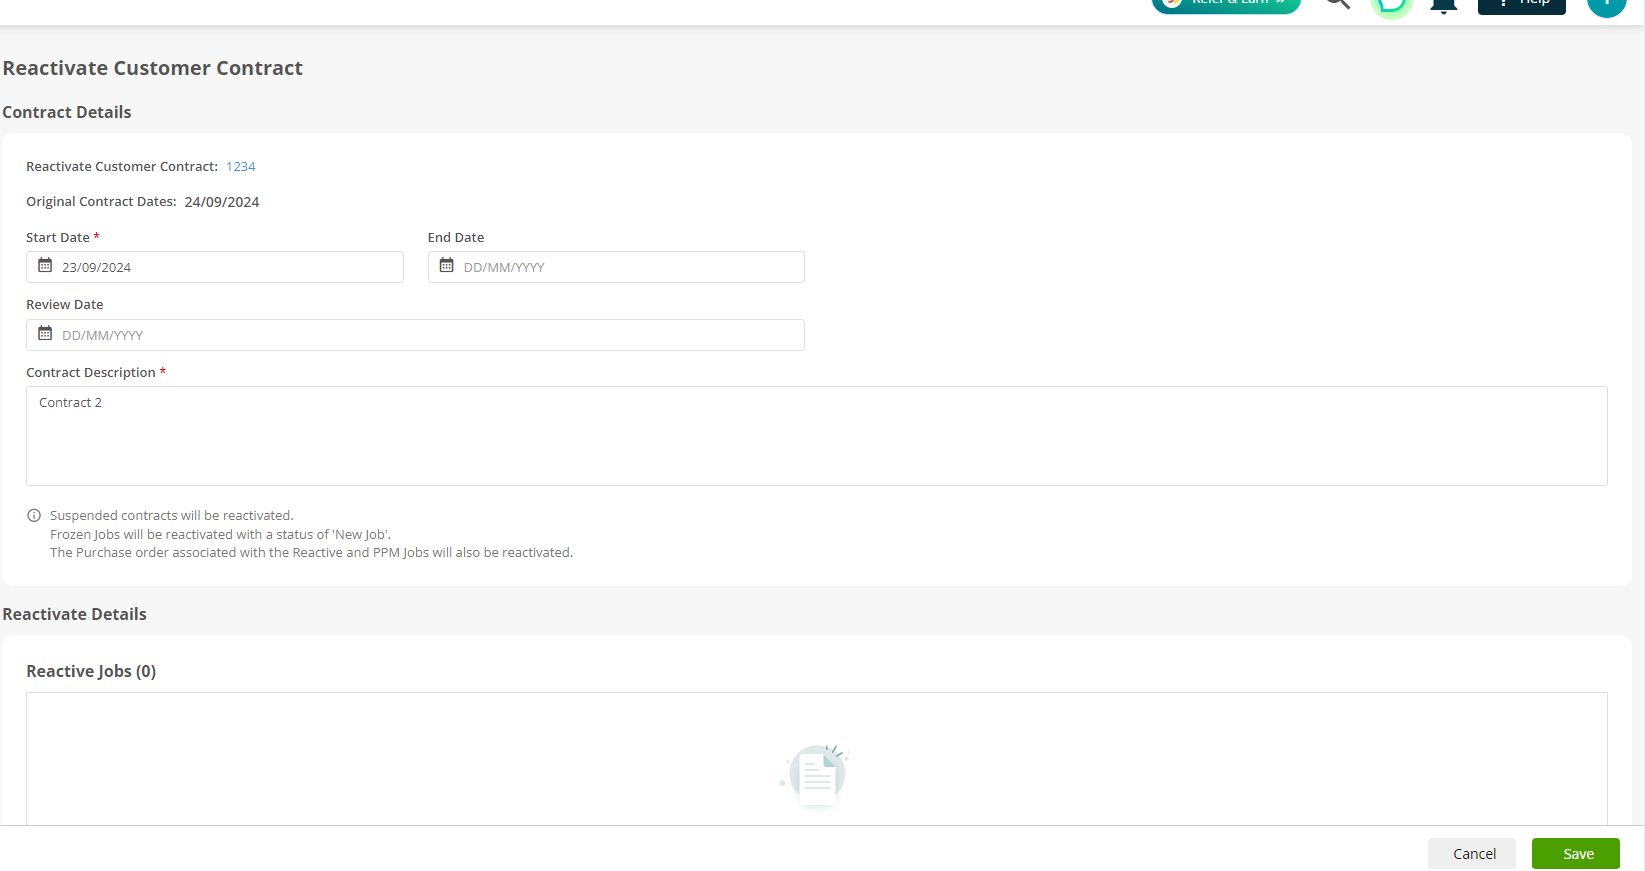
Confirm your Reactivation.
Further Support
For further information or assistance with the above, contact our Support Team on 0800 326 5561 or email support@joblogic.com. Alternatively, our Customer Success Management team can be reached by emailing customersuccess@joblogic.com
Publishing Details
This document was written and produced by Joblogic’s Technical Writing team and was last updated on the date specified above. Be aware that the information provided may be subject to change following further updates on the matter becoming available. Additionally, details within the guide may vary depending on your Joblogic account’s user permissions.