- 12 Mar 2025
- 7 Minutes to read
- Print
- PDF
Direct Sales
- Updated on 12 Mar 2025
- 7 Minutes to read
- Print
- PDF
Introduction
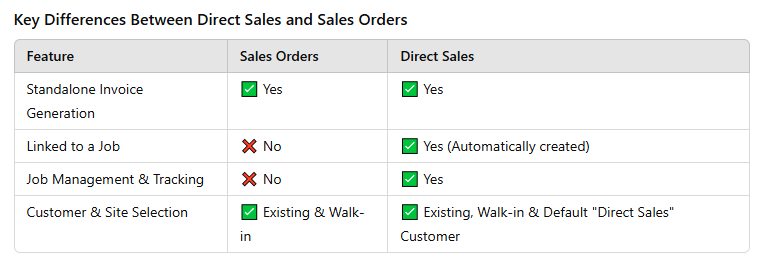
The Joblogic Marketplace provides a powerful solution for handling direct sales through the Direct Sales app. This app builds upon the functionality of the original Sales Orders app, offering additional integration with the Joblogic back-office system.
With Direct Sales, users can quickly generate invoices for over-the-counter or ad-hoc sales while also ensuring that each transaction is logged as a job within the system. This means that every direct sale is now fully traceable, making it easier to track sales history, manage stock, and streamline operational workflows within your Joblogic account.
Users who only need to generate a quick invoice without job and item tracking may still prefer the Sales Orders app. However, those who require full sales visibility within Joblogic’s back-office system, with jobs automatically logged for every sale, will benefit from using Direct Sales.
This guide will walk you through how to access and use the Direct Sales app and explain how and where the invoice, job and other details are logged and stored.
Accessing the App
Once you have subscribed to the ‘Direct Sales’ marketplace app it can be accessed via the Marketplace area down the left side navigation panel within the system.
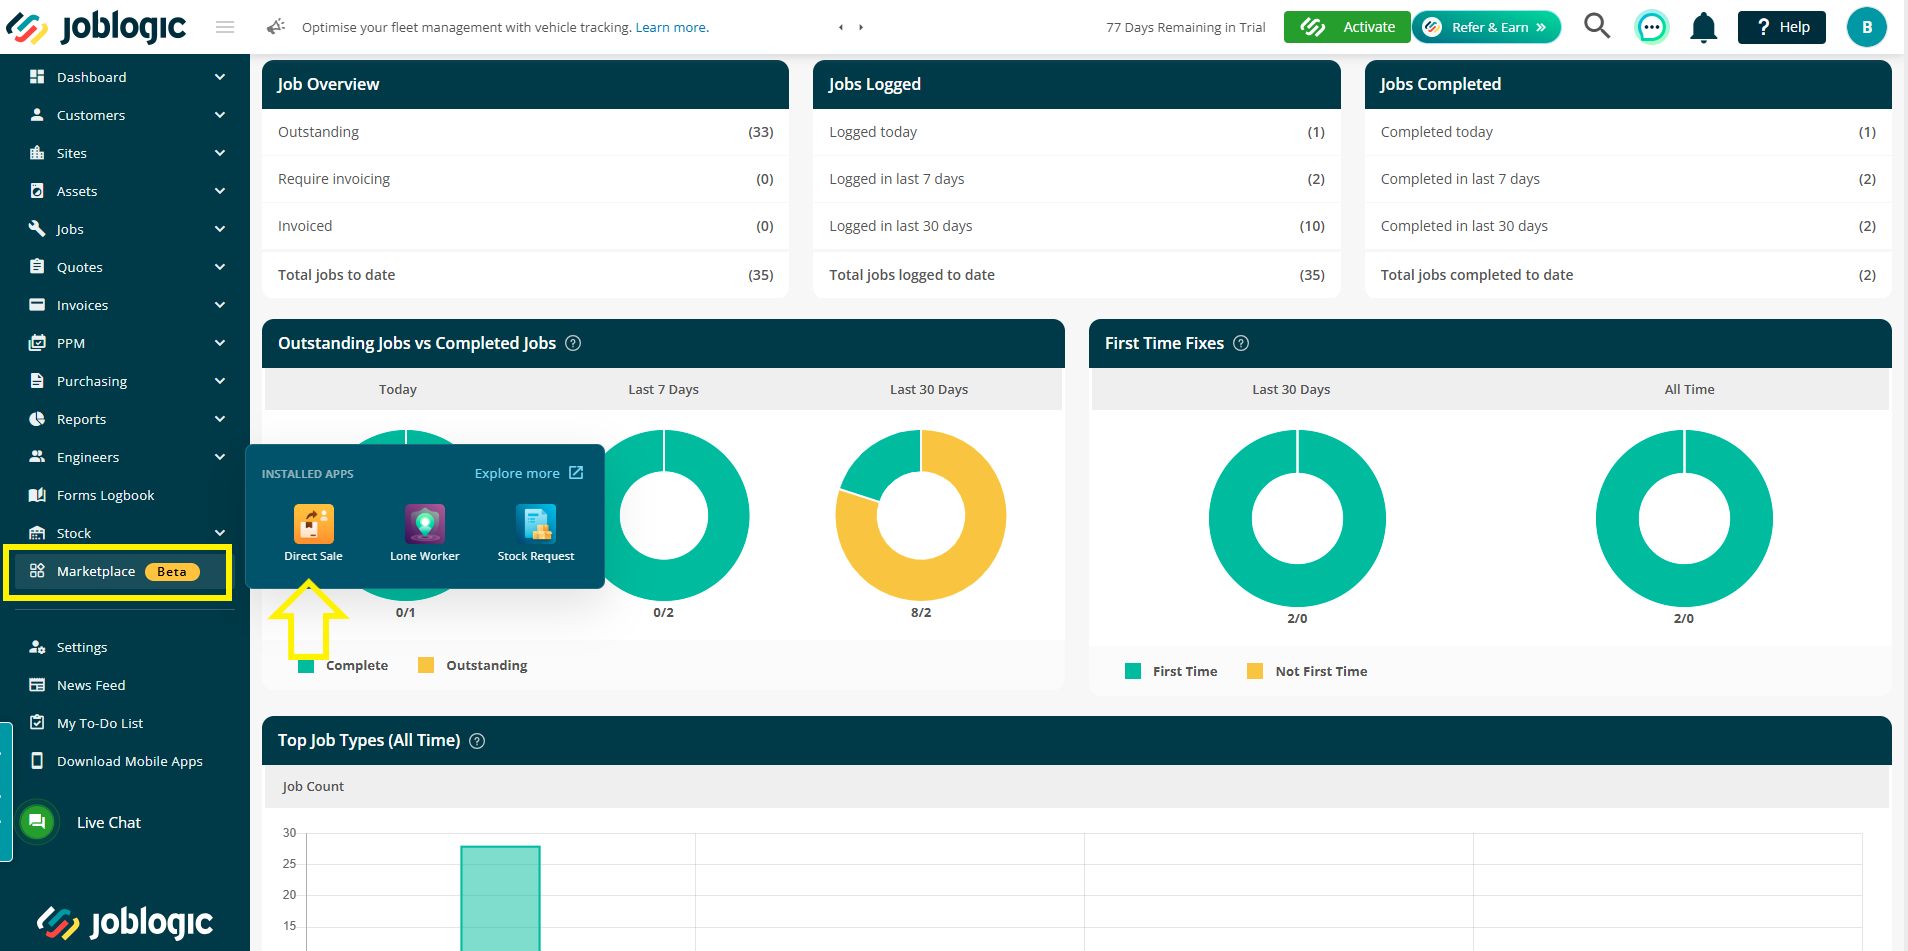
Upon selecting the app, the Direct Sales App will then open.
Using the Direct Sales App
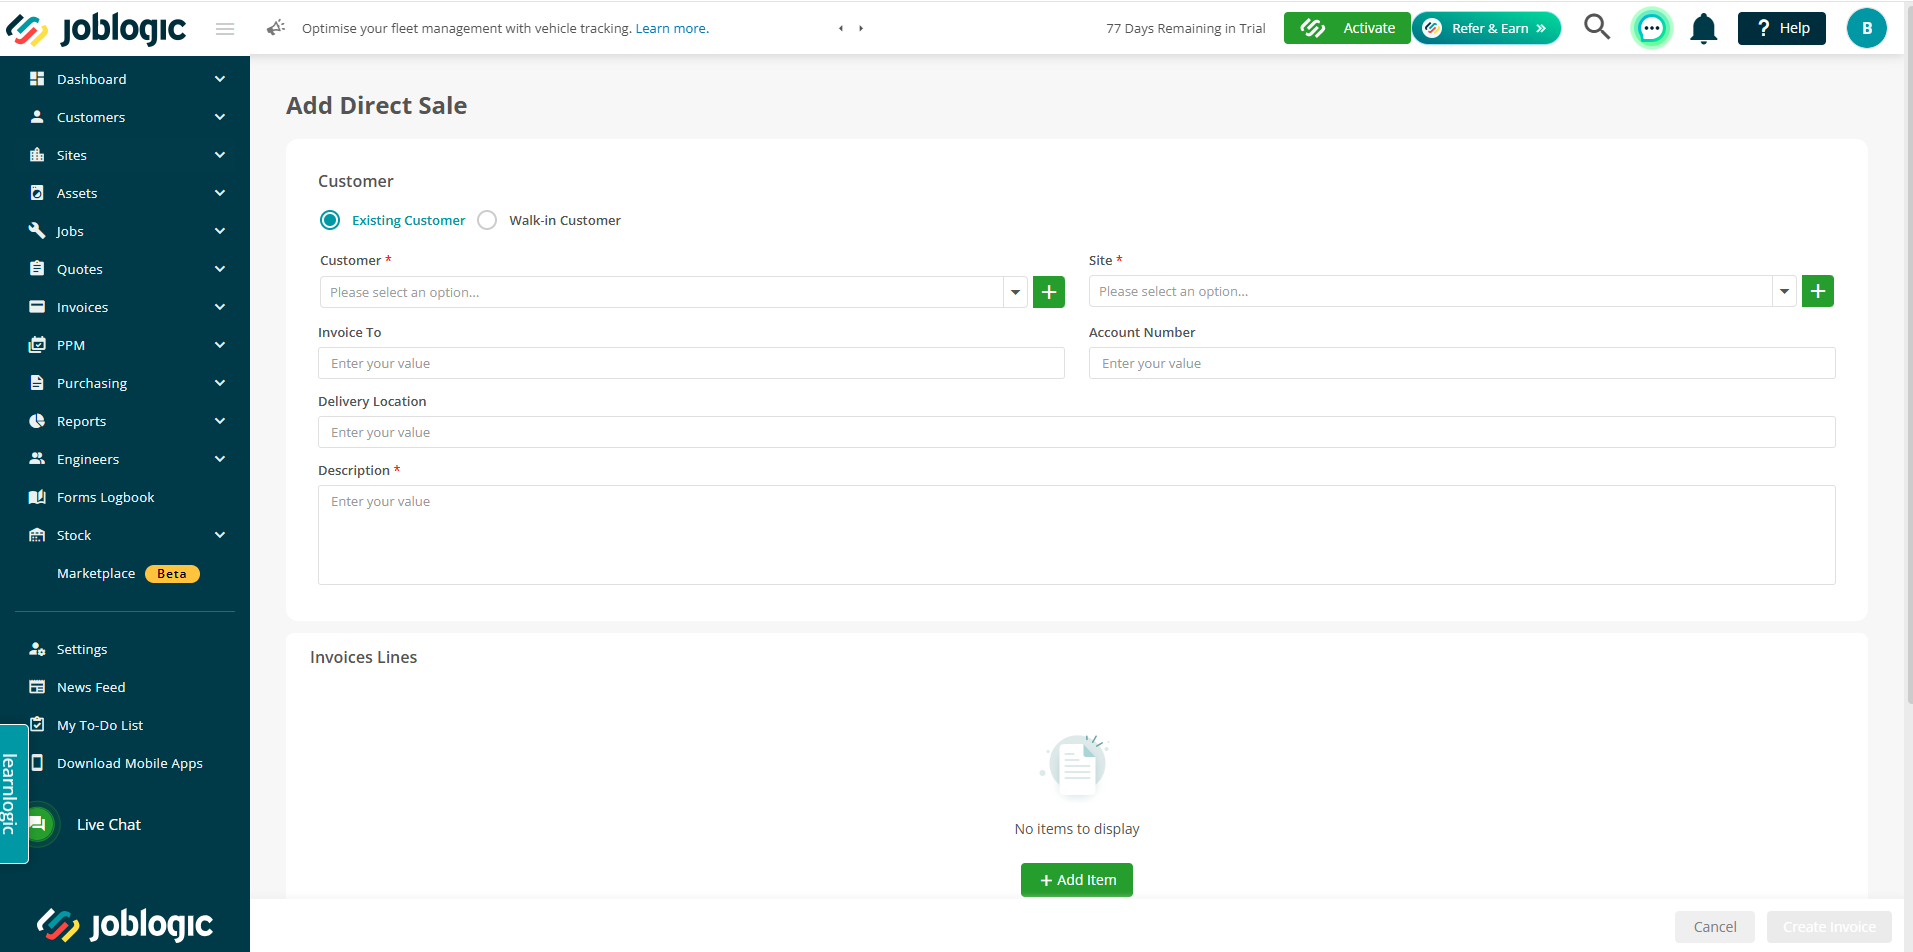
Once you have accessed the app, the initial page directs you to an ‘Add Direct Sale’ page used for creating a new direct sale.
This ‘Add Direct Sale’ page provides three different options for recording a direct sale:
Existing Customer – For customers already recorded within your Joblogic system. This option allows you to raise a sale or invoice without the need to log a separate job manually.
Walk-in Customer – For one-off sales where the customer’s details are not recorded. This option simply logs the sale under a generic ‘Direct Sales’ record similar to the Sales Orders app. See here for more details on this.
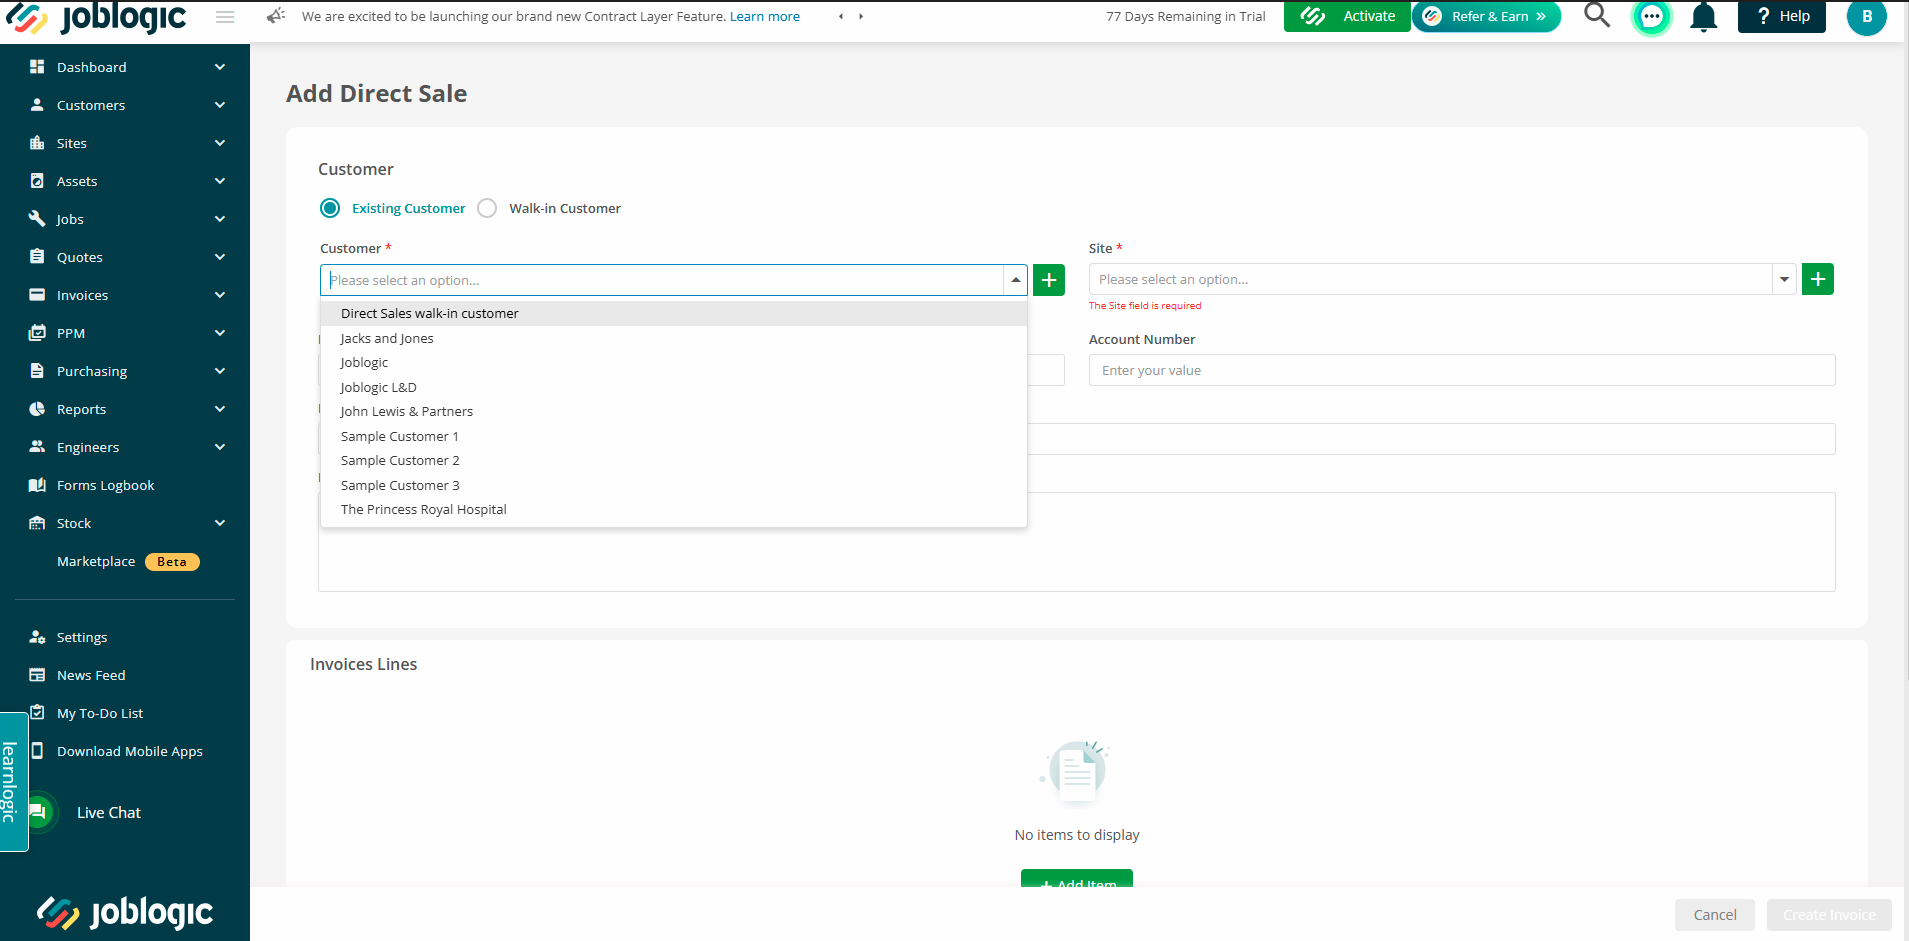
Default Direct Sales Customer (Direct Sales walk-in customer) – A pre-set customer profile within the system for handling regular direct sales without manually entering details each time. This ensures every direct sale is logged as a job within Joblogic, maintaining full traceability without requiring specific customer or site information.
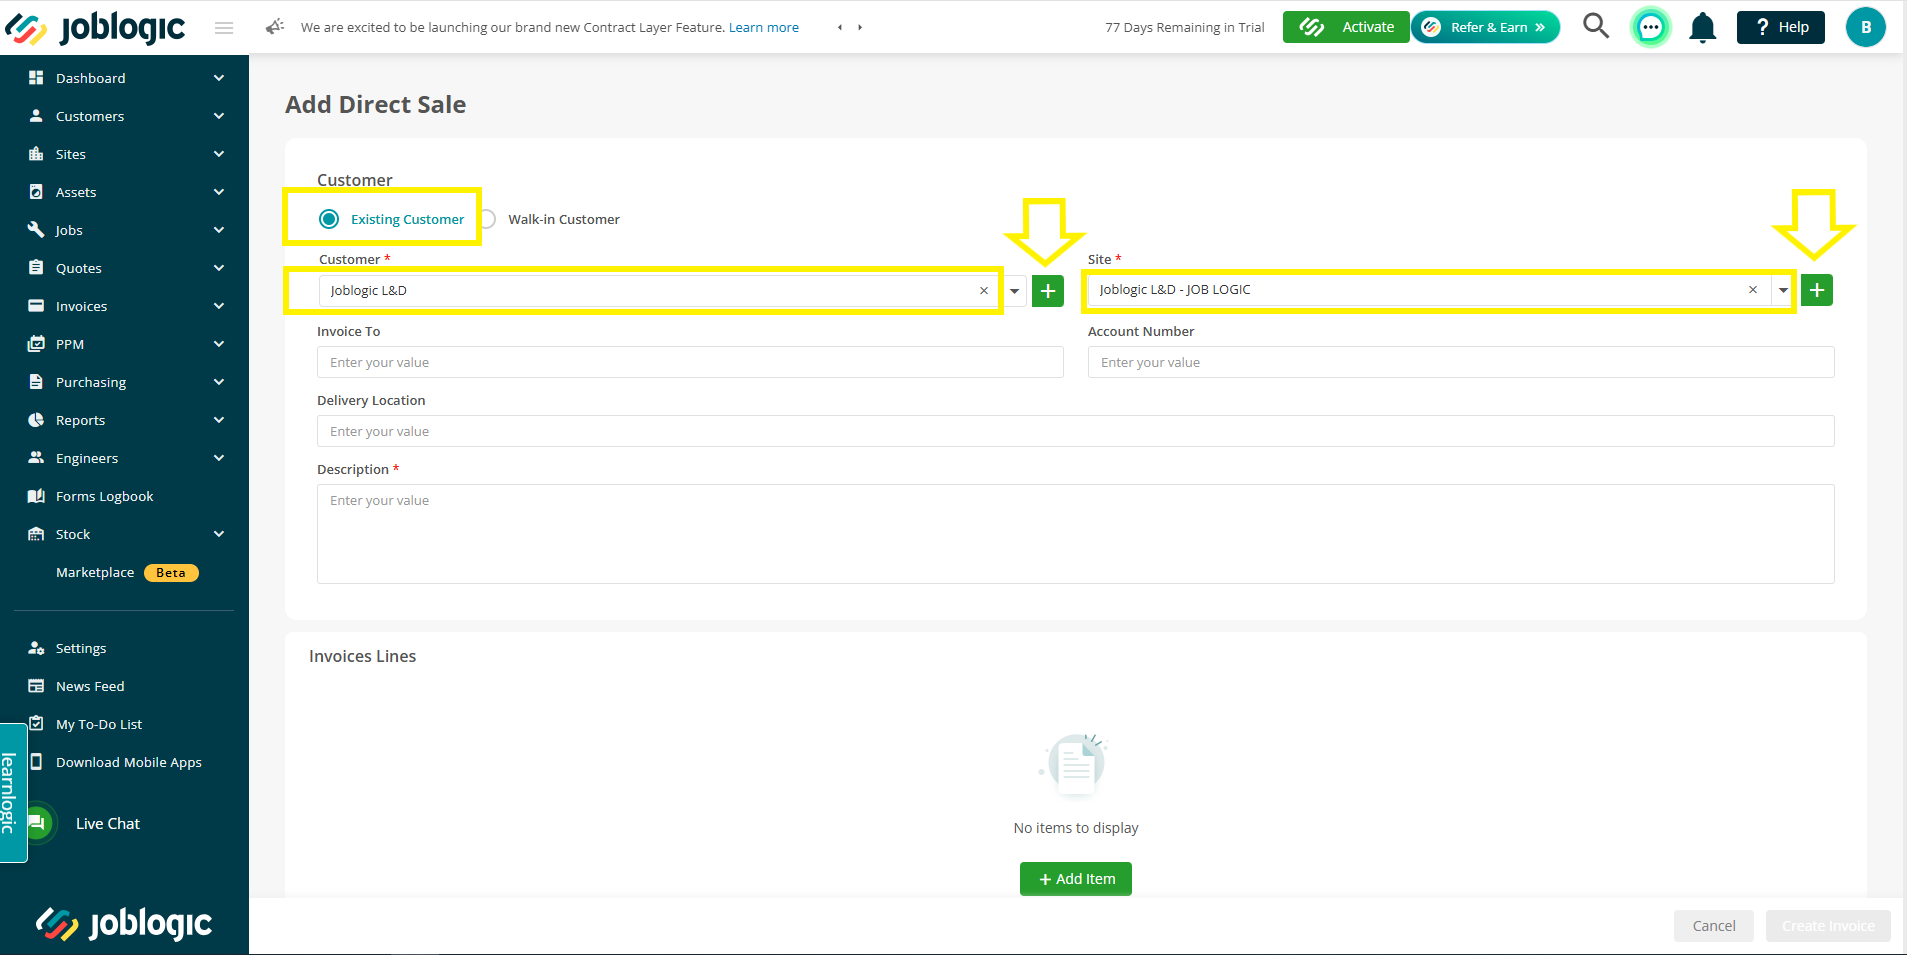
If you select the ‘Existing Customer’ option, the ‘Customer’ and ‘Site’ options will become available to either select the existing details of the customer and site from the dropdowns (populated by those already set up in your Joblogic) or to add new ones via the quick add ‘+’ icons if they do not already exist and you wish to record the customer/site’s details for later use.
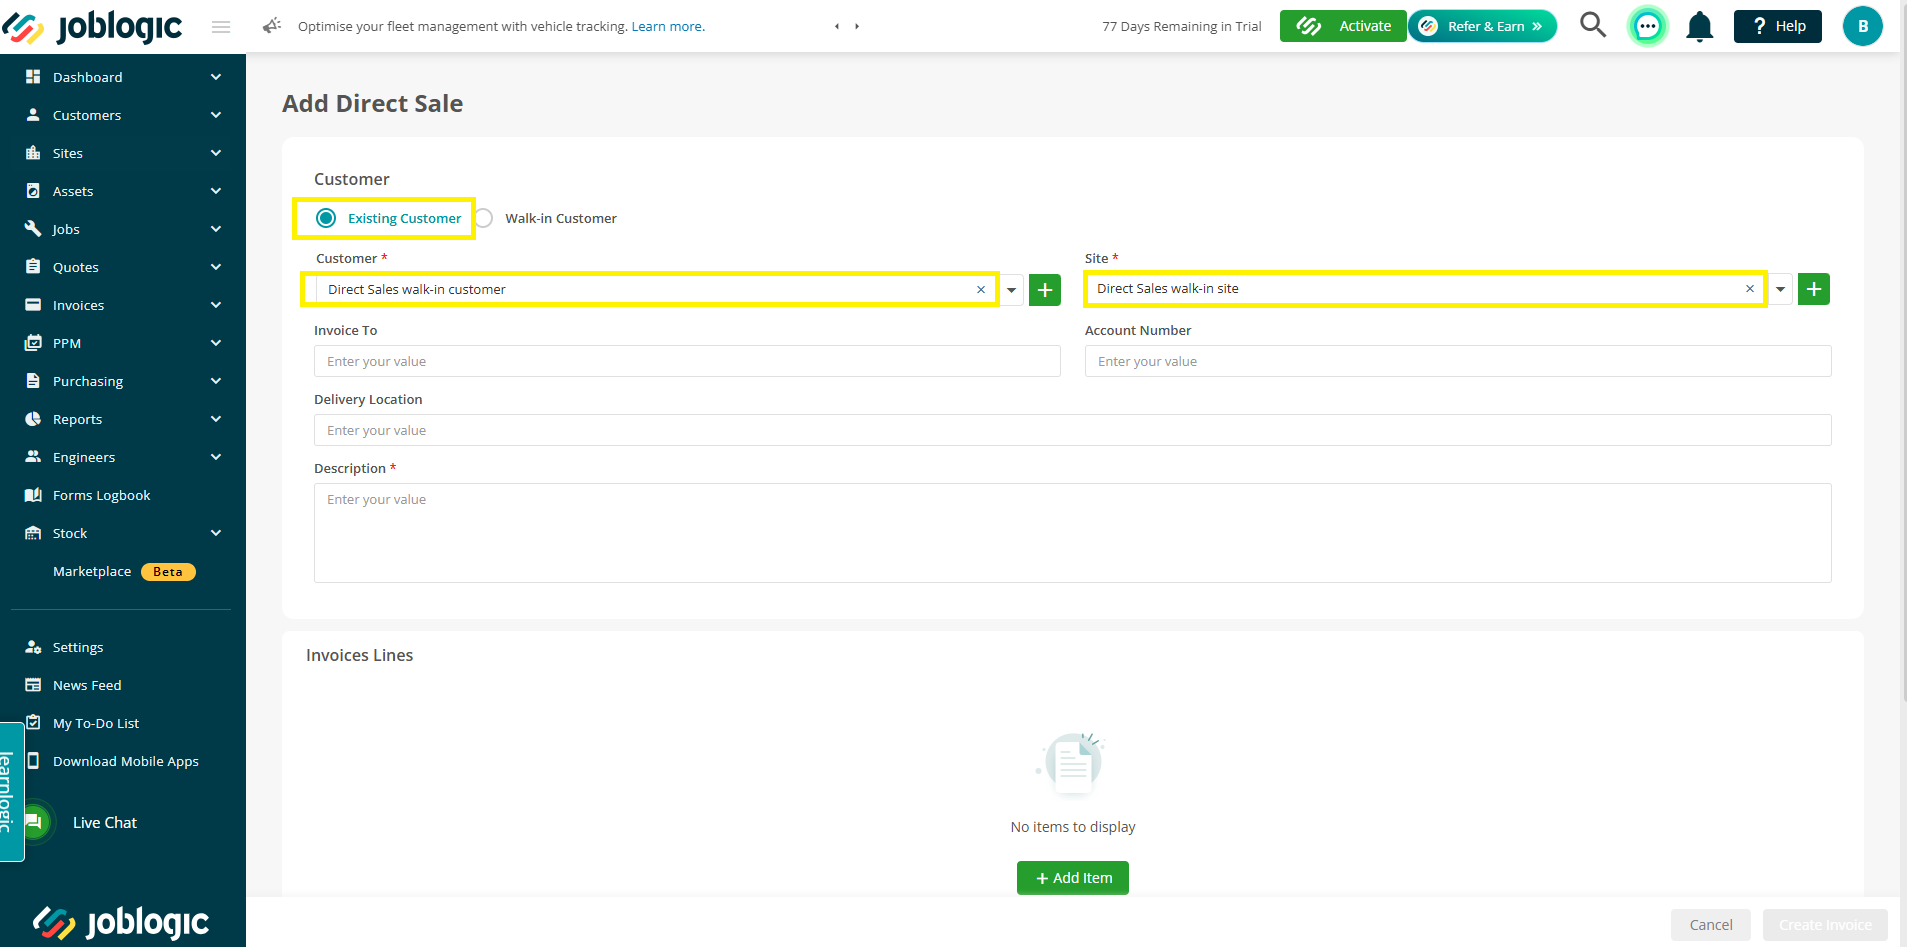
Alternatively, the ‘Direct Sales walk-in customer’ can be selected which refers to point 3 above (to log a direct sale against an associated job but for a customer and site whose details are not to be recorded).
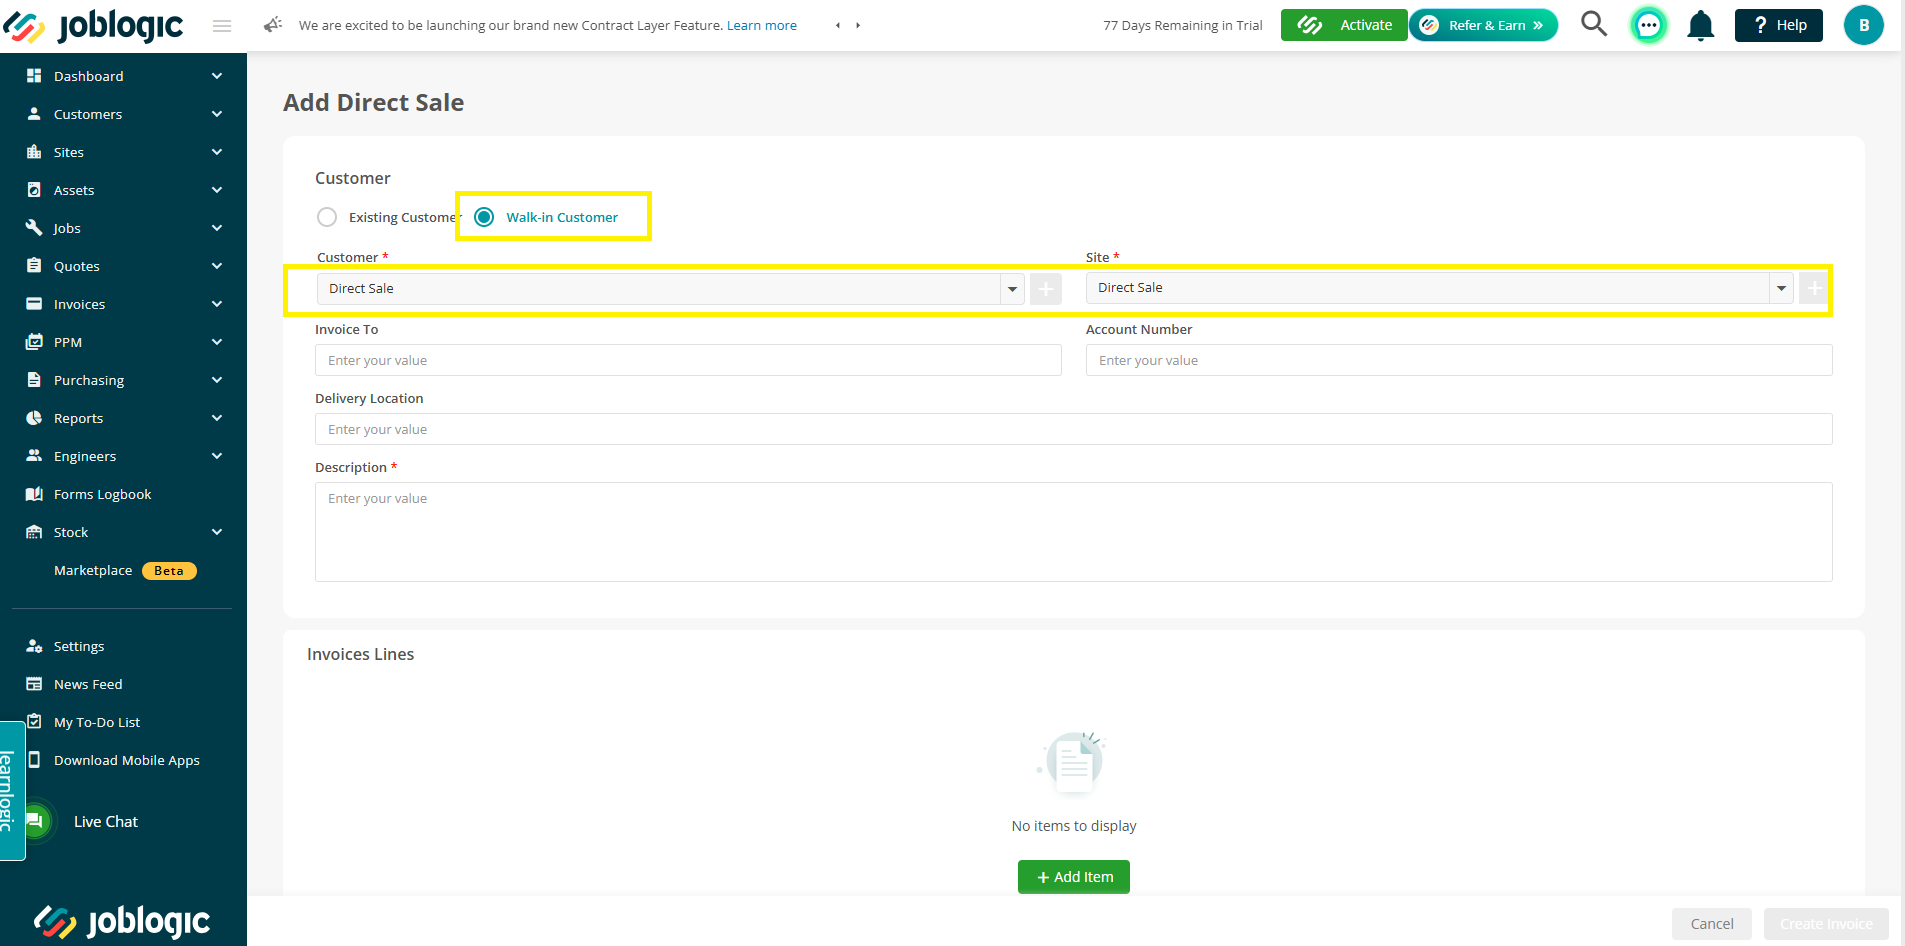
If you select the ‘Walk-in Customer’ option, this means that you do not wish to record the customer's details or log a job and solely want to record the sale/invoice so the customer and site fields will prepopulate as ‘Direct Sales’.
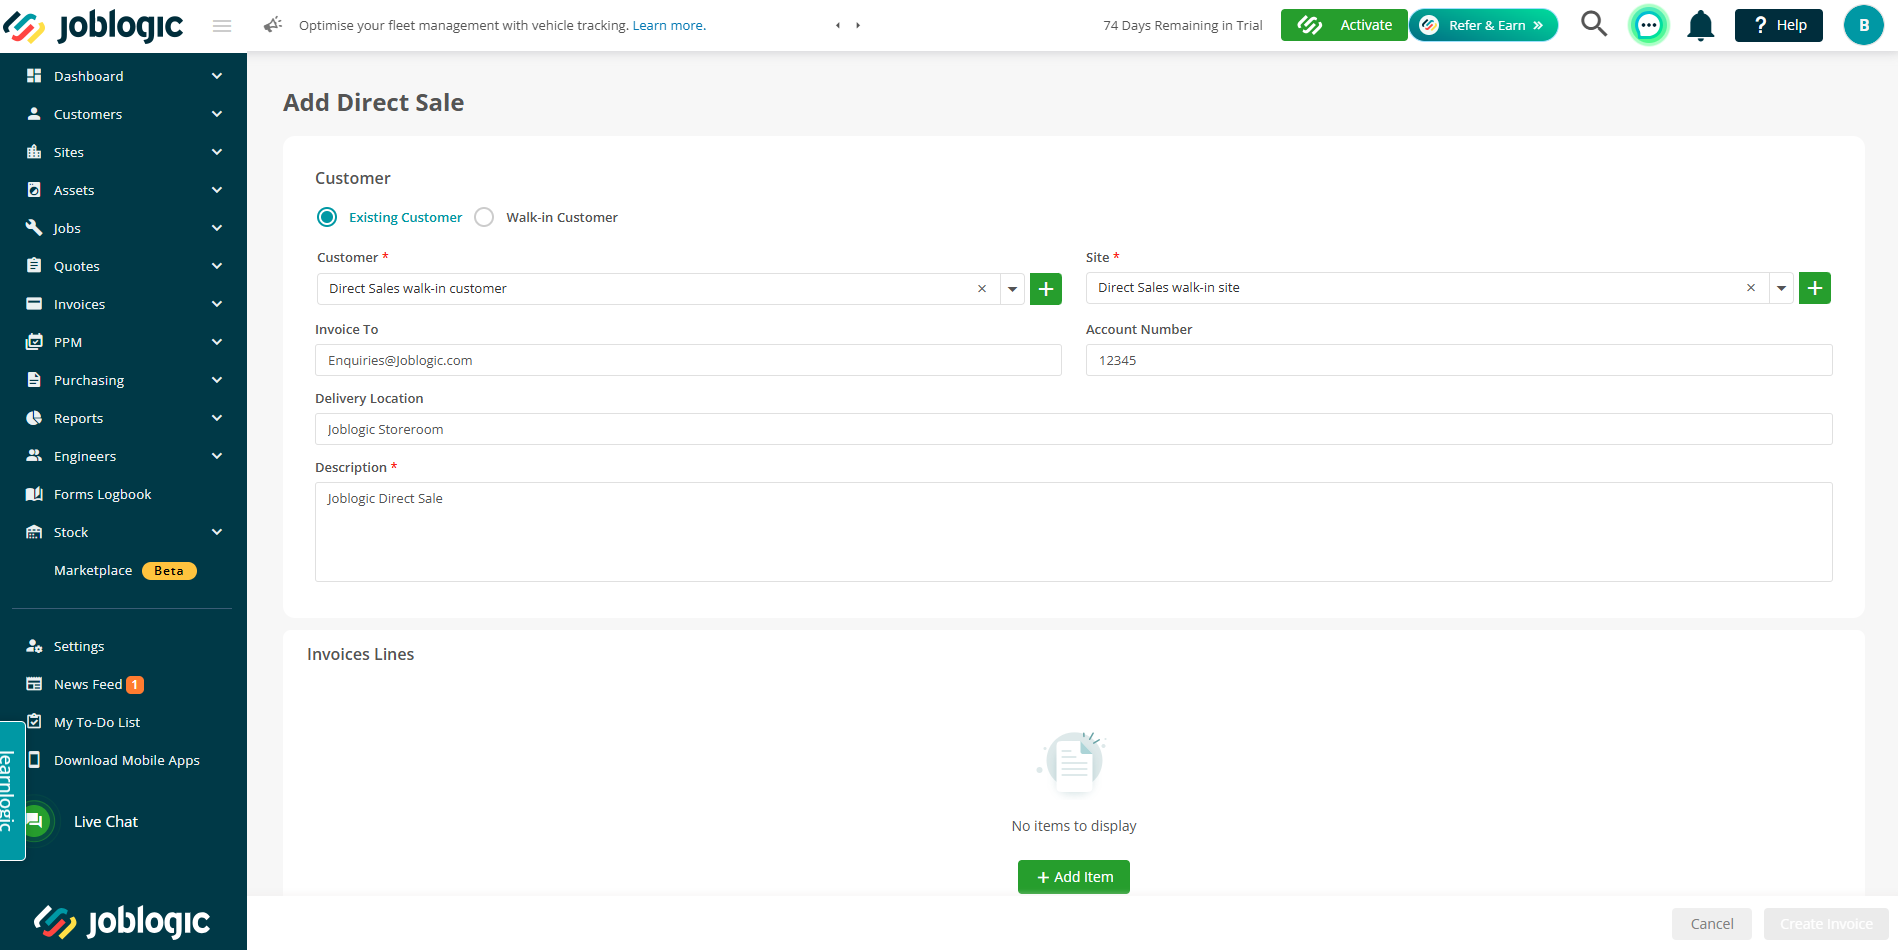
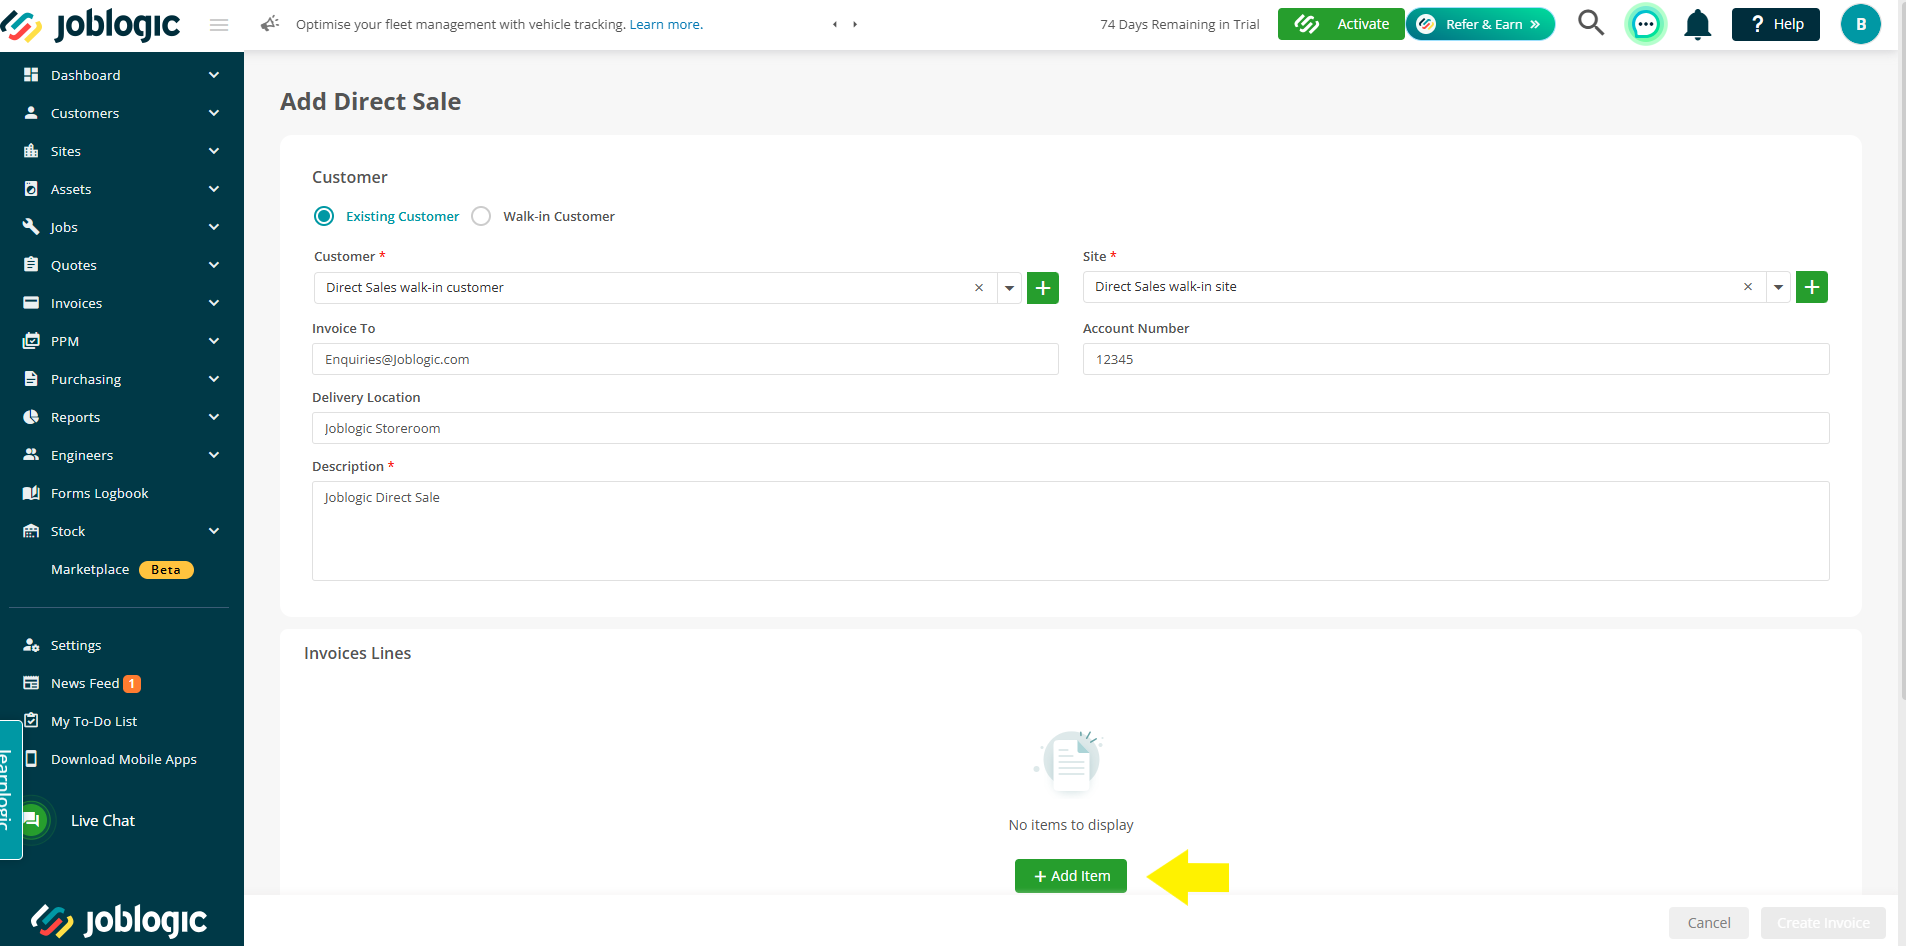
We will use option 3 (Direct Sales walk-in customer) as an example to demonstrate the app throughout this guide.
There are then further details which can be filled in, if required but they are only optional extras such as ’Invoice to’, ‘Account Number’ and ‘Delivery Location’ fields.
There is a ‘Description’ field which must be filled in. This is used to generally describe the transaction or item(s) being sold.
There is then an ‘Invoice Lines’ section used to record the items being sold.
Select the ‘+Add Item’ button.
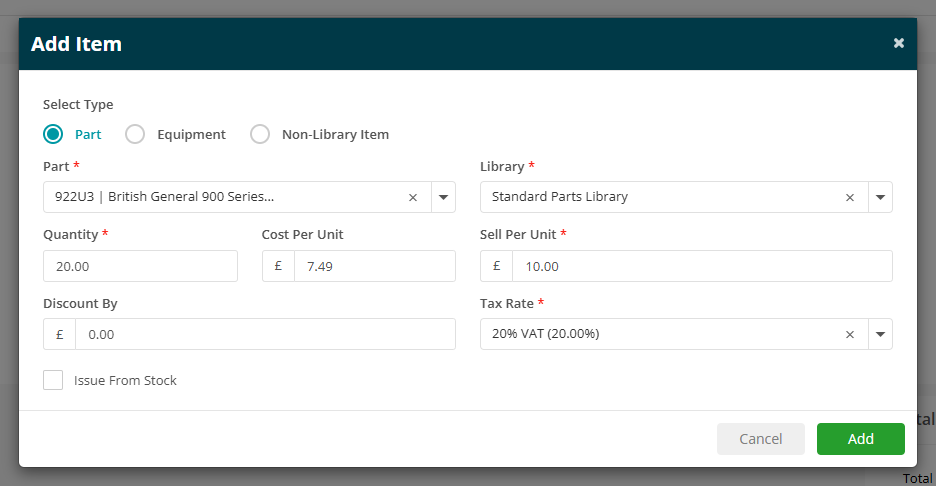
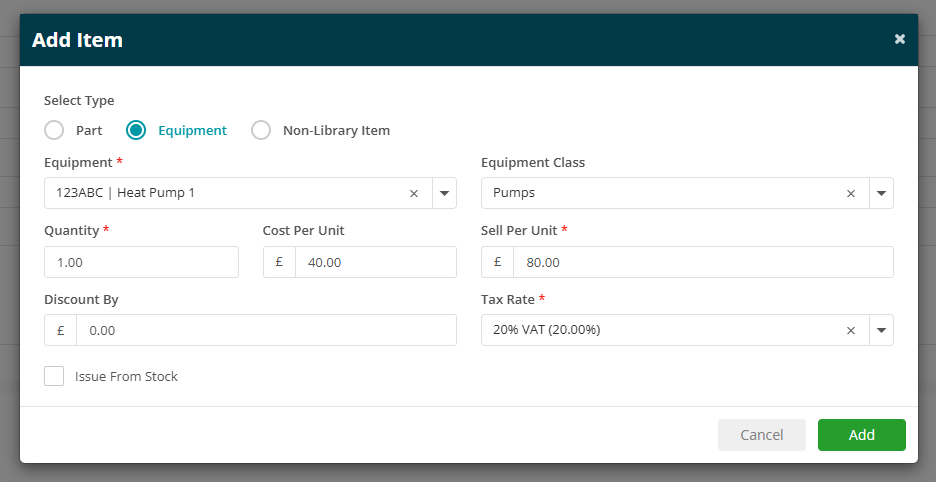
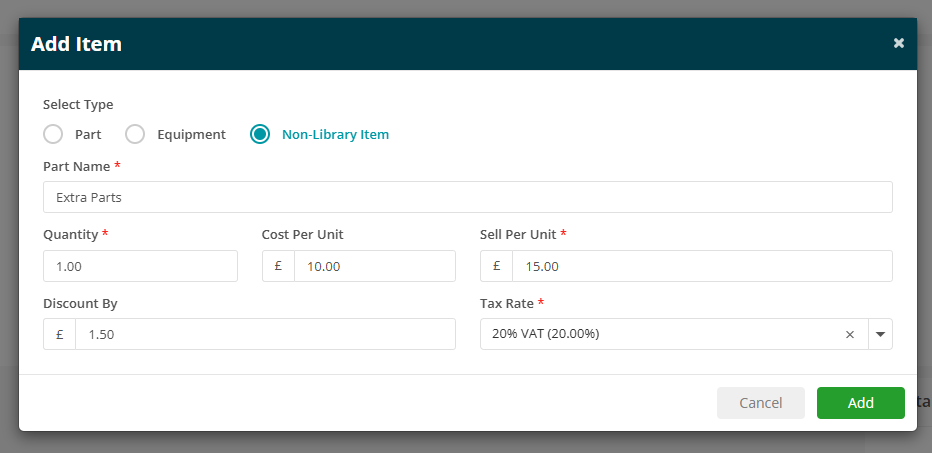
An add item box will appear. There are then 3 options to choose from using the applicable toggle buttons. These are; Part, Equipment and Non-Library Item.
If the item is already recorded in your Joblogic system’s part’s library, the ‘Part' toggle button can be used.
This will populate a ‘Part’ and a ‘Library’ dropdown which can be used to select an existing part with it’s prerecorded details from your back-office system’s parts library(s). It’s worth noting that the item can be ‘Issued From Stock’, if required.
If the item is already recorded in your equipment library, the ‘Equipment' toggle button can be used.
This will populate an ‘Equipment’ and a ‘Equipment class’ dropdown which can be used to select an existing piece of equipment with it’s prerecorded details from your back-office system’s prerecorded equipment library(s). Similarly to parts, it’s worth noting that the item can be ‘Issued From Stock’, if required.
Alternatively, if the item does not exist in your parts or equipment libraries, you can select the ‘Non-Library Item’ option and free type the item’s details such as it’s name, quantity, cost and sell price fields.
Once the required details have been entered, select the ‘Add’ button.
The item and it’s details will then log under the ‘Invoices Lines’ area.
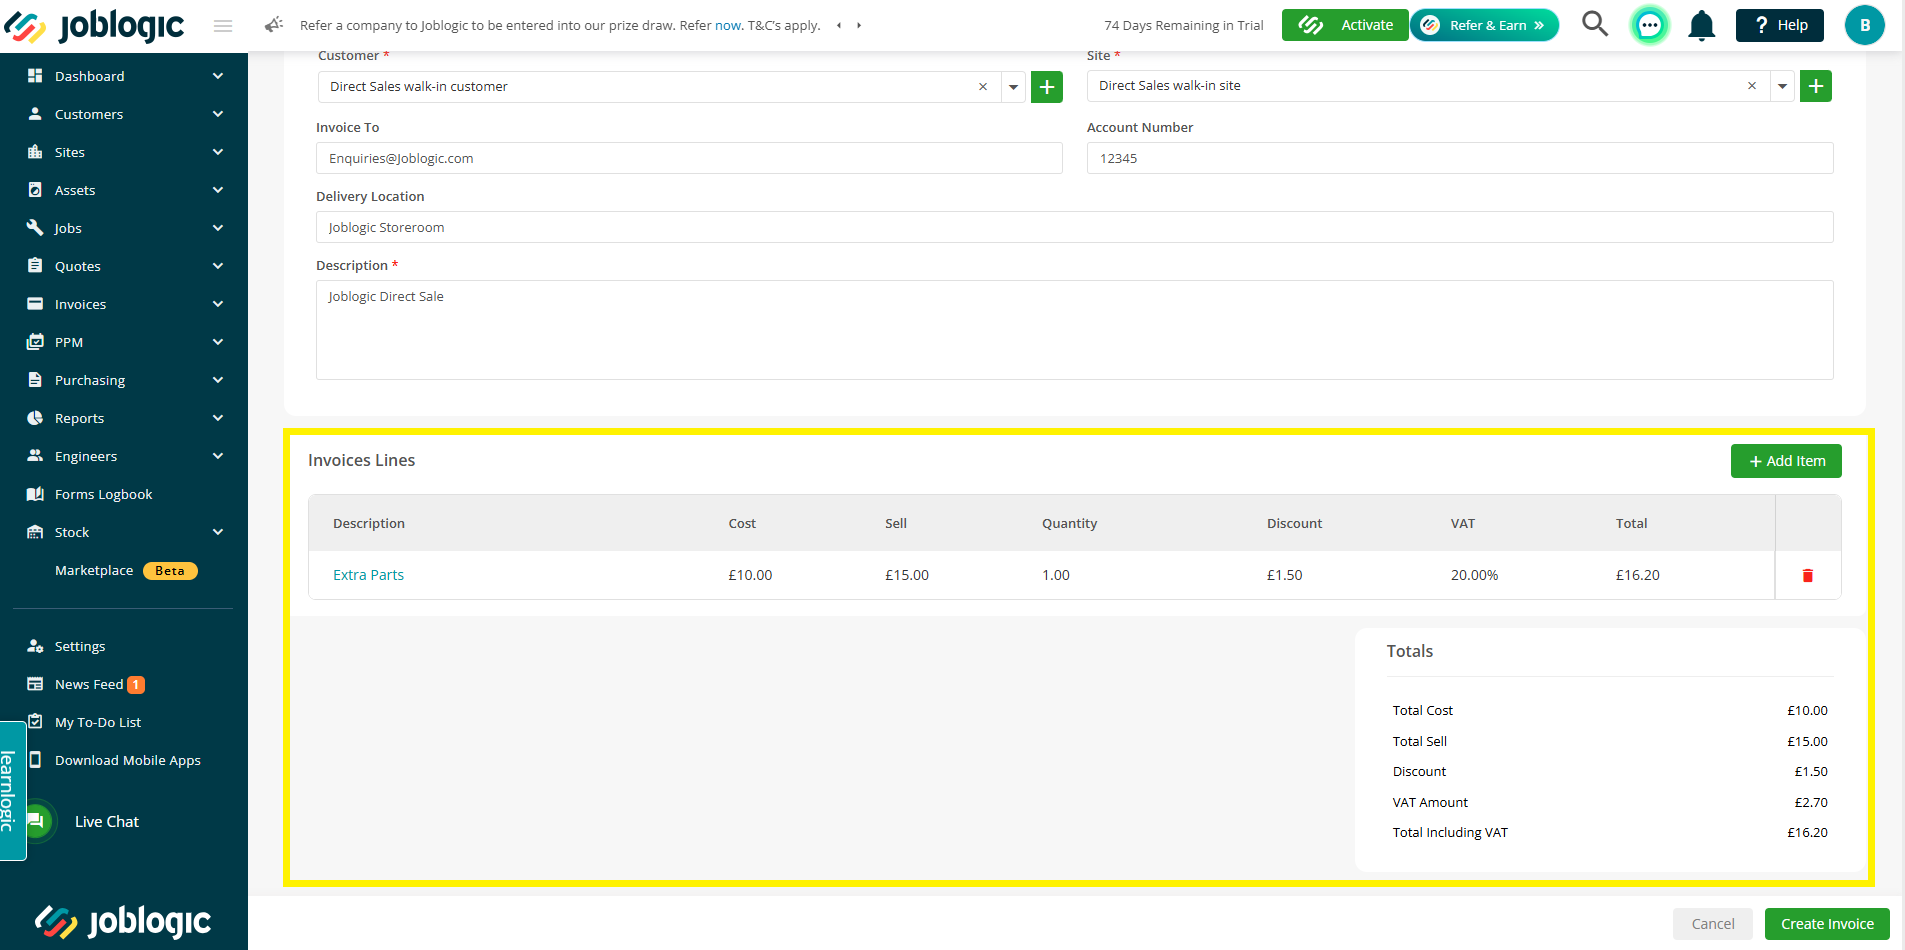
Further parts can be added via the ‘+ Add Item’ option and the ‘Totals’ area provides accumulated number of values for the direct sale’s invoice based on the items added.
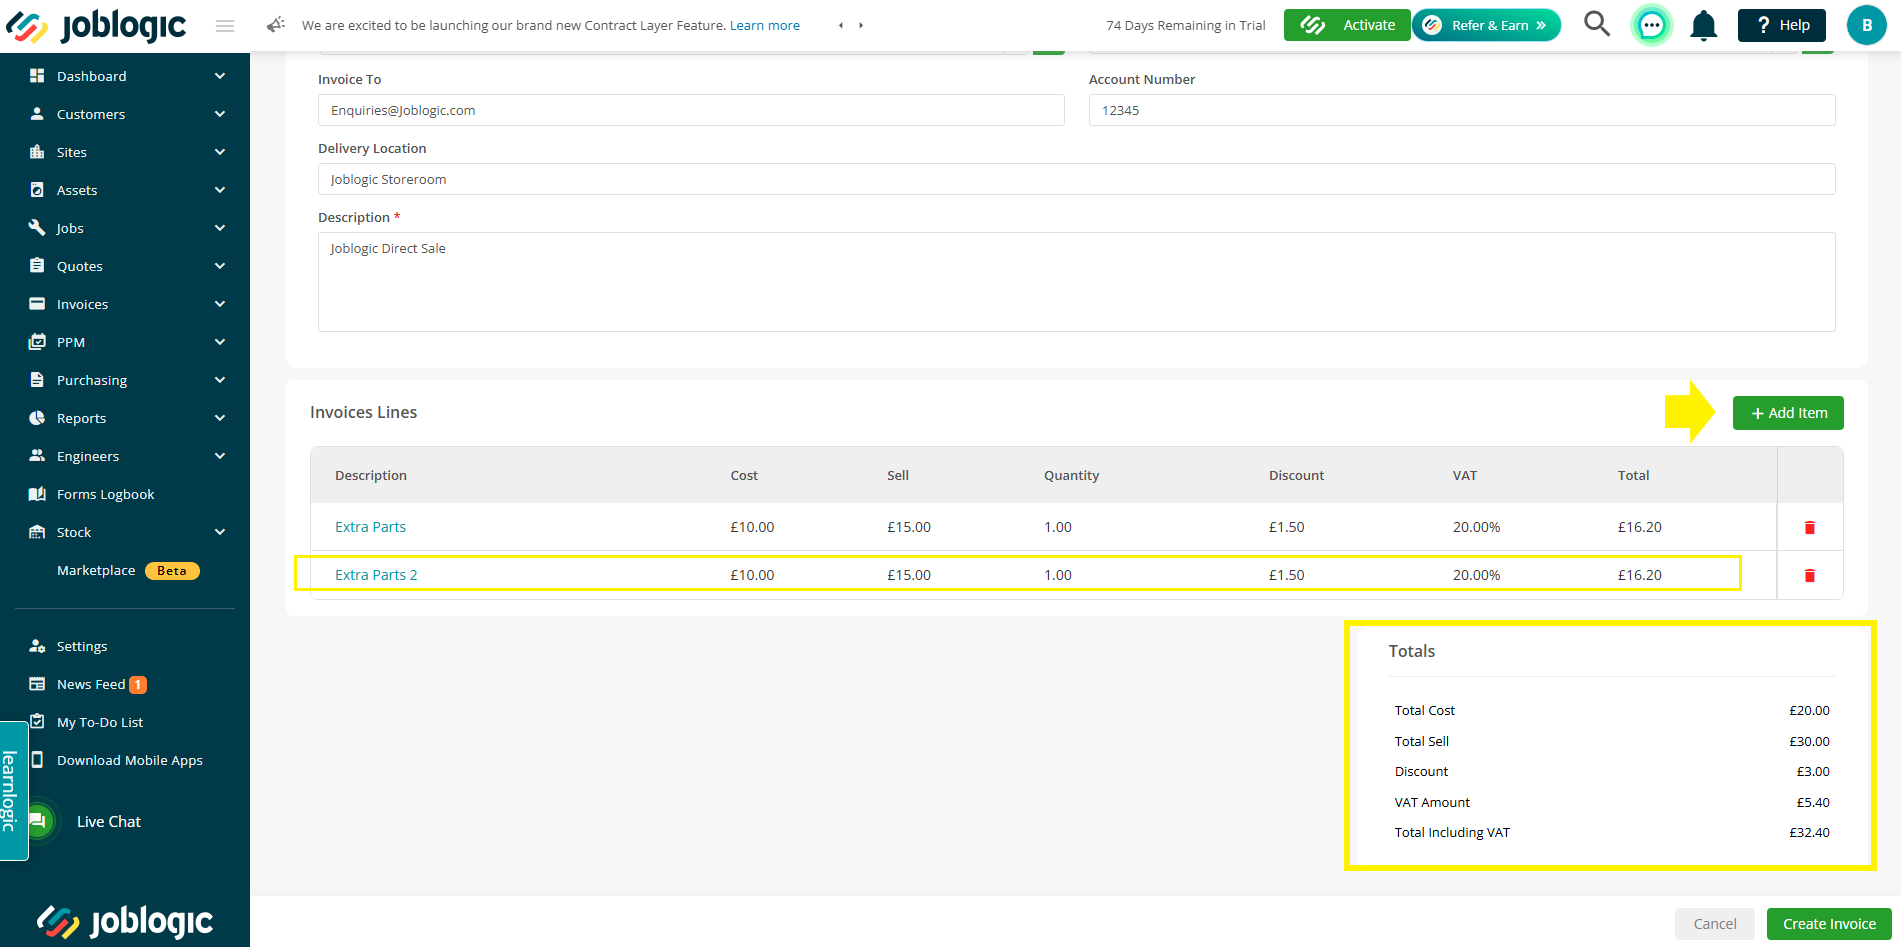
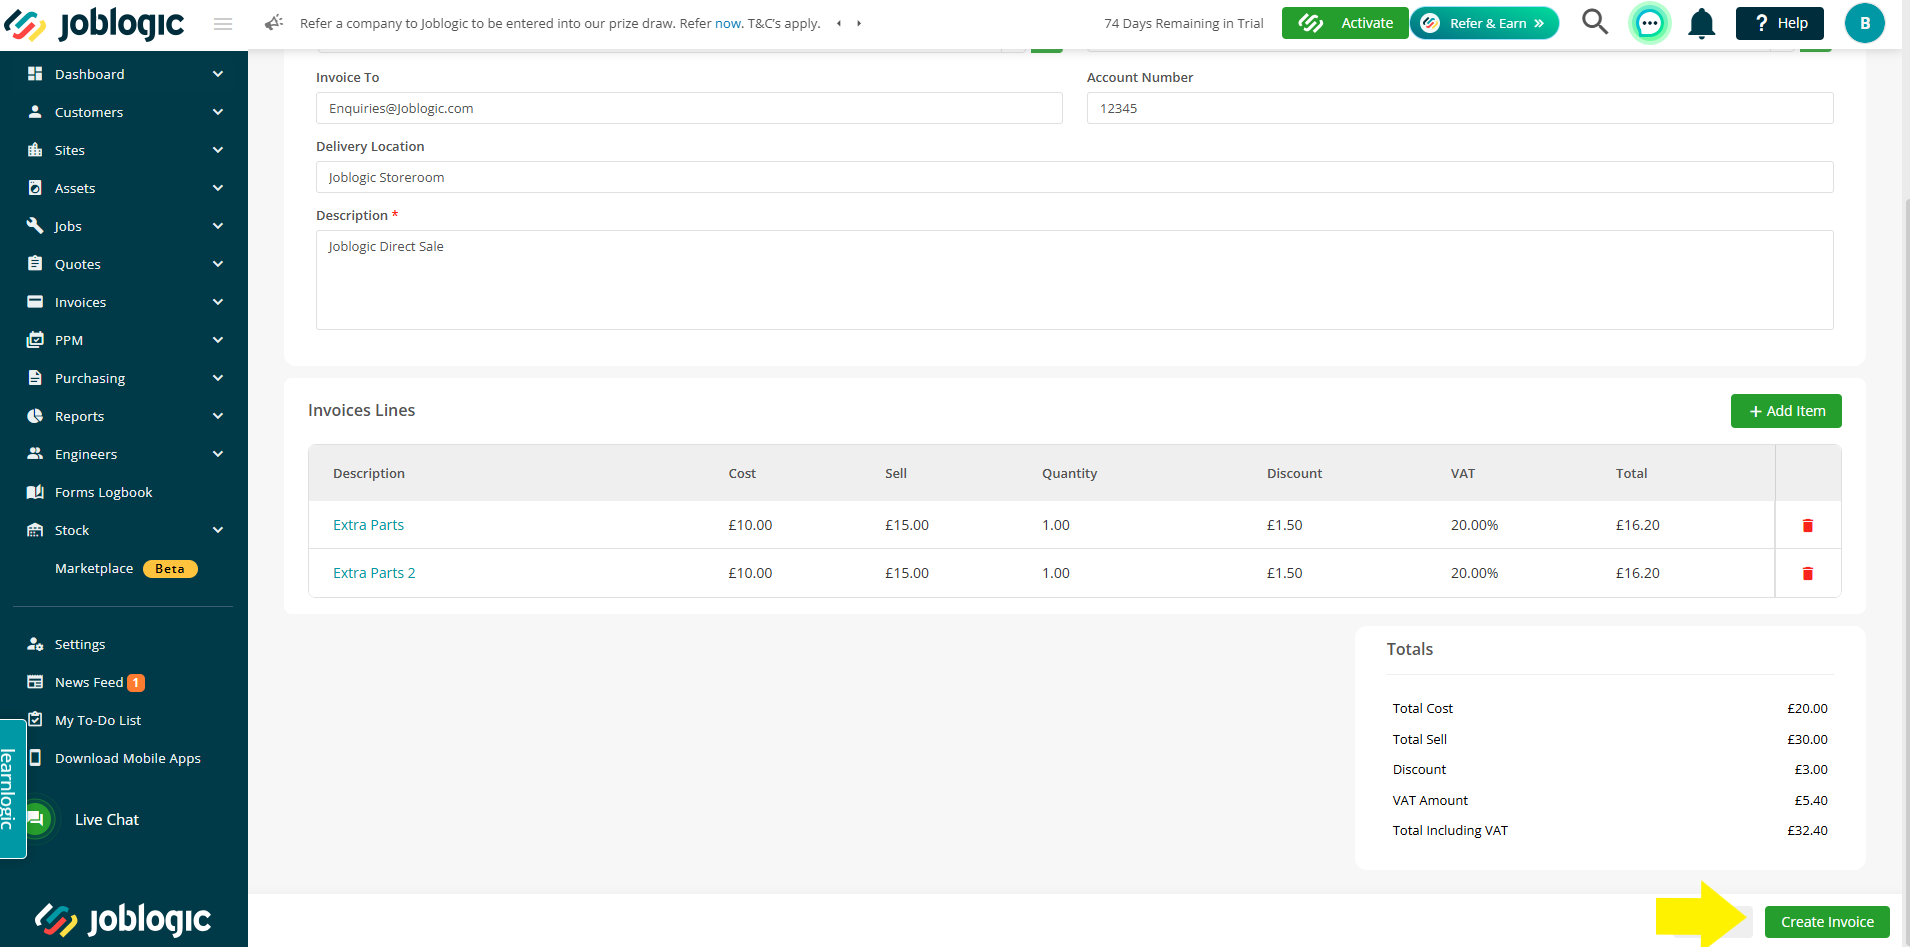
Once you are happy with the items recorded, select the ‘Create Invoice’ option to generate your direct sale’s invoice and it’s associated job.
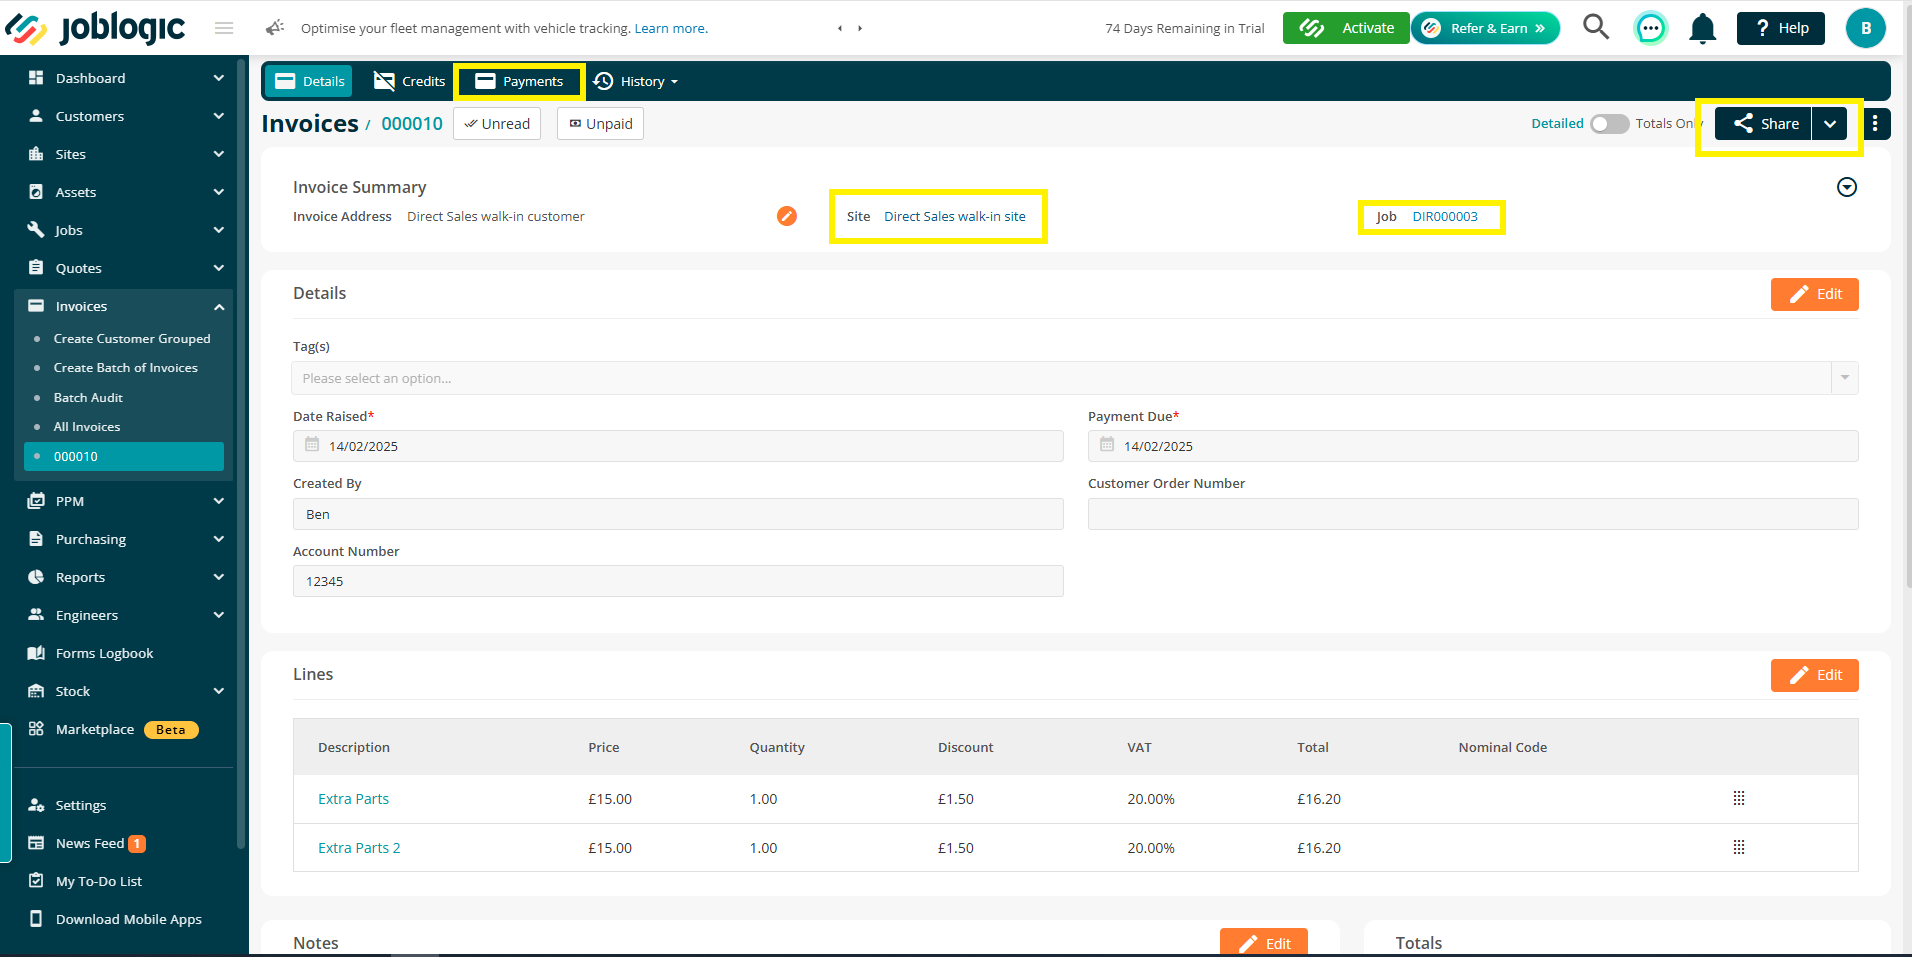
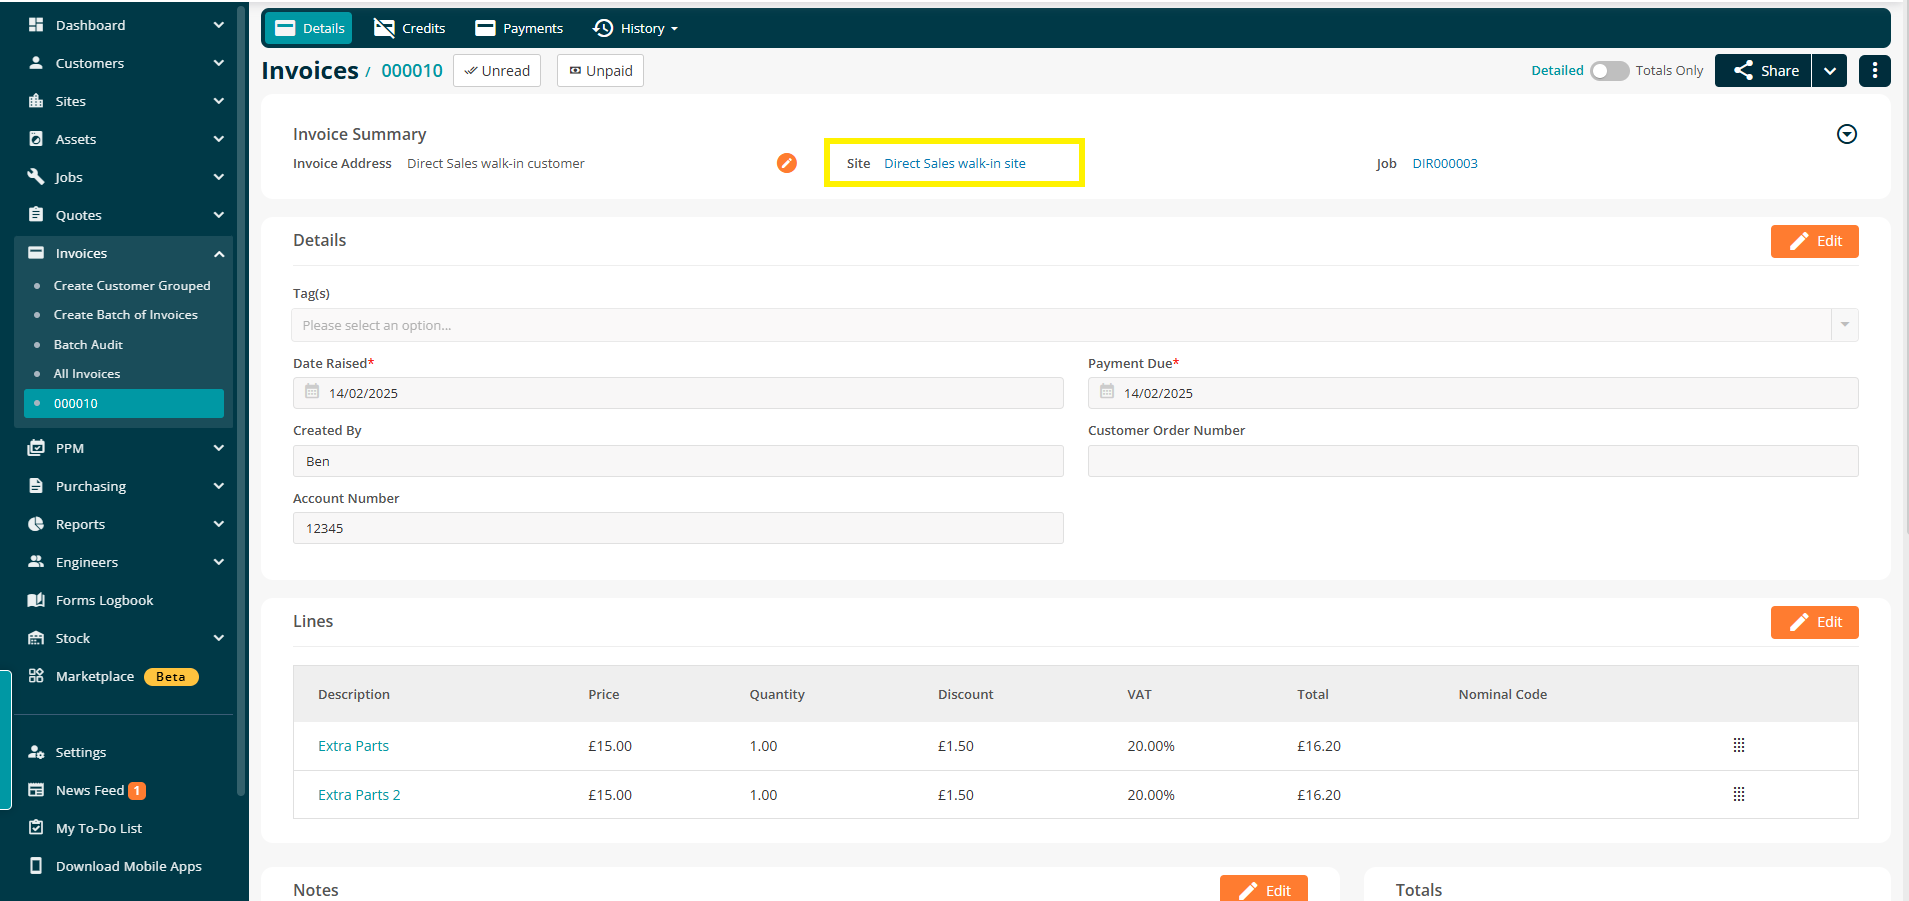
The invoice will generate within the ‘All Invoices’ area of your Joblogic back-office system. It will be assigned a unique invoice number and become logged against a completed job also with it’s own unique job number. The customer and site will generate as applicable, either under the existing customer and site details chosen or under the Direct Sales walk-in customer/site used in our example.
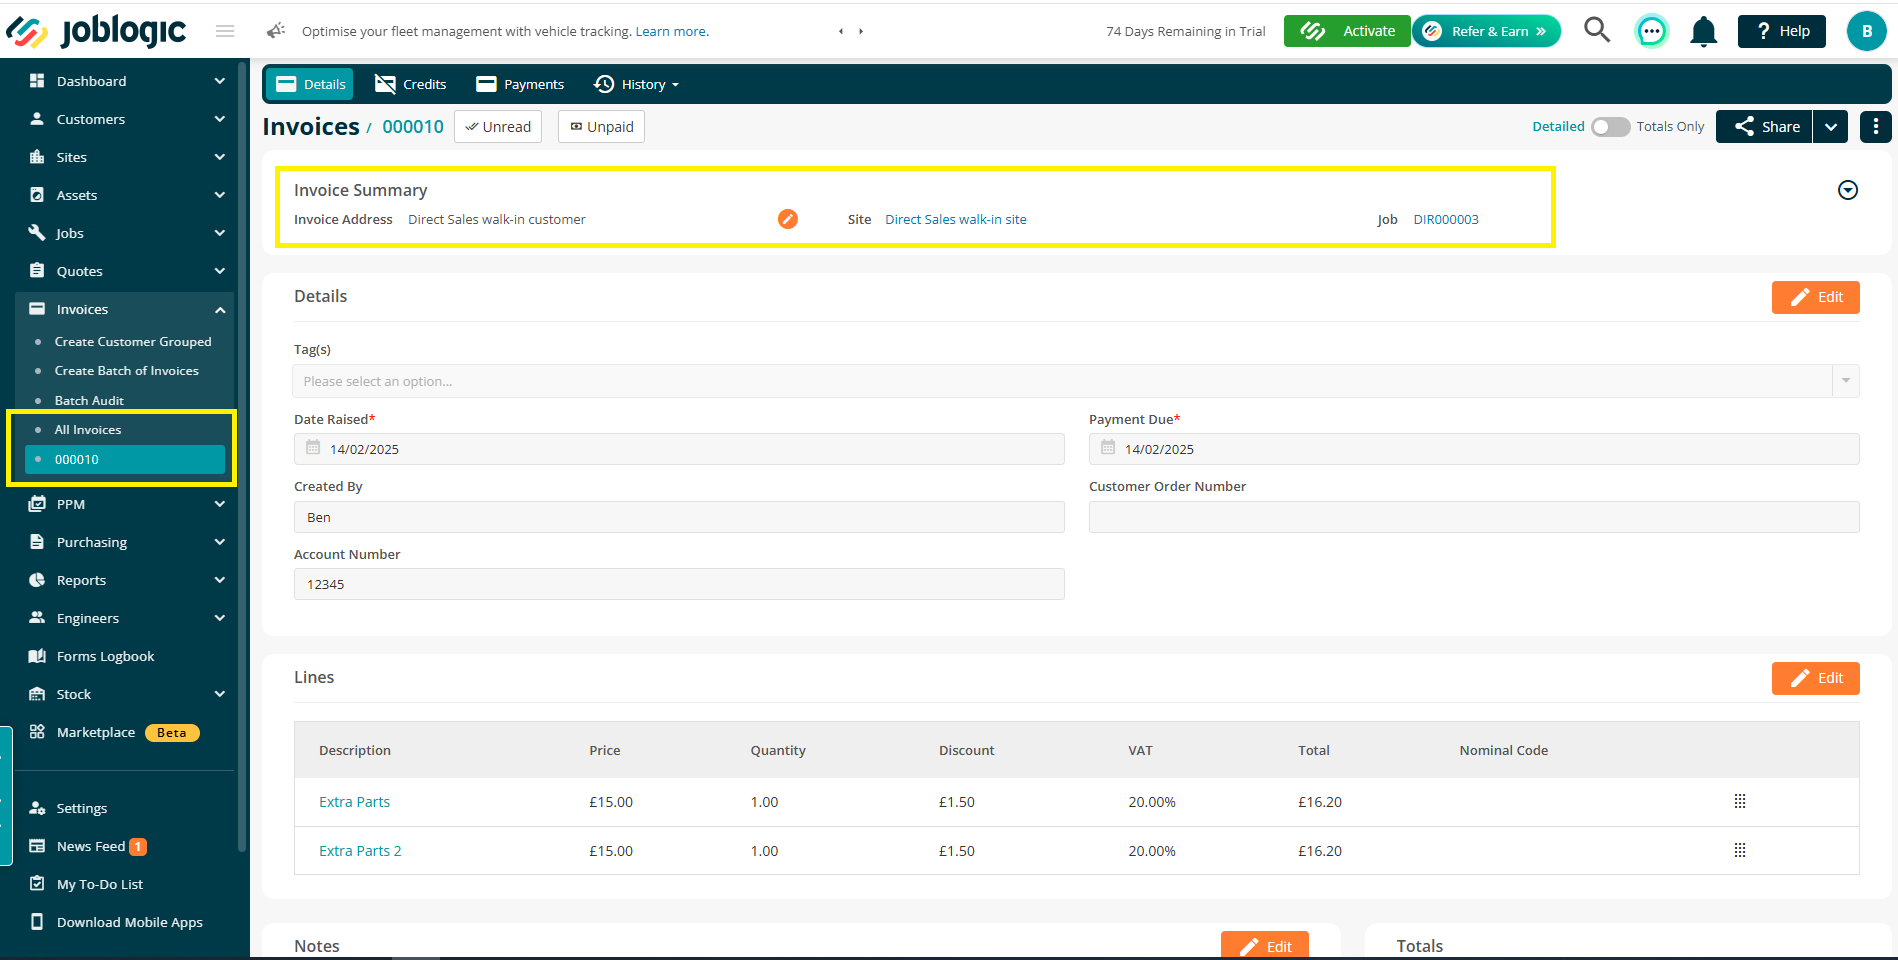
The associated job, customer and site can then be navigated to, viewed and used just like any other jobs, customers and sites within the system, as required by selecting the blue hyperlinks to the job or site against the invoice. The invoice can also be used in the same manner as other generated invoices outside of the direct sales app. For example, shared with a stakeholder, have payments recorded against it or pass it to your accounting package software.
Invoice/Job Creation and Tracking
As mentioned above, when a Direct Sale is created, the system automatically generates a job within Joblogic, ensuring full traceability of each transaction. This job is assigned a unique job number and can be accessed, tracked, and managed like any other job within the system.
Job Types & Numbering
All jobs created via Direct Sales are assigned a specific job type for easy identification. This job type will be automatically created within your system’s job types area under Settings > System Setup > Number Convention when subscribing to the app.
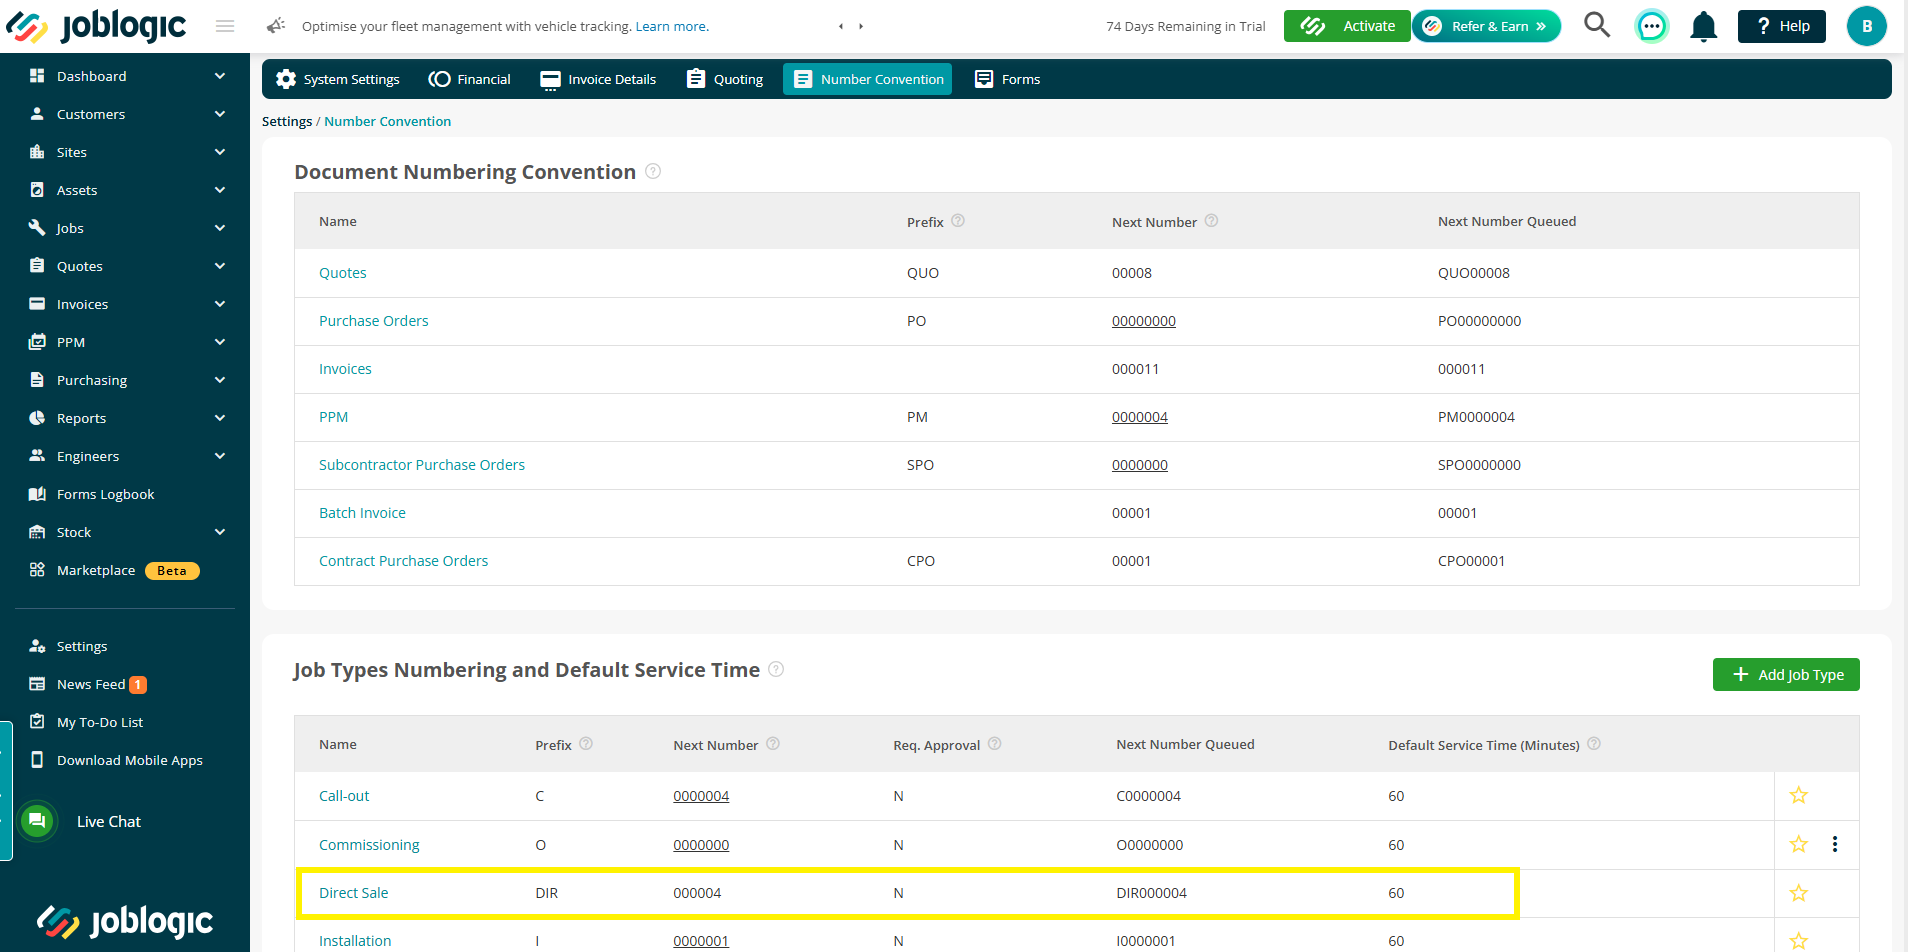
The default details can be found below, but these can be edited, if required.
Job Type: Direct Sale
Prefix: DIR
Next Number Format: DIR000001
Approval Requirement: Not Required
Default Service Time: 60 minutes
These settings ensure that Direct Sale jobs are distinguishable from other job types within the system.
Locating & Managing Direct Sale Jobs
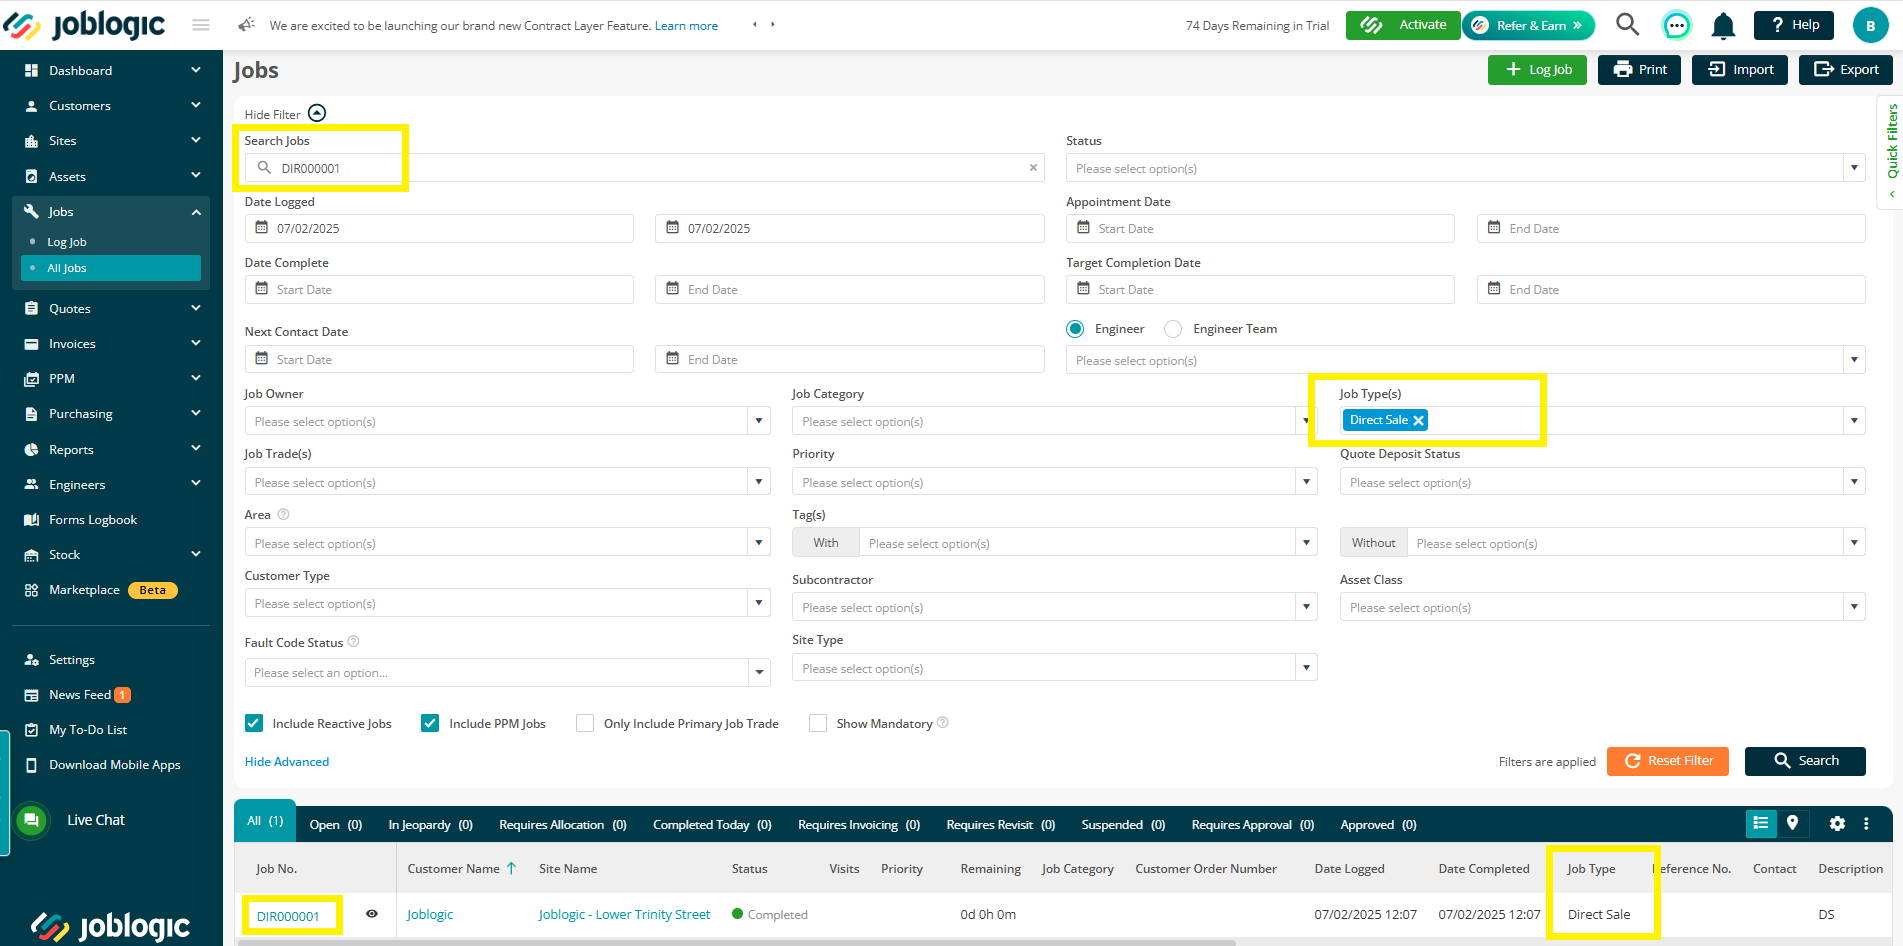
Once a job has been created, users can find and manage it within the All Jobs screen in the Joblogic back-office system. Direct Sale jobs can be filtered and identified using the following options:
Job Type Dropdown: Select Direct Sale to view only direct sale jobs.
Wild Search: The system’s search functionality includes Direct Sale Jobs, enabling users to locate jobs using keywords or job numbers.
Navigating from the Invoice to the Job
Each invoice generated via the Direct Sales app is linked to its corresponding job. Users can:
- Click the blue job number hyperlink on the invoice to open the job details.
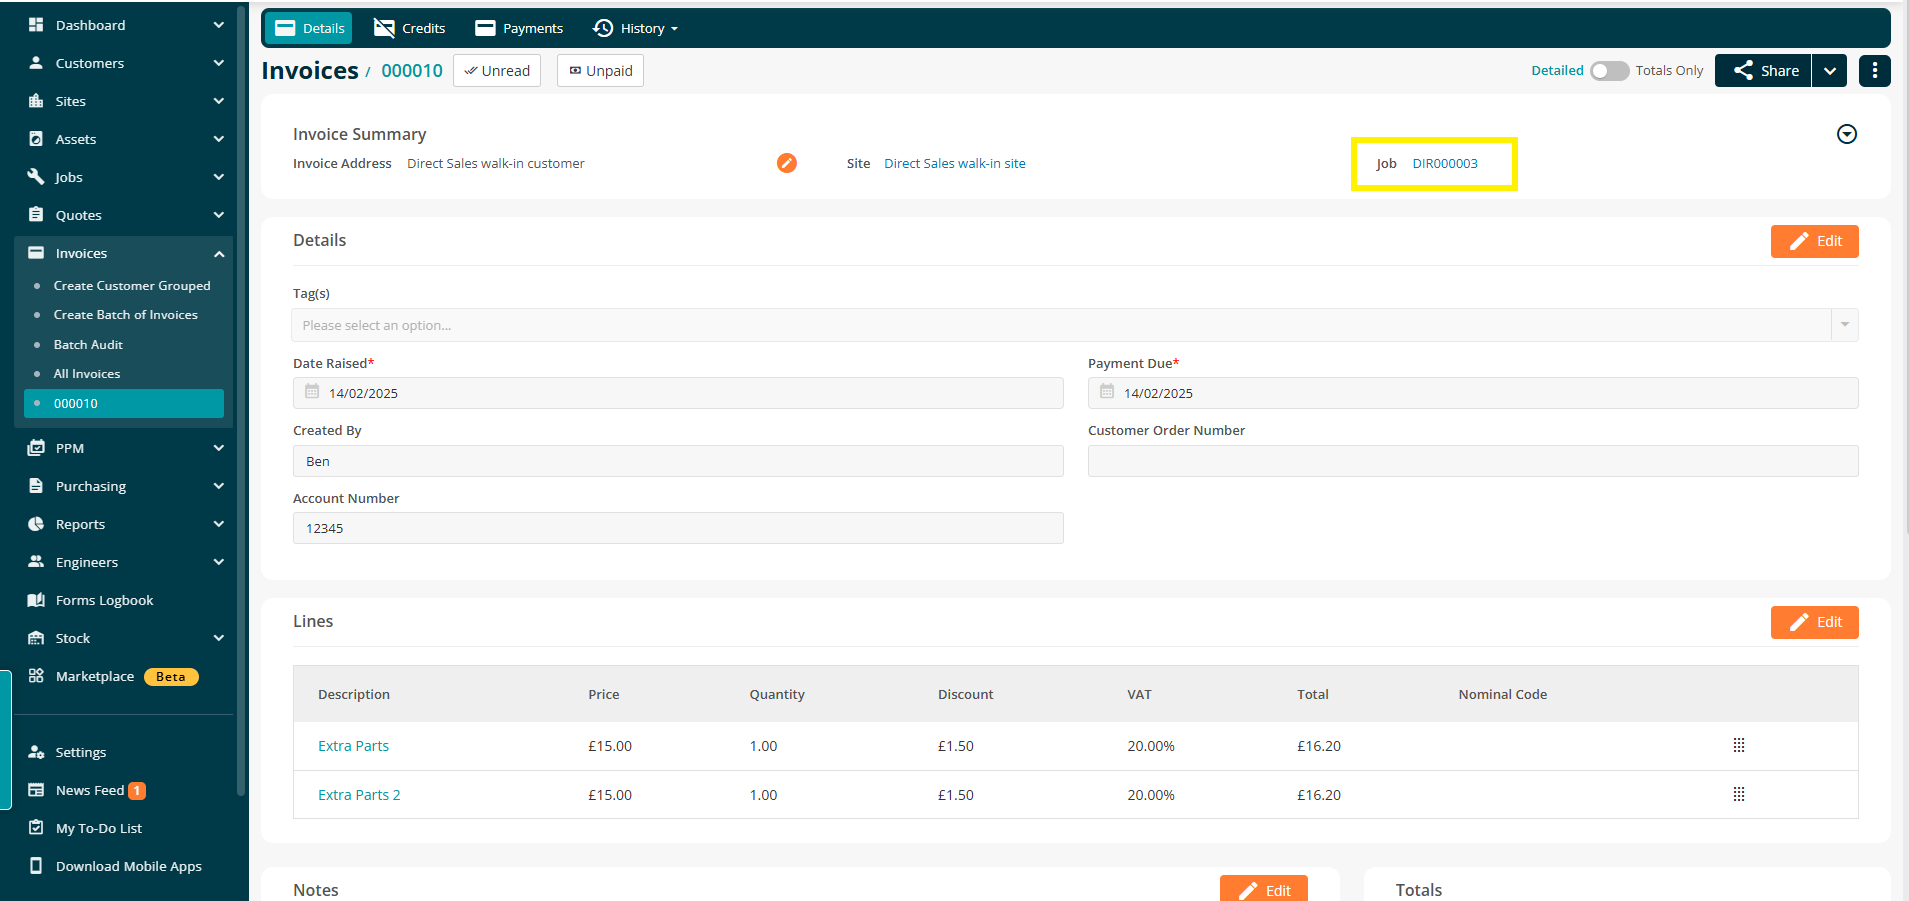
- View the associated Customer and Site via the site hyperlink on the invoice (either an existing record or the Default Direct Sales Customer)
- Access the Costing Screen within the job to review items sold under the Materials Section.
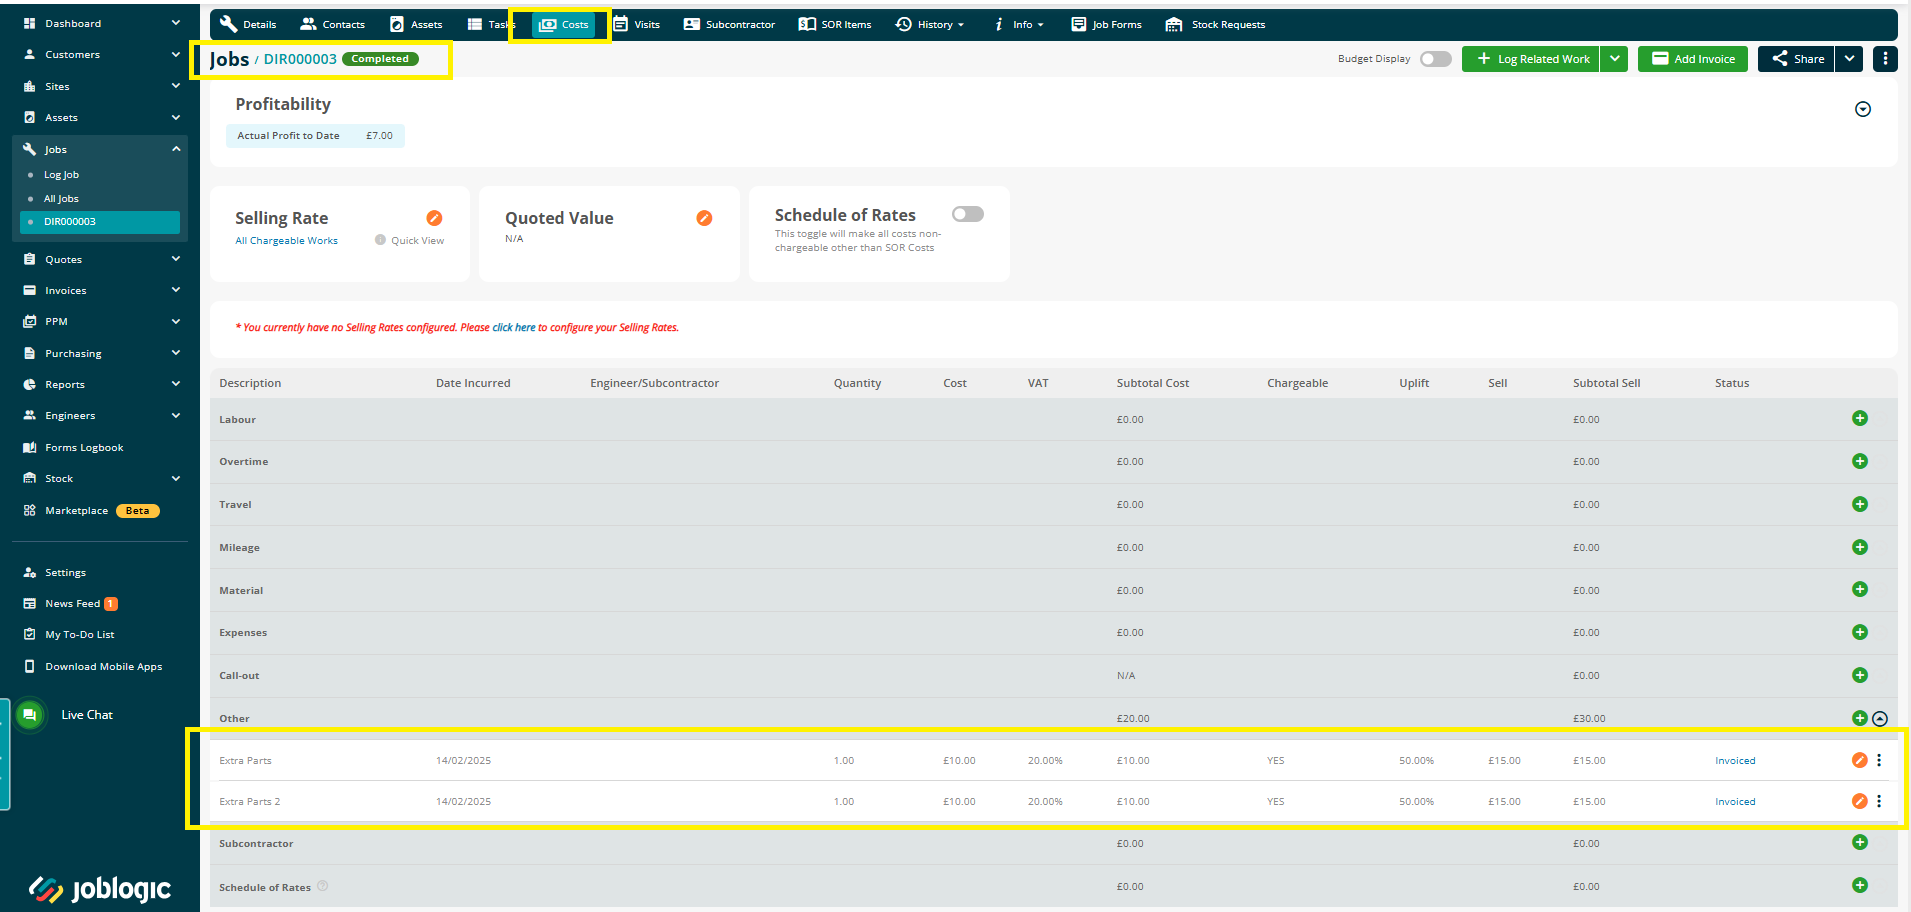
With this setup, Direct Sales transactions are fully traceable within Joblogic, making it easier to monitor sales, item and stock usage, and financial records.
Further Support
For further information or assistance with the above, contact our Support Team on 0800 326 5561 or email support@joblogic.com. Alternatively, our Customer Success Management team can be reached by emailing customersuccess@joblogic.com
Publishing Details
This document was written and produced by Joblogic’s Technical Writing team and was last updated on the date stated above. Be aware that the information provided may be subject to change following further updates on the matter becoming available or new releases within the system. Additionally, details within the guide may vary depending on your Joblogic account’s user permissions and settings or the electronic device being used.


