- 30 Apr 2024
- 3 Minutes to read
- Print
- PDF
Document Expiry Email Configuration
- Updated on 30 Apr 2024
- 3 Minutes to read
- Print
- PDF
Introduction
Email Templates are a useful tool that allow you to set up customised templates for use across the system.
The Documents allows you to configure automatic emails to send out automatically for expiration reminders.
This guide will show you where these templates are set up and the how to configure your subcontractor and colleagues' documents, so they are informed appropriately of their upcoming expiration dates.
Setting up Document Email Templates
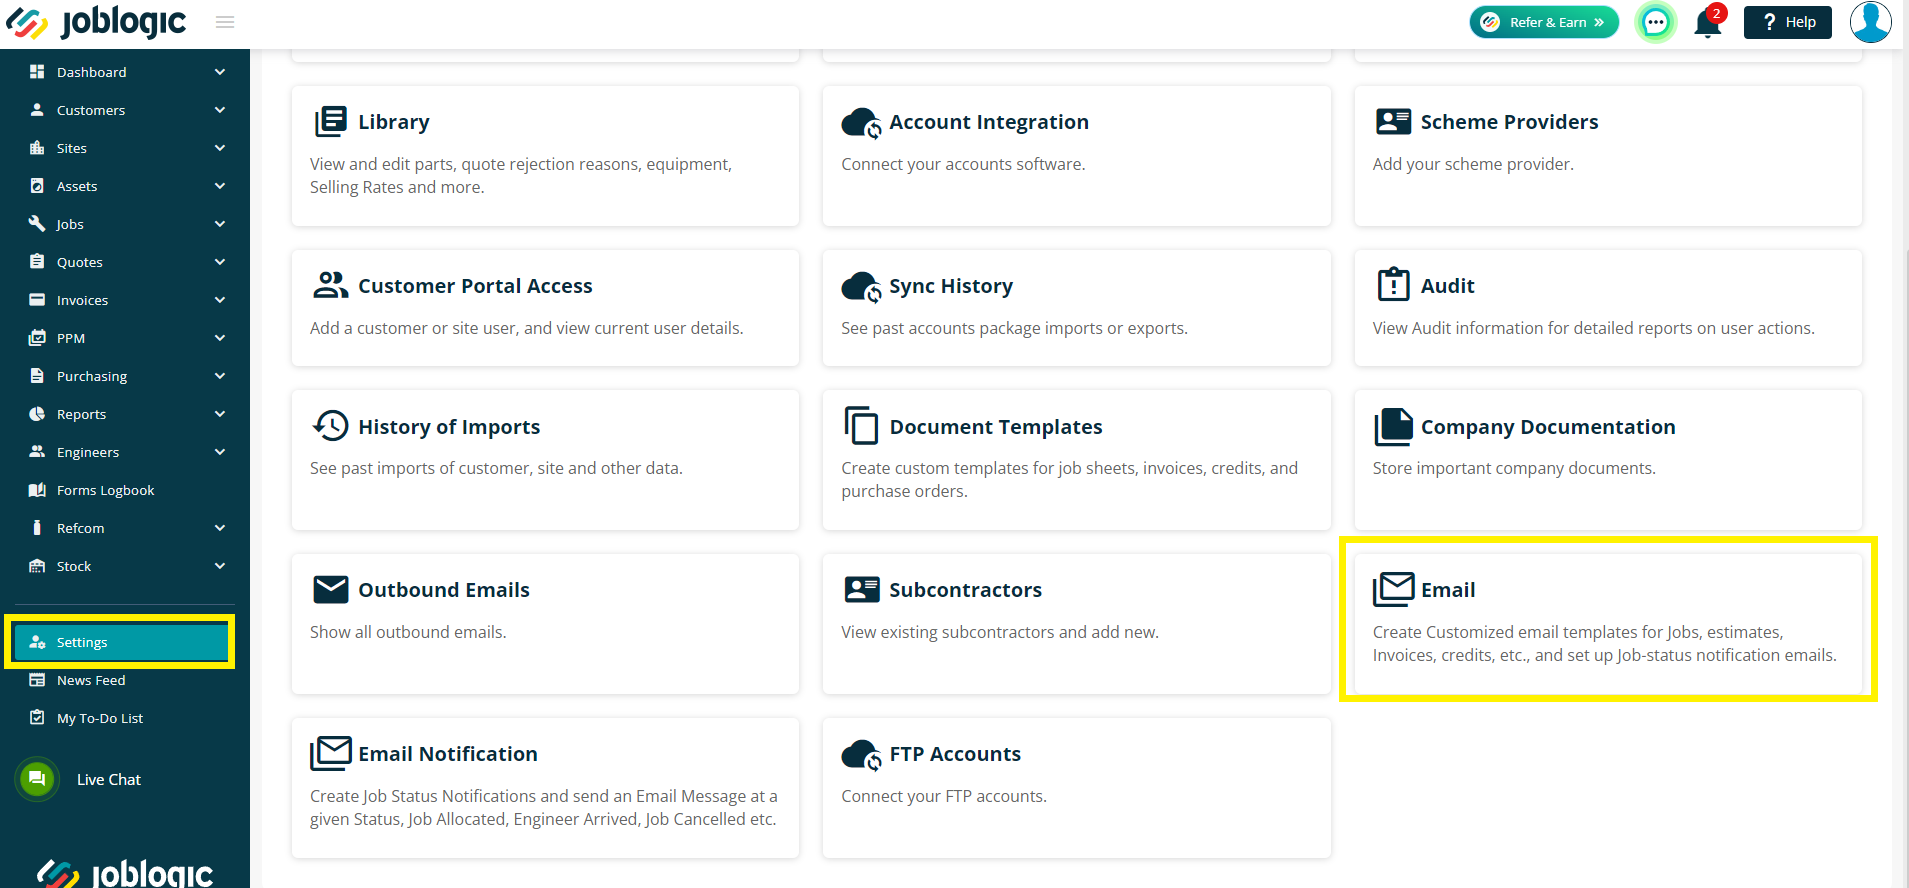
To set up your own email templates to remind your subcontractors and colleagues about expired documentation, navigate to Settings > Email
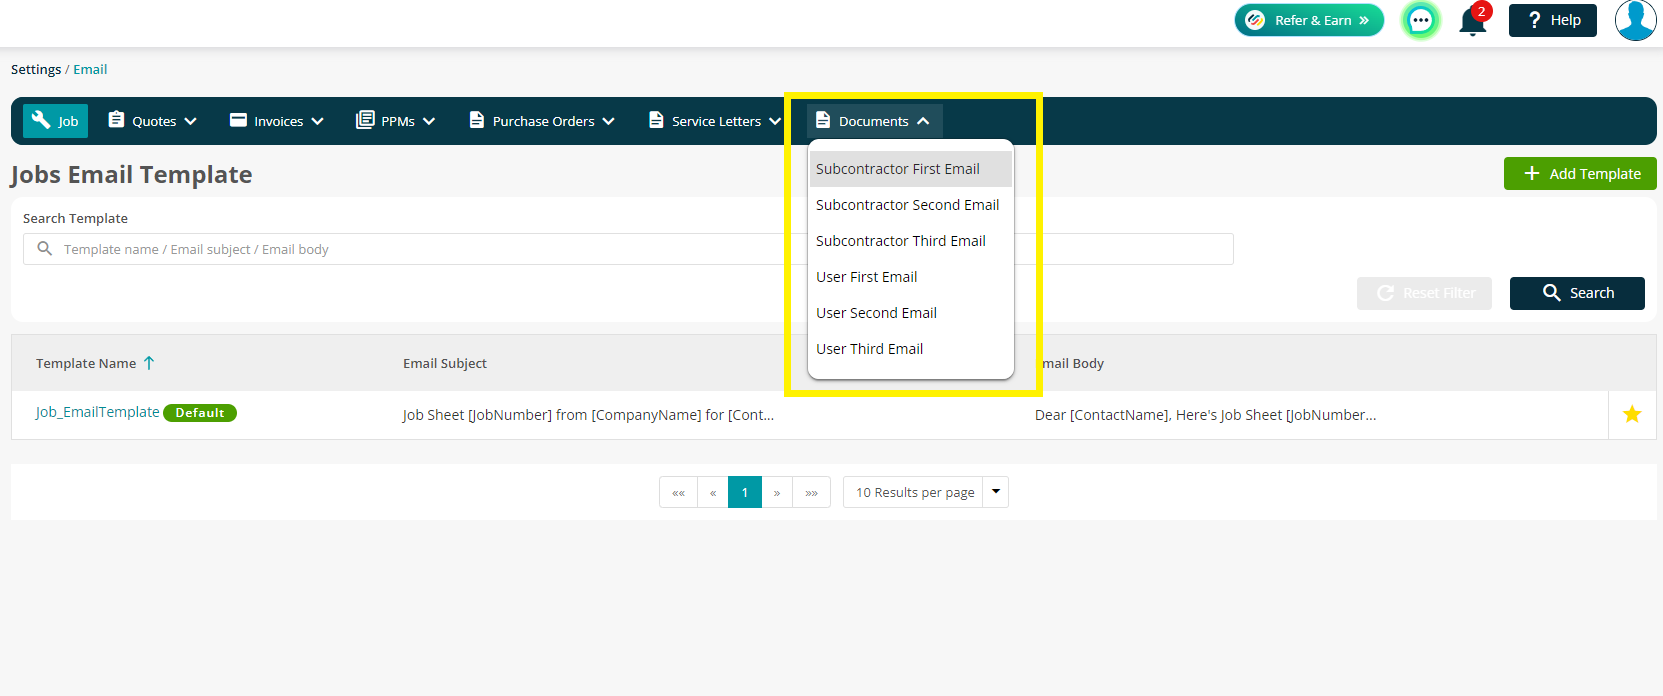
Next, click the Document dropdown and choose the template you’d like to amend
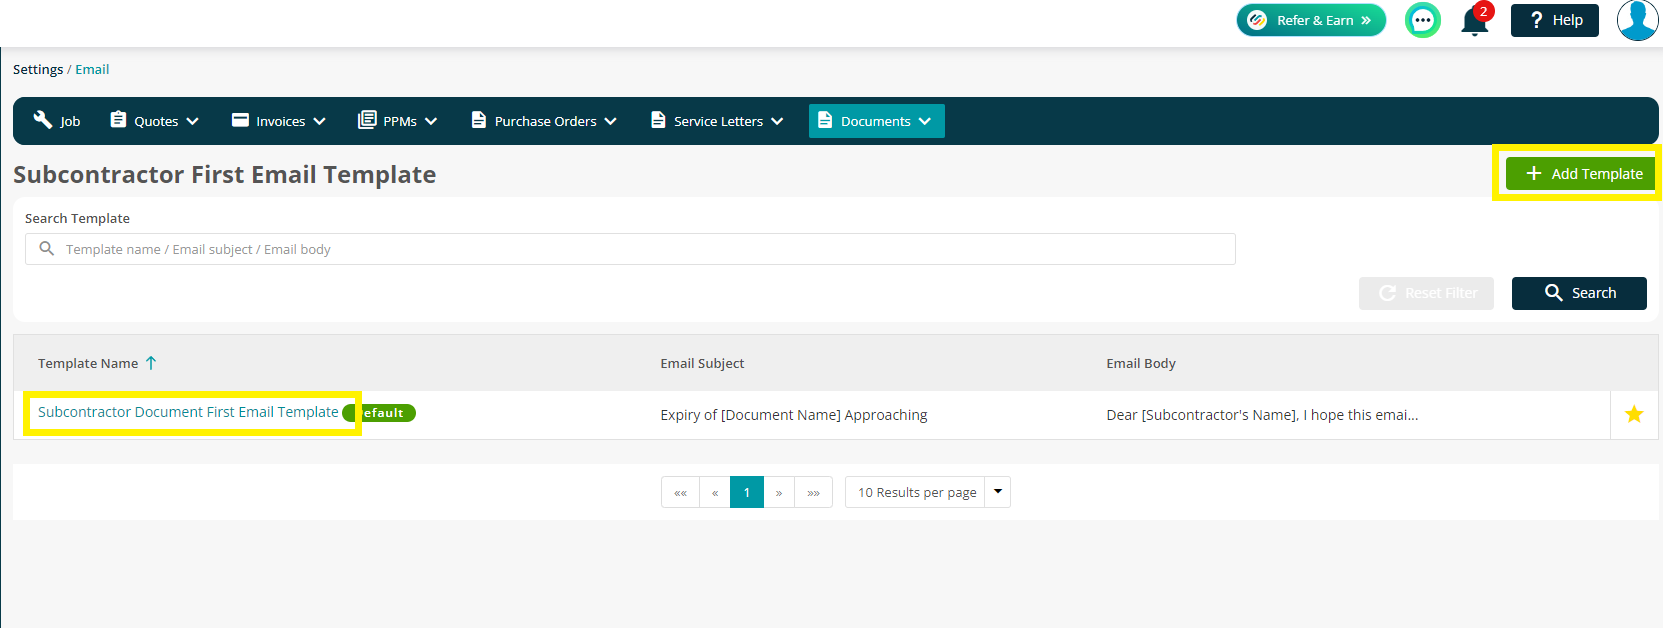
Joblogic has set up a default under each option for you. You can click on the Template Name to amend this or click Add Template in the top right to create your own from scratch.
To read more about setting up your email templates, click here.
Configuring your Document Notifications
Subcontractor
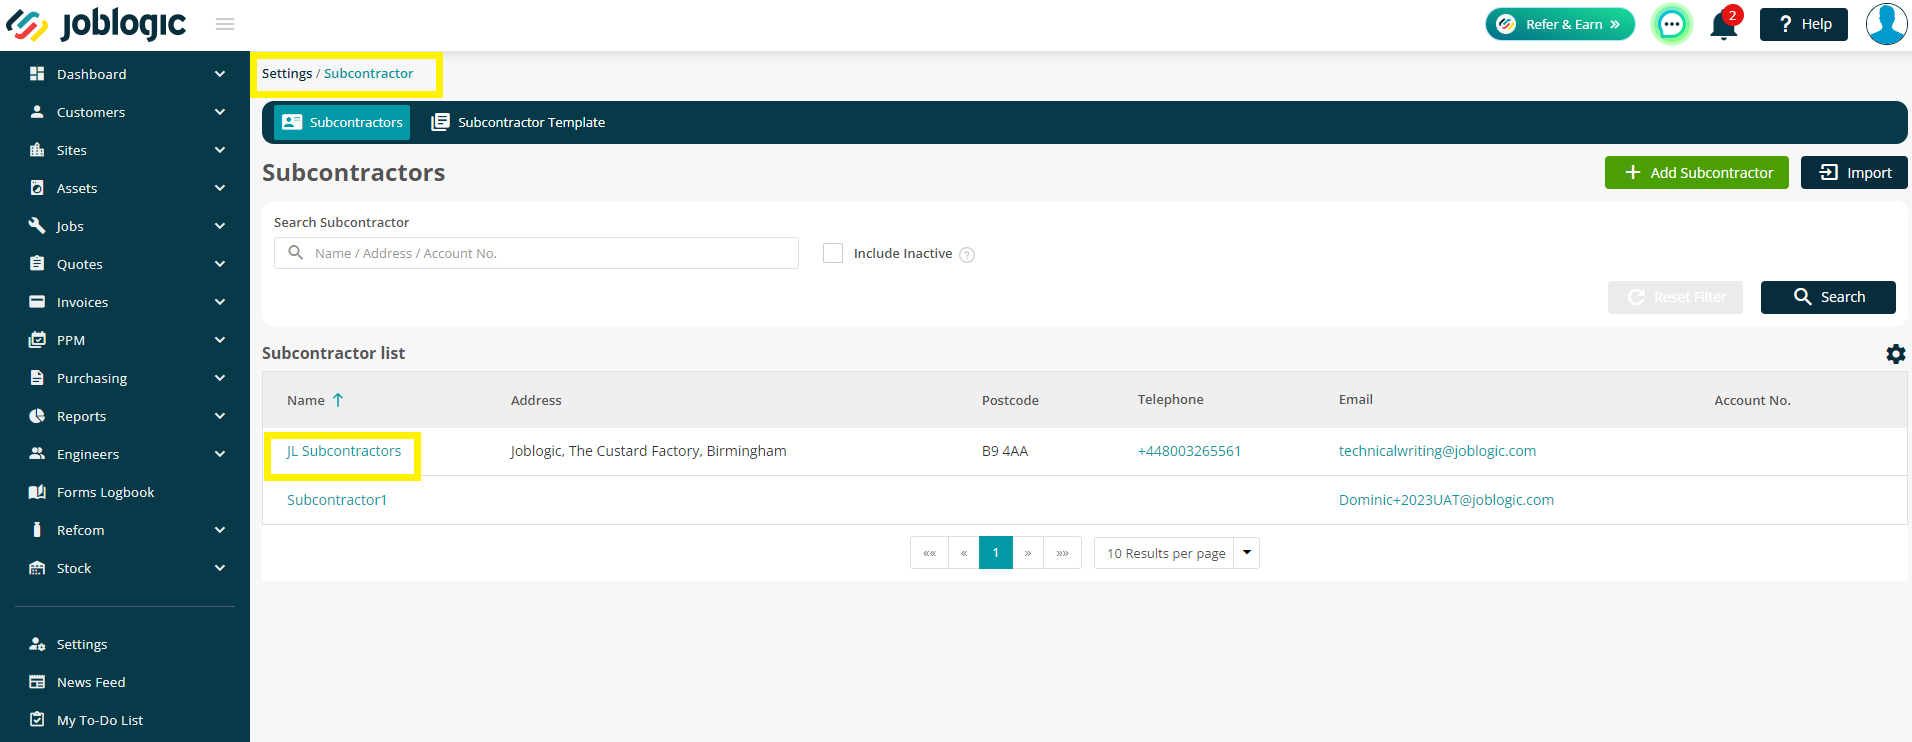
Navigate to Settings > Subcontractors and choose your Subcontractor by clicking their name
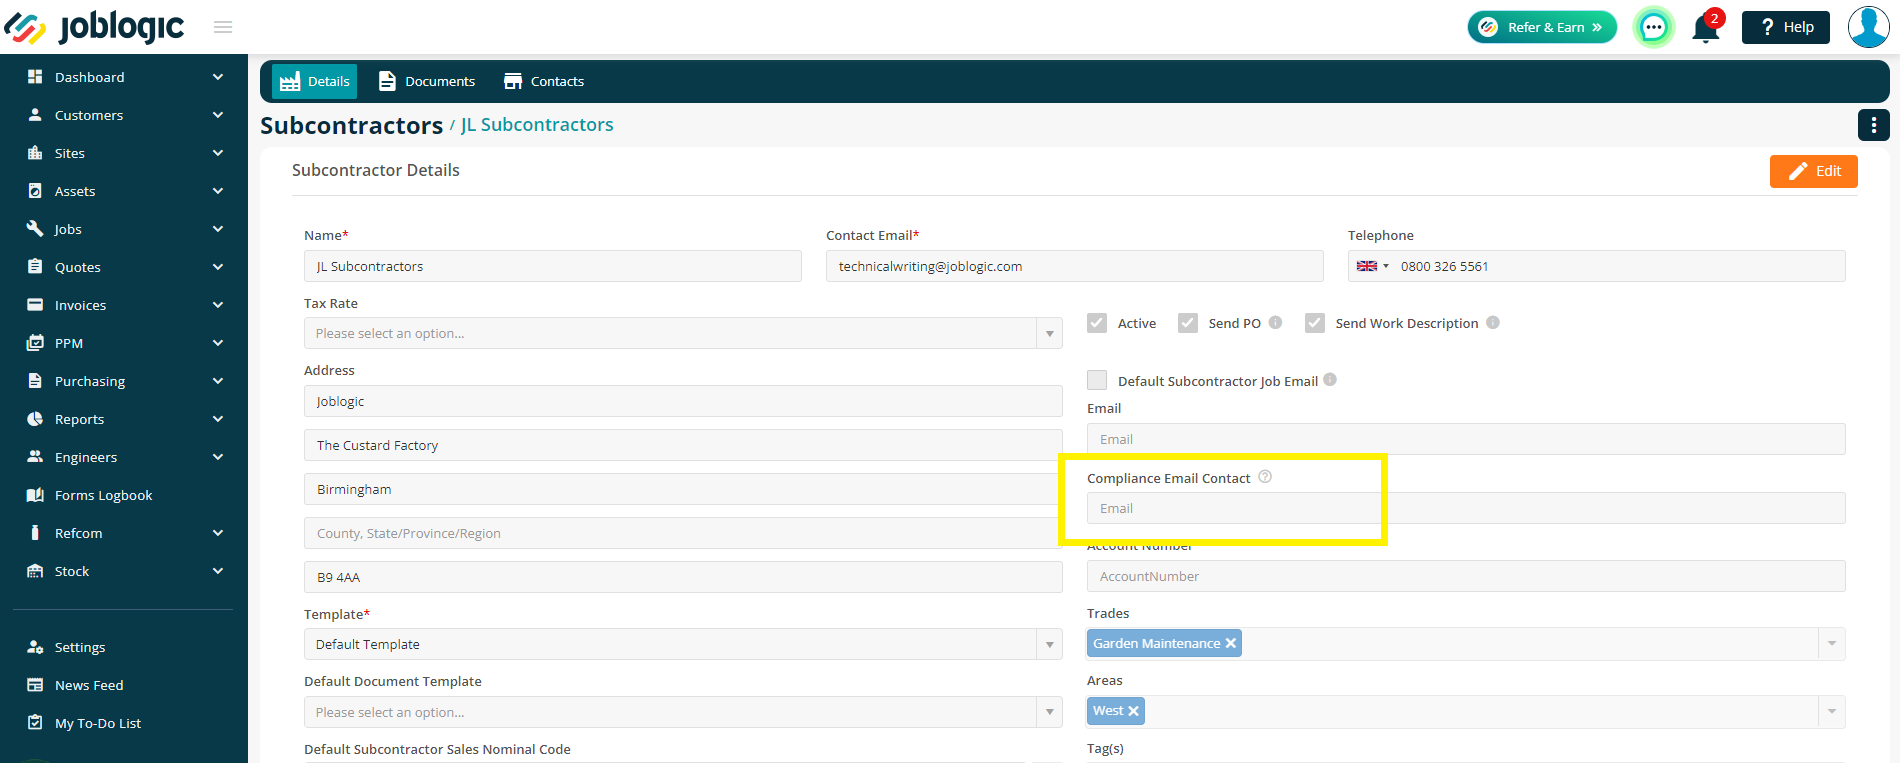
Make sure a Compliance Email Contact is set up on the Details page so they can receive the document notifications.
Click on the Documents tab and click Add Document in the top right

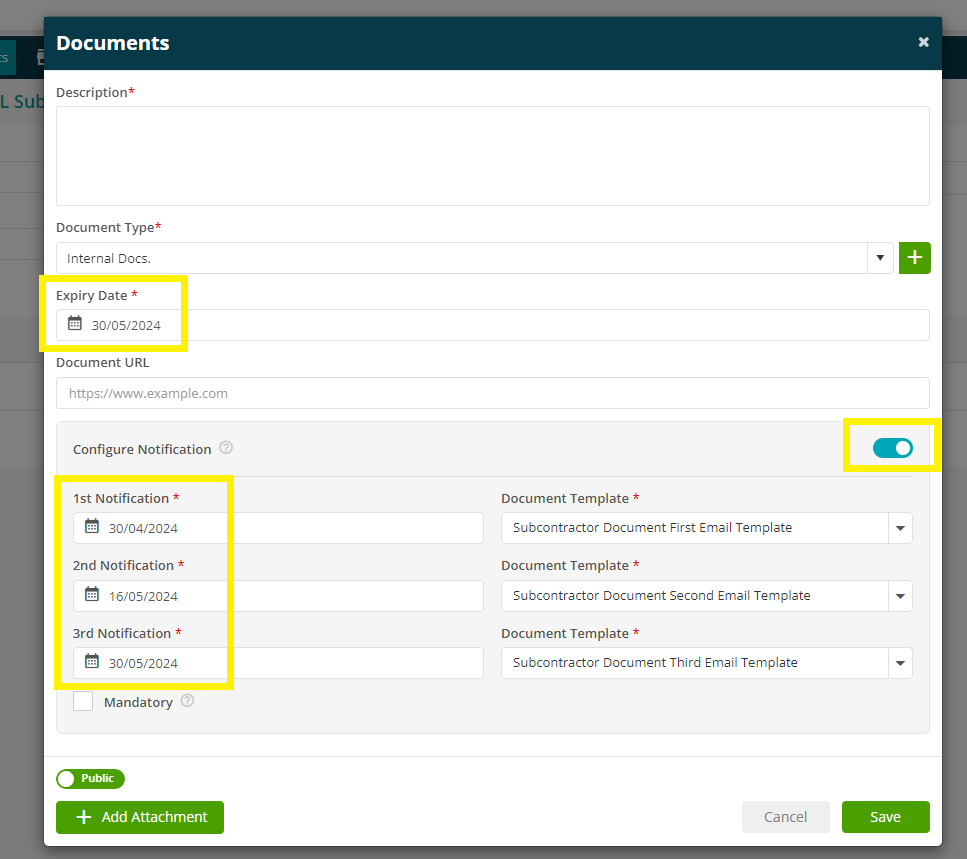
Next, enter your Description, Document Type and Expiry Date.
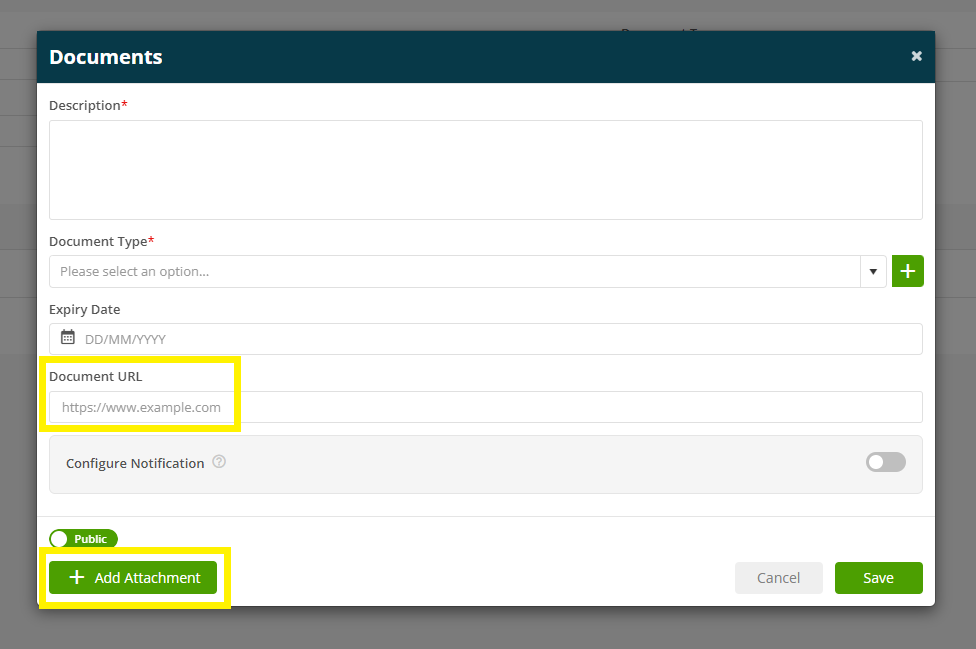
You can add the actual document by including a Document URL or clicking Add Attachment at the bottom of the screen.
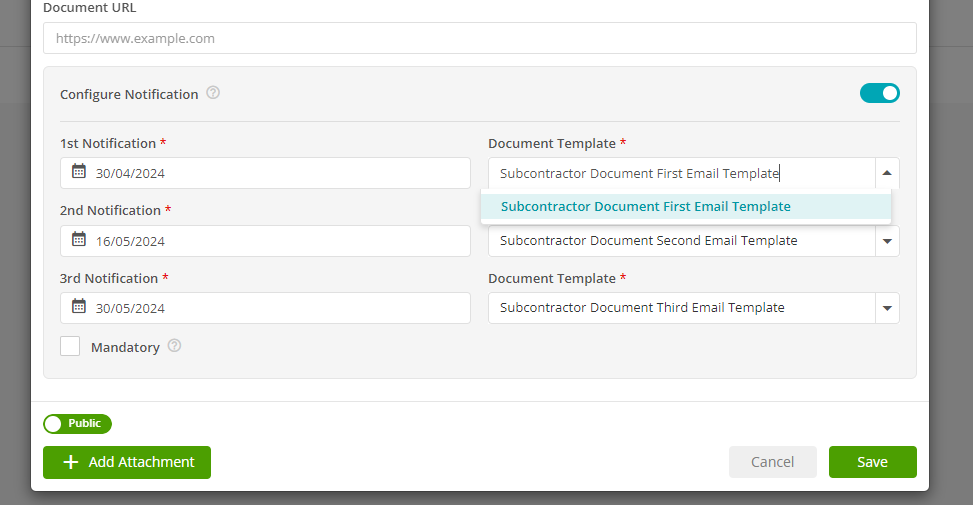
Toggle the Configure Notification section to view the 1st, 2nd and 3rd Notifications and Document Templates.
The Notifications will auto populate with 4 weeks before, 2 weeks before and then the day of the Expiration, as per your Expiry Date field
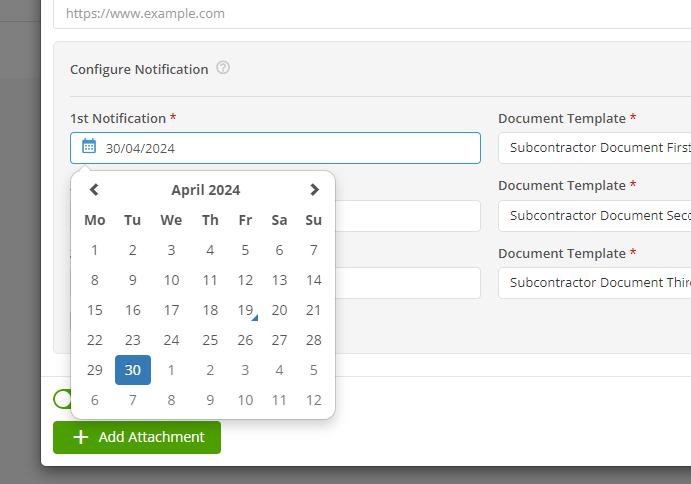
You can amend this manually as needed too by clicking on the Date field and choosing from the Date Picker.
Your Document Templates will auto populate to the default templates in Settings > Document Templates > Document tab, but again can be manually amended via the dropdown options
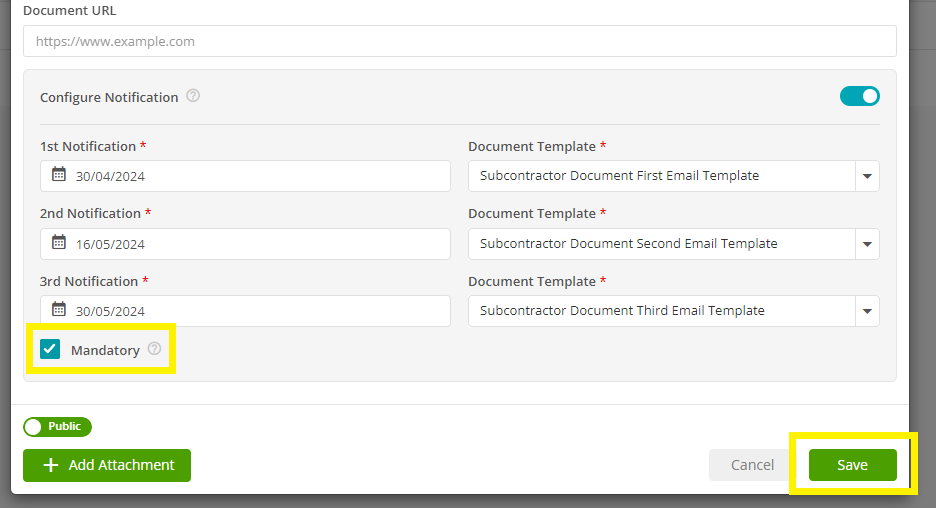
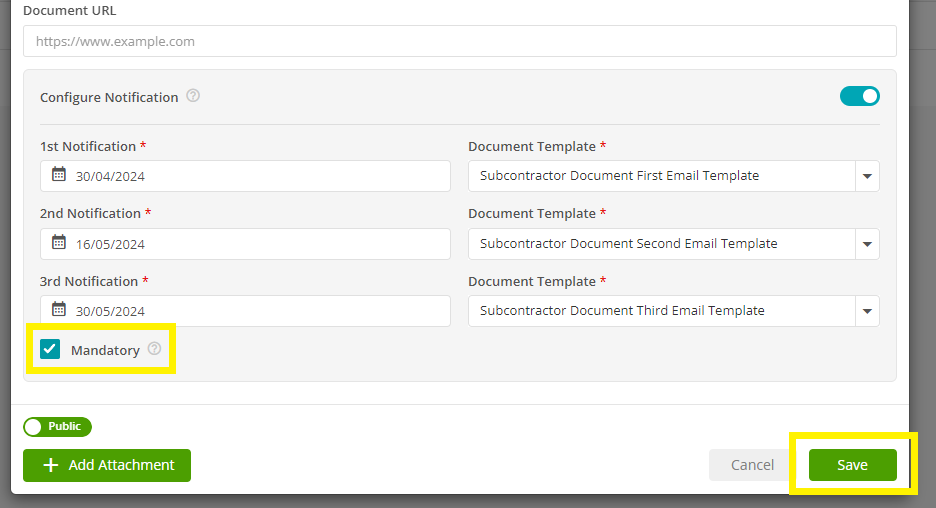
You can also mark the notifications as Mandatory meaning you will get notified if the document expires
Click Save when you are happy with the configuration
User
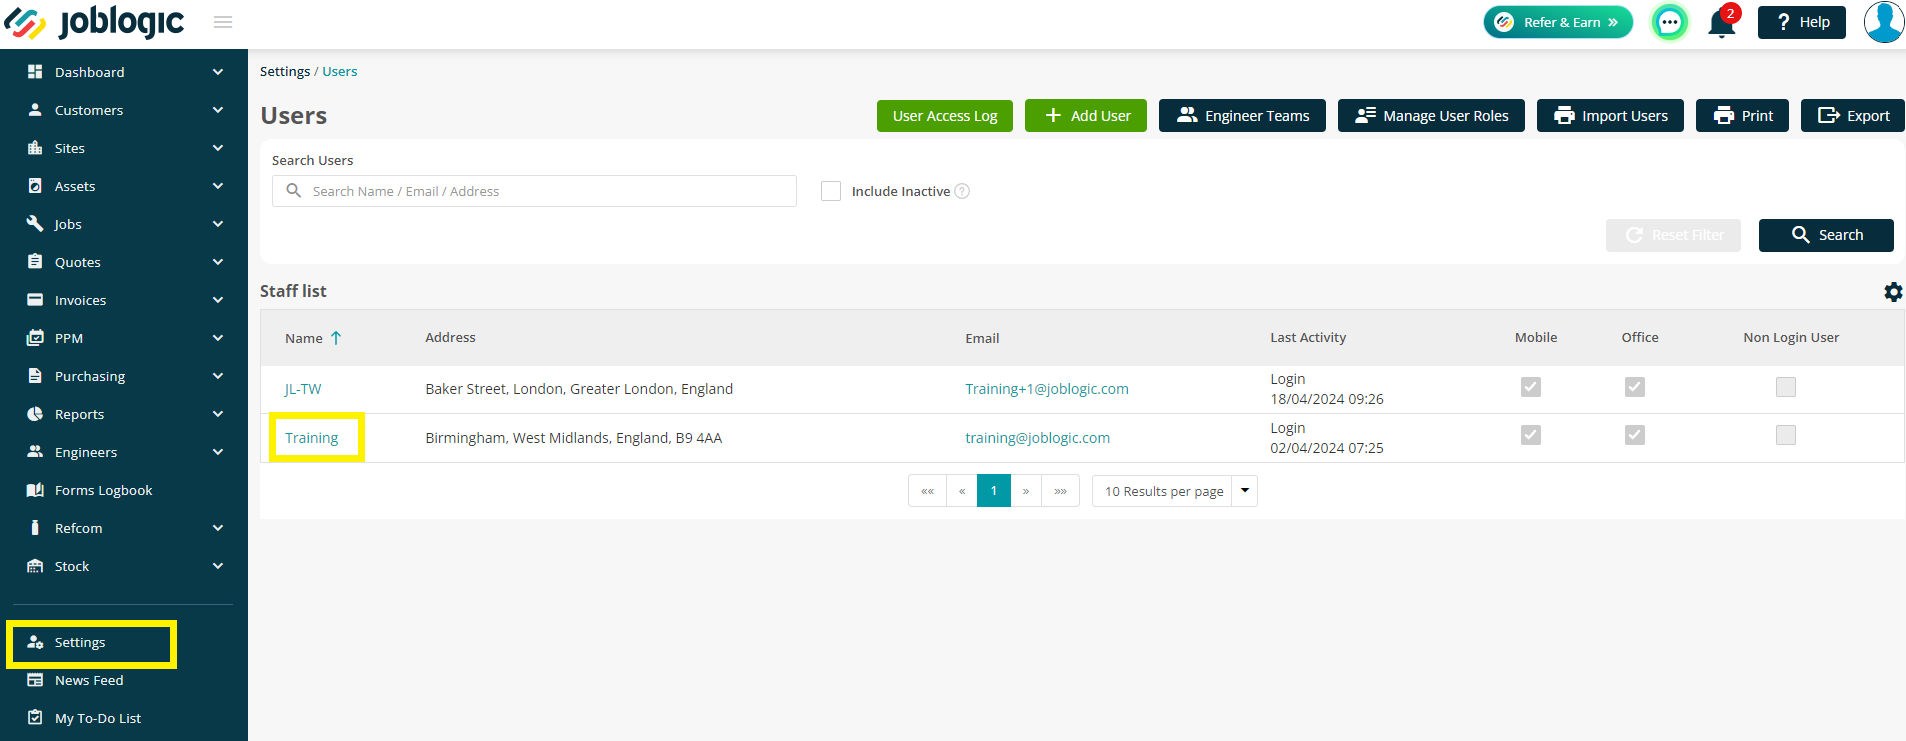
Navigate to Settings > Staff and choose your staff member by clicking their name
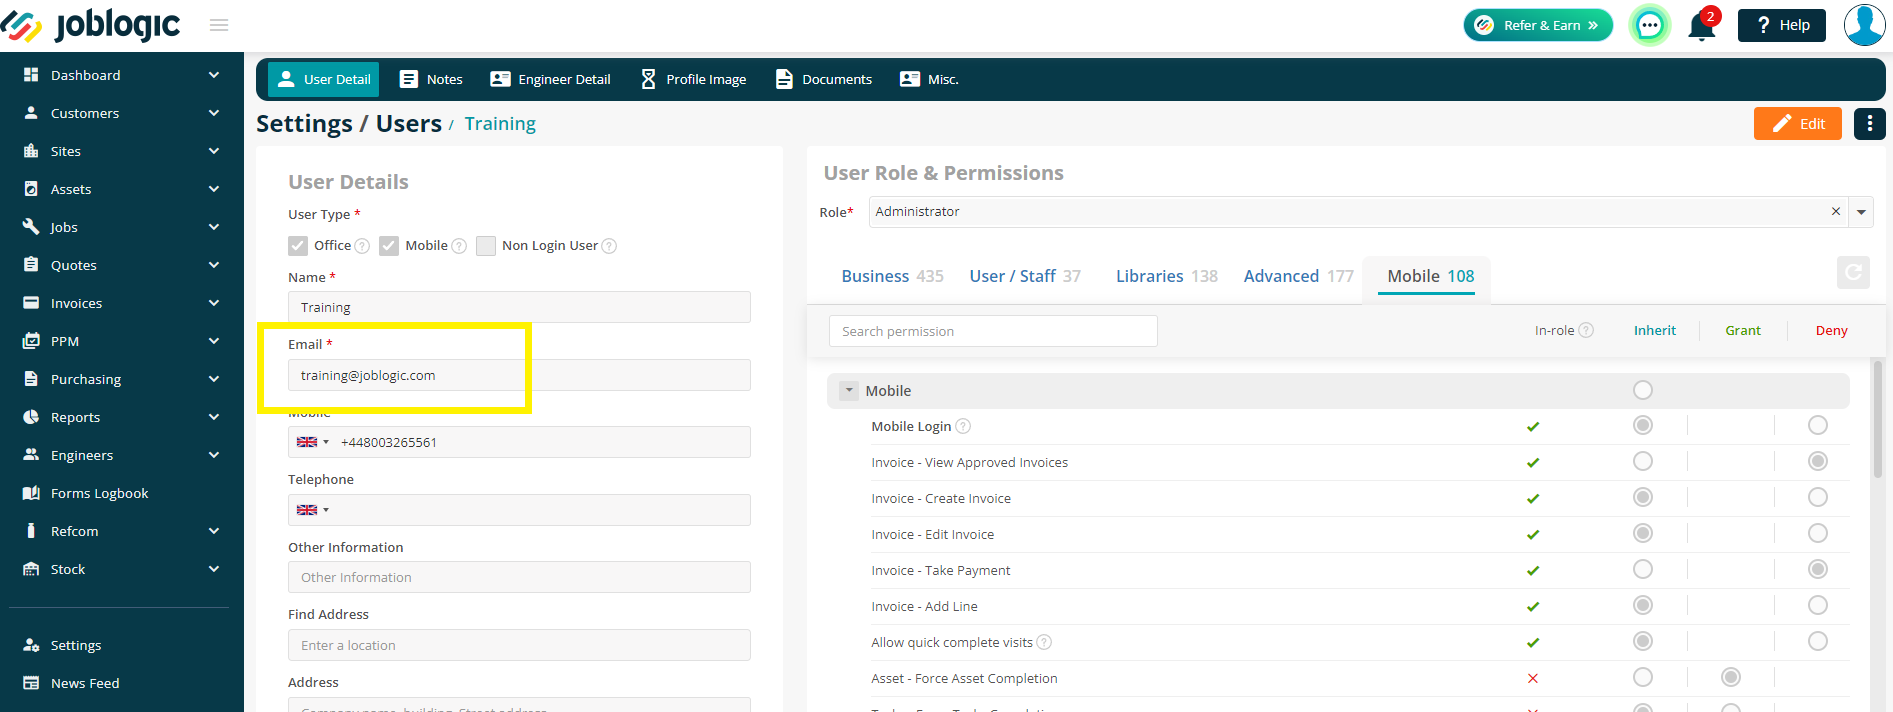
Make sure an Email is set up on the Users Details page so they can receive the document notifications.
Click on the Documents tab and click Add Document in the top right
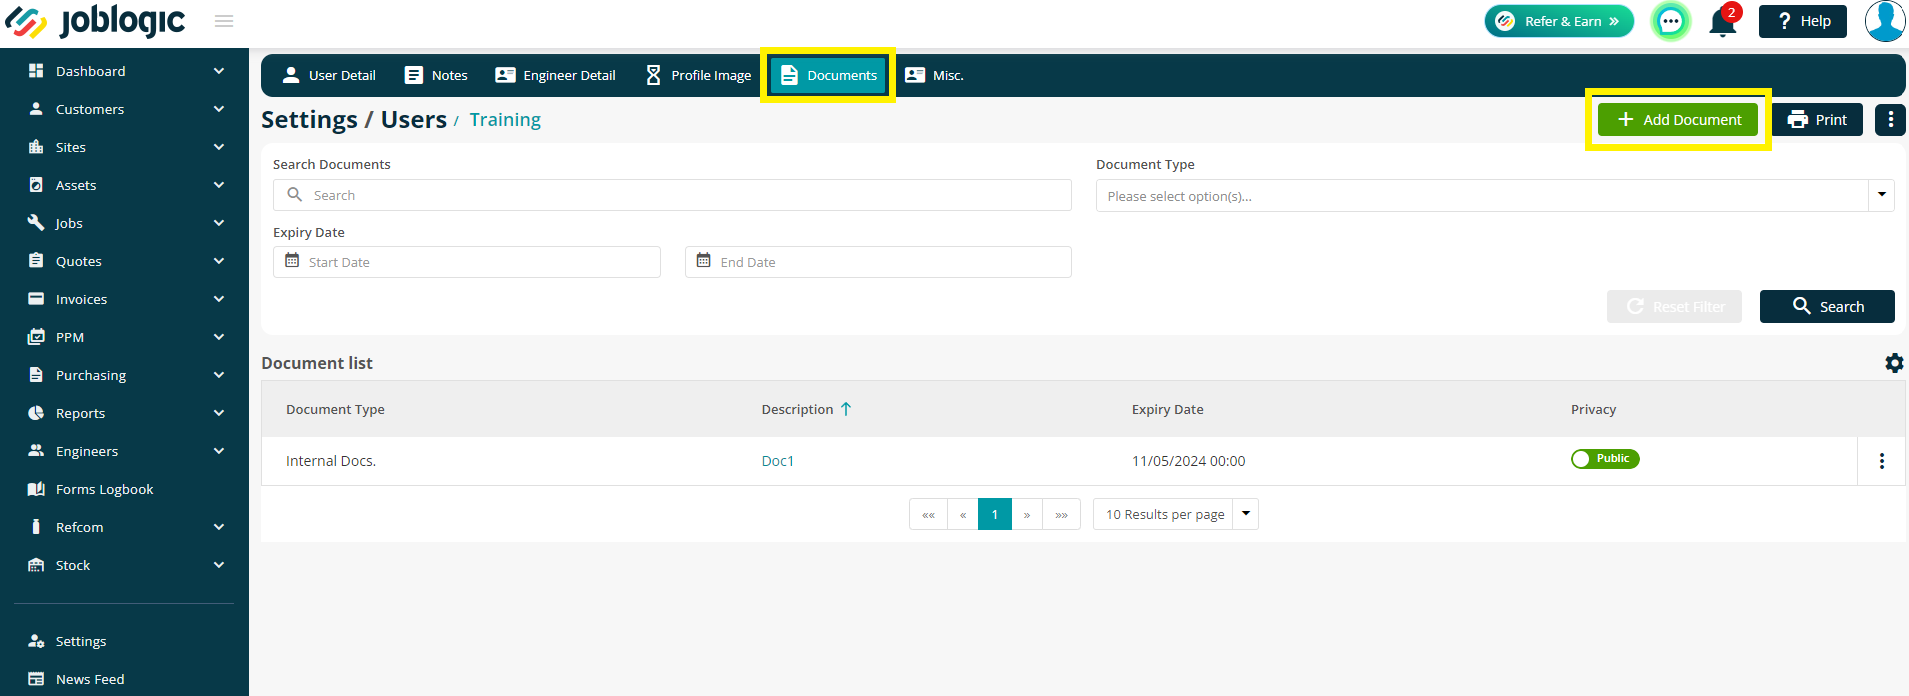
Next, enter your Description, Document Type and Expiry Date.
You can add the actual document by including a Document URL or clicking Add Attachment at the bottom of the screen.
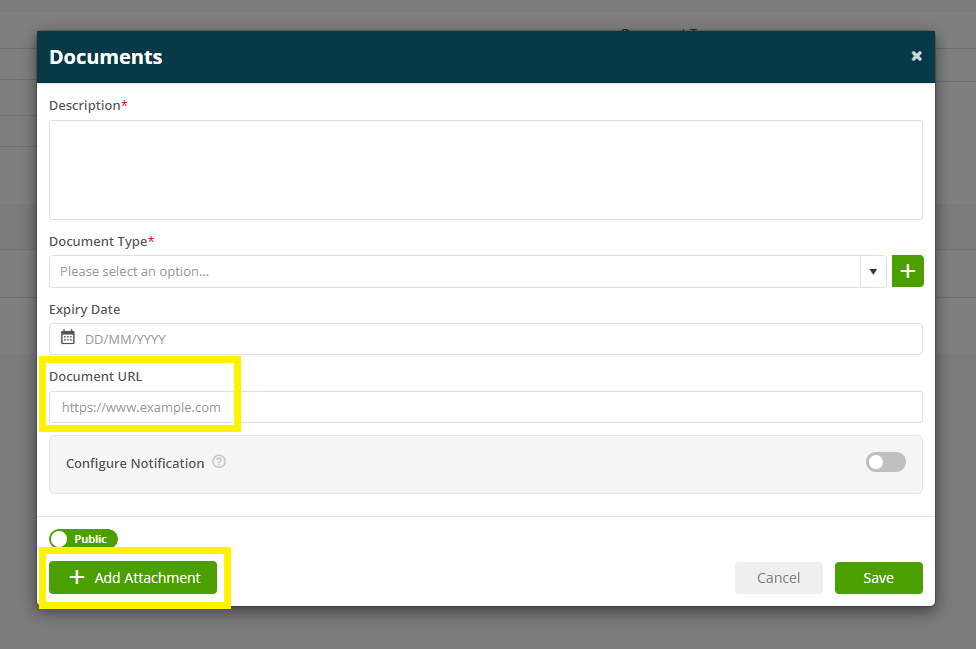
Toggle the Configure Notification section to view the 1st, 2nd and 3rd Notifications and Document Templates.
The Notifications will auto populate with 4 weeks before, 2 weeks before and then the day of the Expiration, as per your Expiry Date field
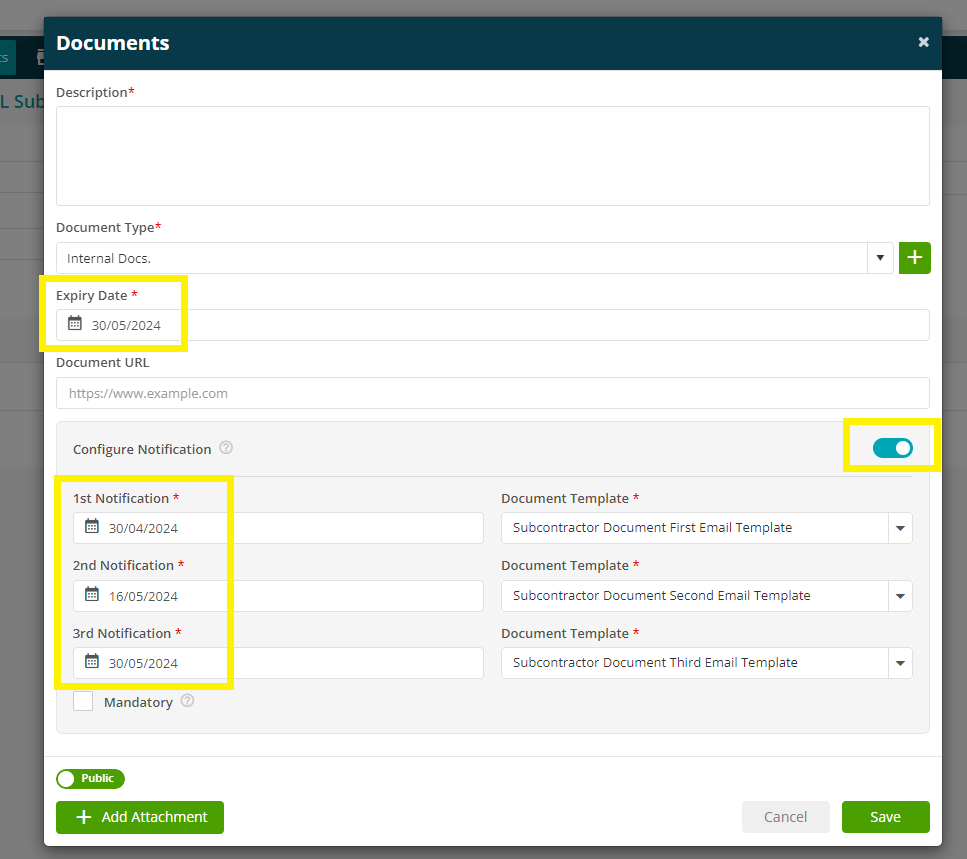
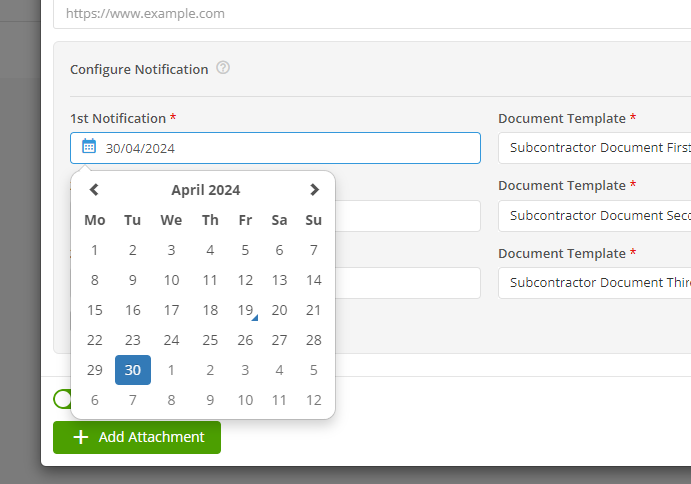
You can amend this manually as needed too by clicking on the Date field and choosing from the Date Picker.
Your Document Templates will auto populate to the default templates in Settings > Document Templates > Document tab, but again can be manually amended via the dropdown options
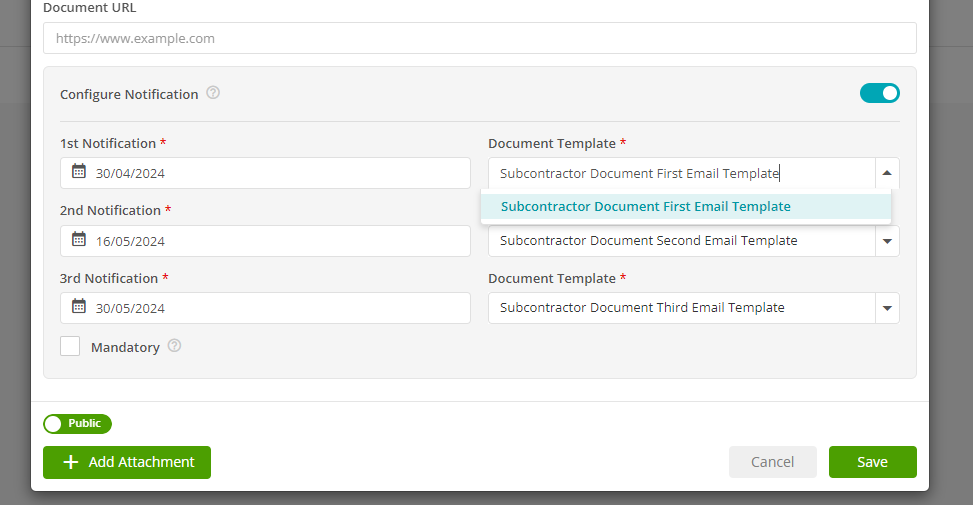
You can also mark the notifications as Mandatory meaning you will get notified if the document expires
Click Save when you are happy with the configuration
Further Support
For further information or assistance with the above, contact our Support Team on 0800 326 5561 or email support@joblogic.com. Alternatively, our Customer Success Management team can be reached by emailing customersuccess@joblogic.com
Publishing Details
This document was written and produced by Joblogic’s Technical Writing team and was last updated on the date specified above. Be aware that the information provided may be subject to change following further updates on the matter becoming available or new releases within the system. Additionally, details within the guide may vary depending on your Joblogic account’s user permissions and settings or the electronic device being used.

