Introduction
The Dynamic Scheduler app helps you optimise engineer scheduling and route planning across both planned and reactive work. By analysing real-time factors like location, skills, availability, and job priority, it automatically recommends the most efficient routes and job assignments for your team.
This saves time, reduces travel costs, and helps you meet SLAs more consistently, while giving you full control over how plans are created and deployed.
In this guide, we’ll show you how to configure your optimisation preferences, generate route plans, and manage recommendations to get the most out of Dynamic Scheduler.
How to access the Dynamic Scheduler app
Click the Marketplace option on the main menu and then click Dynamic Scheduler, if it appears here
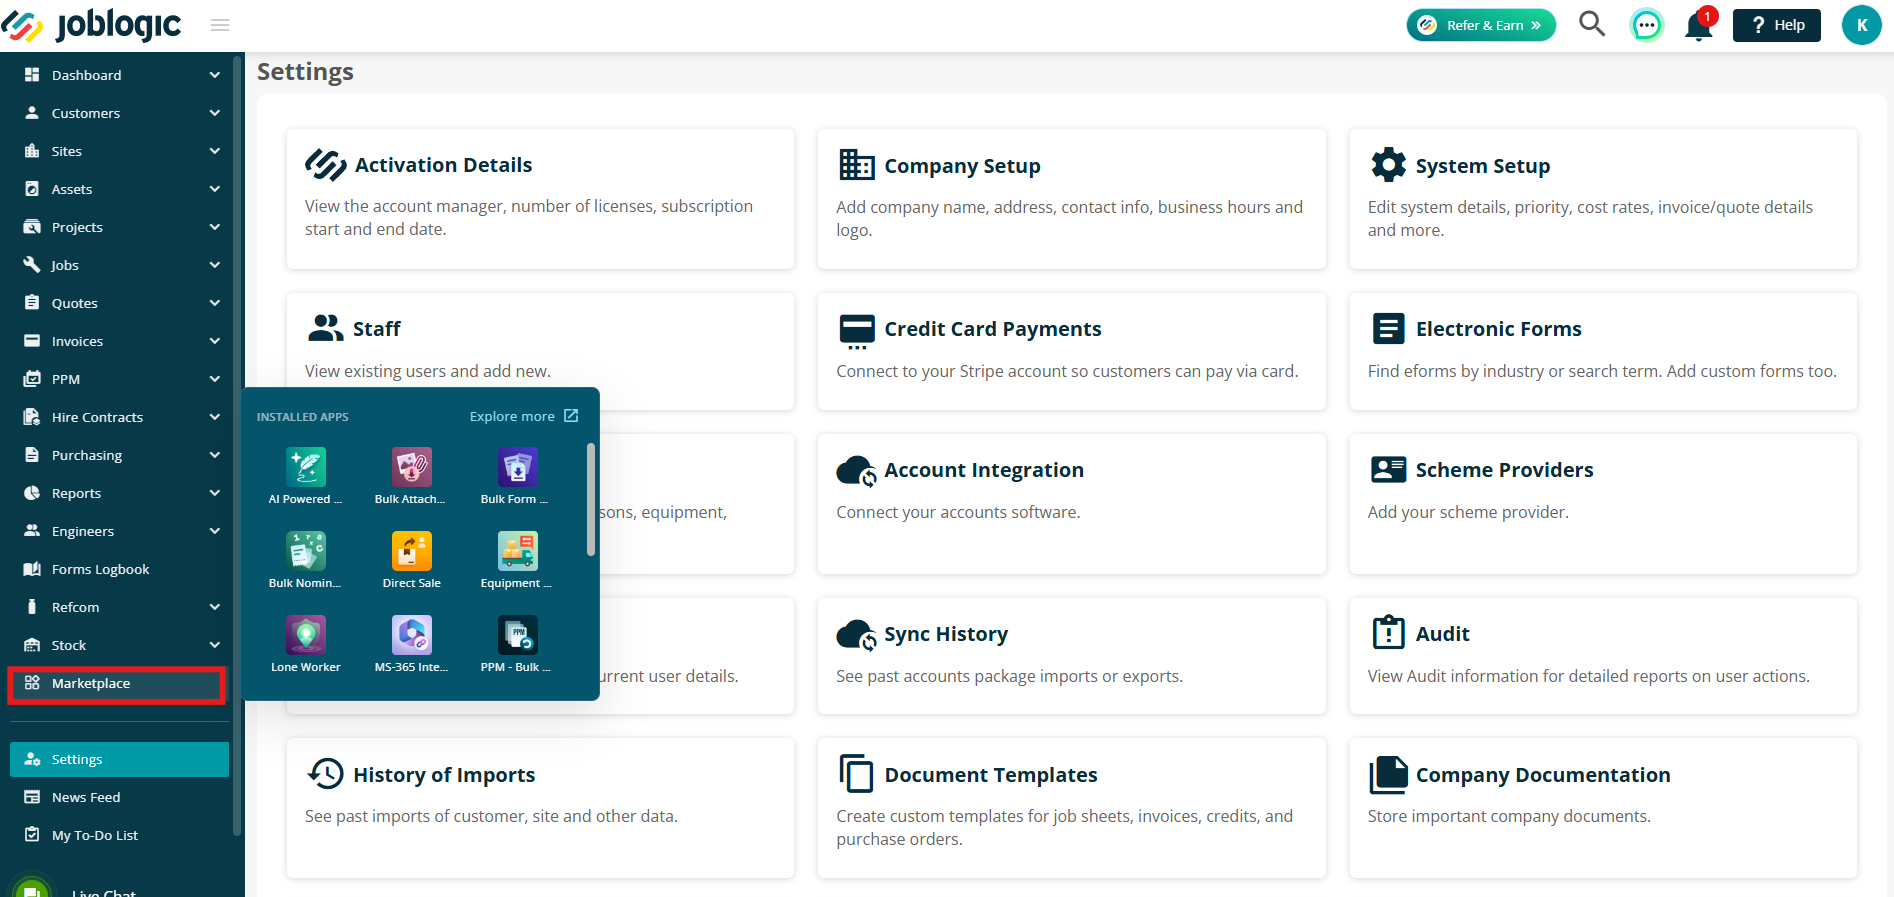
Alternatively, click Explore More to find it under your My Apps page.

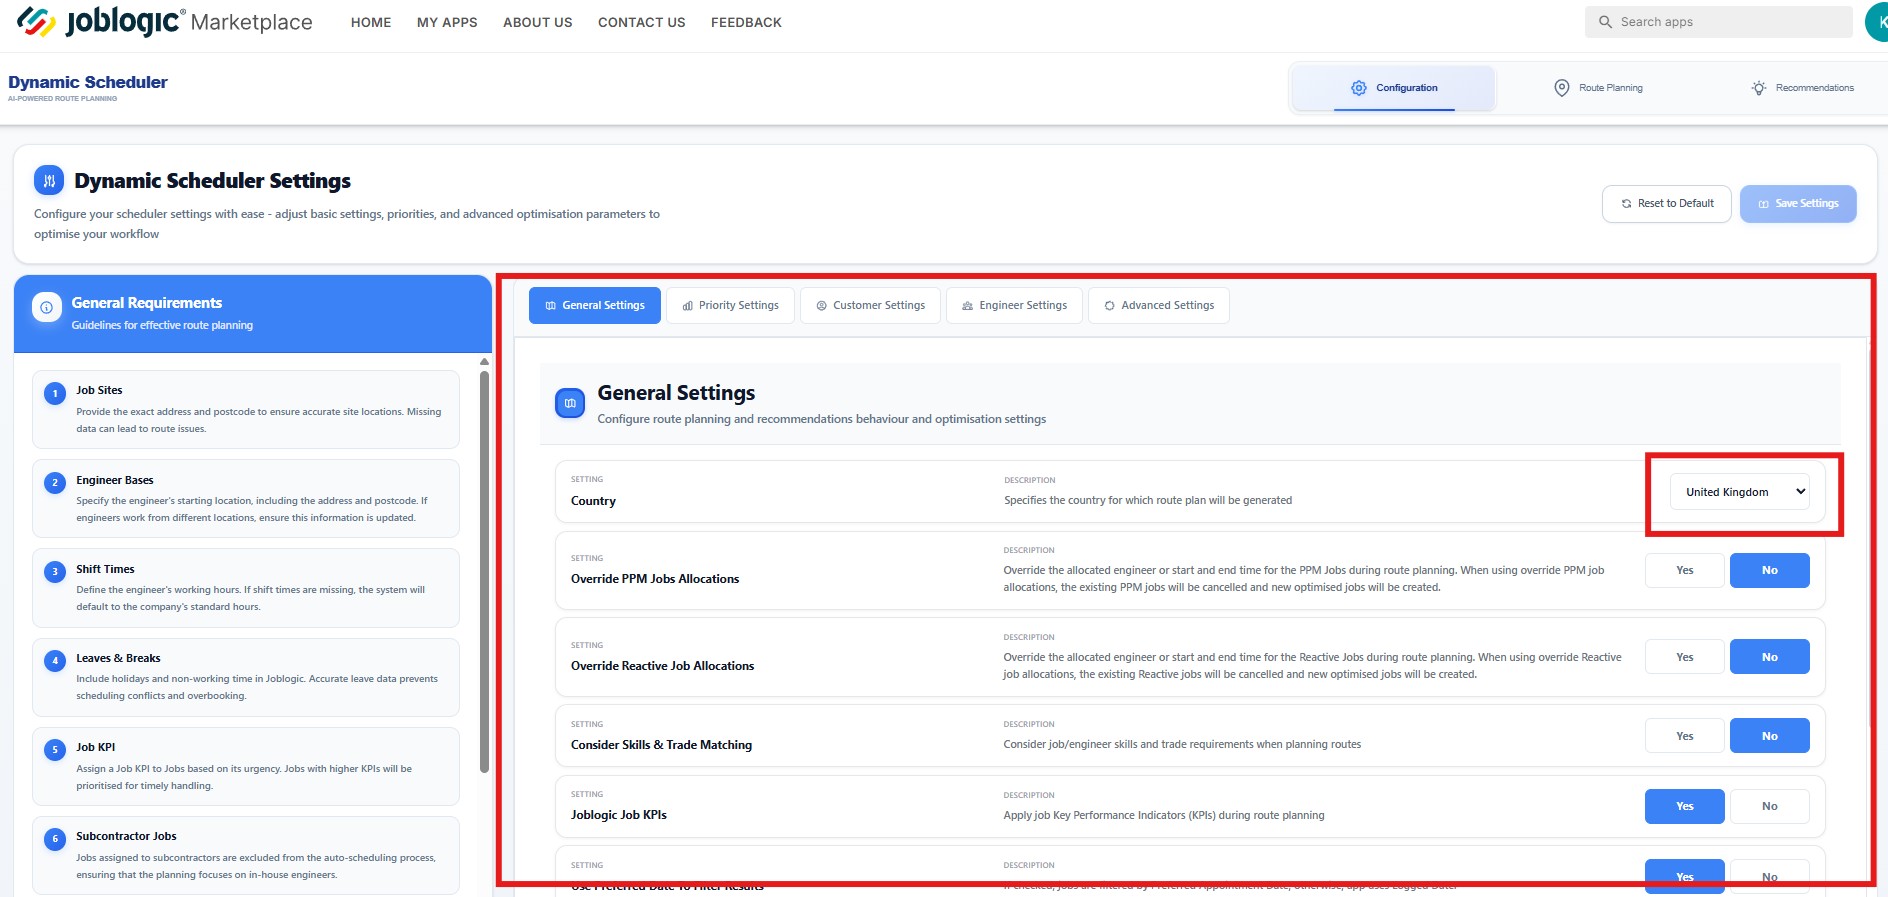
Configuration
The Configuration page is the central hub for managing the core settings that control dynamic scheduling and route planning within Joblogic.
From here, you can configure how jobs are prioritised and assigned, ensuring your scheduling engine works in line with your business goals and service priorities.
.jpg)
General Settings
On the left-hand side, you’ll find some general guidance to help with effective route planning. This includes insights such as engineer locations, shift times and job KPIs.
.jpg)
The main section of this page is your General Settings area. Here, you can set up the following options:
Country
Specifies the country for which route plan will be generated
Override PPM Job Allocations
Override the allocated engineer or start and end time for the PPM Jobs during route planning. When using override PPM job allocations, the existing PPM jobs will be cancelled and new optimised jobs will be created.
Override Reactive Job Allocations
Override the allocated engineer or start and end time for the Reactive Jobs during route planning. When using override Reactive job allocations, the existing Reactive jobs will be cancelled and new optimised jobs will be created.
Consider Skills & Trade Matching
Ensure the system considers both engineer skills and job trade requirements when planning routes, helping to improve first-time fix rates and resource accuracy.
Joblogic Job KPIs
Enable Use Job SLA to apply job Key Performance Indicators (KPIs) during scheduling and route planning.
Use Preferred Date to Filter Results
When enabled, the Route Planner will prioritise the customer’s preferred date when filtering. If unavailable, it will default to the job logged date.
Use Preferred Date As PPM End Date
When enabled, PPM jobs use the preferred appointment date as the latest allowed end date during scheduling.
Note: This depends on Enable Override PPM Jobs Allocations first. This option only applies to movable PPM visits.
Use Custom Duration
Apply specified durations to both PPM and reactive jobs, using custom time values set in minutes.
-
Custom PPM Duration
Override the default time allocation for PPM jobs with a custom duration. -
Custom Reactive Duration
Override the default time allocation for reactive (unplanned or urgent) jobs.
JL Duration for PPM Jobs
Joblogic PPM Jobs Duration (in minutes)
Priority Settings
Click on the Priority Settings tab to set up your job priorities.
On the left-hand side, you’ll see helpful guidelines to help you understand how priorities work before getting started.
.jpg)
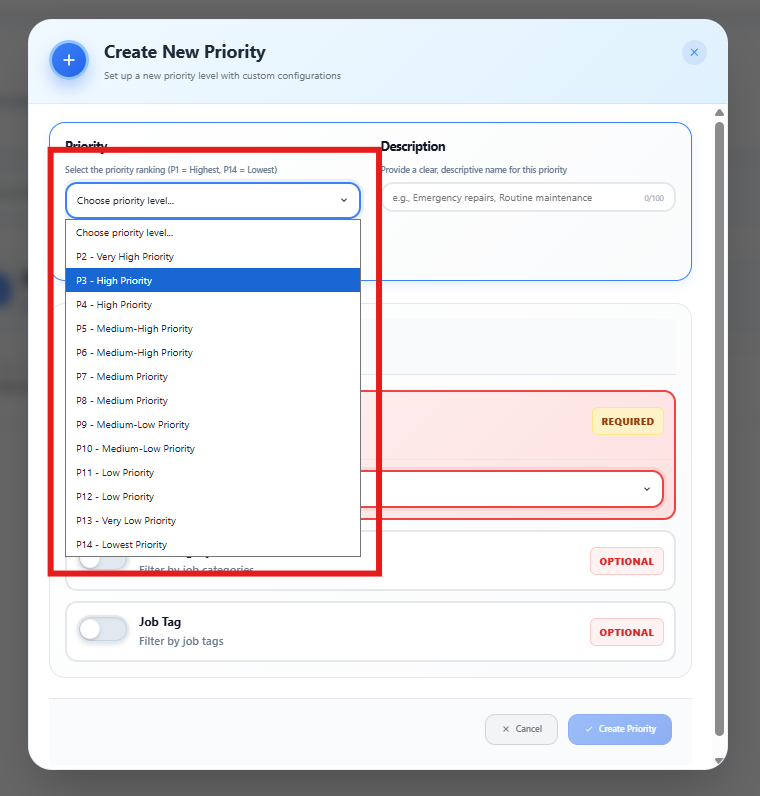
You can create up to 14 priorities, helping you define how different job types are ranked in importance.
Priority 1 represents the highest level, meaning these jobs are considered most important when scheduling and assigning work.
Note:
This doesn’t mean that Priority 1 jobs are always assigned first. The system’s main objective is to optimise travel time and distance when scheduling jobs. Priority comes into play only when multiple jobs are available but only one can be assigned due to constraints, such as engineer shift timings. In these cases, the job with the highest priority will be selected first.
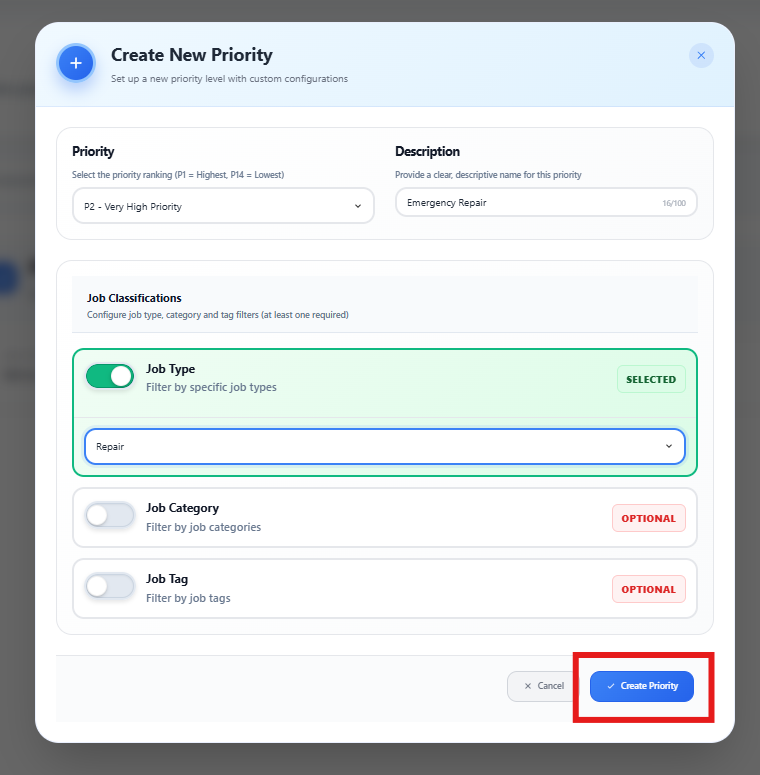
Click Add Priority to create a new one.
.jpg)
Select a Priority Level from the dropdown.
Add a Priority Description (e.g., “Emergency Response” or “Routine Maintenance”)
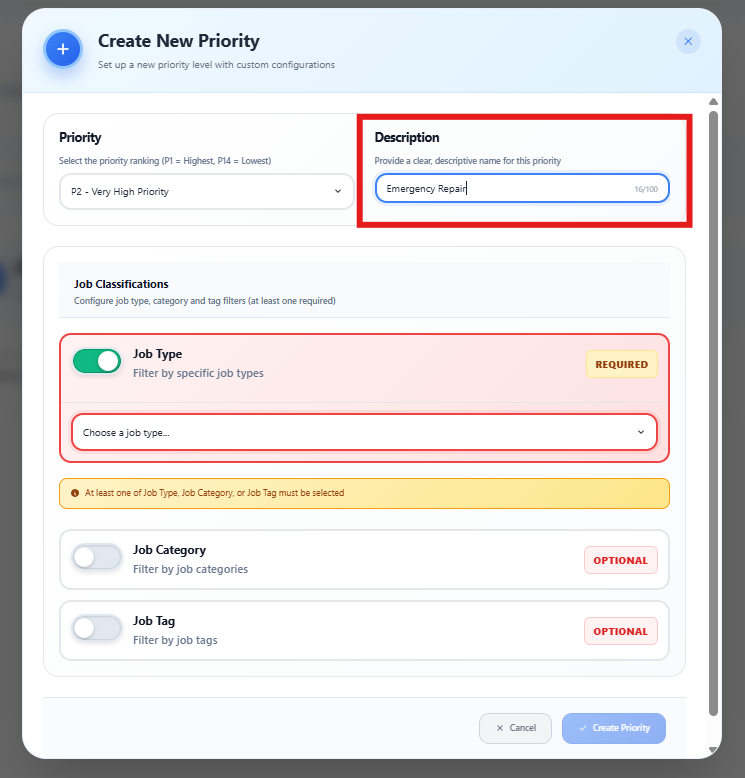
Next, select the Job Classifications that apply. You can select a Job Type, Job Category and/or Job Tags as needed - at least one must be chosen before saving.
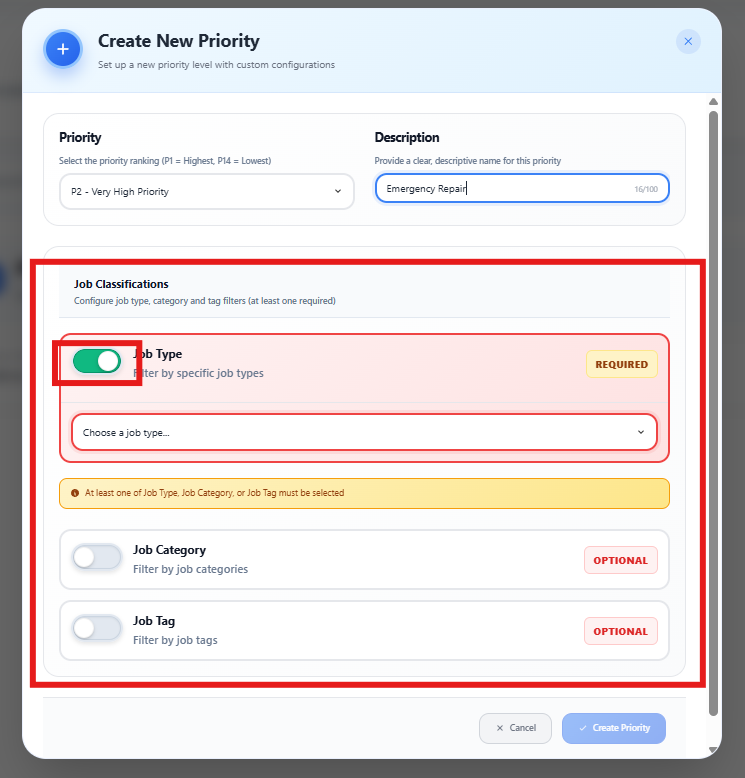
Once complete, click Create Priority to save your settings.
To edit or delete a priority, simply click the corresponding button next to the relevant priority in the list.
.jpg)
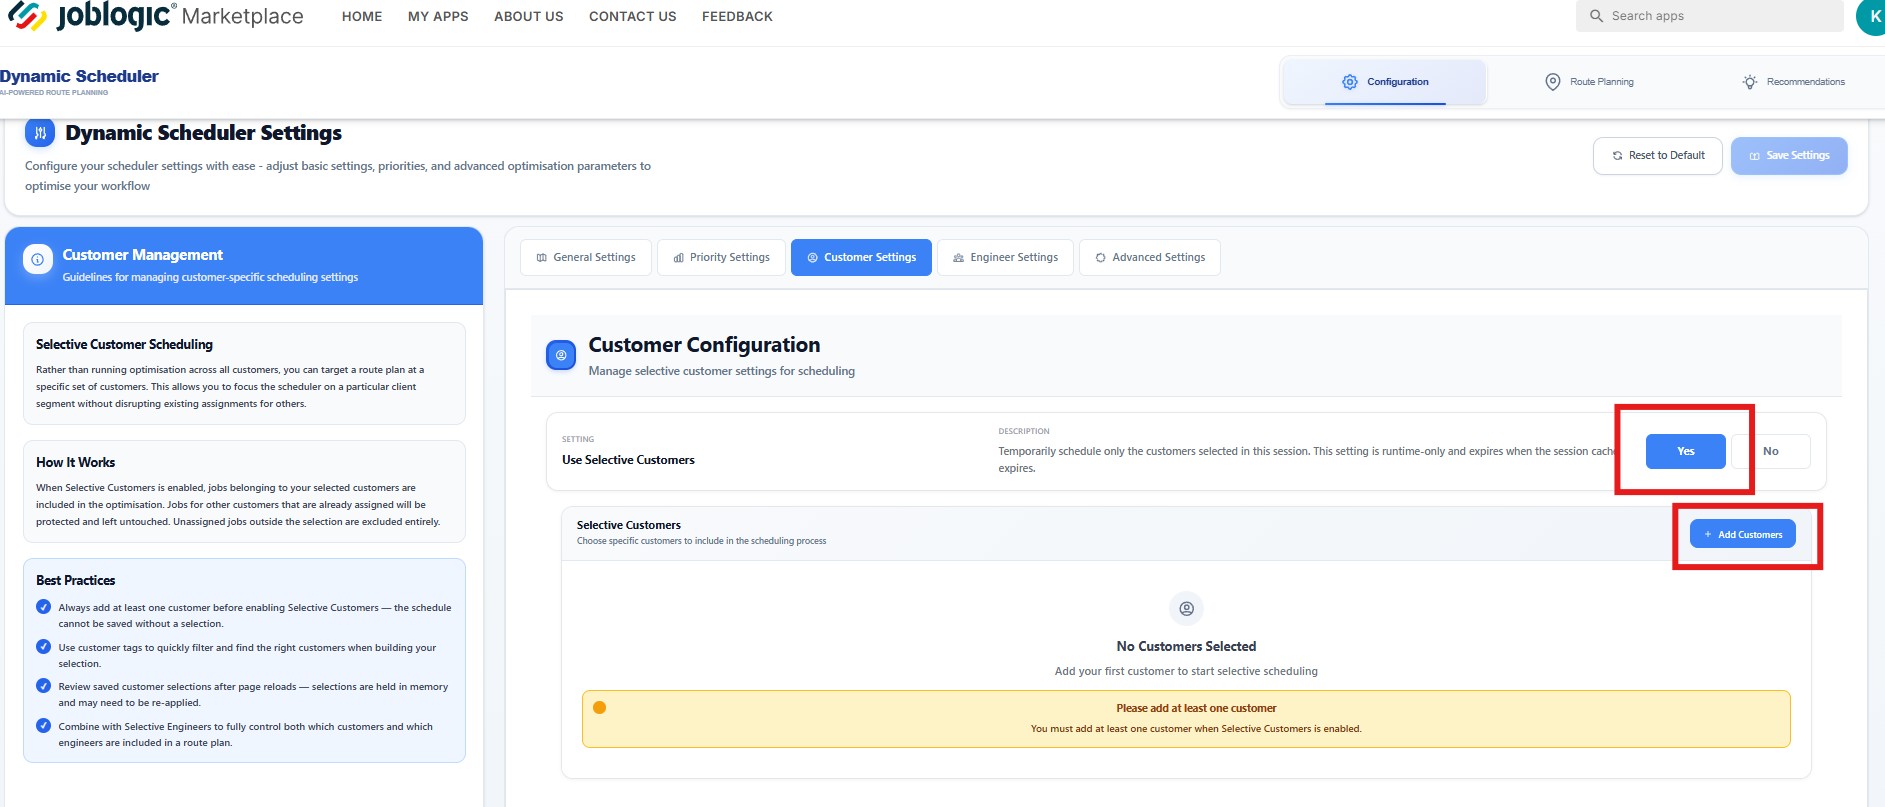
Customer Settings
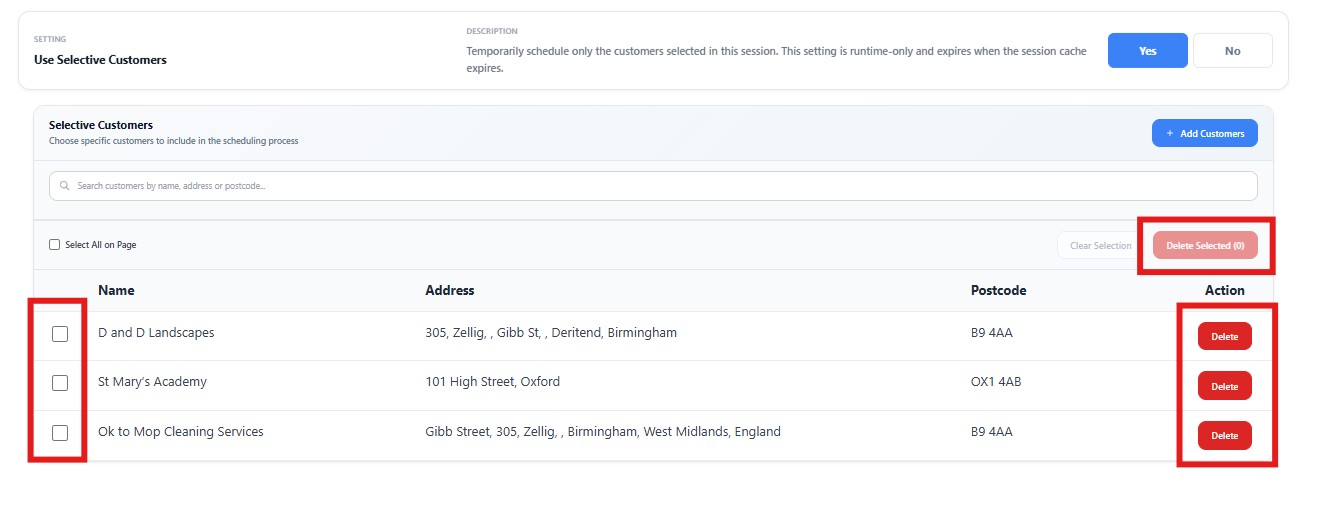
The third tab is Customer Settings. Here, you can choose whether route optimisation should be performed across all customers or restricted to a selected group of customers.
On the left-hand side, you'll also find guidance to help you make the most of customer-based scheduling.
.jpg)
Enable this by clicking Yes, and then click Add Customers to choose which customers should be included.
Tick the customers you would like to include and then click Add Selected Customers to confirm your selection.
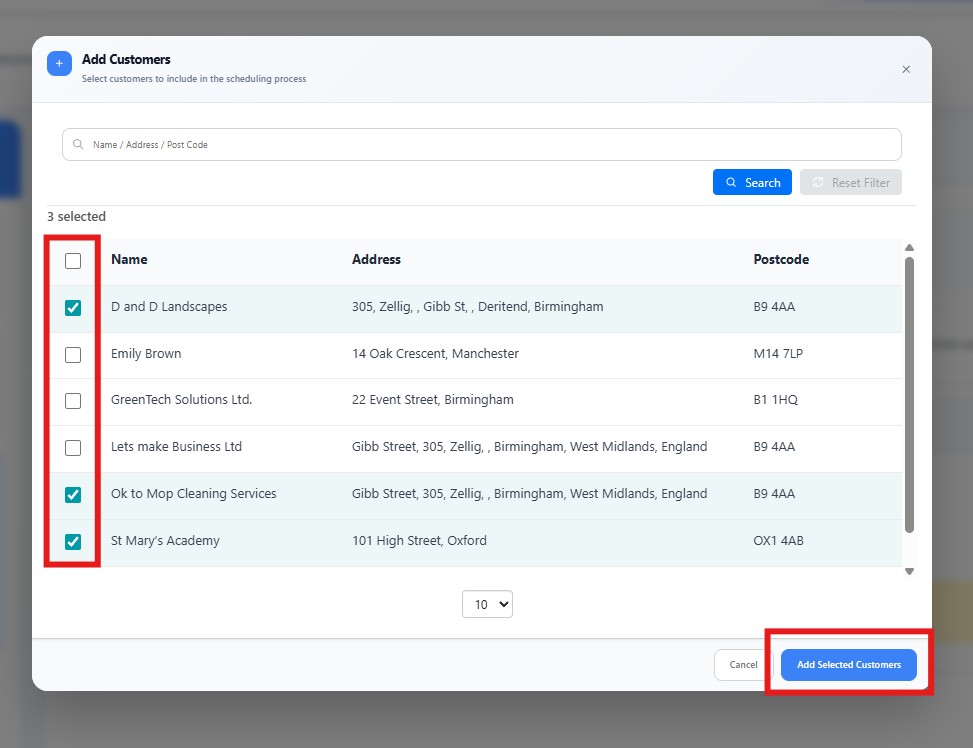
The selected customers will now appear in the list and will be included when route plans are generated.
To remove engineers from the list, select the required names and click Delete Selected to remove multiple engineers at once.
Alternatively, click Delete against an individual engineer to remove them separately.
Engineer Settings
The next tab is Engineer Settings. Here, you can configure engineer overtime and choose which engineers to include in the scheduling process.
On the left-hand side, you’ll also find some handy guidelines to help with effective engineer management.
.jpg)
Allow Engineer Overtime
Enable this setting to permit engineers to complete jobs that may extend beyond regular working hours.
-
Engineer Departure Overtime
Specify the additional minutes engineers may spend before departing from jobs. -
Engineer Travel Overtime
Set the maximum additional travel time permitted for engineers when routes are optimised.
.jpg)
Use Selective Engineers
Enable this to manually select which engineers should be included in the scheduling algorithm
.jpg)
Click Add Engineers to make your selections.
.jpg)
Tick the engineers you’d like to include in the scheduling algorithm, then click Add Selected Engineers to confirm your selection.
.jpg)
To remove engineers from the list, select the required names and click Delete Selected to remove multiple engineers at once.
Alternatively, click Delete against an individual engineer to remove them separately.
.jpg)
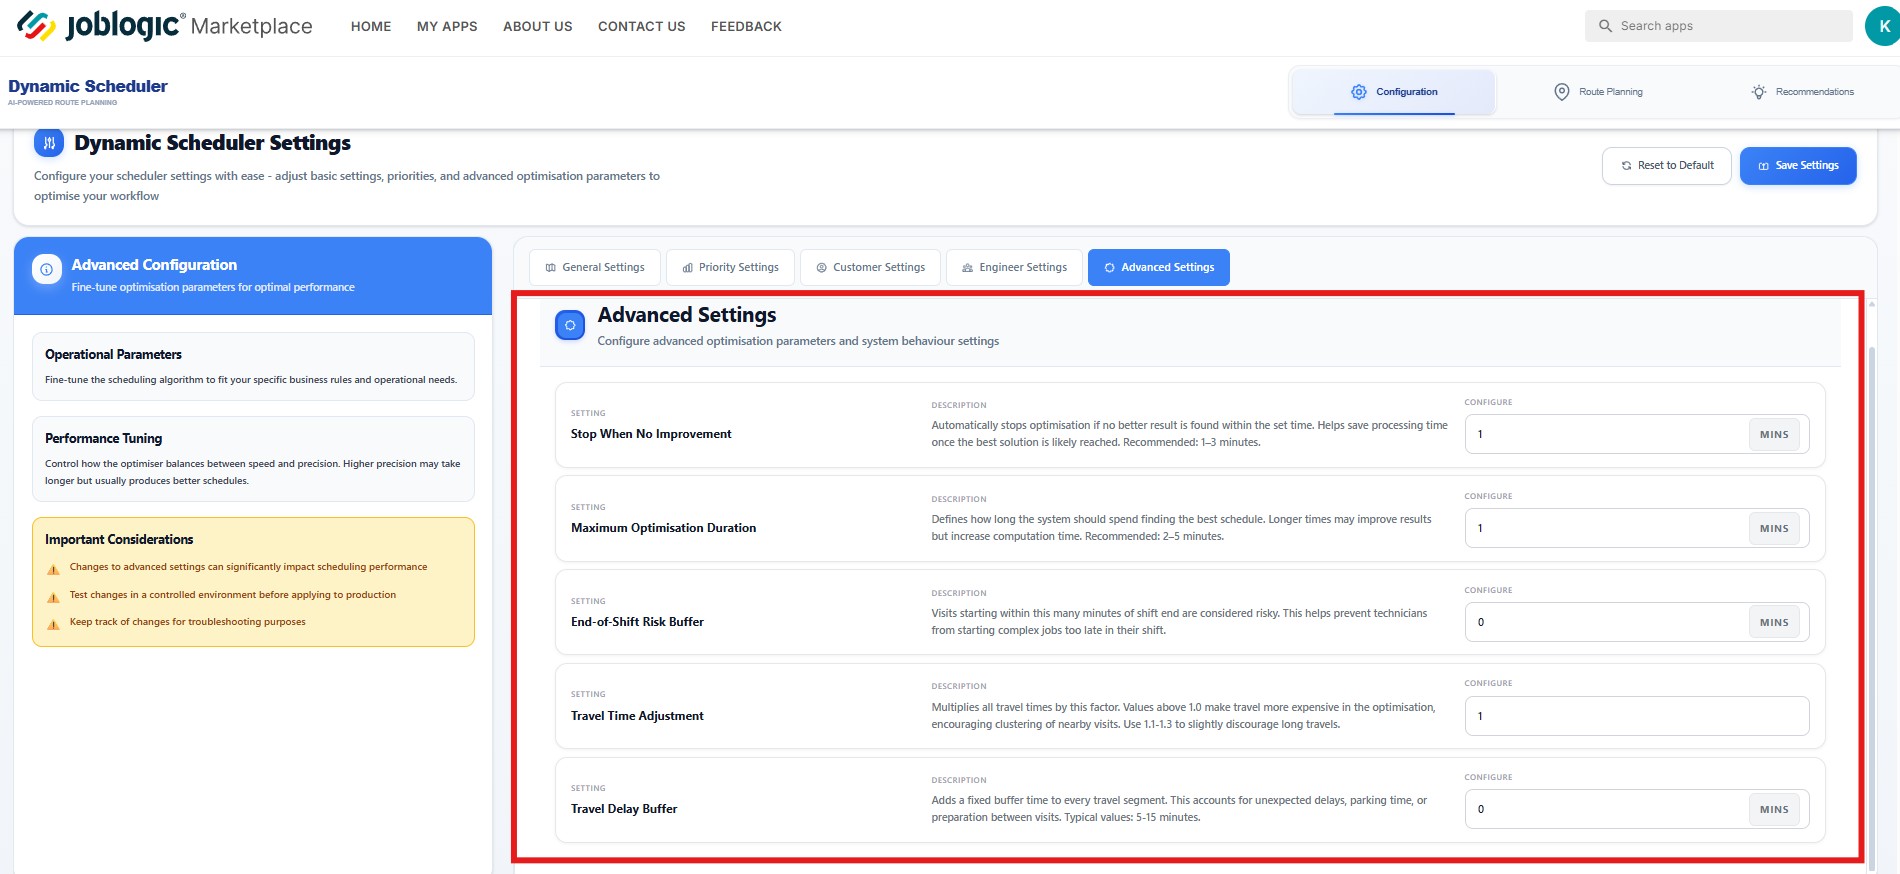
Advanced Settings
The final tab is your Advanced Settings. The Advanced Configuration section allows experienced users to fine-tune optimisation algorithms and expert-level parameters for maximum control over scheduling and route planning.
Only modify these settings if you understand their impact. Incorrect values may reduce scheduling quality. Always test changes before applying them to live data.
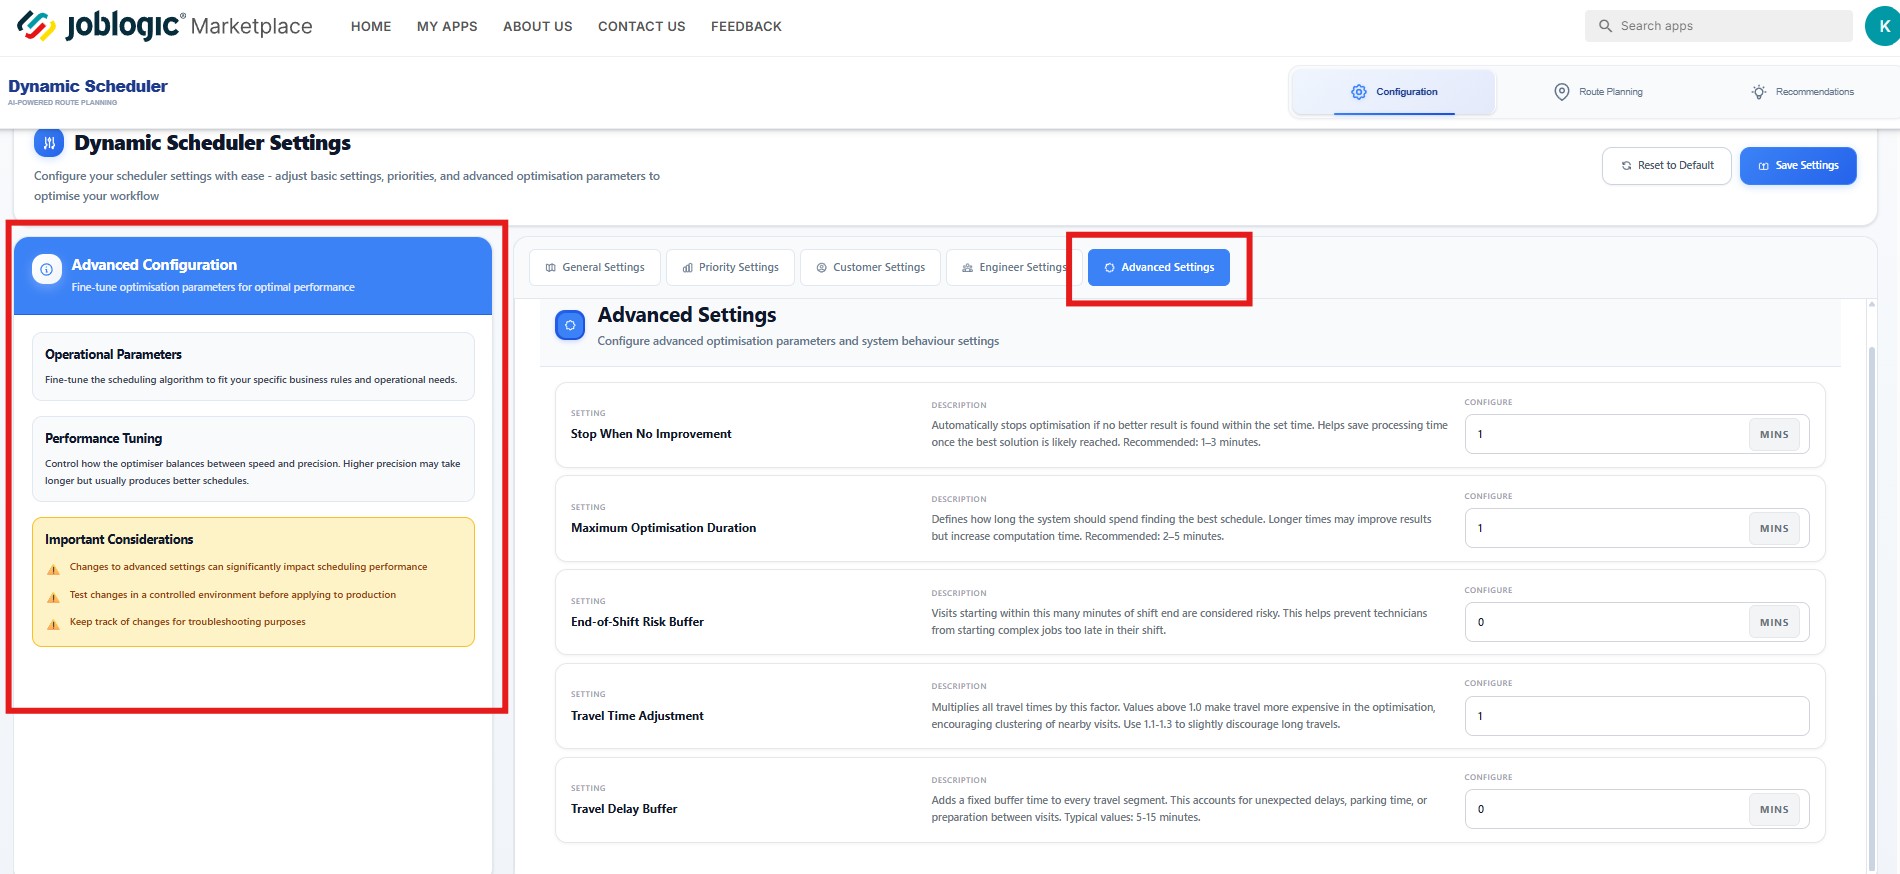
Stop when no improvement
- Automatically stops optimisation if no better result is found within the set time. Helps save processing time once the best solution is likely reached. Recommended: 1–3 minutes.
Maximum optimisation duration
- Defines how long the system should spend finding the best schedule. Longer times may improve results but increase computation time. Recommended: 2–5 minutes.
End-of-shift risk buffer
- Visits starting within this many minutes of shift end are considered risky. This helps prevent technicians from starting complex jobs too late in their shift.
Travel time adjustment
- Multiplies all travel times by this factor. Values above 1.0 make travel more expensive in the optimisation, encouraging clustering of nearby visits. Use 1.1-1.3 to slightly discourage long travels.
Travel delay buffer
- Adds a fixed buffer time to every travel segment. This accounts for unexpected delays, parking time, or preparation between visits. Typical values: 5-15 minutes.
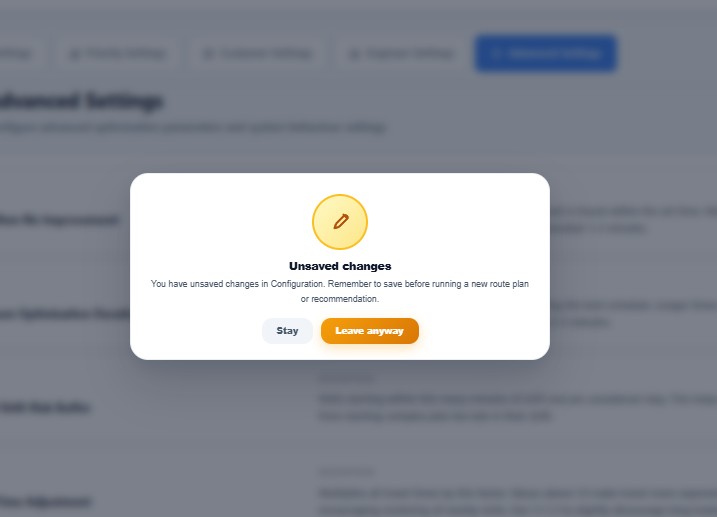
Don't forget to click Save Settings at the top of the page, to finalise all of your changes.
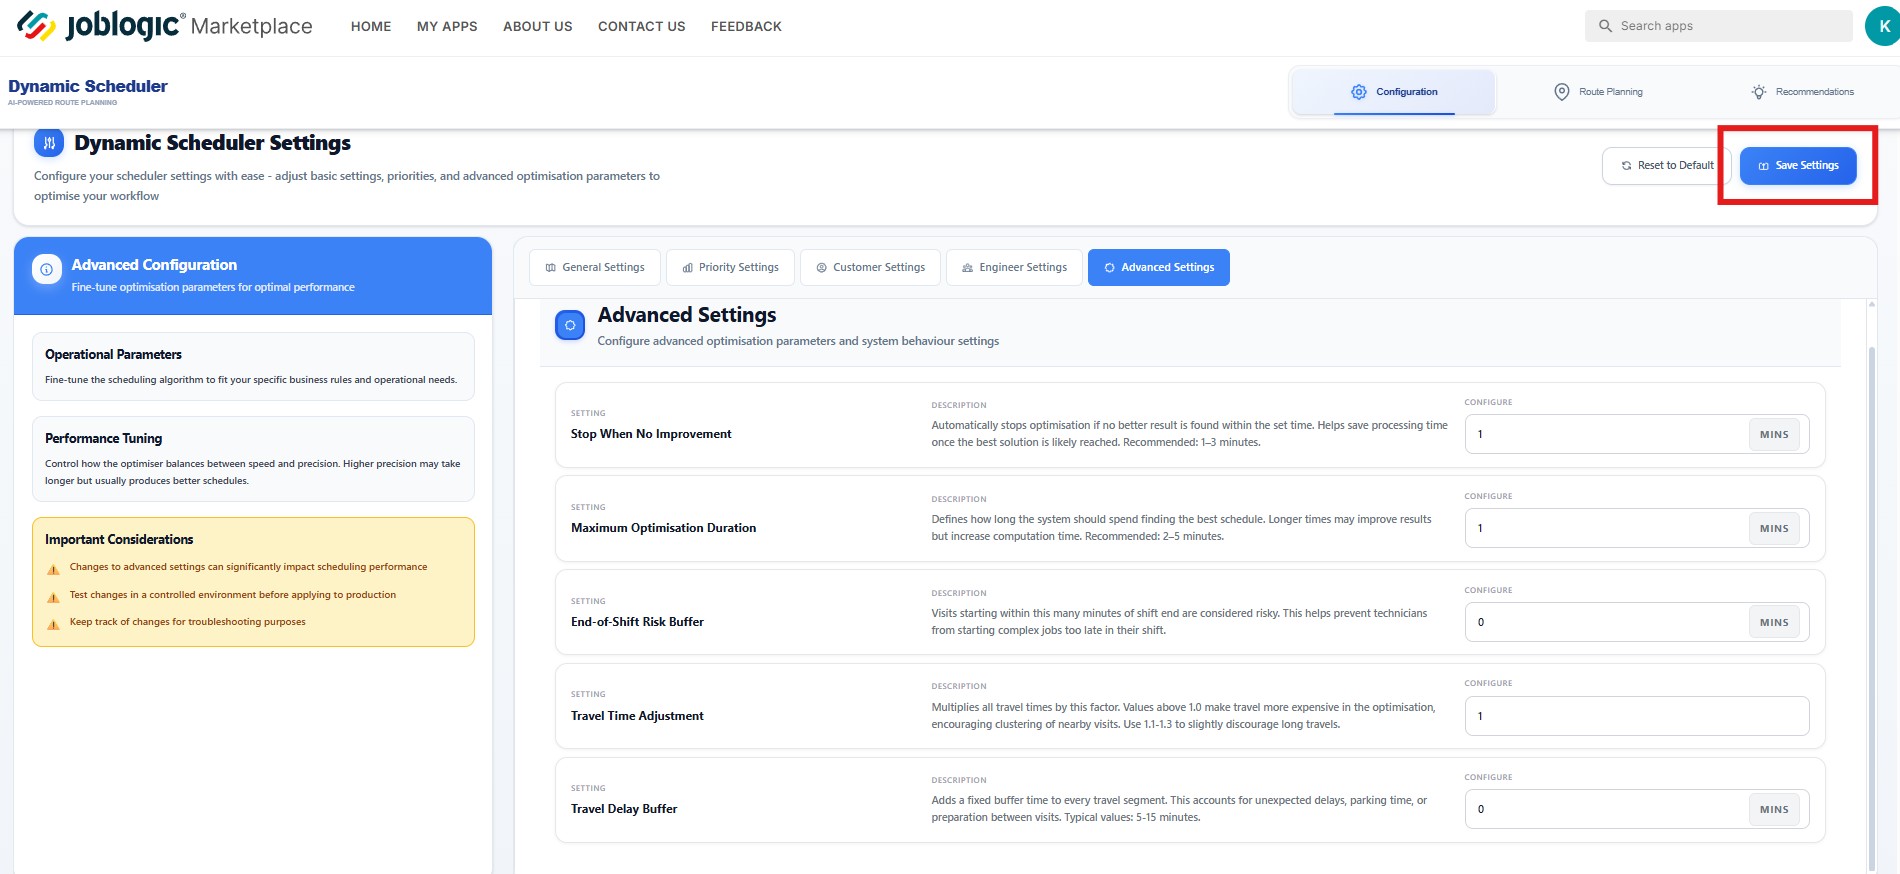
You will be prompted if you try to navigate away from the configuration page without saving first.
This helps prevent accidental loss of configuration updates and ensures your scheduling preferences are saved before leaving the page.
Route Planning
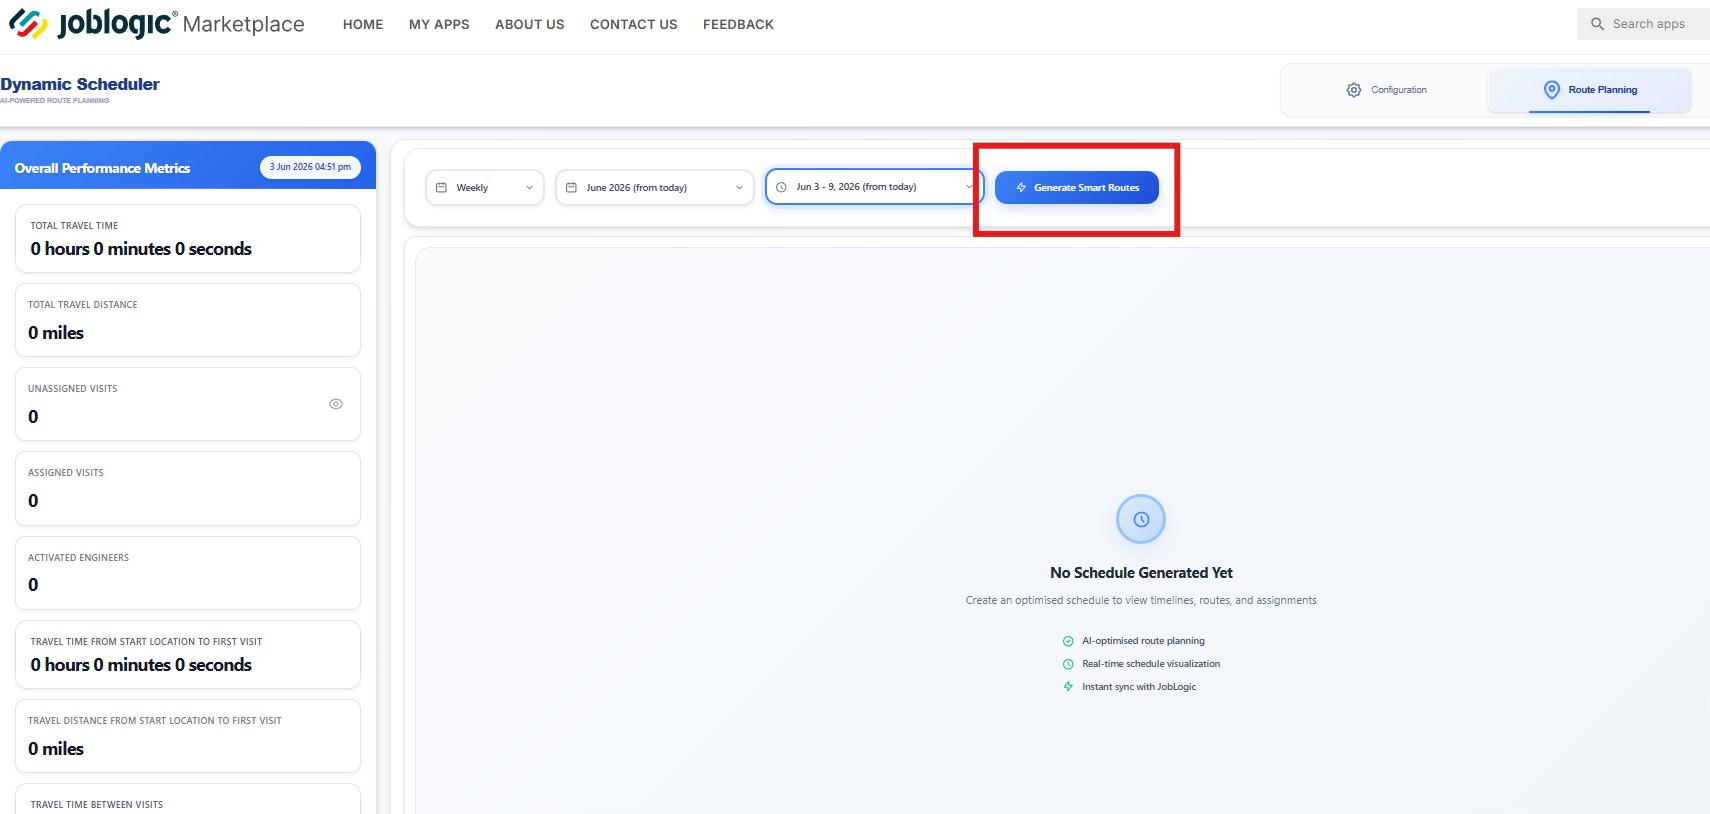
Now that your configuration is set, you can move on to the Route Planning page.
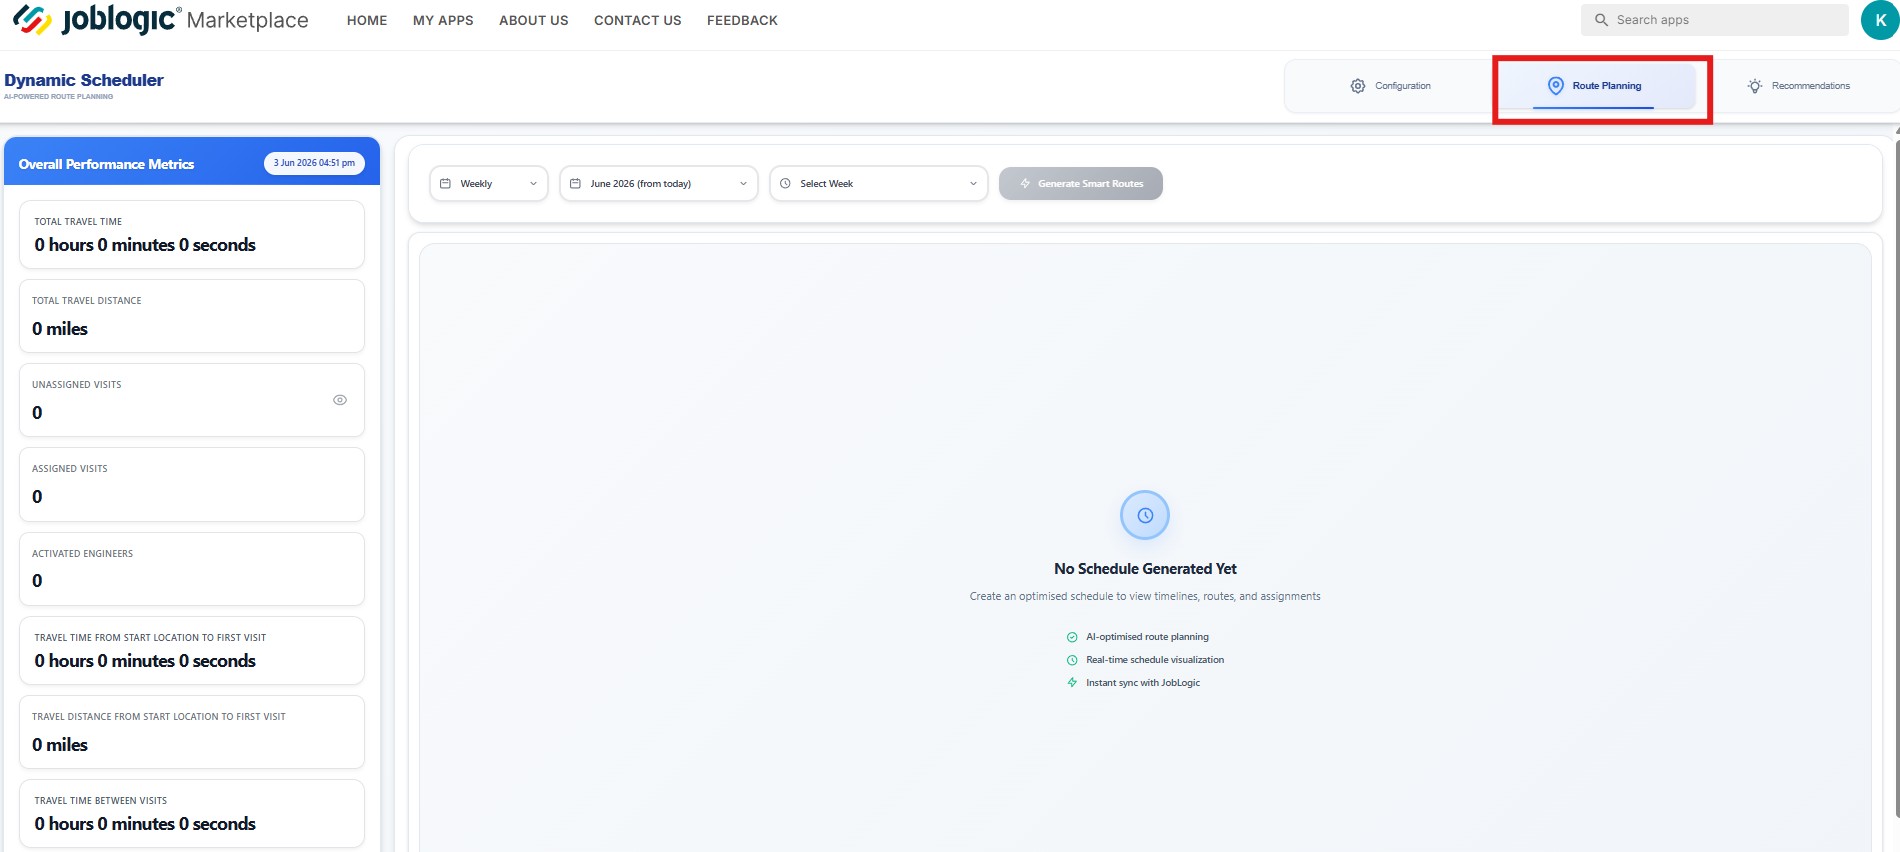
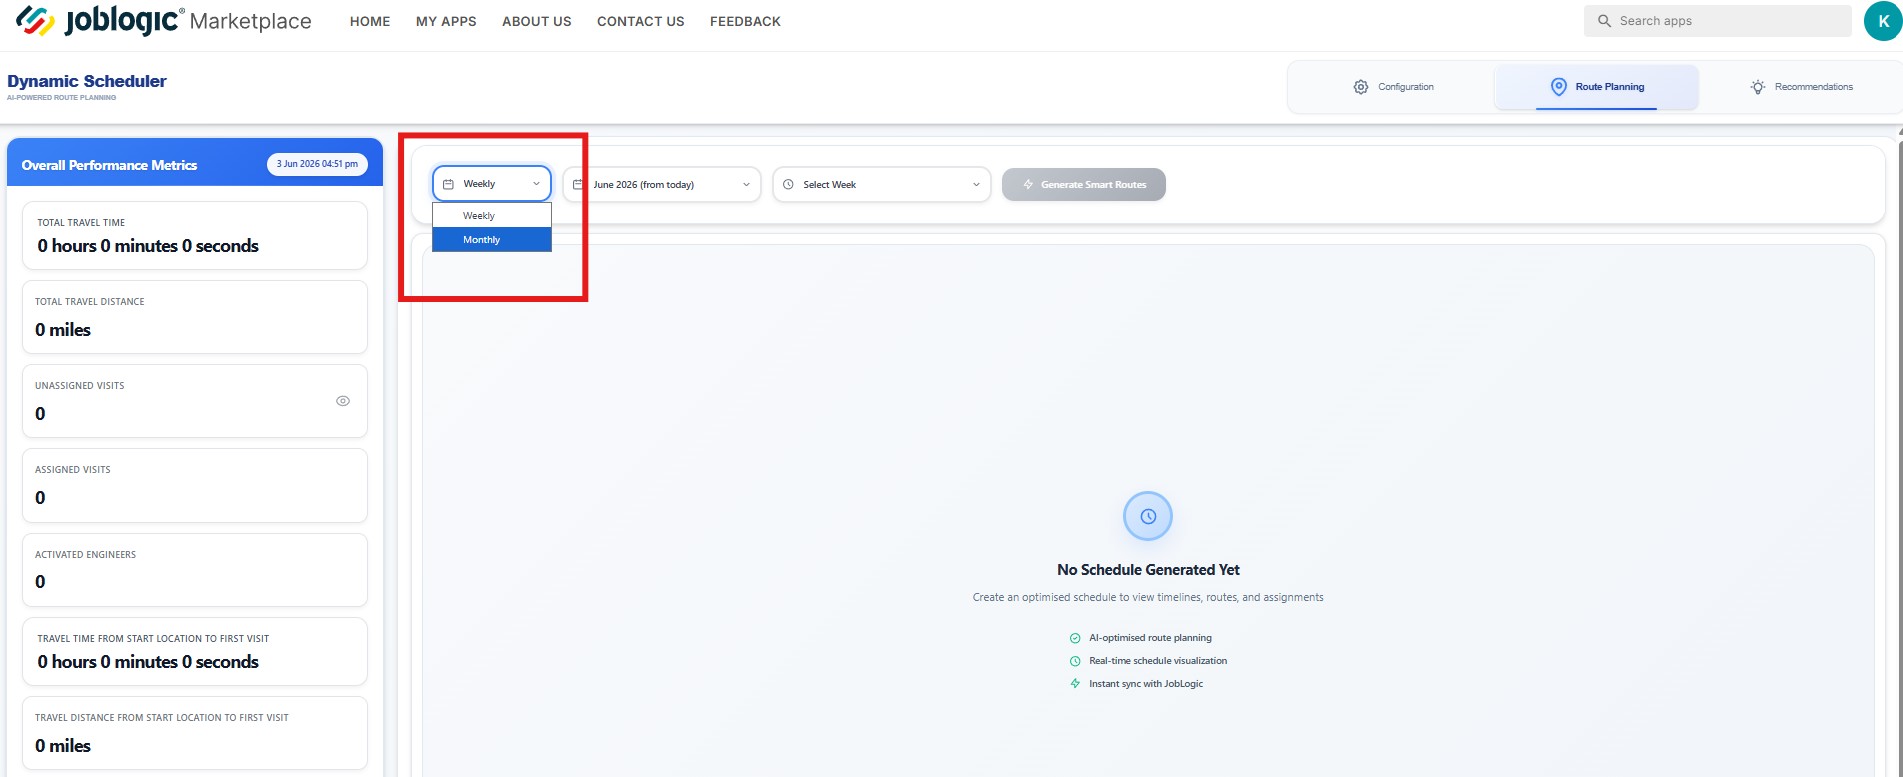
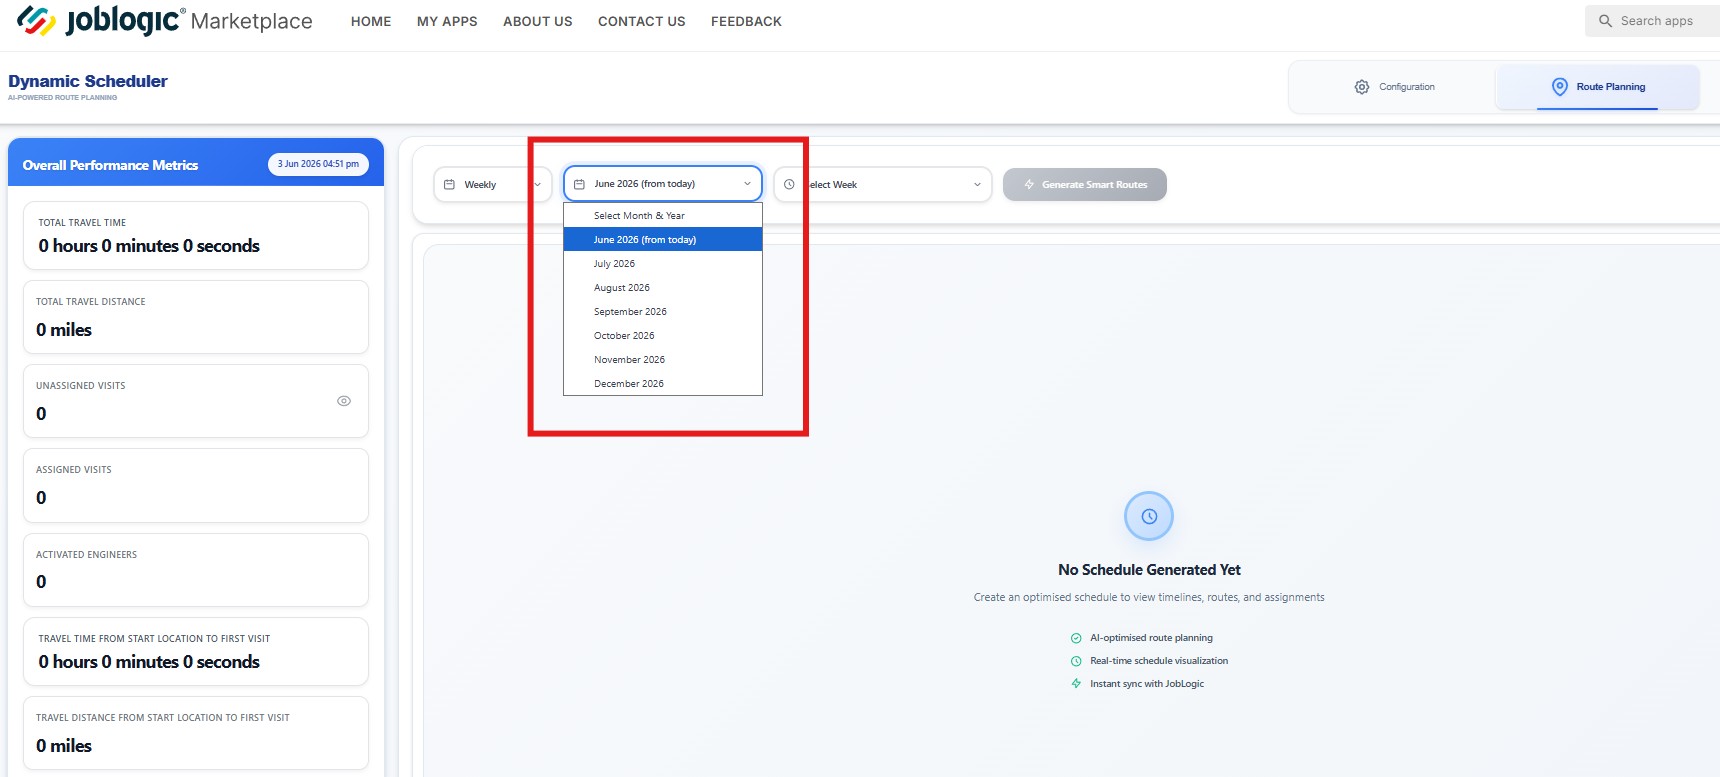
To get started, choose your date range from the dropdowns available - you can view schedules by Week or Month.
Next, choose the desired month from the dropdown.
If you select Weekly, you’ll then be able to pick which specific week you’d like to view.
.jpg)
Once your filters are set, click Generate Smart Routes to automatically create optimised schedules for your engineers based on the configuration and priorities you’ve defined.
Once your smart routes have been generated, the Overview page displays a breakdown of the optimisation results. Here, you can review key factors such as constraint types, their impact, and overall scores to understand how each setting has influenced the route planning.
Note: Where multiple visits exist for the same job, visits are labelled as Visit 1, Visit 2, and so on. For unassigned visits, the system may also display the Visit AutoID to help distinguish visits more clearly during route planning and scheduling review.
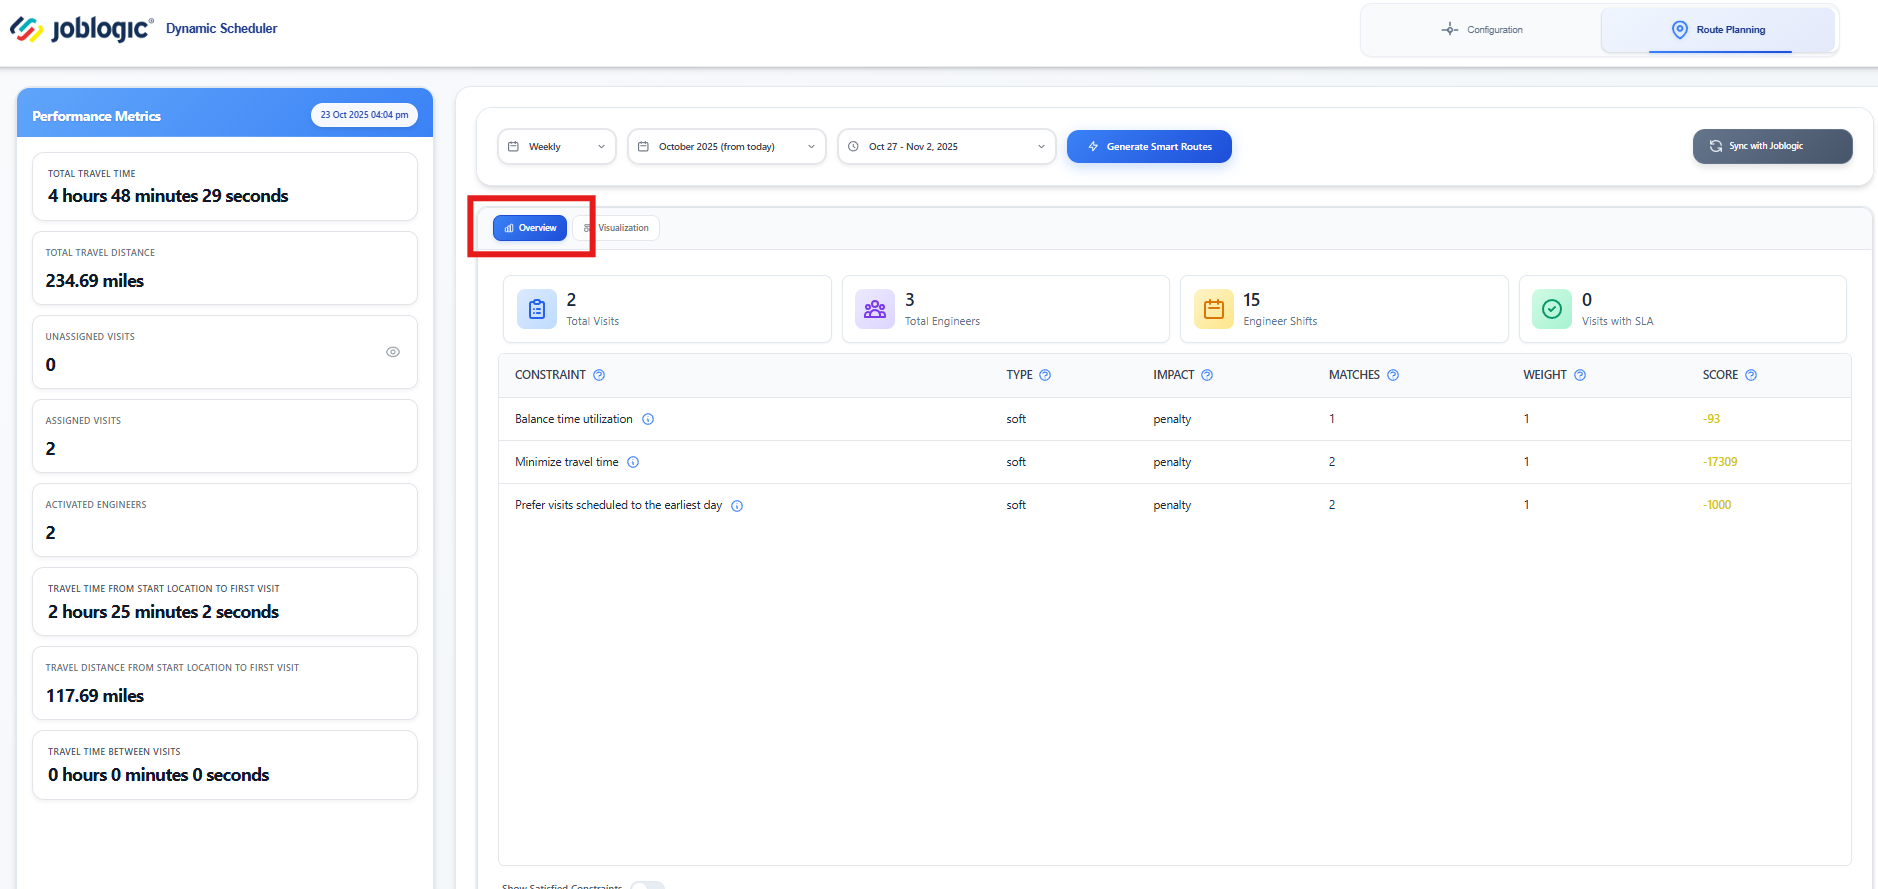
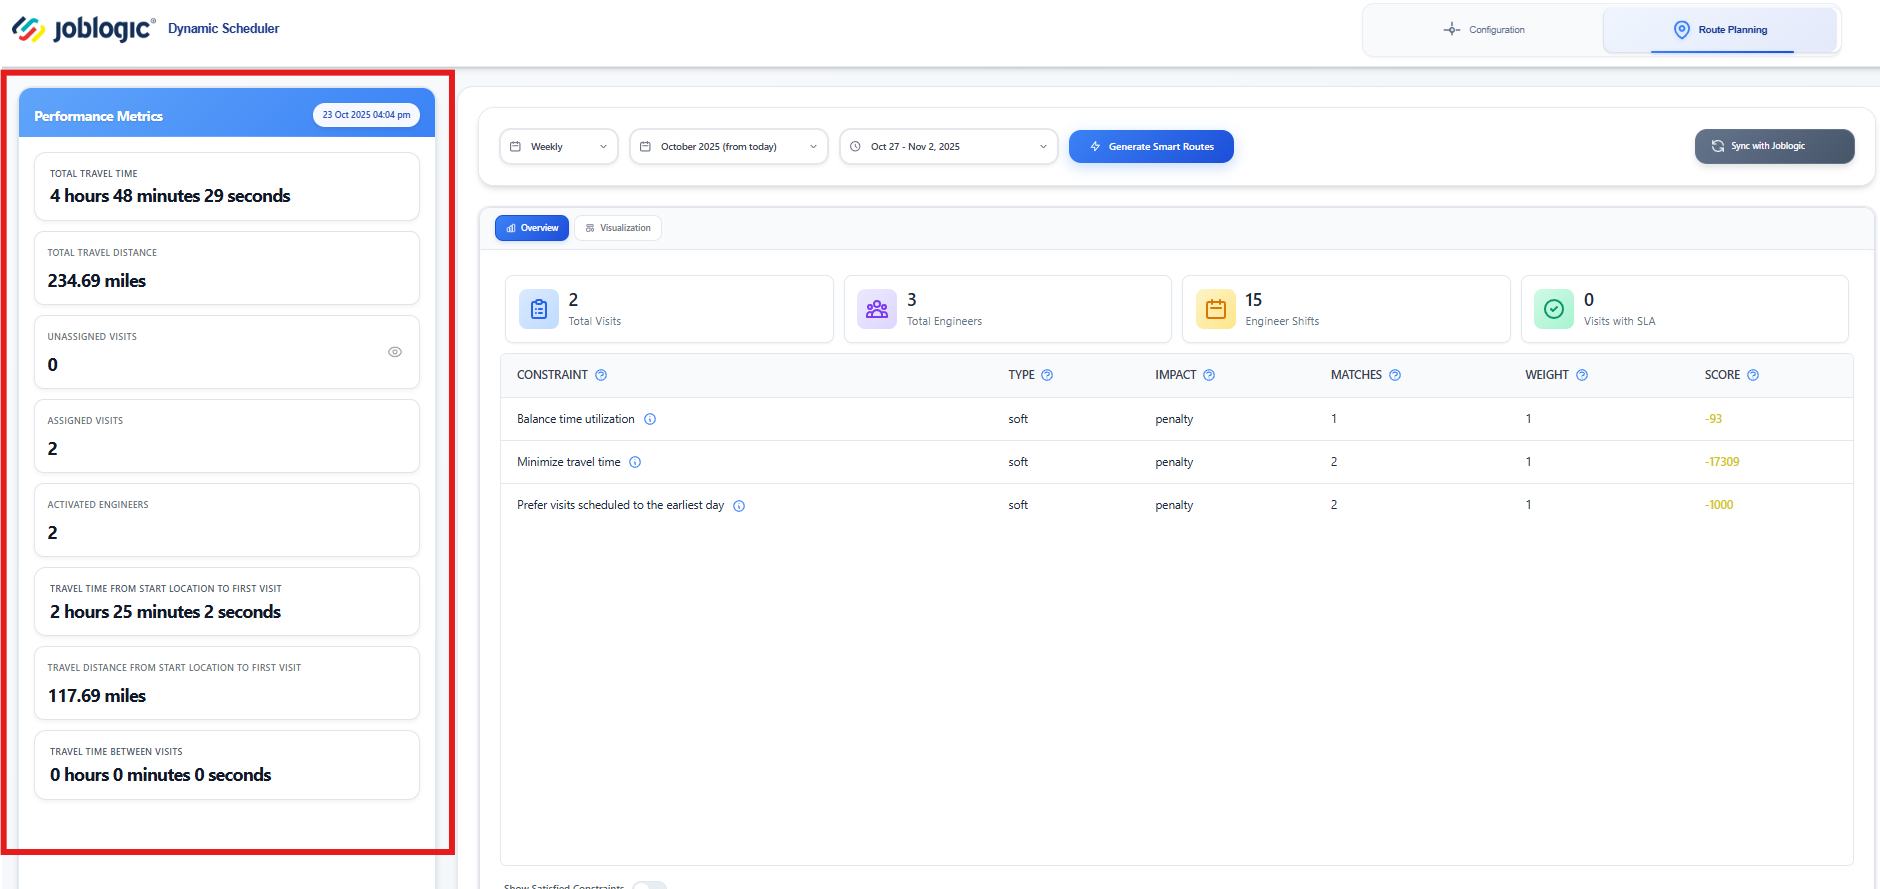
On the left-hand side, you’ll find performance metrics to help you analyse efficiency and route effectiveness.
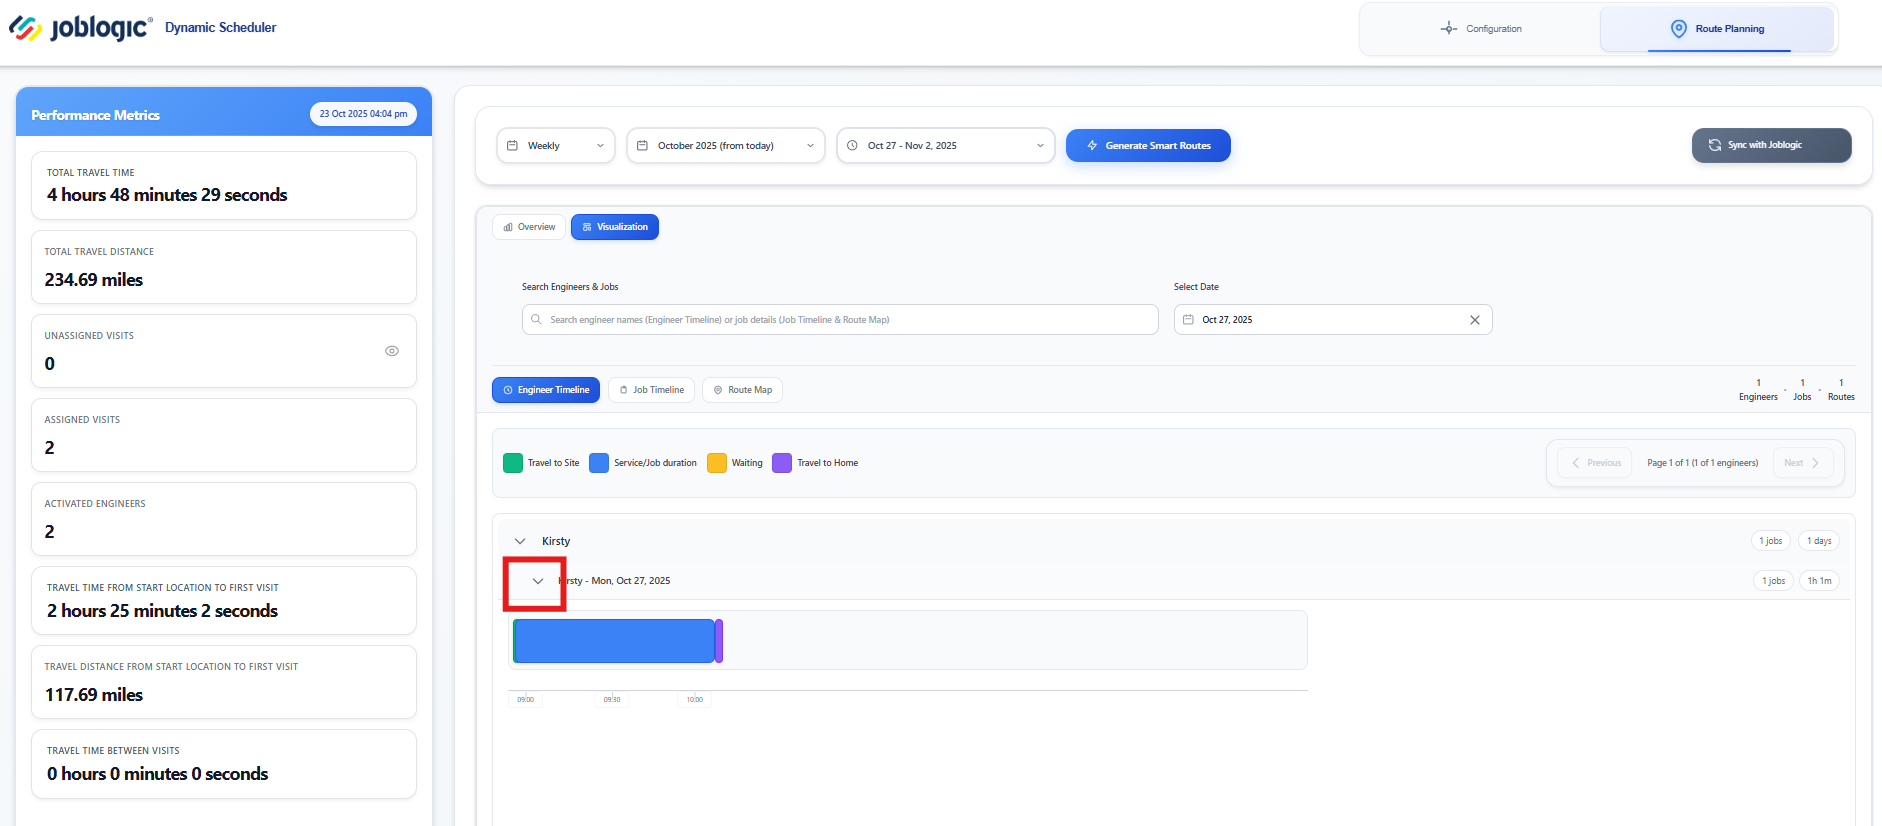
The next tab is your visualisation page. Here you’ll see an Engineer Timeline displaying the planned schedules.
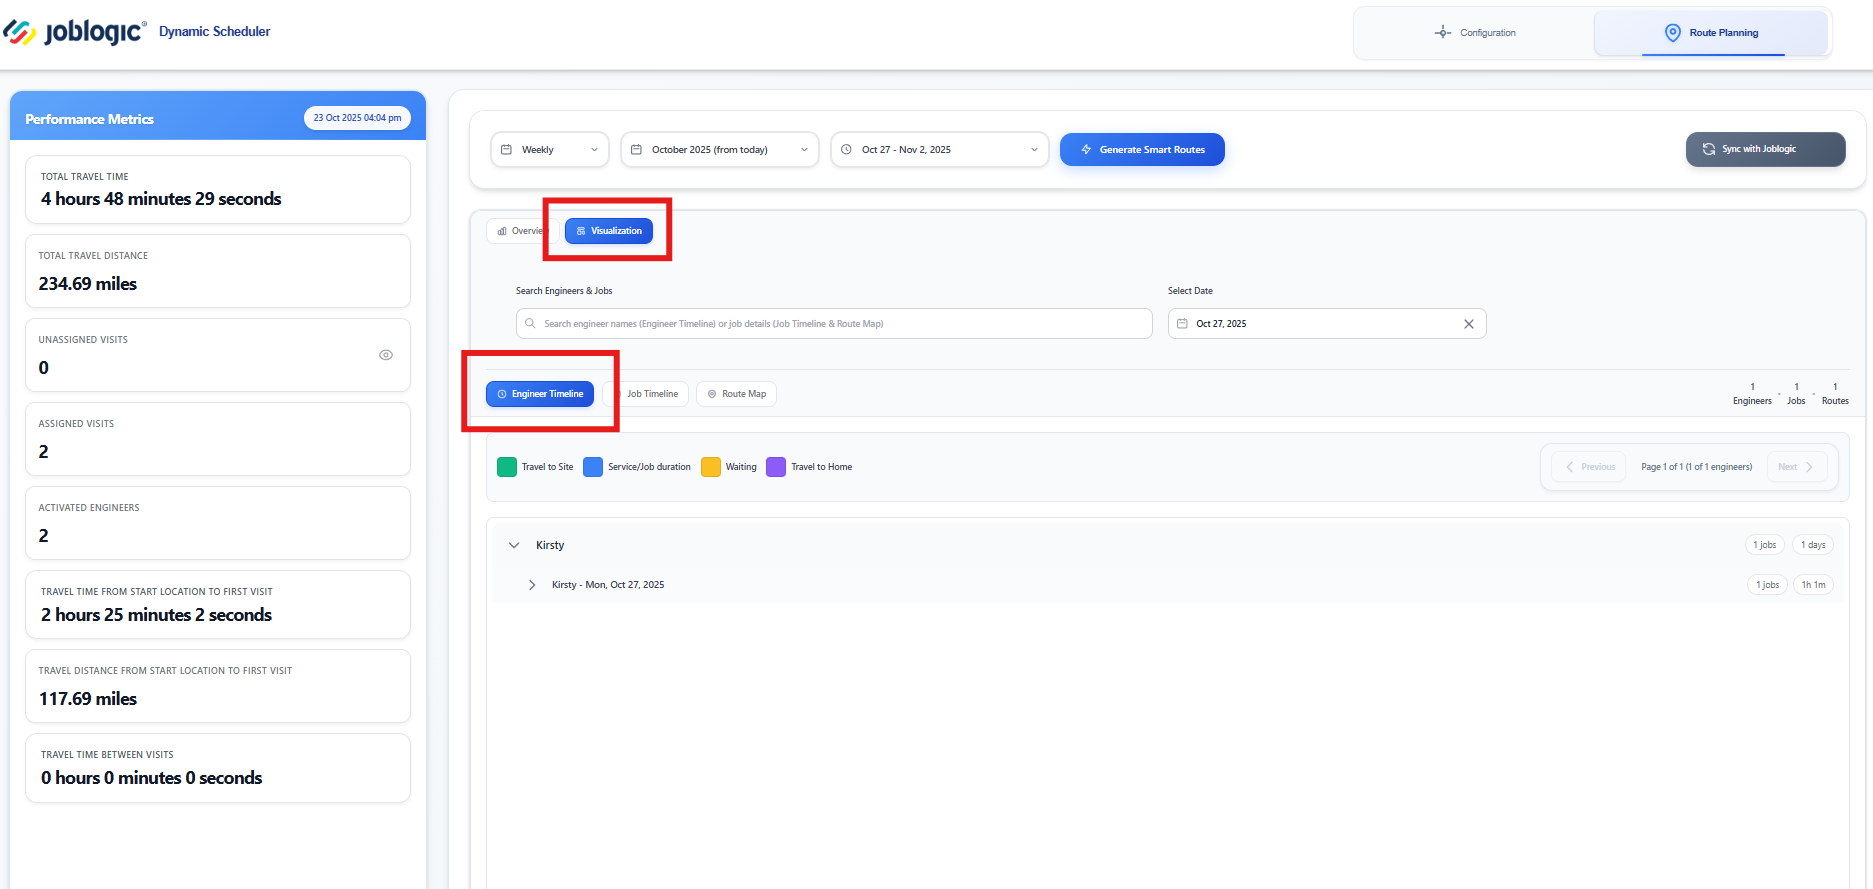
Click the arrow beside an engineer’s name to expand the row and view a detailed breakdown of their jobs and travel information.
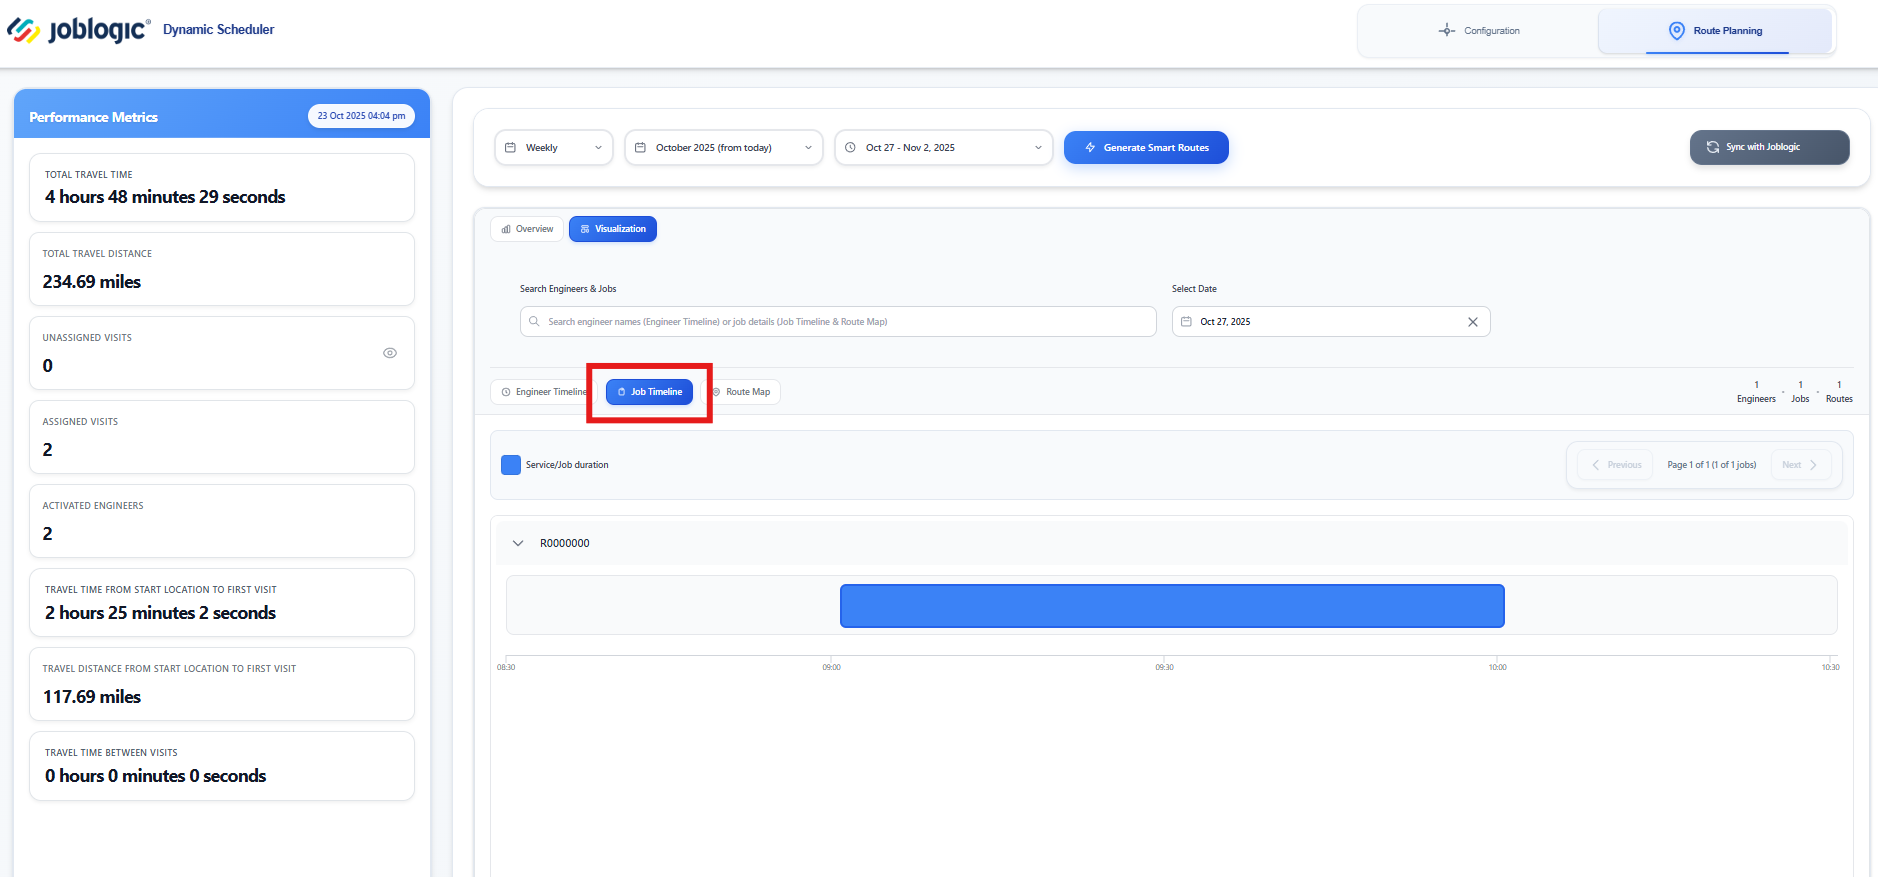
Use the Job Timeline tab to view a clear, time-based breakdown of all scheduled jobs.
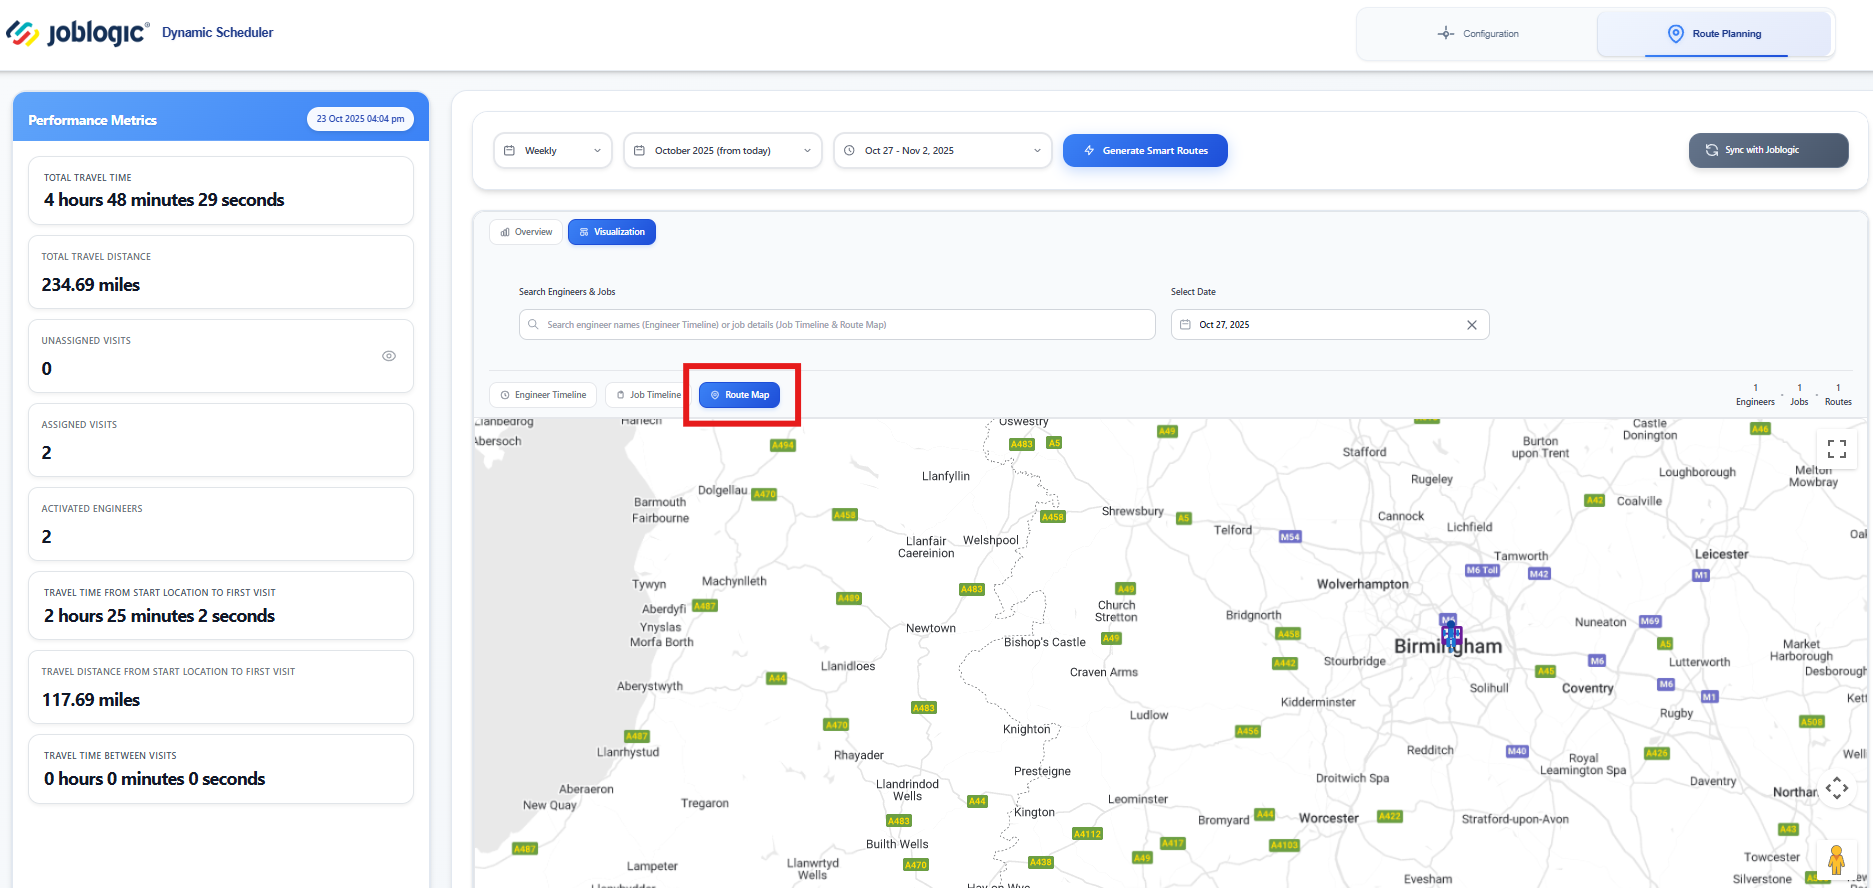
Click Route Map to visualise job locations and travel routes on an interactive map.
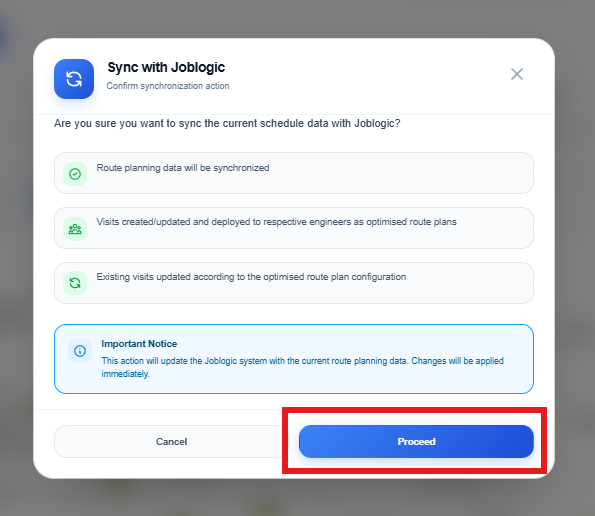
When you’re satisfied with the plans, click Sync with Joblogic to send the generated routes back to the system.
During synchronisation, the system temporarily restricts page navigation to help prevent incomplete or partial updates.
Note: Non-productive time (NPT), including travel and waiting time, is excluded from synchronisation outputs and stored schedules to help maintain cleaner schedule data and reduce the risk of duplication or overlap issues.
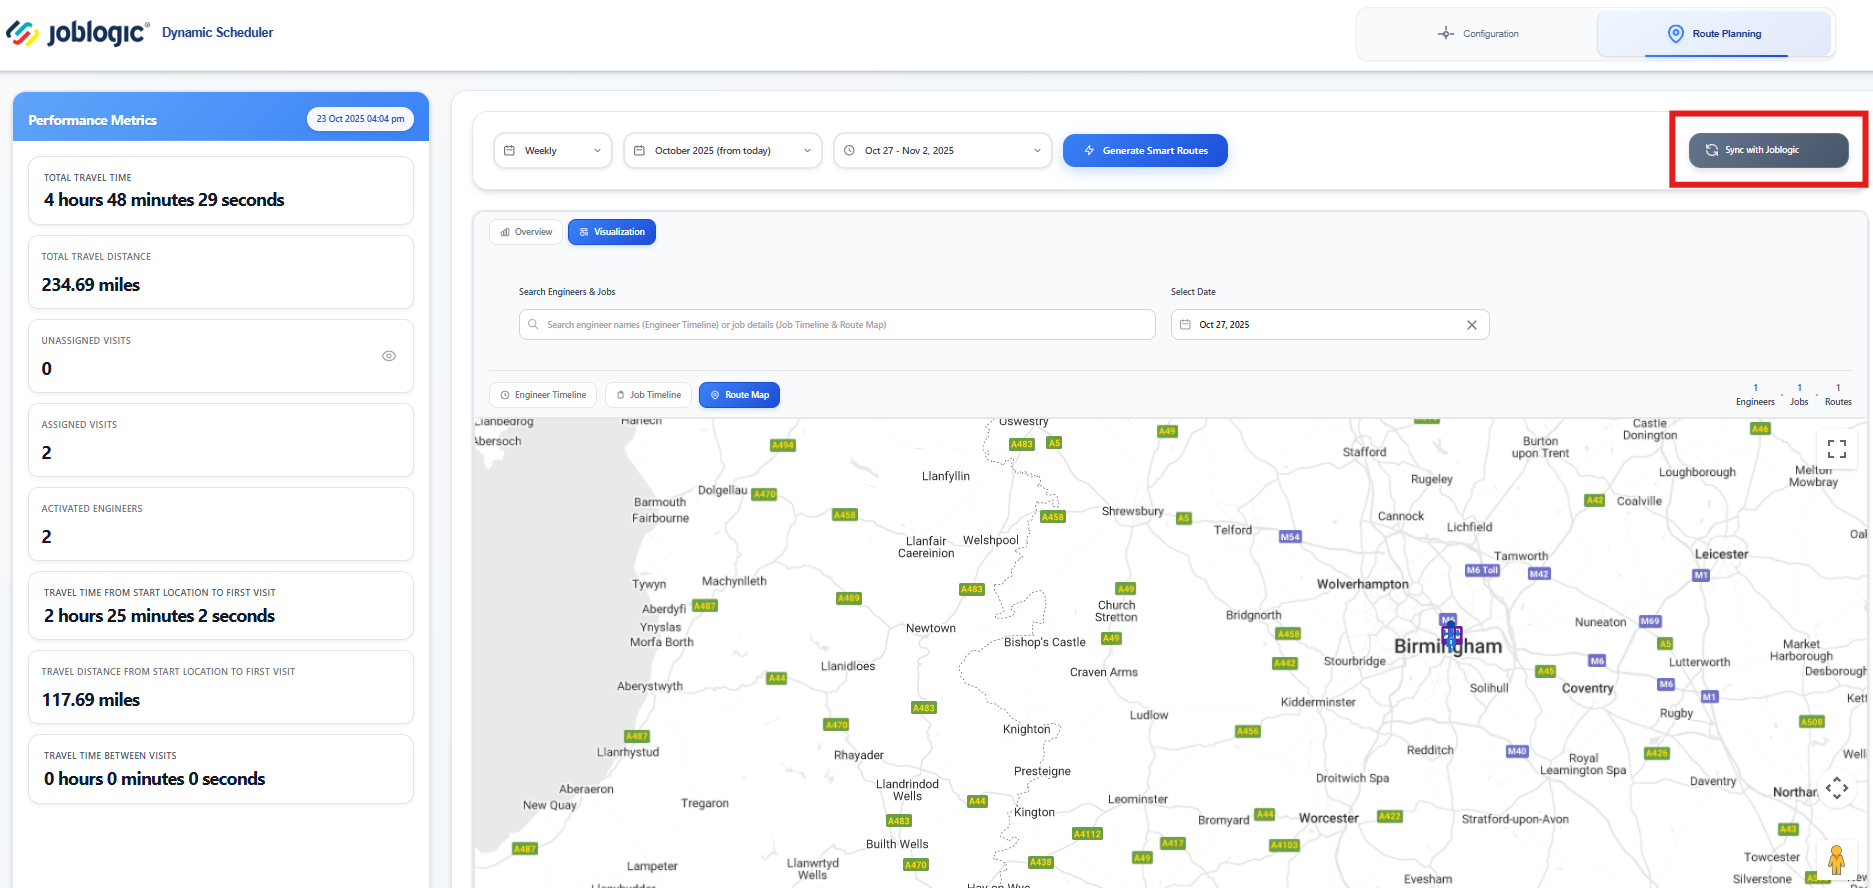
Confirm the sync by clicking Proceed on the confirmation screen.
Recommendations
The Recommendations tab helps you identify the most suitable time slot for a reactive job on a selected day.
Using route optimisation and scheduling logic, the system evaluates engineer availability, travel efficiency, skills, and existing schedules to recommend the best available options.
Once a recommendation has been selected, it can be applied directly into Joblogic with a single click.
.jpg)
Getting Recommendations
To get started, select a date using the date picker and then click Load Jobs
.jpg)
Any eligible reactive jobs, will be displayed on the left-hand side. Select the required job from the list.
.jpg)
Once selected, click Get Recommendations.
.jpg)
The system will evaluate available engineer schedules and return a list of ranked recommendations.
Each recommendation card displays key information including the engineer, proposed start time, estimated travel time and overall suitability score.
Review the available options and click Apply on your preferred recommendation.
.jpg)
Auto-Assign
Enable the Auto-Assign toggle before clicking Get Recommendations to automatically apply the highest-ranked recommendation.
This can help streamline scheduling by allowing the system to select the most suitable engineer and time slot based on the optimisation results.
.jpg)
Important notes
Recommendations are strictly job-based. A job appears only if every one of these is true:
- Job type is Reactive (PPM and other types are excluded).
- Job status is New Job or Parts to Fit.
- The logged date matches the selected day.
- The job has a valid location set in Joblogic.
- If Selective Customers is on, the job belongs to one of the saved customers.
- If Skills & Trade Matching is on, the job has a skill or trade assigned.
- The job passes all validation checks - only valid candidates are shown.
Tip
If you see fewer jobs than expected, check location data and skill/trade assignment in Joblogic first. These are the most common reasons a job is filtered out.
Scheduling Exclusions and Prerequisites
The system automatically filters jobs to ensure accurate scheduling and routing.
- Appointment Dates: Jobs without an appointment date are excluded when filtering by preferred appointment date. You can instead filter by Job Log Date
- Statuses: Jobs or visits marked Completed or Cancelled are not included in plans.
- Subcontractors: Jobs assigned to subcontractors are excluded from scheduling.
- Location Data: Site postcodes are converted to coordinates for routing. The engineer’s latest location is also used to assess proximity.
- Shift Hours: Jobs are only scheduled within each engineer’s defined working hours.
- Engineer Location: Based on the Start Point set in Joblogic. This could be the engineer’s home, office, or another address.
- Future Dates: You can only filter to view jobs scheduled for future dates by Job Log Date or Preferred Appointment Date.
- PPM Lock Handling: Locks applied to PPM jobs are also reflected directly at the visit level, helping ensure consistency between planning logic and scheduled visits.
- Validation Checks: Recommendation results include only jobs that successfully meet all scheduling and configuration validation criteria.
Further Support
For further information or assistance with the above, contact our Support Team on 0800 326 5561 or email support@joblogic.com. Alternatively, our Customer Success Management team can be reached by emailing customersuccess@joblogic.com
Publishing Details
This document was written and produced by Joblogic’s Technical Writing team and was last updated on the date specified above. Be aware that the information provided may be subject to change following further updates on the matter becoming available. Additionally, details within the guide may vary depending on your Joblogic account’s user permissions.