Adding Visits to a PPM Contract
- 30 Apr 2024
- 4 Minutes to read
- Print
- PDF
Adding Visits to a PPM Contract
- Updated on 30 Apr 2024
- 4 Minutes to read
- Print
- PDF
Article summary
Did you find this summary helpful?
Thank you for your feedback!
Introduction
This user guide will detail how to create a visit against a PPM (planned preventative maintenance) contract within the back office of Joblogic and explain how to assign assets and tasks to be worked on.
Adding a visit to a PPM Contract
You will first need to create a PPM Contract if you have not already done so. To read our guide on how to do this, click here.
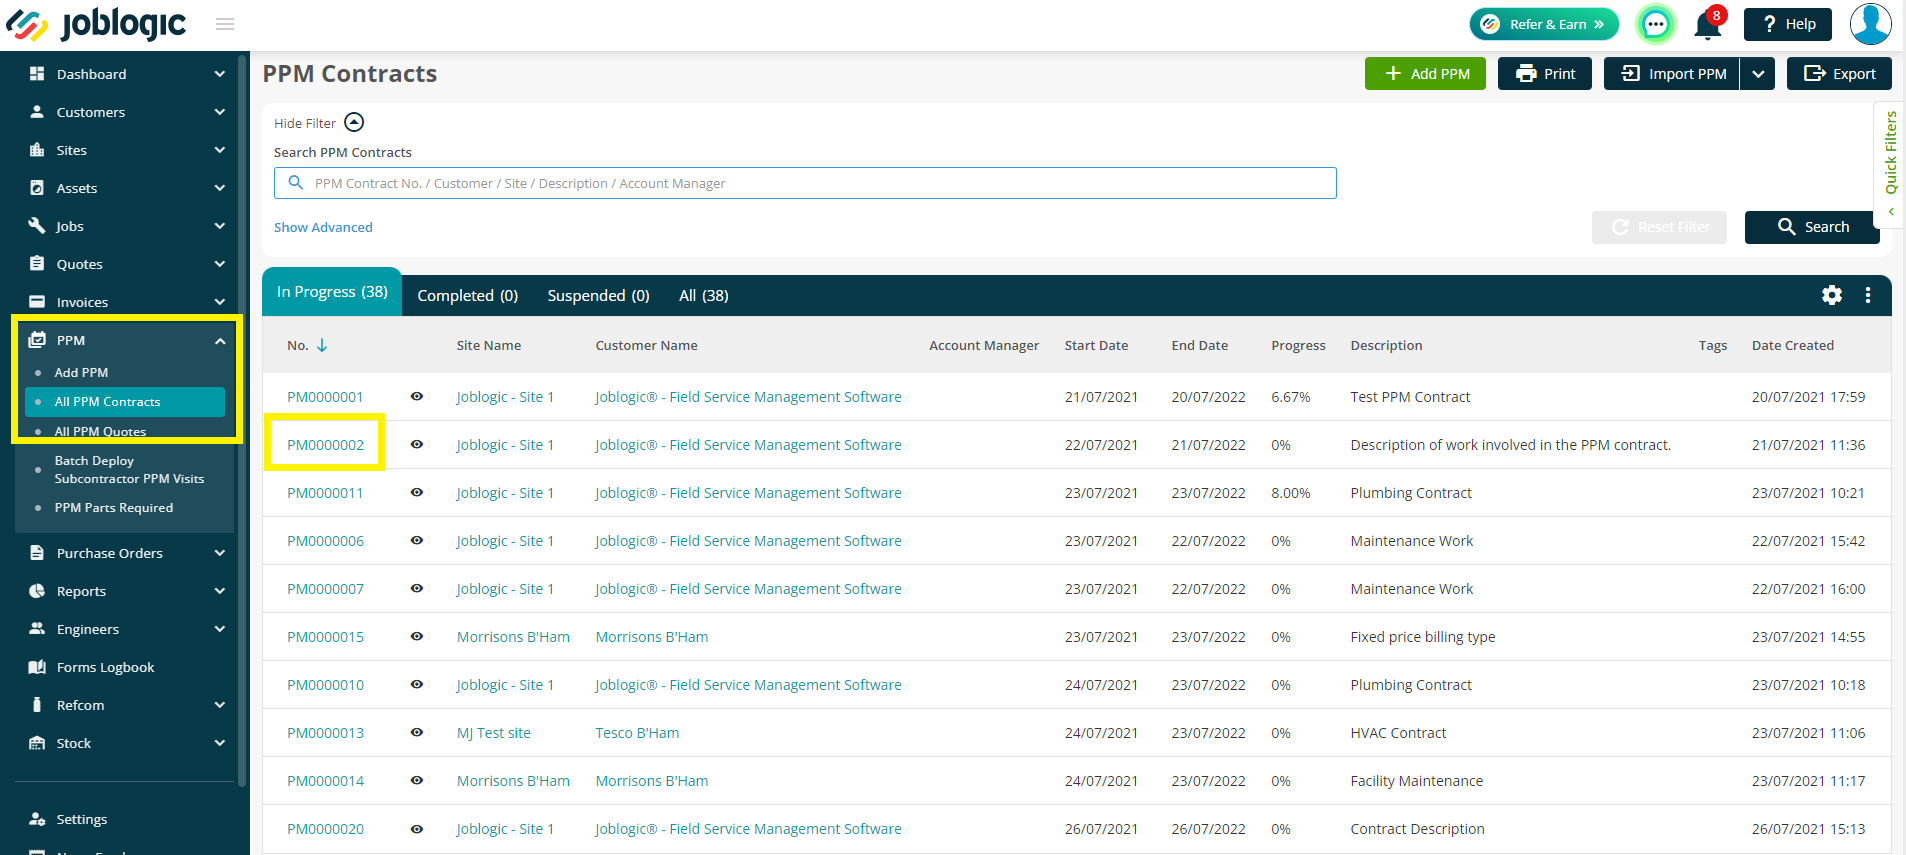
Navigate to PPM > All PPM Contracts from the menu on the left and then choose your relevant PPM Contract by clicking on a PPM Number.
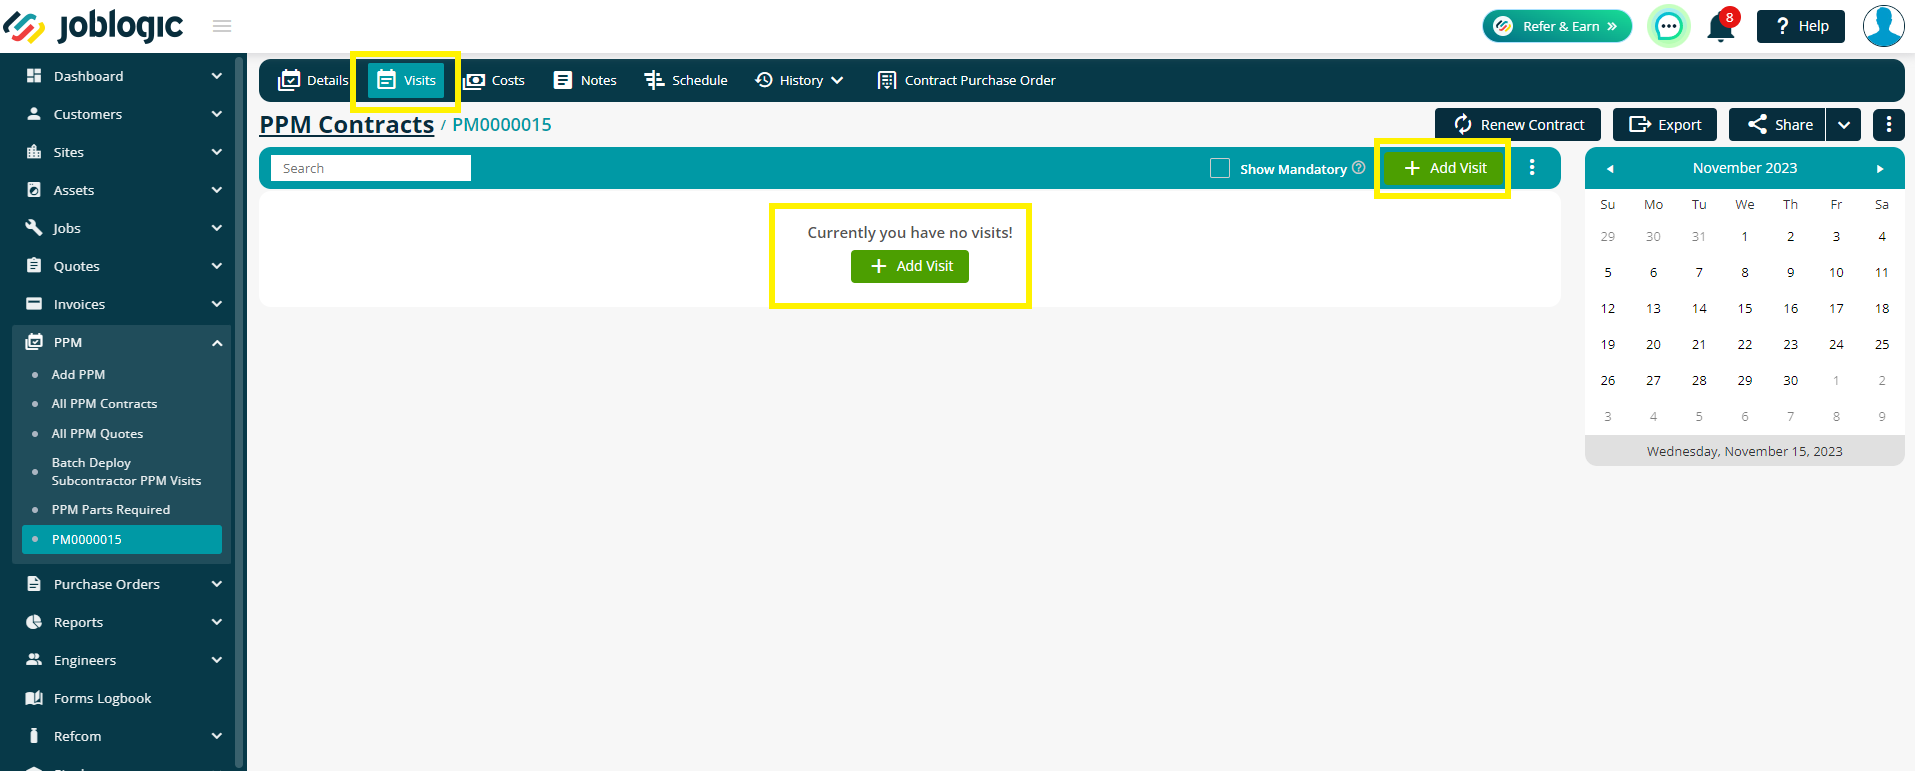
Next, select the ‘Visits’ tab from the top navigation bar and then Add Visit.
Details
Enter a Description for the PPM visit (a general description of the work to be carried out) and fill in any other details that you wish to record.
The Due Date field refers to the date and time that the appointment is scheduled for with the customer.
If you choose to Lock Date and Time, the Due Date cannot be changed. This box will be automatically ticked if you choose to mark any tasks as Mandatory.
The Completion Date will auto populate after this visit has been completed.
A ‘Job Category’ from your existing library can be assigned against this individual PPM job (for search and reporting purposes). A new job category can also be created within your library and applied to this PPM job via the green ‘+’ icon.
The Duration field and Fixed Duration tick box refers to overriding the ‘Default Service Time’ (under Settings > System Setup > System Settings) for this individual visit and the Appointment tick box refers this visit having been confirmed by the client.
An Engineer, Engineer Team or Subcontractor can also be assigned here, if applicable at this point.

Tasks
The tasks option allows you to add any tasks and associated subtasks set up in your tasks library (under Settings > Library > Tasks) to the PPM job. Tasks need to be set up within the settings library before they can be assigned to PPMs. If they are already set up, they can be selected from the dropdown menu.
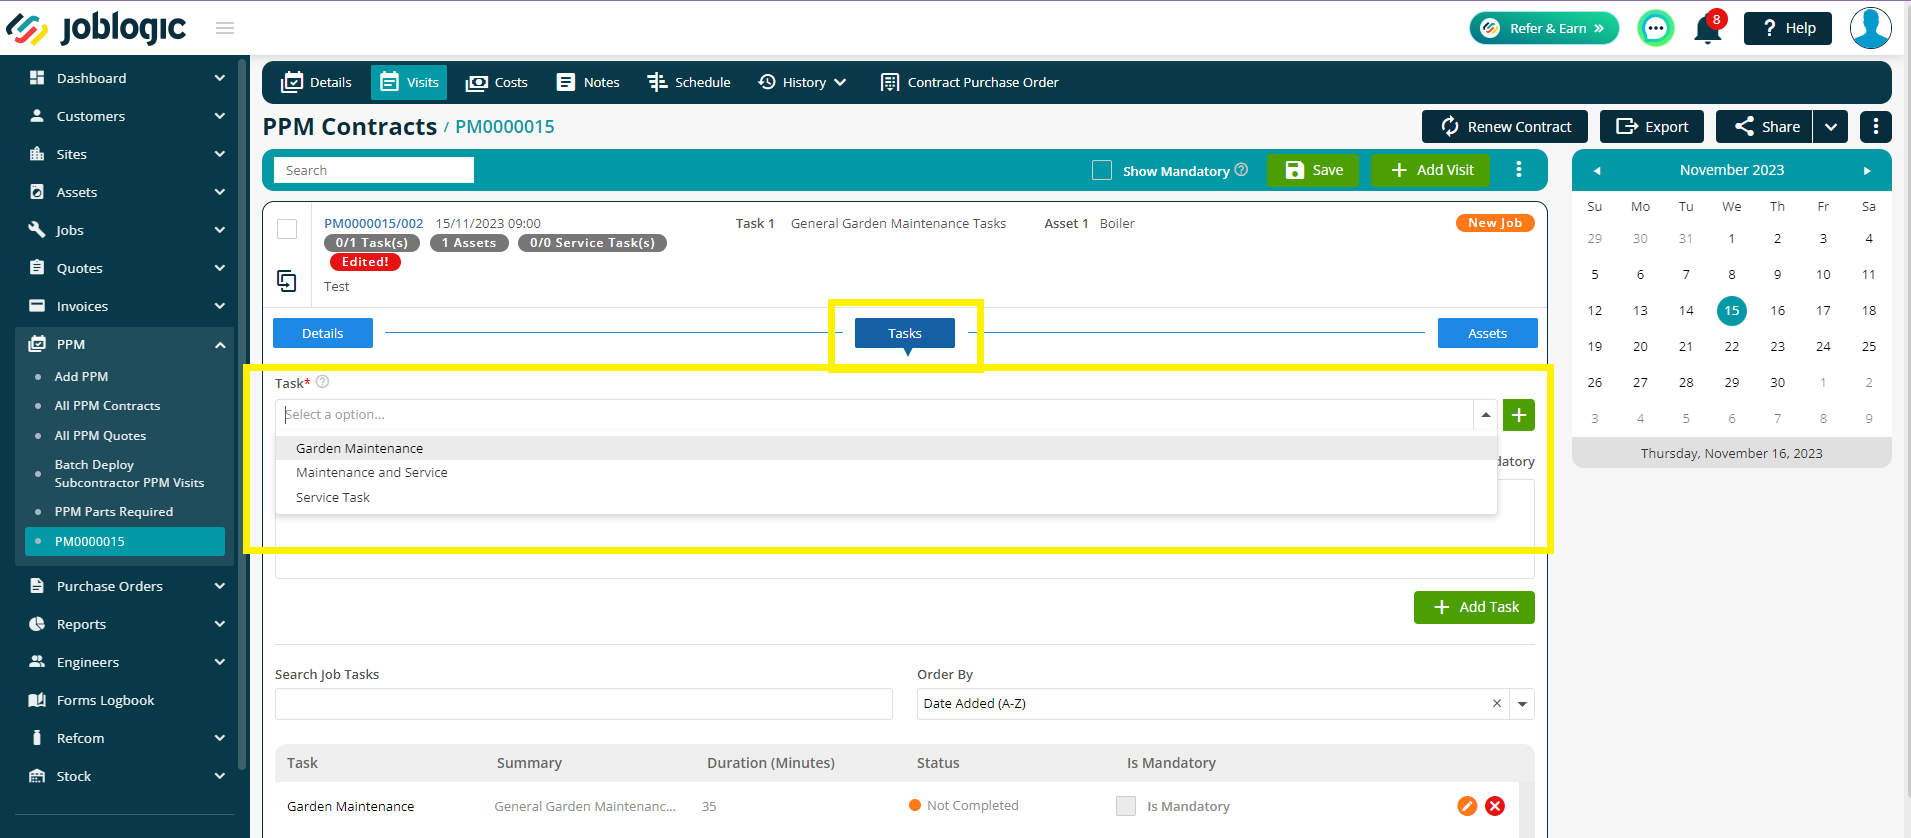
If you do not have any tasks set up, or you need to create a new task, you can use the Green Plus button to add one to your library.
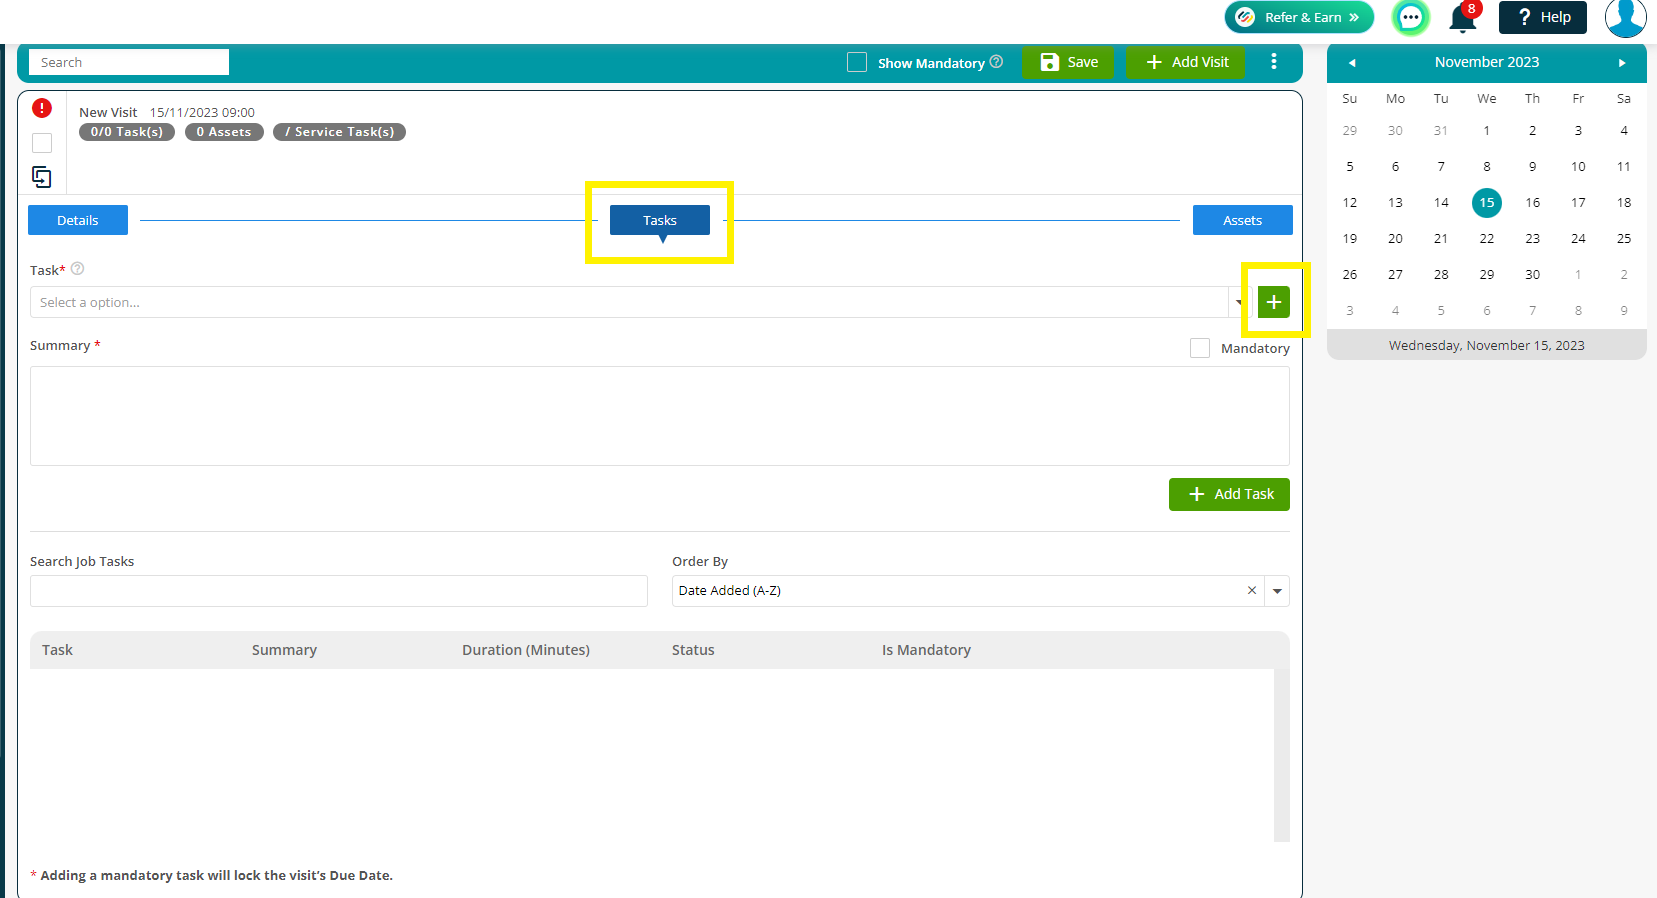
Select the relevant task from the ‘Task’ dropdown and the Summary and Subtask(s) will auto populate for you based on the task’s settings.
If you wish to add more Subtasks, choose the Add Subtask button.
Once you are happy, click Add Task to add all details to the PPM visit.
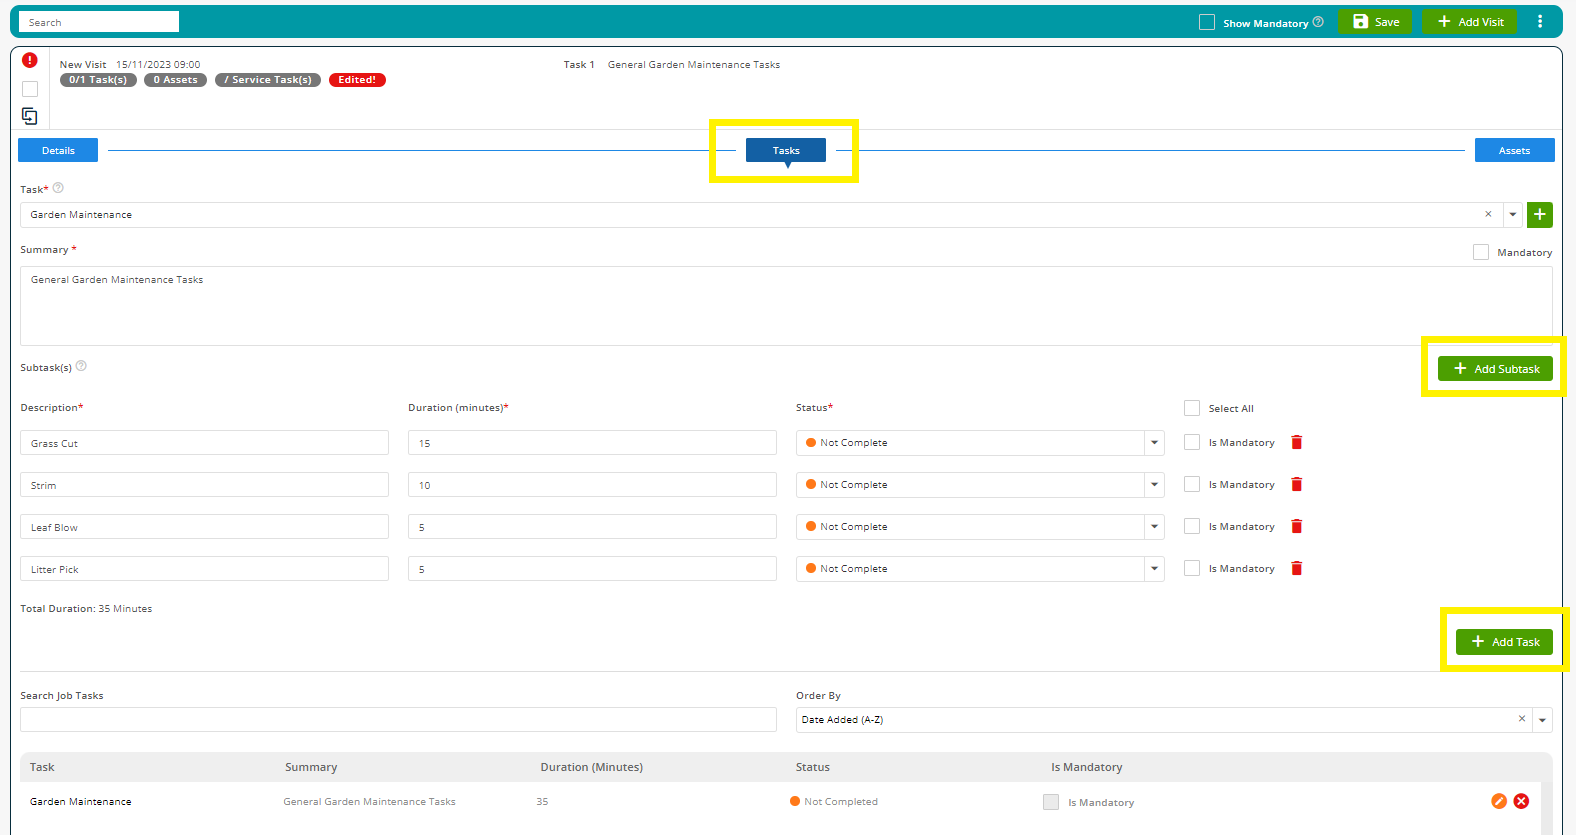
The task can be removed from the list or edited via the icons on the right, if needed.

The task, or individual subtasks can also be marked as completed via the back office if interaction from the mobile app is not used. To do this click the Edit icon and choose from the individual dropdowns to Complete a subtask, or tick the Completed box and enter a Date to close off the whole task.

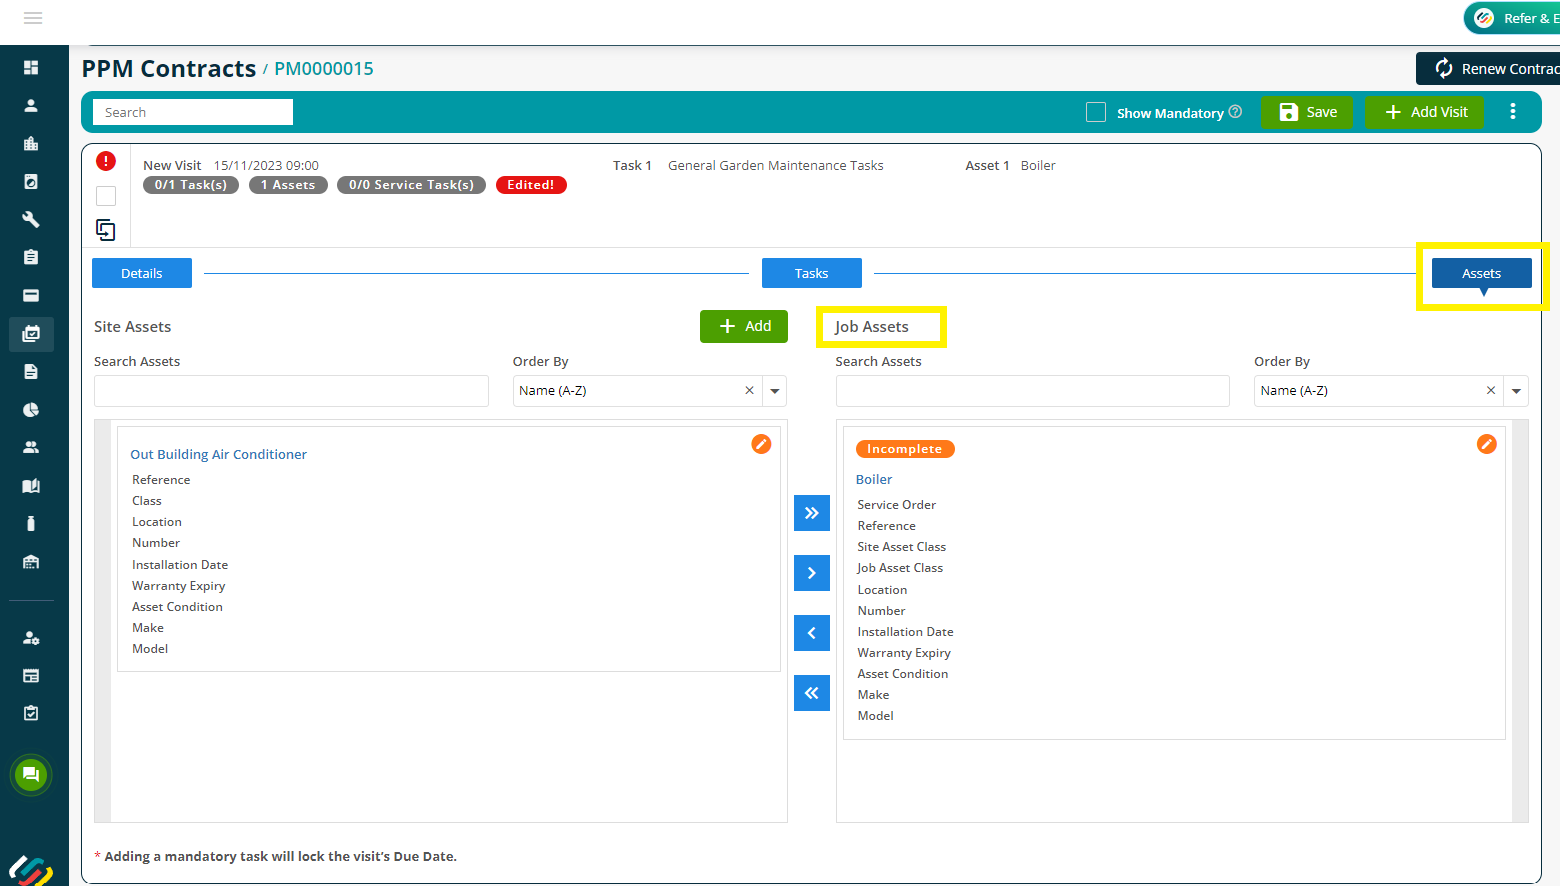
Assets
The ‘Assets’ option will present you with a list of ‘Site Assets’ (the already existing assets on the site that the contract is against). These can be moved over to the ‘Job Assets’ section, indicating that those assets on the site need to be worked on for this job.
This can be done by selecting the asset and using the blue arrow icons. The single arrow ‘>’ icon allows you to move an asset over individually and the double arrow icon ‘>>’ will move all of the assets over. They can also be removed from the job using opposite directional arrow icons.
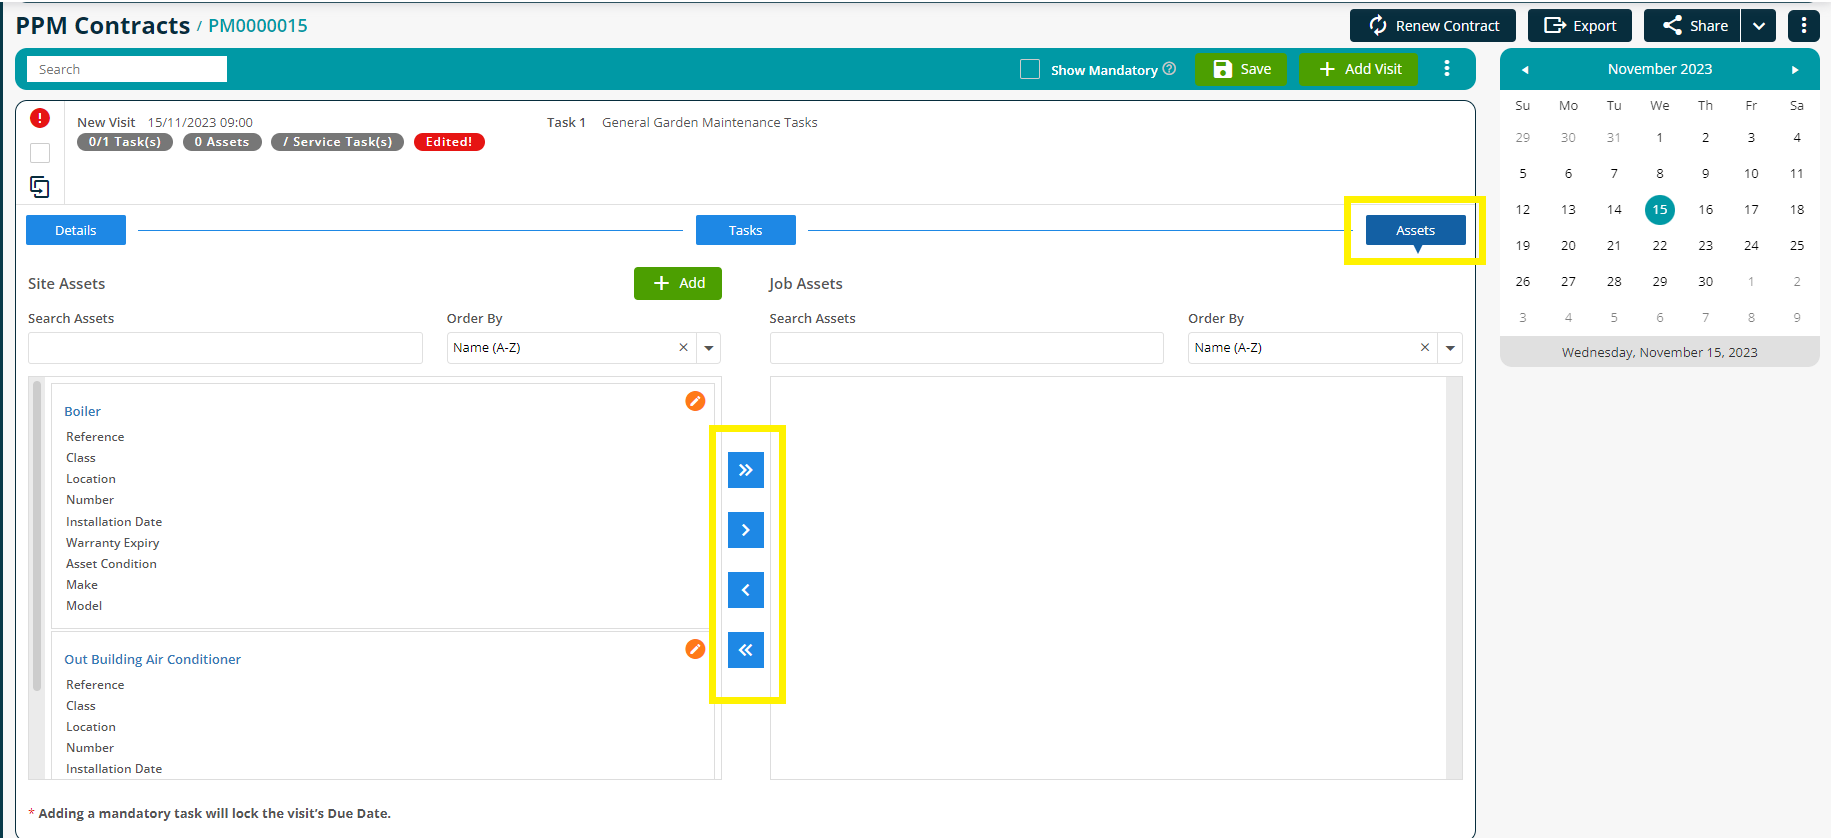
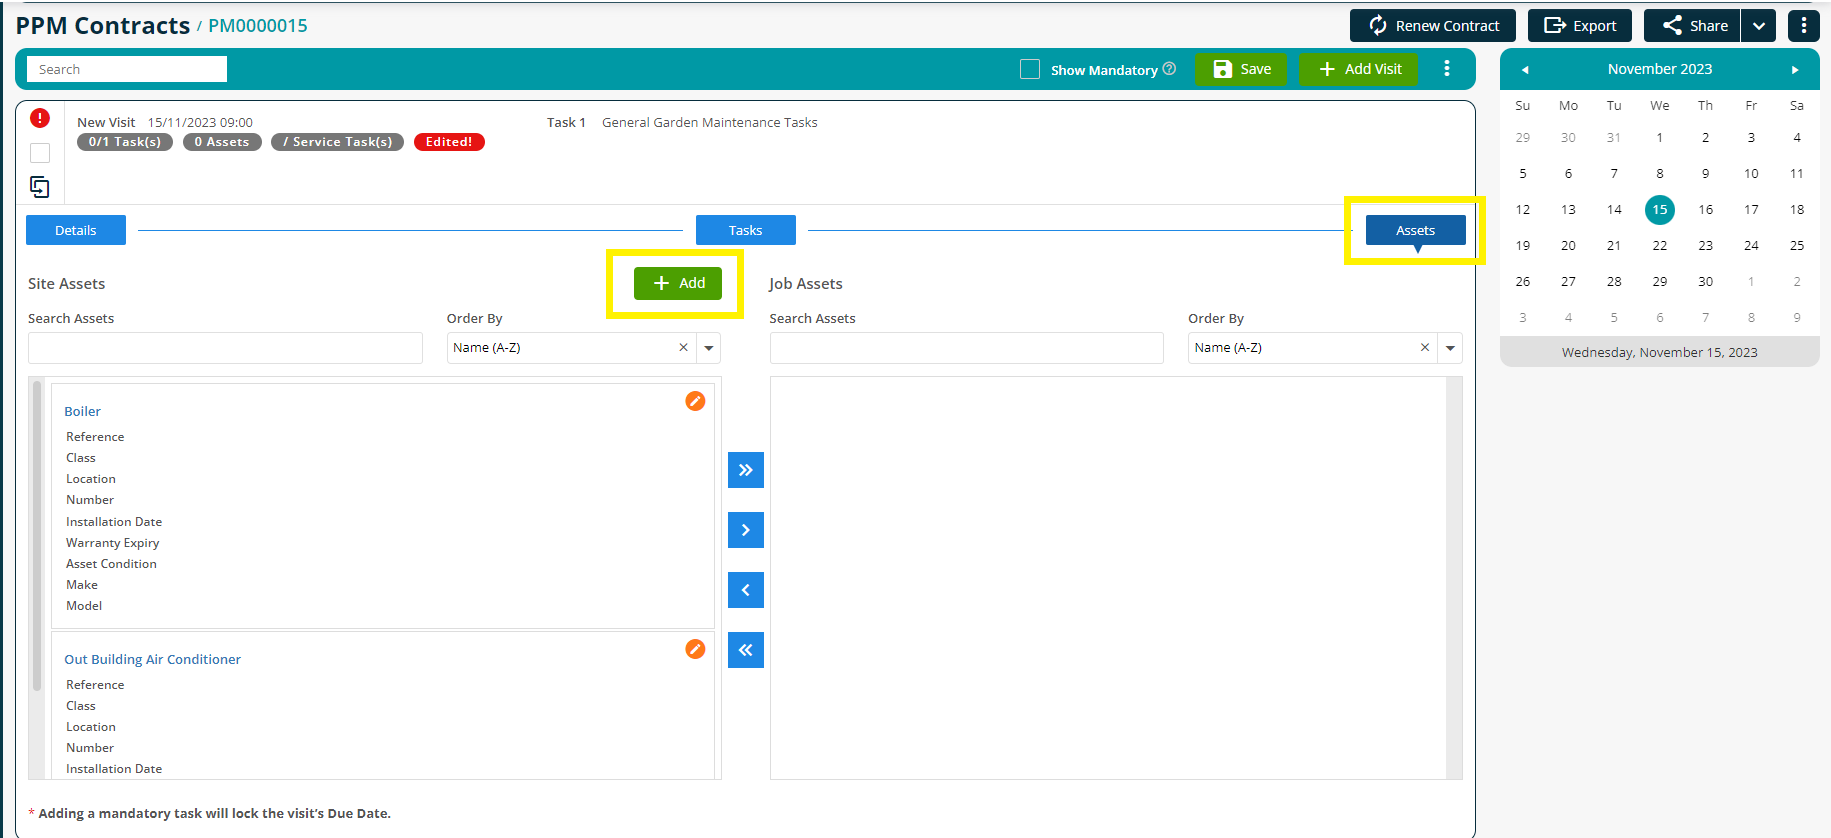
You can add a new Asset to the site by clicking the Add button. You can then also move this to the current job as above.
When moving the asset to the job an ‘Add Job Assets’ page will appear.
Here, you can enter and select the type of work required for the asset. None of the fields are mandatory and can be left blank if required.

A Duration can be entered in order to indicate the length of time that the asset work should take and the Action Required notes can be used to free type additional information to the service type or fully detail the work required.
The Complete tick box and Date Complete field can be used to mark the work as finished once done if interaction from the mobile app is not used.
If you do choose a Service Type, further details will automatically populate based on the Service Type settings.
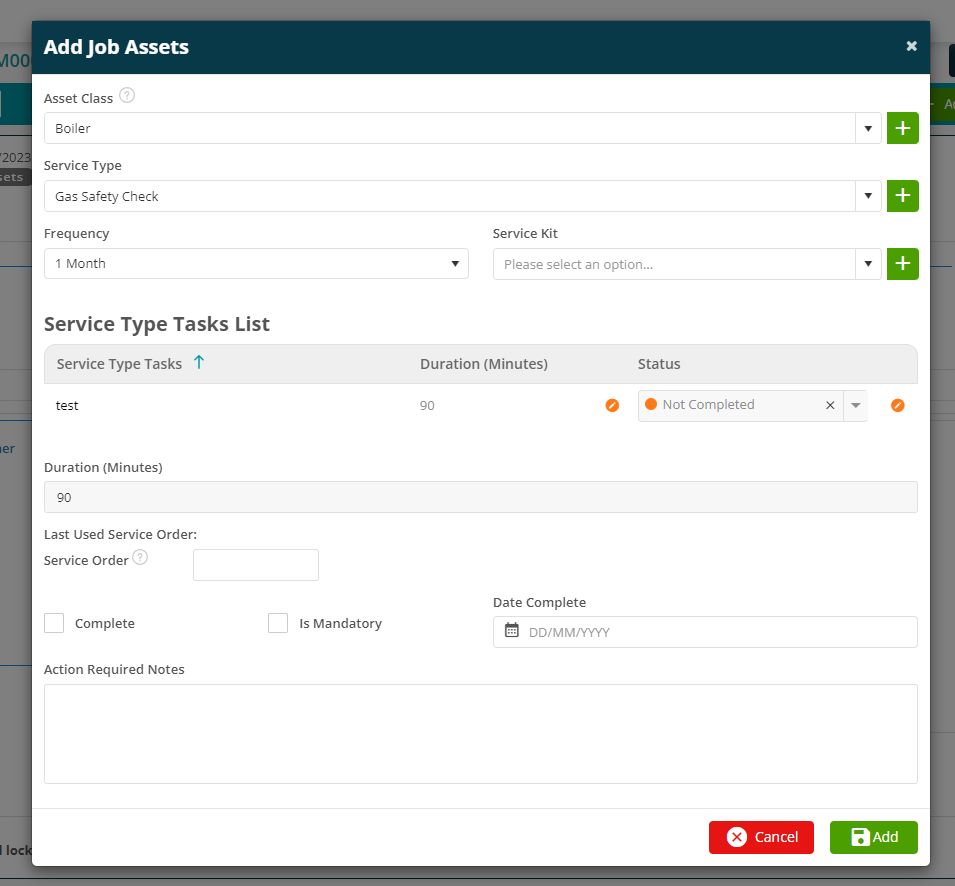
Once you are happy with all details, click Add and your Asset will be added to the Job side.
Saving the visit
Once you are satisfied with the Details, Tasks and Assets added to your PPM visit select the ‘Save’ button towards the top of the page.
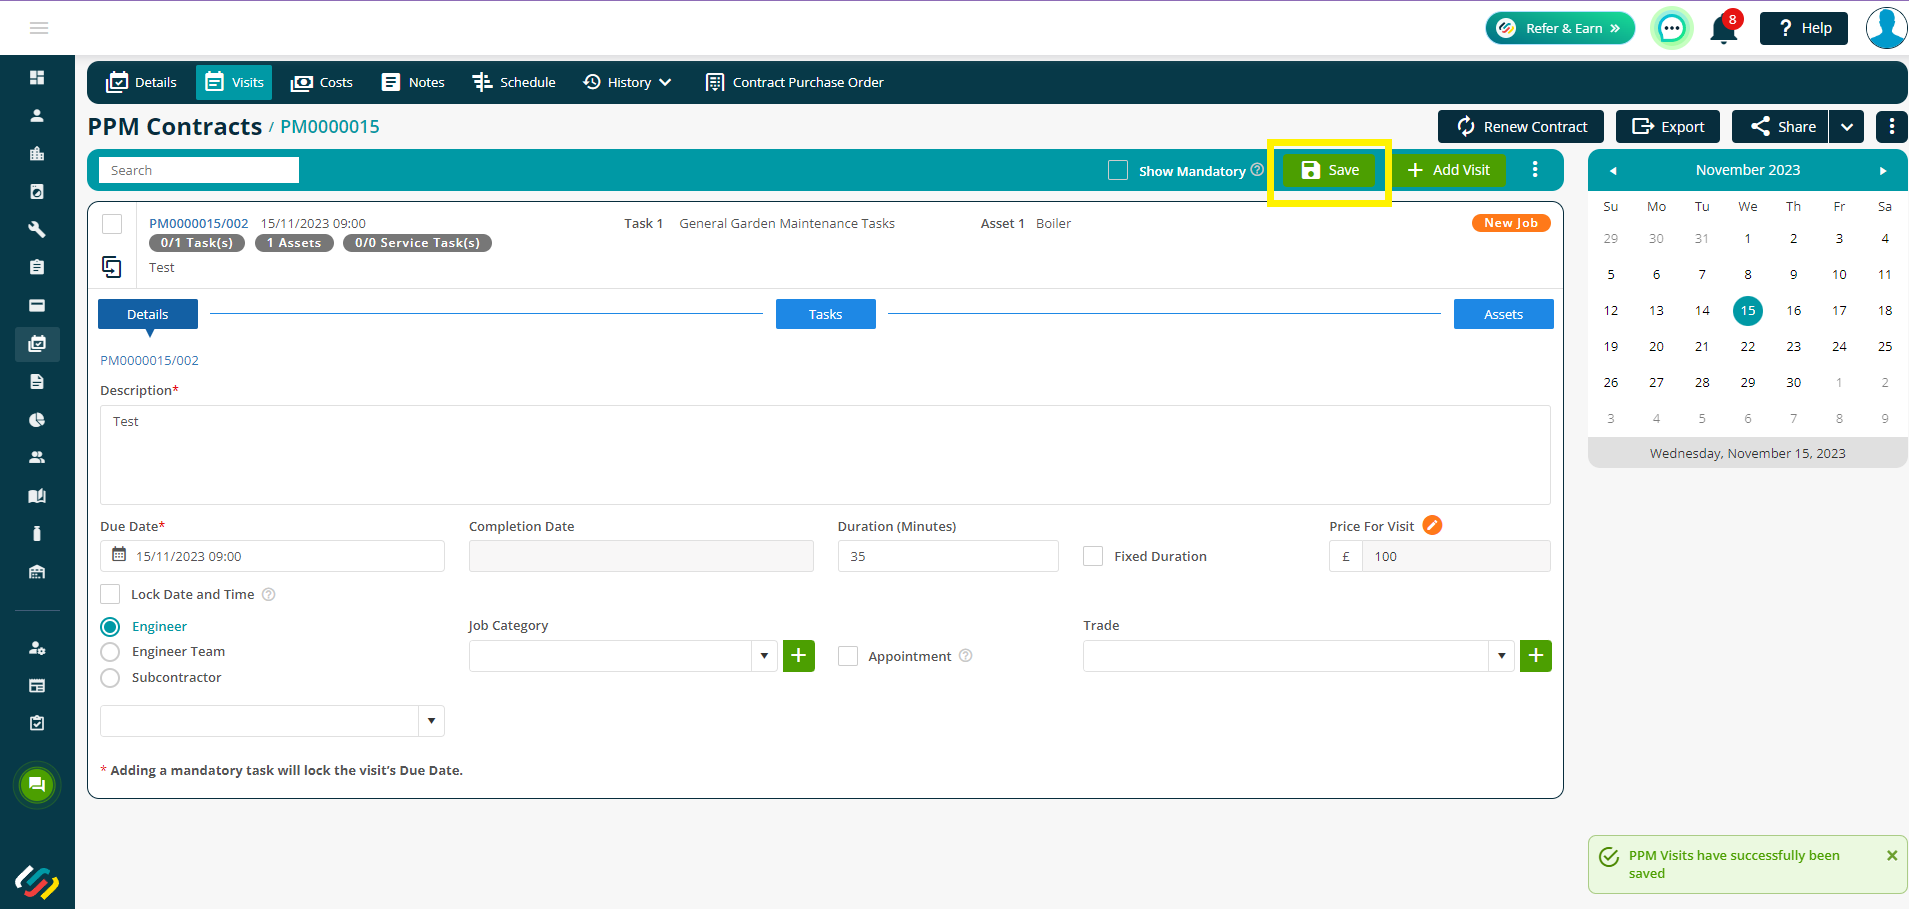
The visit will then generate under the Visits tab of your PPM contract, assigning it a unique PPM job number.

Further visits can be individually added to the schedule for the contract by selecting Add Visit button and repeating the process. There is also a cloning method which can be used to assist in creating a visit schedule with less manual intervention. See our Cloning PPM Visits user guide here for more details on this.
Further Support
For further information or assistance with the above, contact our Support Team on 0800 326 5561 or email support@joblogic.com. Alternatively, our Customer Success Management team can be reached by emailing customersuccess@joblogic.com
Publishing Details
This document was written and produced by Joblogic’s Technical Writing team and was last updated on the date specified above. Be aware that the information provided may be subject to change following further updates on the matter becoming available. Additionally, details within the guide may vary depending on your Joblogic account’s user permissions.
Was this article helpful?