Introduction
Joblogic provides a ‘Number Convention’ area whereby users can set up their own numbering conventions and prefixes for job types and other items within the system. The area also governs the ‘Job Type’ settings. This user guide will detail how these settings can be set for use.
The Numbering Convention Area
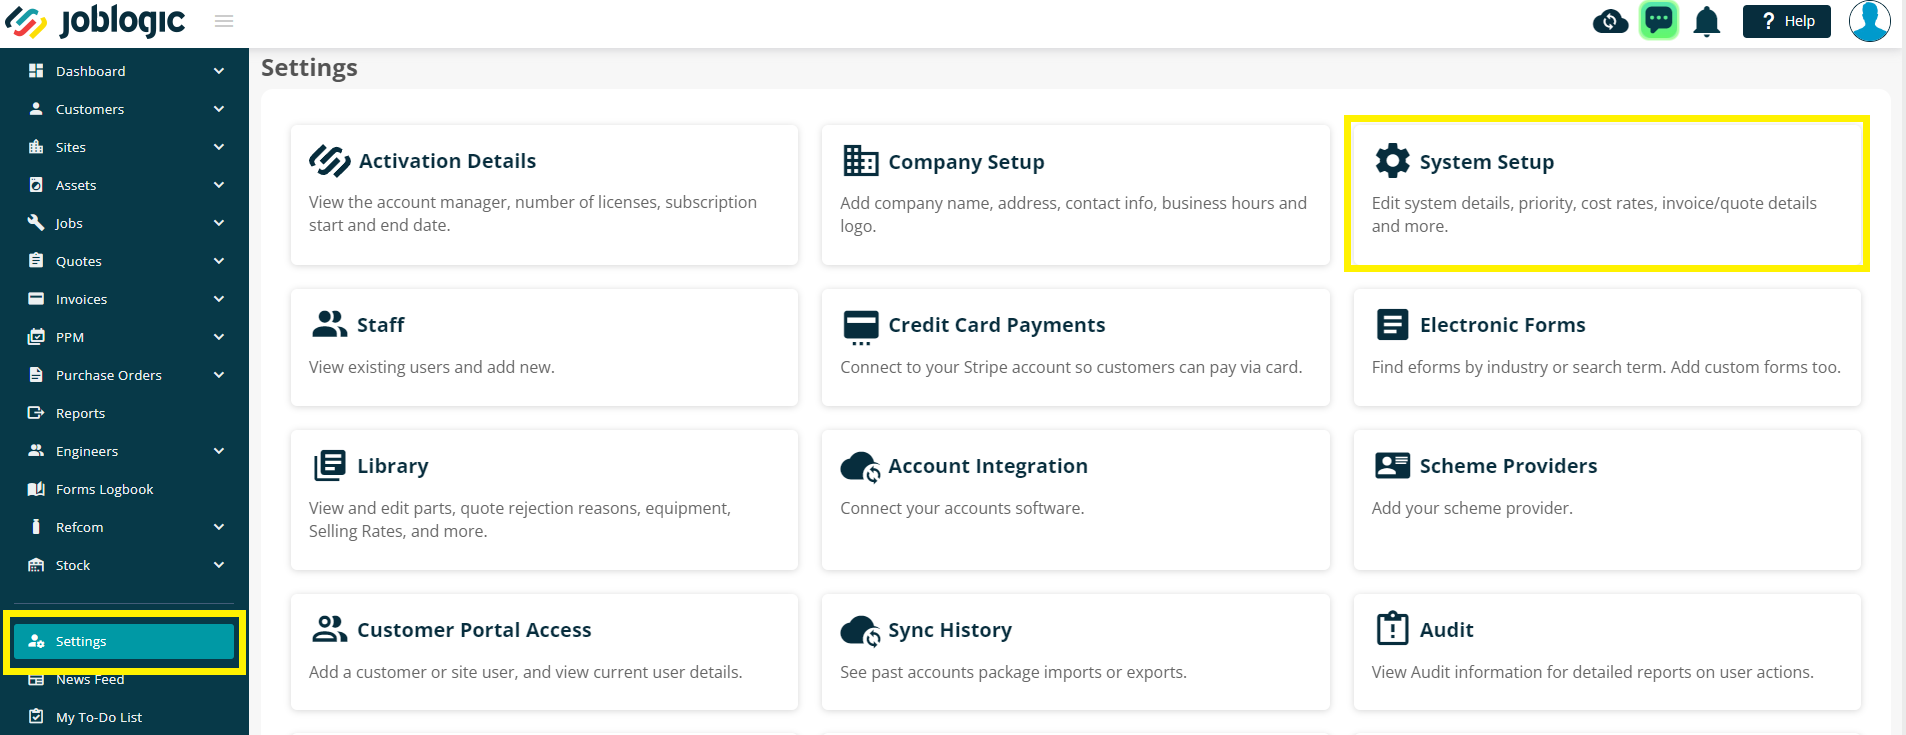
In order to access the numbering convention area, select the ‘Settings’ option from the left side navigation menu > ‘System Setup’ > ‘Number convention’.
This area is comprised of two sections, a ‘Document Numbering Convention’ section and a ‘Job Types Numbering and Default Service Time’ section.
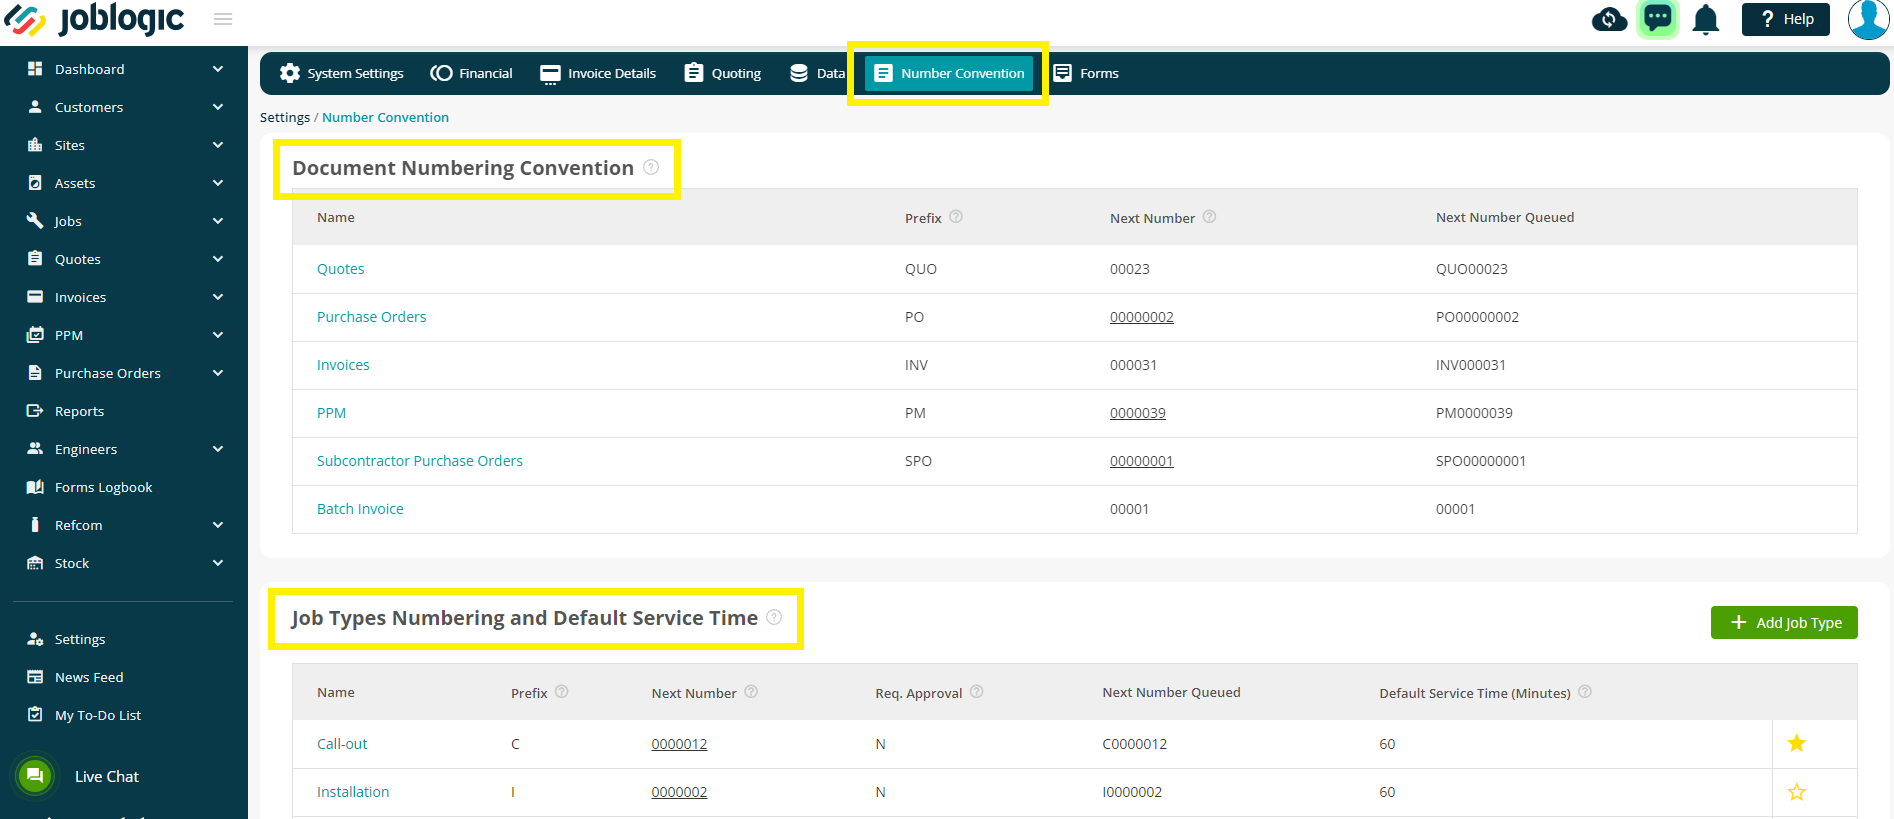
The ‘Document Numbering Convention’ section allows you to set numbering conventions and prefixes for documents such as Quotes, Invoices, PPM Contracts and Purchase Orders.
The ‘Job Types Numbering and Default Service Time’ section allows you to create and manage your job type settings within the system and assign number prefix and default service time settings for jobs which adhere to that job type.
Setting Number Conventions and Prefixes for Documents
In order to set number conventions and prefixes for documents, select the blue hyperlinked name of the document type that you would like to do this for. This example will use Invoices.
Amend the ‘Prefix’ and ‘Next Number’ fields as applicable in order to match your desired numbering conventions.
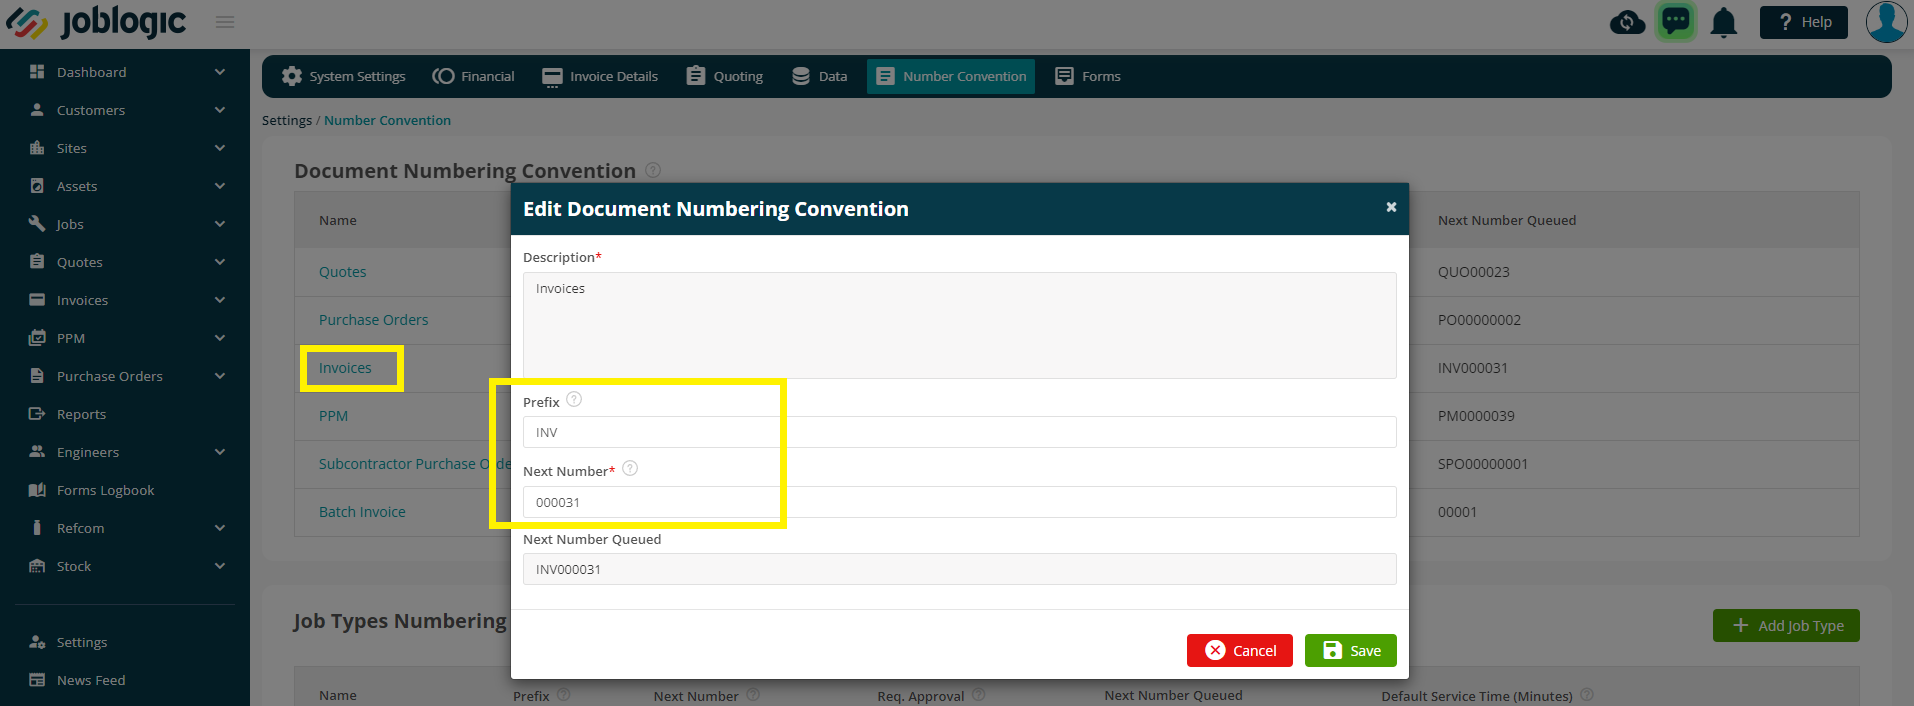
‘Prefix’ refers to an alphabetical letter(s) used to identify the document type.
‘Next Number’ refers to a numeric sequence that document numbers of that type will initiate from and follow.
The ‘Next Number Queued’ field will automatically update as per the prefix and next number set, indicating what the document number will be for the next document raised of that type.
Any further documents of this type raised will be assigned a document number incremented by one with every new document raised.
Amending Descriptions, Number Conventions, Prefixes and Default Service Times for Existing Job Types
In order to amend the description, number conventions, prefixes and/or default service times for existing job types, select the blue hyperlinked name of the job type that you would like to do this for.
Amend the ‘Description’, ‘Prefix’, ‘Next Number’ and ‘Default Service Time’ fields as applicable in order to match the required conventions.
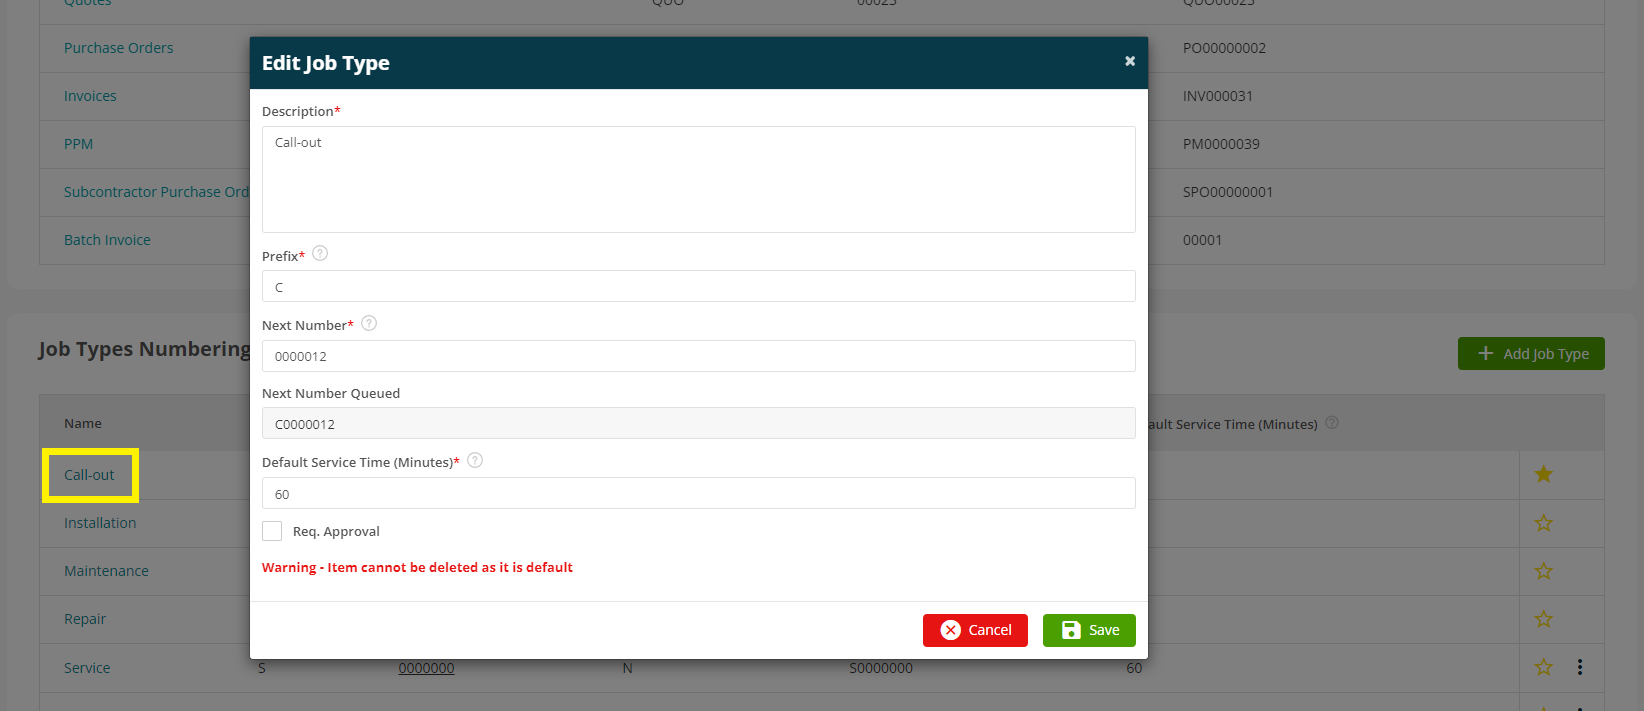
Select the ‘Save’ option and the next job under this job type raised will generate with a job number as per the ‘Next Number Queued’ set.
Any visits raised under the job will initially default to a duration as per the ‘Default Service Time’ set.
Adding a New Job Type
In order to add a new job type select ‘Add Job Type’.
Fill in the required details of the ‘Add Job Type’ screen.

The job type can be set as the system default (the initial job type populated against a job when logging it) by ticking the ‘Default’ tick box.
Select the ‘Save’ option and the job type will save within the system's settings.
Deleting Job Types
In order to delete a job type select the ‘3 dots’ icon against the item that you wish to remove.
Select the ‘Delete’ option and ‘Yes’ to the confirmation pop up window.
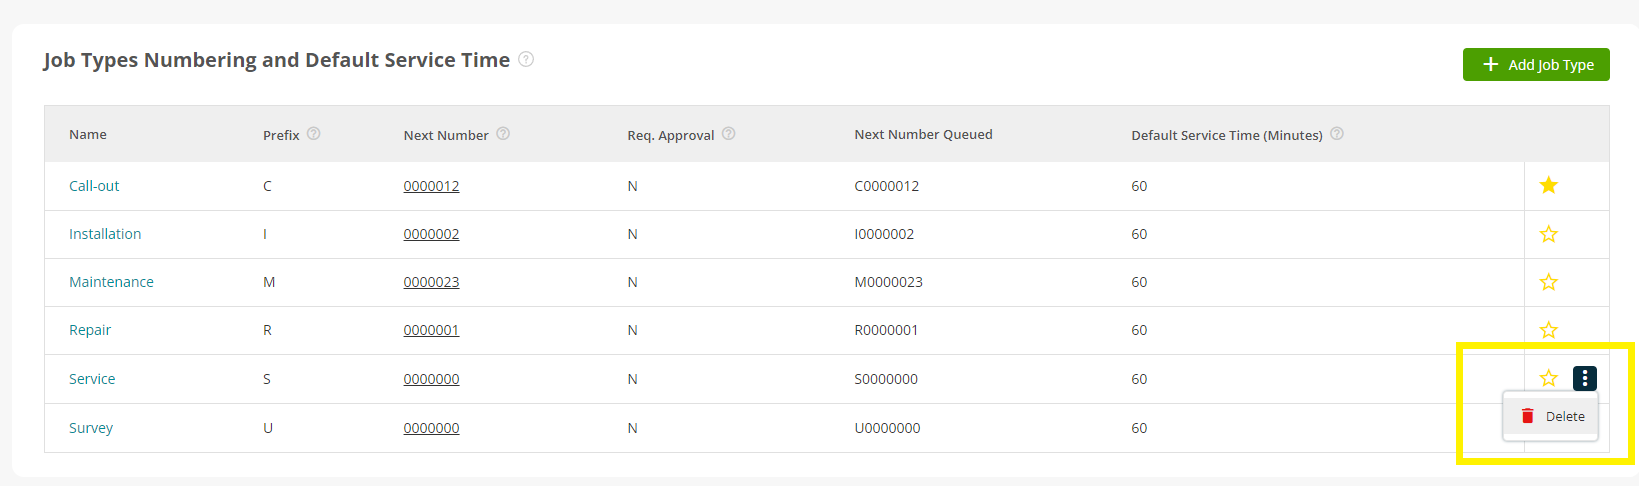
The job type will then be removed from the system.
It is important to be aware that a job type can not be deleted if already in use within the system. For example, if it is currently assigned to a job or is set as the system default.
The ability to delete items is permission based, so if you don't see the three dots, please speak to one of your colleagues with administrator permissions.
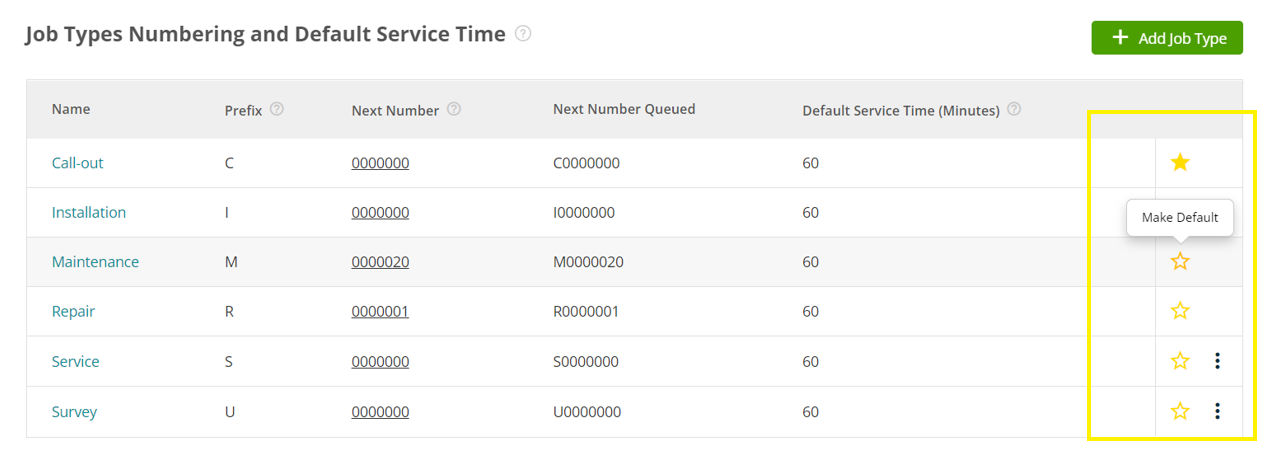
Amending the System Default Job Type
The yellow star icon against the job type indicates the system default.
You can amend as required, by clicking a white star, to make it yellow.
Further Support
For further information or assistance with the above, contact our Support Team on 0800 326 5561 or email support@joblogic.com. Alternatively, our Customer Success Management team can be reached by emailing customersuccess@joblogic.com
Publishing Details
This document was written and produced by Joblogic’s Technical Writing team and was last updated on the date specified above. Be aware that the information provided may be subject to change following further updates on the matter becoming available. Additionally, details within the guide may vary depending on your Joblogic account’s user permissions.