Planner Integration with Google and Apple Calendars
- 20 Jun 2024
- 6 Minutes to read
- Print
- PDF
Planner Integration with Google and Apple Calendars
- Updated on 20 Jun 2024
- 6 Minutes to read
- Print
- PDF
Article summary
Did you find this summary helpful?
Thank you for your feedback!
Introduction
Joblogic provides the ability to set up a one way integration/synchronisation of the Planner schedule with Google and/or Apple Calendars.
This means that any items added to an engineers planner schedule can be set to automatically update and show within a Google and/or Apple calendar.
This will allow users of the mobile application to view theirs and others overall schedules when out in the field via their individual Google or Apple calendar.
This user guide will detail the planner integration functionality within Joblogic and provide the most efficient methods of integrating a planner schedule with either a Google or Apple calendar.
To read our guide on integrating with Outlook calendars, click here.
Initial steps for integrating with either calendar
In order to integrate an engineer’s planner schedule with either an Apple or Google calendar you will firstly need to login to the back-office area of Joblogic via web browser (or request a colleague with these permissions to conduct the first steps for you, if you do not have back-office access).
Within the back-office, navigate to the Engineers tab > Engineers List > select the engineer who’s calendar you would like to be synced.
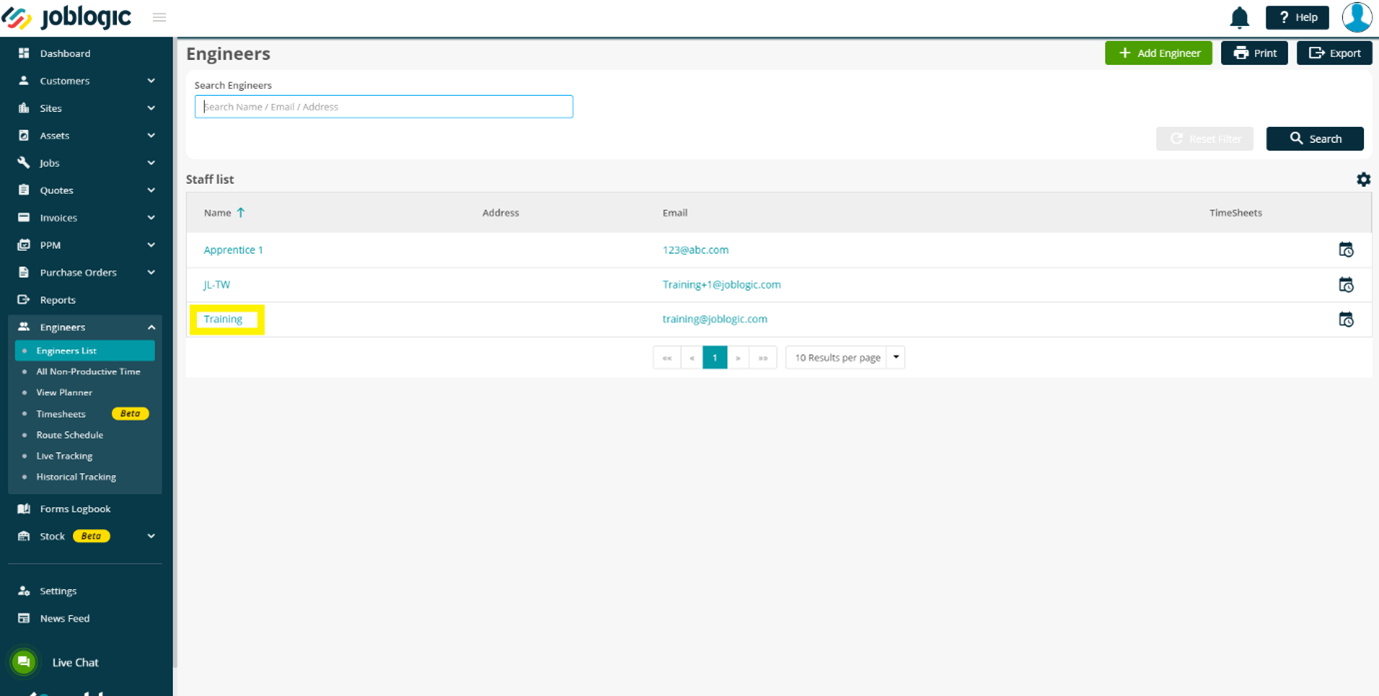
Once you have selected the engineer who’s calendar you would like to sync, select the ‘Engineer Detail’ tab > scroll to the bottom of the page and select ‘Integrate Calendar’.

You will then be directed to the below “Calendar Integrations” page.
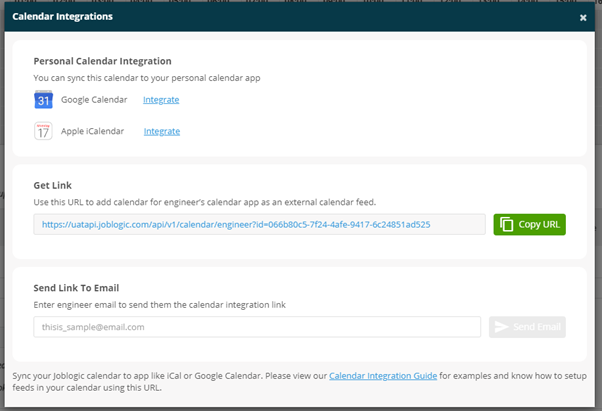
This page provides the option to sync the engineers Planner schedule with either a Google or Apple calendar. Additionally, it provides the option to copy or email a URL link associated to the Planner schedule that you would like to synchronise.
This URL will be used to integrate Joblogic with the required Google or Apple calendar. The Google and Apple calendars work differently but each have a respective area to add/synchronise a Joblogic Planner schedule by URL.
In order to copy the URL to your local machine, select “Copy URL”.

Alternatively, this URL can be emailed to a required engineer or other colleagues and stakeholders from the system by entering their email address in the email field and selecting “Send Email”.

The recipient of the email will also be able to copy the URL from the email to their local machine once received.
You will need to have access to the calendar/settings of the calendar which you are wanting to sync Joblogic with (for both Google and Apple Calendar). If you have access, copy the URL link to your local machine and follow the applicable steps below for the calendar which you are wanting to sync with. If you do not have access, send the URL to an individual with access to the calendar which needs to be synced and request that they copy the URL within the email sent to their local machine. Ask them to then follow the below steps applicable with the calendar which needs to be synchronised.
There are 3 options of steps to follow:
- Integrating the Planner with a Google Calendar (with access to a Joblogic back-office account)
- Integrating the Planner with a Google Calendar (without access to a Joblogic back-office account)
- Integrating the Planner with an Apple Calendar
Integrating the Planner with a Google Calendar (with access to a Joblogic back-office account)
From the “Calendar Integration” page within the back office, open a new tab on your internet browser and login to the Google account for the calendar which you would like to integrate the Joblogic Planner with.
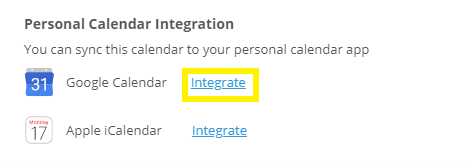
Navigate back to the “Calendar Integration” page within Joblogic and select the “Integrate” button next to “Google Calendar”.
You will then be directed to the “Add calendar from a URL” page within the Google account’s calendar settings.
(Skip to ‘The add calendar from a URL page’ section below).
Integrating the Planner with a Google Calendar (without access to a Joblogic back-office account)
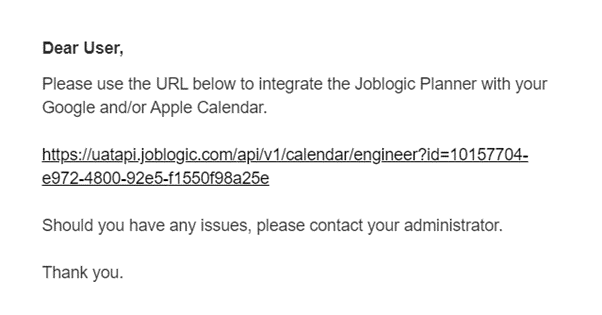
Request that a back-office user send the Planner integration URL for the Planner schedule you would like to sync with the Google calendar.
Once received, copy the URL within the email to your local machine.
Login to the Google account for the calendar which you would like to integrate the Joblogic Planner with via the web browser of your device.
Navigate to the Google calendar and select the ‘addition’ icon under “Other calendars”.
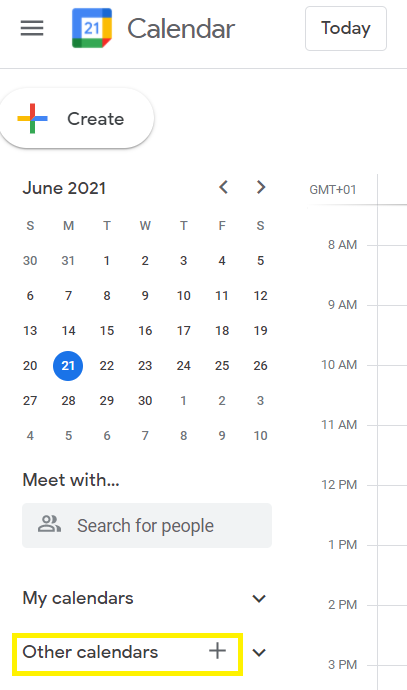
Select “From URL”
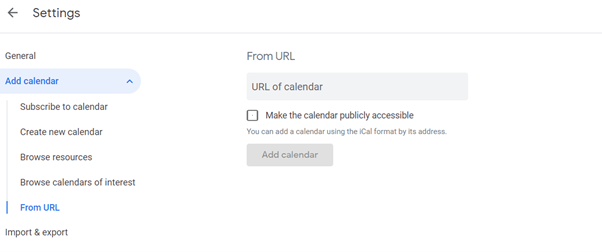
You will then be directed to the below “Add calendar from a URL” page within the Google account’s calendar settings.
The add calendar from a URL page
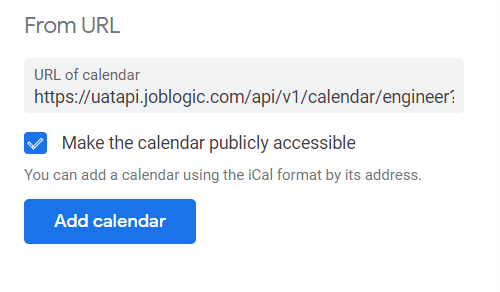
Paste the Planner URL copied from the Joblogic back office system or email (if shared with you via email) and tick “Make the calendar publicly accessible” if applicable.
Then select “Add calendar”.
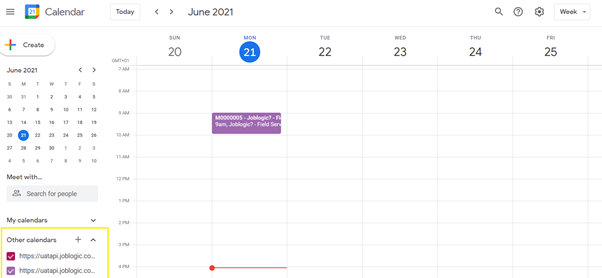
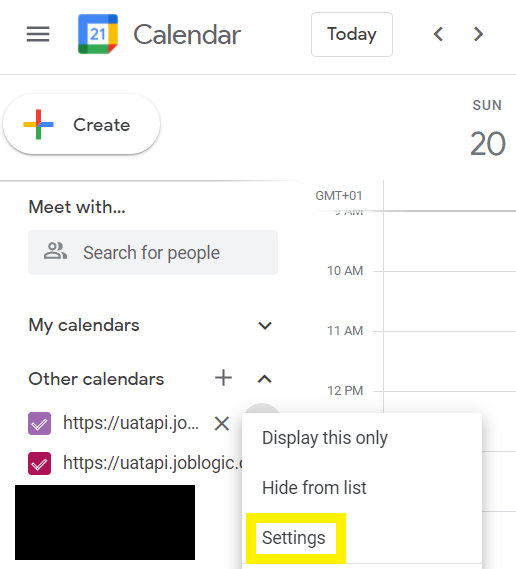
Navigate to the Google calendar schedule page and locate your recently synced Planner schedule calendar (named as the link) from the “Other calendars” list.
Select the ‘3 dots’ icon of the calendar > Settings.
Rename the calendar to a name of your choice (in order to distinguish it).
The calendar will then show as named in your Google calendar.
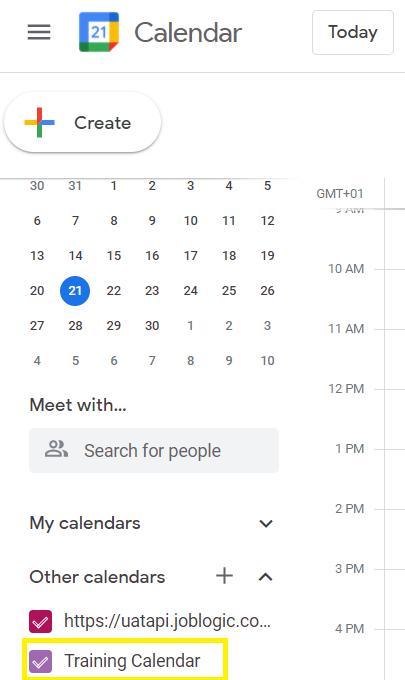
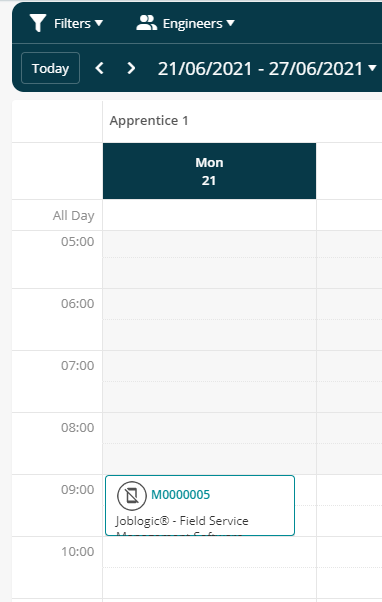
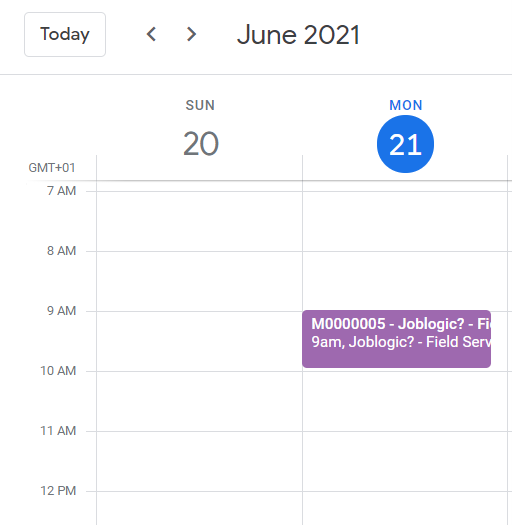
Selecting this planner schedule calendar to show (via the tick box) will then present any items scheduled within the planner onto this Google calendar.
Be aware that the Google Calendar integration will only pull information from Joblogic approximately every 12 hours, with no option to refresh the calendar or force a sync. This means that Planner items will not instantly update in a Google Calendar. If you are looking for a quicker calendar
synchronisation, an integration with an Apple Calendar (which can be set to sync every 5 minutes) may be more suited to you.
Integrating the Planner with an Apple Calendar
Apple calendar does not allow for integration via web browser but the integration can be achieved via the calendar settings of the Apple device/account in question (such as an iPhone, iPad or Mac).
Firstly, access the Apple device which will be used and login to the Apple account associated to the Apple calendar you are wanting to sync.
Ensure that the URL link (obtained from the Joblogic back office) is accessible to paste on the device being used. This can be achieved by logging into the Joblogic back-office via the Apple device’s web browser and copying the link within Joblogic. Alternatively, you can email the URL to yourself (to an email address accessible on the Apple device) from another device (such as your Windows P.C) or ask a colleague with back-office permissions to email this to you (if you do not have access to the back office). See the “Initial steps for integration with either calendar” section above for more information on this.
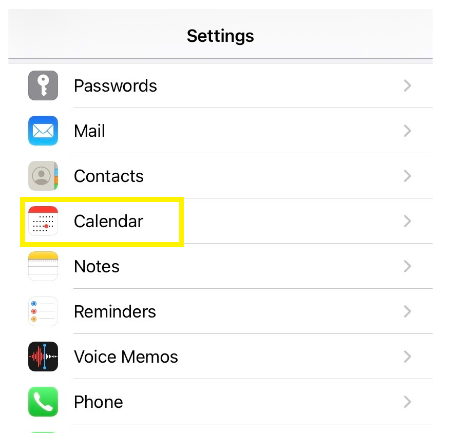
Once you have the URL copied on the Apple device, select the settings icon from the home screen > select “Calendar”.
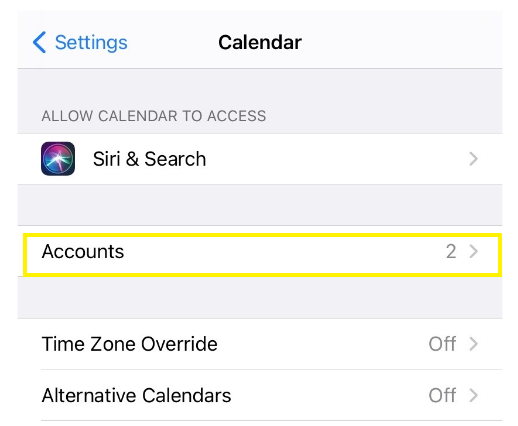
Select “Accounts”.
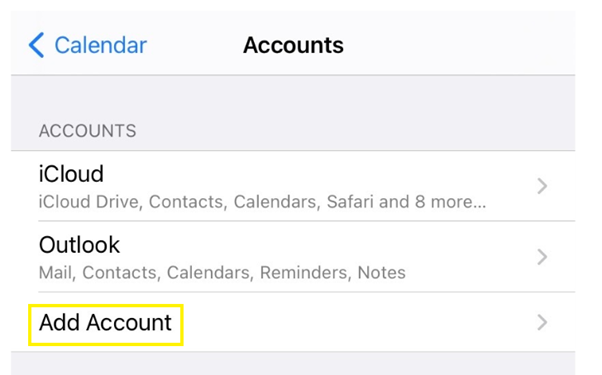
Select “Add account”.
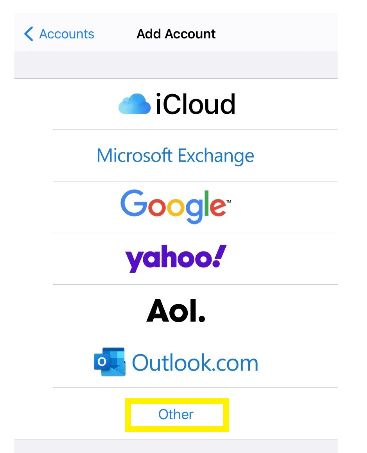
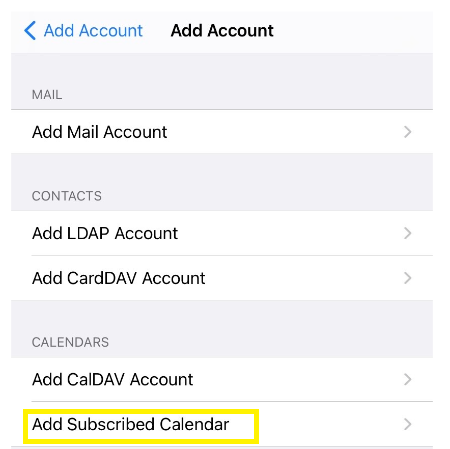
Select “Other”.
Select “Add Subscribed Calendar”.
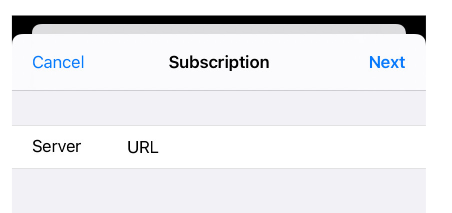
Paste the URL copied from Joblogic (or the email) to the “Server” field and select “Next”.
Fill out the details for the calendar as required and select “Save”.
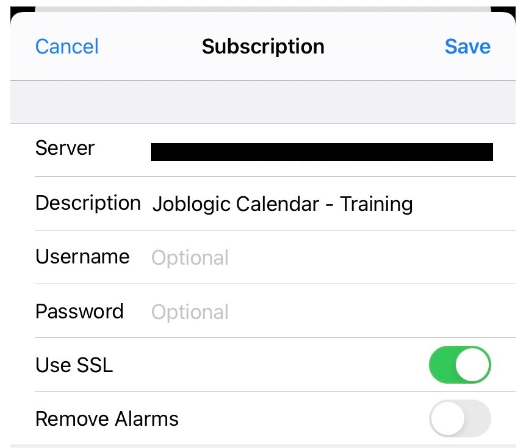
The chosen Planner schedule will now sync with the Apple calendar for the associated Apple account, showing any Planner items scheduled on this Apple calendar.
Further Support
For further information or assistance with the above, contact our Support Team on 0800 326 5561 or email support@joblogic.com. Alternatively, our Customer Success Management team can be reached by emailing customersuccess@joblogic.com
Publishing Details
This document was written and produced by Joblogic’s Technical Writing team and was last updated on the date specified above. Be aware that the information provided may be subject to change following further updates on the matter becoming available or new releases within the system. Additionally, details within the guide may vary depending on your Joblogic account’s user permissions and settings or the electronic device being used
Was this article helpful?