Introduction
Joblogic allows you to assign specific days for engineers to be on-call, to handle time critical jobs, out of hours.
This guide will help you set up the feature and then also show you how to implement it.
Nothing will change on the mobile app for your engineers. They can continue as per your normal processes.
Settings Setup
The initial set up is done in two phases – you will firstly need to enable the setting in Settings > System Setup
Click edit, scroll to the ‘On Call Engineers' option and tick to enable.

Engineer Setup
You can then mark an engineer as ‘on-call’ for a specific date, straight into the Planner.
To do this, click Engineers > View Planner
Next, click the three dots next to the date for a particular engineer and choose ‘Mark as On-Call'
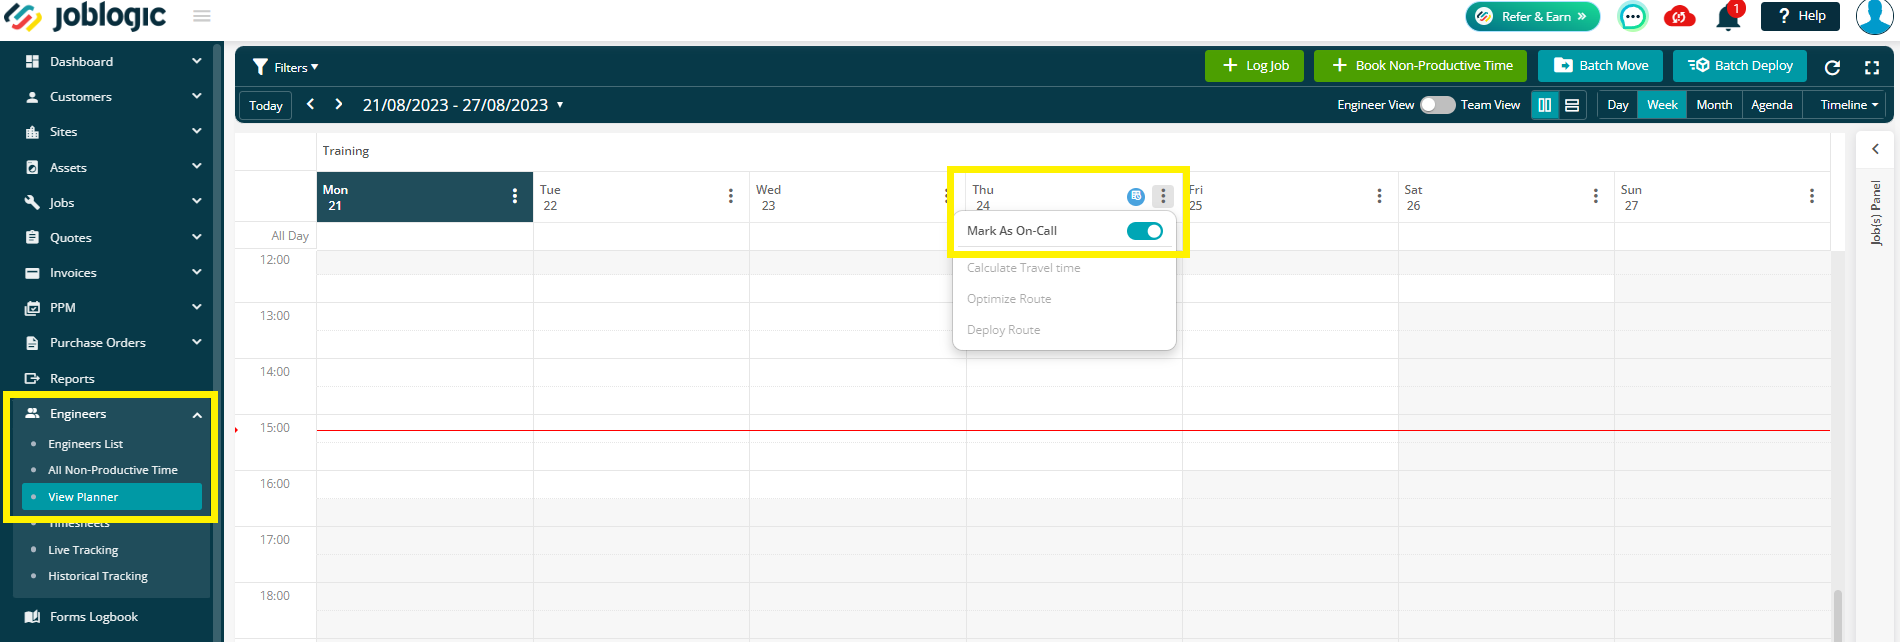
When you have selected this option, you’ll see an icon to show that the engineer is ‘on-call’ for this date.
The On Call feature only applies to jobs that are logged outside of the engineer or company working hours.
Logging a Job
You are now all set up, so let’s look at logging a job with this new feature applied.
You can log a job from any area you normally would, whether that’s from Job > Log Job or via the planner (or any of the other routes)
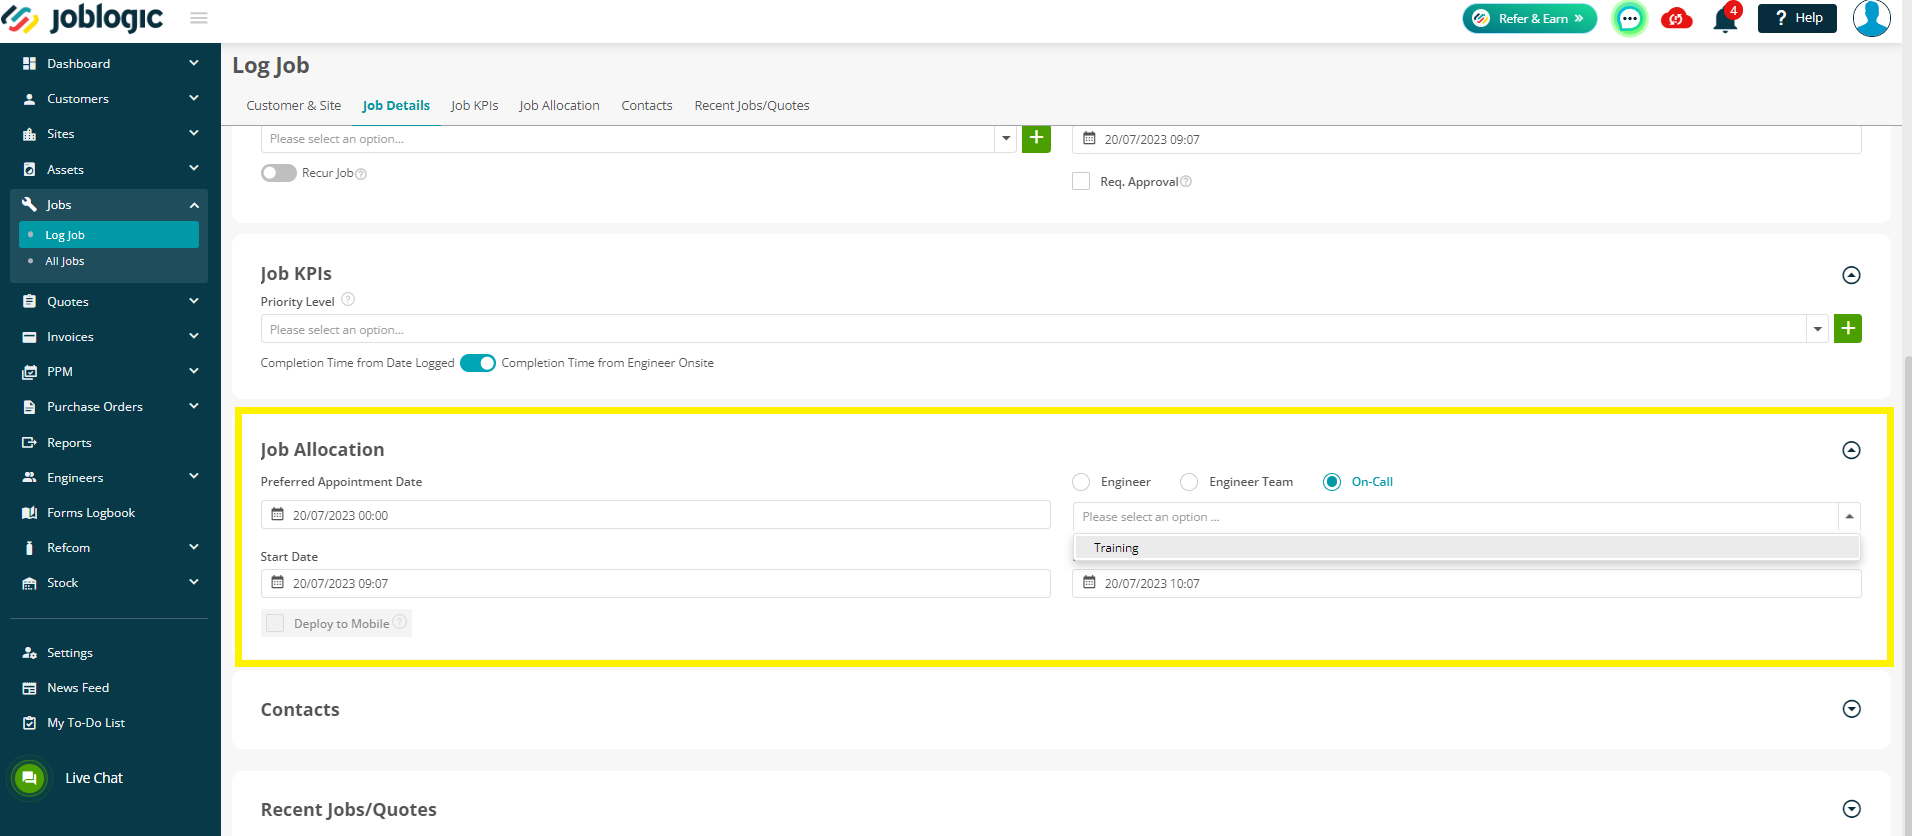
When you get to the Job Allocation section, you’ll notice the On-Call button is now available alongside your Engineer / Engineer Team options
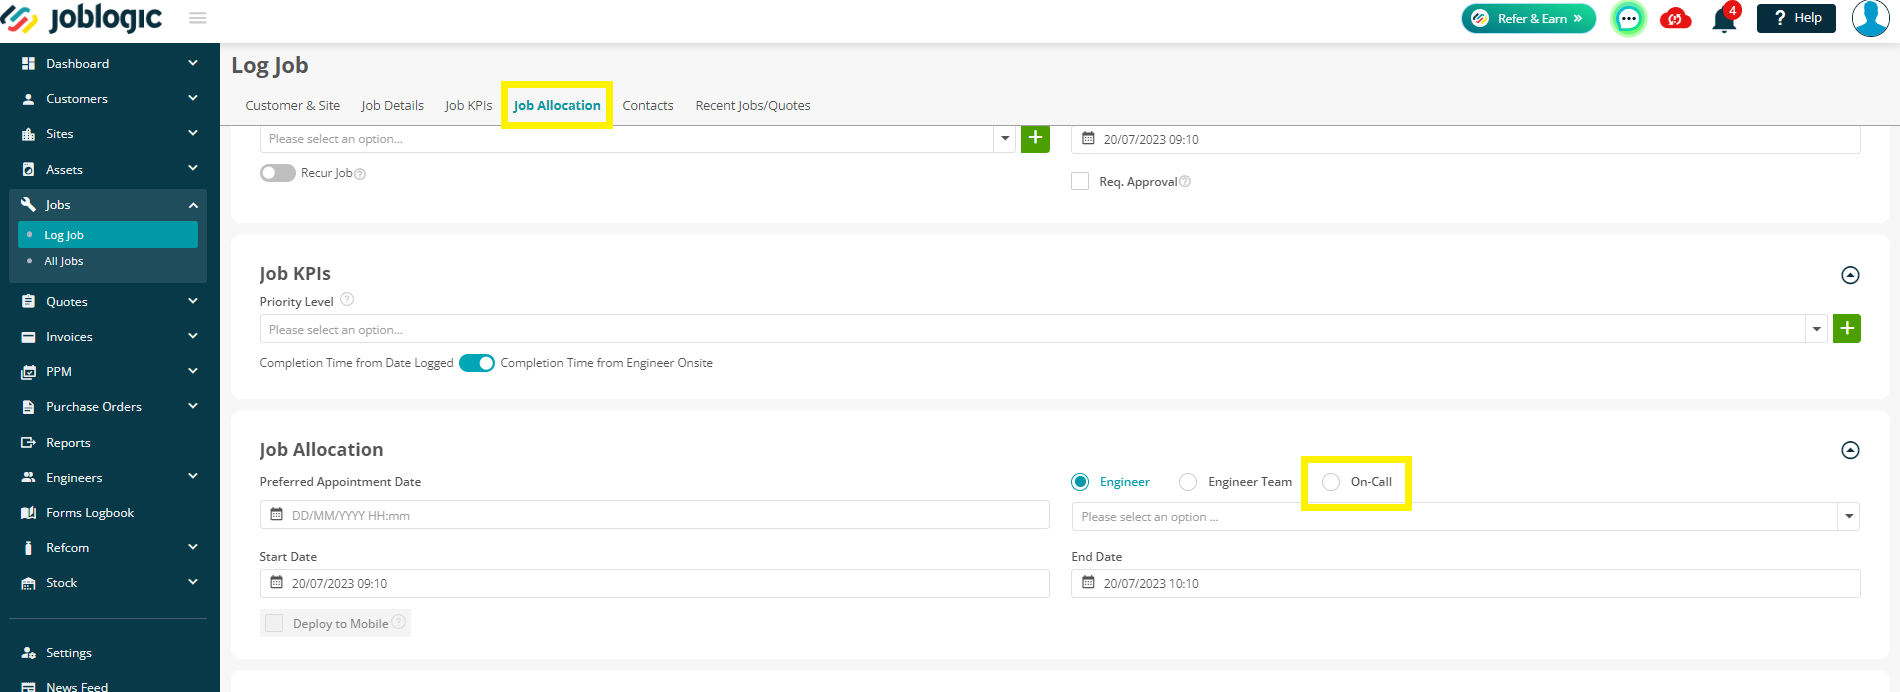
If you click the On-Call option, the list will filter to show only the engineers who are marked as ‘on call’ for that day.
You can then choose the engineer and carry on logging the job as normal
If you have no engineers set up as ‘on call’ for this day, the list will show this message - ‘Sorry, No matching options’
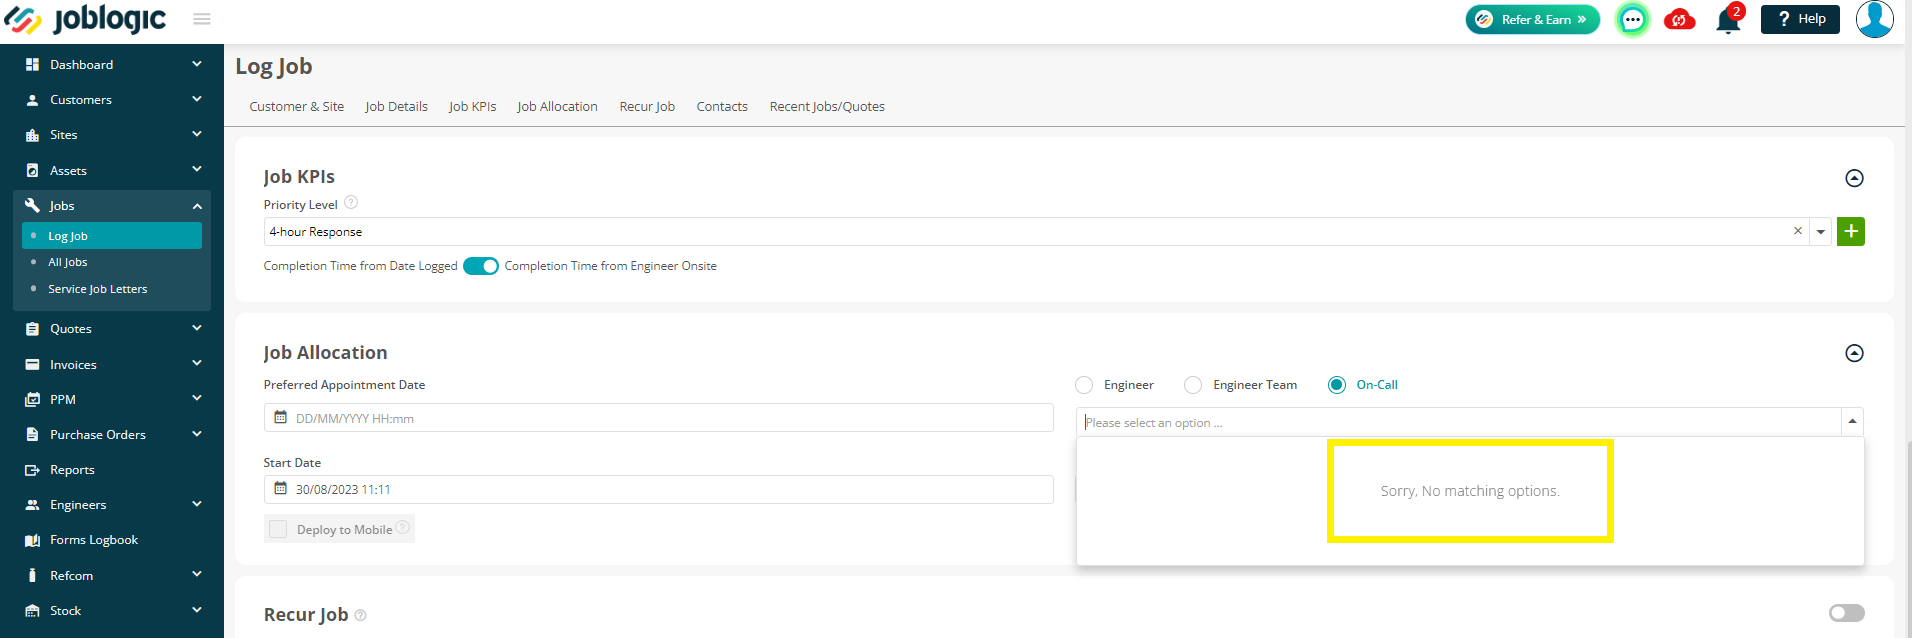
Alternatively, if you choose a Start Date / End Date, the On Call Engineer list will filter to show the available on call engineer(s) for that specific date.

Planner
An alternative option to this, is to view the on call engineer and log/assign the job via the Planner screen
To do this, go to Engineers > View Planner
Next, click the Filters option in the top left and move the toggle to view engineers you have marked as on-call for the current date/week.
Click Apply Filter for the changes to take affect.
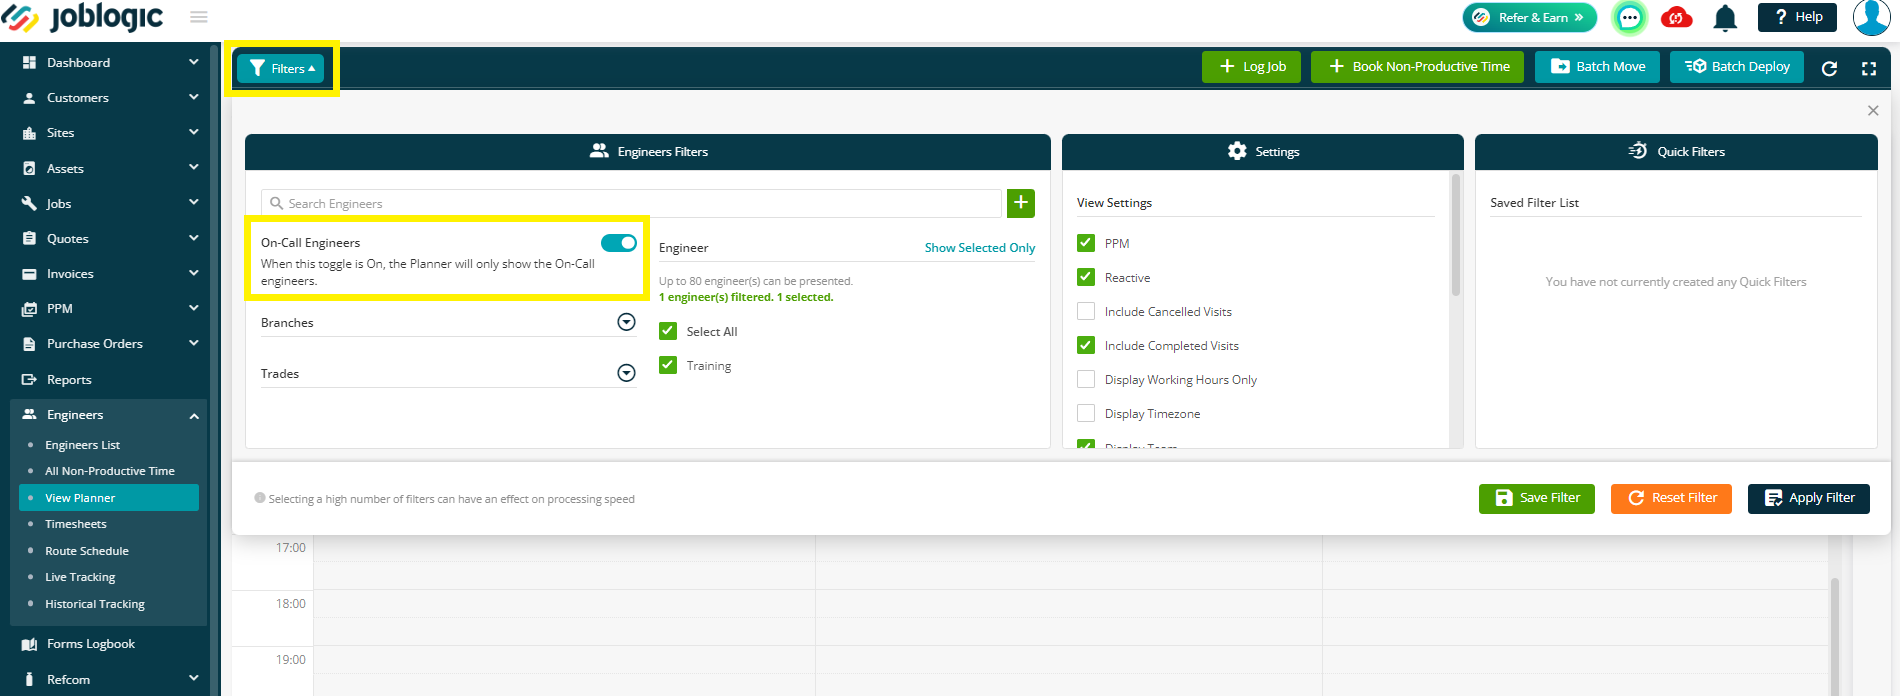
When you have filtered the engineers this way, you will only be able to view the planner in ''Day'' or "Week" view.
The other views will be greyed out until you change the filter

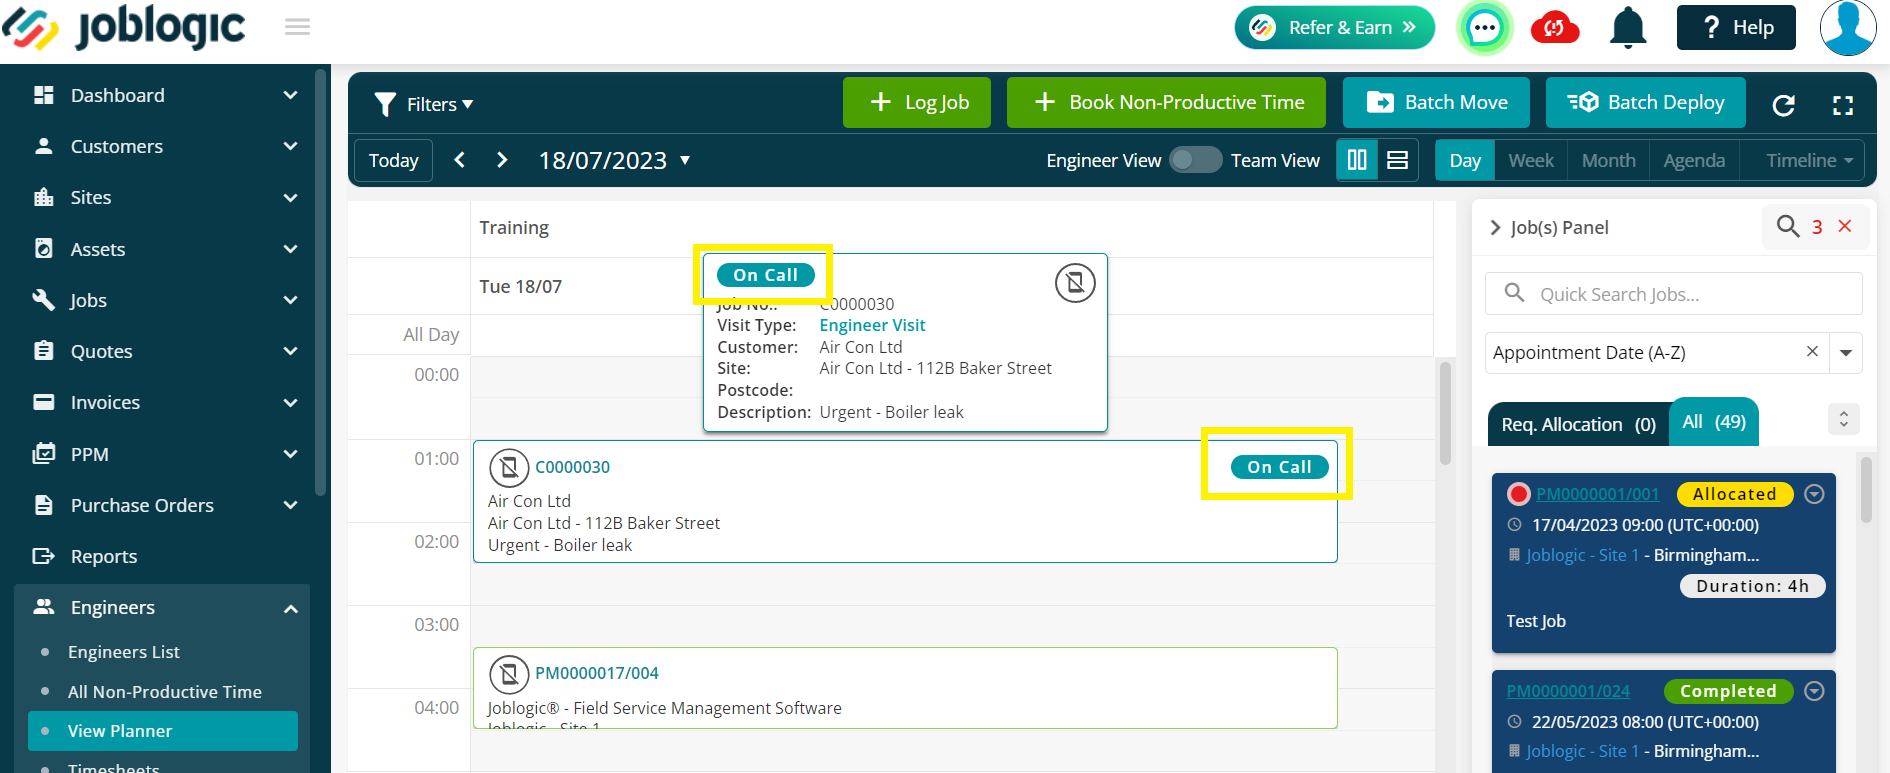
When a job is logged via the ‘’on-call’’ engineer option, you’ll see a label against the visits on the planner, to specify this type of work.
Timesheets
There is also a label to specify the on-call jobs within the Timesheet module (Engineers > Timesheets)
New options are available for ‘Labour Time / On Call’, ‘Travelling Time / On Call’ and 'Unreported Time / On Call'

You can also view these extra options when Exporting the timeline view:

Further Support
For further information or assistance with the above, contact our Support Team on 0800 326 5561 or email support@joblogic.com. Alternatively, our Customer Success Management team can be reached by emailing customersuccess@joblogic.com
Publishing Details
This document was written and produced by Joblogic’s Technical Writing team and was last updated on the date specified above. Be aware that the information provided may be subject to change following further updates on the matter becoming available or new releases within the system. Additionally, details within the guide may vary depending on your Joblogic account’s user permissions and settings or the electronic device being used.