Introduction
The Equipment Transport app in Joblogic is designed to simplify and streamline the movement of assets and equipment between locations.
With features such as transport request creation, driver and vehicle assignment, delivery status tracking, and cost integration with job costing, the app ensures every step of the logistics process is controlled and transparent. This guide will walk you through how to access, use, and manage transport requests, helping you improve operational efficiency and deliver better service to your customers.
App Settings
To get started, let’s set up your Equipment Transport settings—this will lay the foundation for managing transport requests smoothly and efficiently
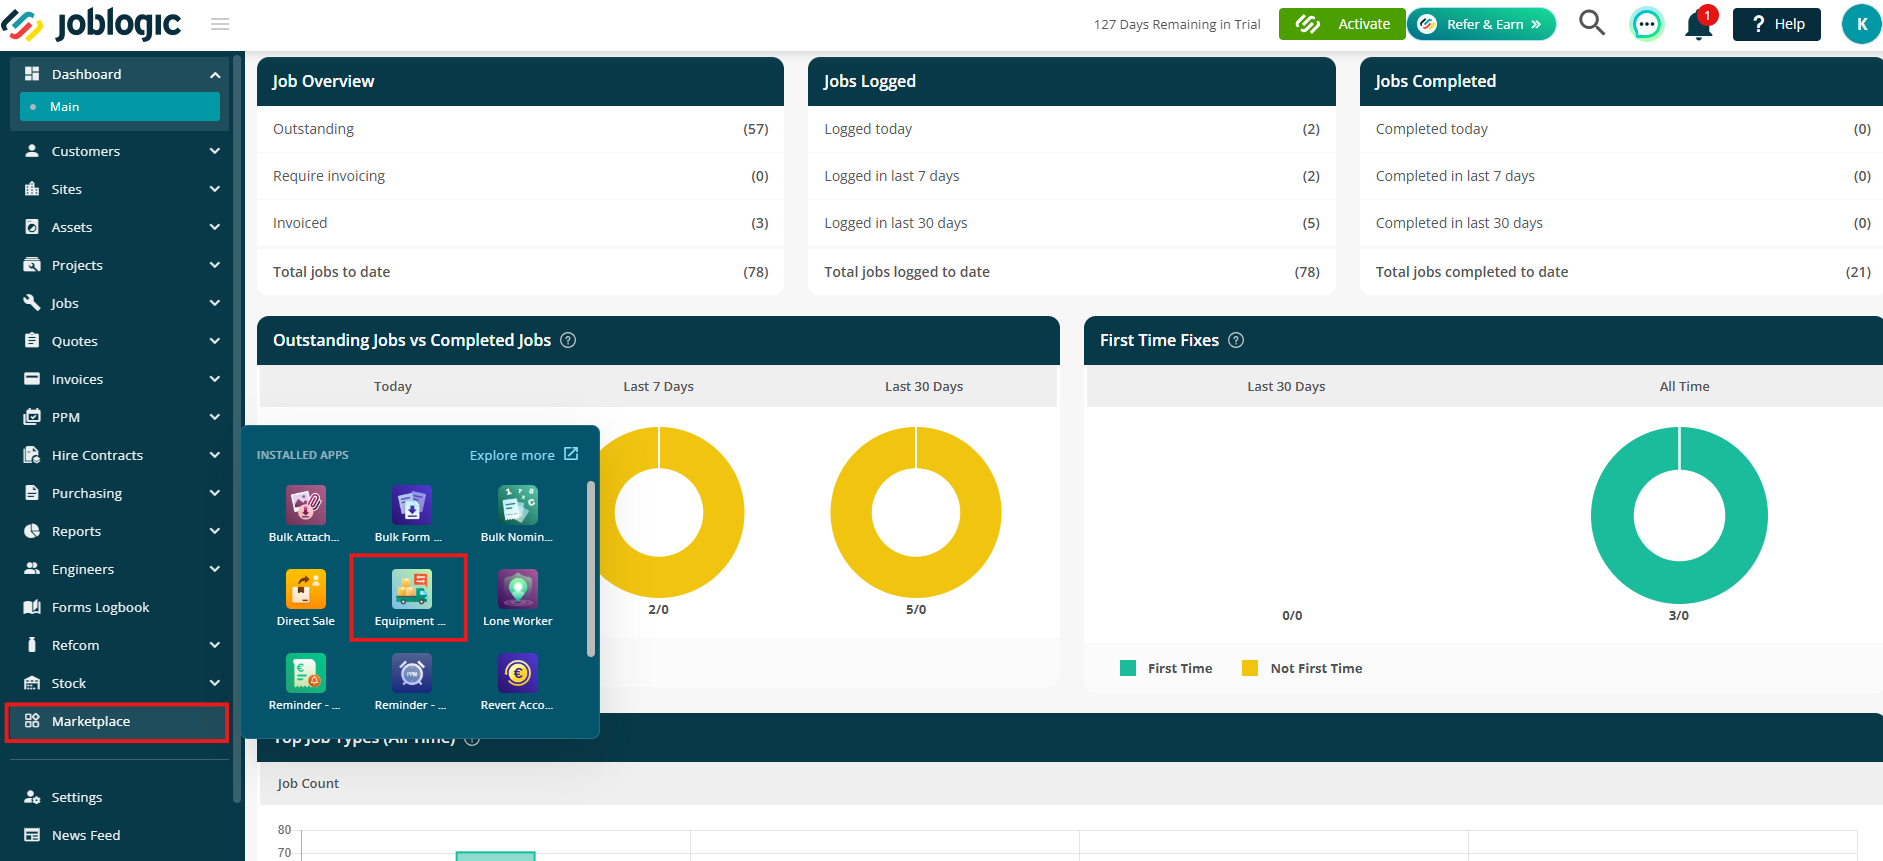
Navigate to Marketplace via your main menu and select Equipment Transport.
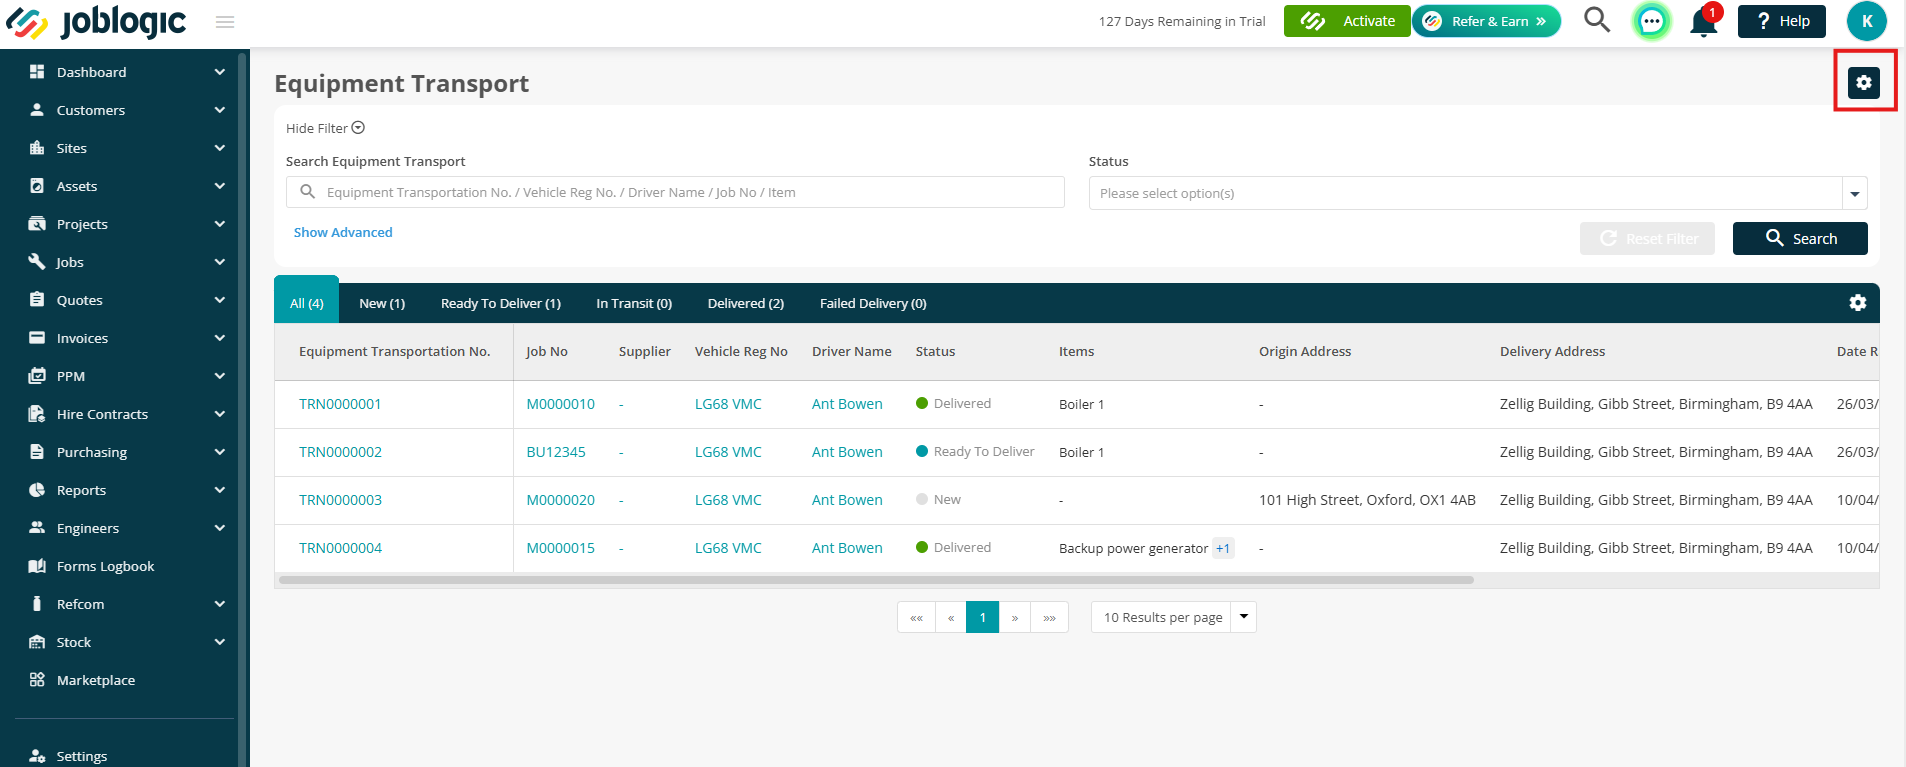
Next, click the Settings icon in the top right corner
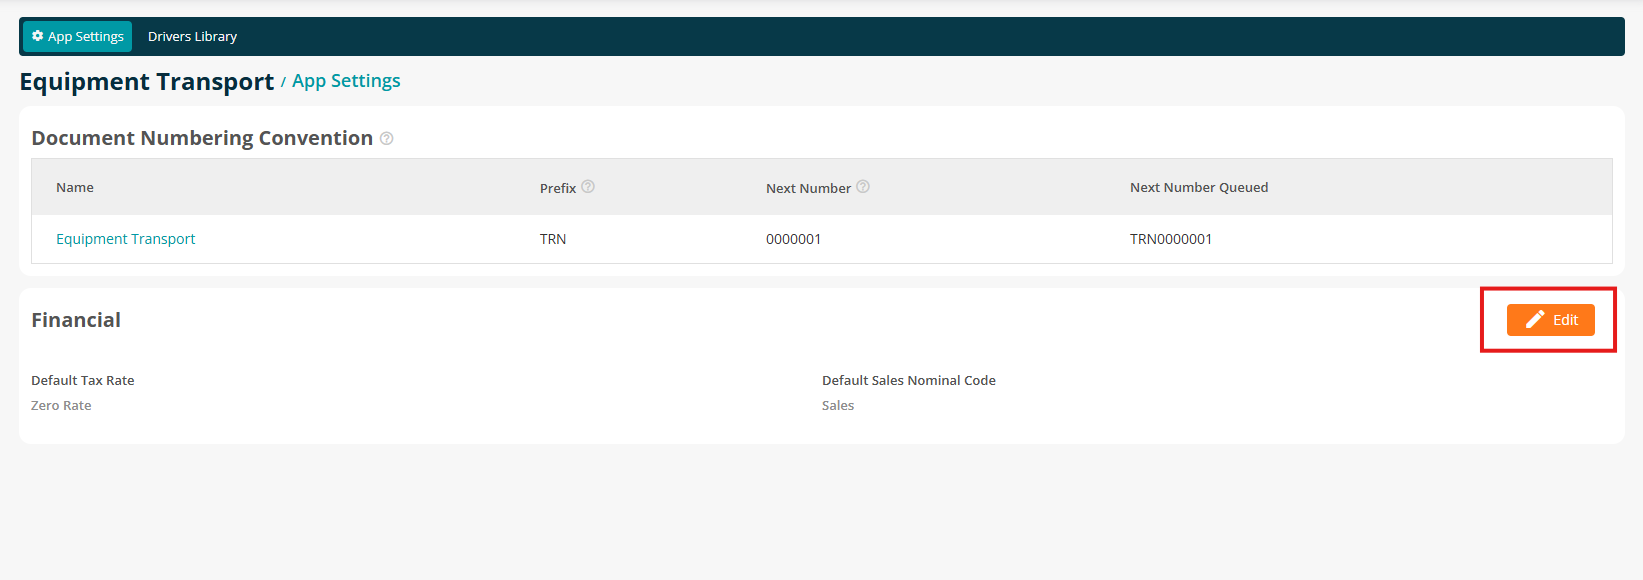
Number Conventions
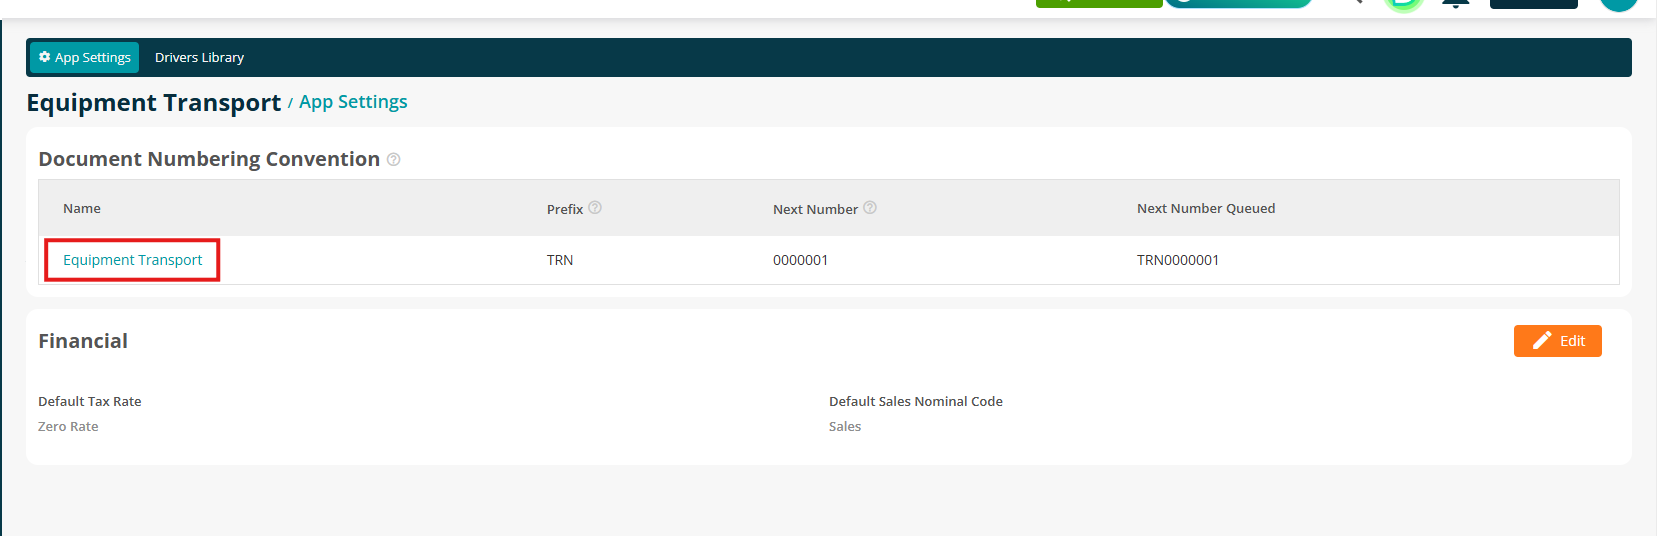
First, let’s set the Prefix and Next Number for your transport requests.
Click the Equipment Transport name.
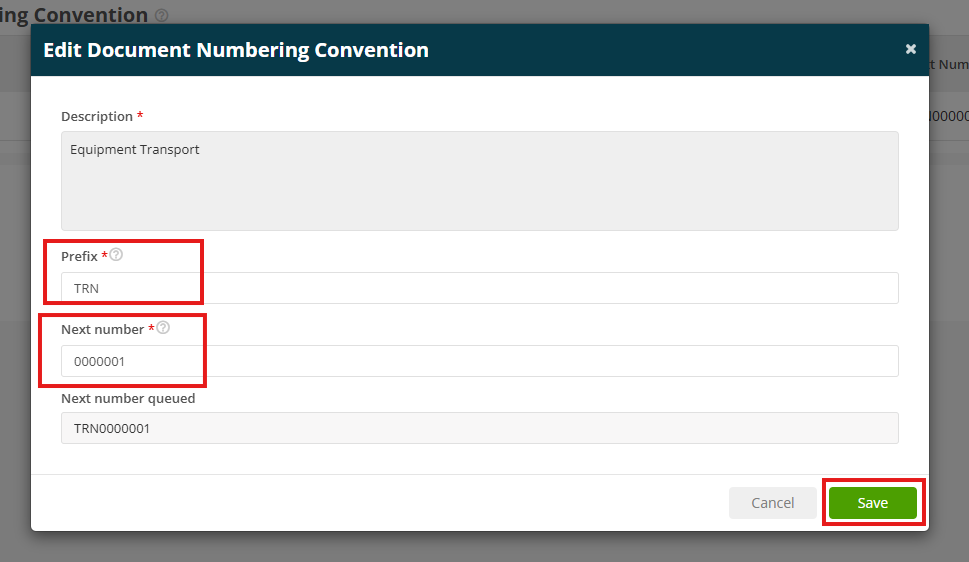
Enter your preferred Prefix and Next Number, then click Save.
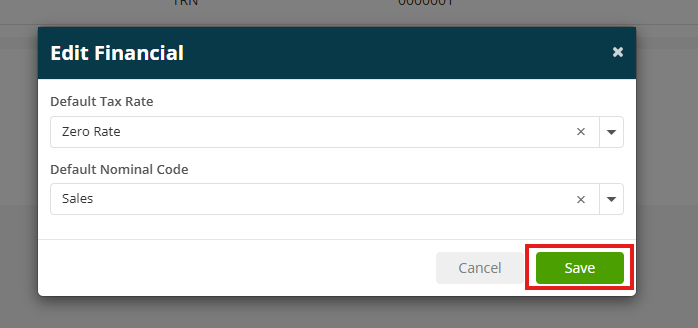
Financials
To configure your default Tax and Nominal Codes for transport requests, click the Edit icon.
Select your codes from the dropdown menus, then click Save.
Drivers Library
Click the Drivers Library tab at the top of the page to manage your driver list.
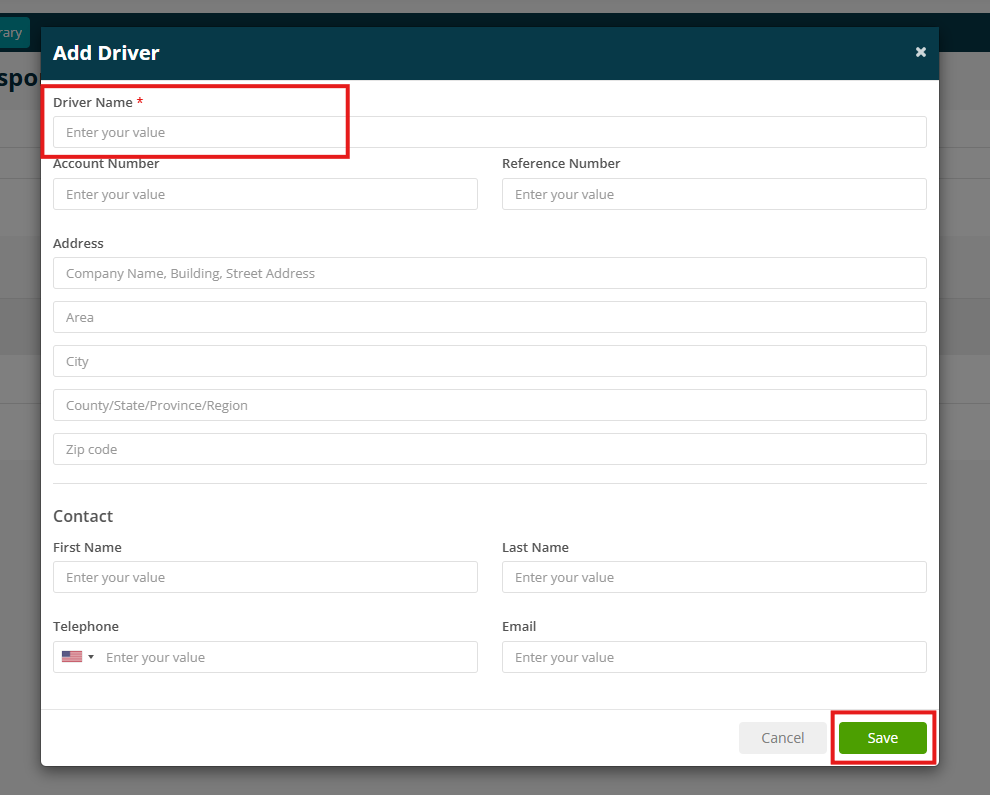
Click Add Driver to create a new driver entry

In the pop-up window, enter a Driver Name (this is the only required field). All other details are optional.
Fill in any information you need, then click Save.
Adding a transport request
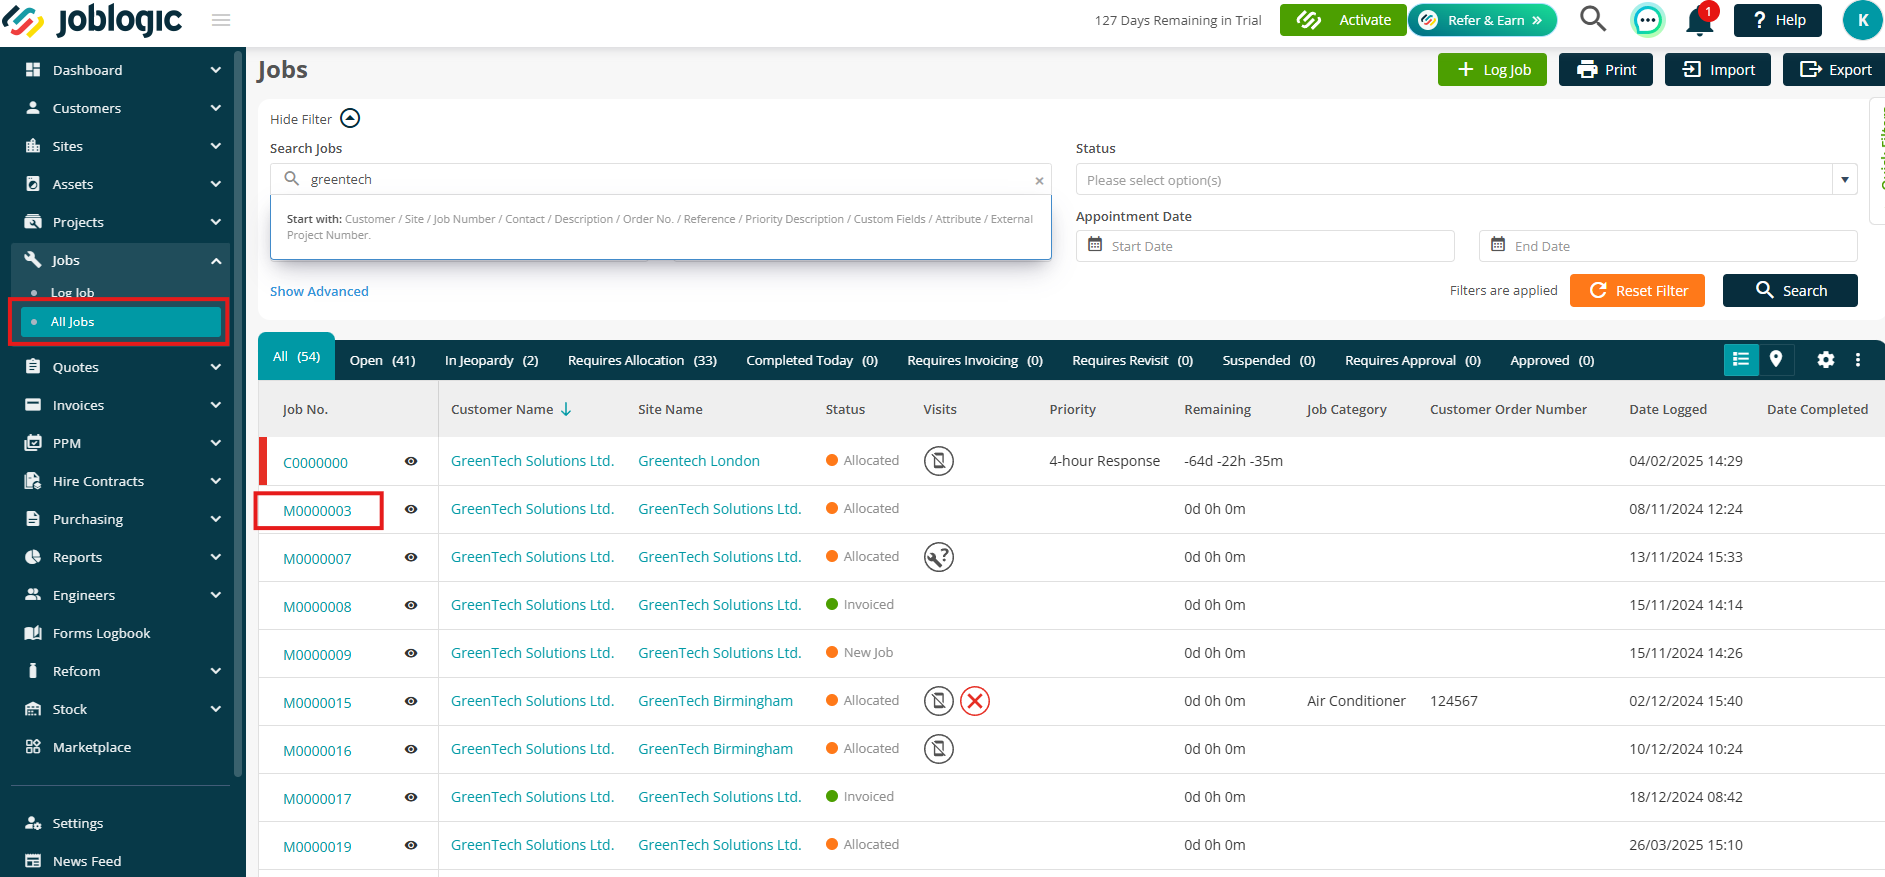
Now that your Equipment Transport settings are set up, let’s walk through adding a transport request to see how it works in action.
Navigate to Jobs > All Jobs and select the relevant job number.
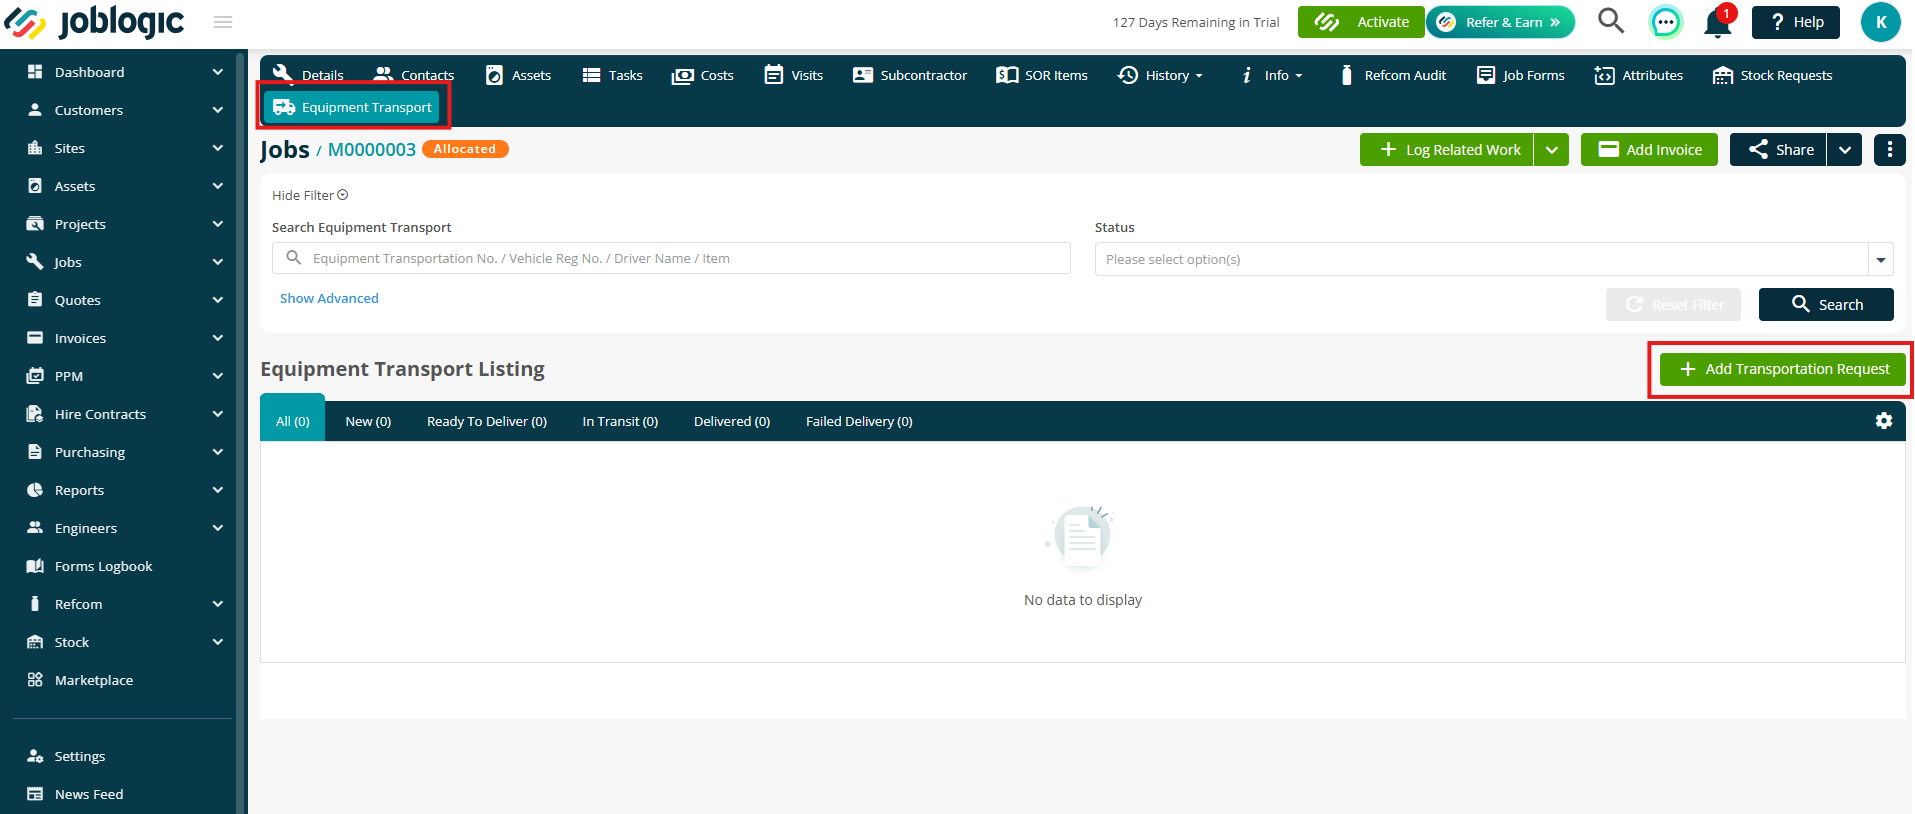
Click on the Equipment Transport tab at the top.
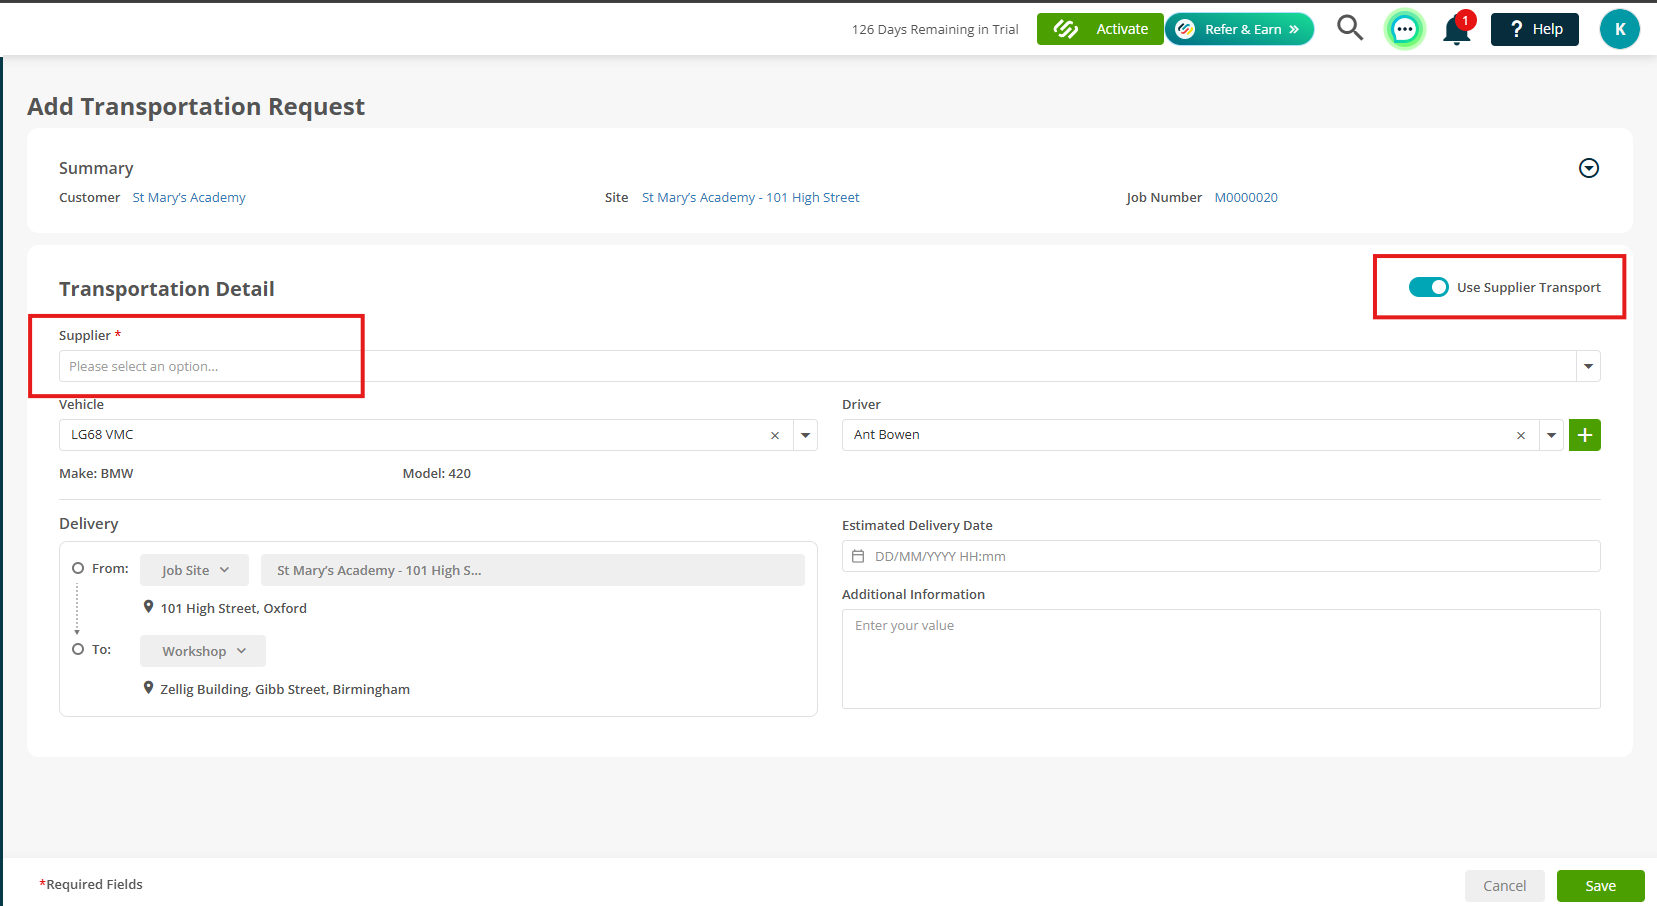
Then, click Add Transportation Request.
Here, you can select the Vehicle and Driver from the dropdown menus.
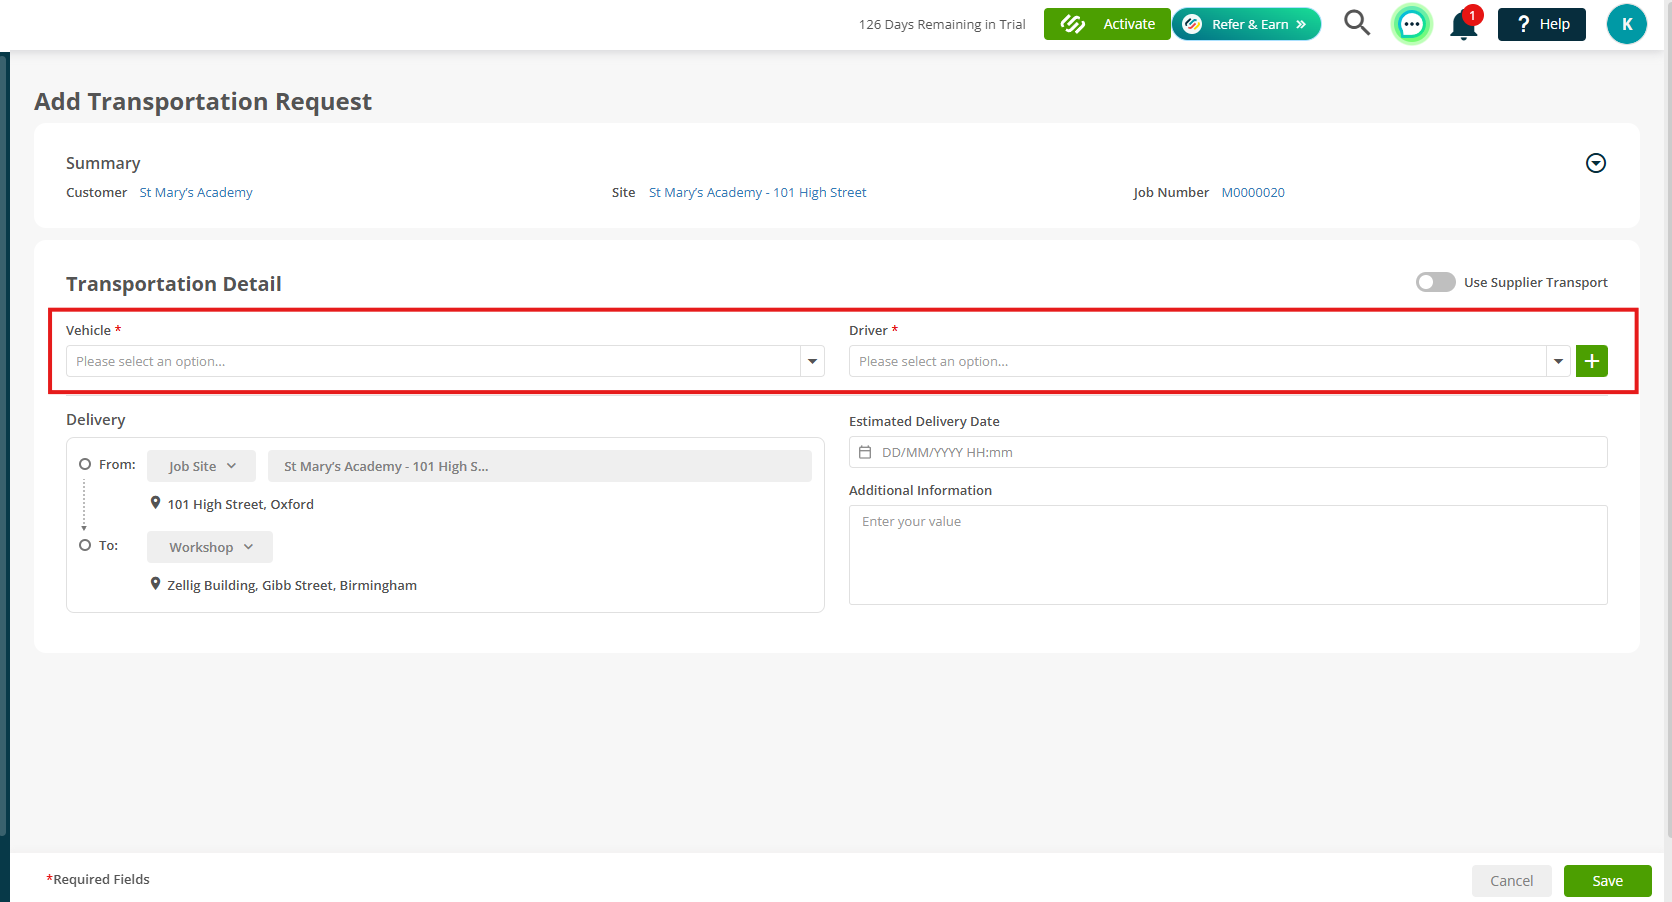
By default, the delivery section will show:
From: Job Site → To: Workshop
You can switch these if you’re making a return delivery.
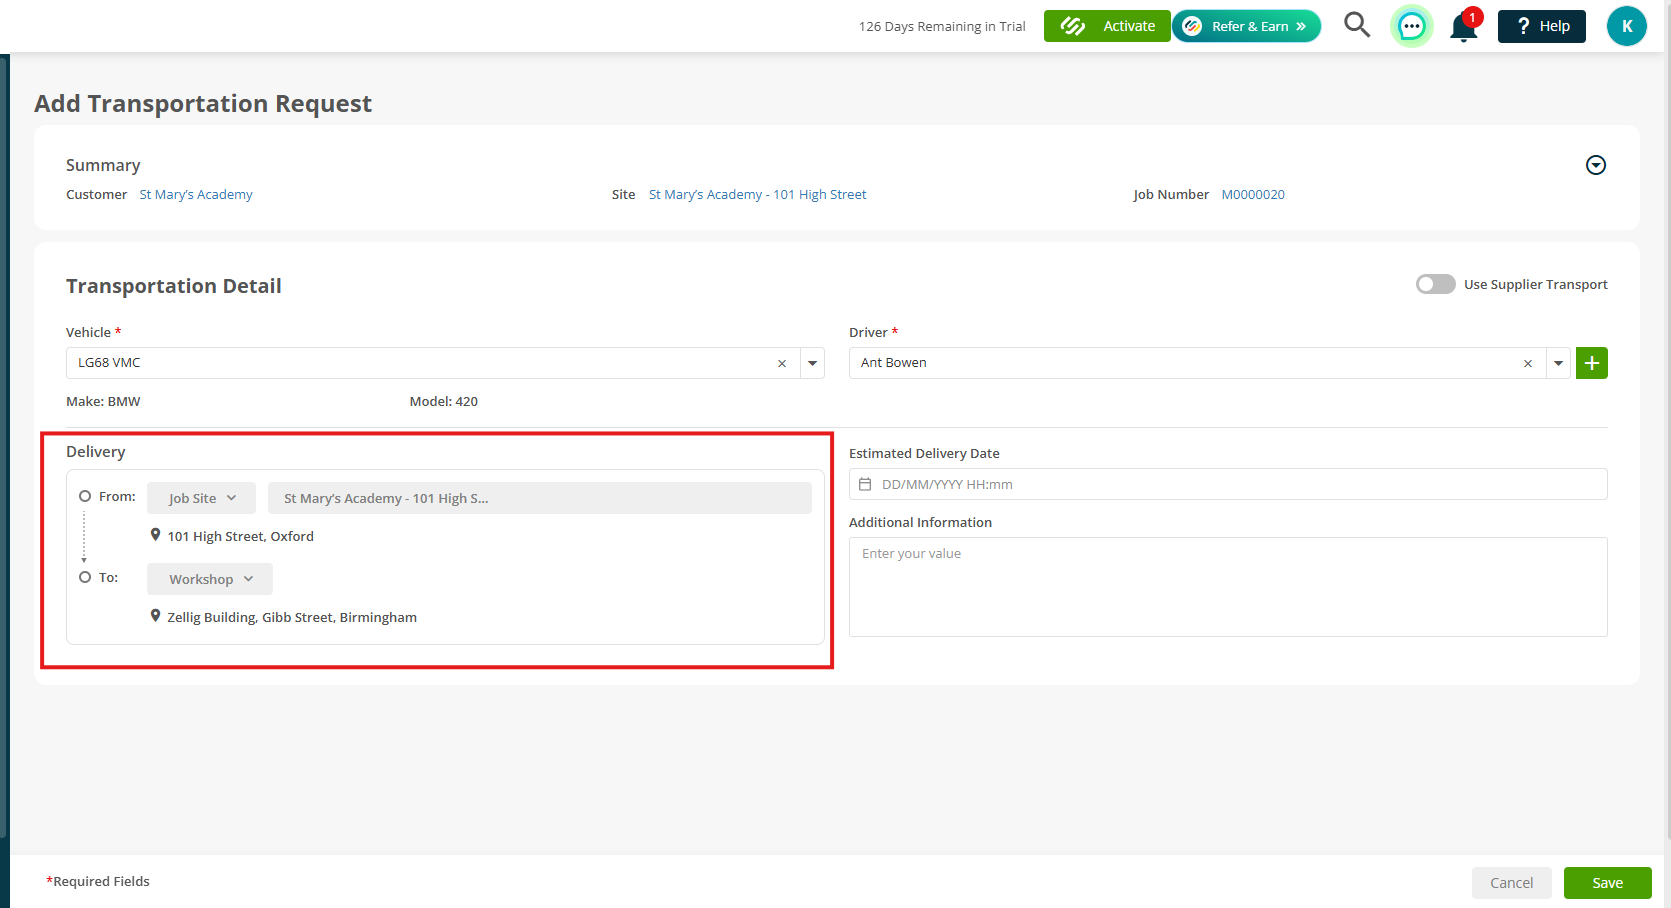
📌 Note: The Workshop address is pulled from your setup in Settings > Company Setup.
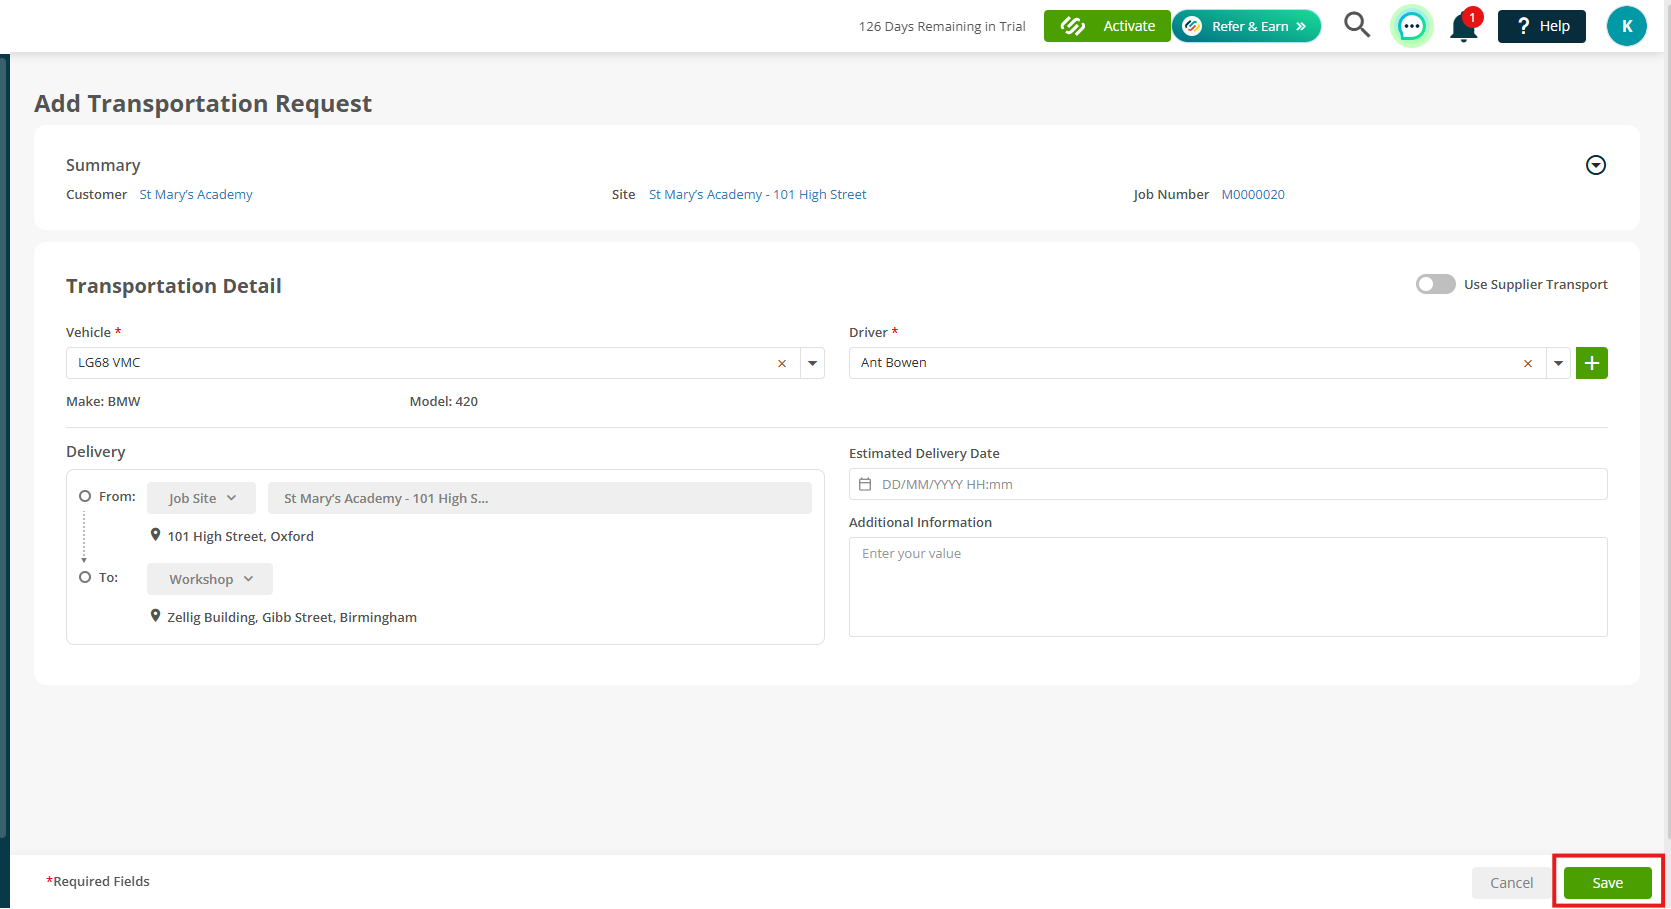
Once your details are filled in, click Save to log the request.
Supplier Transport
Alternatively, if you're using an external service, toggle the Use Supplier Transport option in the top right.
From there, you can choose a Supplier to handle the transport instead of one of your internal drivers.
Adding items
Once your transport request has been saved, head to the Items tab.
Click Add Items to begin.
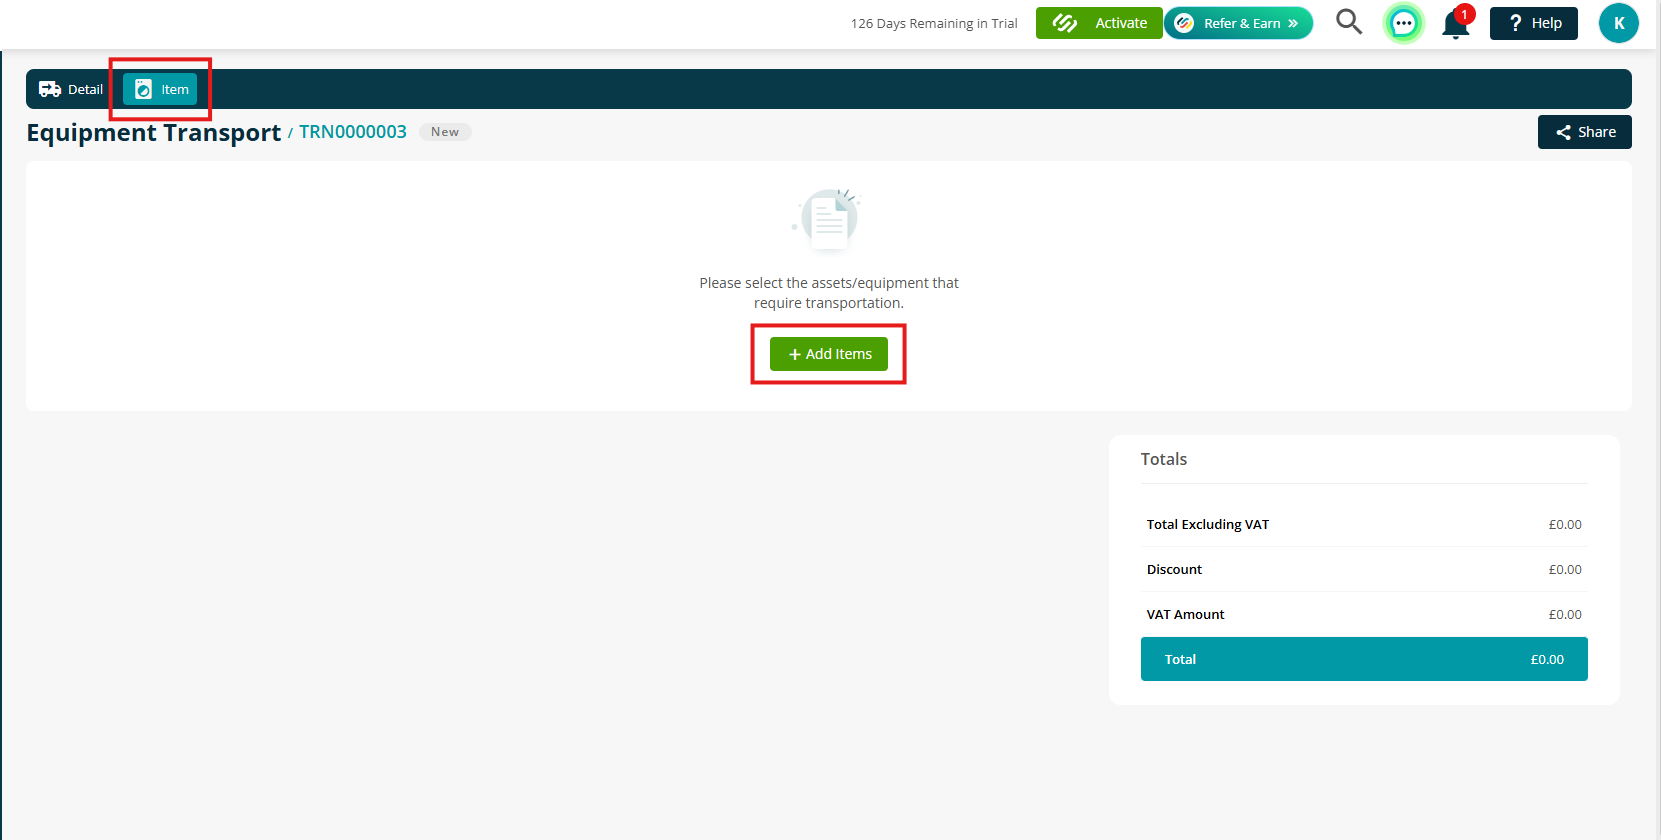
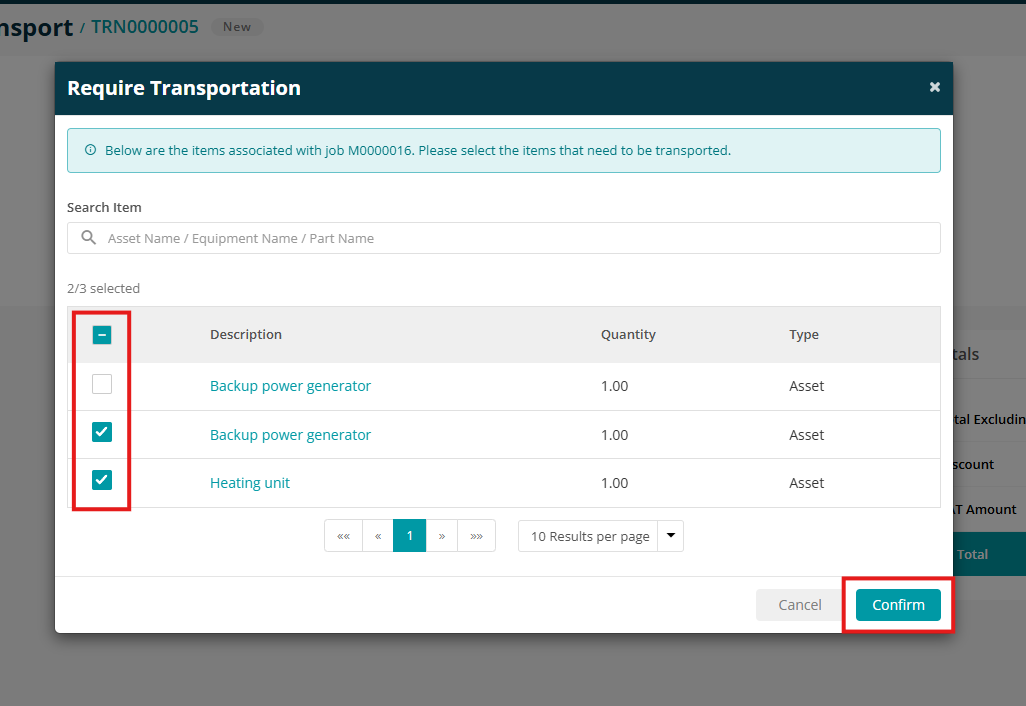
You’ll see a list of assets, parts, or equipment associated with the job number.
Tick the item(s) that require transportation and click Confirm.
Adding Transport Charges
You can now choose how to apply charges:
Per Item Charge:
Click on an item to enter a Transport Charge, including any applicable discount.
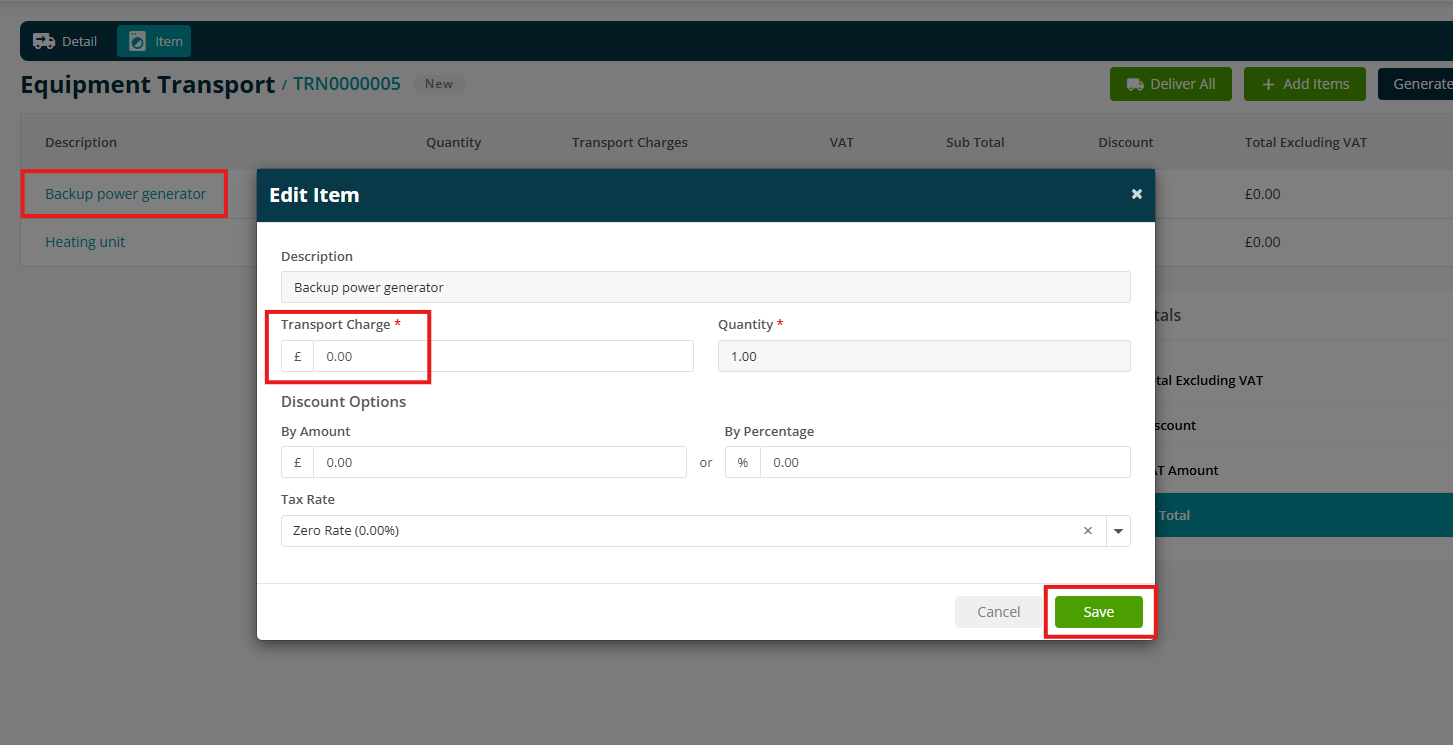
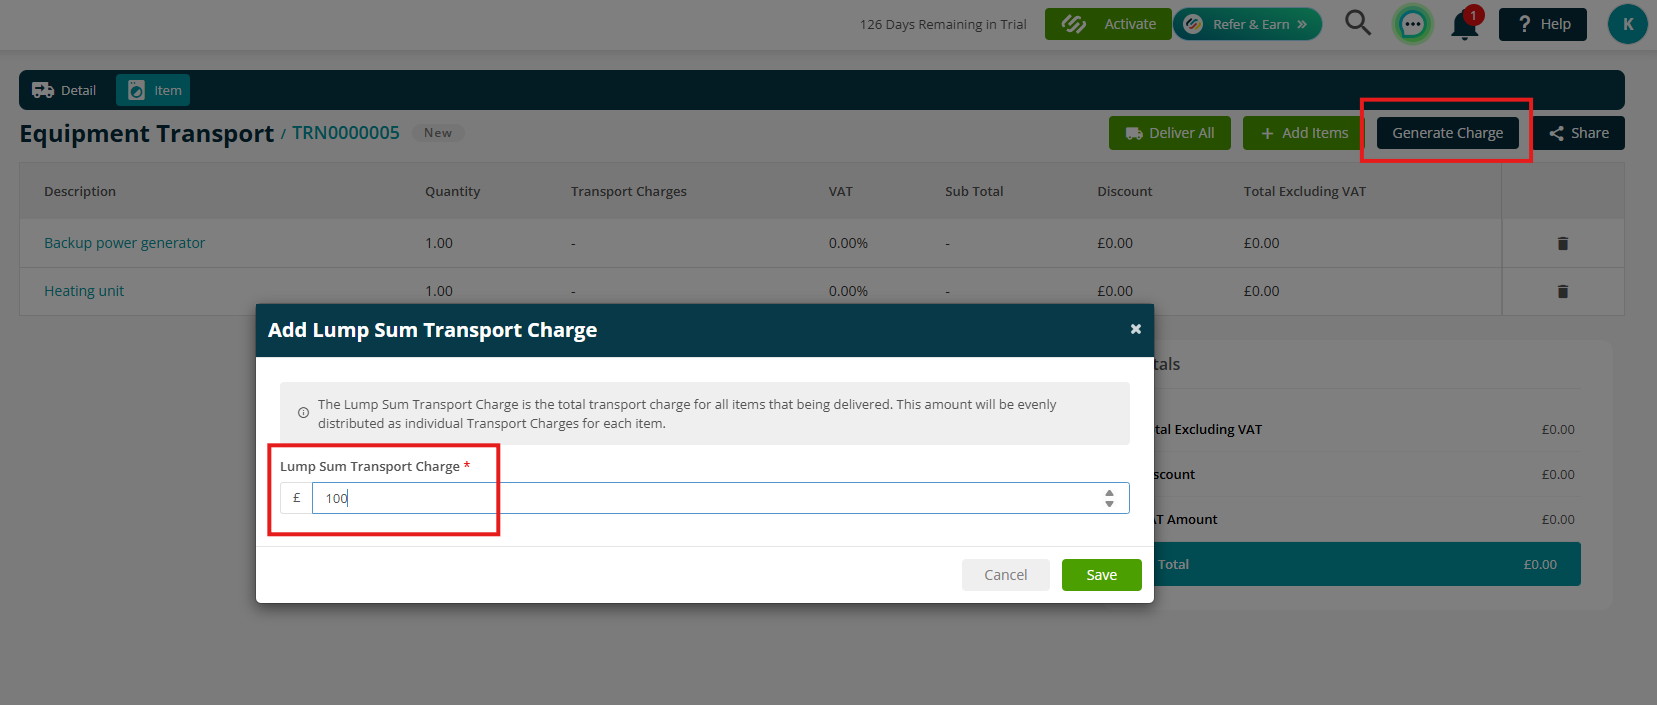
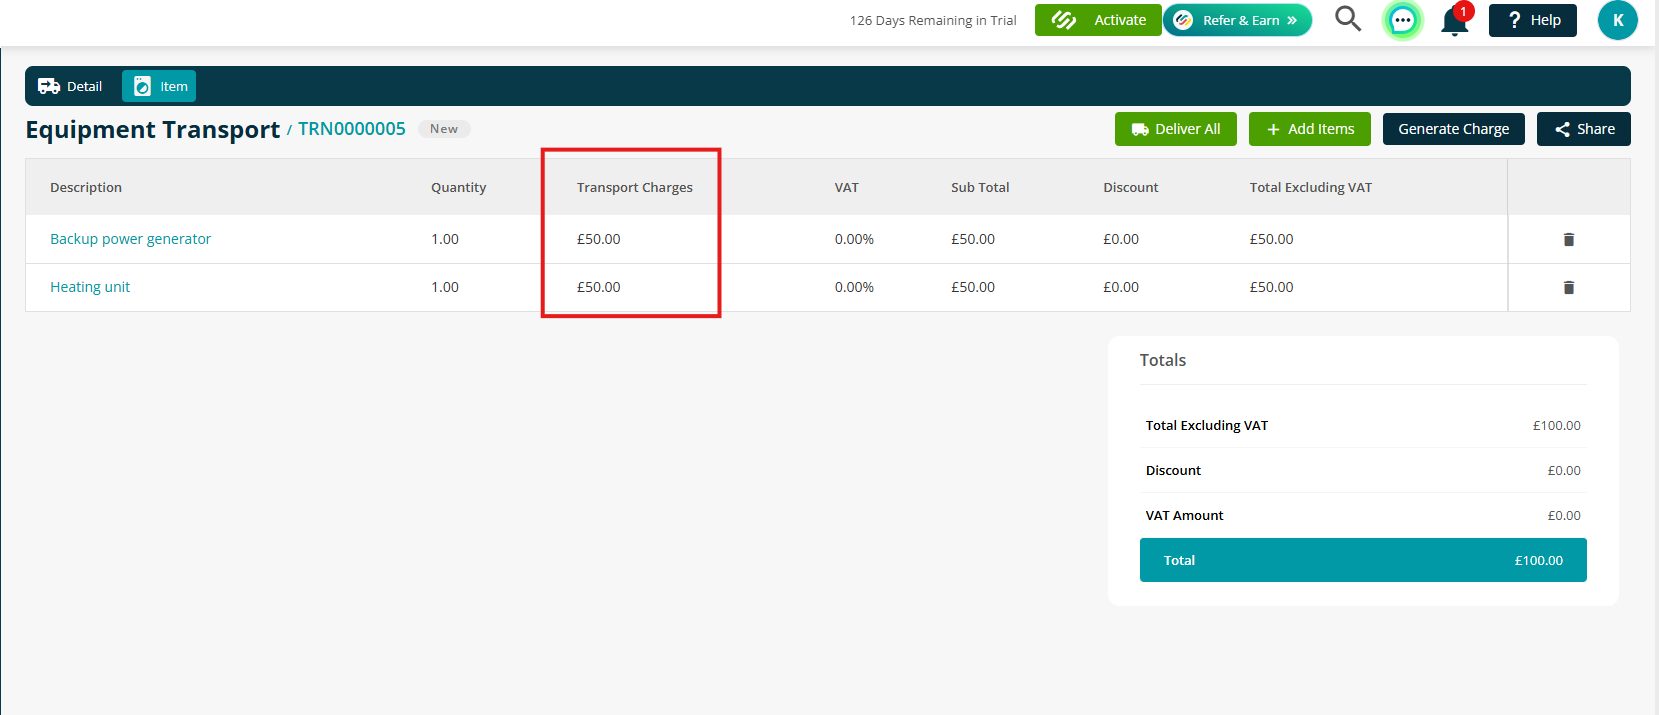
Lump Sum Charge:
Click Generate Charge in the top right to create one overall charge, which will then be split evenly across all items.
Delivery and Job Costing
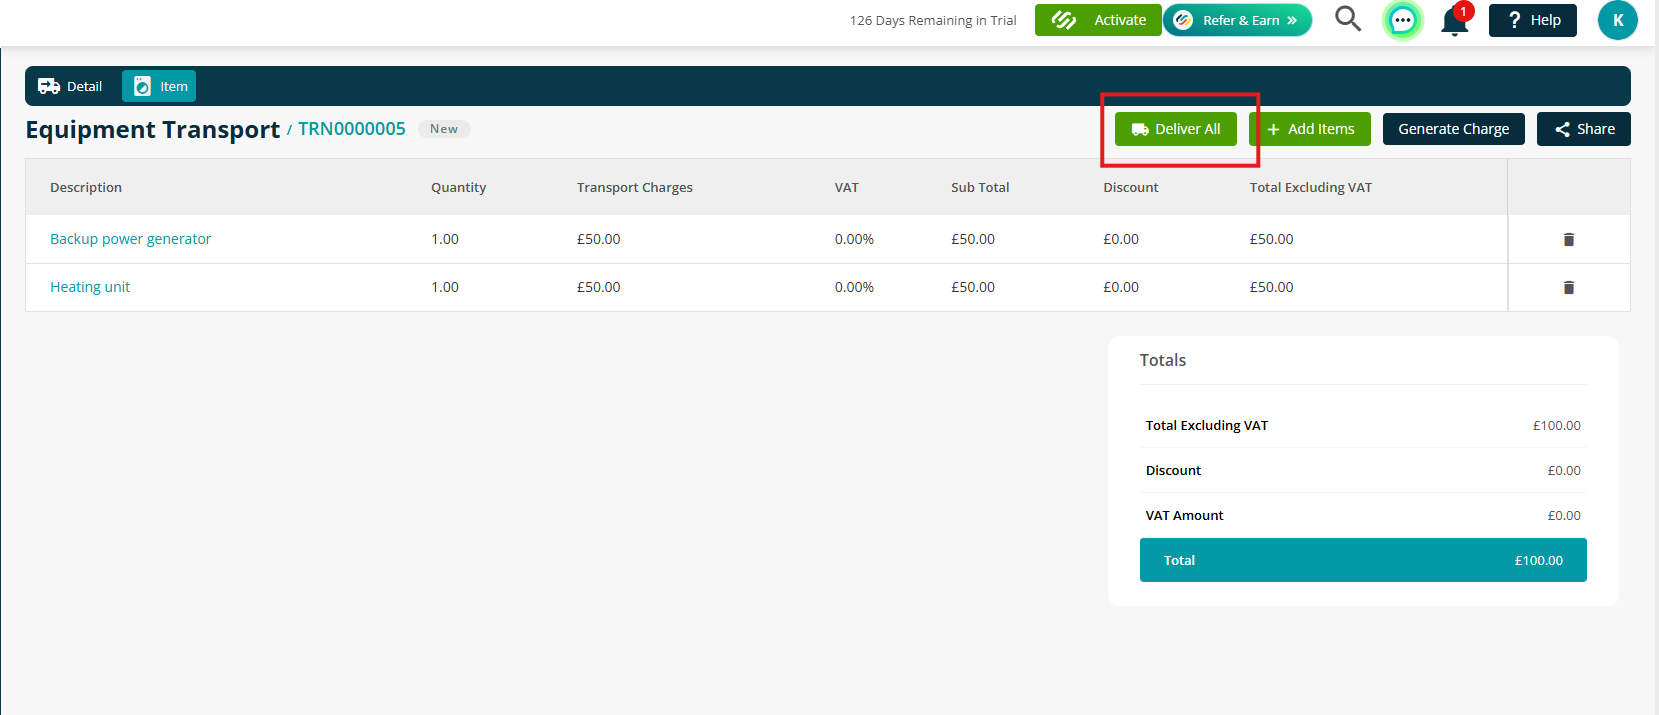
Once the items have been delivered, click Deliver All.
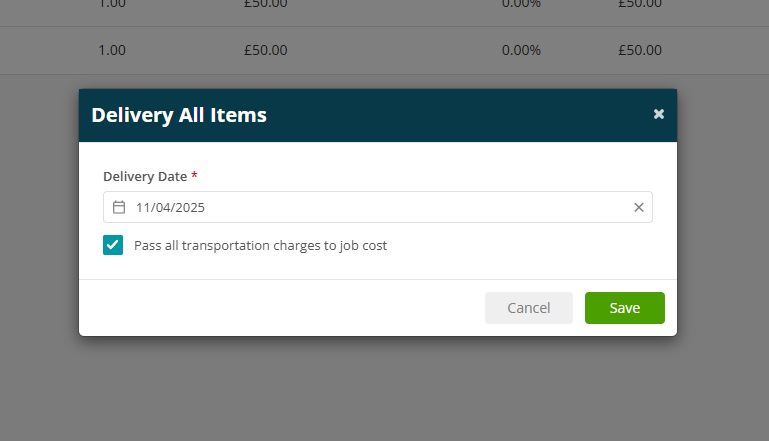
The Delivery Date will default to today’s date. You can change this if needed, or untick the box to skip passing costs at this stage. Then click Save.
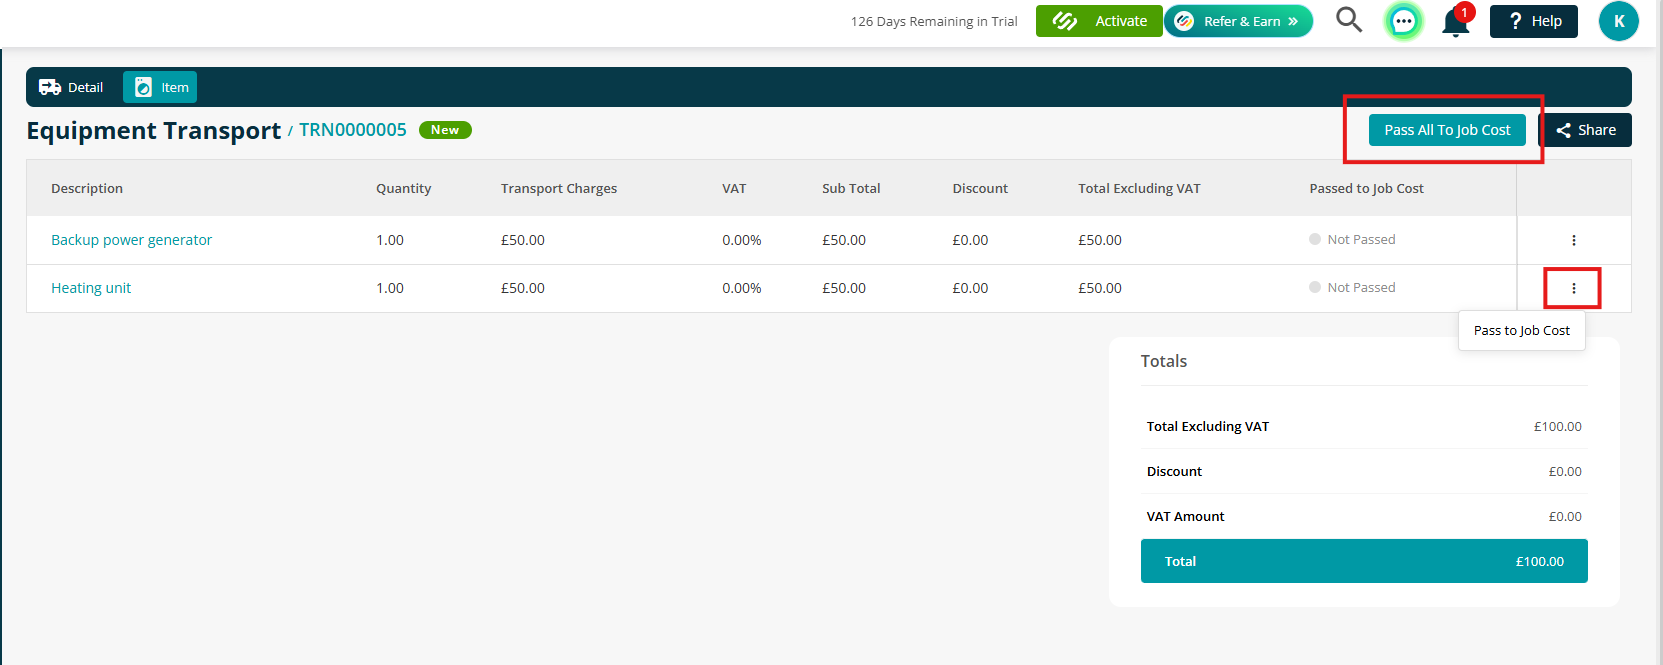
To manually pass the transport costs to Job Costs, either click Pass All to Job Cost at the top right or use the three dots next to individual items.
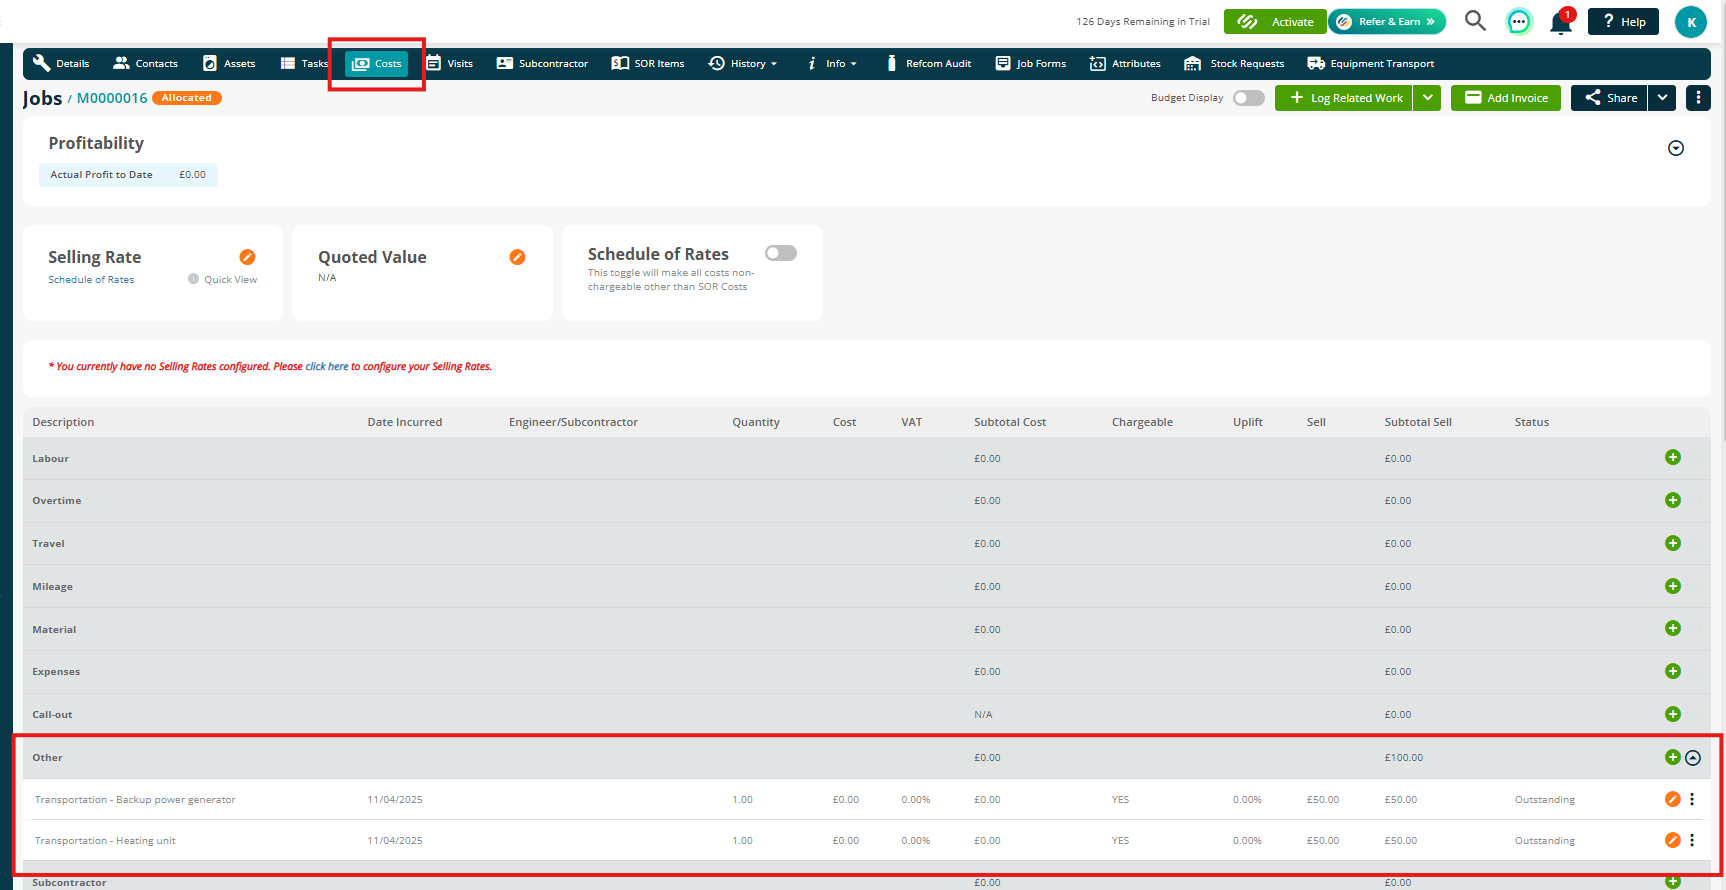
To review your charges, go to the Costs tab on the job. Transport charges will appear under the Other header.
Further Support
For further information or assistance with the above, contact our Support Team on 0800 326 5561 or email support@joblogic.com. Alternatively, our Customer Success Management team can be reached by emailing customersuccess@joblogic.com
Publishing Details
This document was written and produced by Joblogic’s Technical Writing team and was last updated on the date specified above. Be aware that the information provided may be subject to change following further updates on the matter becoming available. Additionally, details within the guide may vary depending on your Joblogic account’s user permissions.