- 11 Dec 2024
- 2 Minutes to read
- Print
- PDF
Non-Job Expense Scanner
- Updated on 11 Dec 2024
- 2 Minutes to read
- Print
- PDF
Introduction
The Joblogic Marketplace provides a useful ‘Non-Job Expense Scanner’ add on app which when subscribed to will allow your engineers to record expenses much more easily. The system already allows for the manual input of non-job expense details but this add on app makes things a lot easier as all engineer’s will need to do is scan their receipts and the details will prepopulate for them within the mobile application (app).
The purpose of this add on app is therefore to increase engineer efficiency, saving engineer’s time and work resource.
This user guide will detail how to use the ‘Non-Job Expense Scanner’ Joblogic Marketplace app via the Joblogic mobile app.
Adding Non-Job Expenses via the Scanner
In order to add a non-job expense via the scanner you will firstly need to have your expense item’s receipt to hand.
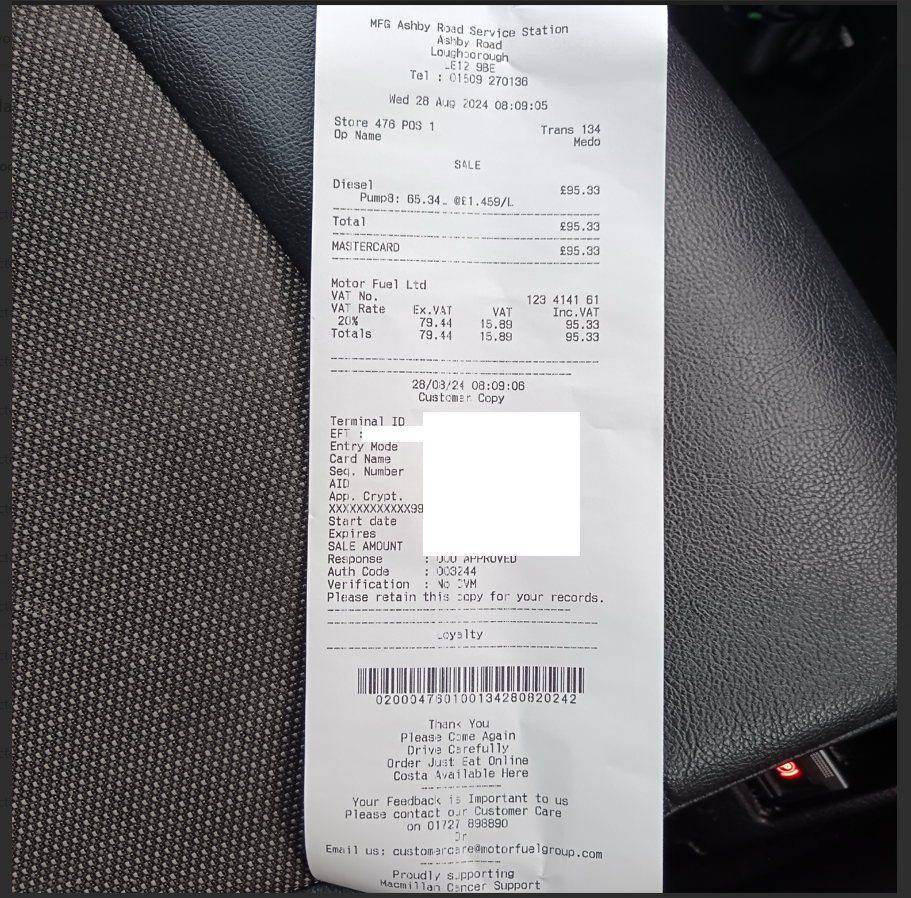
Once the receipt has been obtained access your Joblogic mobile app.
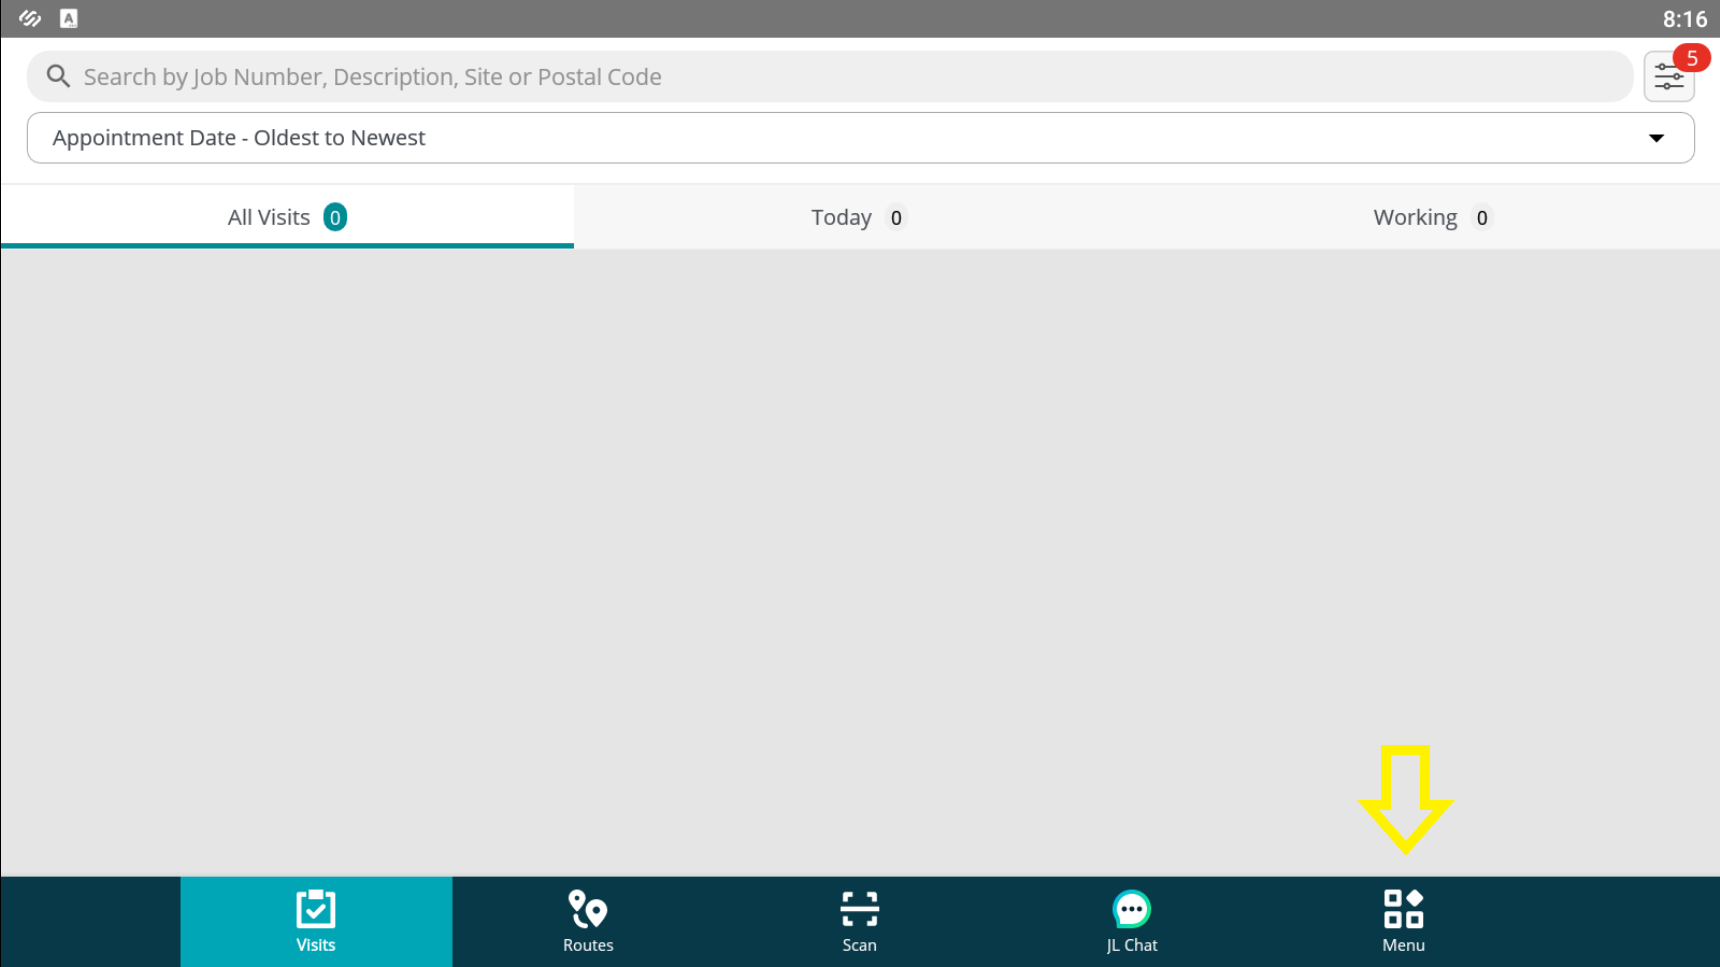
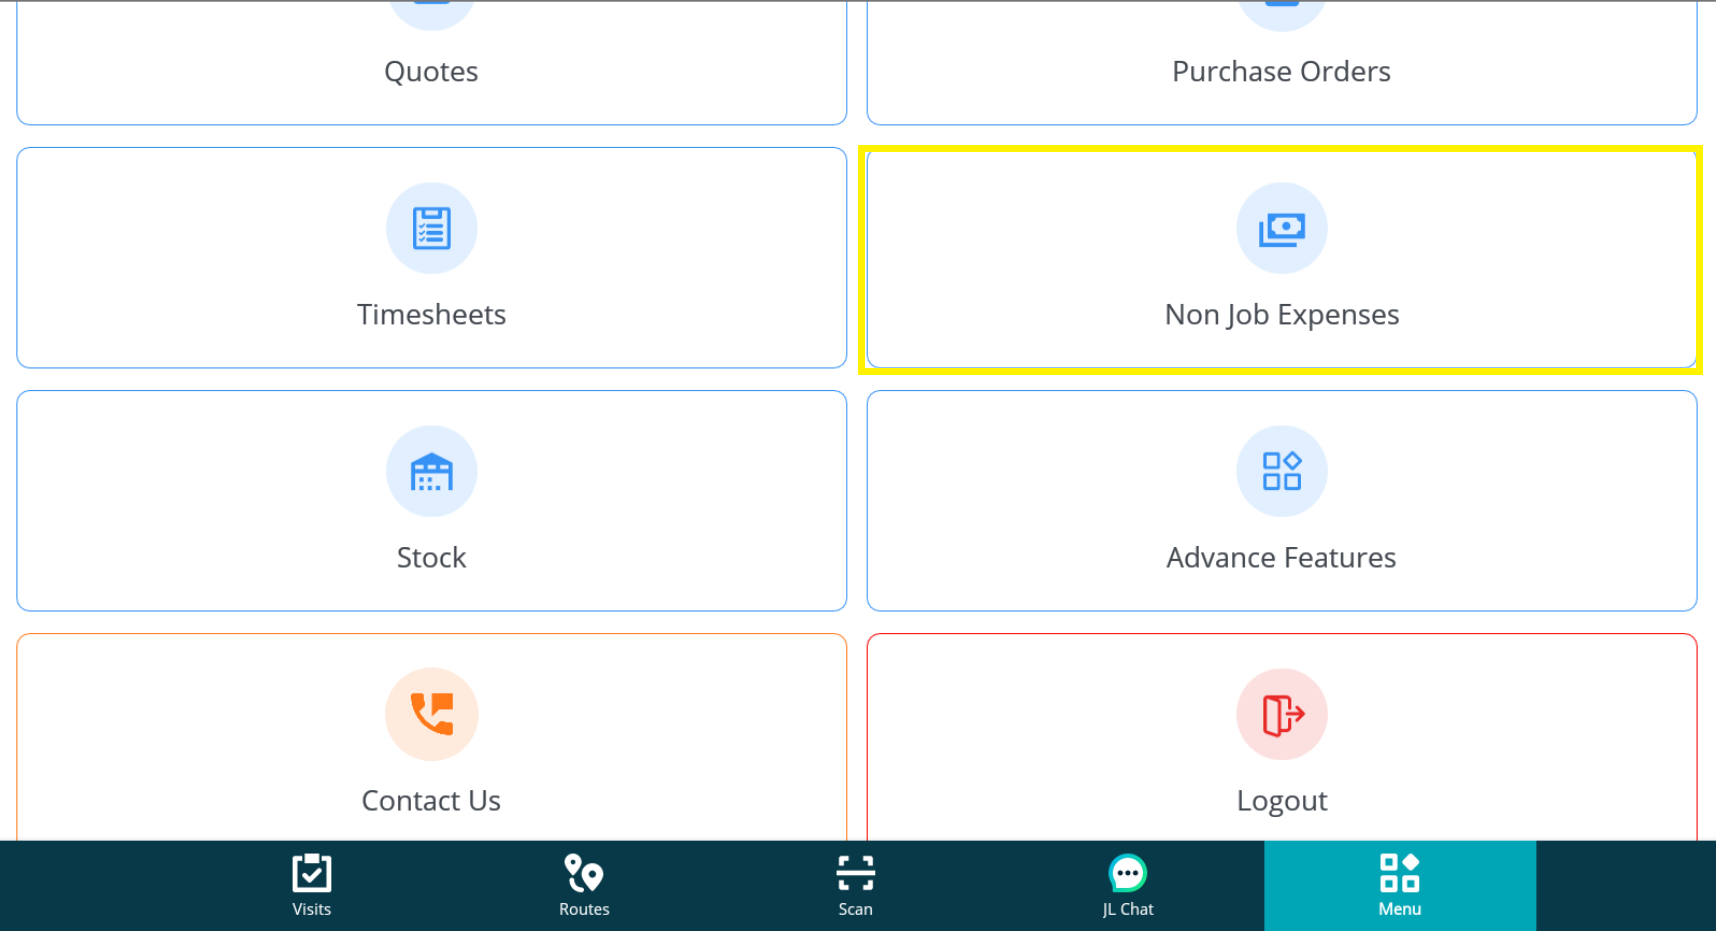
From the visits page select the ‘Menu’ option.
Within the menu page scroll down and select the ‘Non Job Expenses’ option.
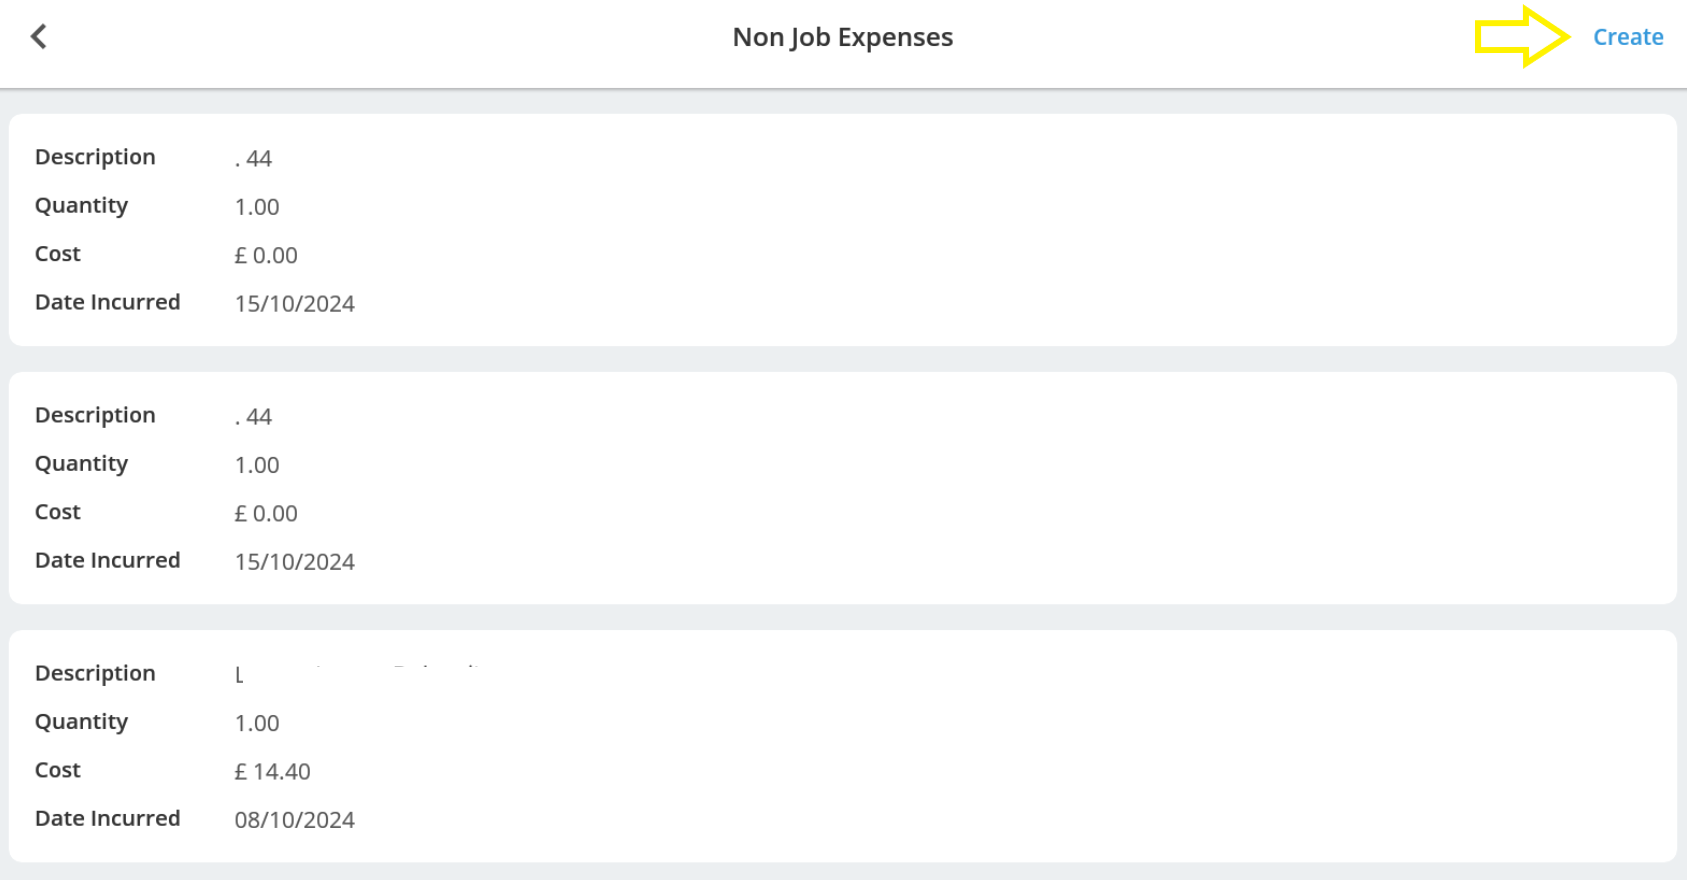
Select the ‘Create’ button towards the top right corner of the page.
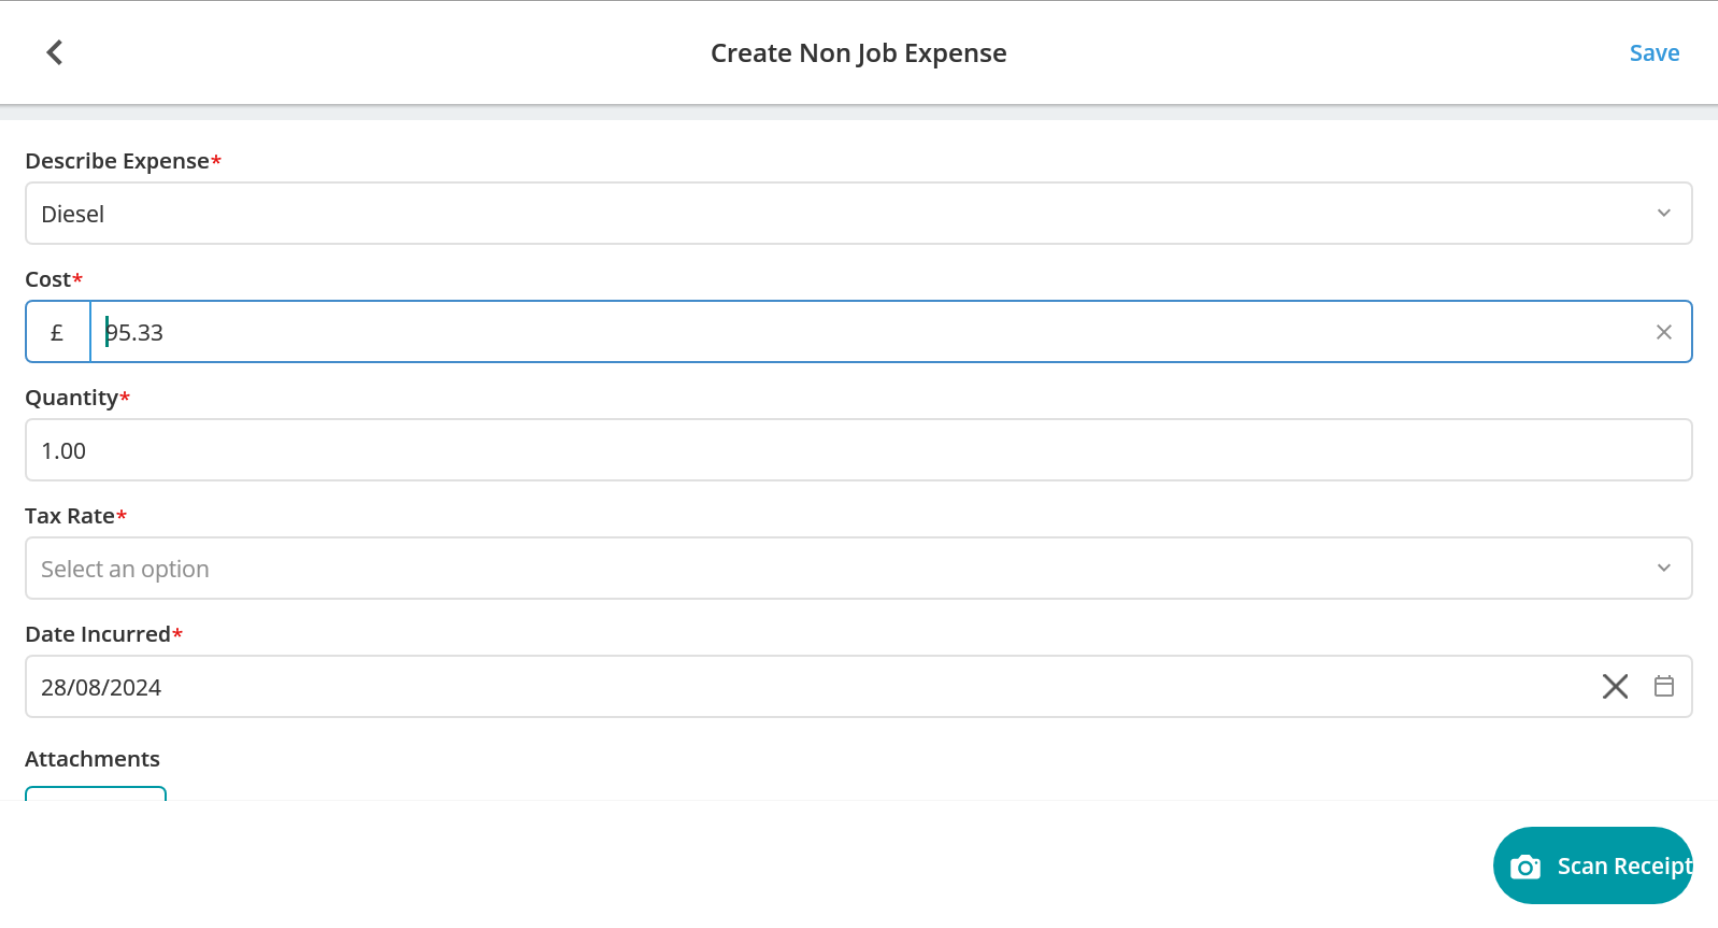
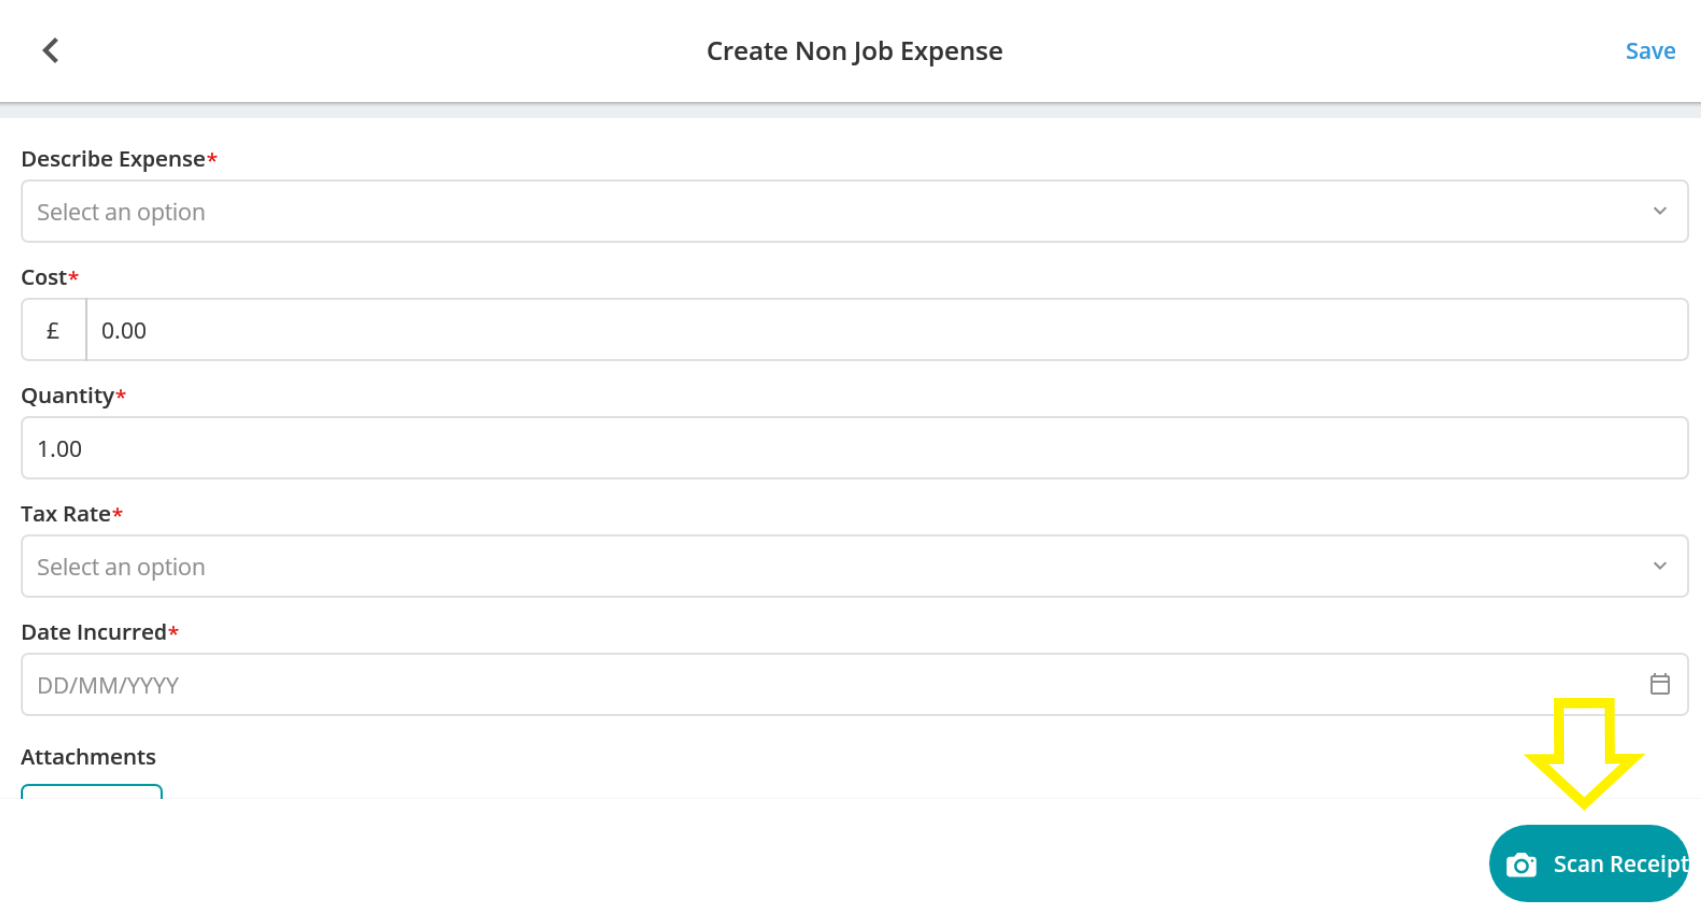
The ‘Create Non Job Expense’ page offers fields to manually upload the expense details and attach an image of the receipt but the Marketplace app provides an additional ‘Scan Receipt’ option.
Select the ‘Scan Receipt’ button.
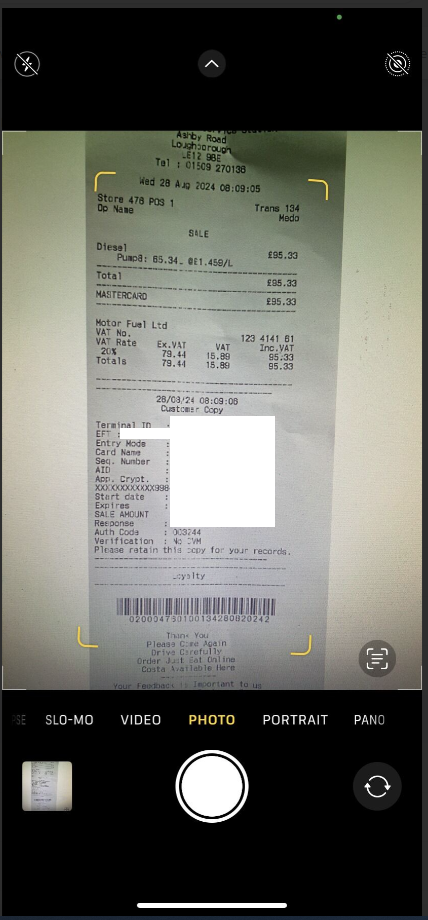
The mobile phone’s camera will open whereby the physical receipt can be scanned.
Note: Depending on the mobile phone being used, your camera may prompt you with a pop up(s) requesting permission to access the camera.
Position the receipt into the frame of the camera and the app will pick out the details of the receipt.
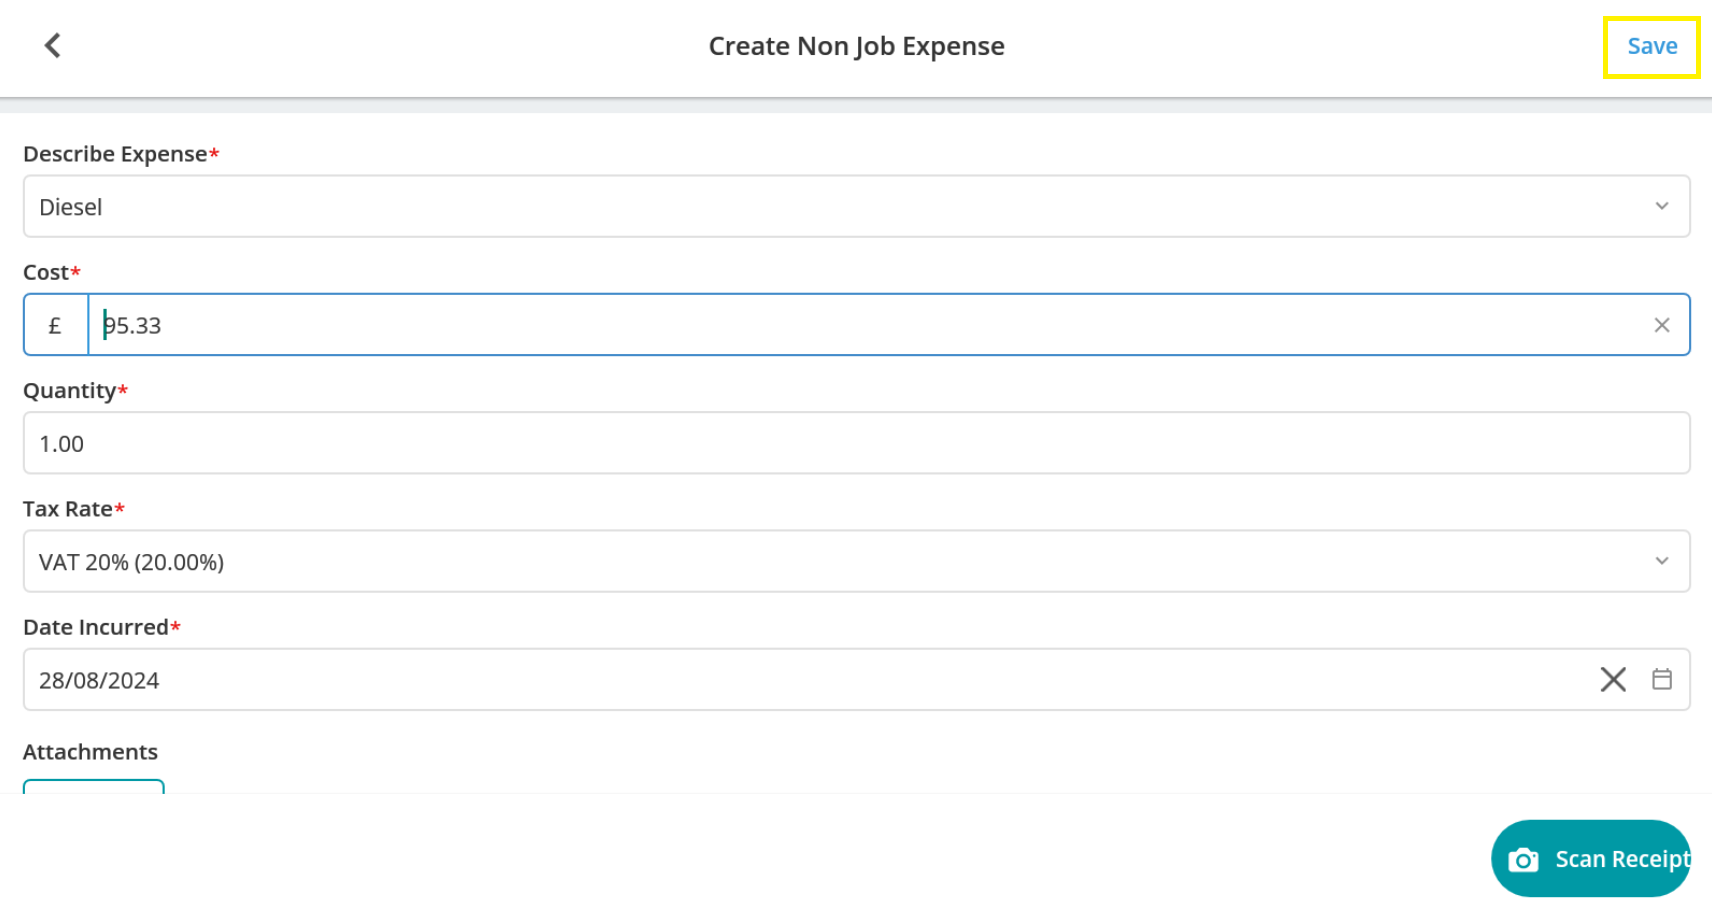
The receipt’s details will then automatically populate within the ‘Create Non Job Expense’ area of the mobile app for you.
Note: The ‘Describe Expense' field populates based on key details picked up within the receipt’s item lines.
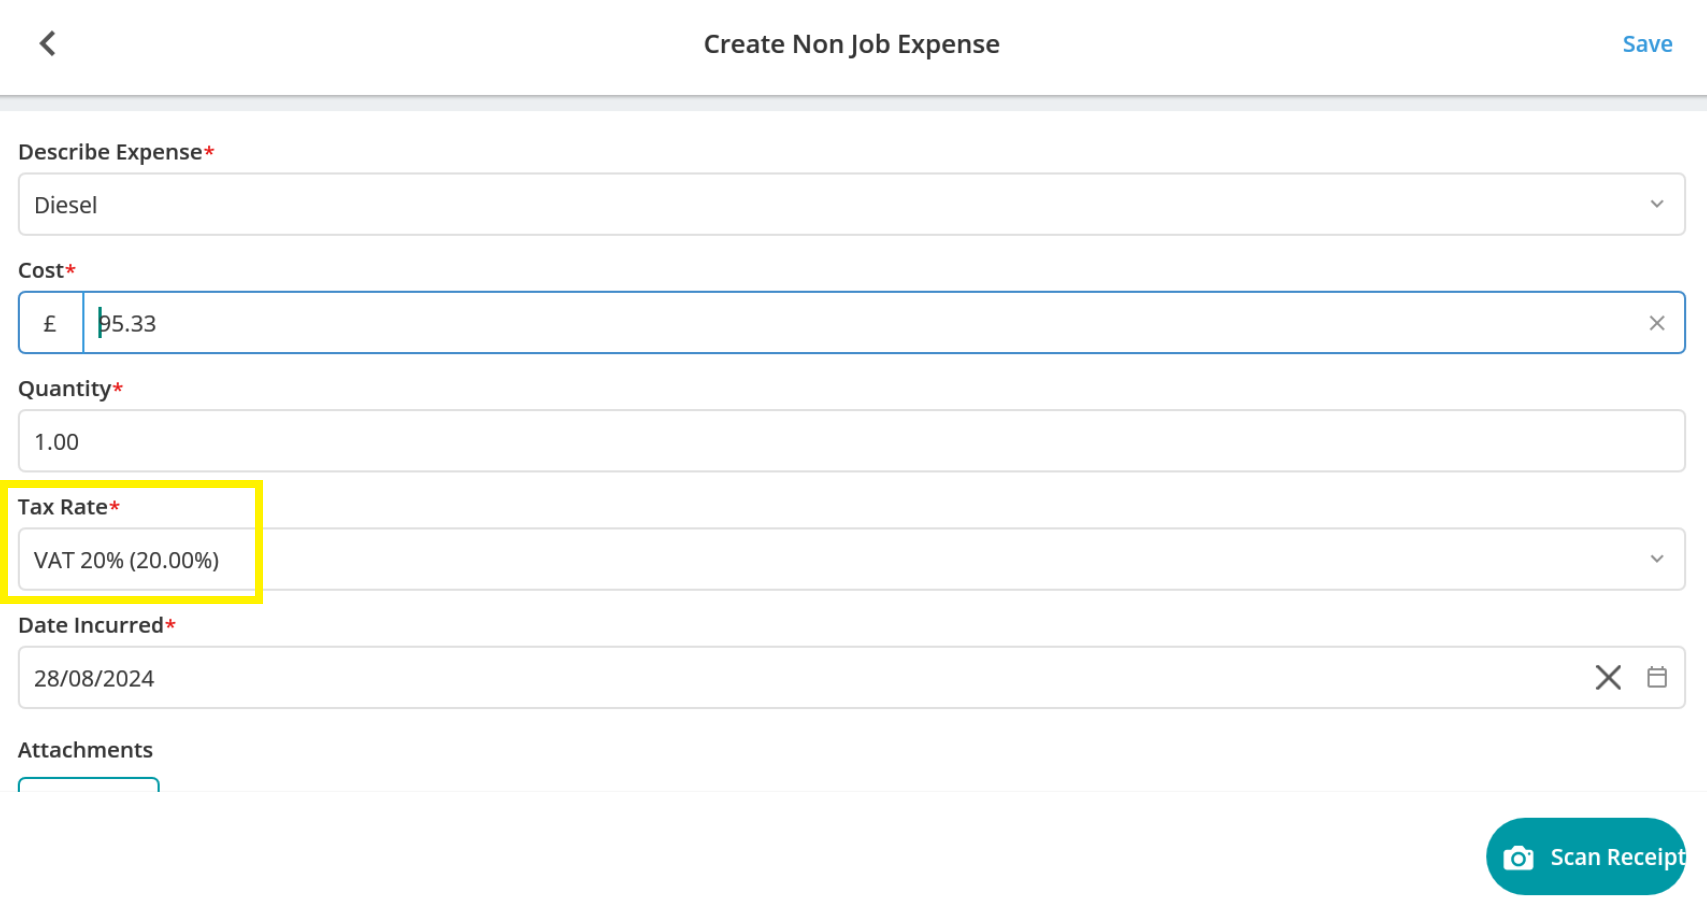
All details will be populated except for the ‘Tax Rate’ field which needs to be entered manually. The field will provide a drop-down option to select the tax rate from a list of those set up in your back-office. They can be searched via the search tool if there are a large number of rates to choose from.
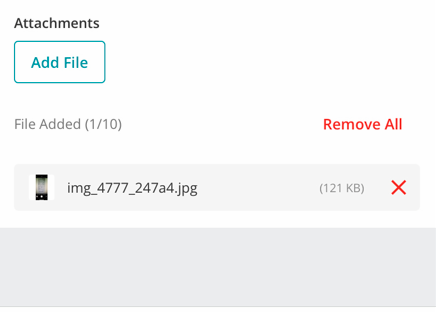
The scanned image will also be uploaded to the mobile app as an attachment against the created expense.
Note: If required, the populated details can still be manually amended if any are not quite right.
Once you are happy with the expense’s details, select the ‘Save’ option.
The expense will be logged within your app’s ‘Non Job Expenses’ area.
Further Support
For further information or assistance with the above, contact our Support Team on 0800 326 5561 or email support@joblogic.com. Alternatively, our Customer Success Management team can be reached by emailing customersuccess@joblogic.com
Publishing Details
This document was written and produced by Joblogic’s Technical Writing team and was last updated on the date stated above. Be aware that the information provided may be subject to change following further updates on the matter becoming available or new releases within the system. Additionally, details within the guide may vary depending on your Joblogic account’s user permissions and settings or the electronic device being used.


