Introduction
A Goods Received Note (GRN) can be created when receiving stock items that were ordered on a Purchase Order.
This guide will help you to understand and set up your Goods Received Notes.
Set Up
Enable setting
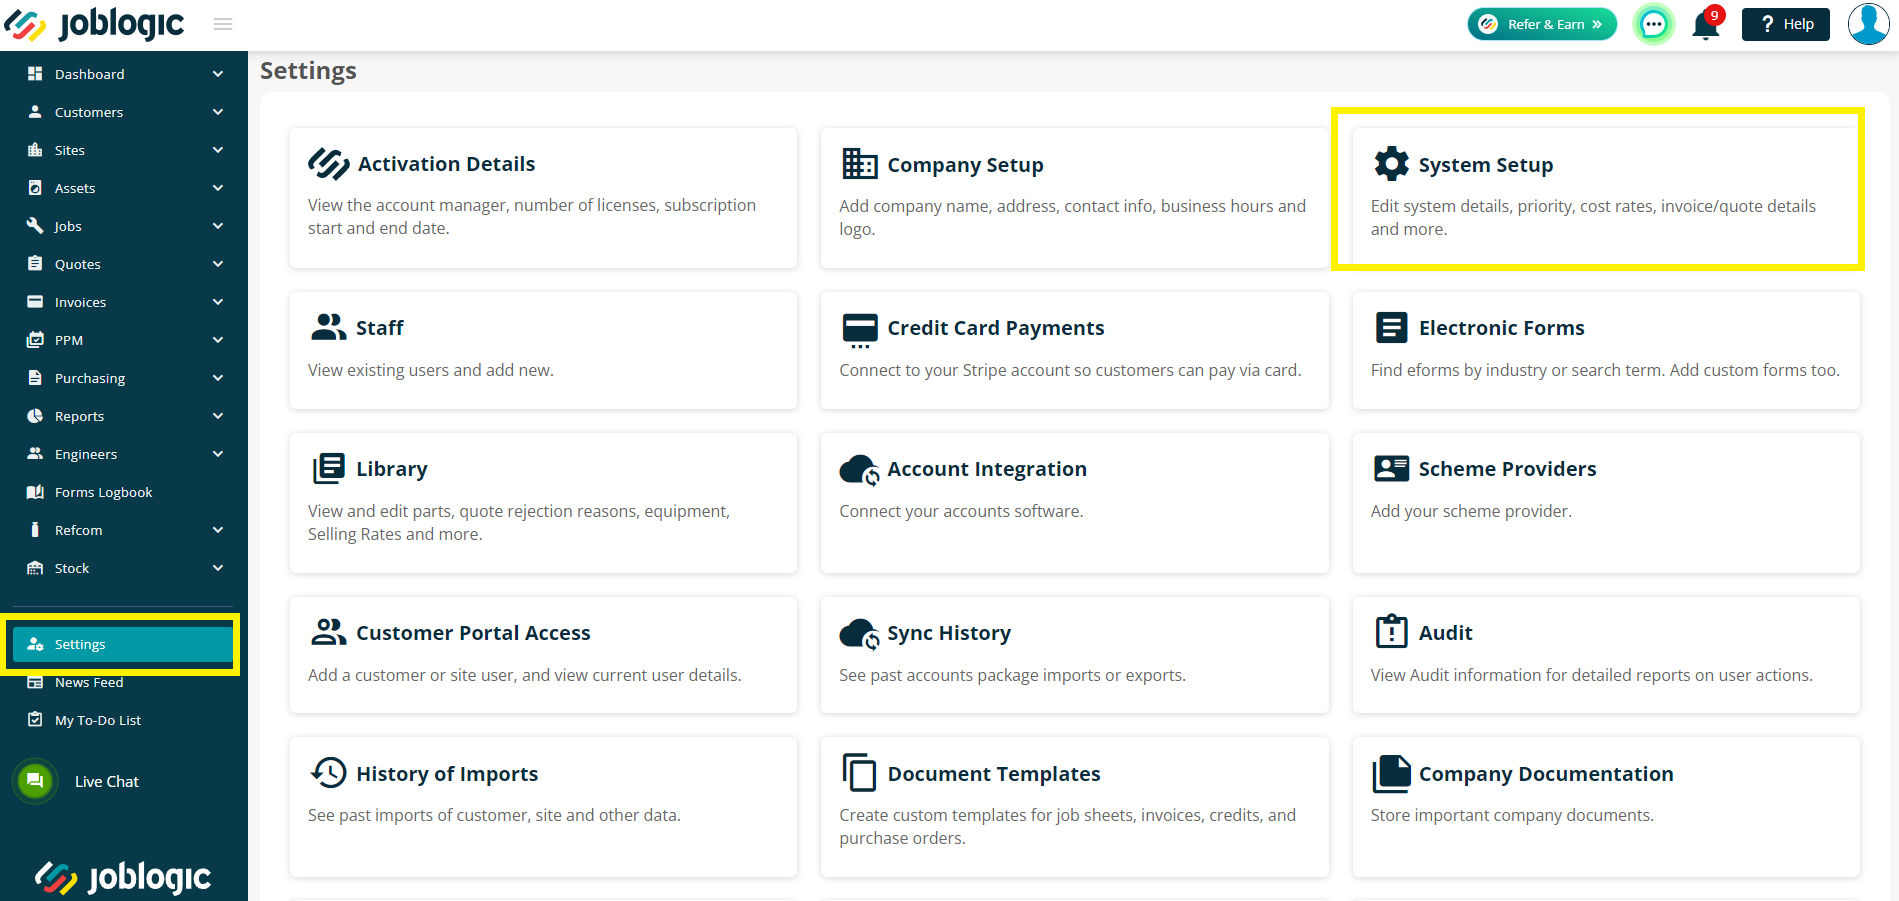
To turn on this setting, go to Settings > System Setup.
Scroll to find the Goods Received Notes and tick Enable.
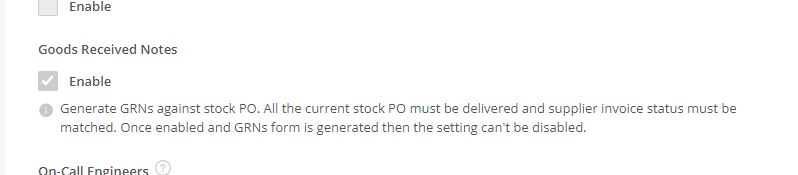
You will need to make sure that all current Stock Purchase Orders are marked as Delivered and the Supplier Invoice status is Matched.
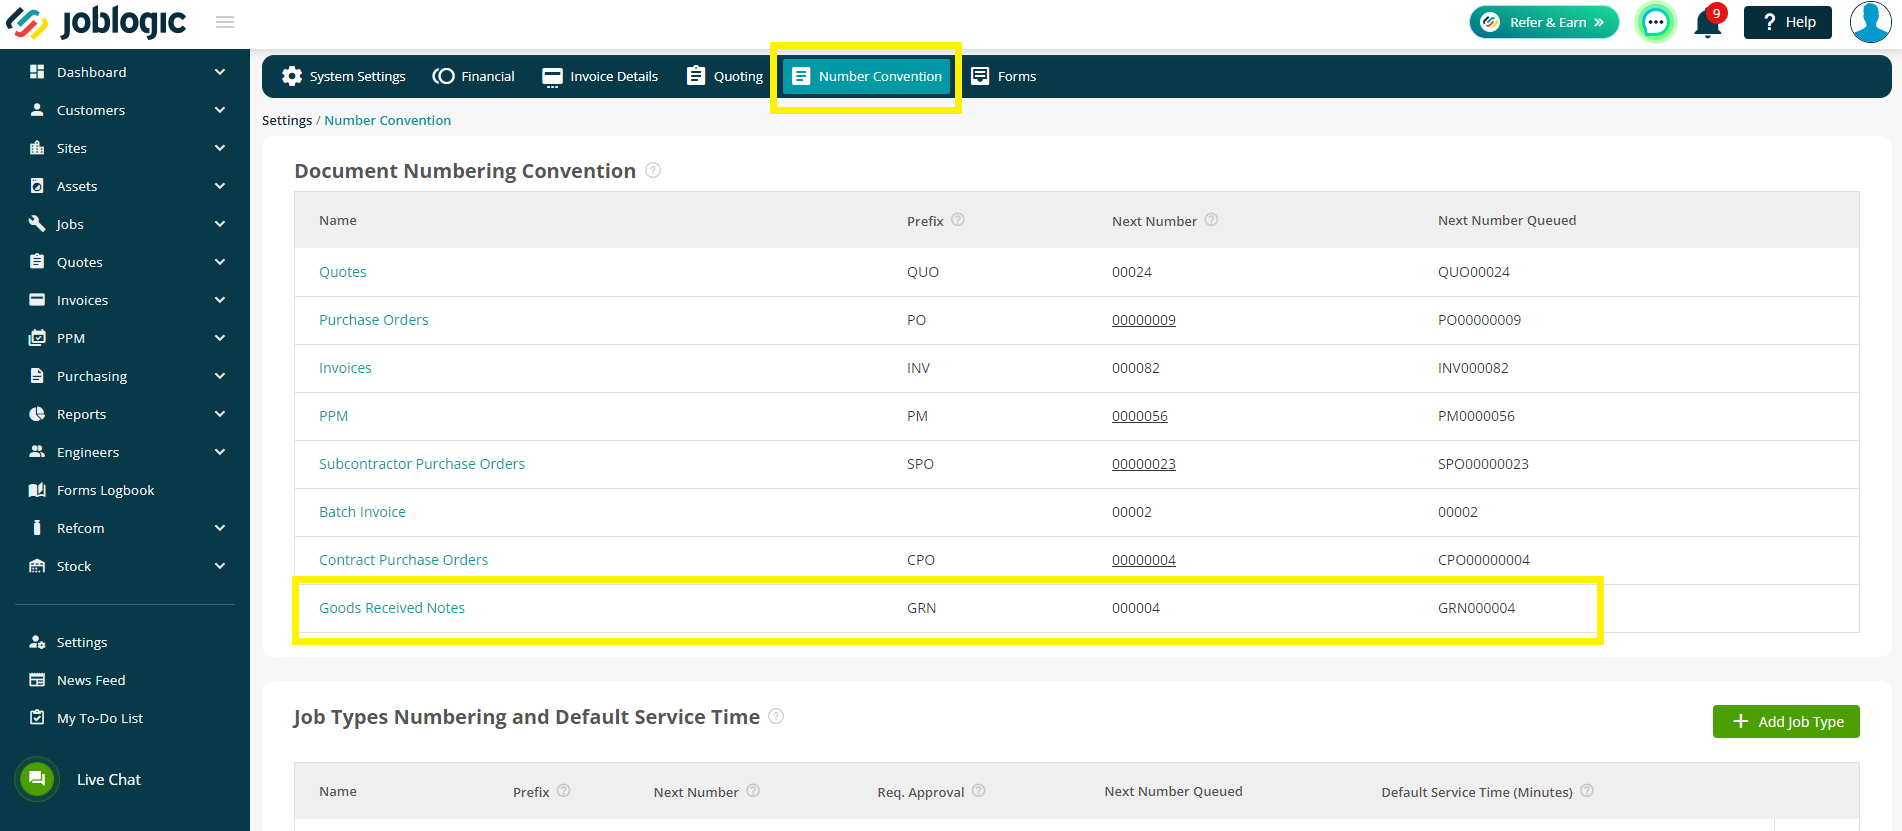
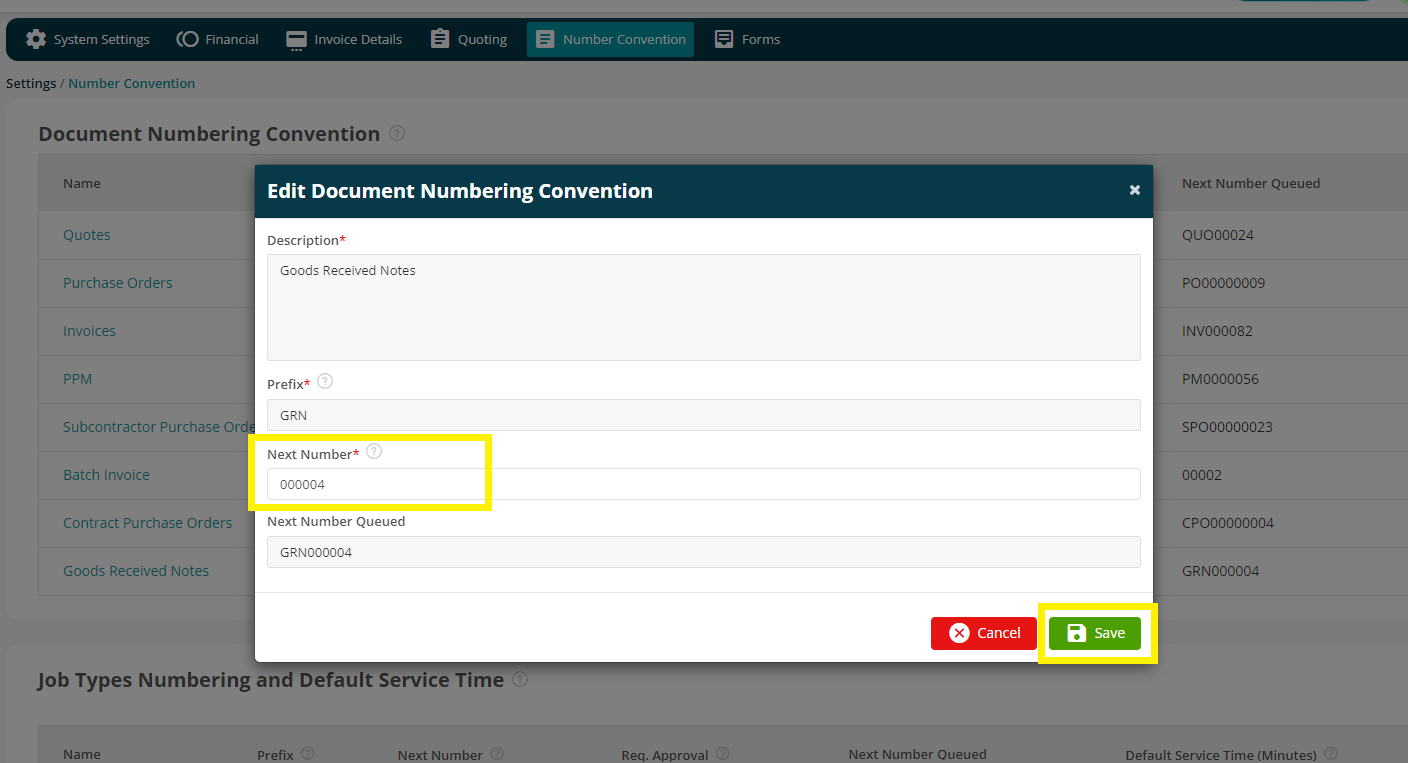
Number Conventions
Next, go to the Number Convention tab at the top
Here, you can set up your own starting number so any Goods Received Notes you create have a unique reference number of your choosing.
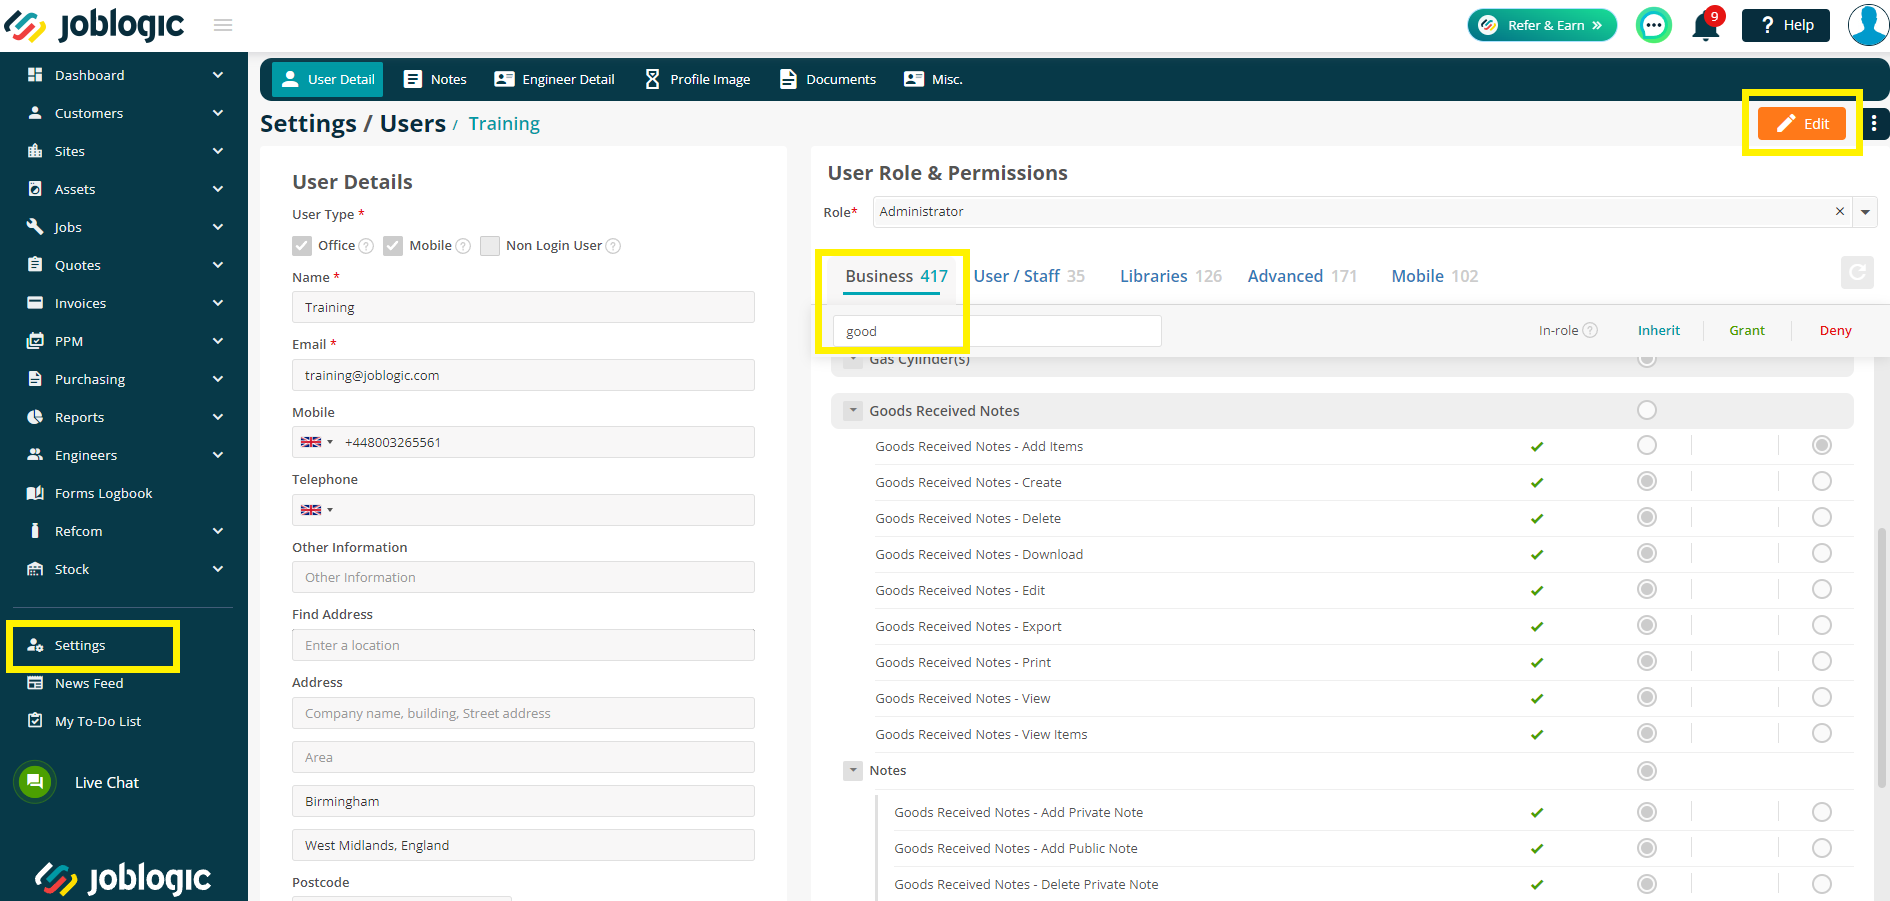
Permissions
This feature is permission based, meaning you can deny or grant certain aspects, as needed.
To do this, go to Settings > Staff > choose staff member
Find the Goods Received Notes section under the Business header and amend permissions as required by clicking the Edit button
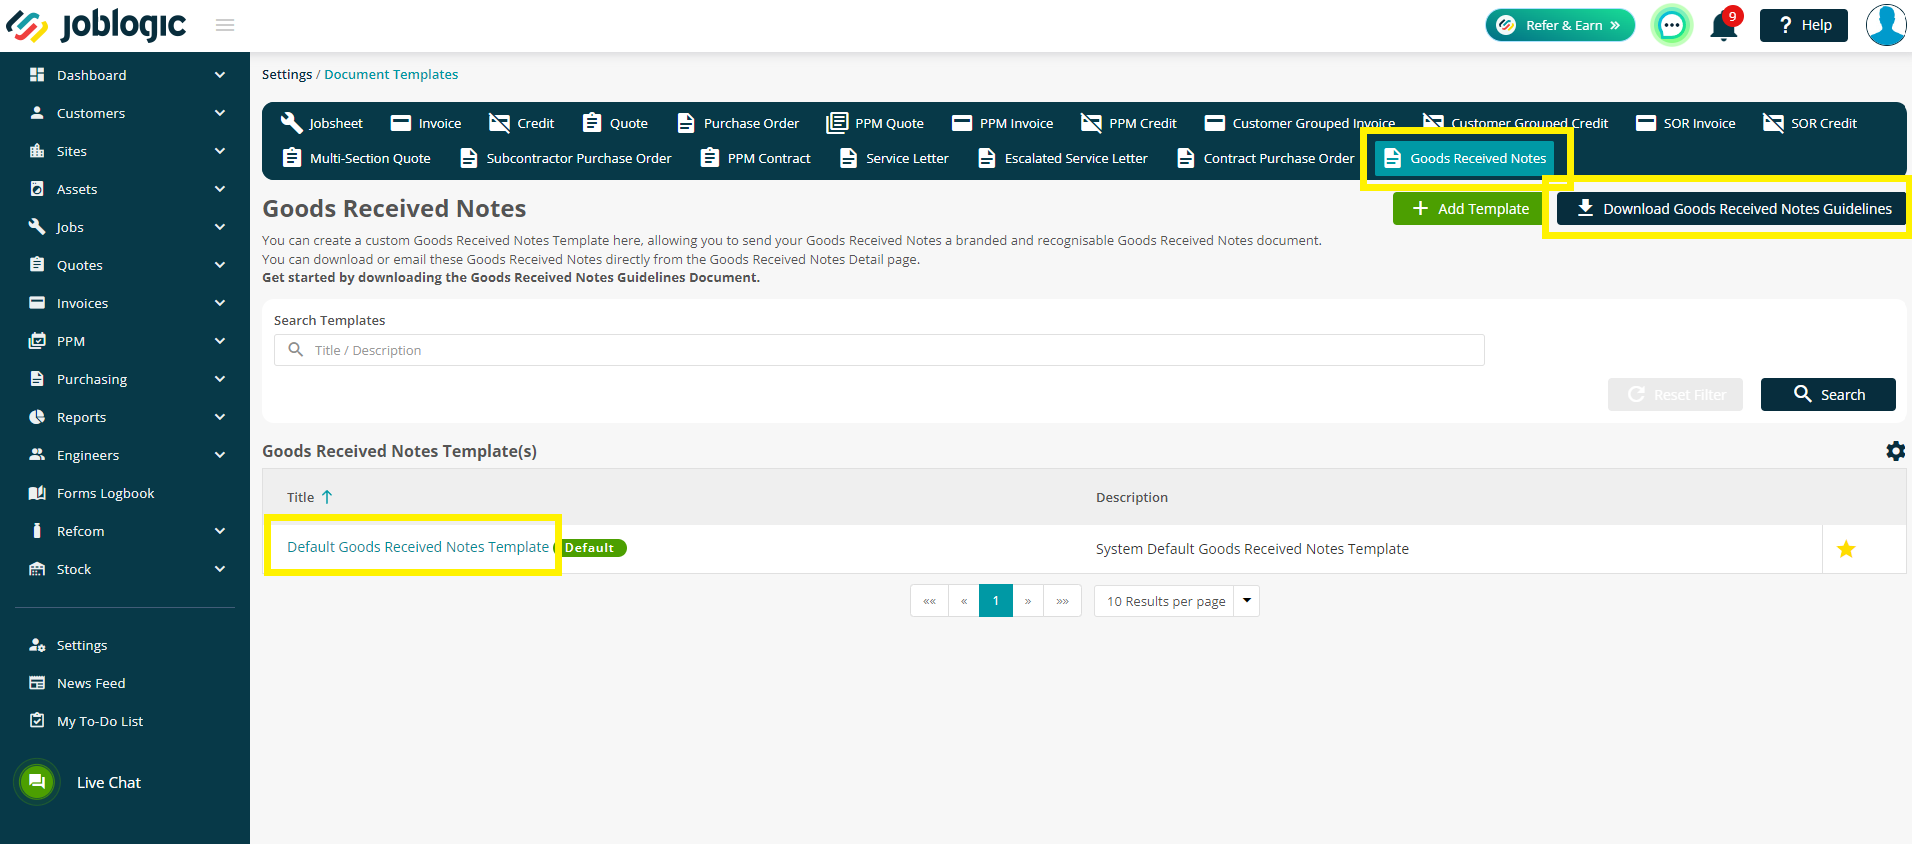
Templates
You can amend / create your own Goods Received Notes templates via Settings > Document Templates > Good Received Notes tab.

To edit the current template, click the Title to download it.
Remember to Download the Guidelines to help you with the tags, too.
To read more about setting up document templates, please click here.
Creating a GRN
1.
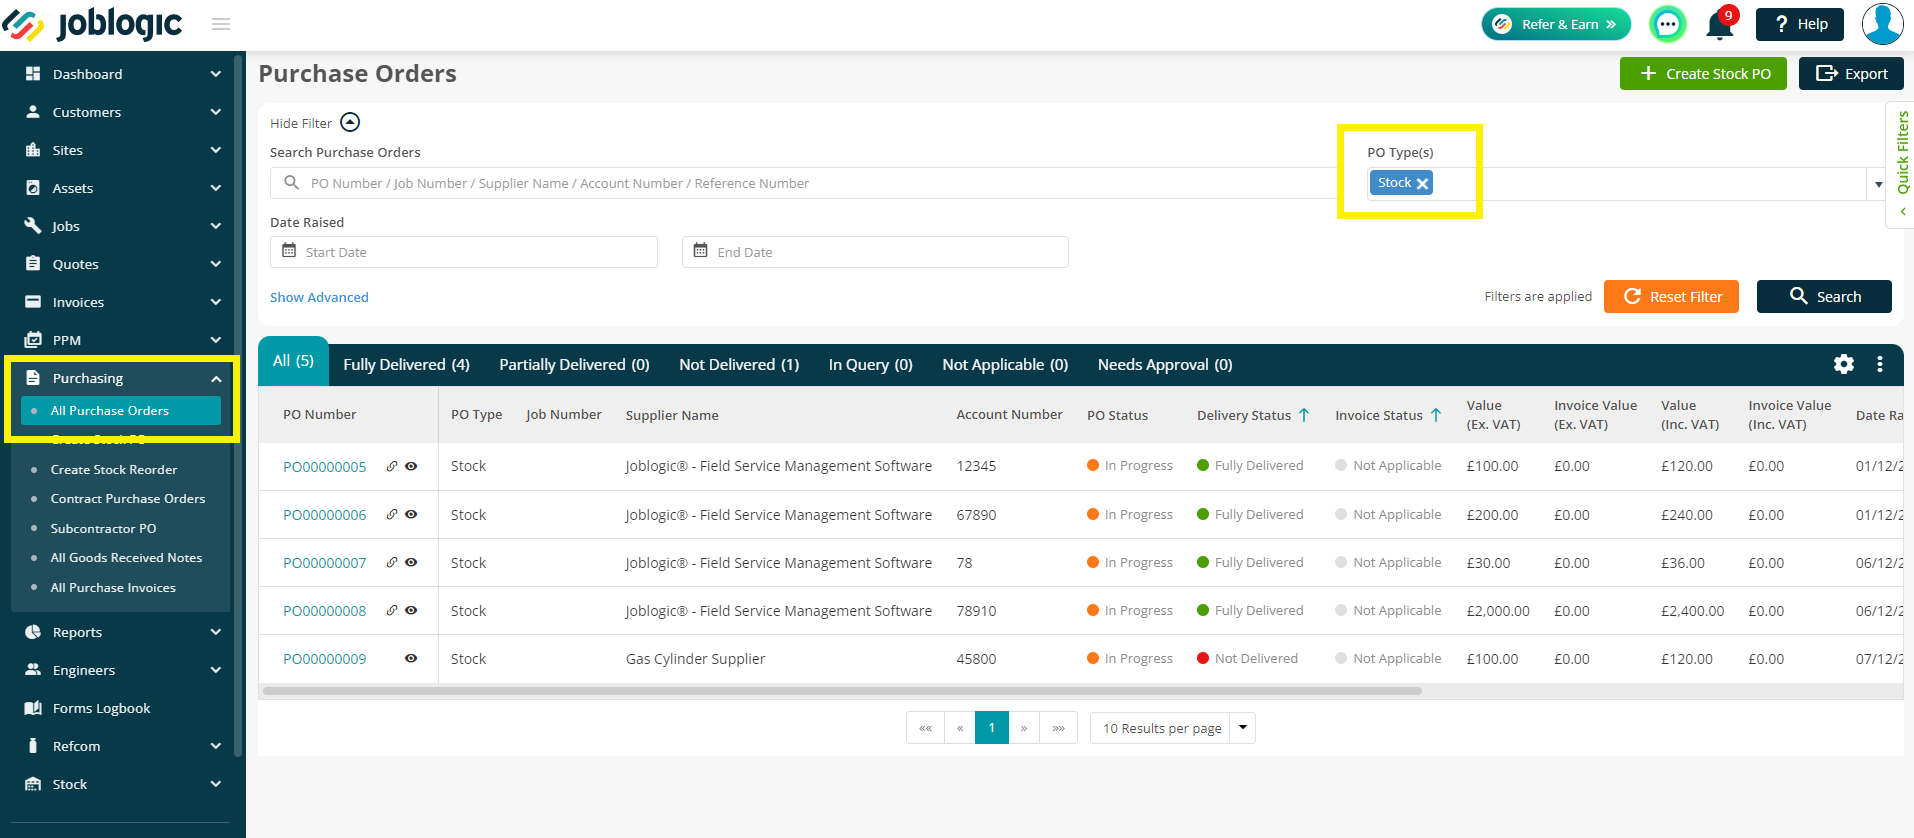
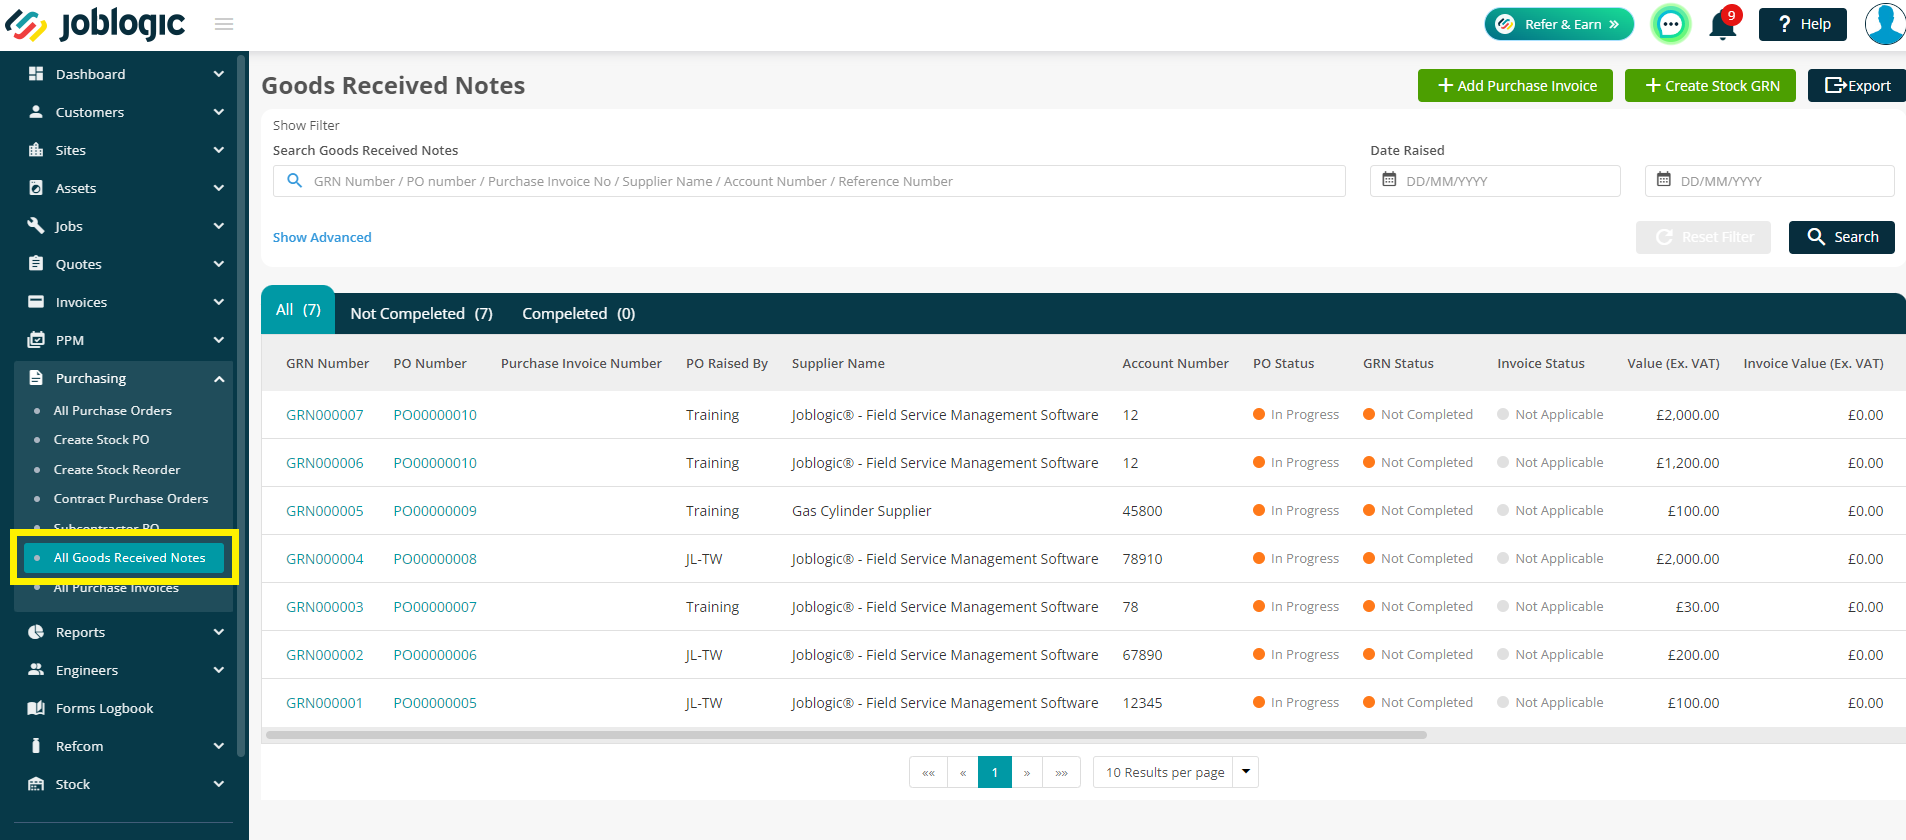
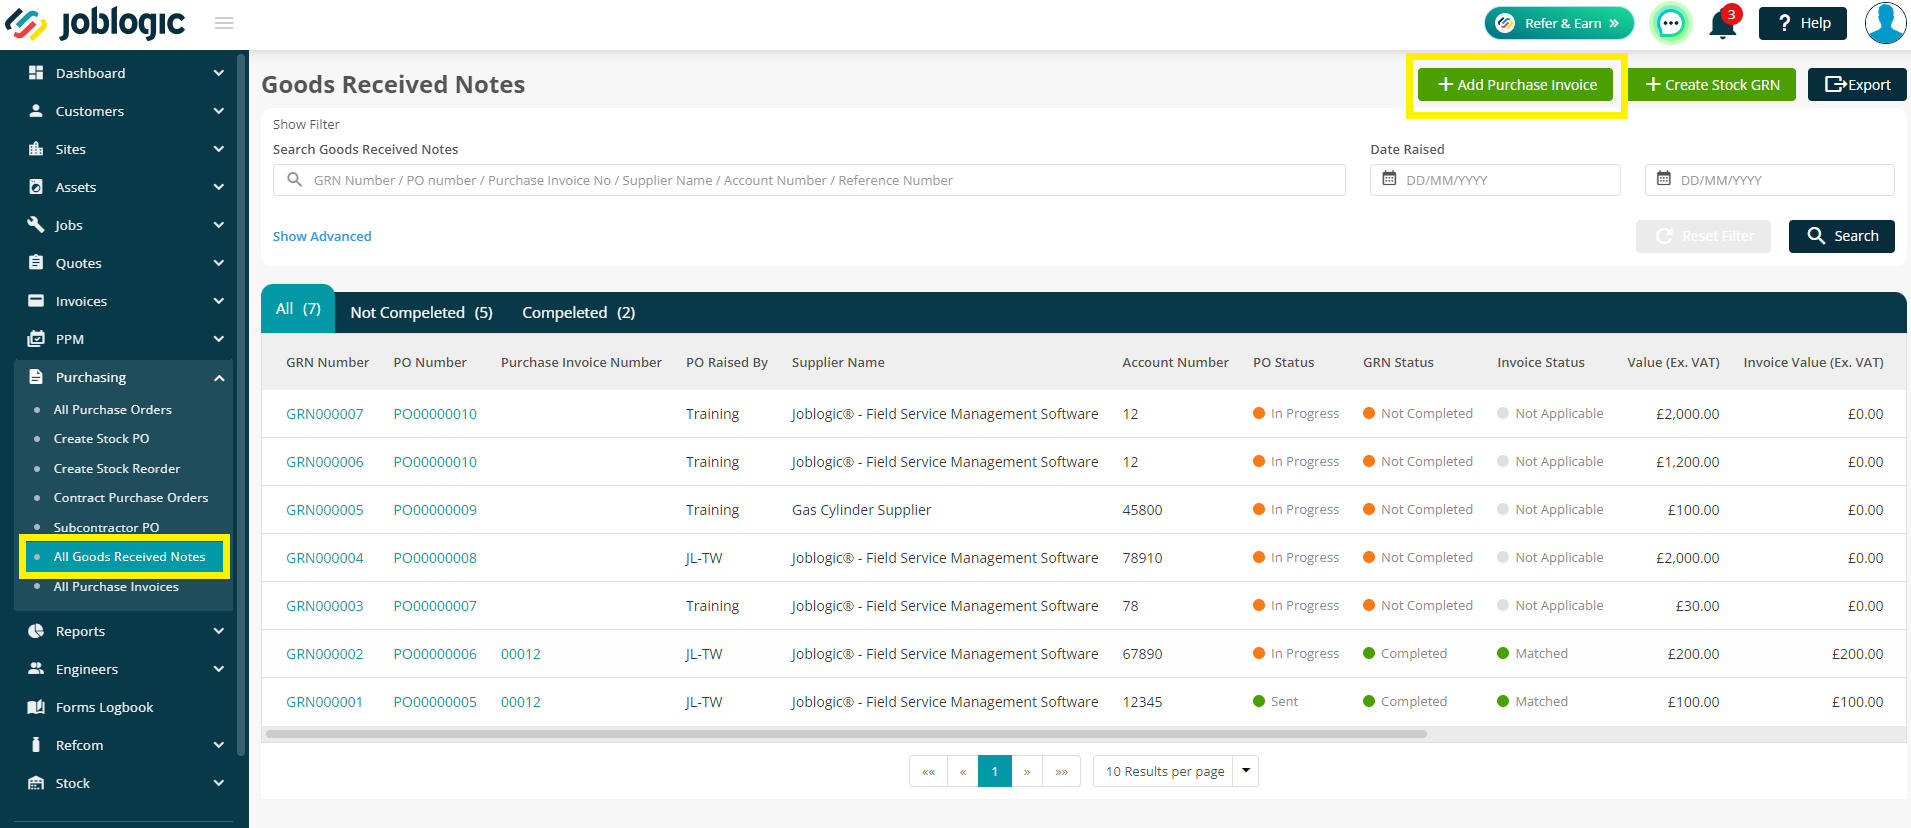
Navigate to Purchasing > All Goods Received Notes
Click Create Stock GRN to get started
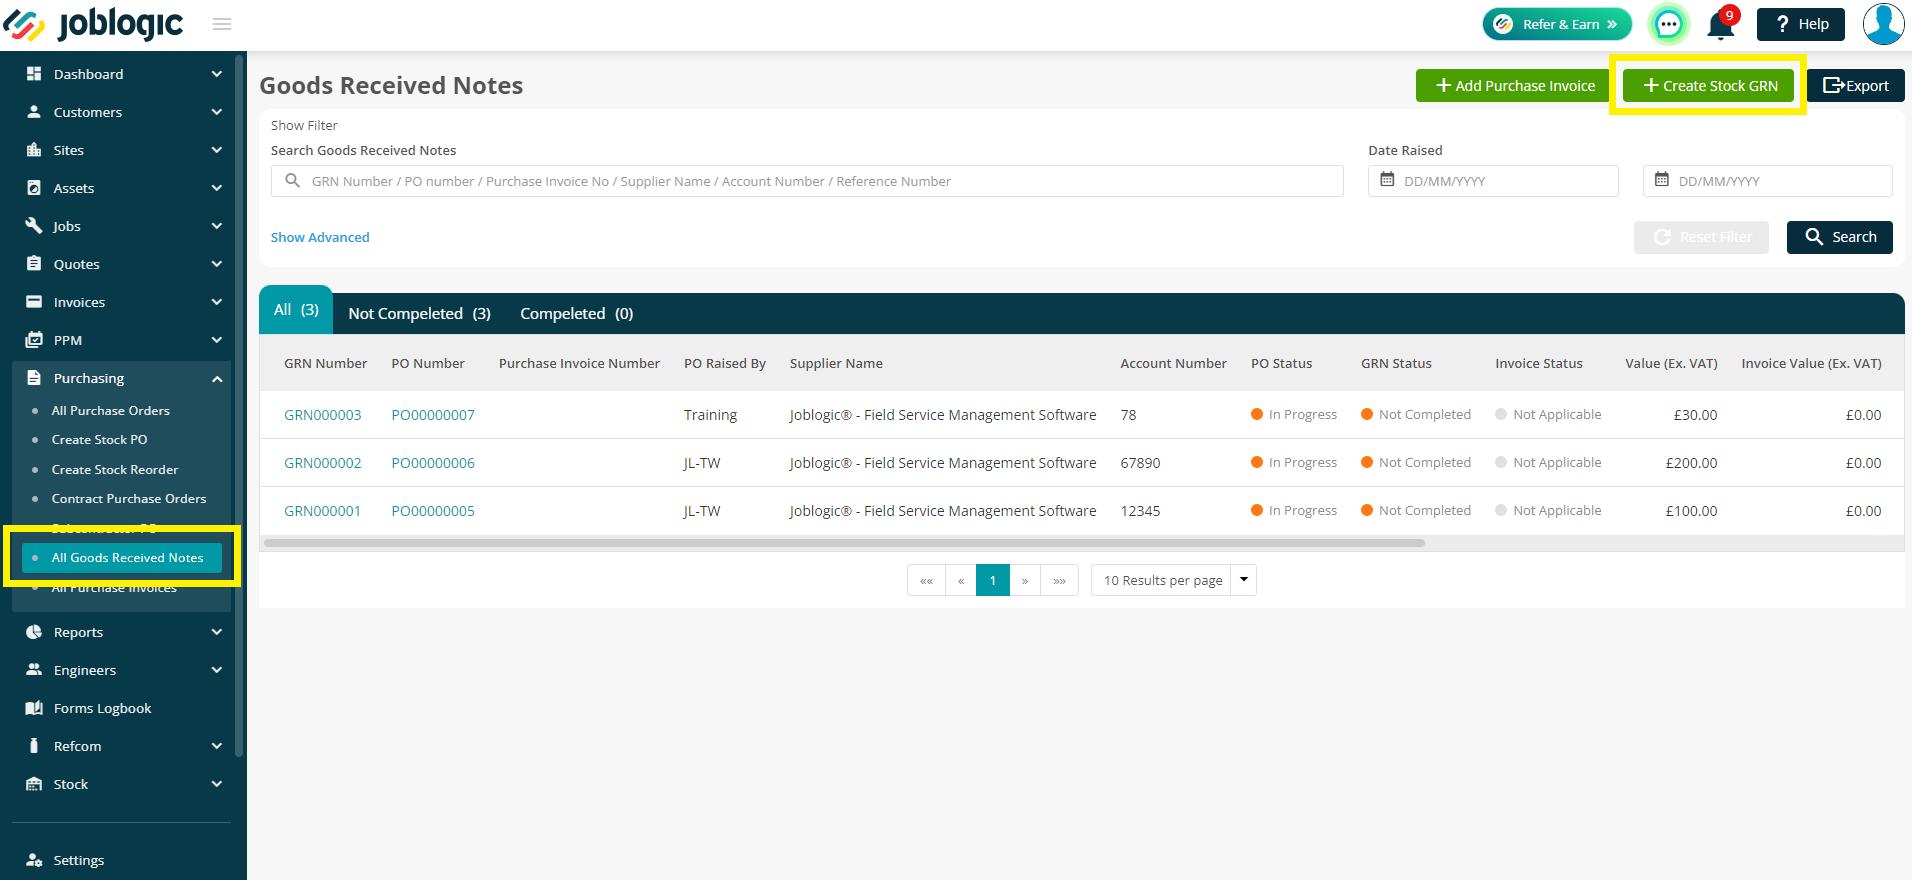
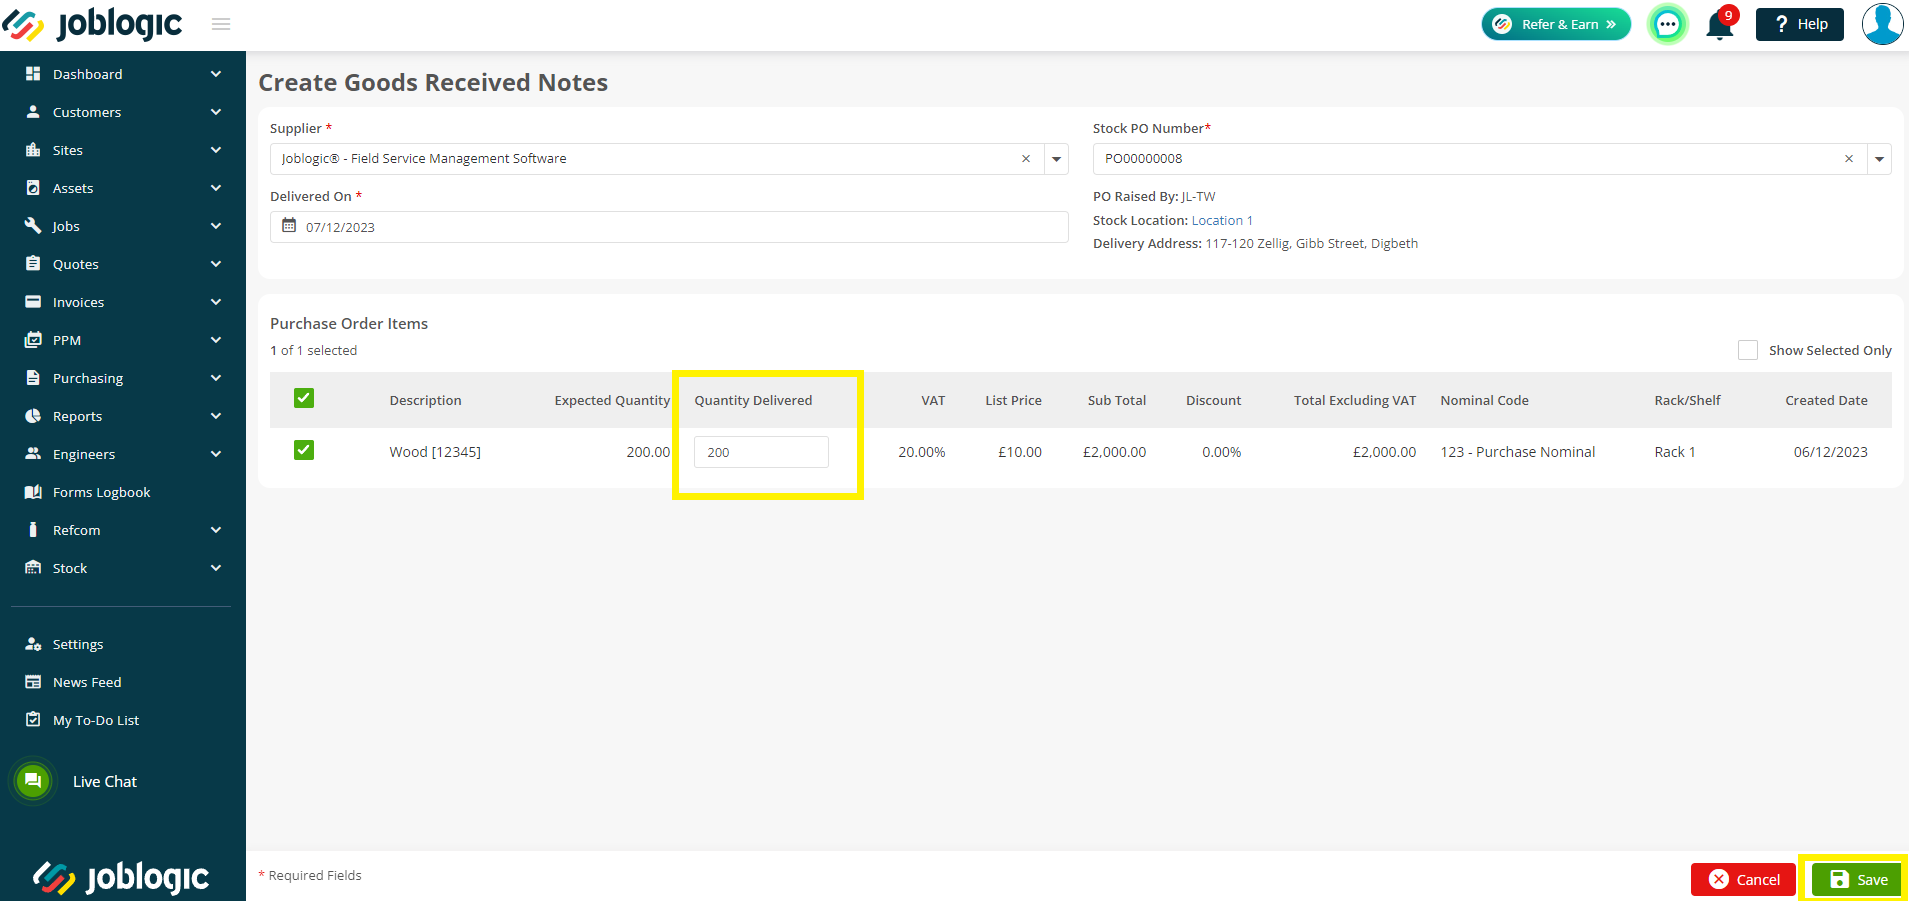
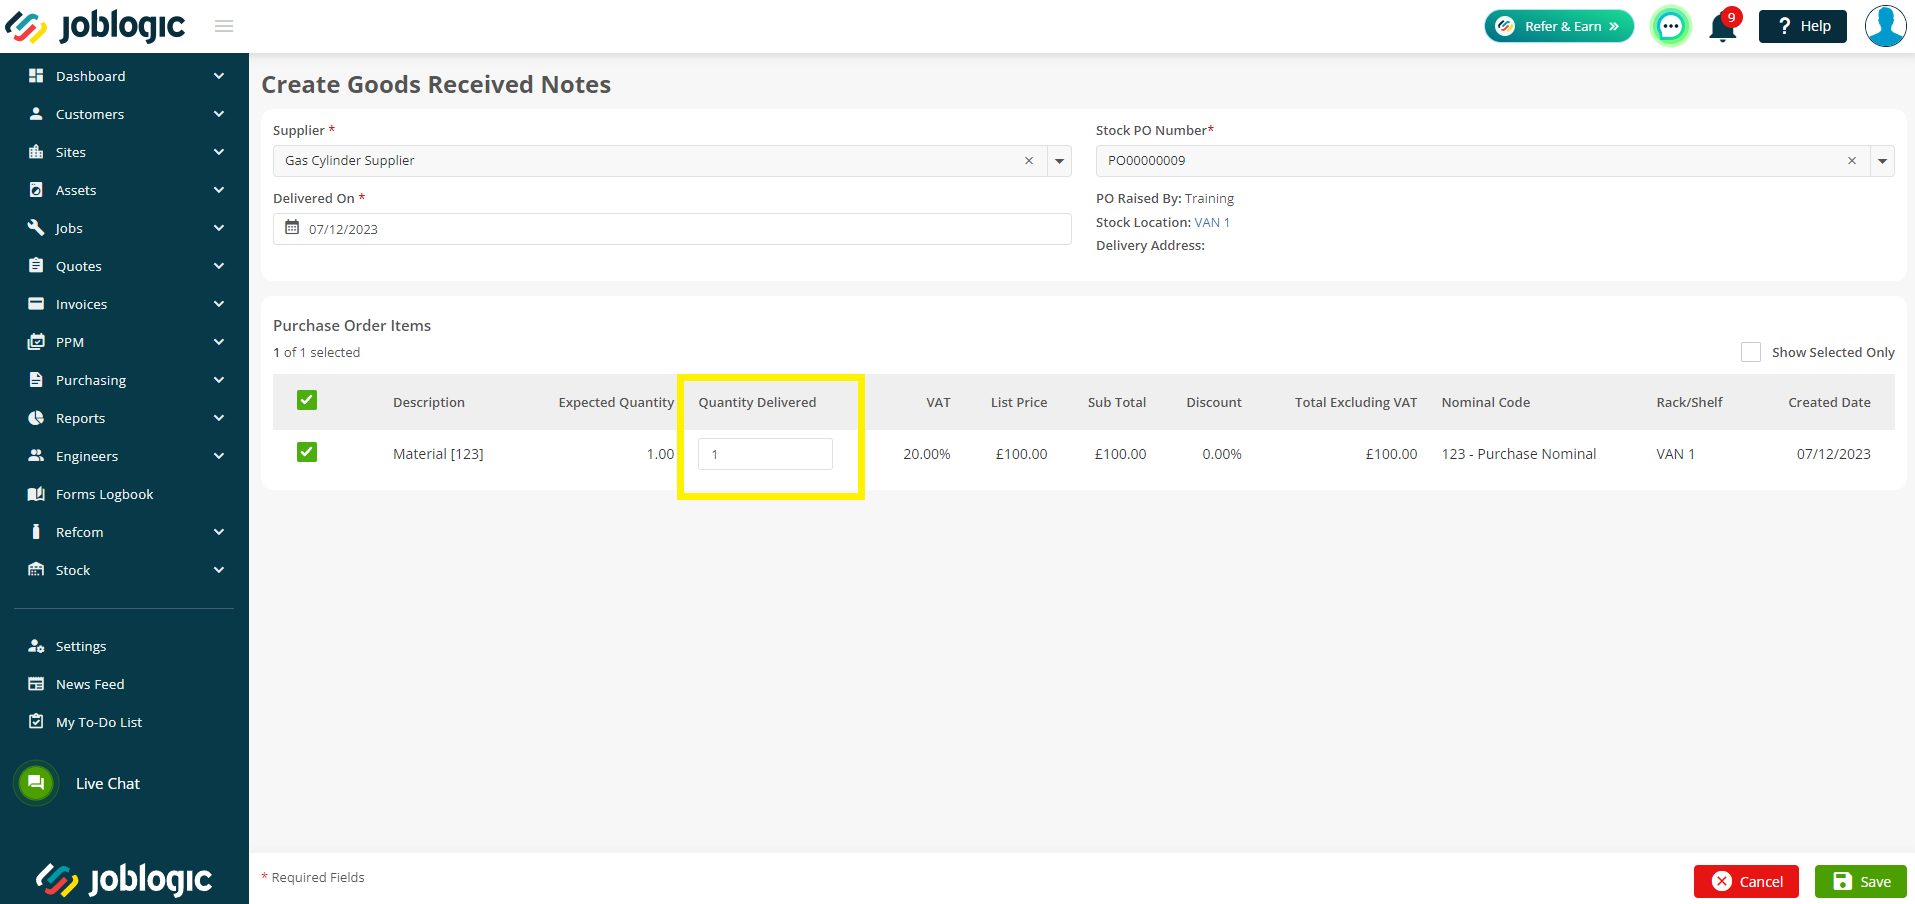
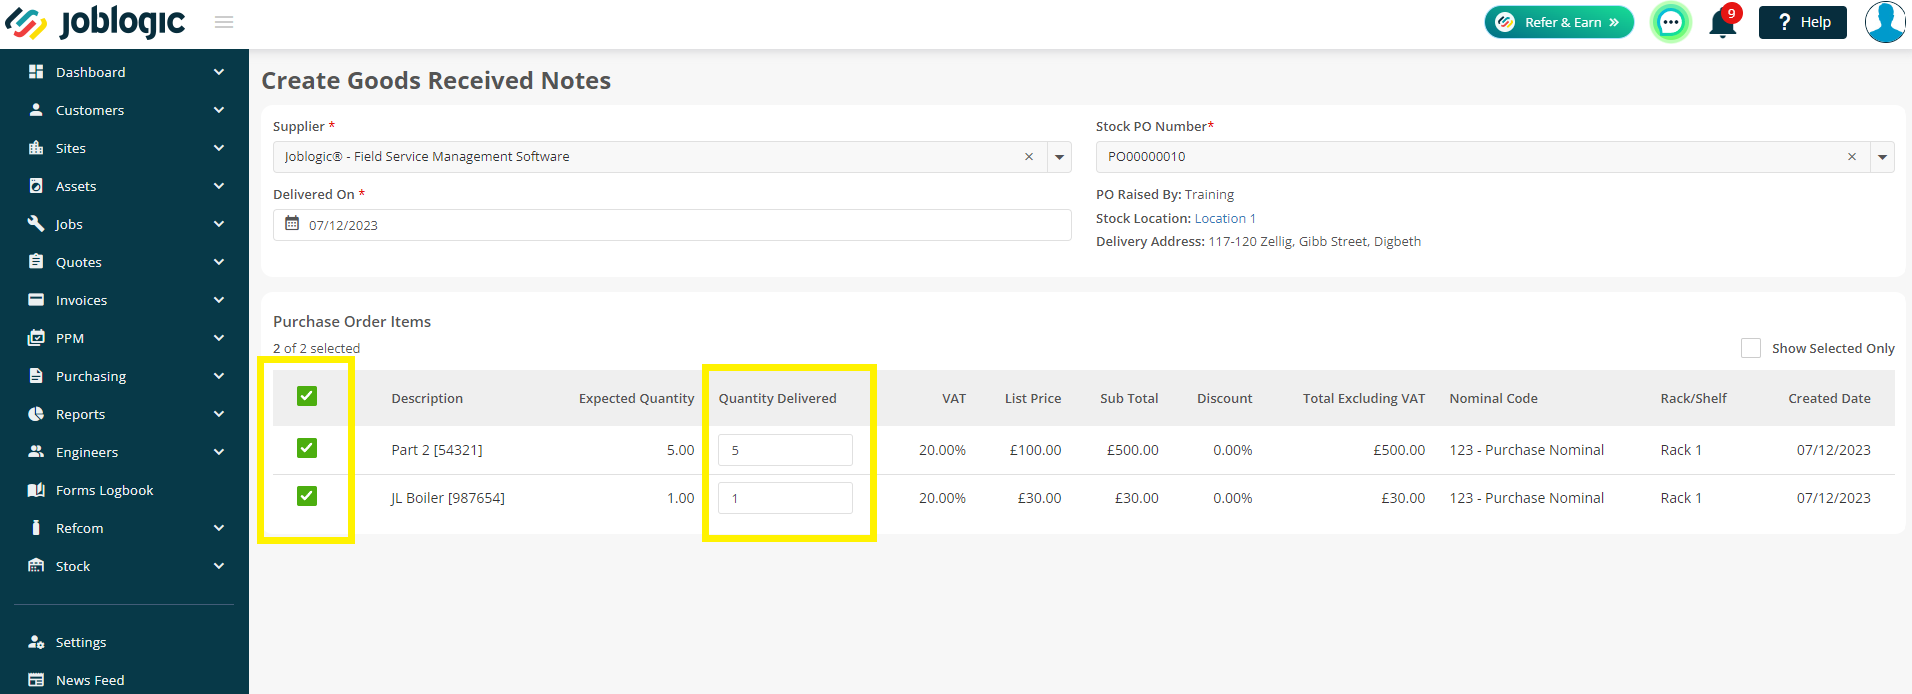
Choose your Supplier, and then select a Stock PO Number.
This list will only be populated with PO’s that have undelivered line items against it.

Next, check your line details and amend the Quantity Delivered if needed, and then click Save.
2.
You can also create a GRN from within the Purchase Order.
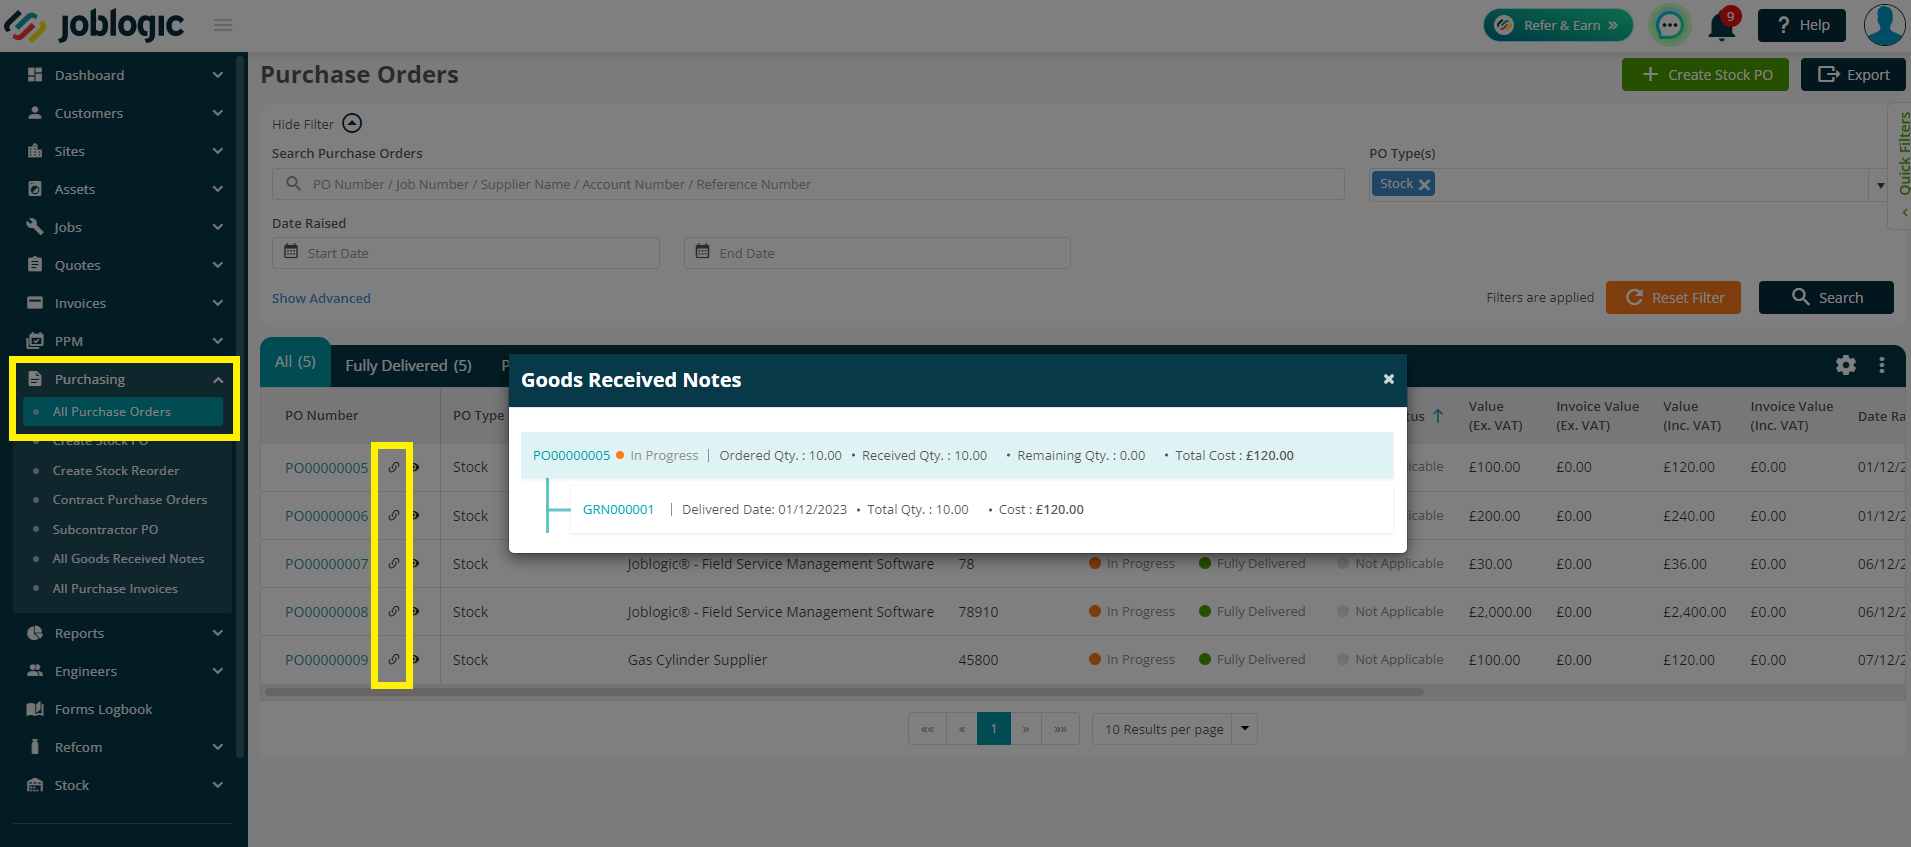
To do this, go to Purchasing > All Purchase Orders > find your relevant Stock PO
From here, click the Items tab and then Create Stock GRN.
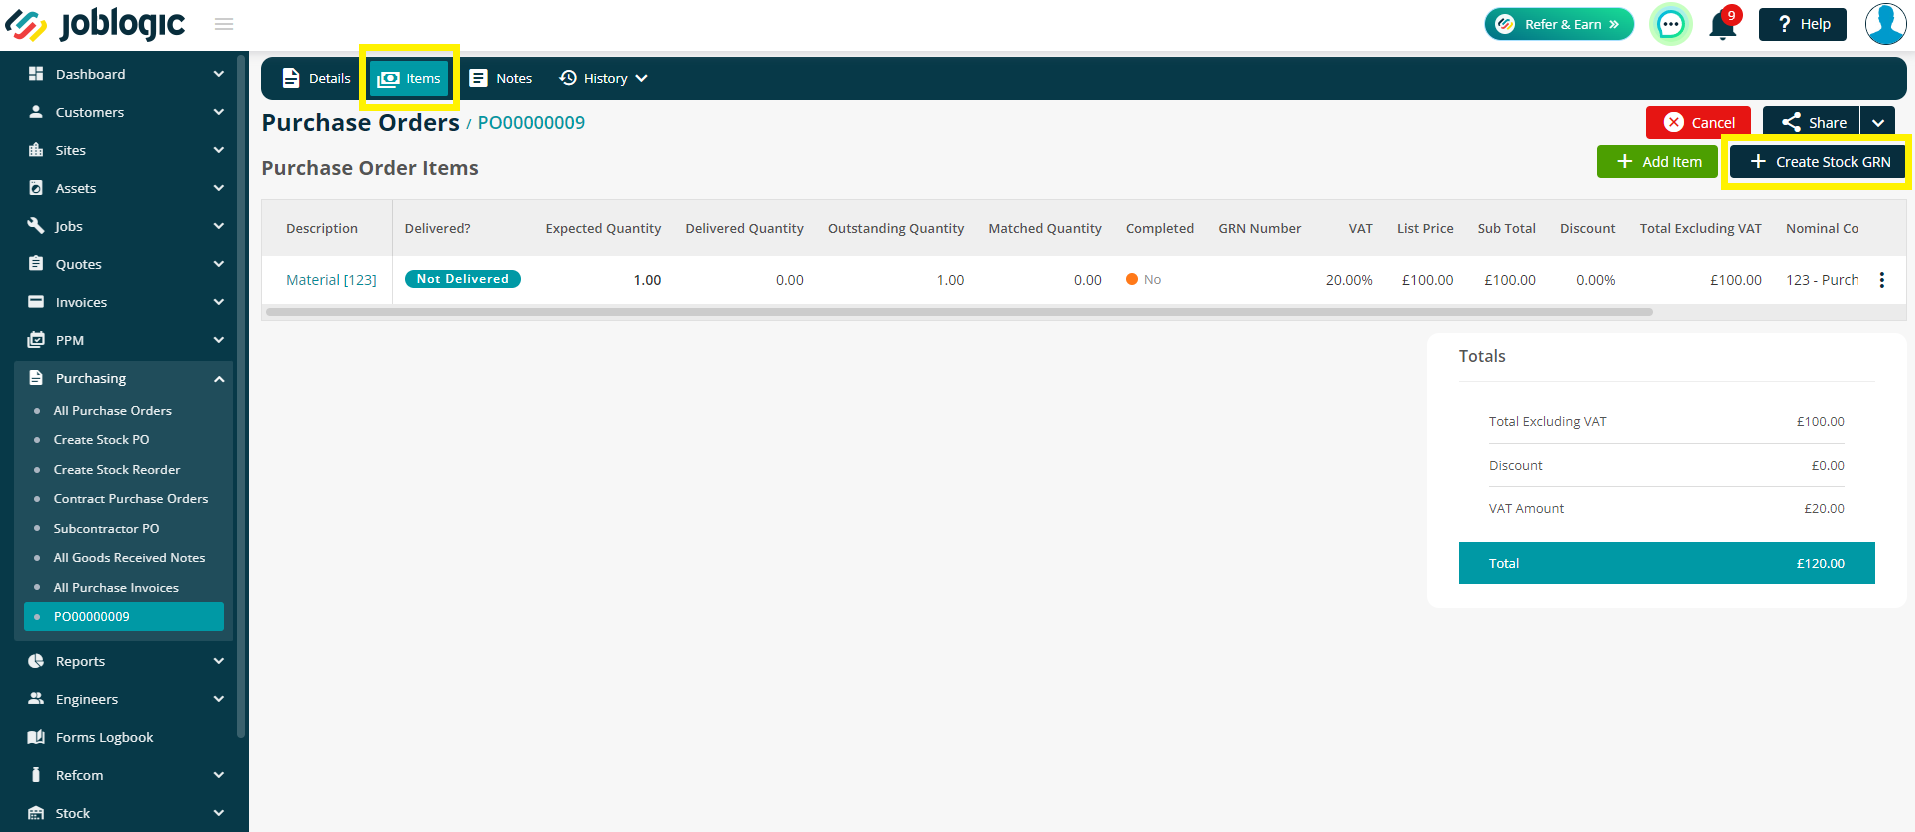
The data will populate automatically for you. Click Save if you are happy with the details.
Creating a GRN will mark the Purchase Order line item(s) as Delivered, automatically.
If you amend the quantity, the line item will show as Partially Delivered and show you how many are outstanding.
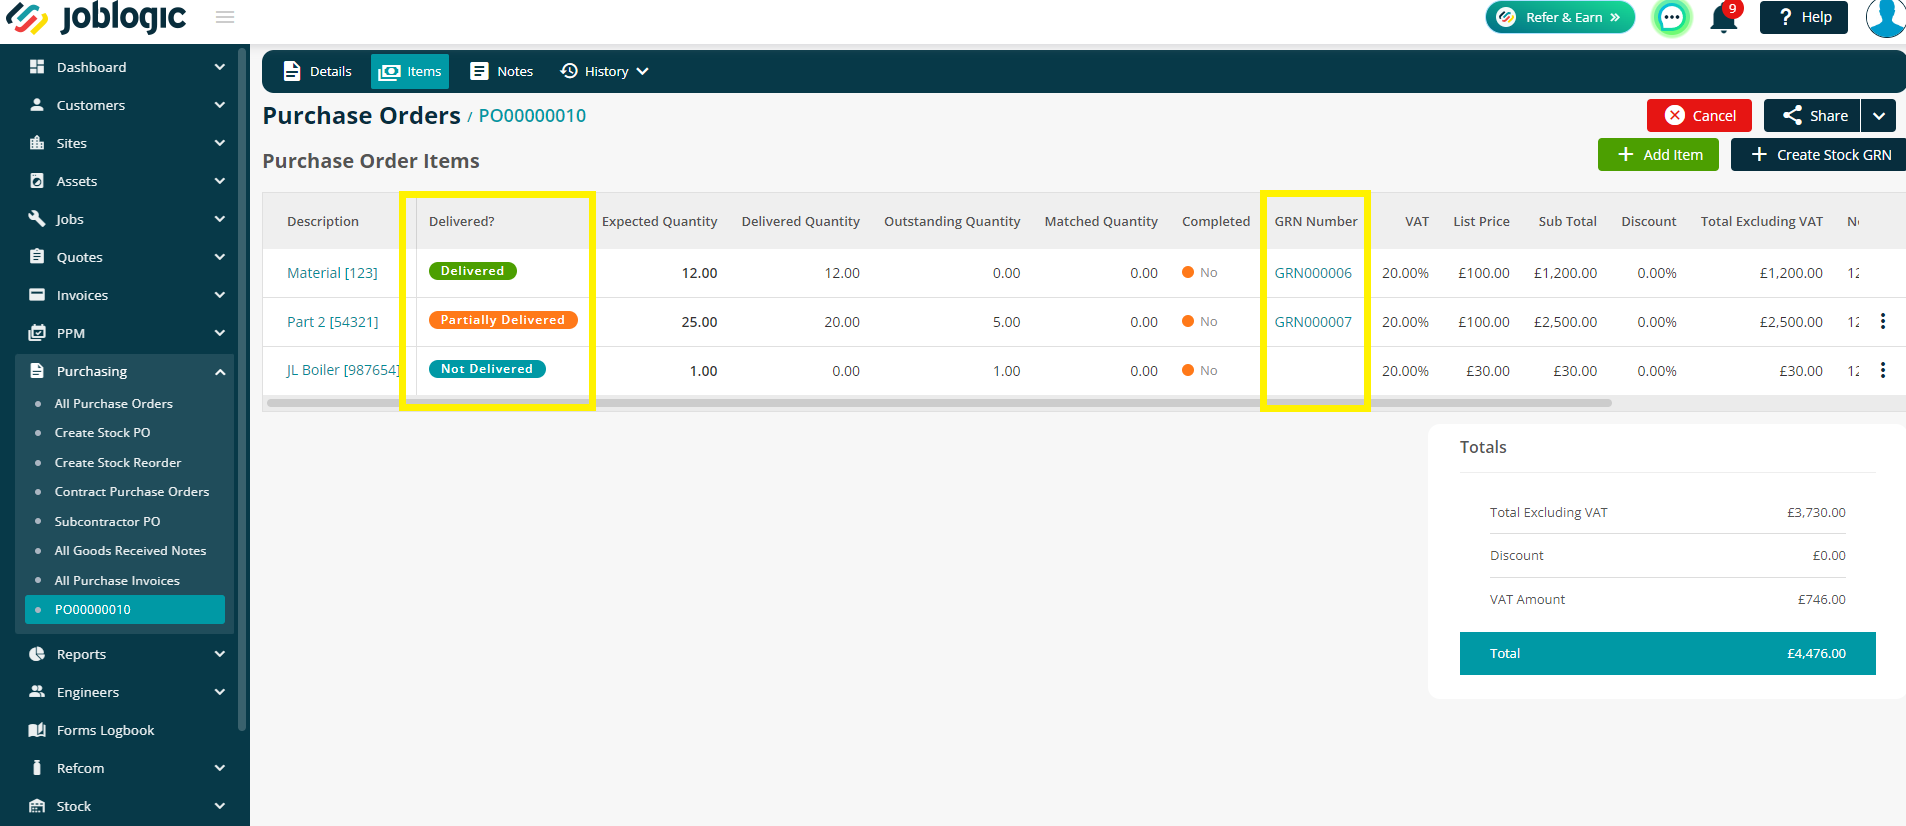
When you next click Create Stock GRN, it will pull through all remaining items. Again, you can choose the line items and amend the quantities as needed.
Viewing a GRN
To view the note, you can either go back to Purchasing > All Goods Received Notes
Or you can go to the All Purchase Orders screen and click the link icon next to the PO Number.
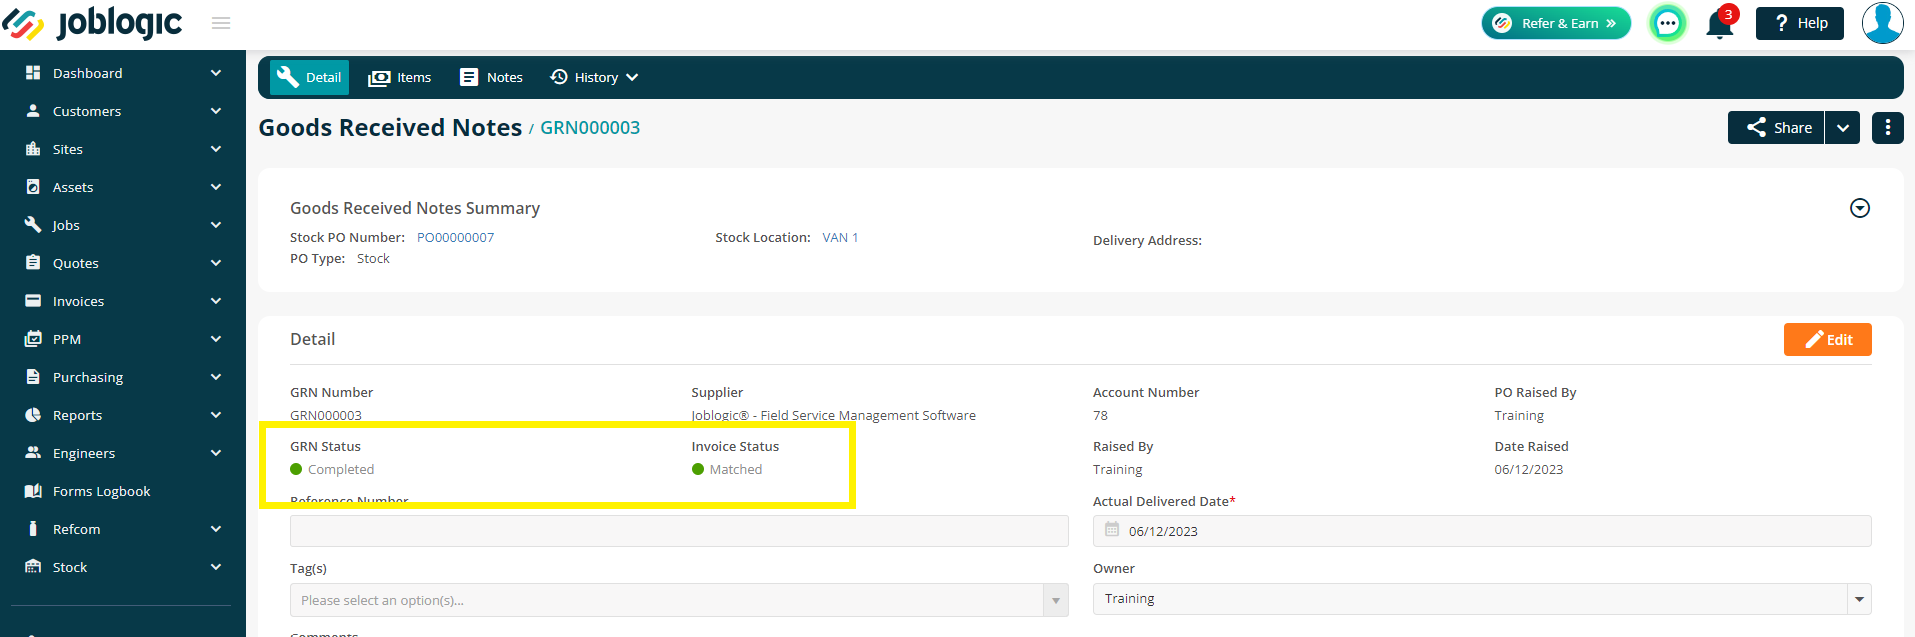
This will show you the main details of the GRN. You can then click the GRN number to be taken to the main details screen.
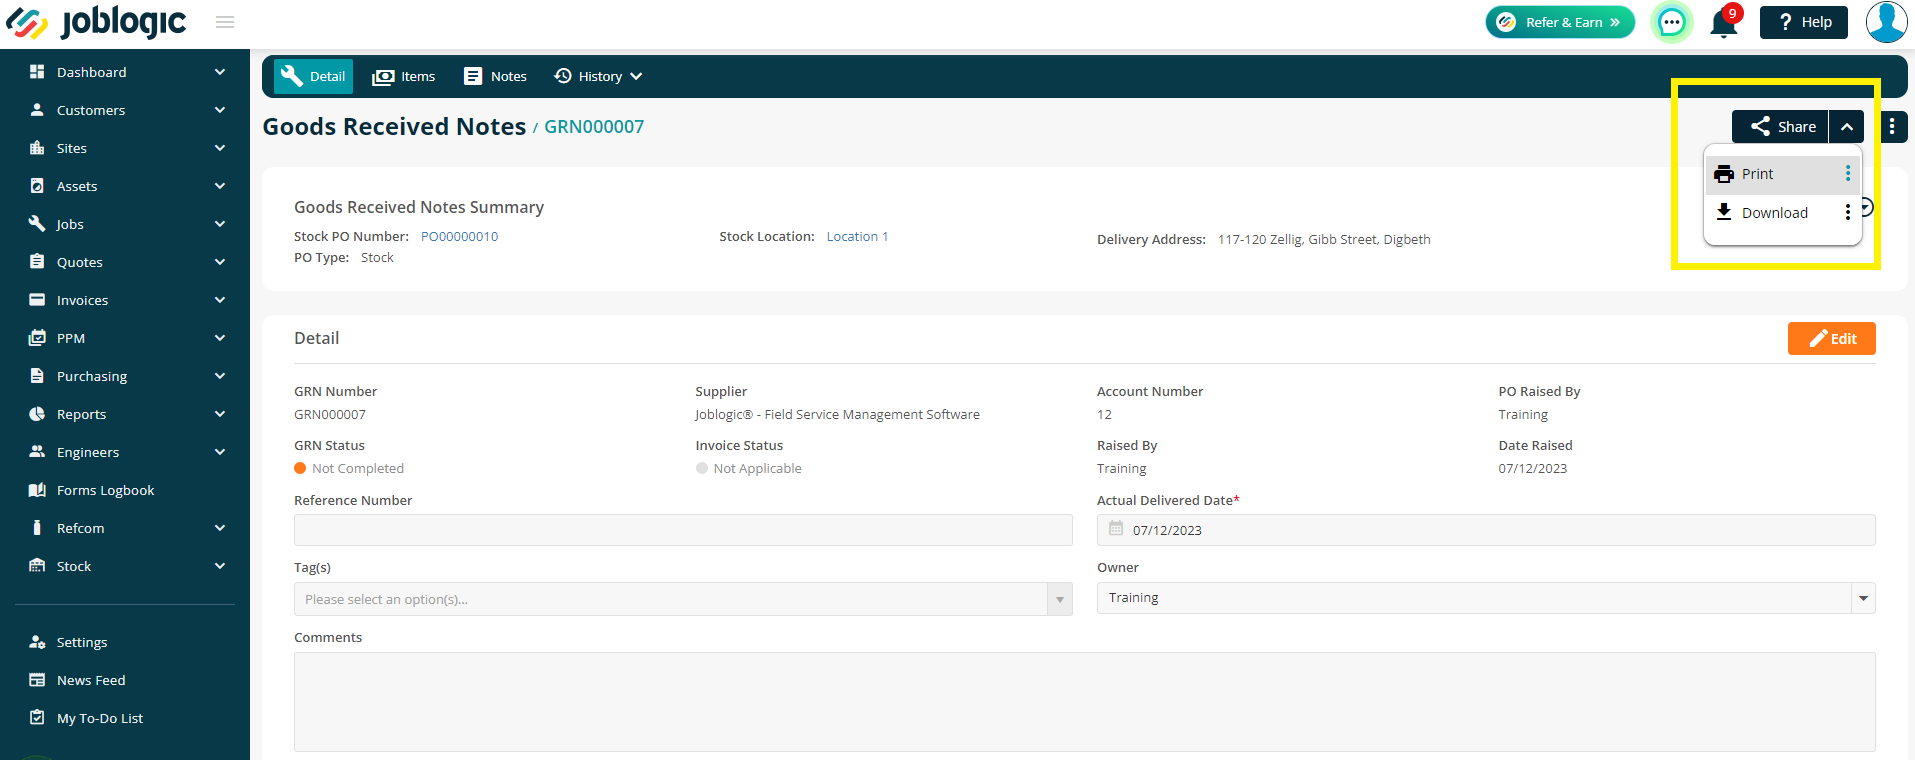
To Download or Print the Goods Received Note, click the Share arrow.
Clicking the word will simply Print/Download your default template.
If you have multiple templates set up, click the 3 dots to manually choose a template to Print/Download.
Stock Purchase Invoices
To add a Purchase Invoice, you can either go to :
Purchasing > All Goods Received Notes > Add Purchase Invoice
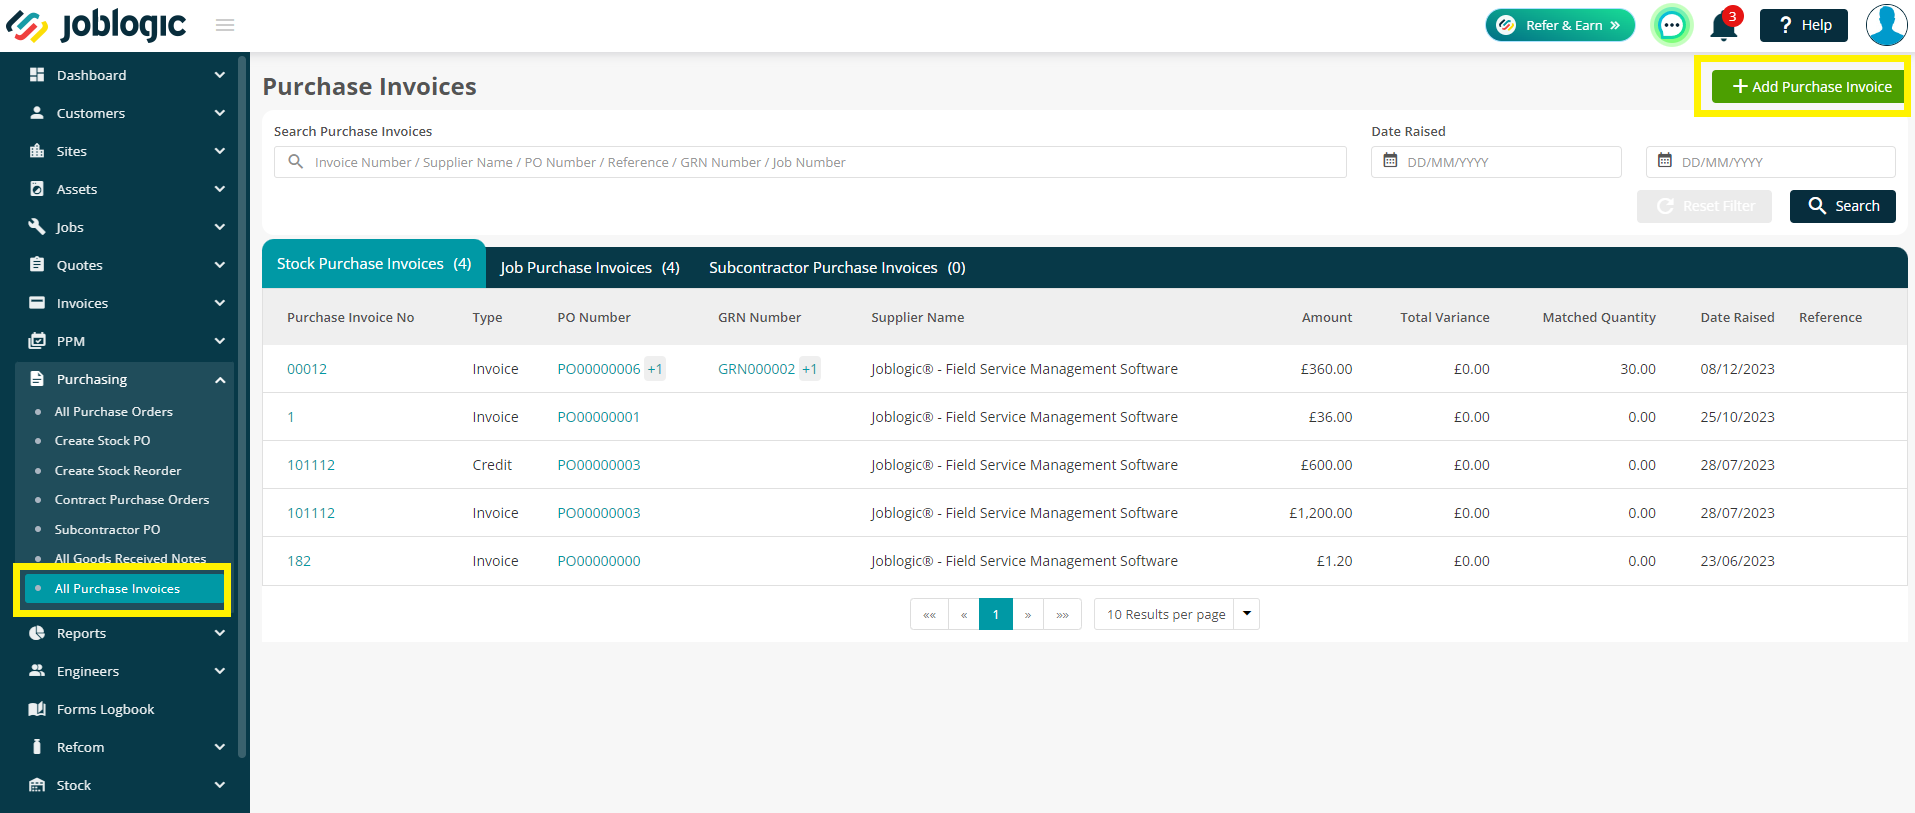
or Purchasing > All Purchase Invoices > Add Purchase Invoice
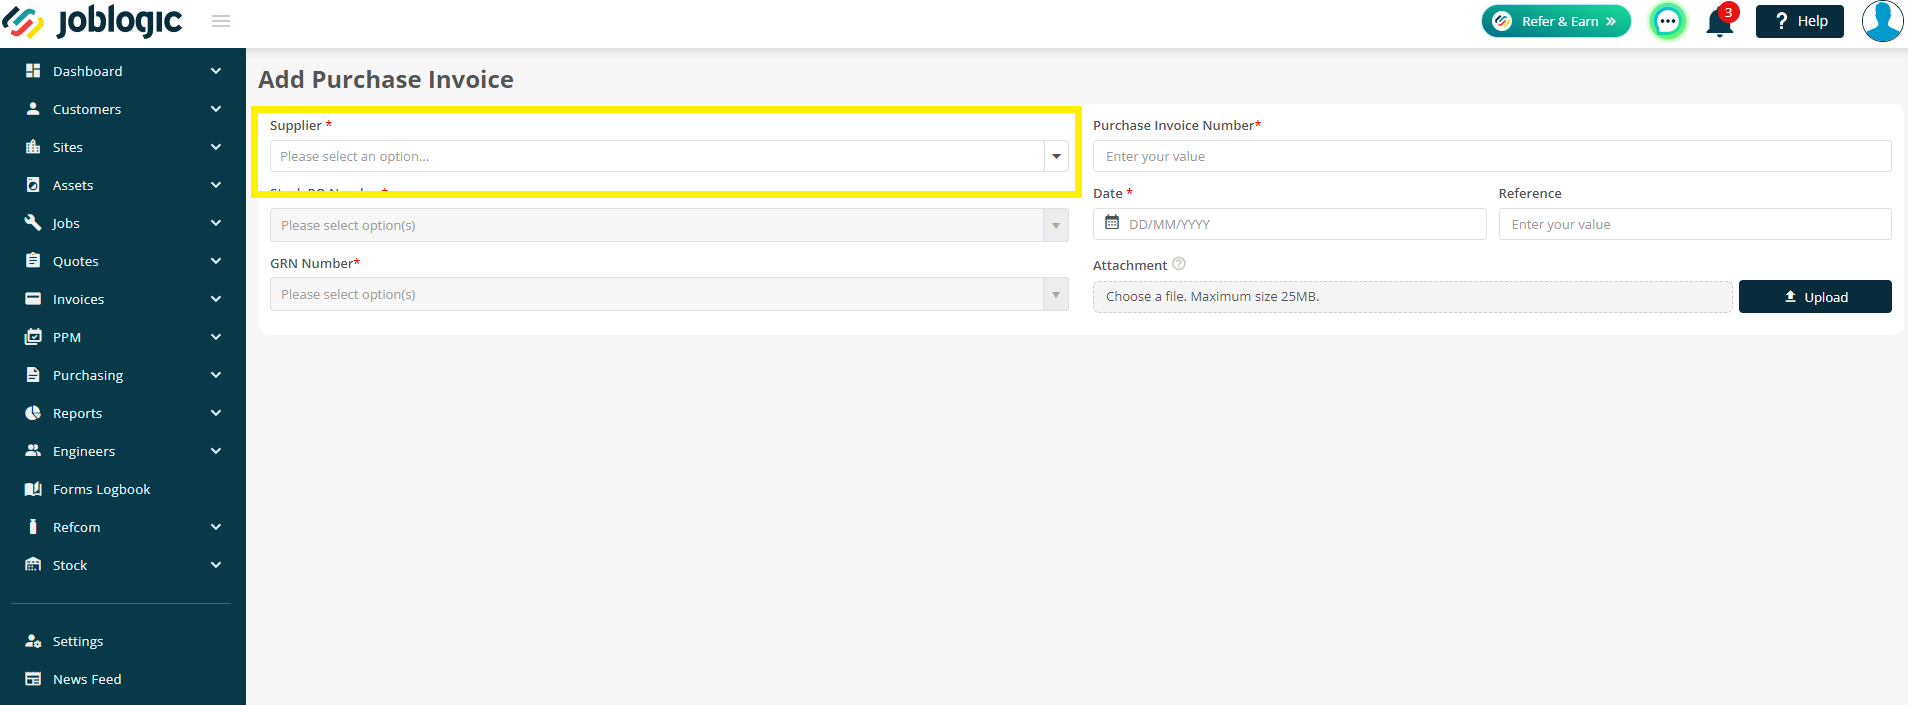
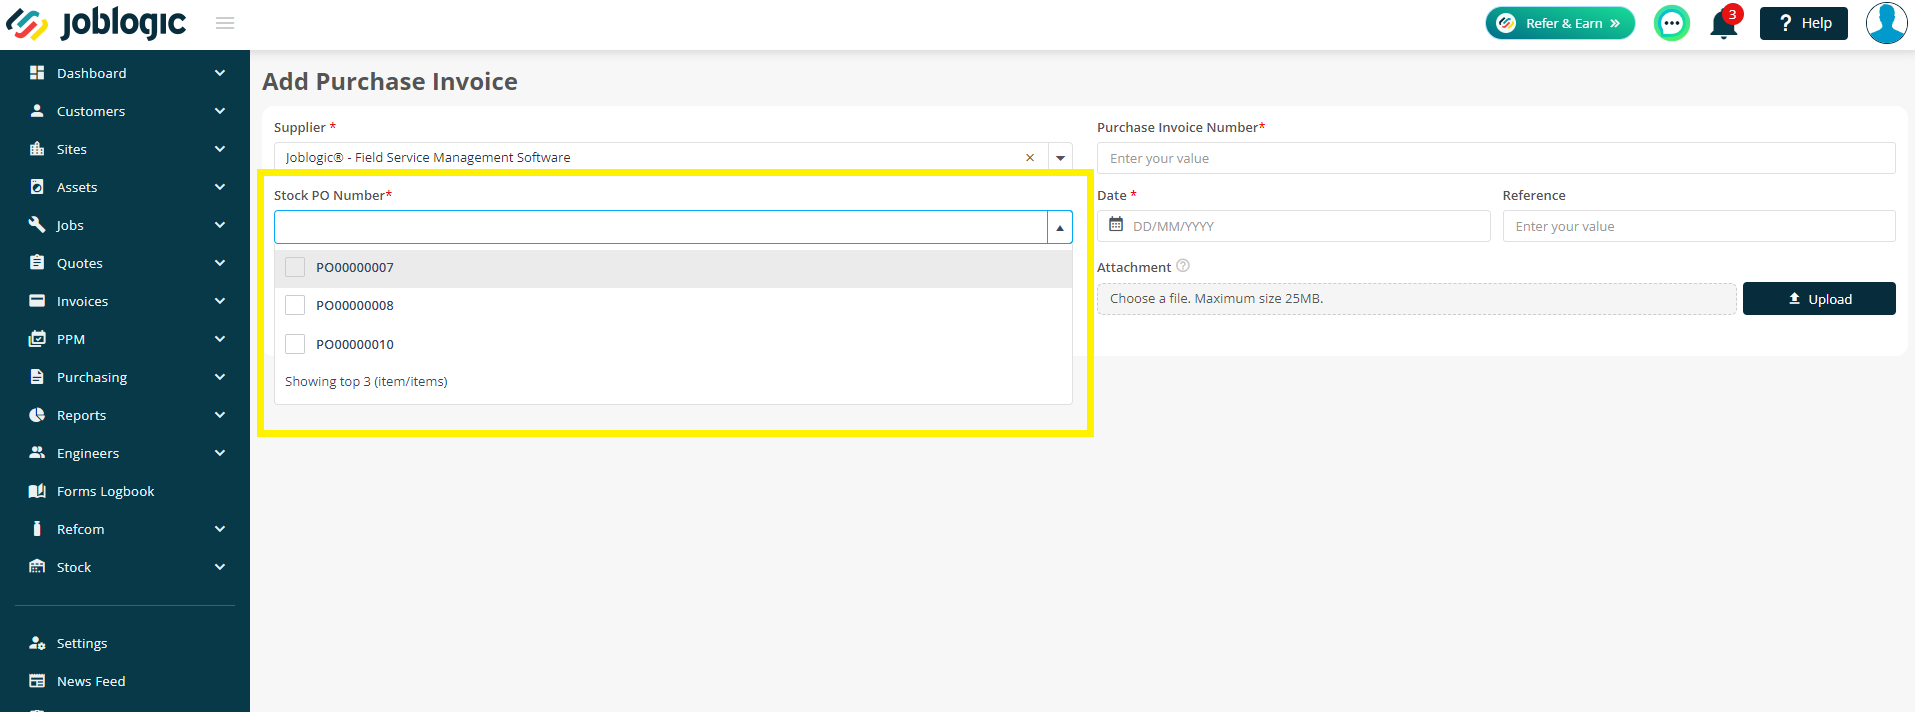
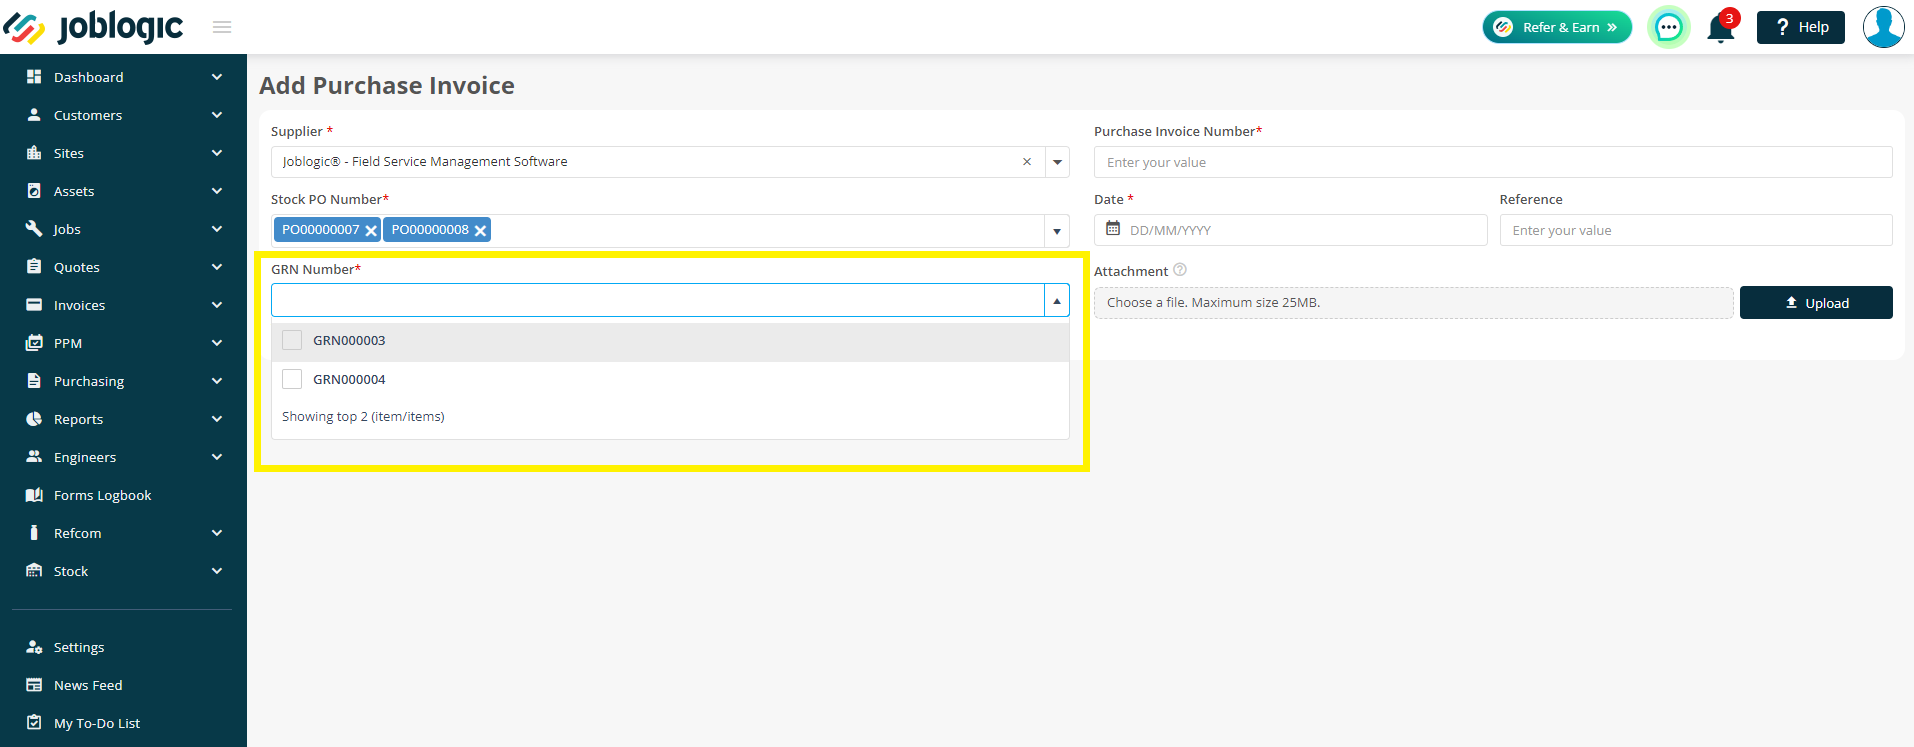
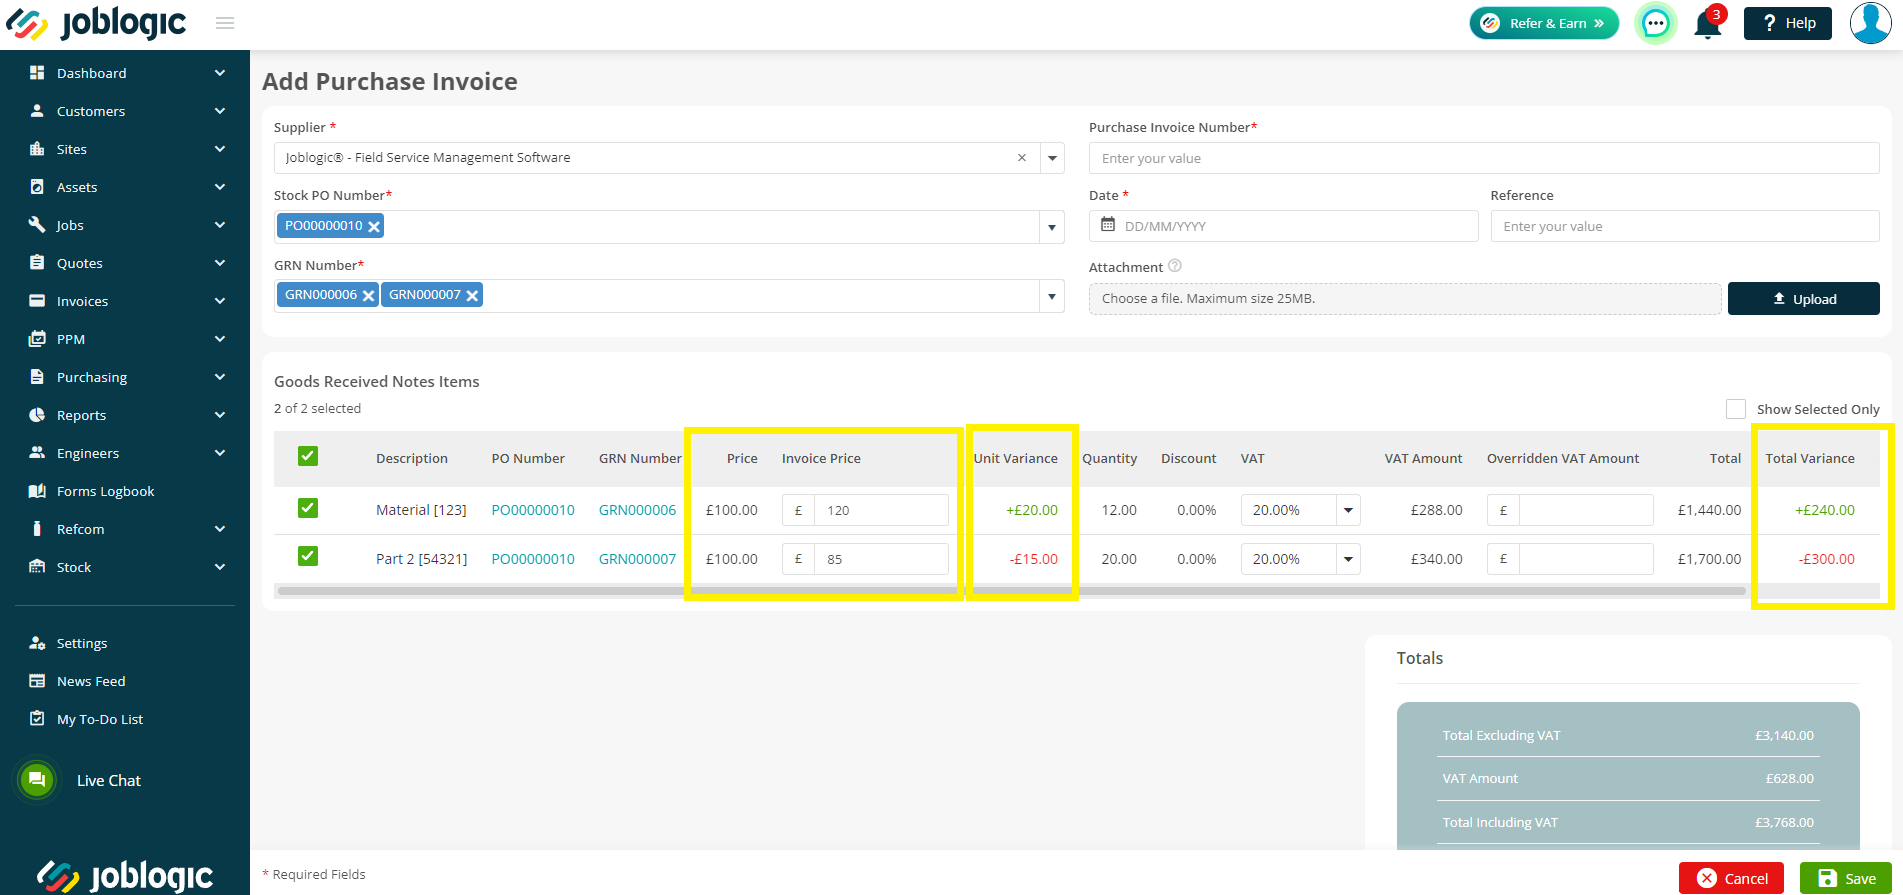
Next, choose your Supplier. This will then open the Stock PO Number dropdown.
Choose your Purchase Orders as needed. You can add more than one by ticking the relevant boxes.
And then choose your GRN Numbers. Again, you may choose more than one if required.
Once your GRN has been chosen, then items will be listed below for reference. Here, you can amend the Invoice Price, Invoice Qty, VAT and Overridden VAT Amount, along with deselecting line items as a whole.
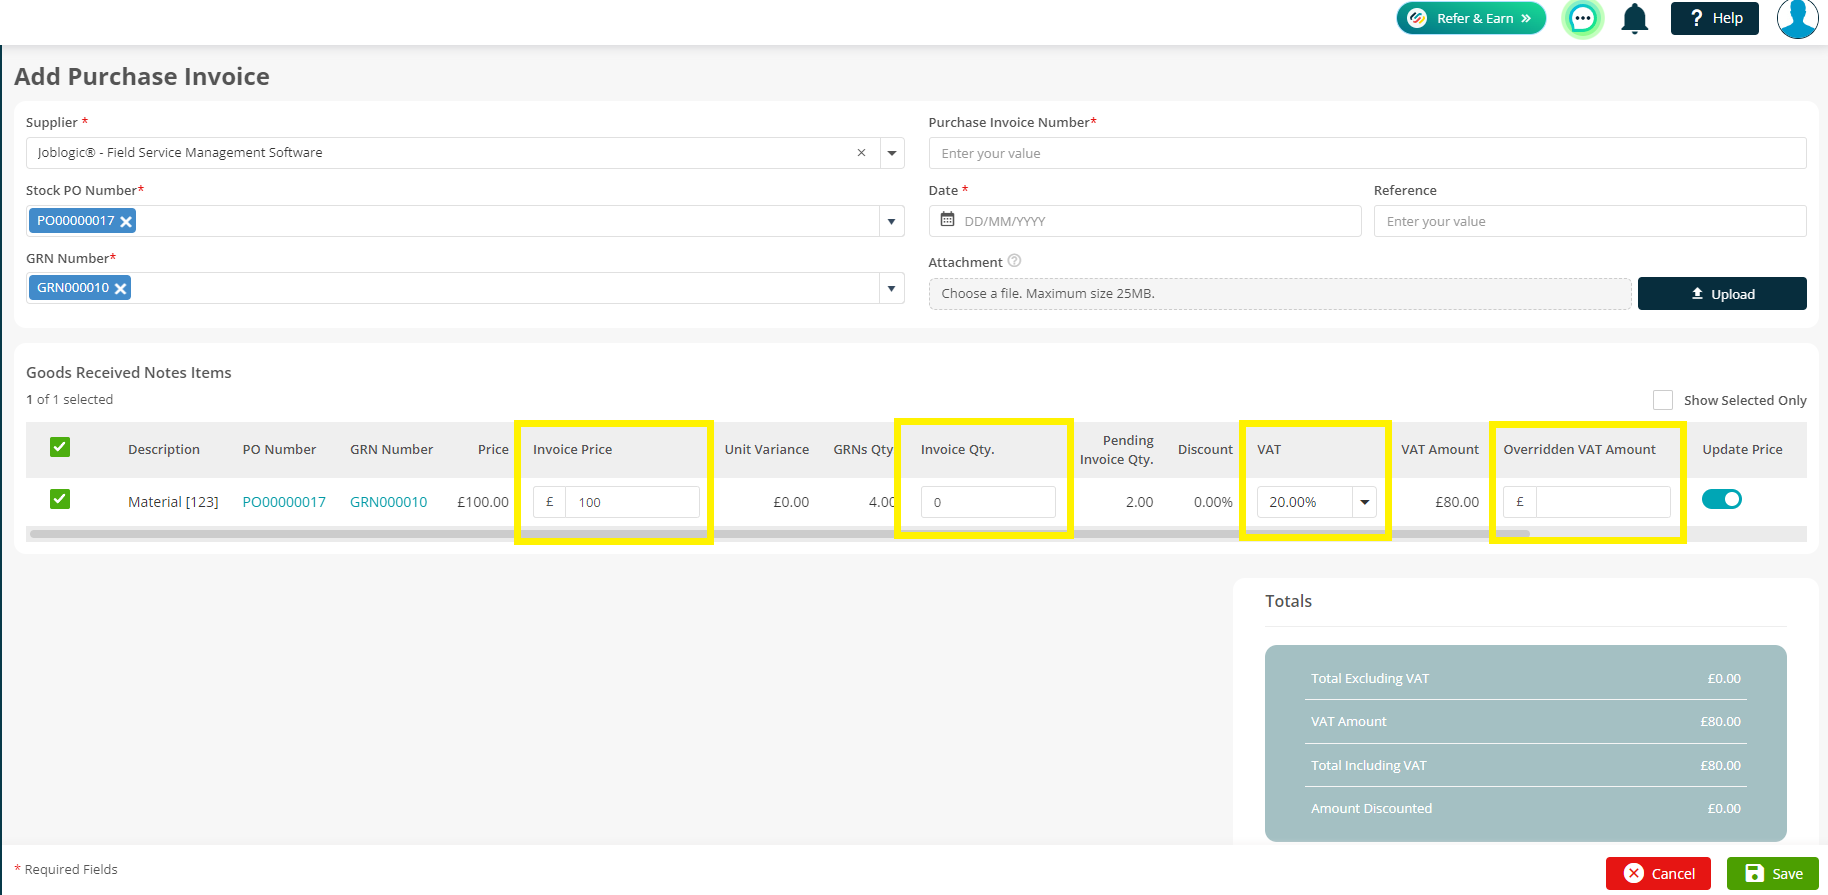
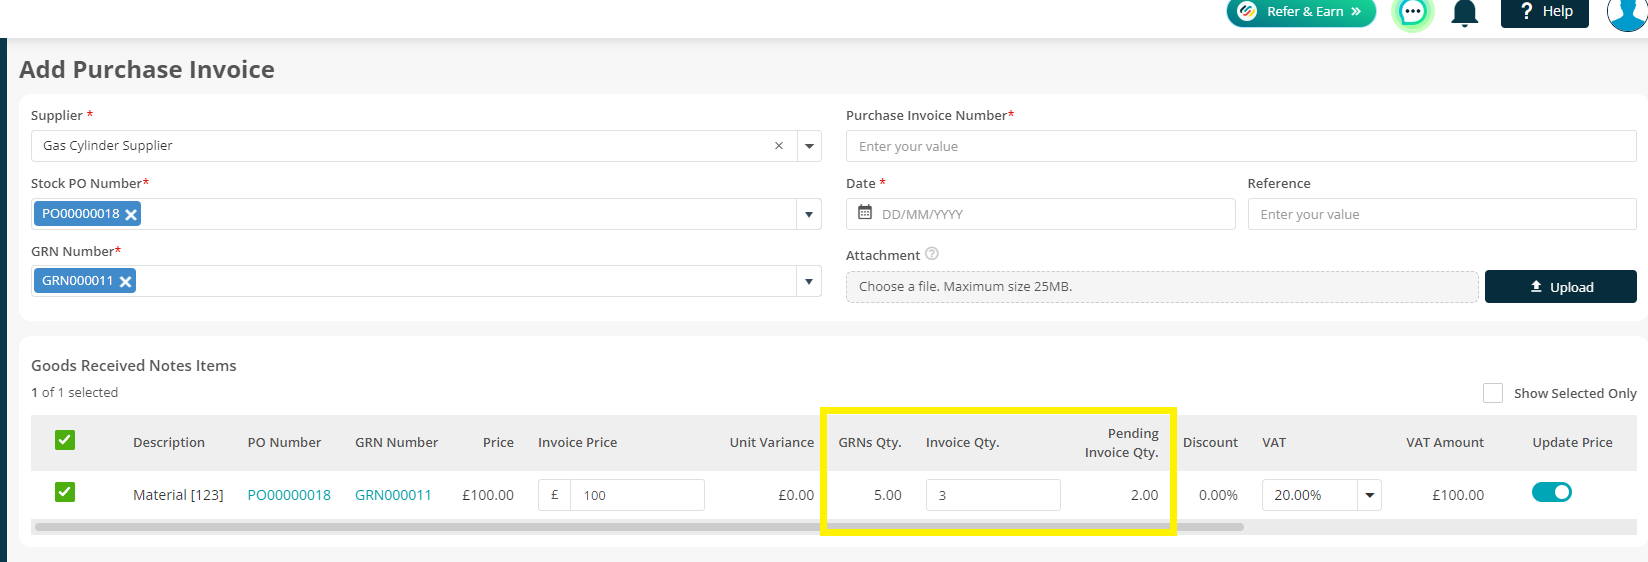
If you wish to only invoice part of the GRNs Qty, you can amend the Invoice Qty to reflect this.
Your Pending Invoice Qty will then be updated automatically to show you what you have left to invoice.
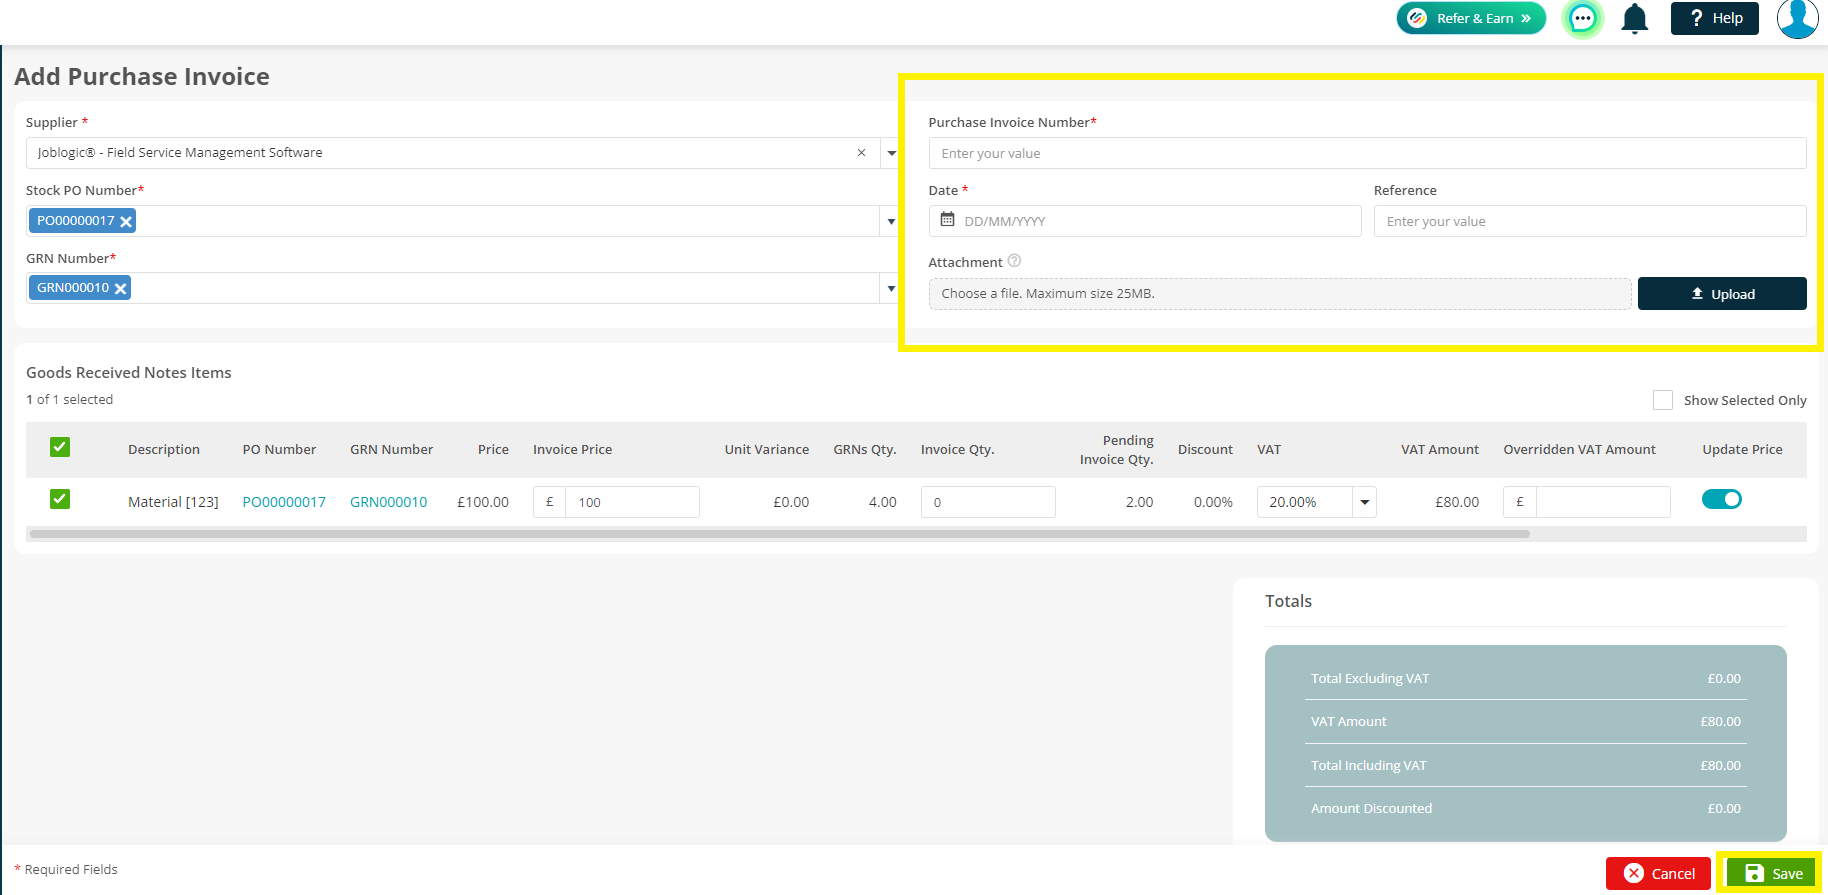
You will need to enter a Purchase Invoice Number and the Date as these are mandatory fields.
You can then add a Reference and Attachment of the Invoice before clicking Save.
This will then mark your GRN as Completed and Invoice Matched.
It will also mark your Purchase Order as Invoice Matched.
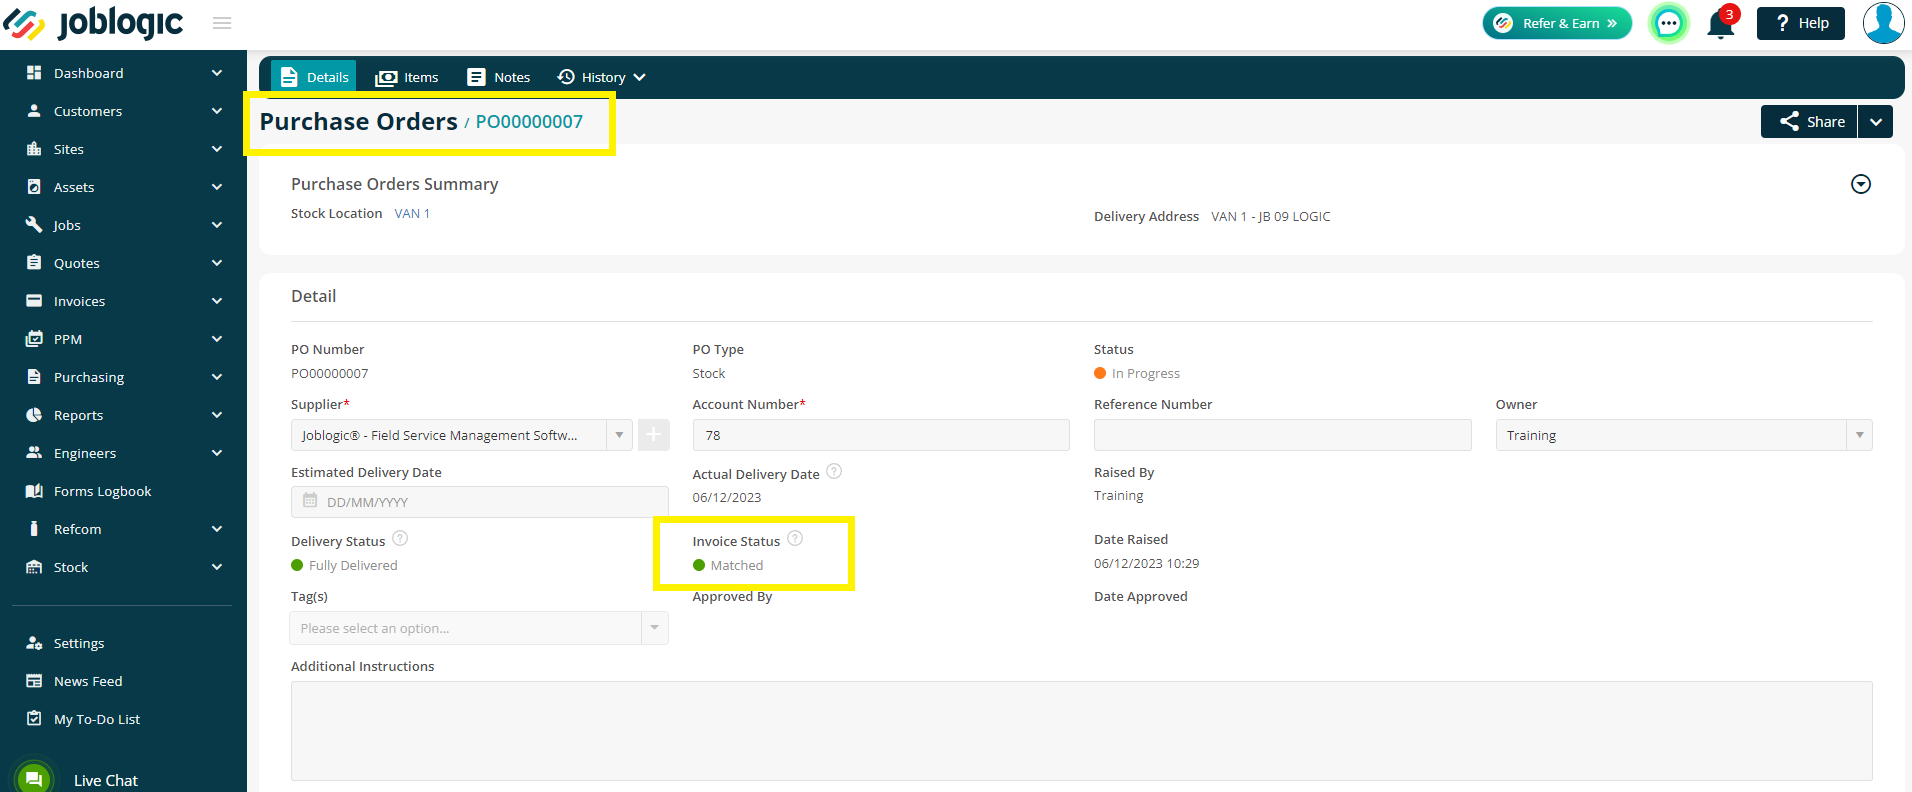
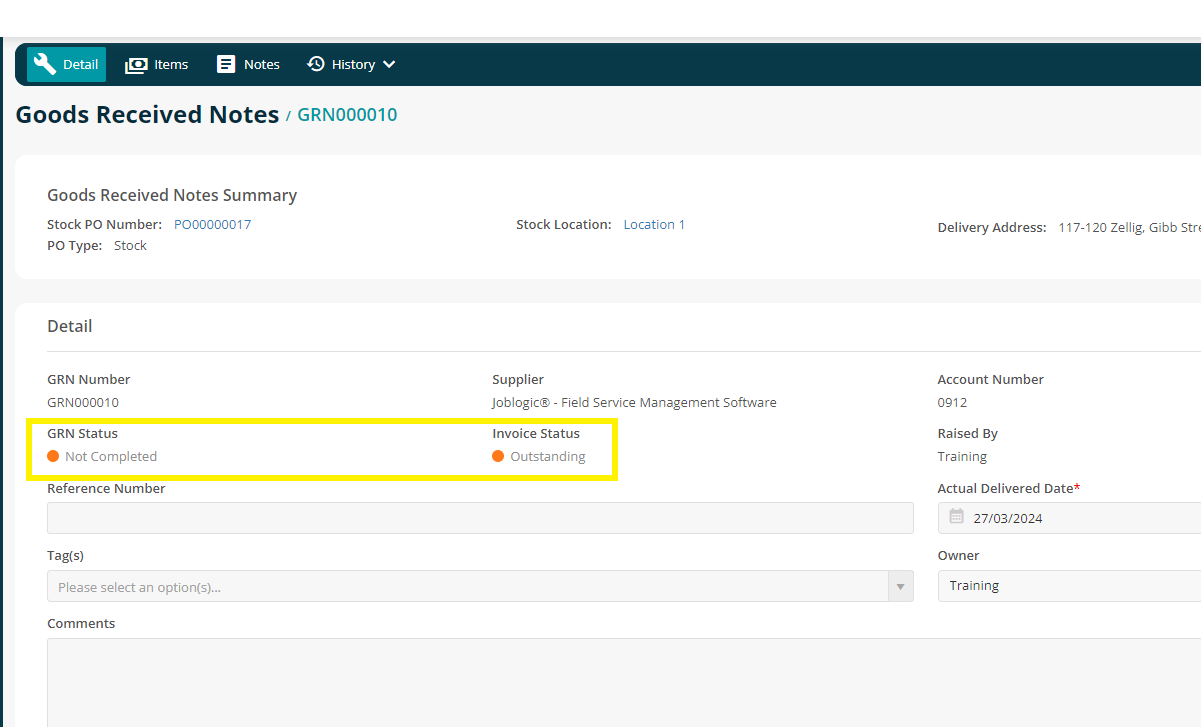
However, if there is anything still outstanding, the GRN and invoices statuses will reflect this
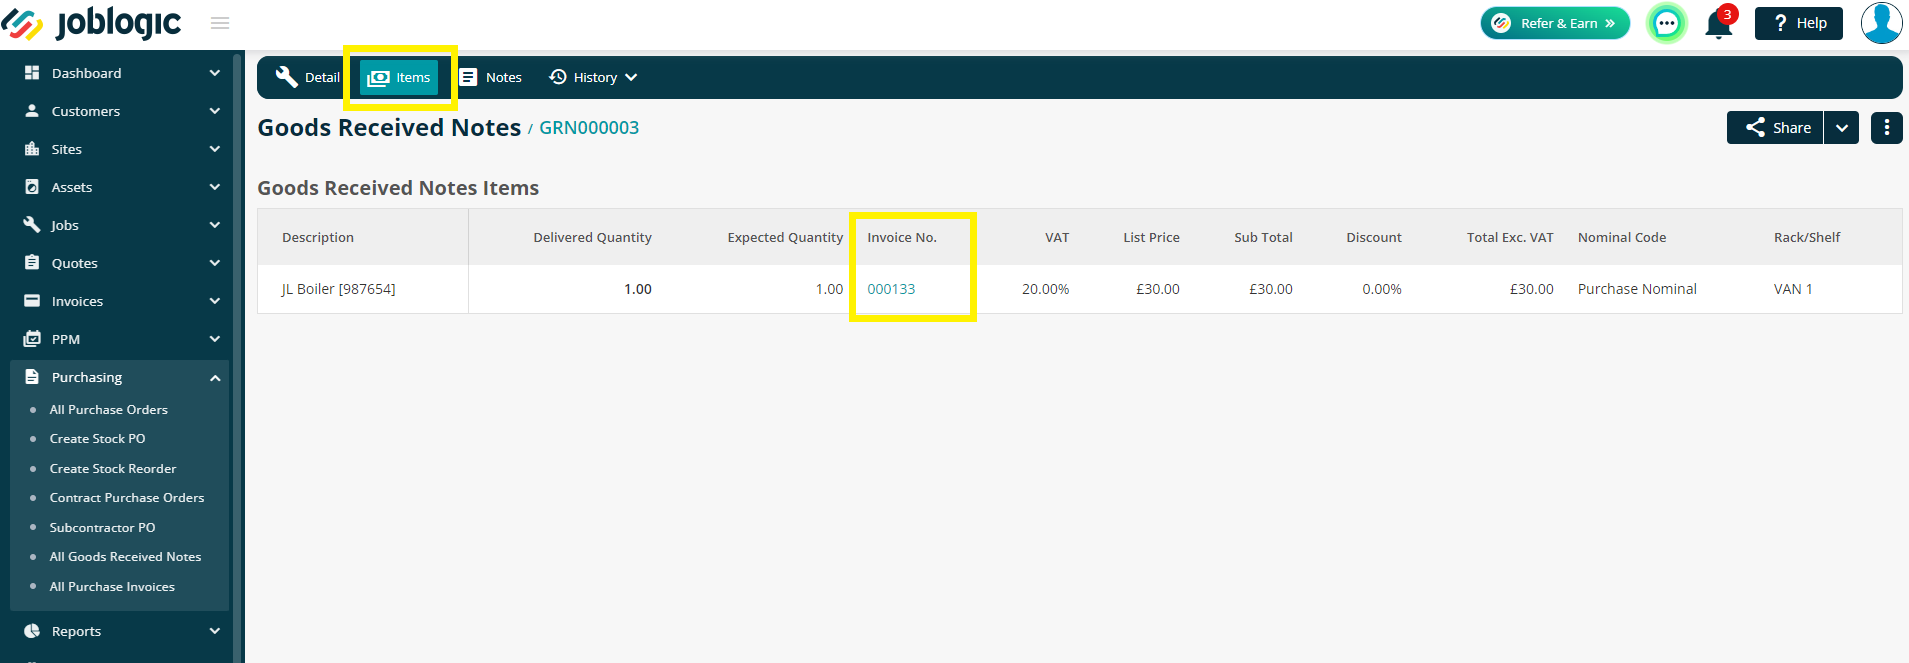
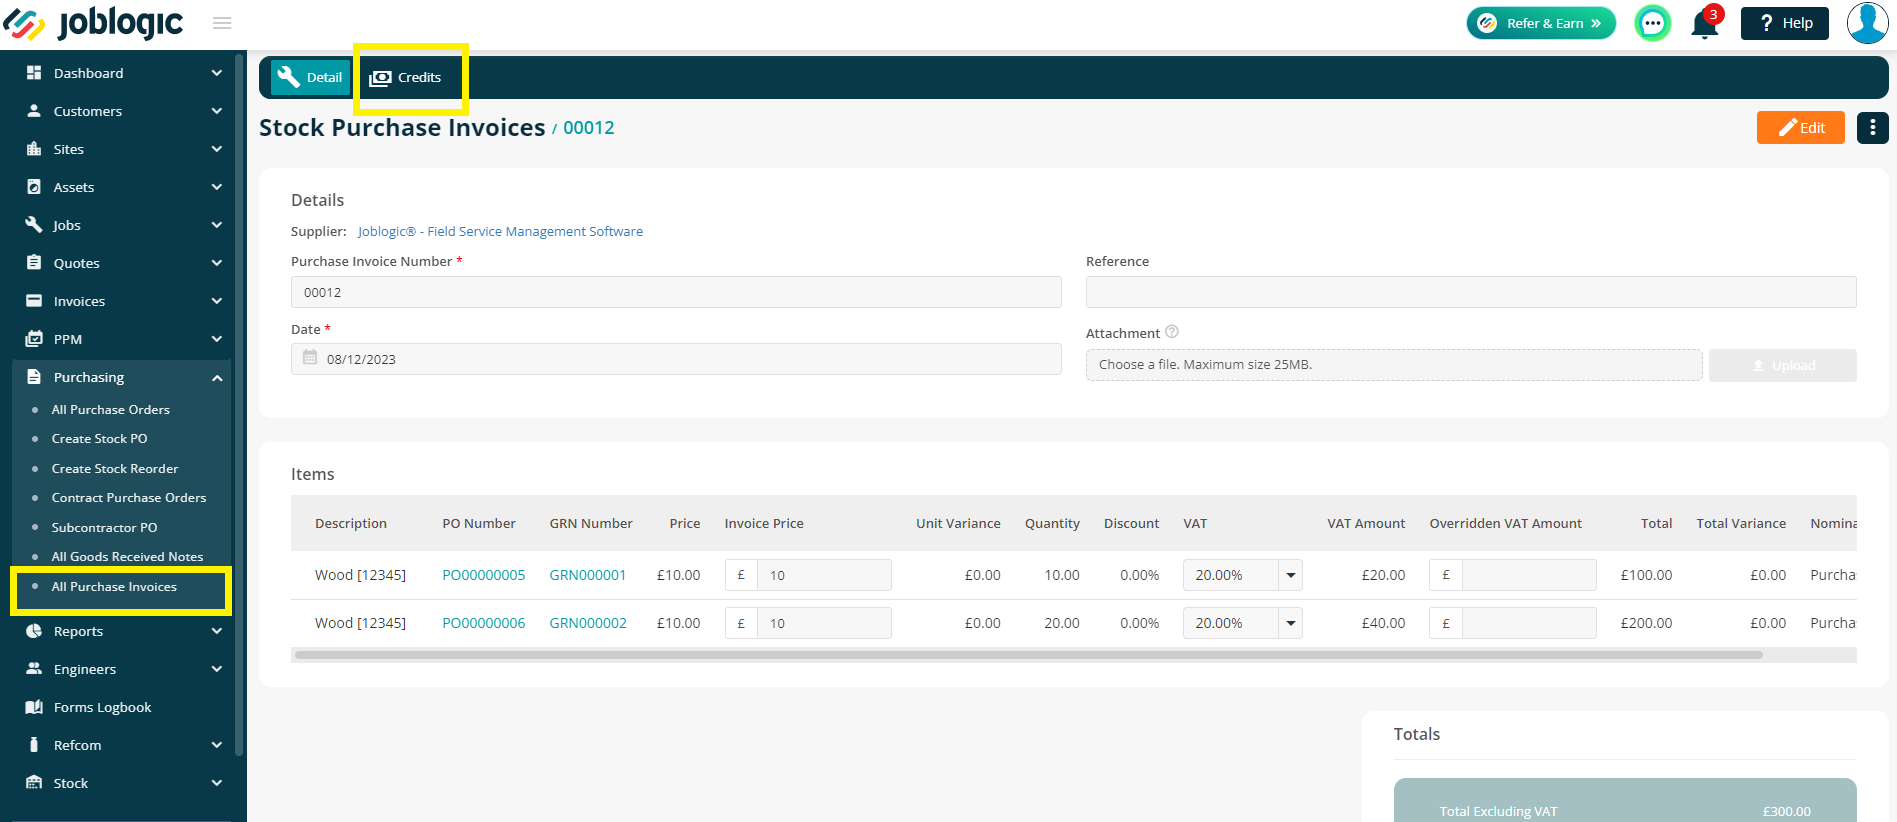
If you click into the Items tab on your GRN, you will be able to view which Invoice the line items are associated with. This is a hyperlinked text meaning you can click on this to view your Stock Purchase Invoice details.
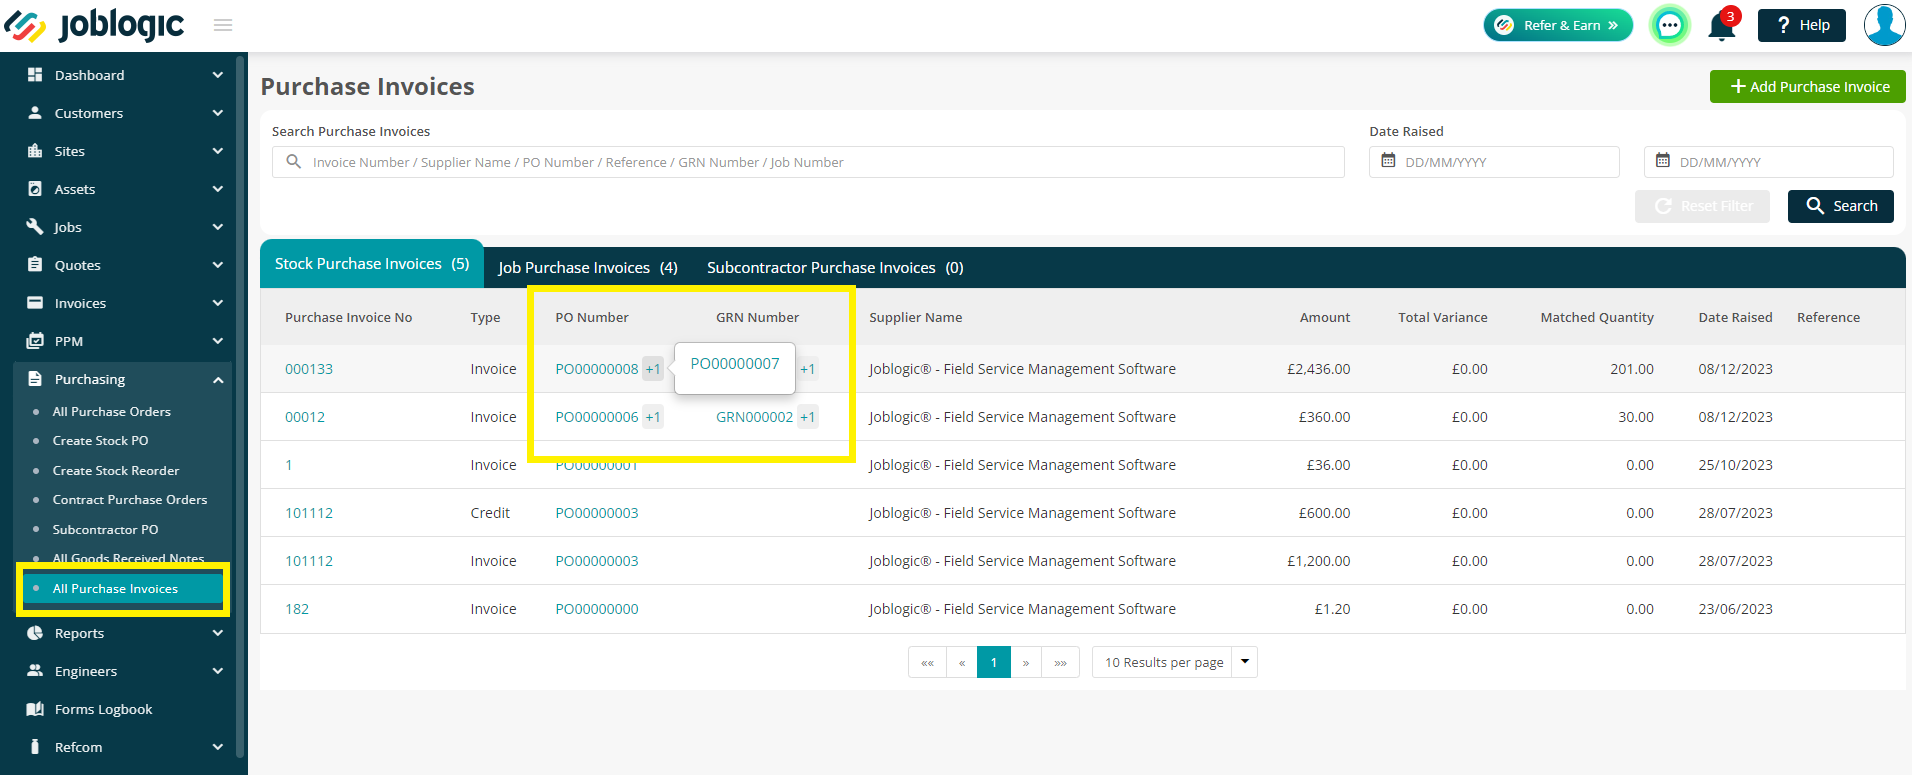
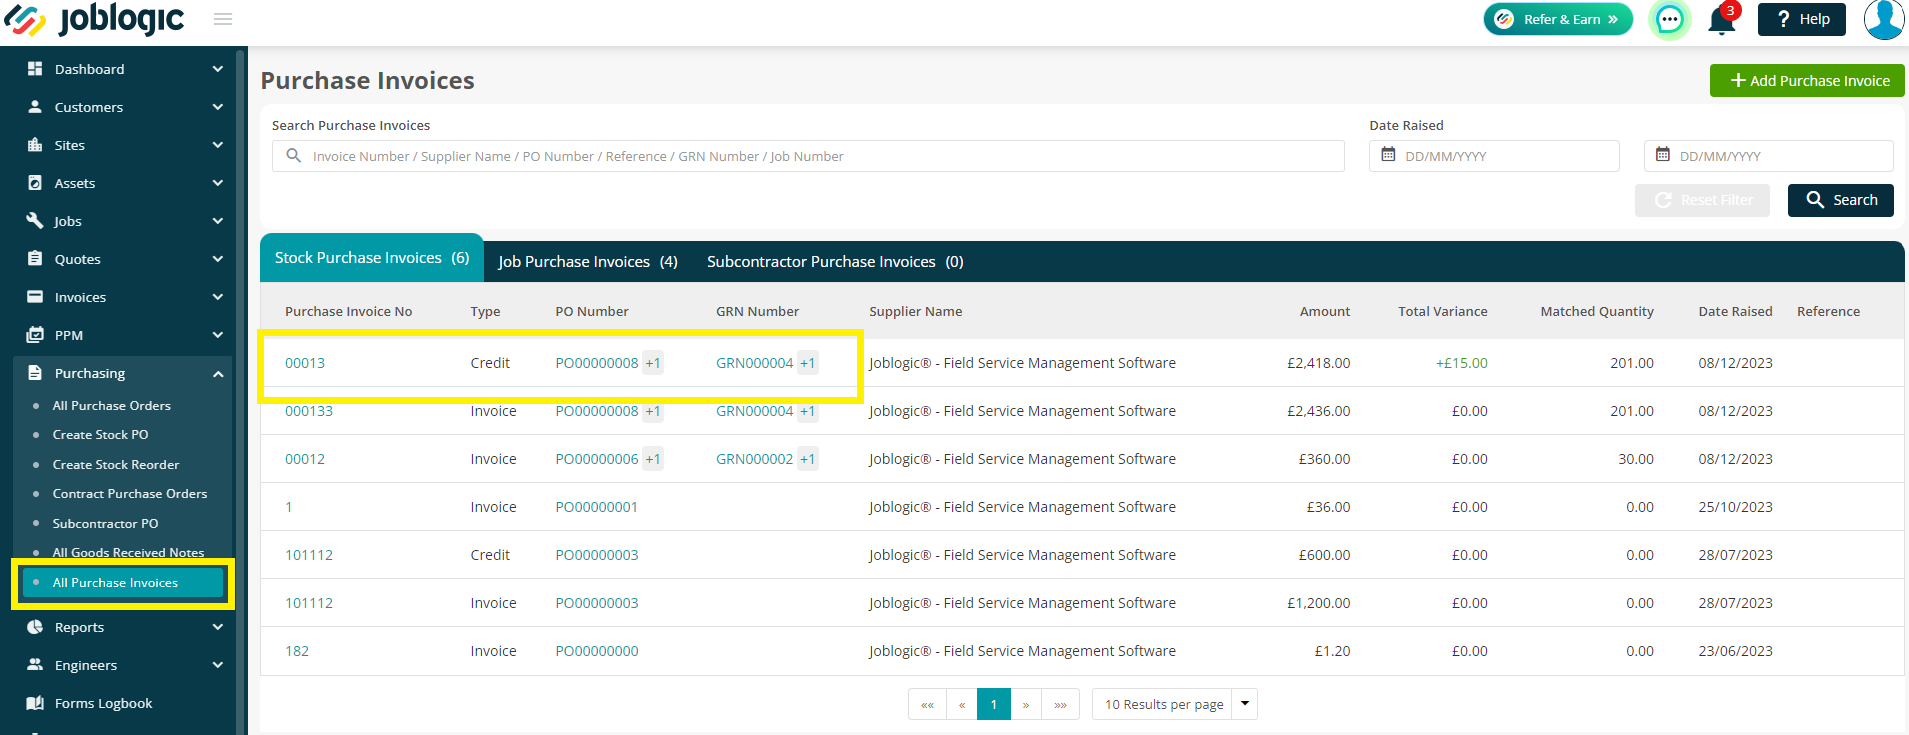
On the All Purchase Invoices page, you can view all Purchase Orders and Goods Received Notes associated with the Invoice.
There will be a + button with a number against it to show you how many further PO’s or GRN’s are against the Purchase Invoice. All items here are hyperlinked and will take you to the relevant pages if clicked.
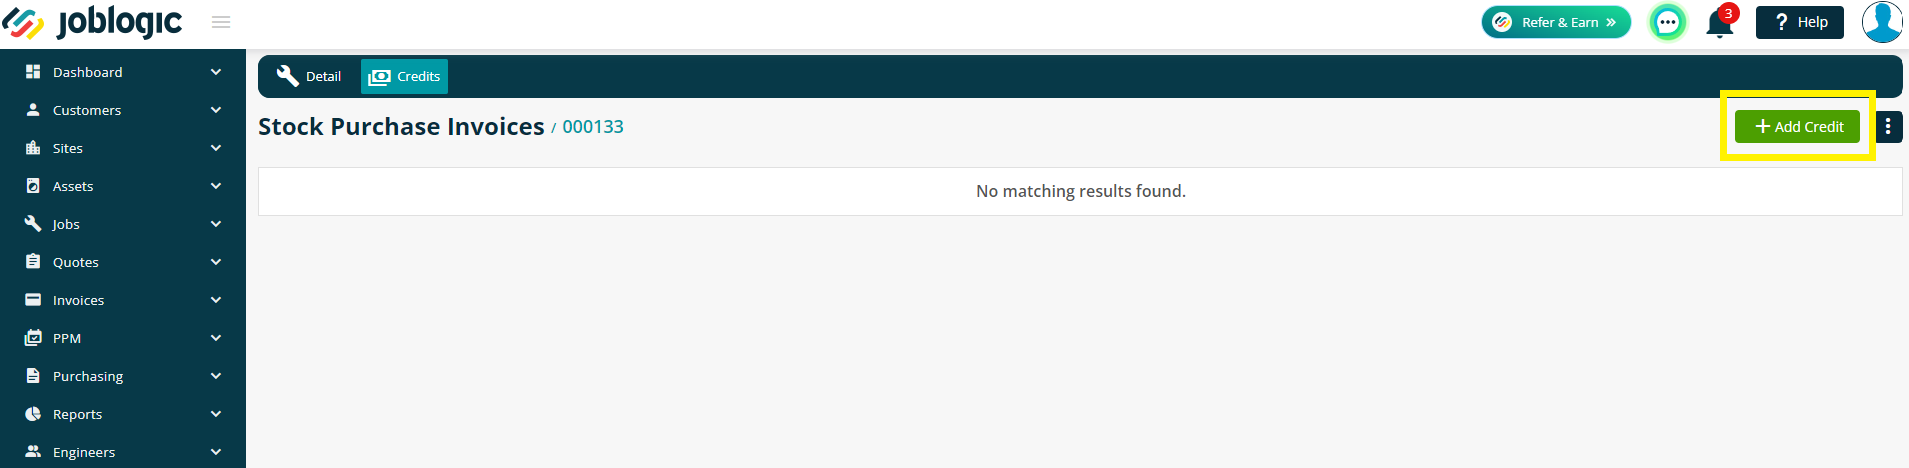
Credits
To raise a Credit against a Stock Purchase Invoice, click through to Purchasing > All Purchase Invoices > choose your invoice > Credits tab
Click Add Credit, and you’ll be transferred to the Add Purchase Credit page
Firstly, enter your Purchase Credit Number and the Date.
Next, add a Reference if required. This field is not mandatory and can be left blank.
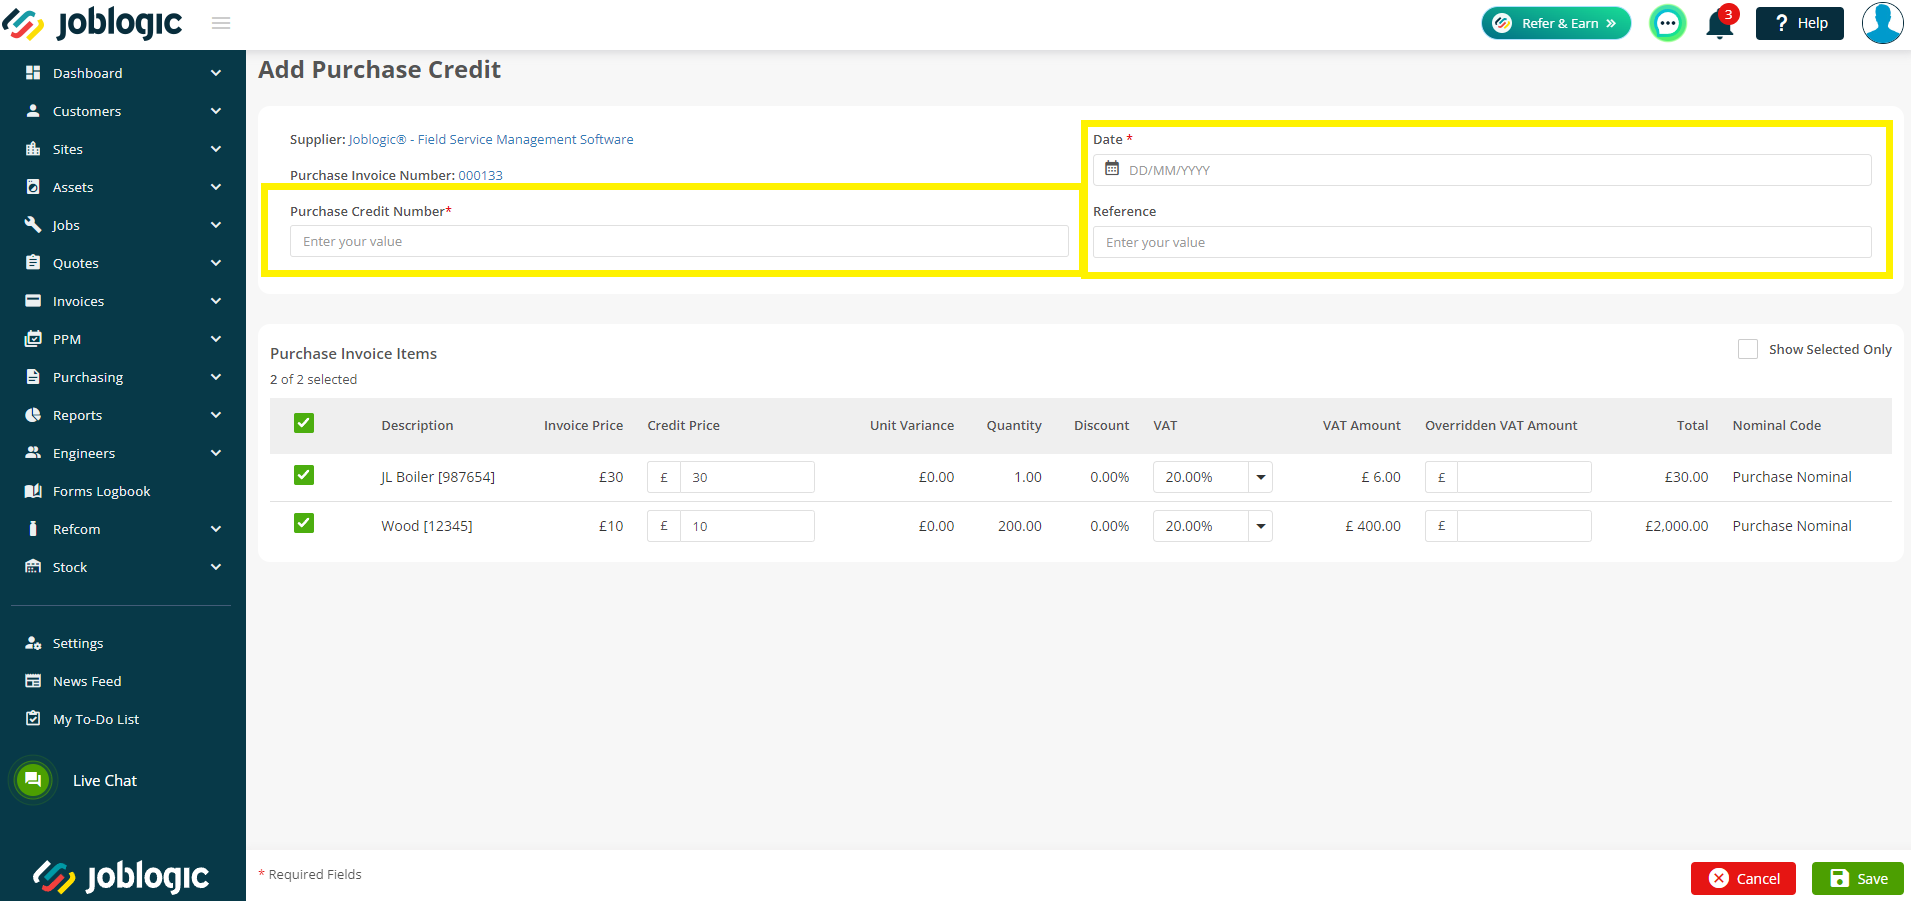
Finally, check over your line items. Untick lines that do not need to be credited, or make amendments to the Credit Price, VAT and Overridden VAT Amount as required.
Click Save when you are happy with the details.

The Credit will show in the All Purchase Invoices list in the same way as the Invoices. You can view the PO’s and GRN’s associated with the Credit by clicking the links or the + icon to view more.
Variances
If you do make amendments to the Prices when creating a Stock Purchase Invoice or Credit, Joblogic will calculate the Variance for you.
The Unit Variance and Total Variance will be populated automatically.
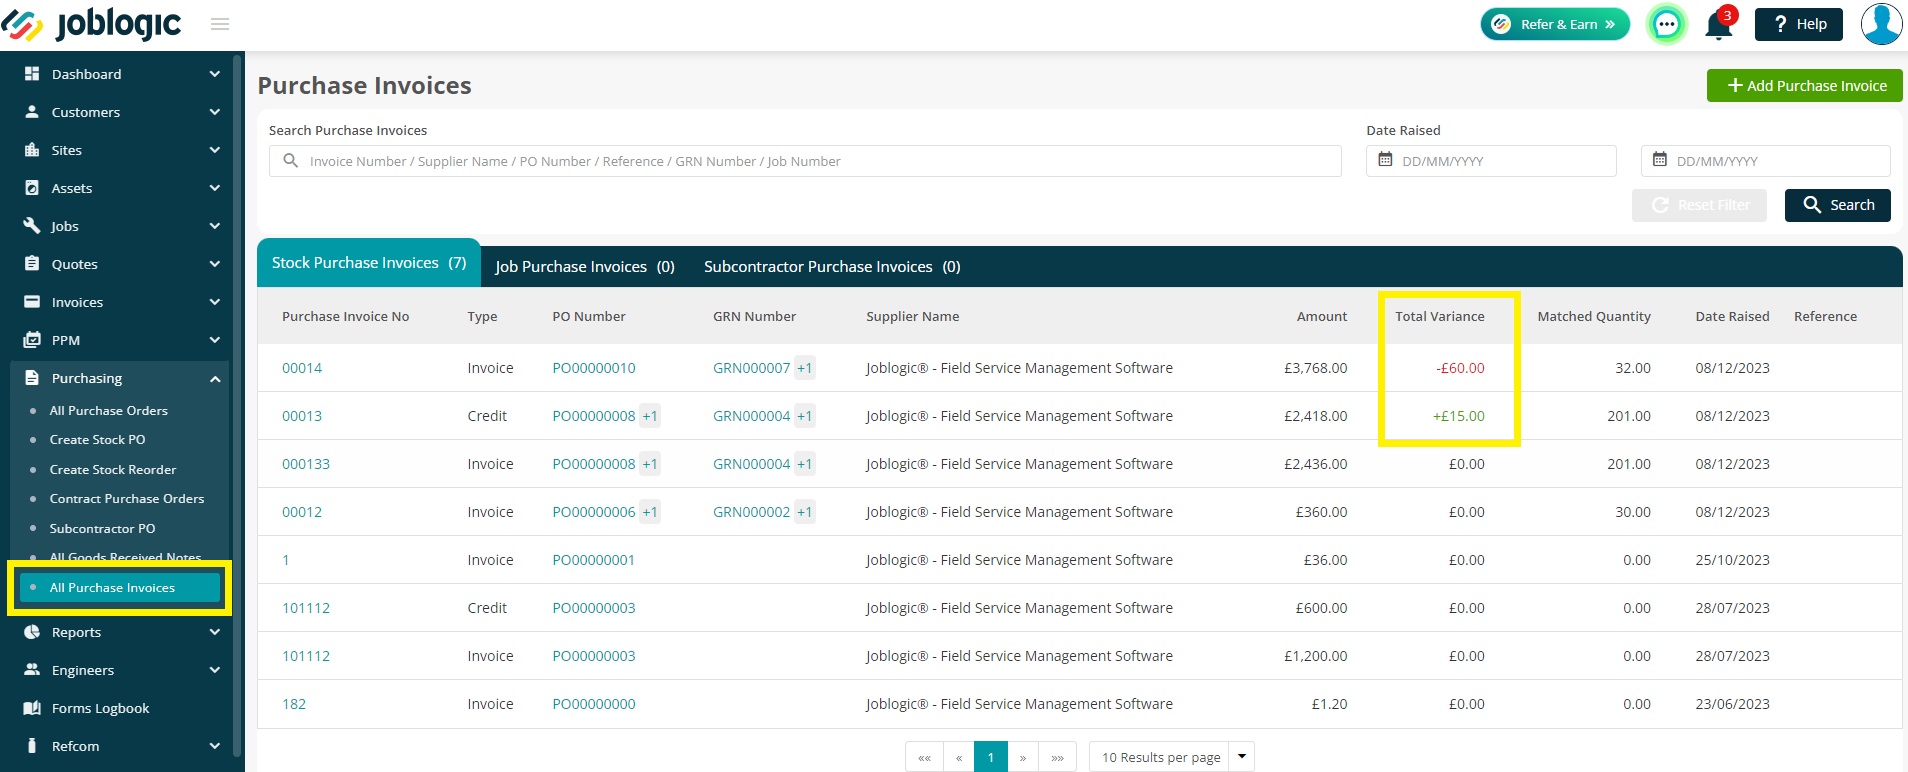
The All Purchase Invoices screen will also be updated with the overall Total Variance for that Invoice/Credit.
You can set up a default Nominal Code for your Purchase Price Variances if required.
To do this, go to Settings > System Setup > Financial tab
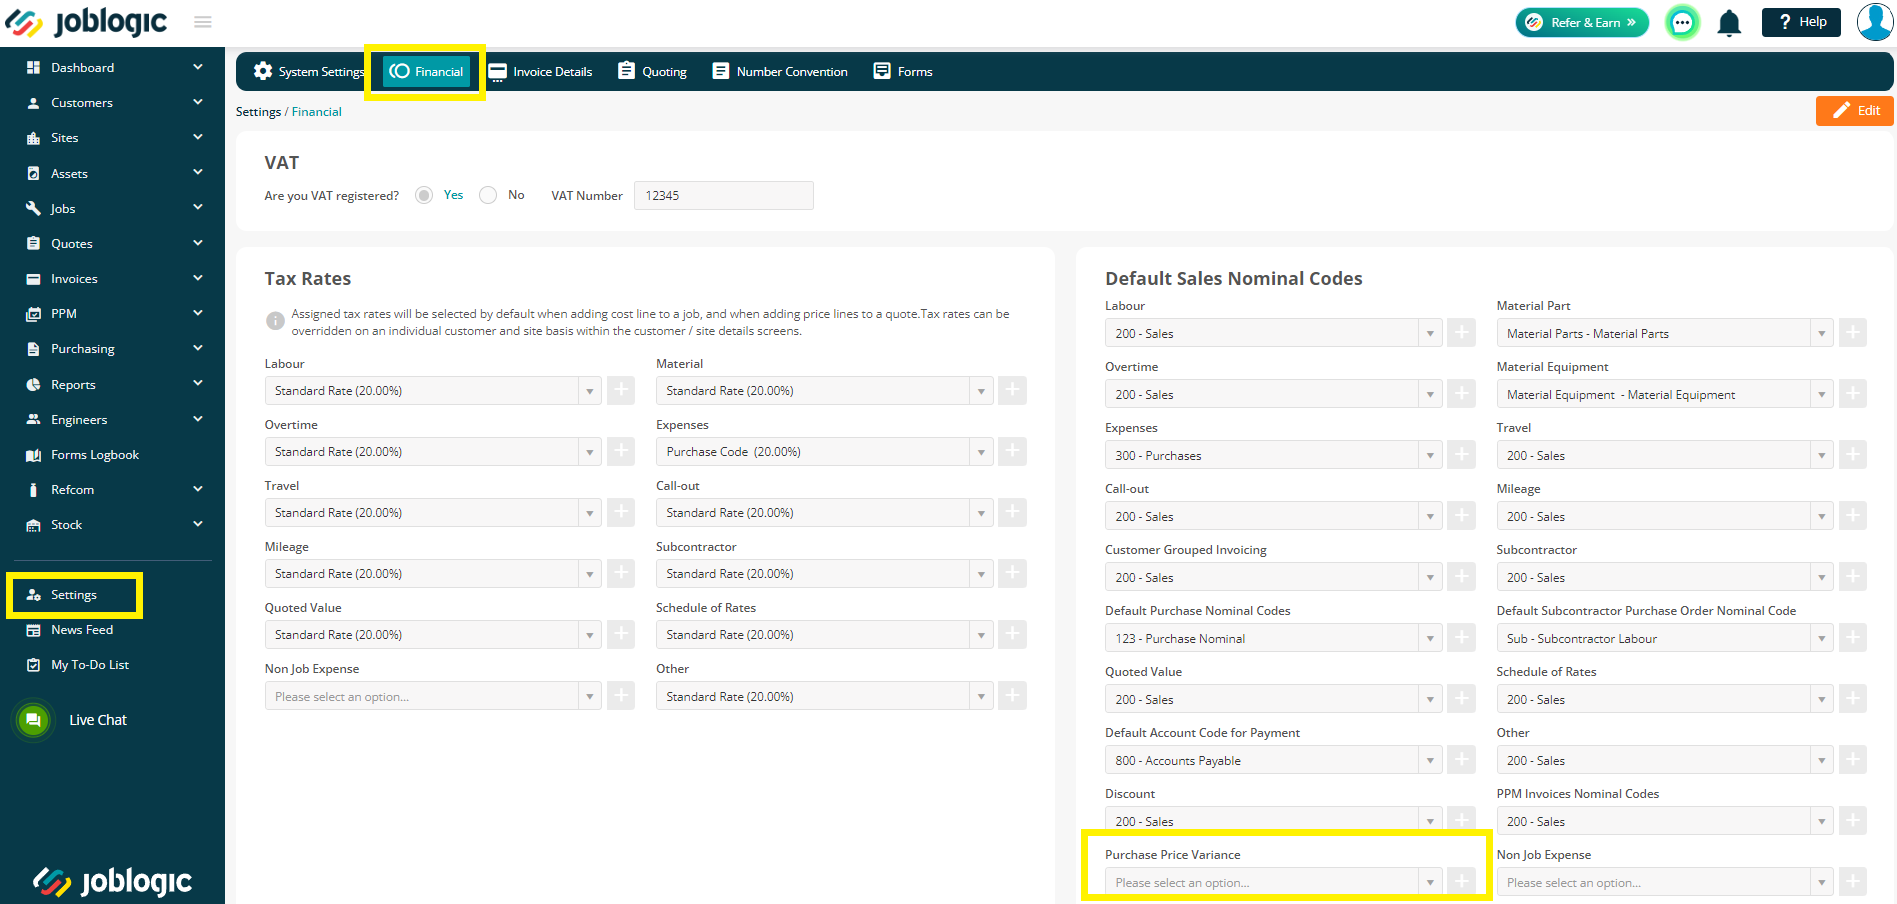
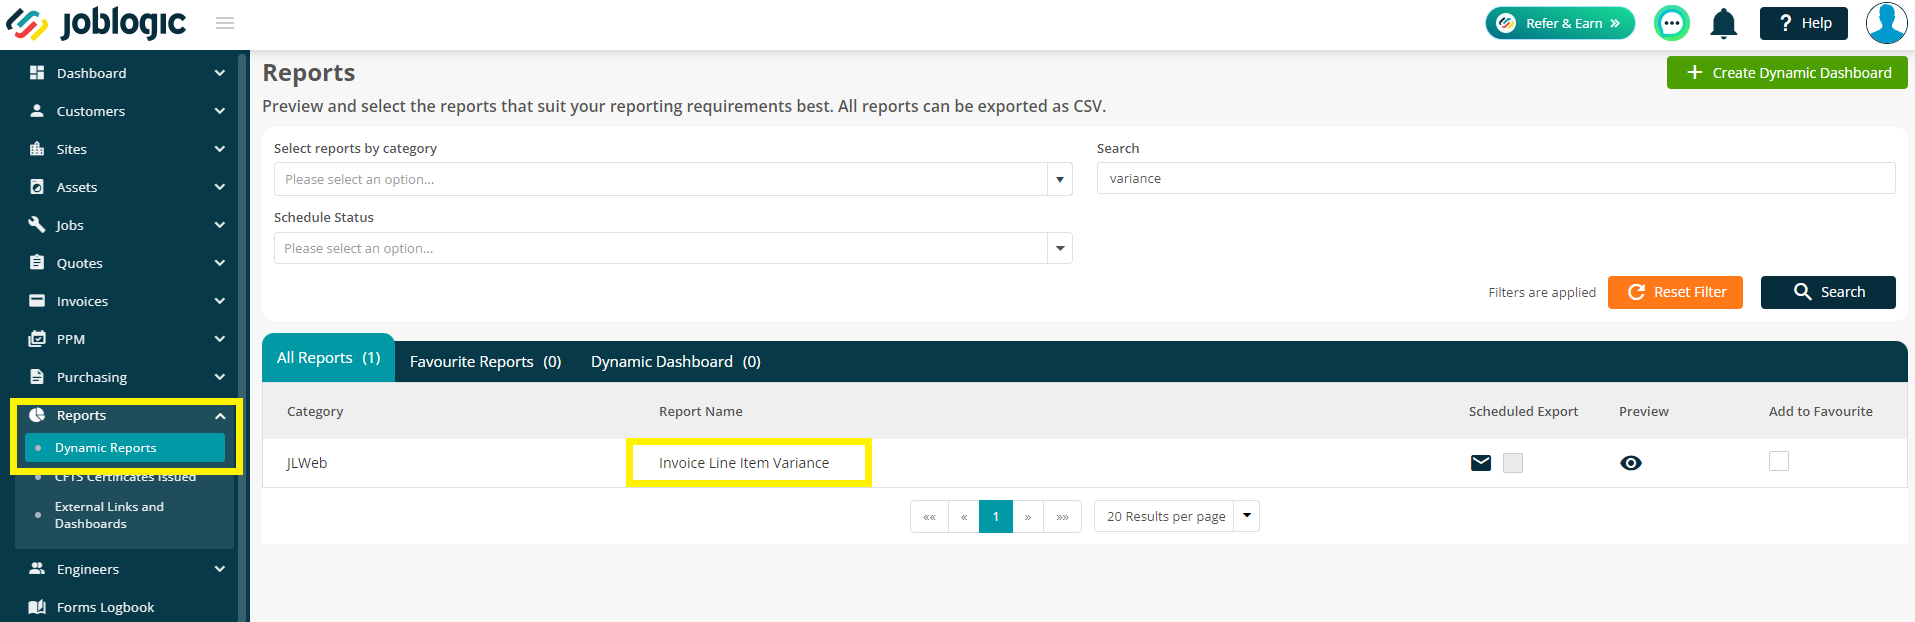
This will then pull through to your report Invoice Line Item Variance via Reports > Dynamic Reports
Further Support
For further information or assistance with the above, contact our Support Team on 0800 326 5561 or email support@joblogic.com. Alternatively, our Customer Success Management team can be reached by emailing customersuccess@joblogic.com
## Publishing Details
This document was written and produced by Joblogic’s Technical Writing team and was last updated on the date specified above. Be aware that the information provided may be subject to change following further updates on the matter becoming available. Additionally, details within the guide may vary depending on your Joblogic account’s user permissions.