Introduction
The Equipment Hire Contracts Module provides a seamless way to manage equipment rentals, allowing you to handle everything from contract creation and invoicing to tracking on-hire equipment, assets, and parts.
With tools to customise hire rates, monitor availability, and manage logistics, this feature simplifies the hiring process and boosts efficiency.
This guide will walk you through setting up and using the Equipment Hire Contracts module, helping you streamline your equipment hire operations and maintain clear oversight of every rental.
Initial Set up
Before you dive into using the Equipment Hire Contracts module, there are a few quick setup steps to get everything ready, like configuring your Hire Contract ID and adjusting some library settings:
Number Convention
To set your own Hire Contract number and prefix, head over to Settings > System Set up > Number Convention
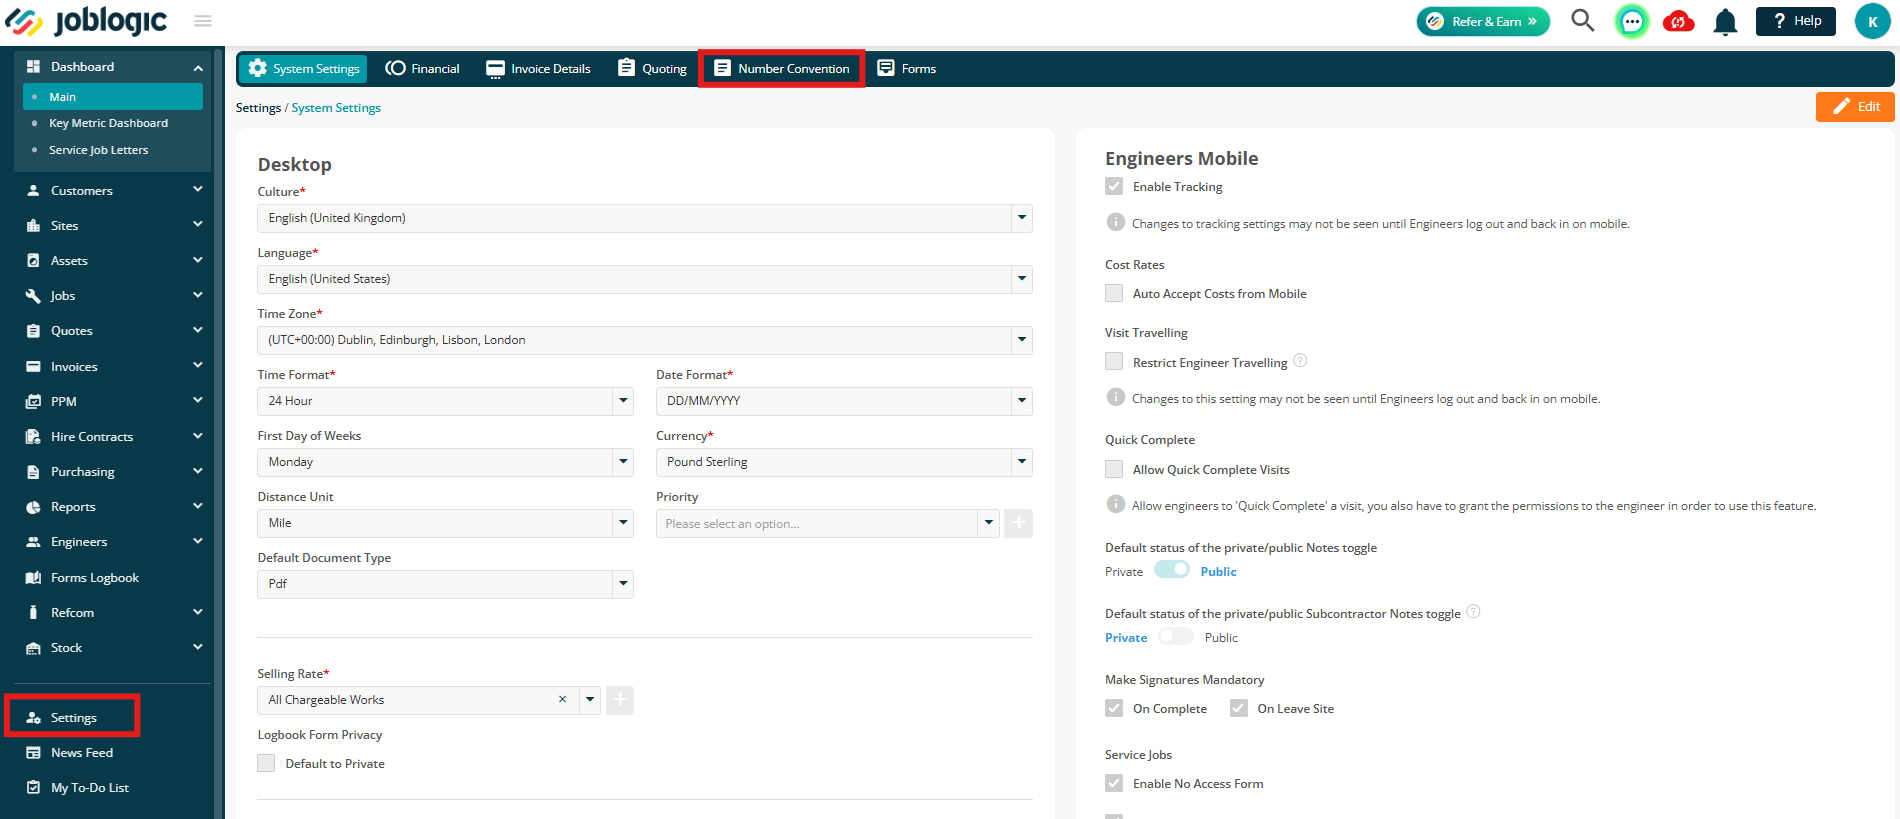
Click the Hire Contracts name
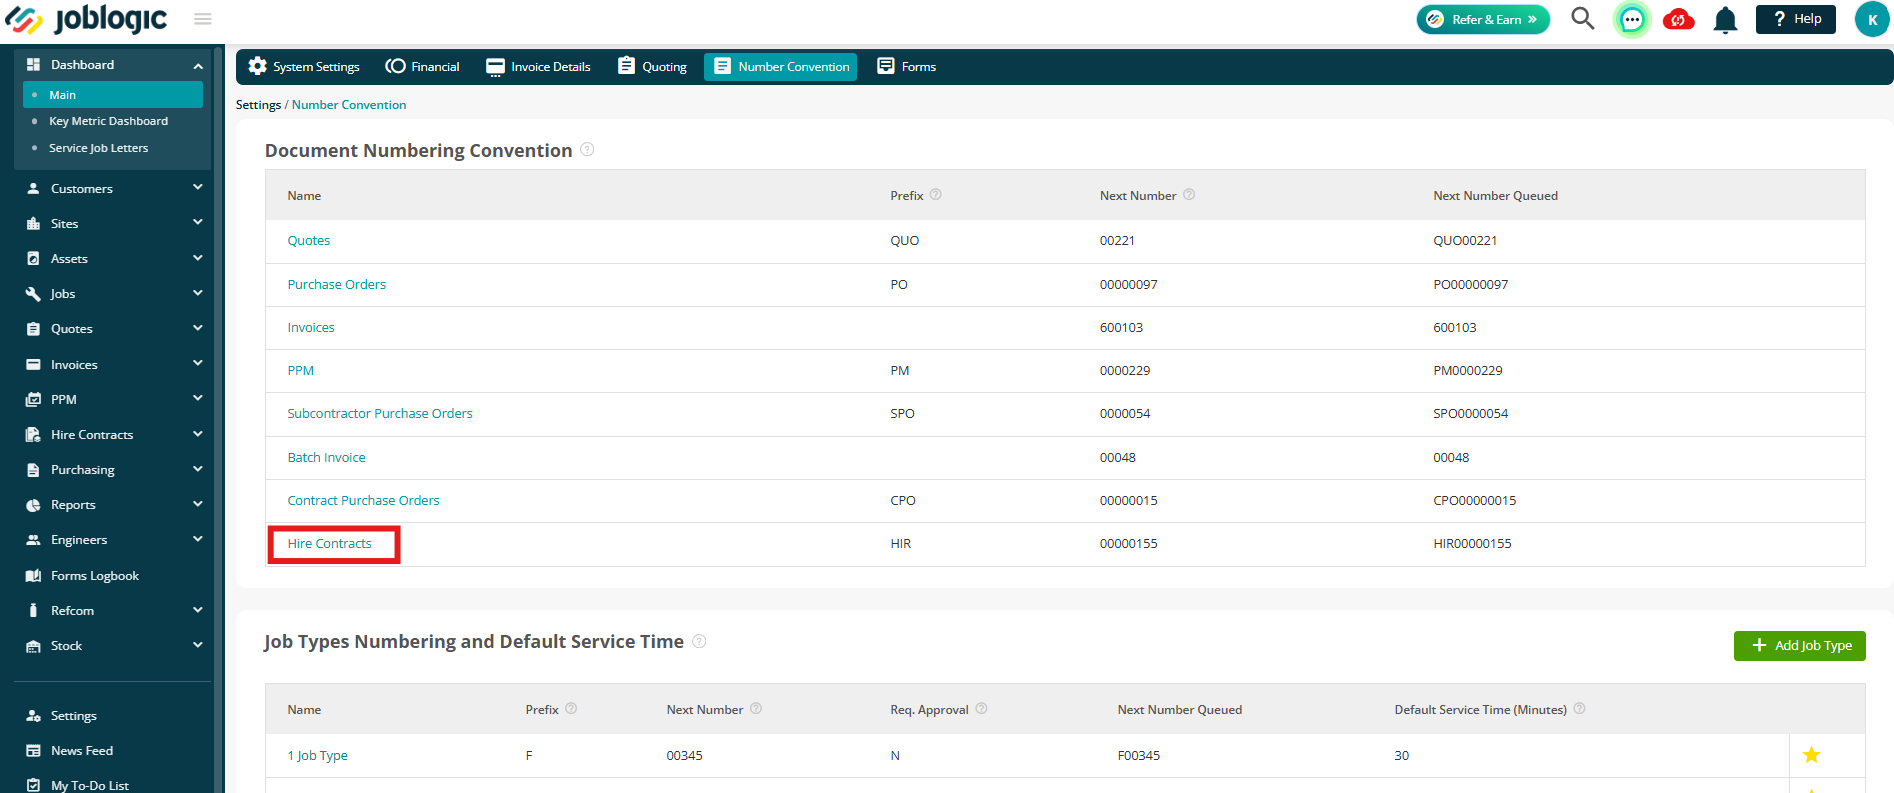
Type your chosen prefix, and Next Number. When you start adding Hire Contracts, this will be the Joblogic ID

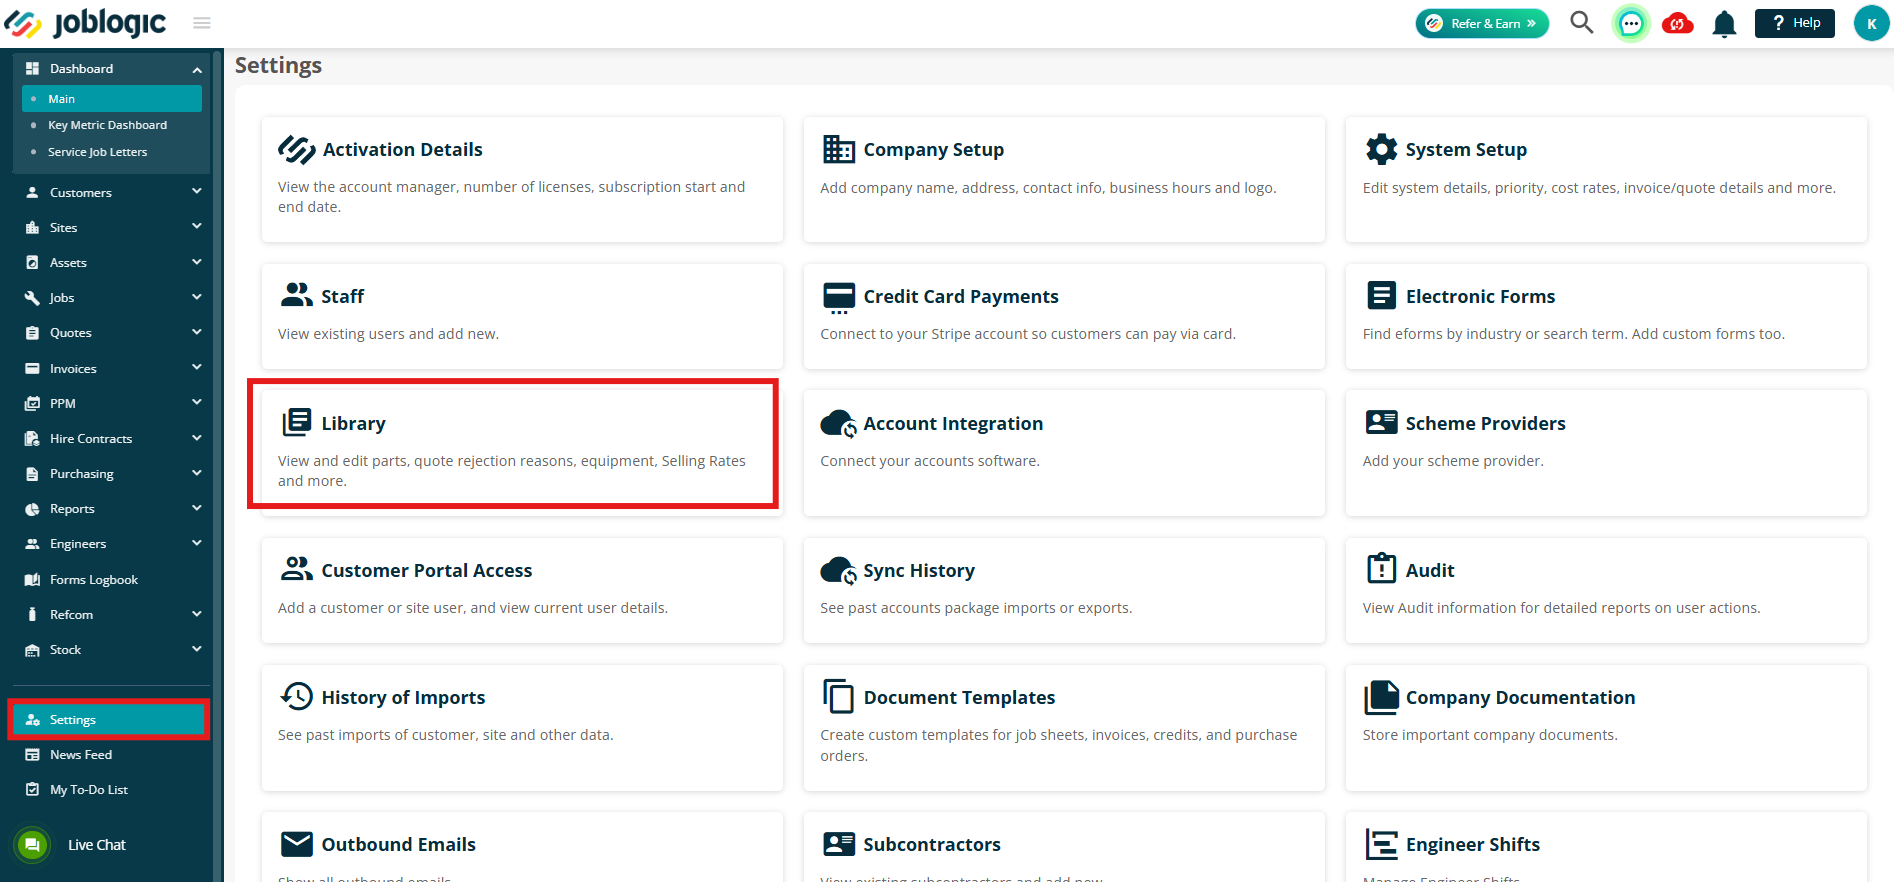
Library Settings
Hire Assets
To add a new hire asset, click Hire Contracts on your main menu, and then select Create Hire Asset.
.png)
This will take you to a familiar Create Asset screen, with the addition of the Hire Rate section at the top.
Fill in your asset details, including the hire rate, and click Save.
.png)
Suspending an asset
To suspend an asset, click the 3 dots next to it on the main list here:
.png)
or within the asset details page here:
.png)
Click Suspend to confirm.
.png)
To reactivate an asset, simply repeat the processes above. Click Reactivate to make the asset available again.
.png)
.png)
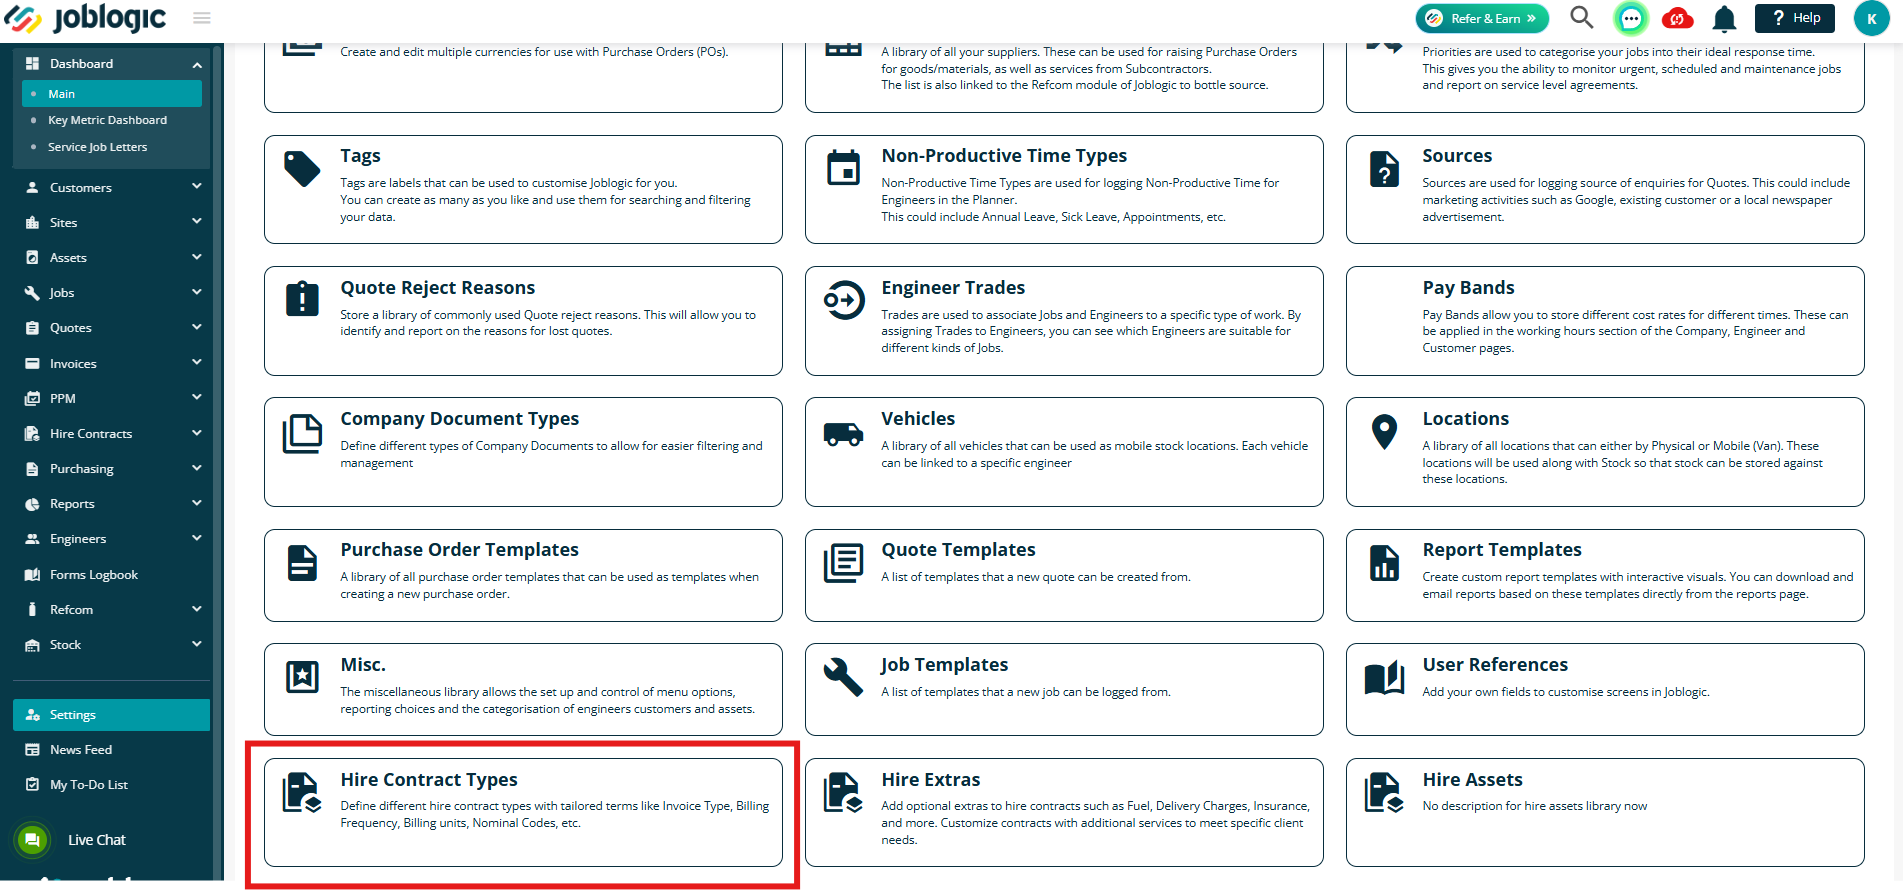
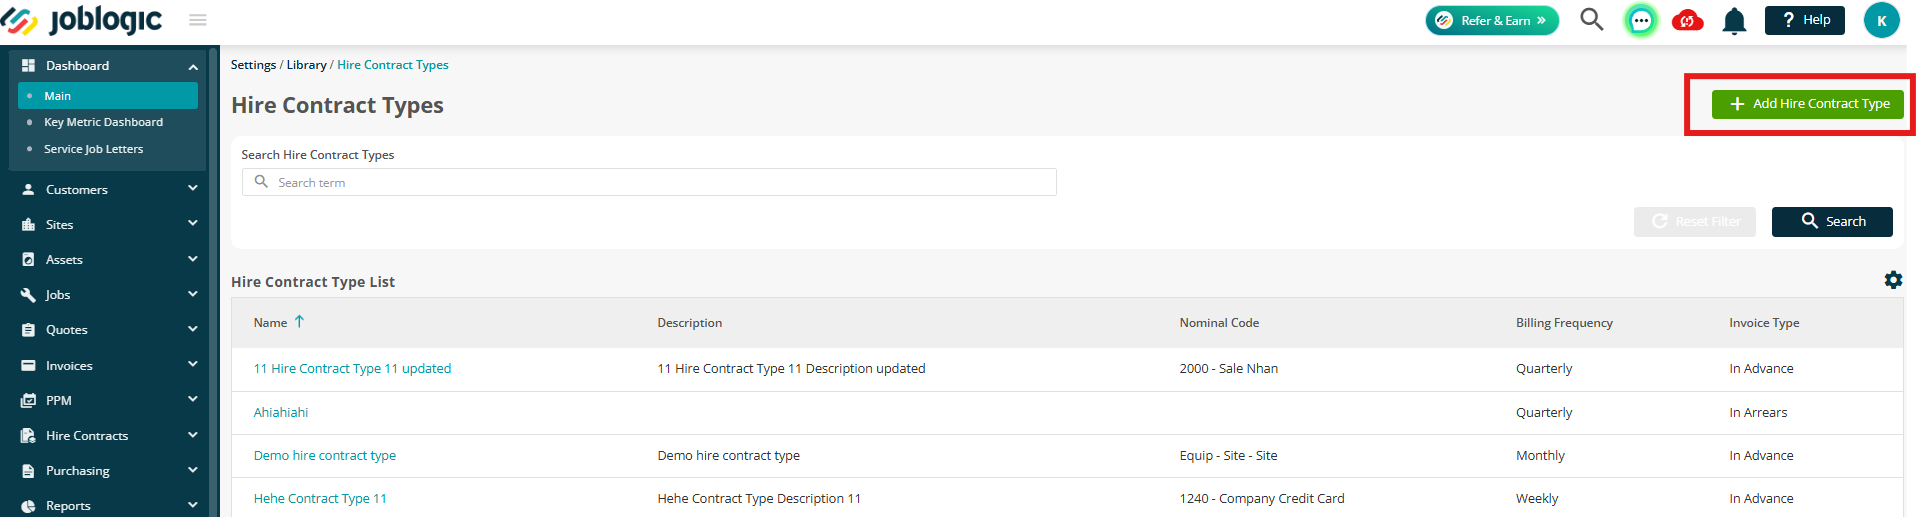
Hire Contract Types
Next up, you can set up your Hire Contract Types and Extras under Settings > Library
Click the Hire Contract Types button to get started
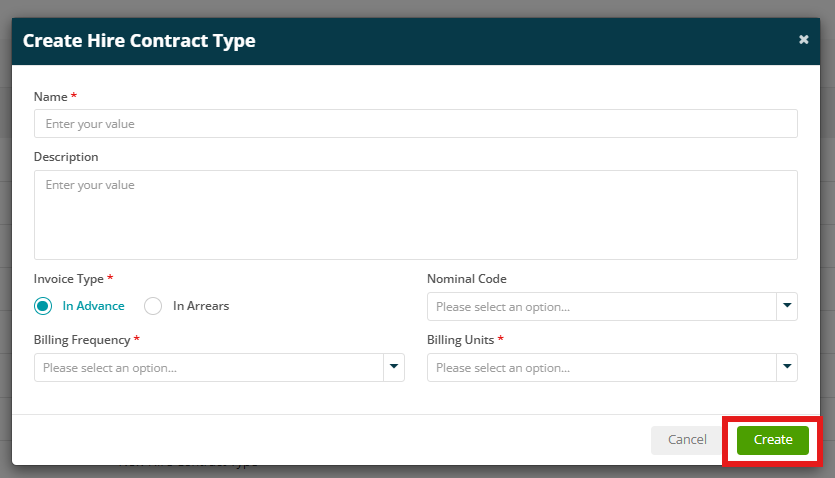
Next, click Add Hire Contract in the top right
Enter your Contract Type details here and then click Create
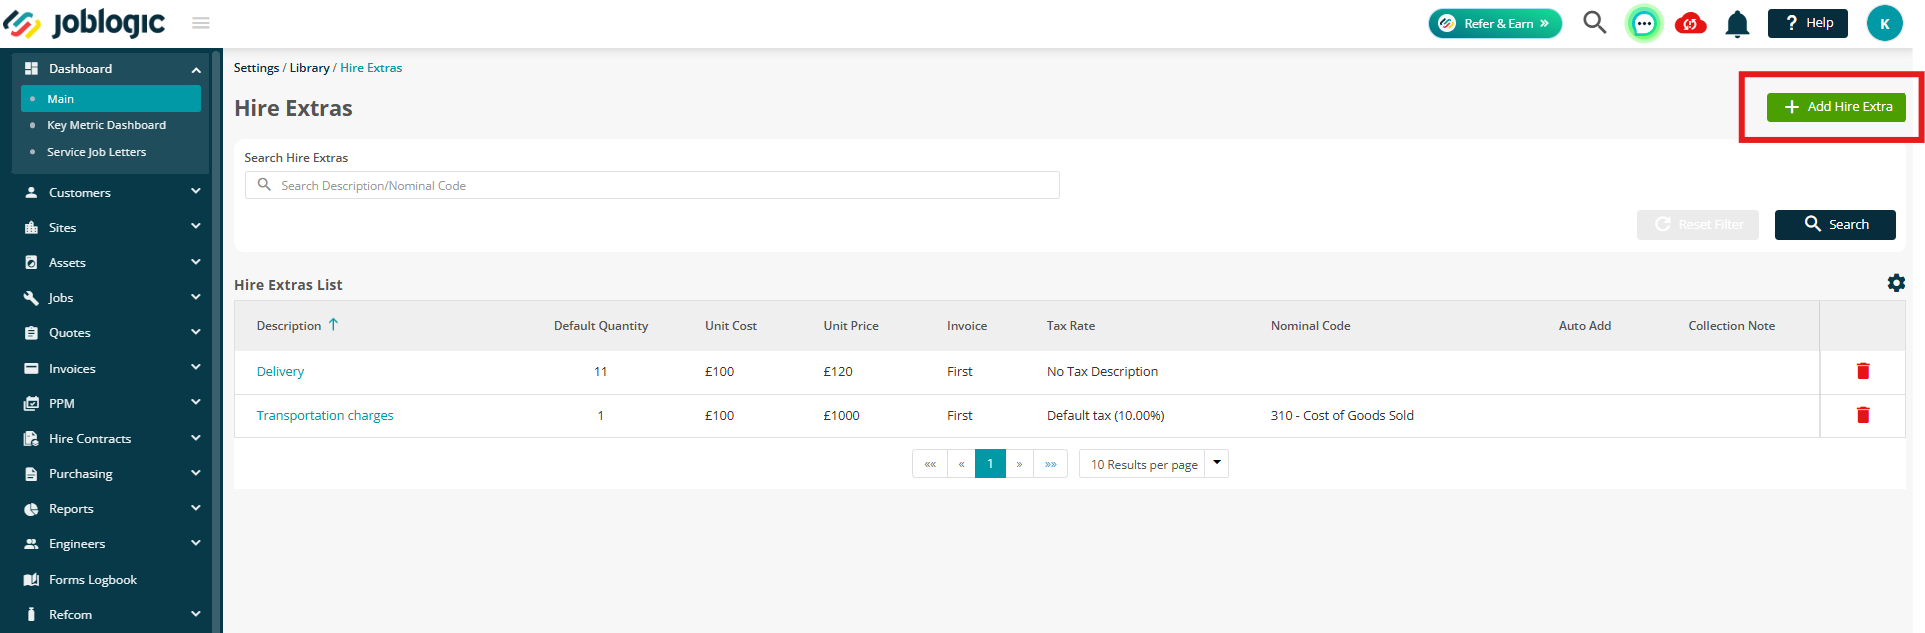
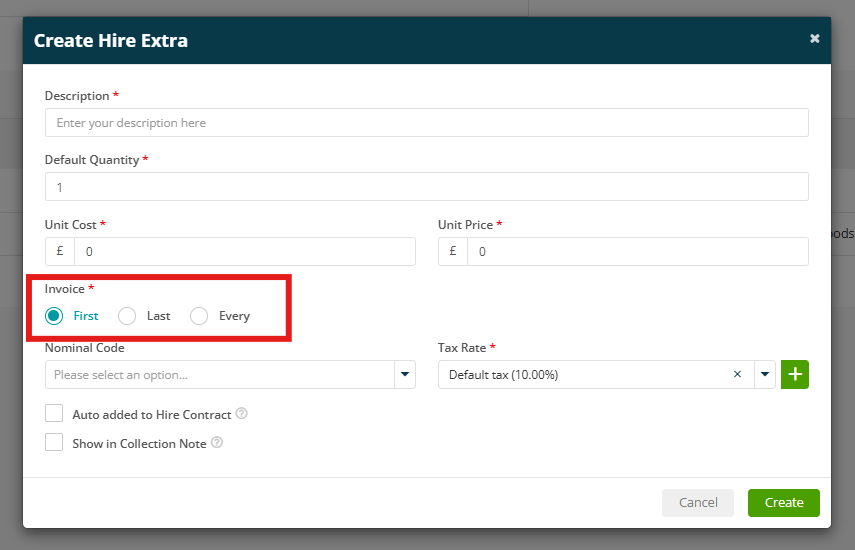
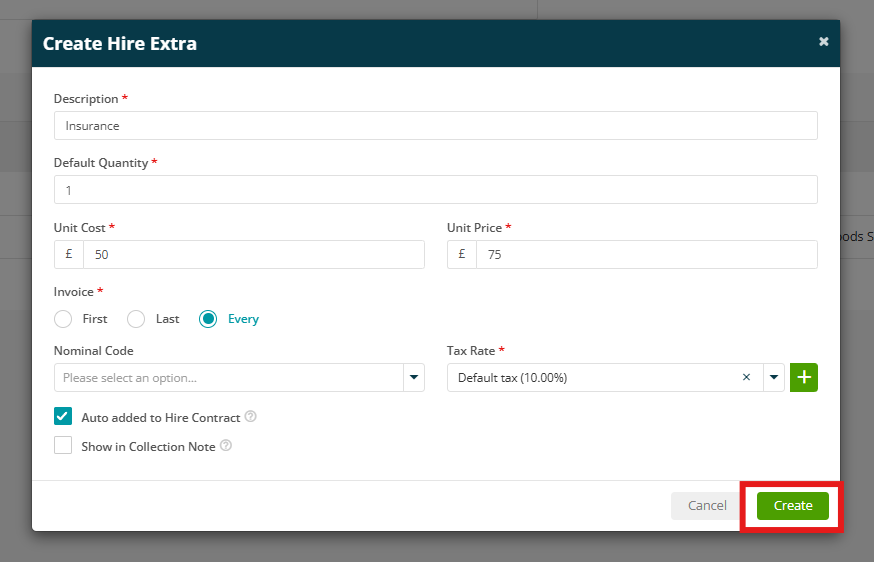
Hire Extras
Click Hire Extras to start adding your optional extras, such as Fuel, Delivery and Insurance charges.

Click Add Hire Extra in the top right
Fill in your details here.
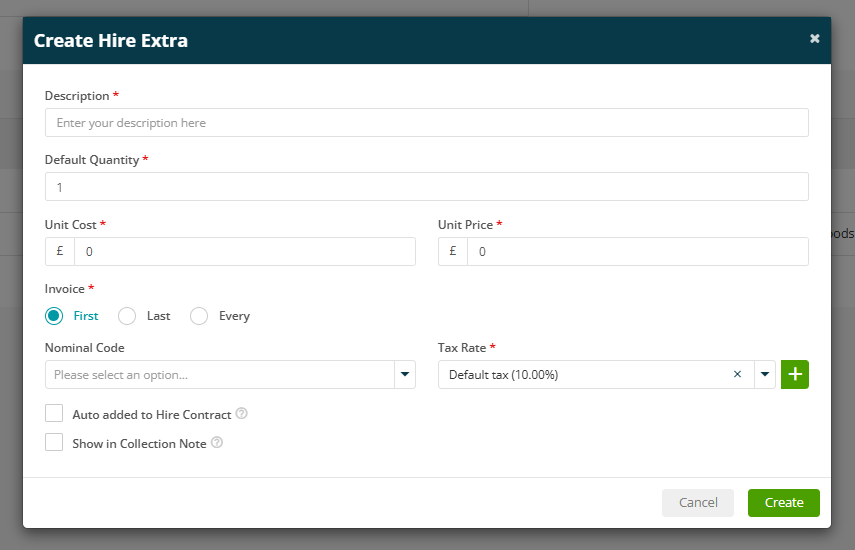
Your Invoice options, First, Last and Every will allow you to choose when this extra is charged.
- First – This extra will be charged on the first invoice
- Last – This extra will be charged on the final invoice
- Every – This extra will be charged on every invoice
You can also tick to add this extra to Hire Contracts automatically
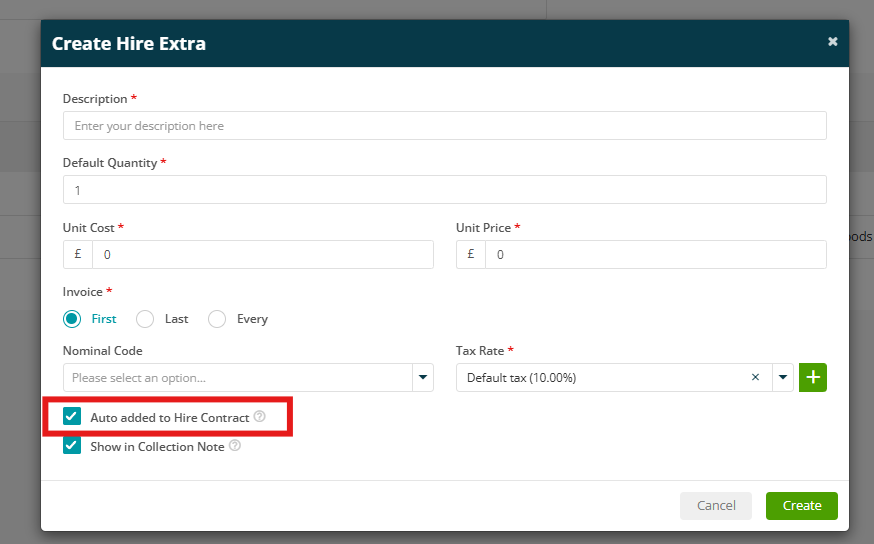
Click Create when you have added all the relevant details.
Hire Details for Parts
Parts can also be configured for hire within Joblogic.
When managing Parts in the Parts Library or Stock Records, you can add Hire details to allow parts to be added directly to Hire Quotes and Hire Contracts.
Within the Settings > Library menu, click the Parts button.
.png)
Click into a part and click edit to enable the Hire option for this part.
.png)
Enter a rate and frequency and click save.
.png)
Hire Quotes
Adding a Hire Quote
Once your settings are in place, you're ready to start creating Hire Quotes and Contracts.
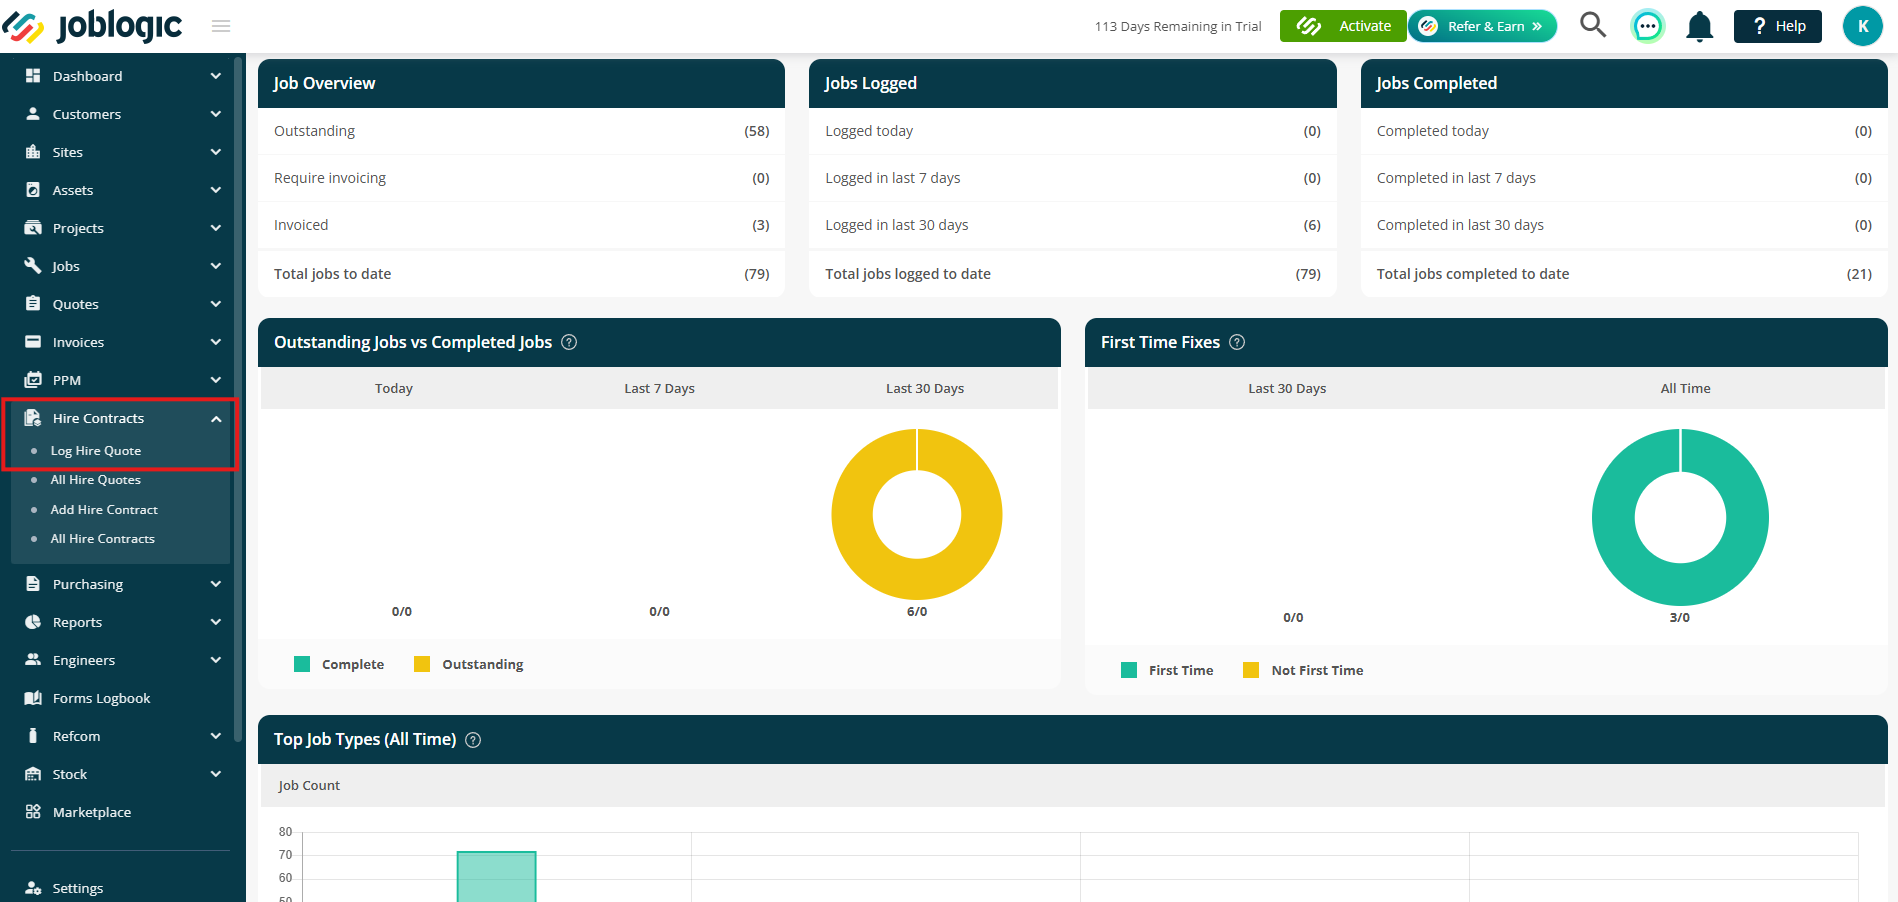
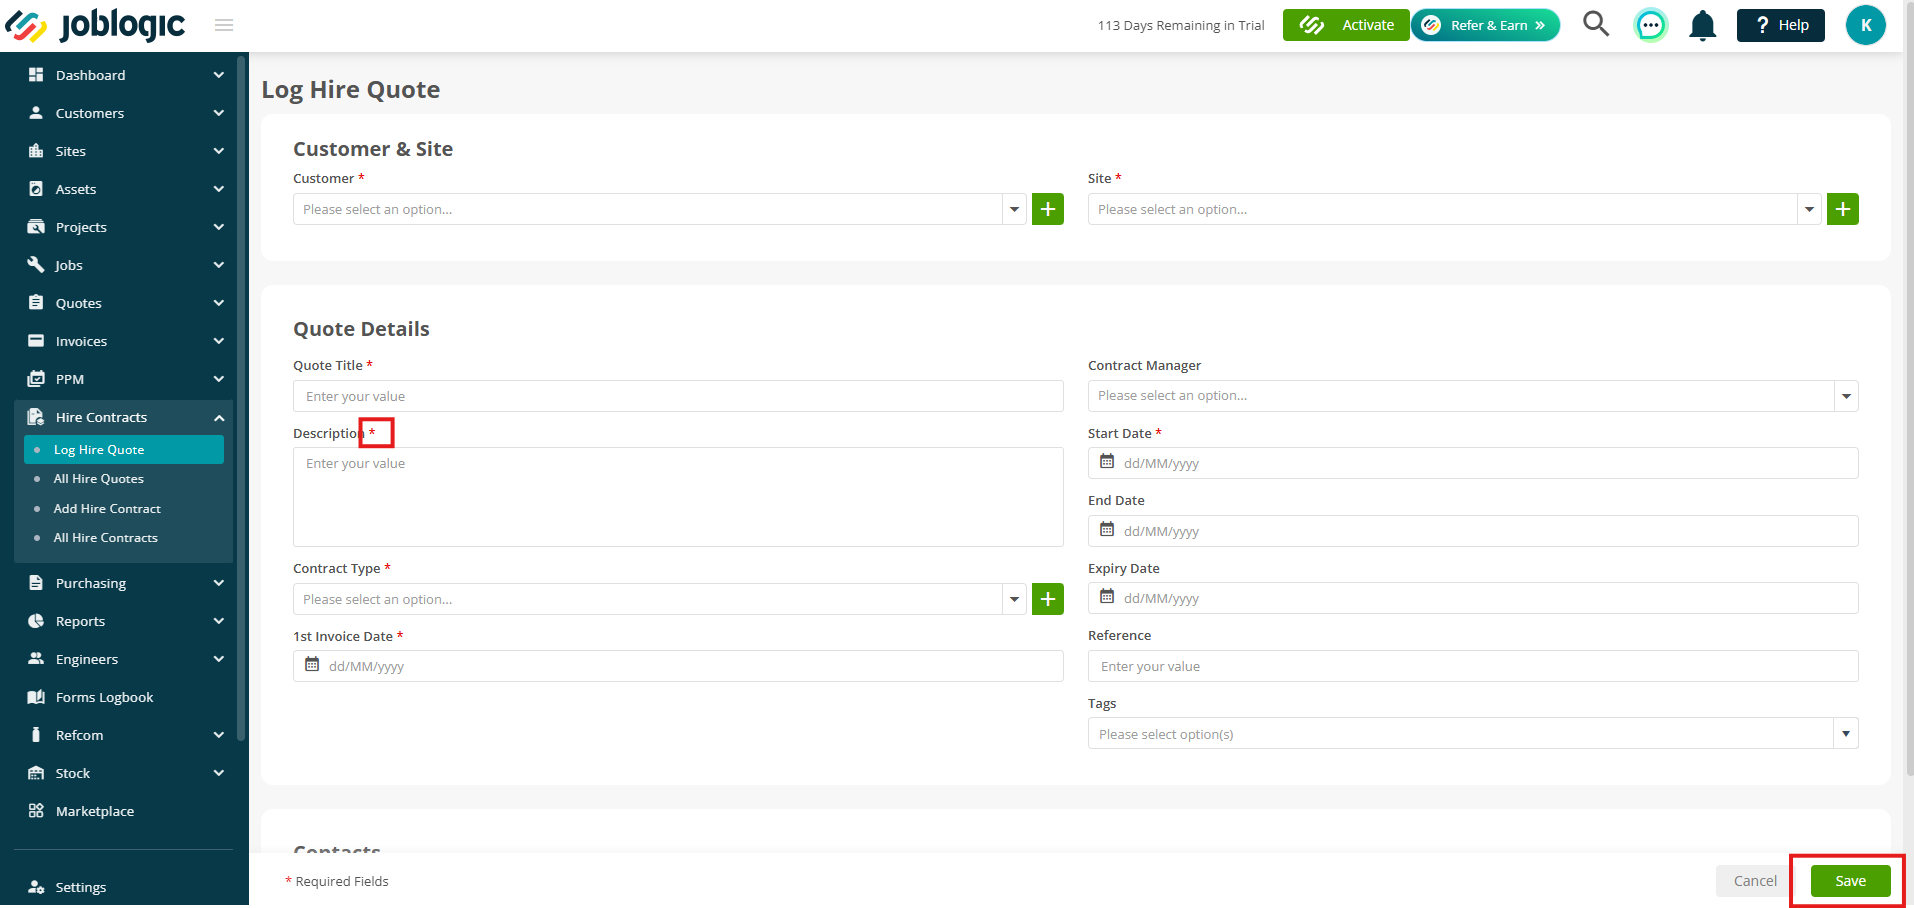
To add a Hire Quote, Navigate to Hire Contracts > Log Hire Quote.
On the quote creation screen, select the Customer and Site, then fill in the remaining quote details.
Remember, anything with a red * is mandatory and will need to be filled in before you click Save.
Adding Hire Items
After saving your Hire Quote, head to the Hire Items tab to begin adding equipment, assets, parts, or extras.
If you previously ticked ‘Auto Add to Hire Contract’ for any extras, they’ll automatically appear in this list.
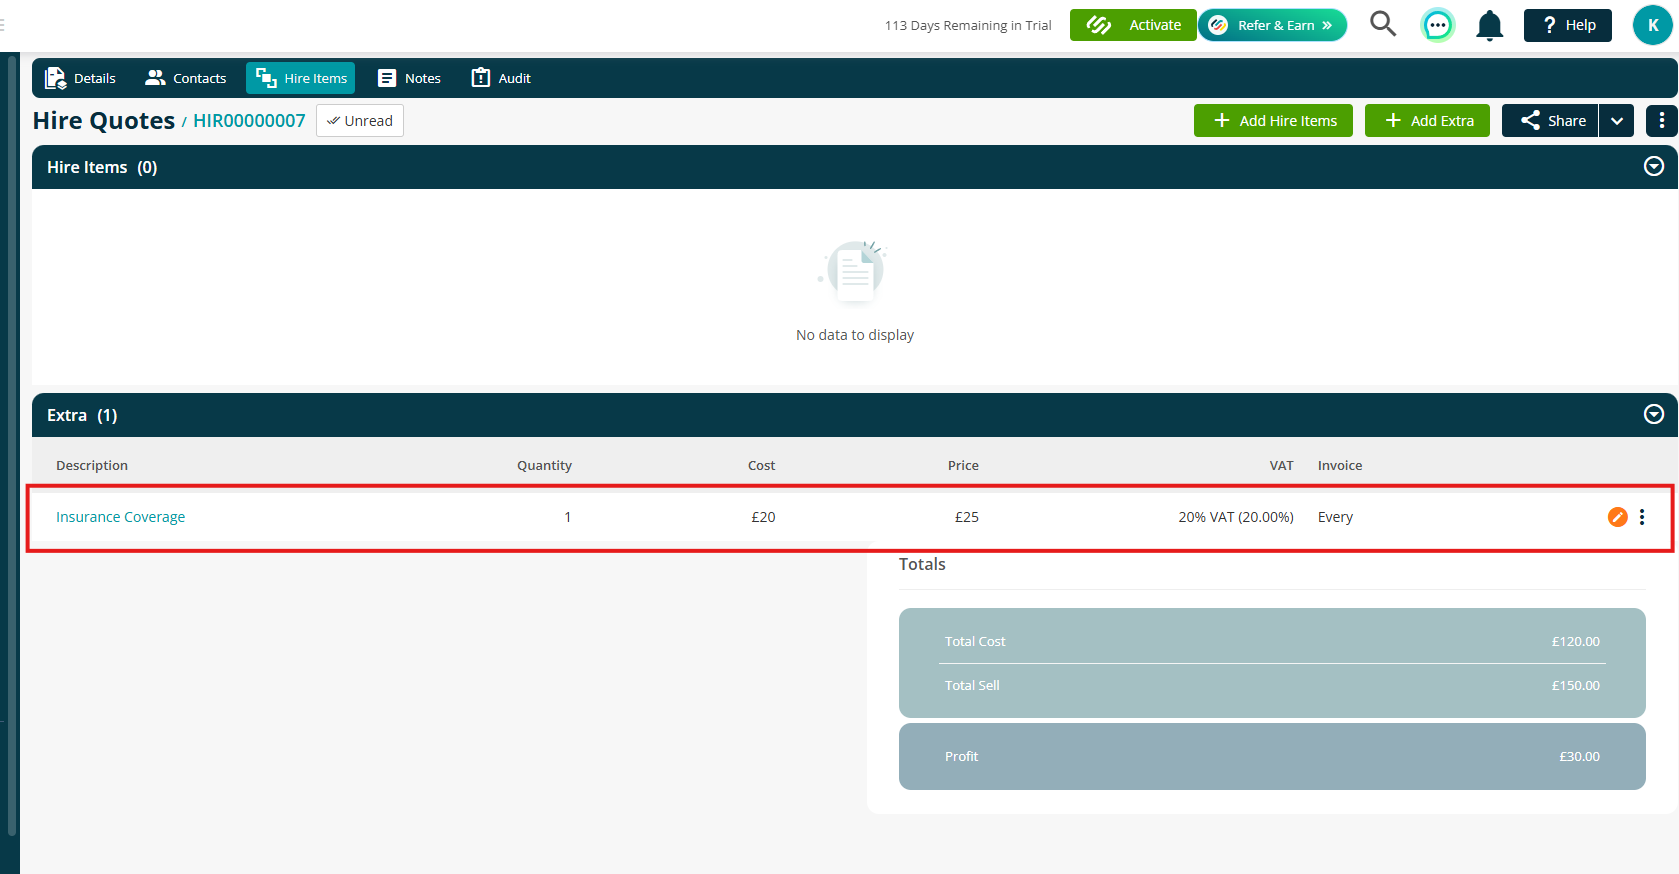
Click Add Hire Items to begin.
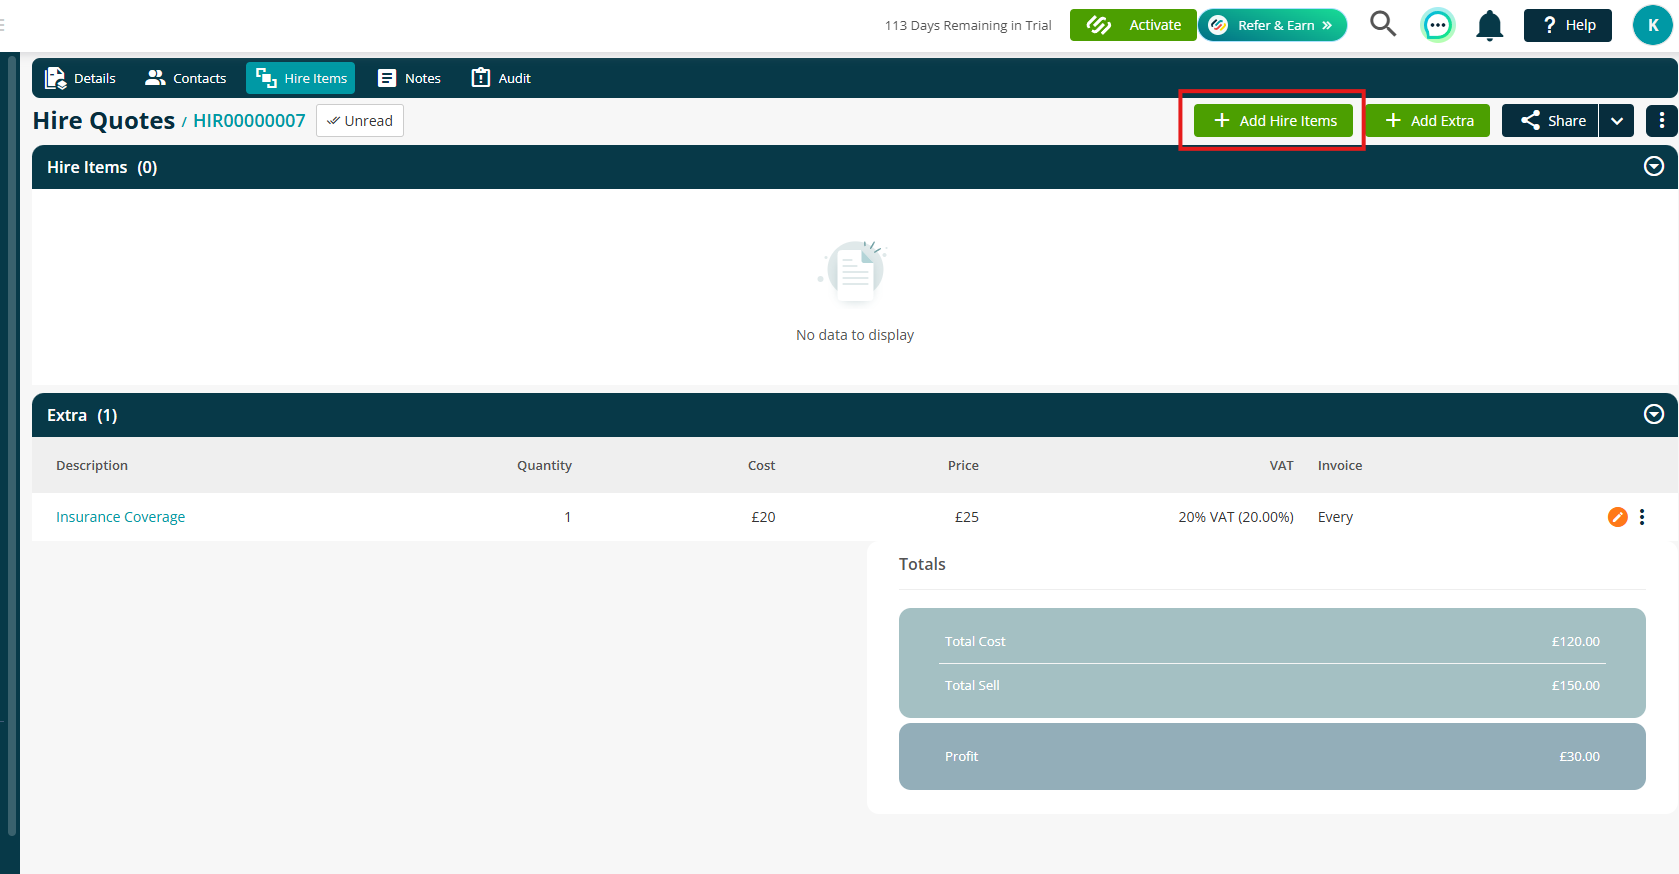
In the pop-up window, select the relevant Hire Asset, Equipment or Part.
The Hire Status will be set to On Quote by default and cannot be changed at this stage.
.png)
Fill in the necessary item details, then click Save to add the item to your quote.
.png)
Pricing and tax information will automatically populate based on the item’s hire settings, reducing manual entry and helping maintain consistency across quotes and contracts.
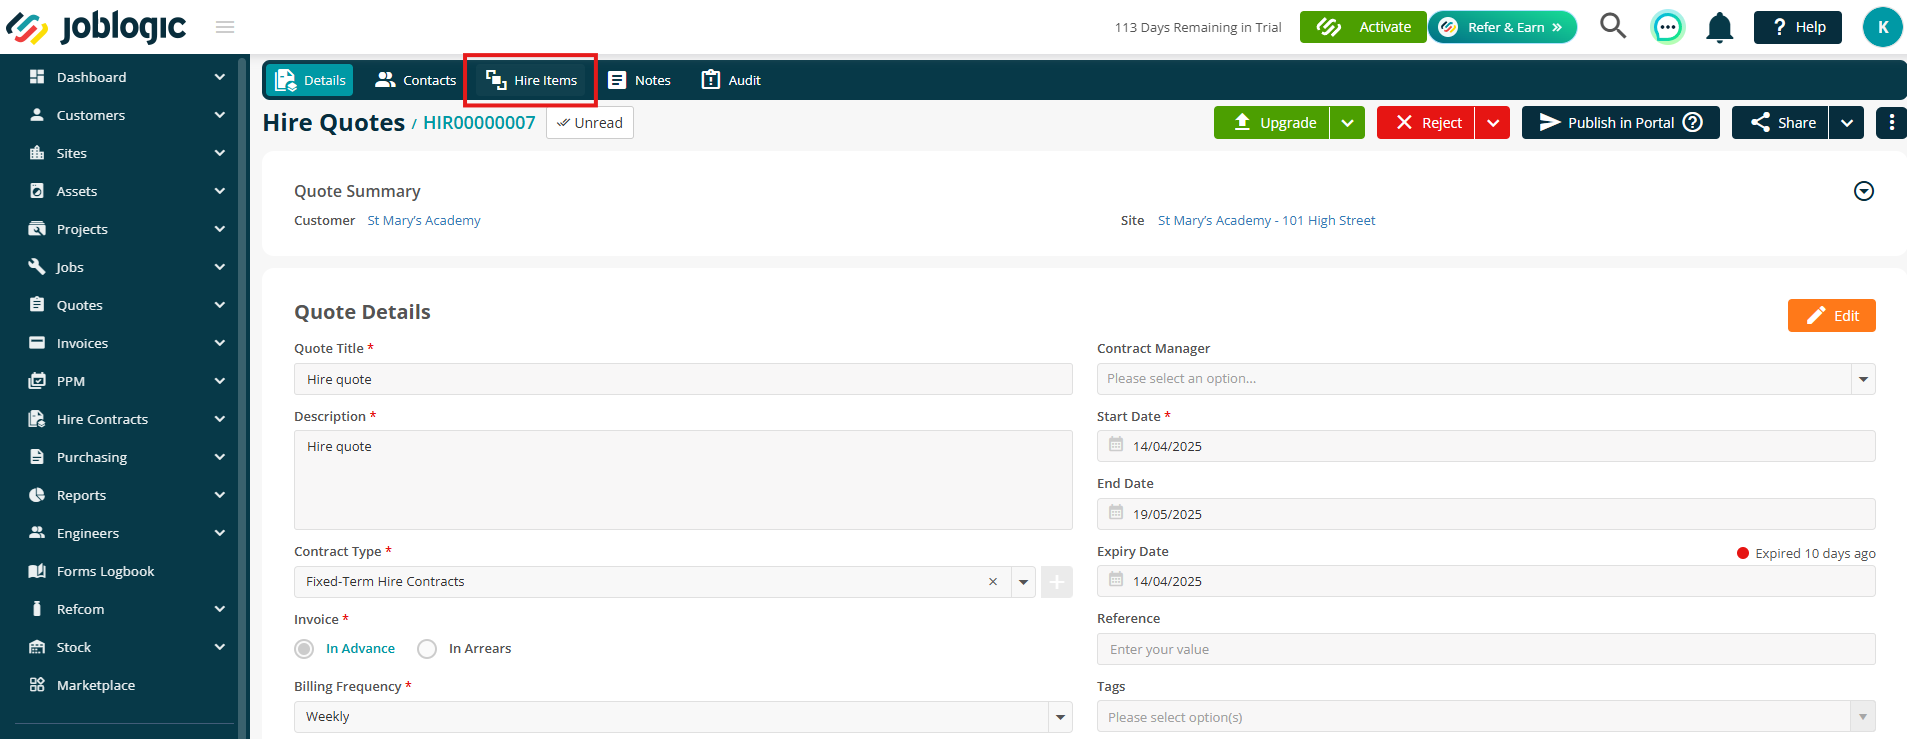
Quote Status options
Once your Hire Quote is ready, you have a few different options to manage its next steps.
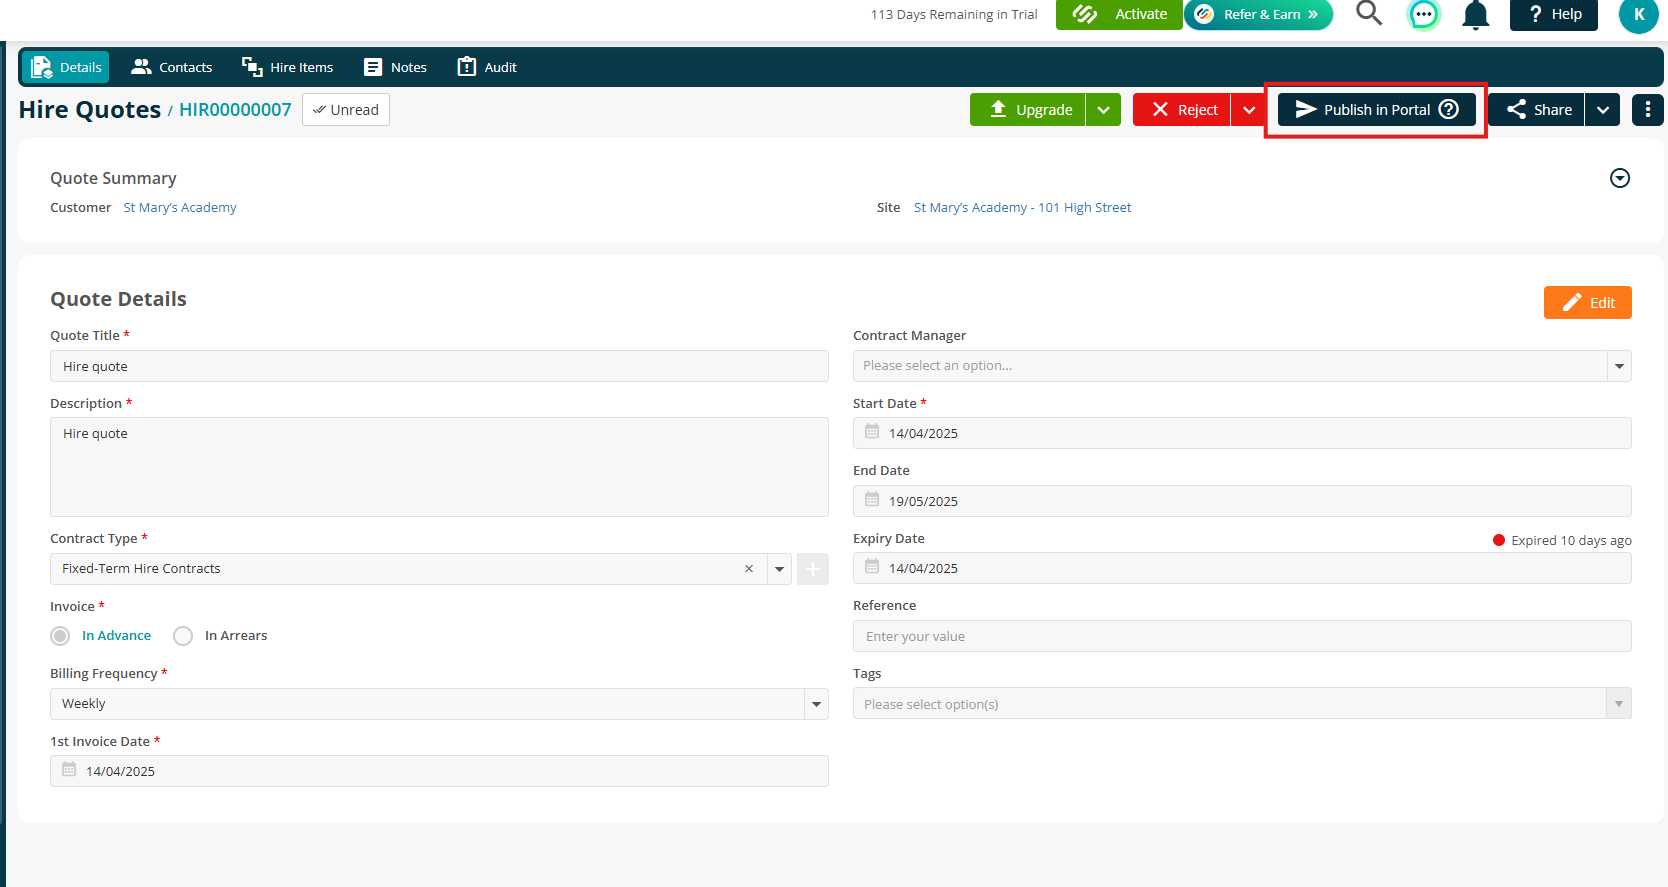
Publish in Portal
- Click Publish in Portal to send the quote to your Customer Portal.
- Your customer will be able to view, accept, or reject the quote—depending on their portal permissions.
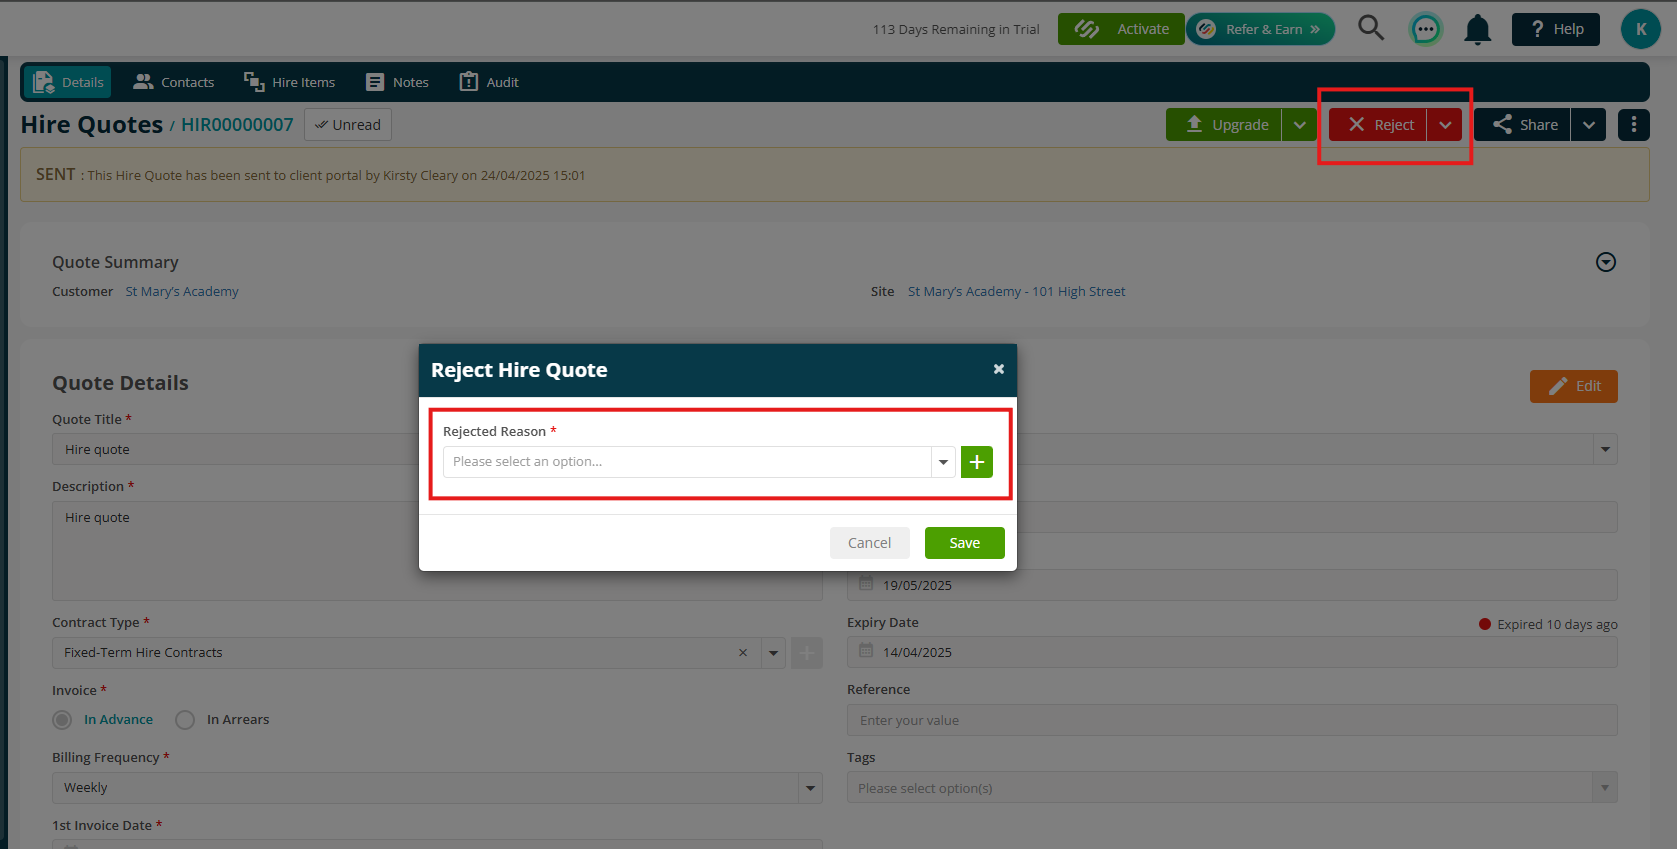
Reject
- Click Reject to decline the quote.
- Choose a reason from your existing Library list or click the green plus (+) icon to add a new one.
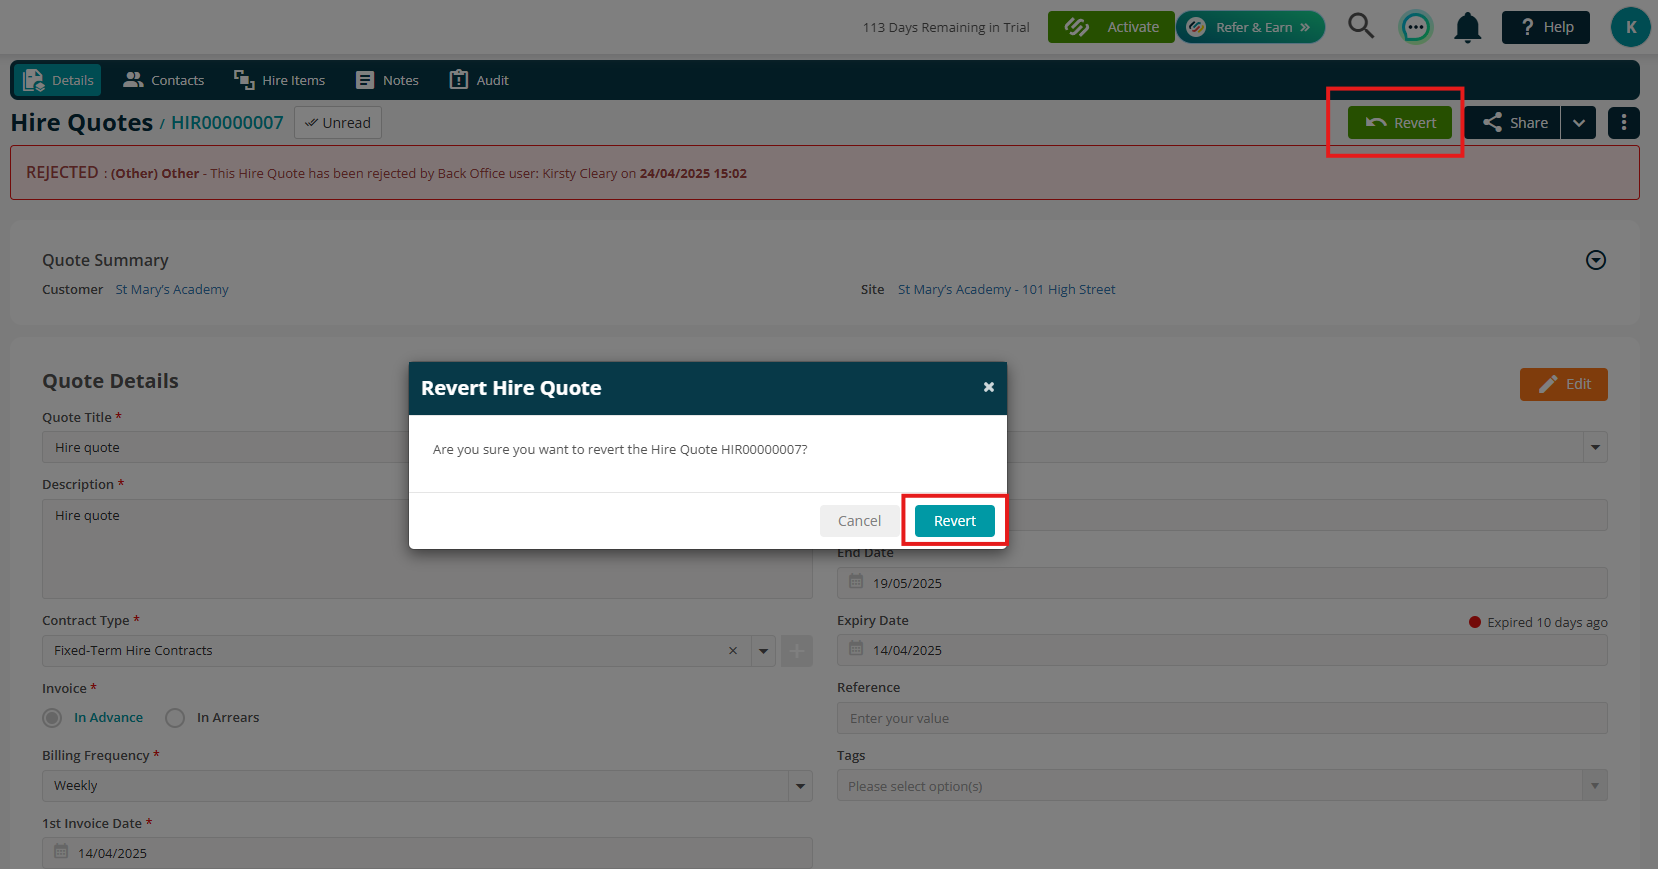
Revert
- If needed, you can revert a rejected quote back to Active status. Simply click Revert and confirm your action to restore the quote.
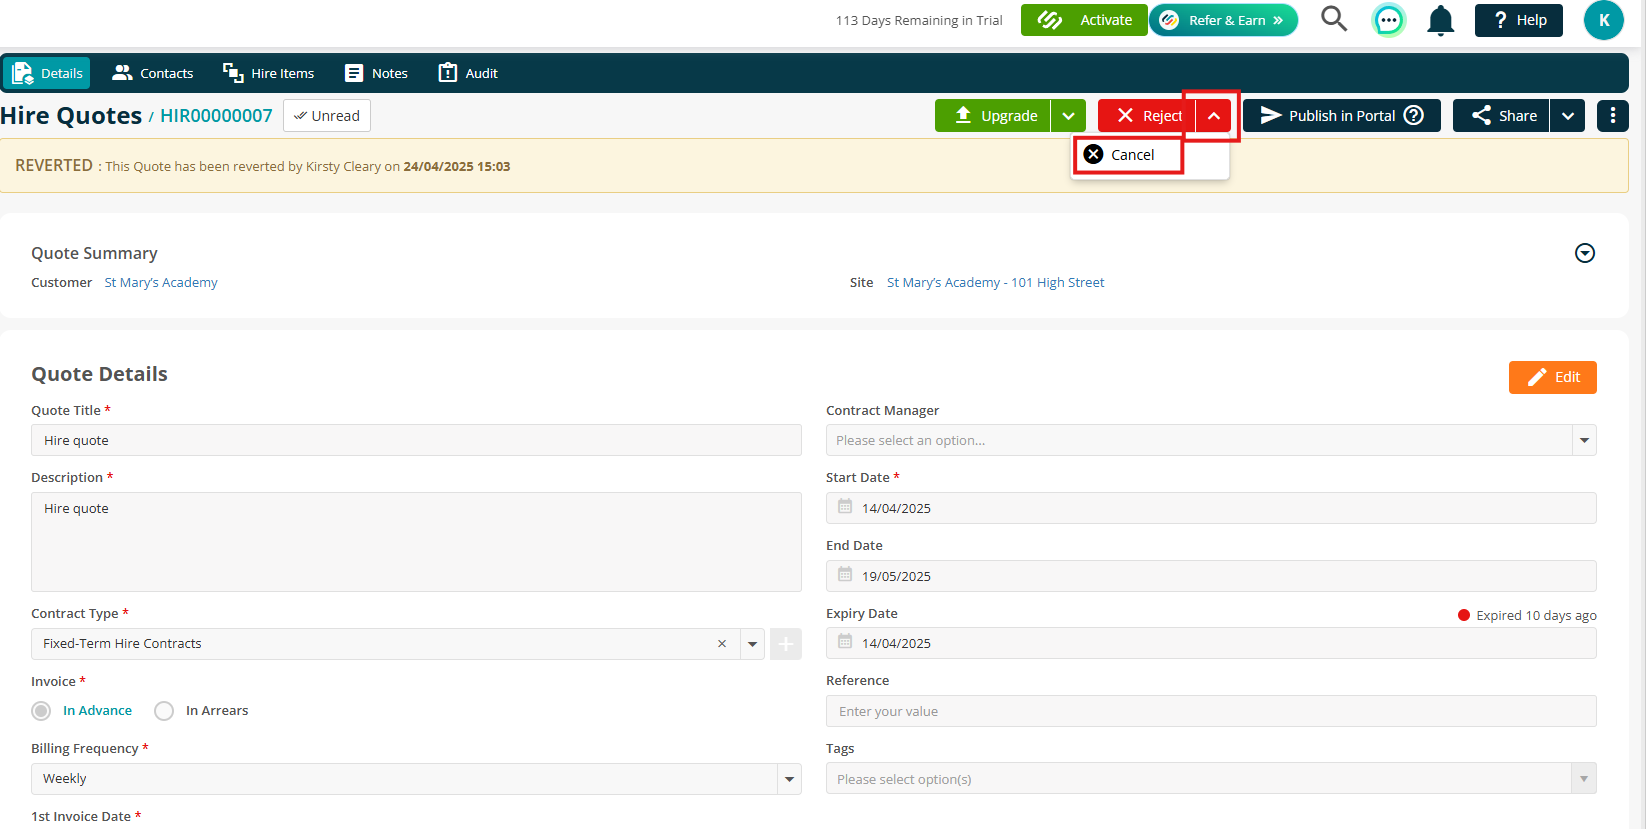
Cancel
- Click the arrow next to Reject and select Cancel.
- Enter a reason for the cancellation and click Save to confirm.
- A cancelled Hire Quote cannot be reverted.
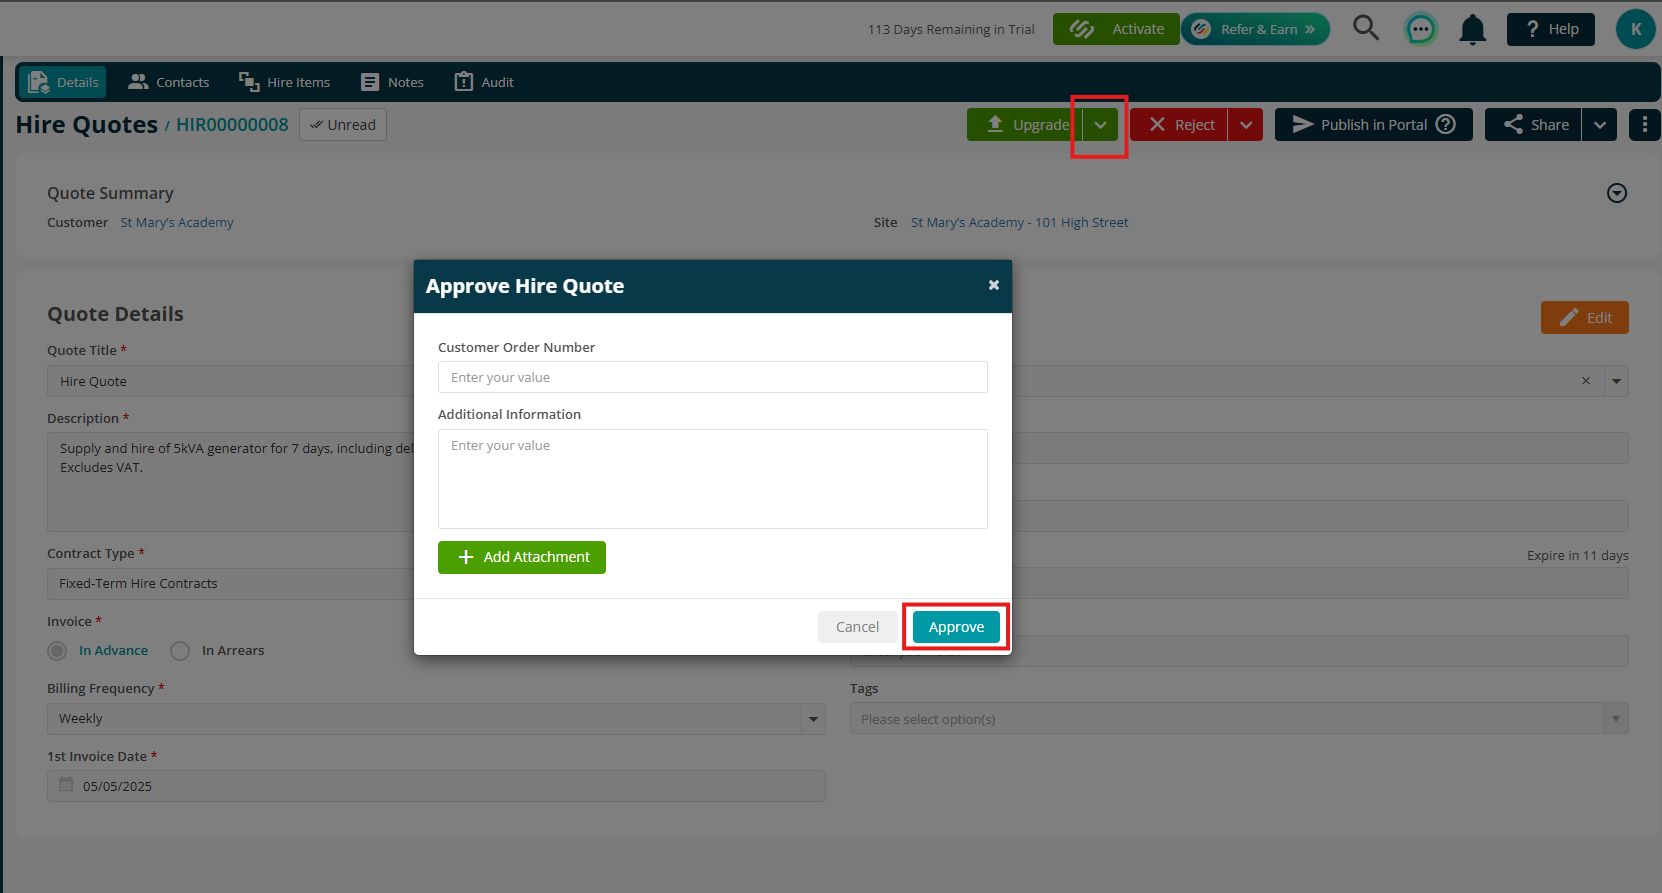
Approve
- Click the arrow next to the Upgrade button and select Approve.
- This action approves the quote but has not upgraded it to a contract yet.
- If you have a Customer Order Number, enter it here, along with any additional details or attachments. Then click Approve to save.
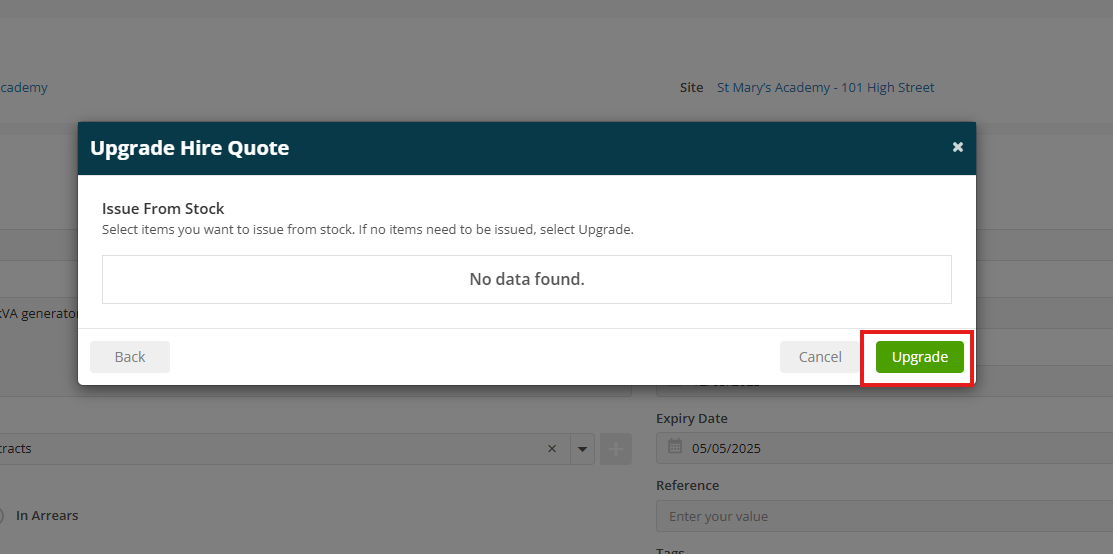
Upgrade
- Click the Upgrade button to convert the quote into a full Hire Contract.
- Enter the Order Number if available and click Continue.
- You’ll then be asked to select any items you'd like to issue from stock, if relevant.
- Once done, click Upgrade to complete the process.
Hire Contracts
Adding a Hire Contract
To start adding Hire contracts, click the Hire Contracts option from your menu, and then click Add Hire Contract.
From here, you can select your Customer & Site before filling in the rest of the contract details.
Remember, anything with a red * is mandatory and will need to be filled in before you click Save.

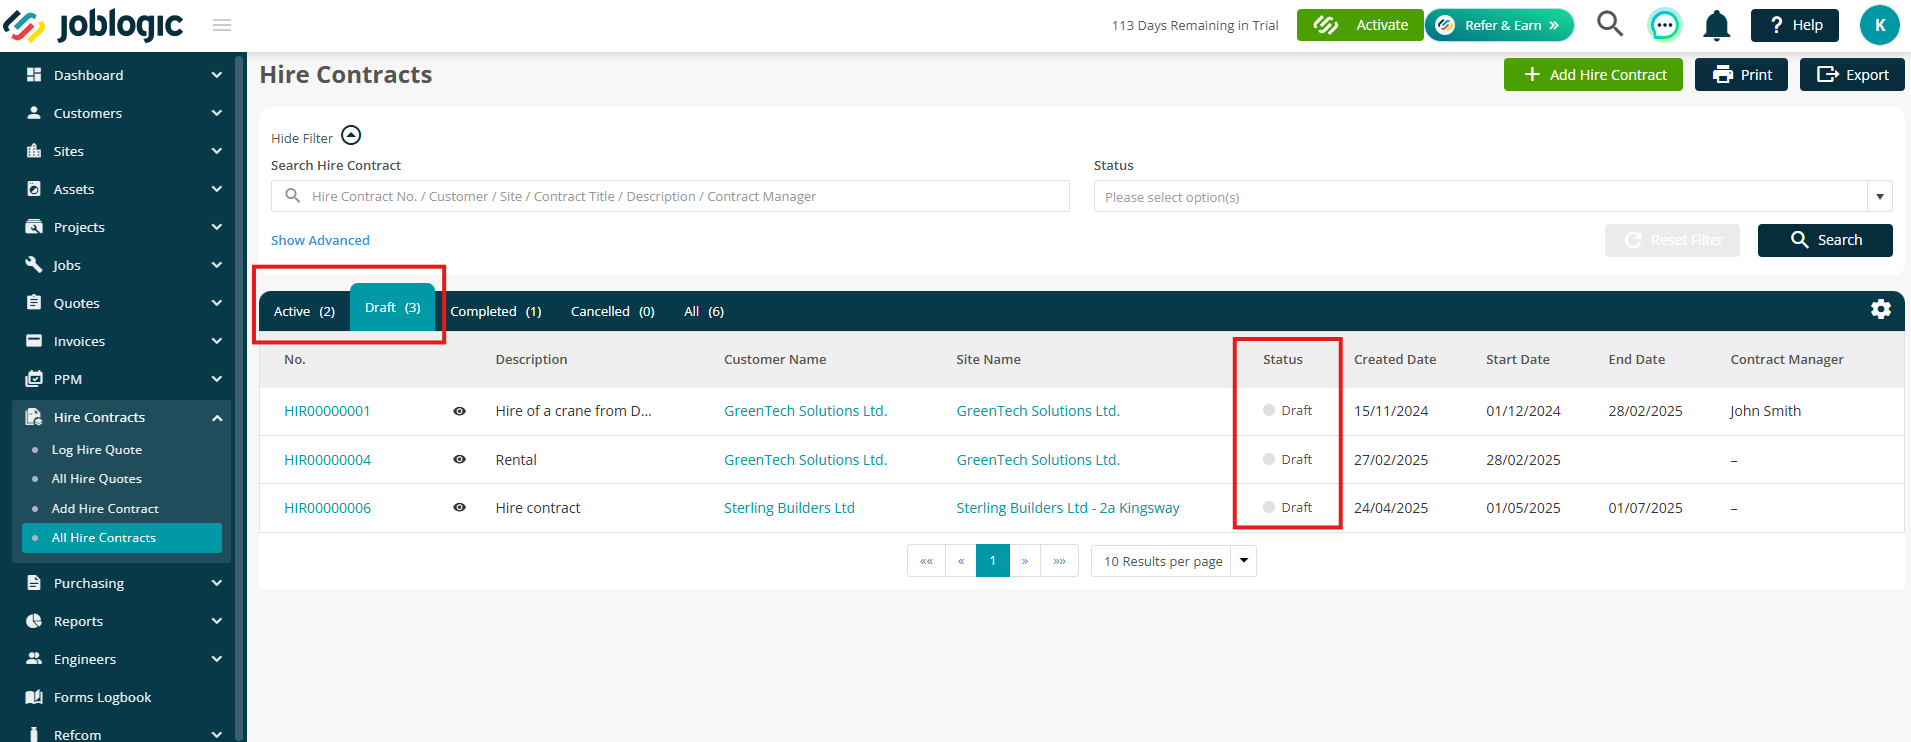
Hire Contracts will remain in Draft status until the designated Start Date. Once the Start Date is reached, the contract will automatically move to Active status.
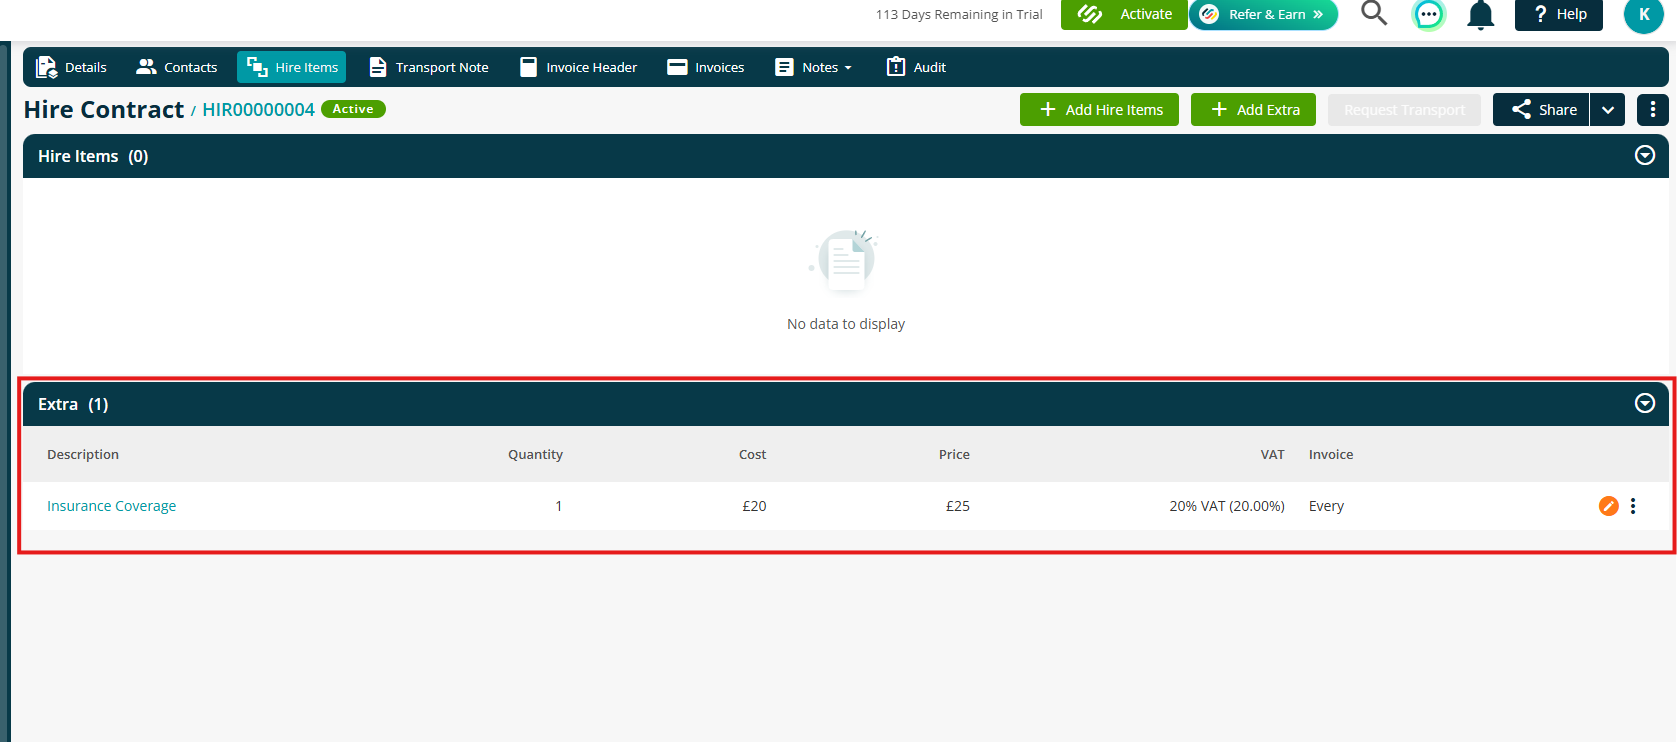
Hire Items
Once you have saved the Contract, you can click into the Hire Items tab to add the items or extras you’d like to include.
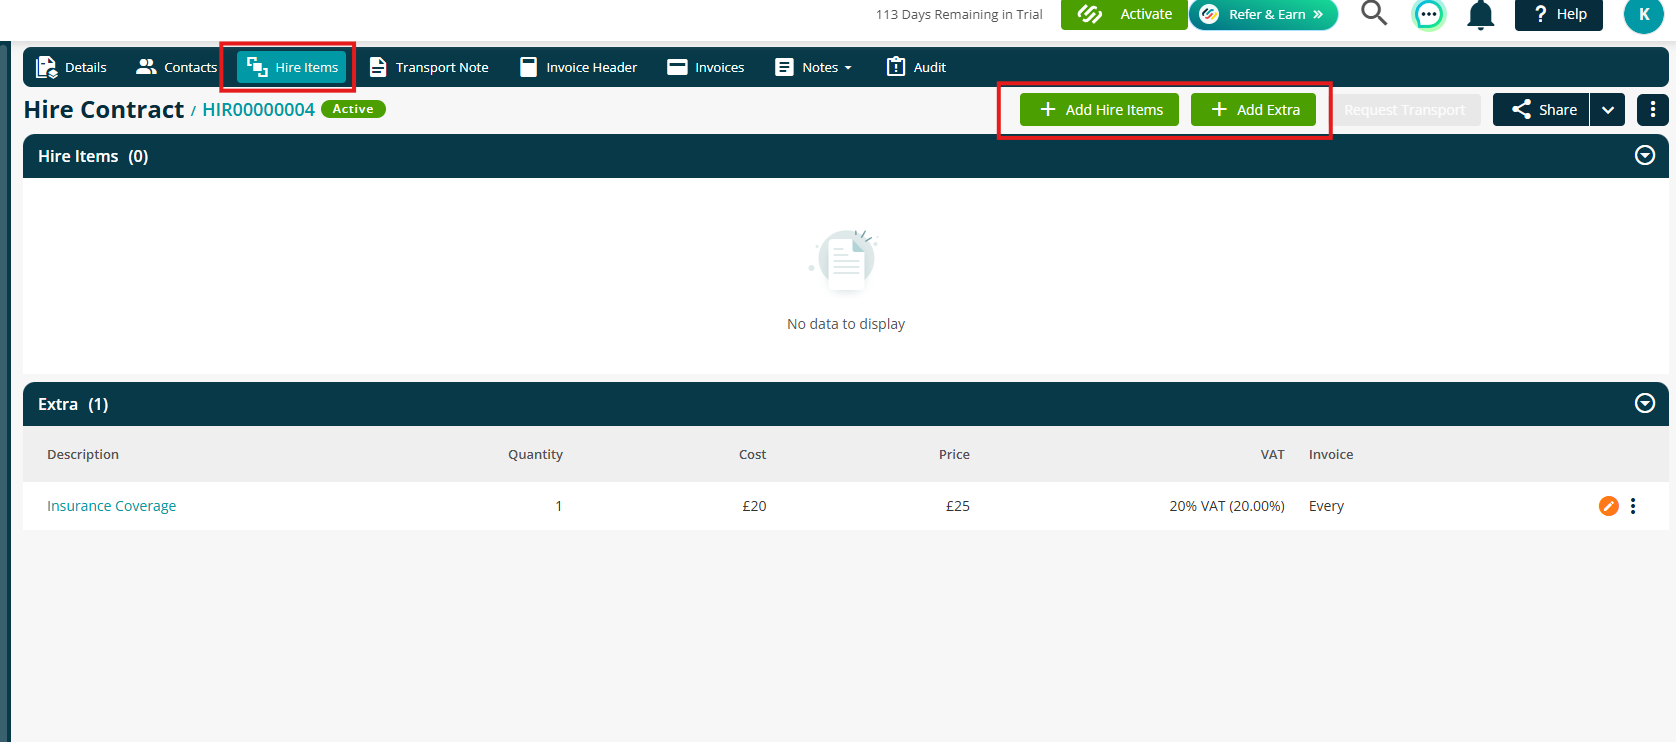
If you ticked ‘Auto Add to Hire Contract’ against any extras, they will automatically show in your list here.
When you’ve clicked Add Hire Items, a new window will pop up where you can select your Equipment, Hire Asset, or Part.
.png)
Fill in the details as necessary and then click Save.
.png)
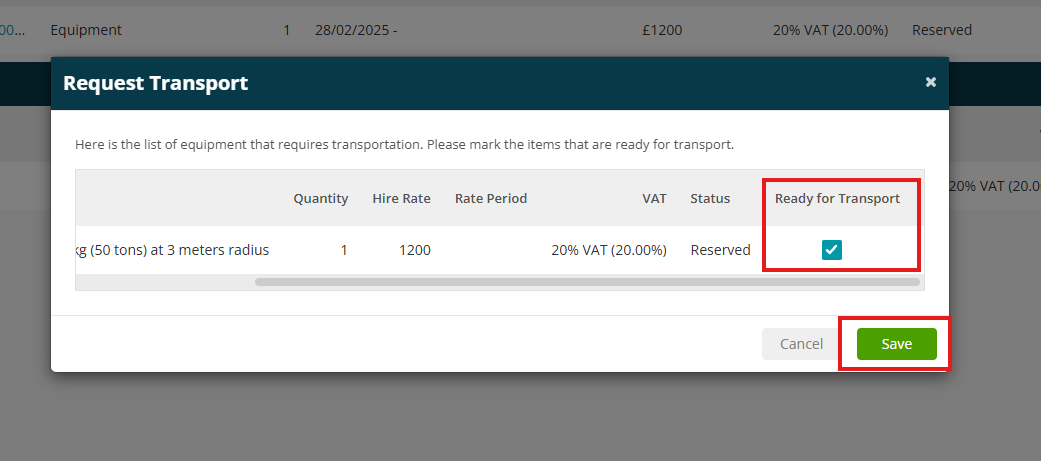
When the item is ready for transport, you can click Request Transport
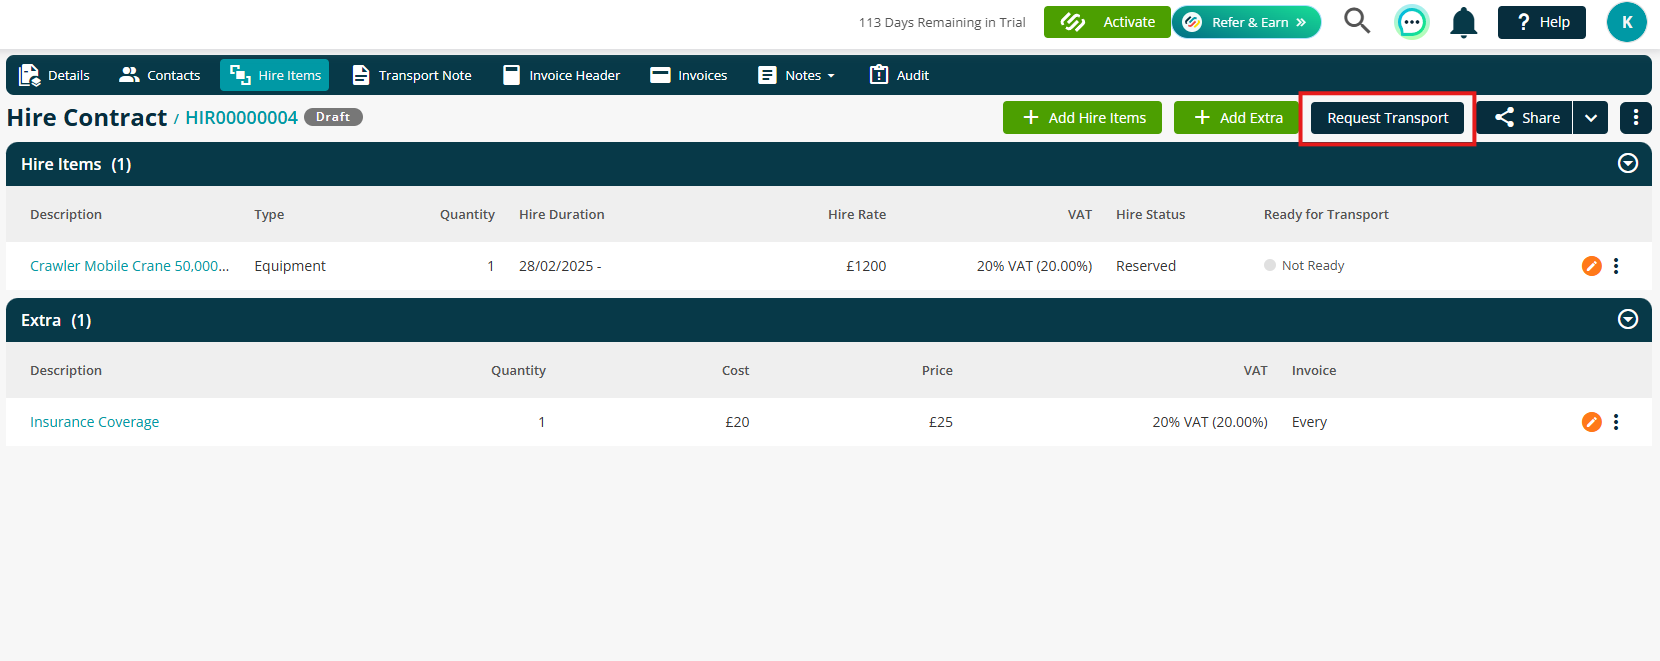
Tick the items that are ready, and then click save
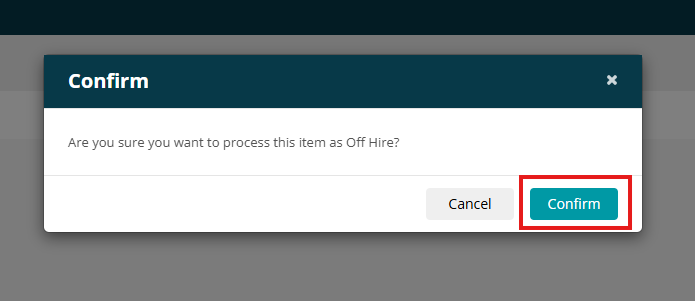
When an item is marked as On Hire, you can update its status by clicking the three dots on the right and selecting Mark as Off Hire.
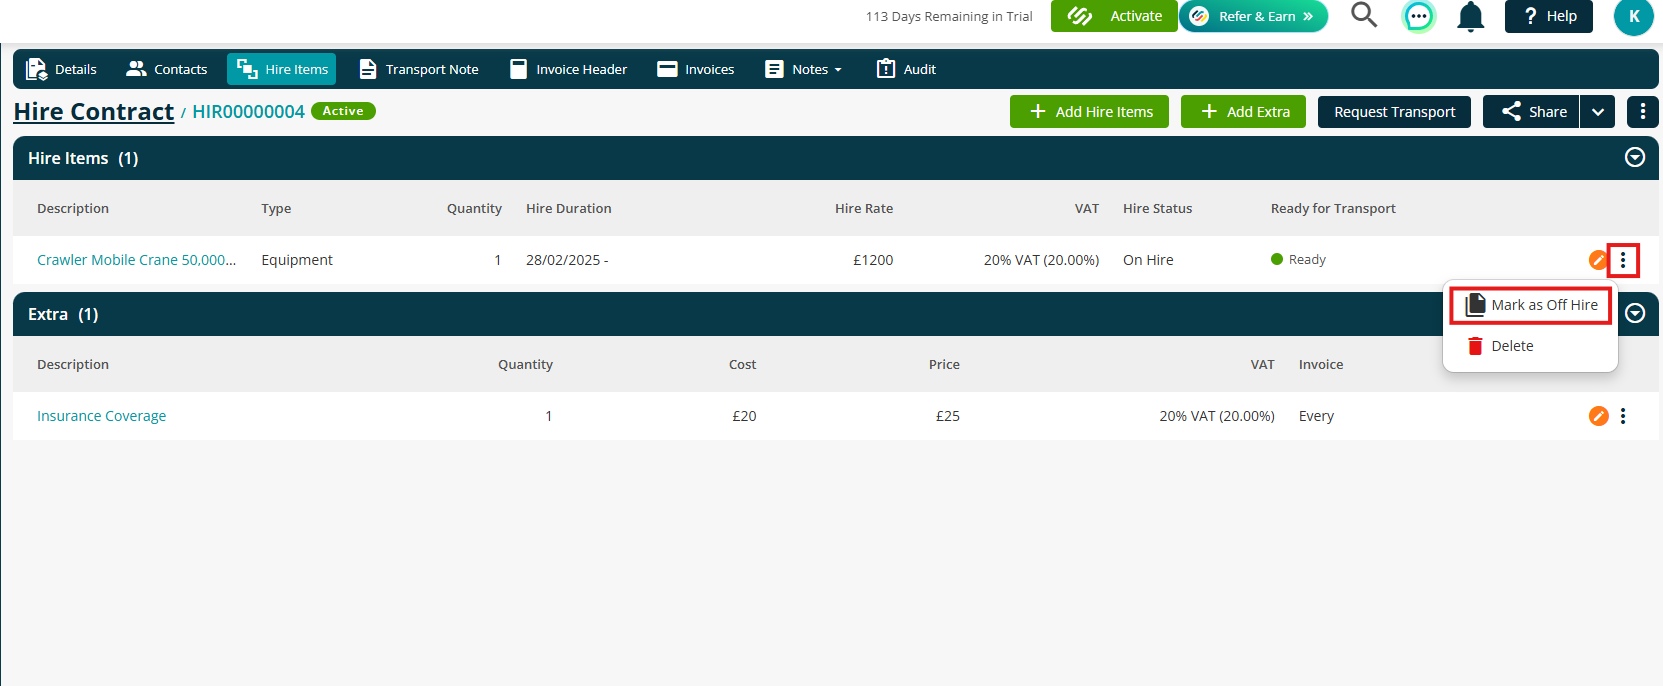
Click Confirm to proceed and finalise the change.
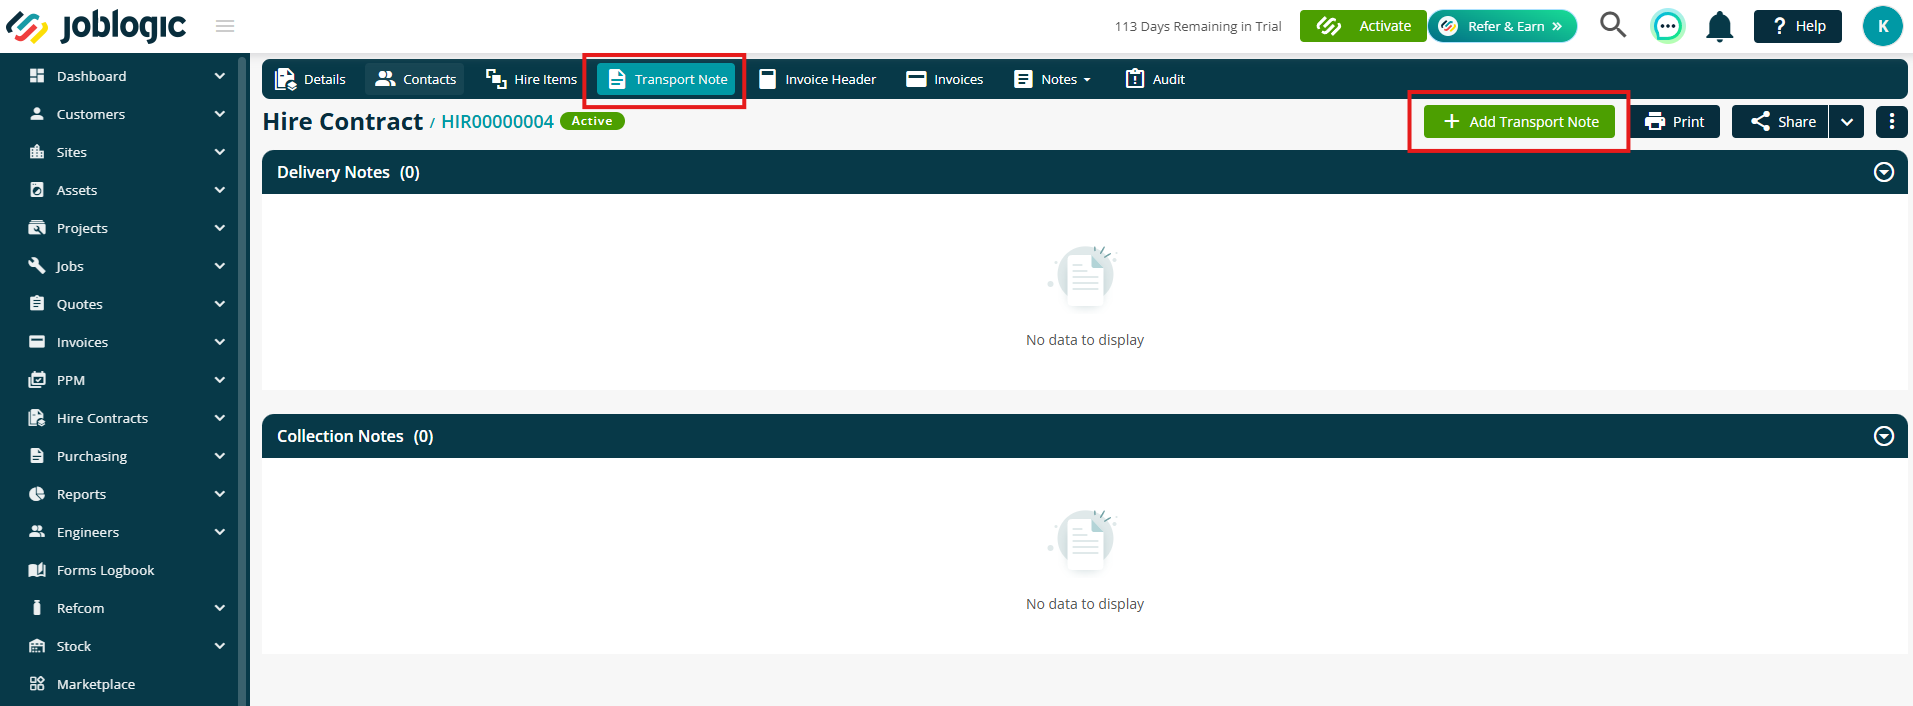
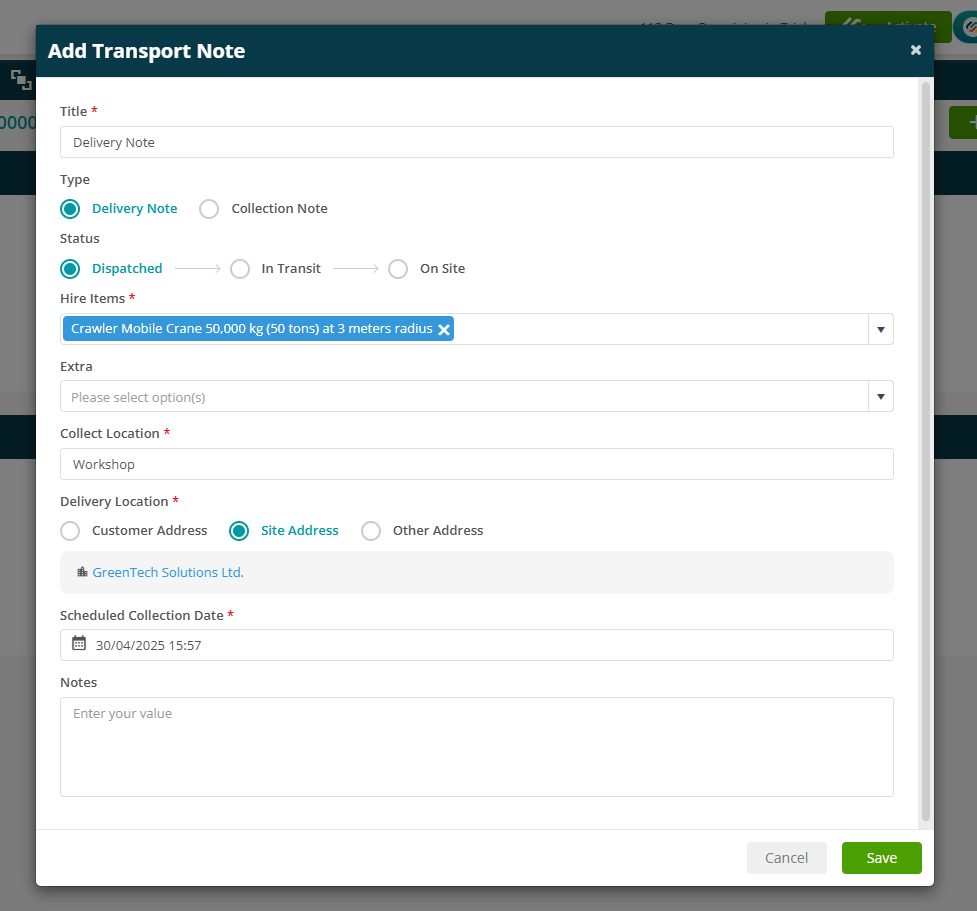
Transport Notes
Adding transport notes is a great way to maintain accountability and traceability for items or payments being transferred between locations.
To add a note, click the Transport Note tab and then click Add Transport Note in the top right
Give your note a Title and select either Delivery or Collection.
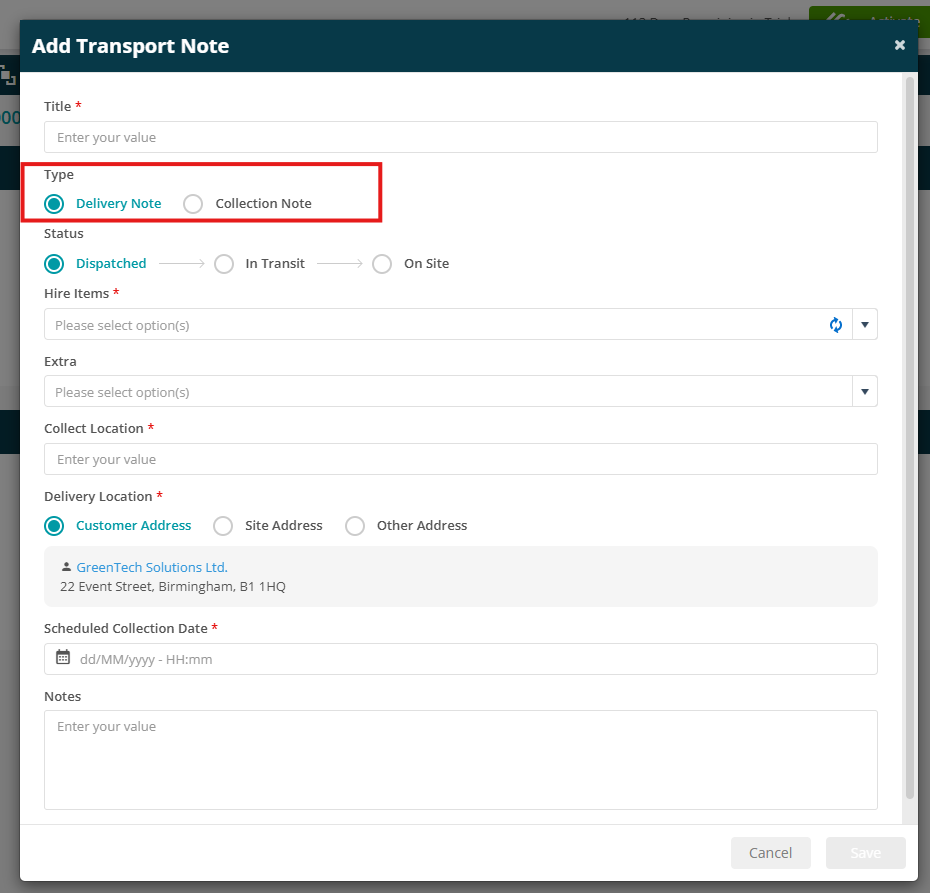
Depending on the type selected, different status options will be available:
If you select Delivery:
- Dispatched - Marks the contract as Awaiting Dispatch
- In Transit - Marks the contract as Awaiting Dispatch
- On Site - Marks the item as On Hire and the contract as Active
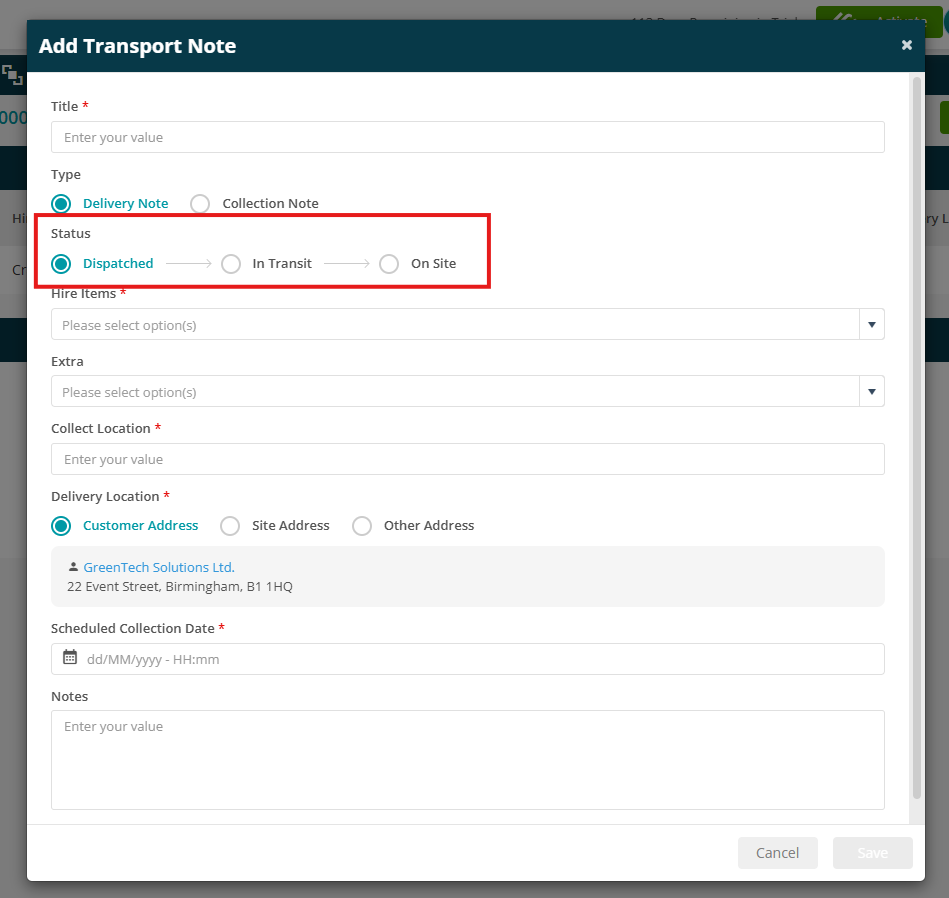
If you select Collection:
- Collected - Marks the contract as Awaiting Collection
- In Transit - Marks the contract as Awaiting Collection
- Under Inspection - Marks the items as Inspect and the contract as Completed
- At Depot - Marks the items as For Hire and the contract as Completed

These statuses help clearly track the progress of each transport activity from start to finish.
Fill in the rest of the details as needed and click Save.
Adding an Invoice
Creating invoices for your Hire Contracts is similar to what you'll be used to across the system.
Click the invoices tab and then select Add Invoice
.jpg)
Enter the required details such as Date Raised, Payment Due, Description and Value.
Click Save.
.jpg)
Once saved, these invoices are automatically included in your configured accounts sync and transferred to your connected accounting software, including;
- AccountsIQ
- Sage Intacct
- Sage 200
- Sage 50
- Xero
- Quickbooks
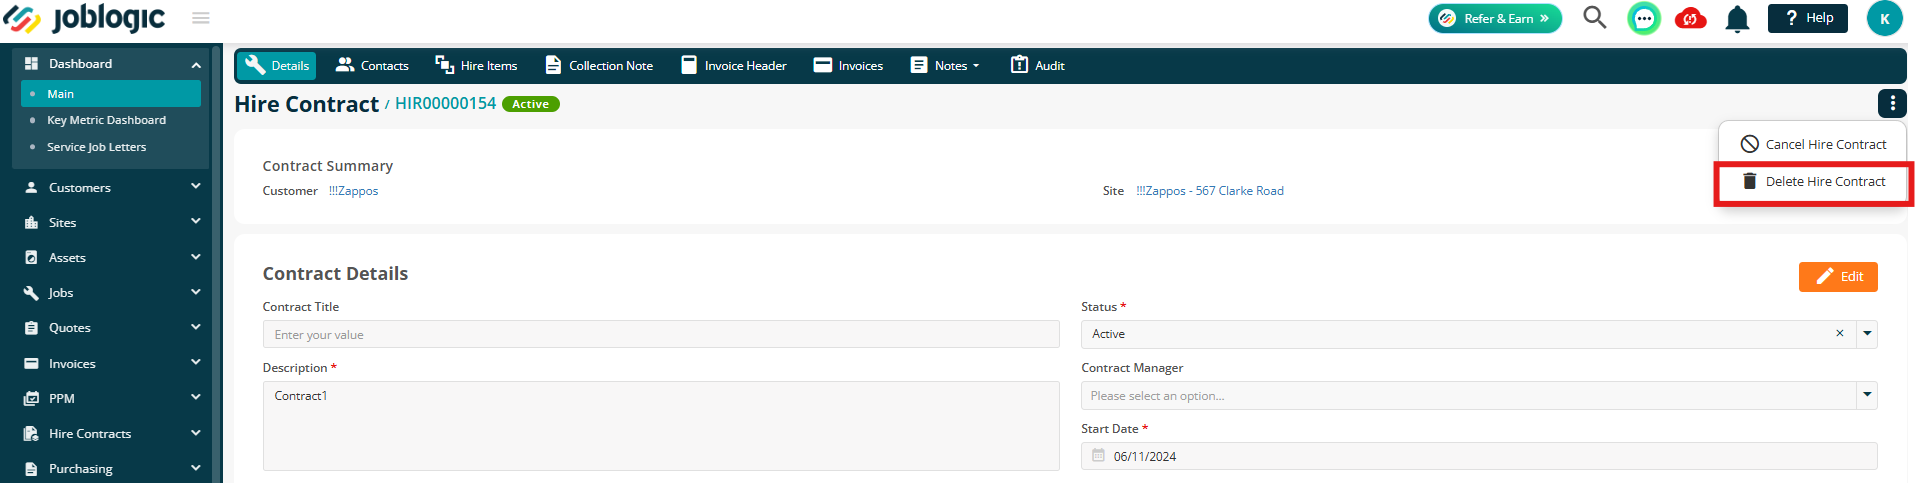
Cancel or Delete a Hire Contract
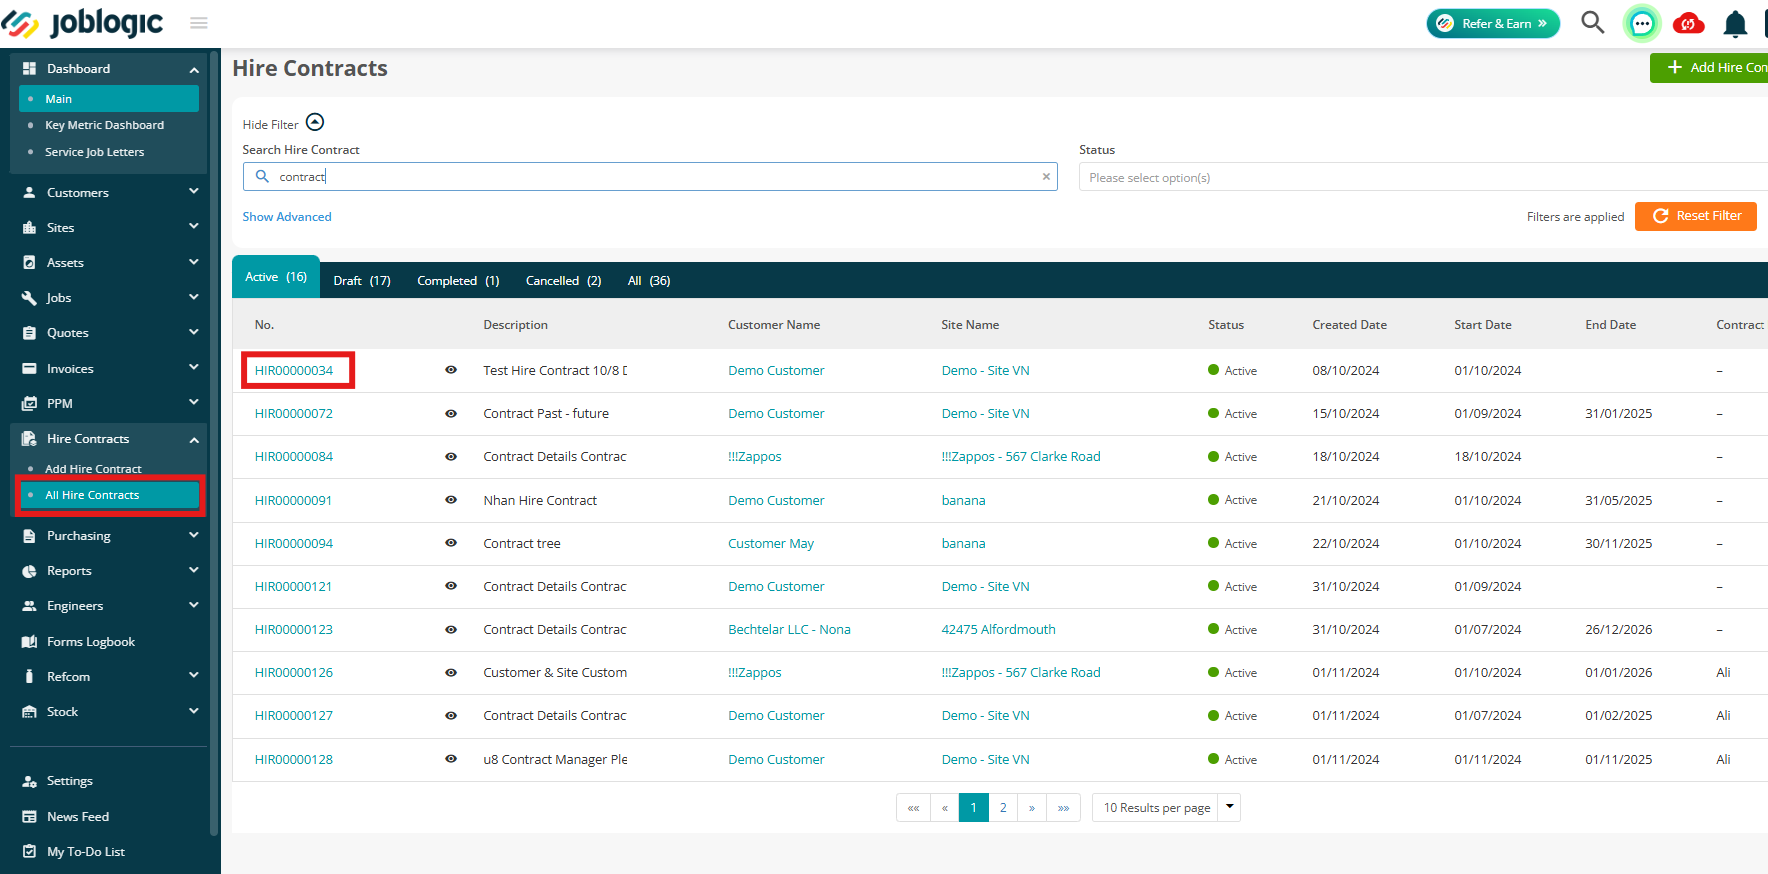
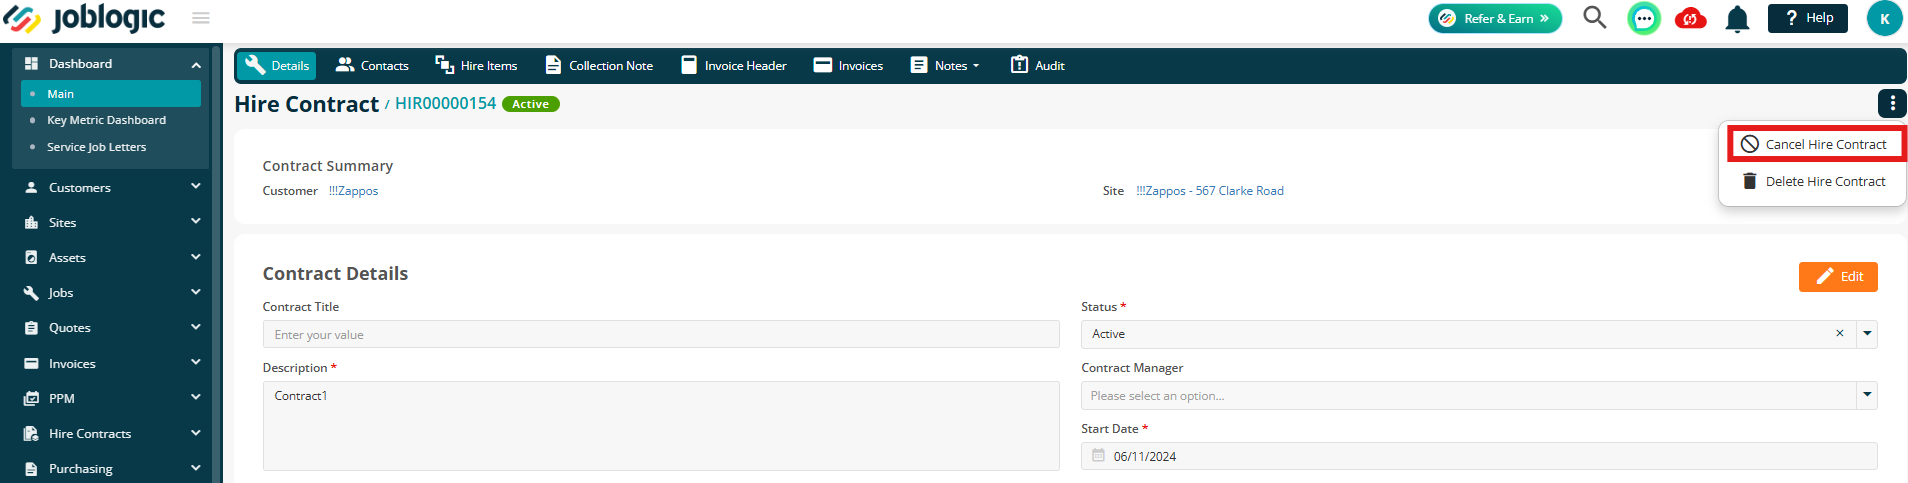
To cancel or delete a Hire contract, again head over to your chosen Hire Contract (Hire Contracts > All Hire Contracts > click your contract number)
Click the three dots in the top right corner
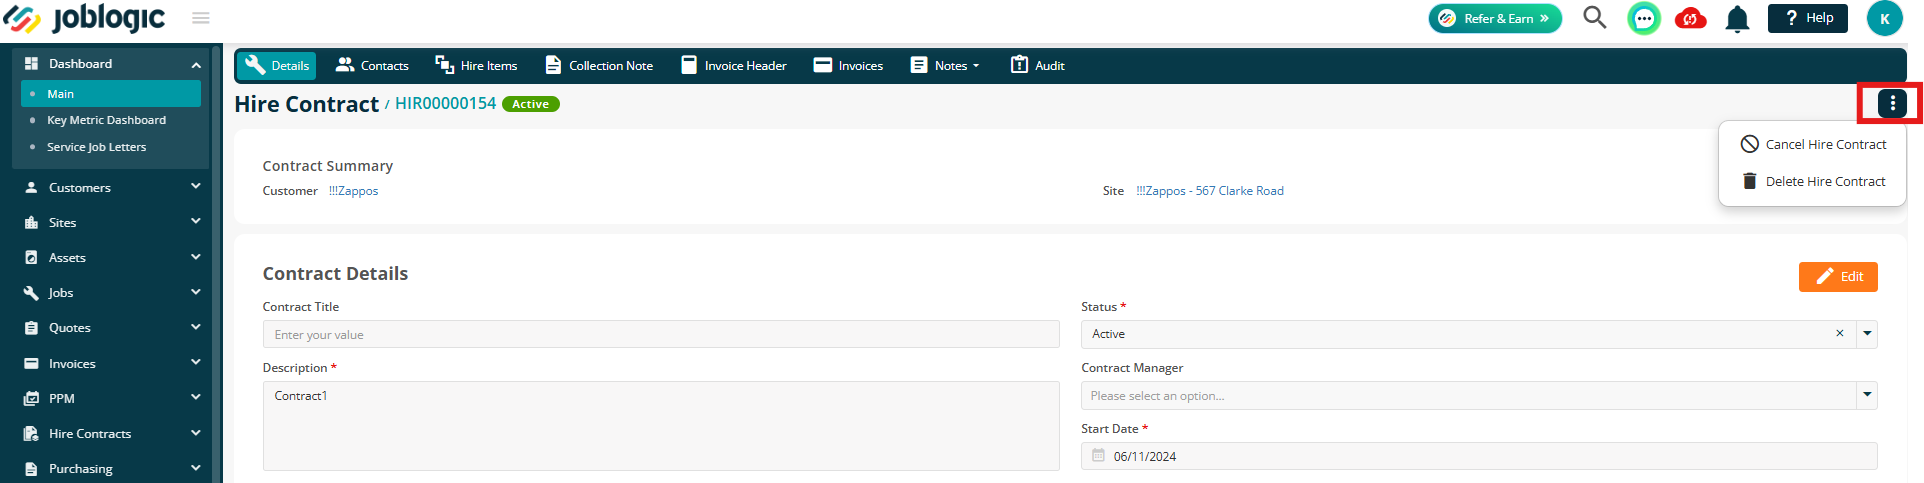
Cancel:
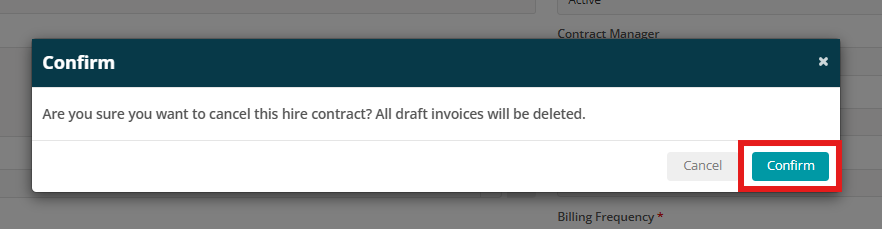
Click Cancel Hire Contract
You will then need to confirm the cancellation
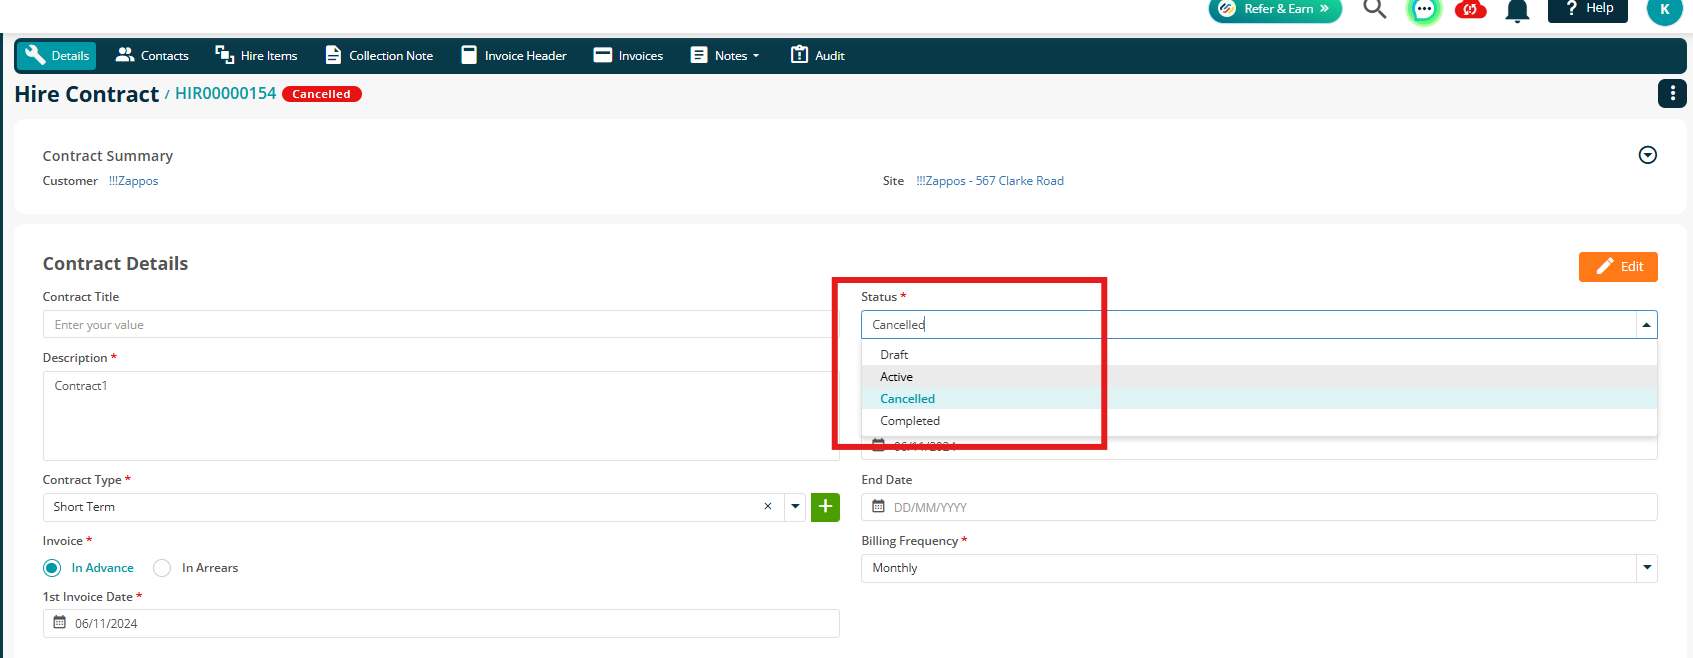
You can mark the Contract as Active again, or another status, by clicking back into the details tab.
Click Edit to make your changes
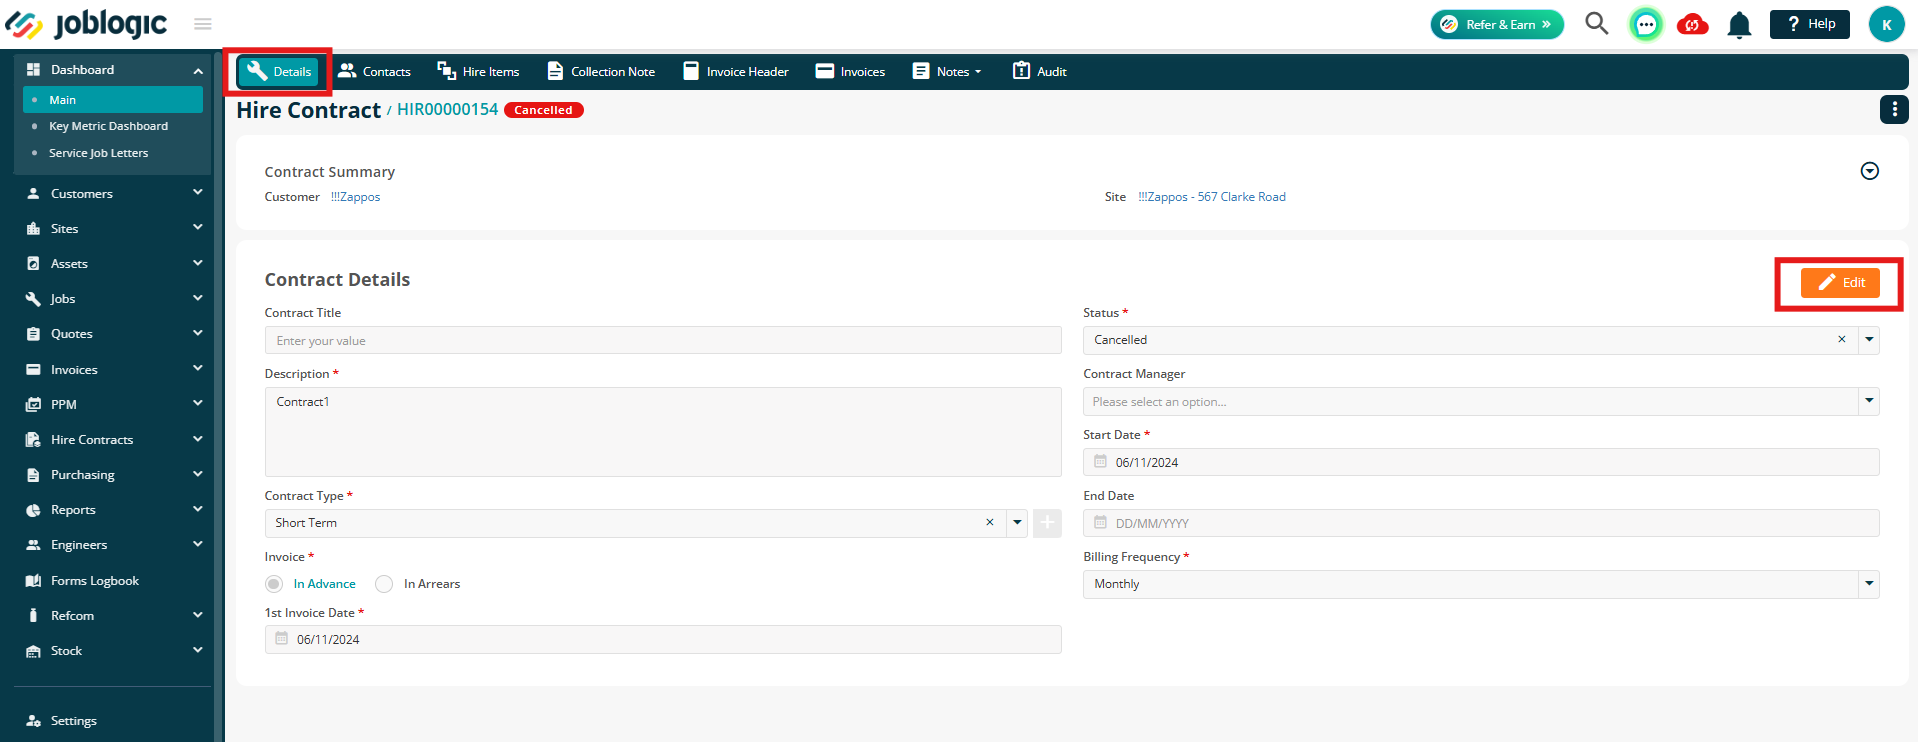
Choose your status, and then click Save.
Delete:
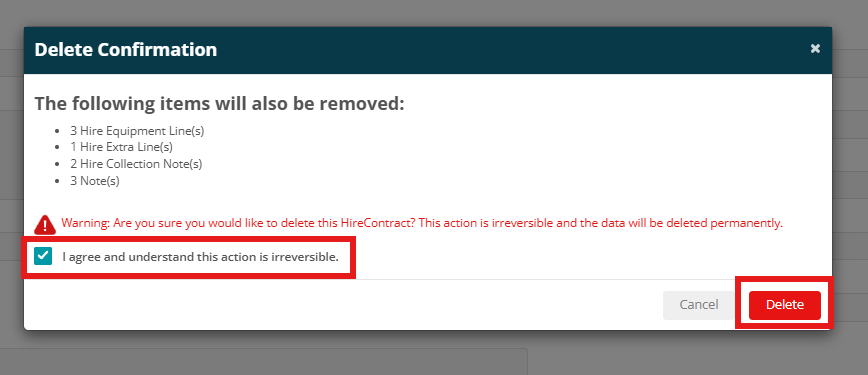
Click Delete Hire Contract
Read and tick the agreement before clicking Delete
Further Support
For further information or assistance with the above, contact our Support Team on 0800 326 5561 or email support@joblogic.com. Alternatively, our Customer Success Management team can be reached by emailing customersuccess@joblogic.com
Publishing Details
This document was written and produced by Joblogic’s Technical Writing team and was last updated on the date specified above. Be aware that the information provided may be subject to change following further updates on the matter becoming available. Additionally, details within the guide may vary depending on your Joblogic account’s user permissions.