Introduction
This guide will detail how to allocate and transfer your Reactive jobs and PPM jobs between joblogic accounts.
If you want to look at setting up and linking a subcontractor, check out our guide here.
If you are a subcontractor and want to understand how to receive and complete jobs, click here.
Reactive Jobs
Allocating jobs to a subcontractor
To allocate a subcontractor, click on the Subcontractor tab of your already logged job
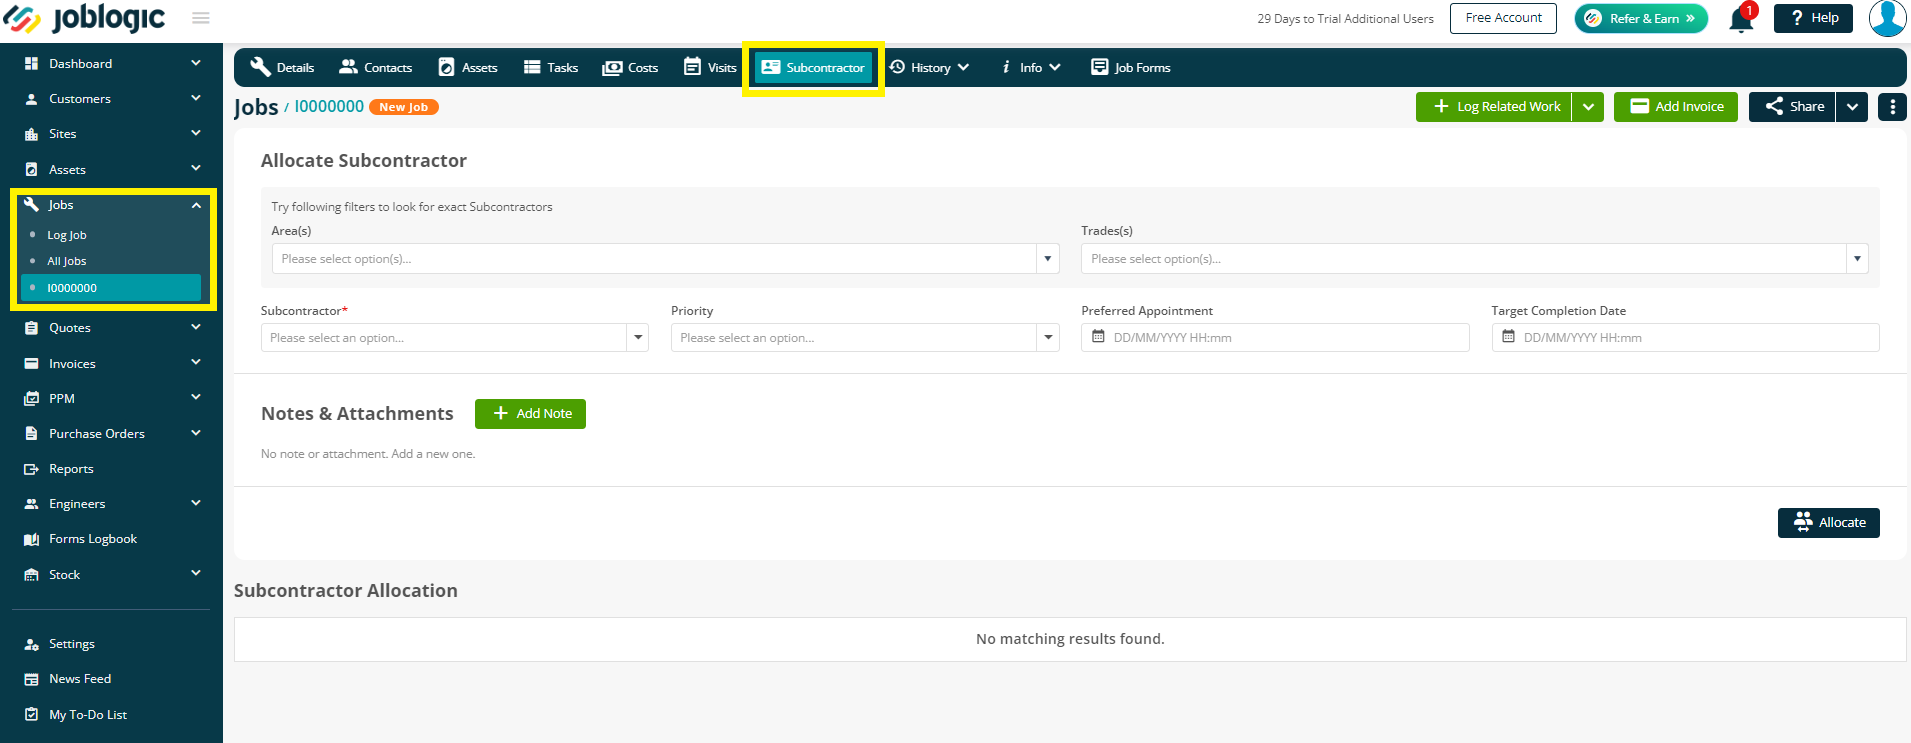
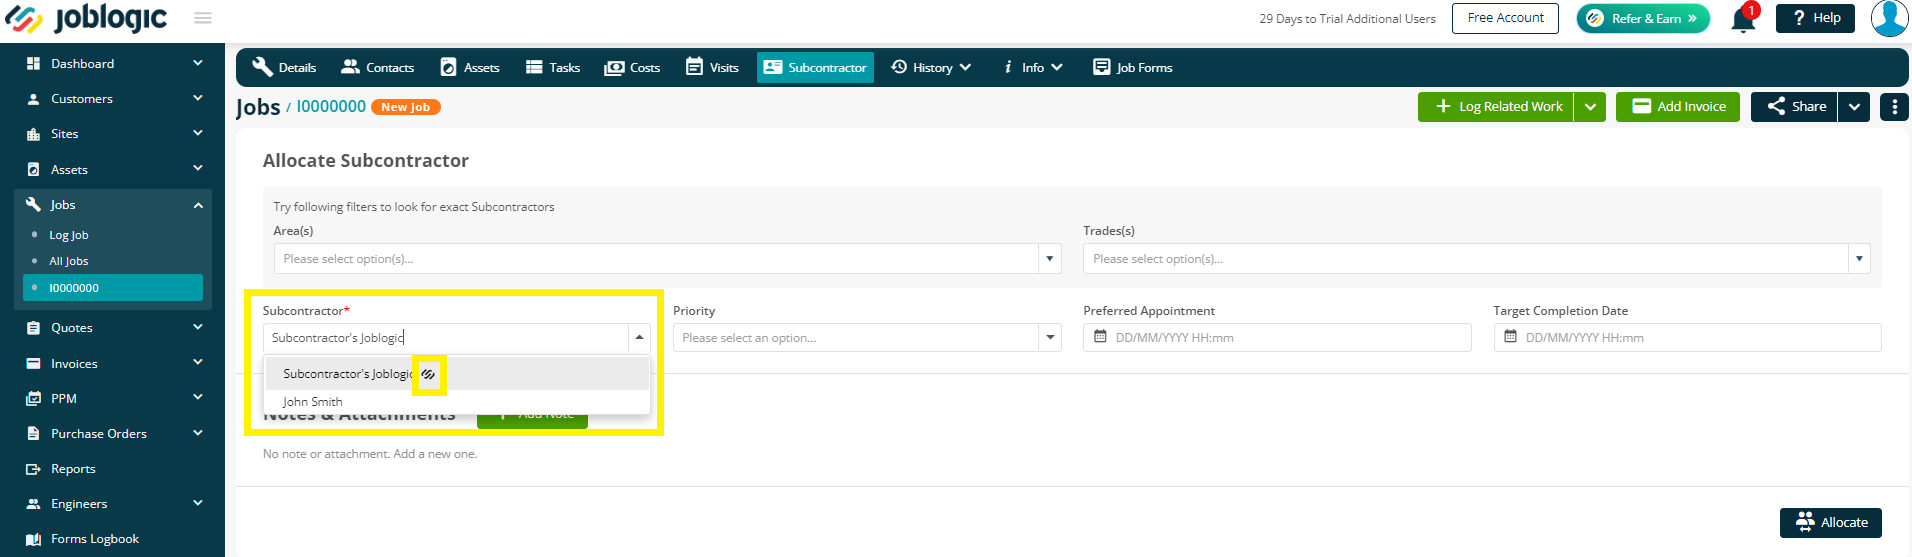
You can choose to filter by Area or Trade if required, but next you can select your chosen subcontractor from the Subcontractor dropdown
Your linked subcontractors will be identified via the joblogic logo next to their name
Next, fill in the priority and date details if you wish to do so – they are not mandatory so can be left blank if you prefer.
Subcontractor Purchase Orders
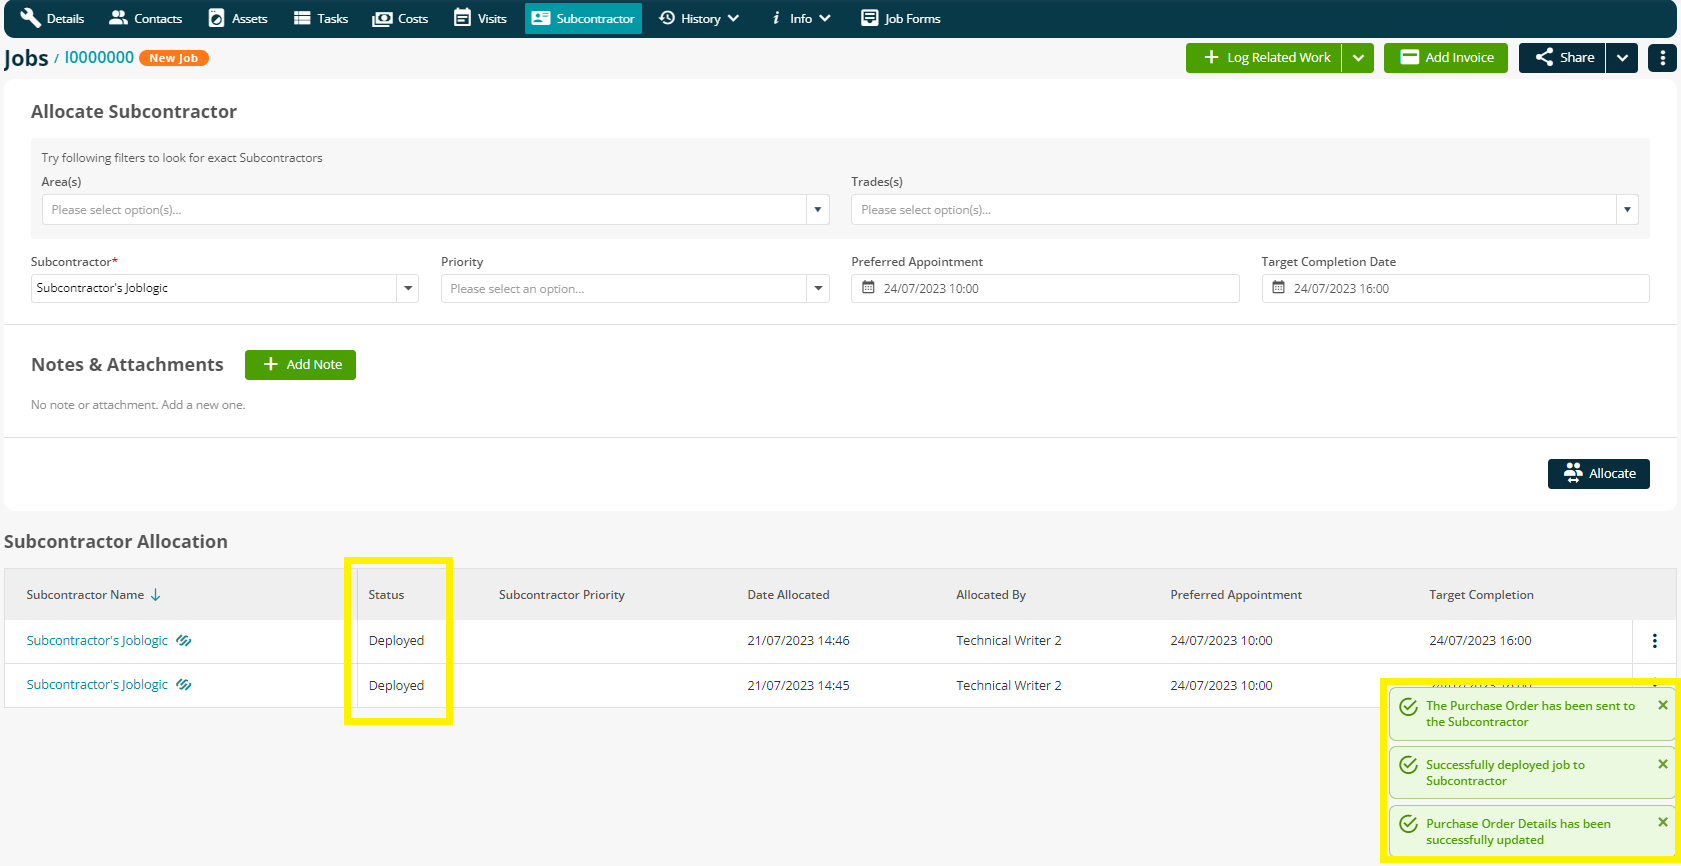
When you click Allocate, you’ll receive a pop up to create a Purchase Order for your subcontractor
This is where you enter the work details, such as description, value and work instructions.

If you need to add more than one task, click the Add More button for further work options

Once you have clicked Save against the Purchase Order screen, the system will allocate and deploy the job, create the PO and also send the PO (if you have this option ticked)
To look at raising Subcontractor Contract PO's, please click here.
Notifications & Status updates
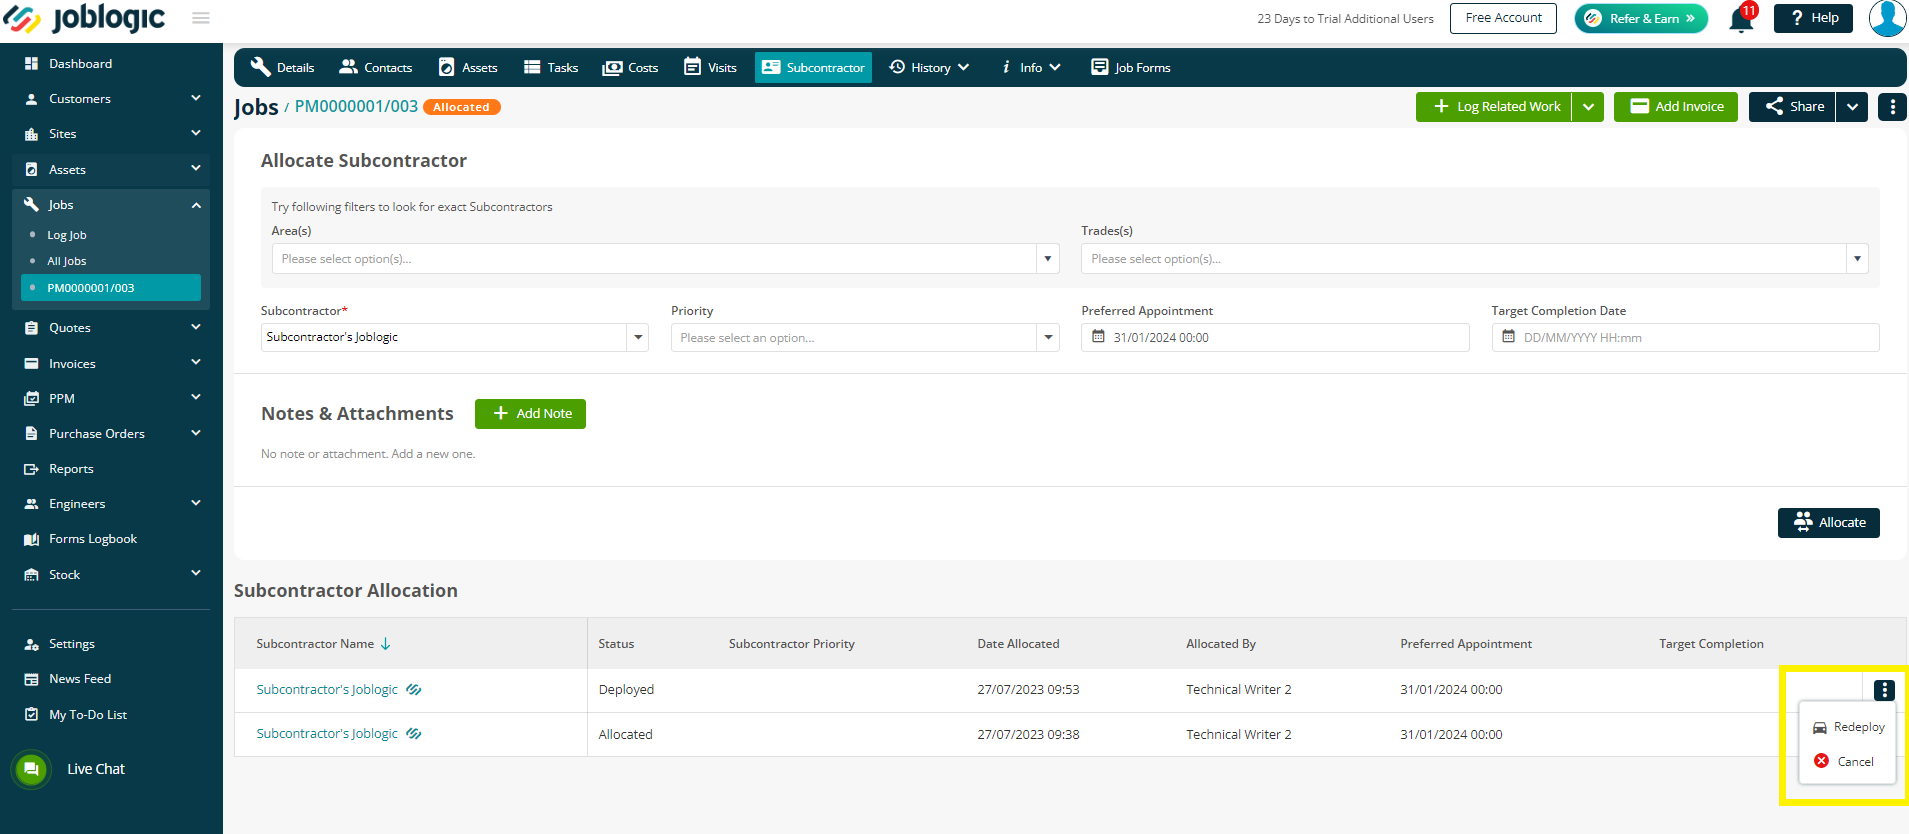
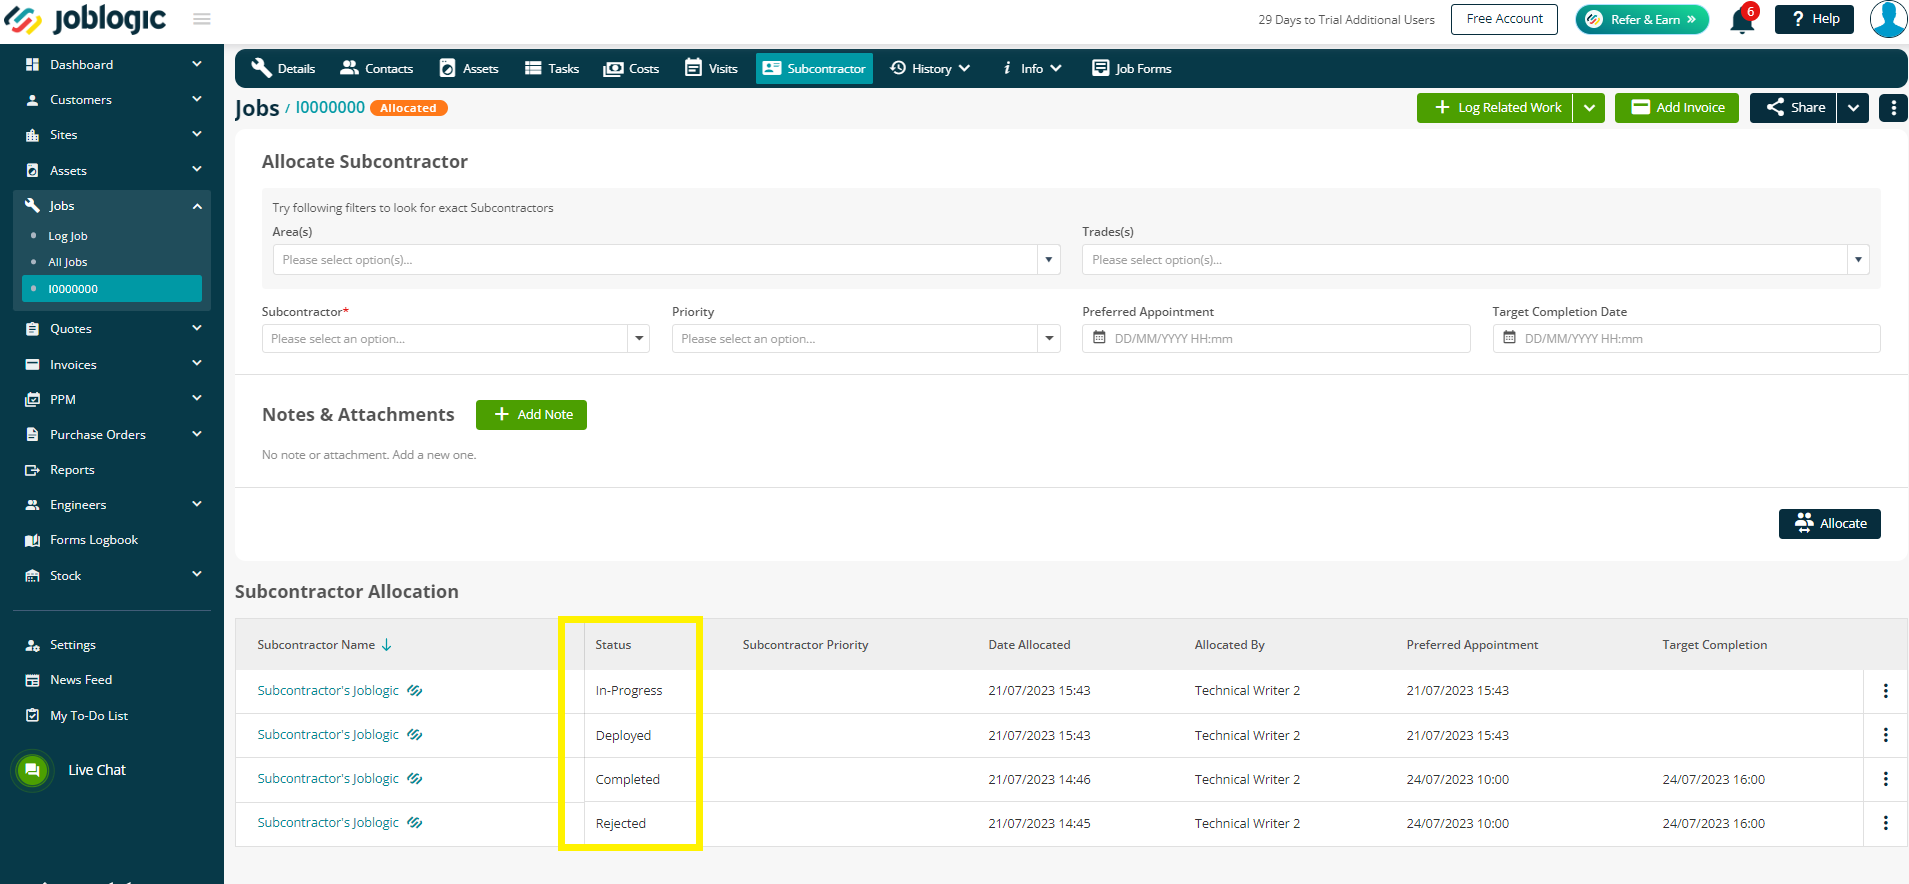
Should you require to redeploy the job, or cancel it, you can do so via the three dots on the right
When your subcontractor Accepts or Rejects the job, you’ll receive a notification via the bell icon in the top right
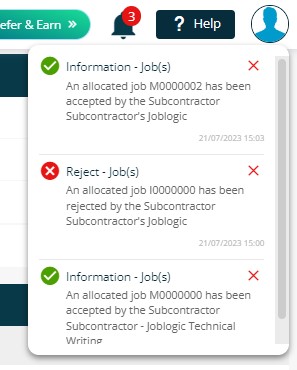
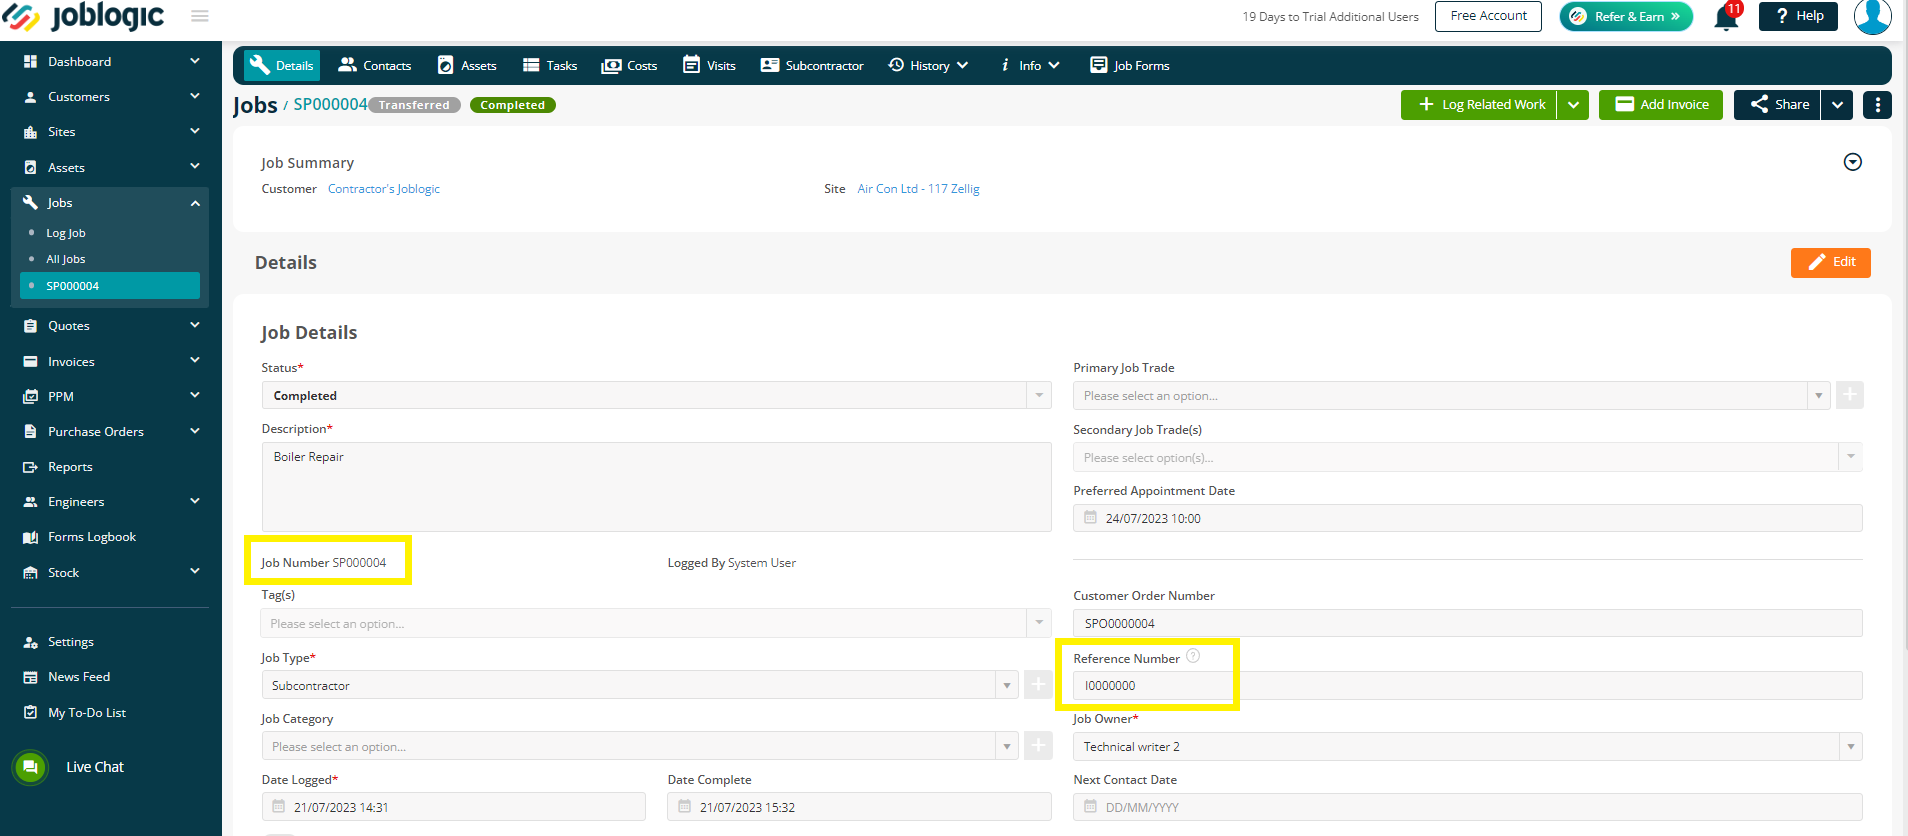
Your joblogic job number will show on their system under the Reference field
Their account will generate a new joblogic job number with an SP prefix.
Your account - joblogic number
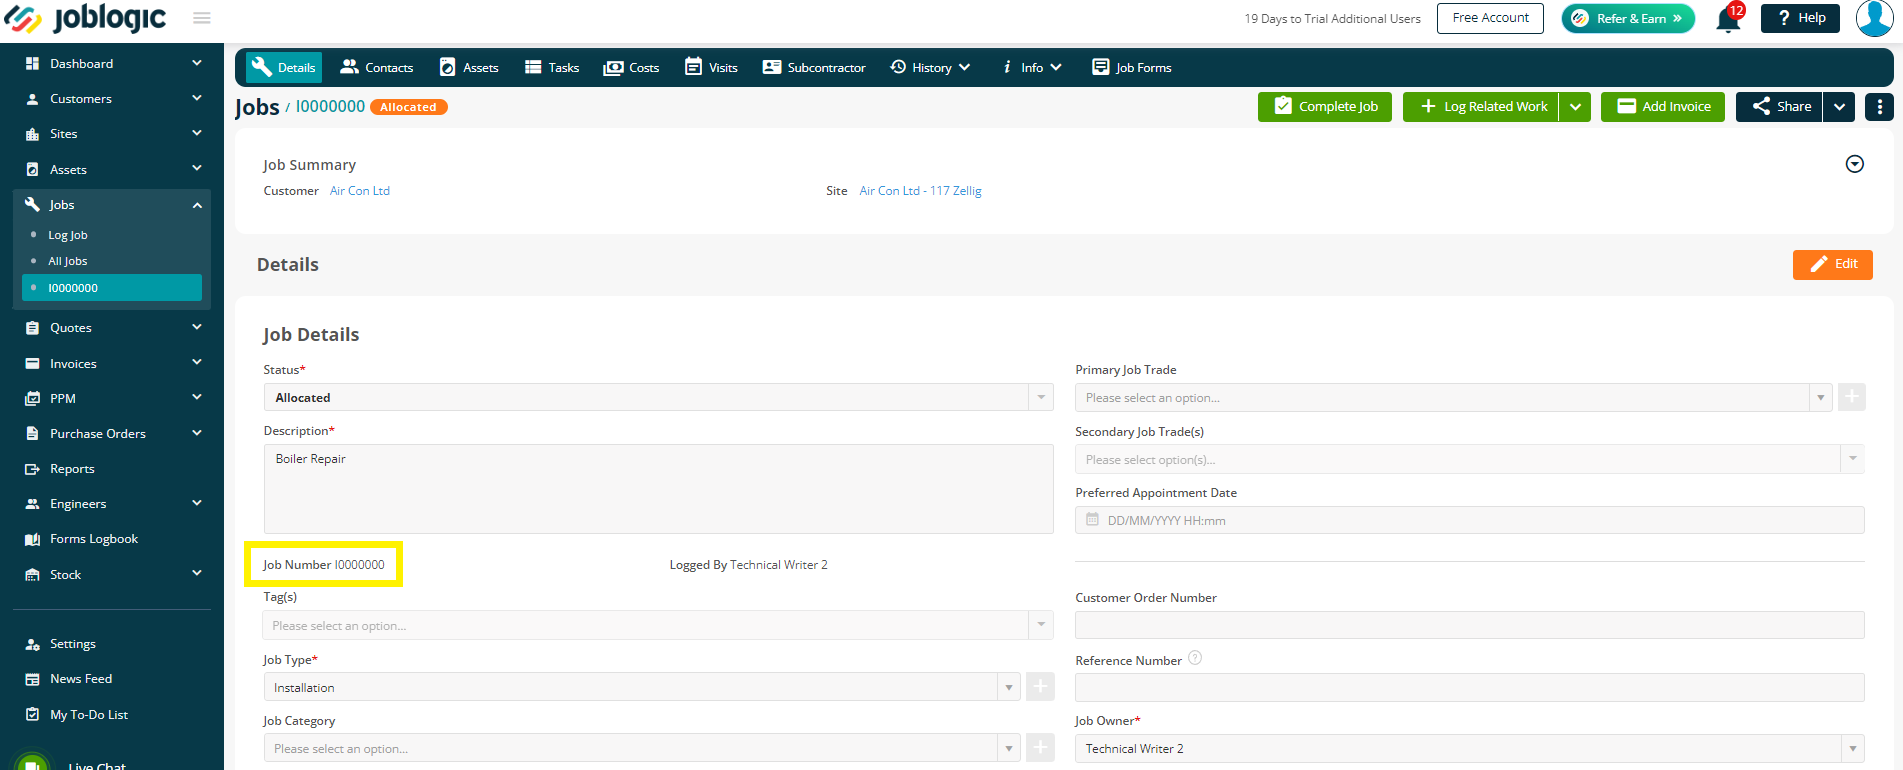
Subcontractors account - their new joblogic number + your joblogic number in their Reference field
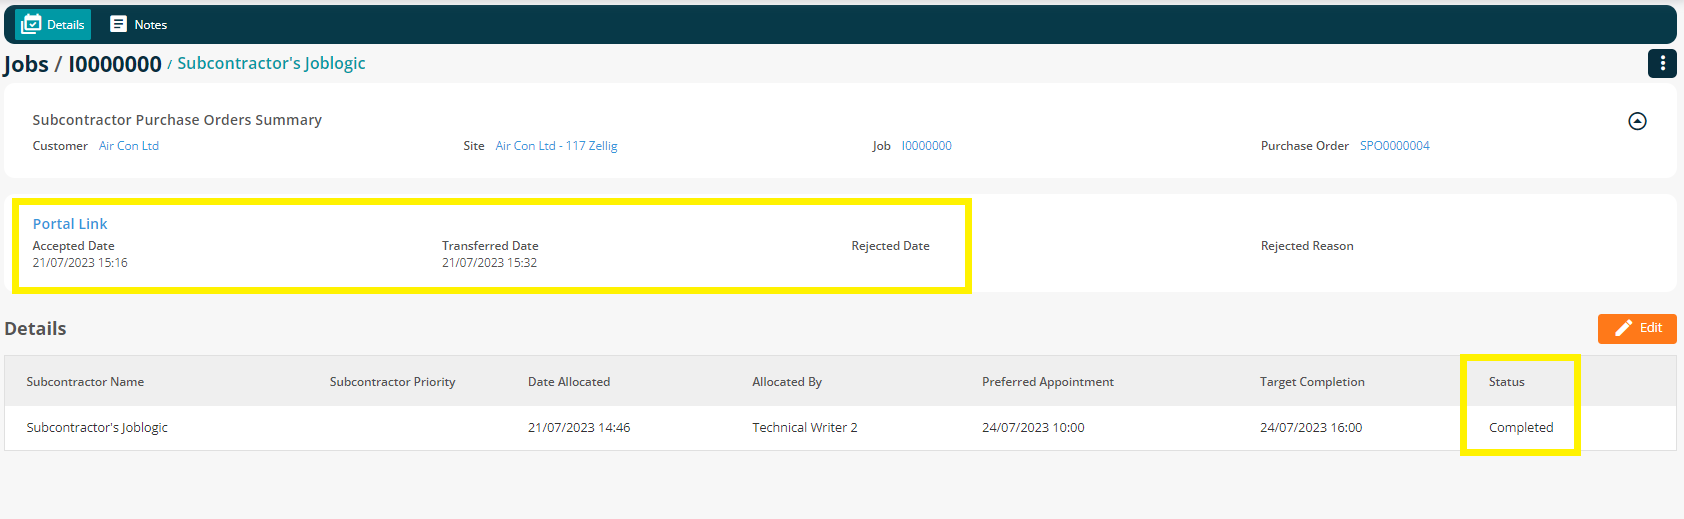
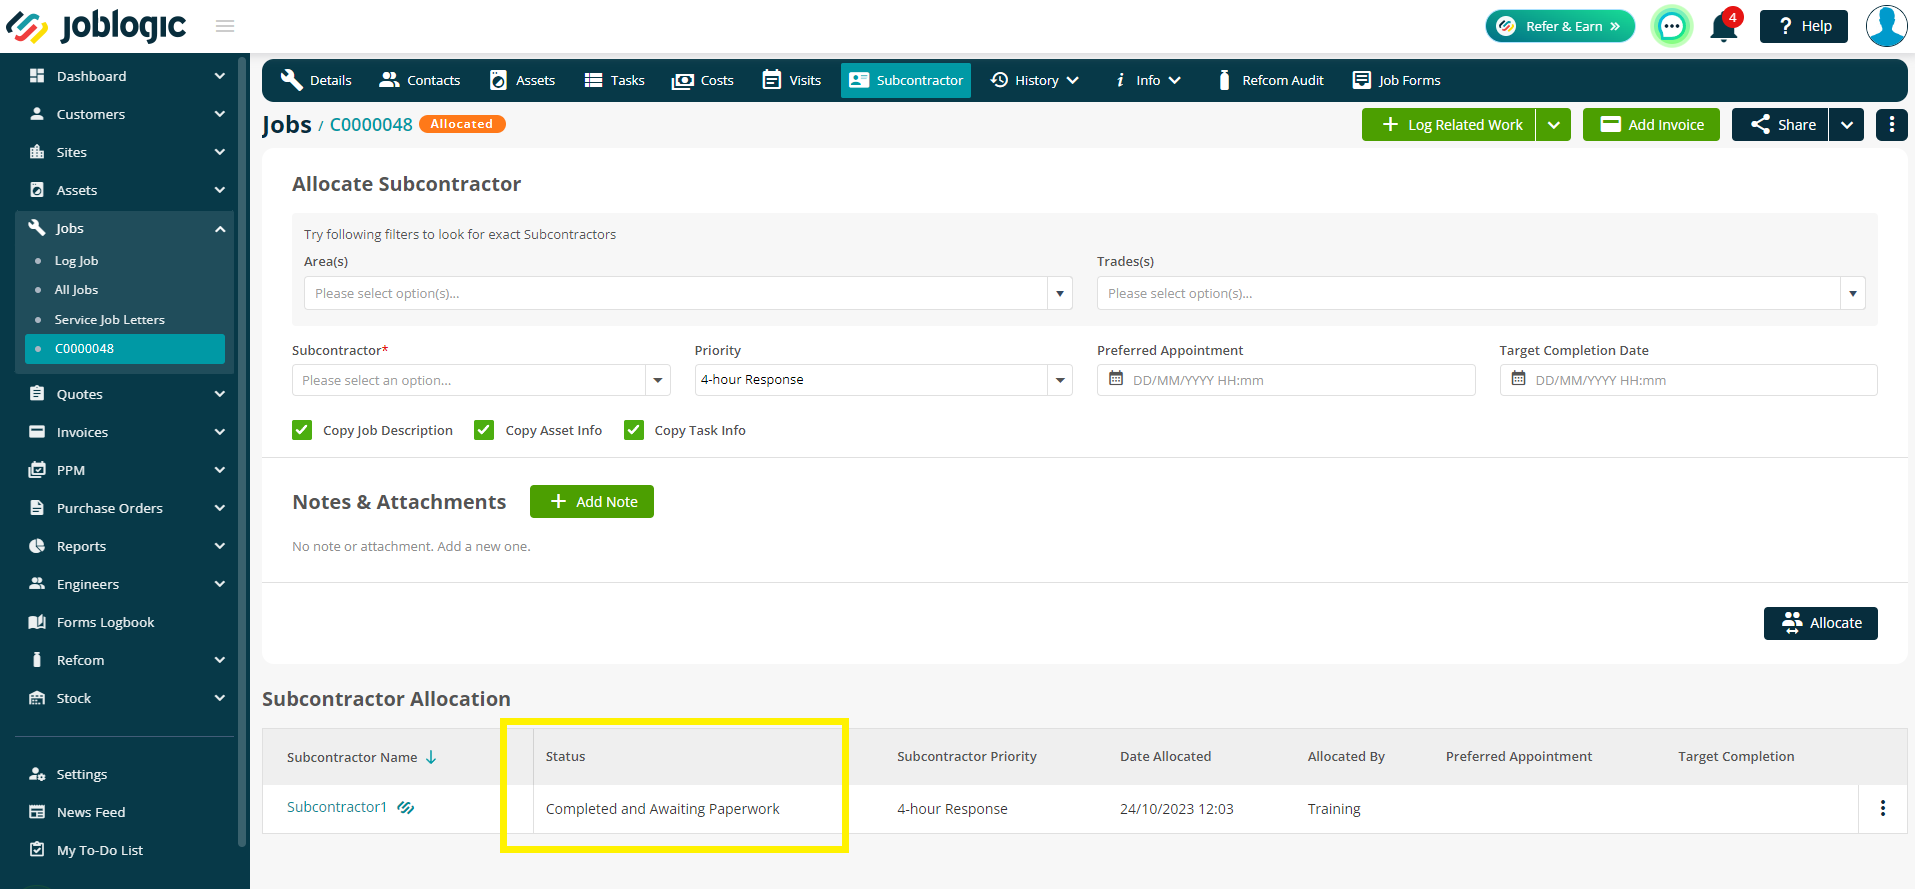
If you navigate back to your job > subcontractor tab, you can keep an eye on the status and dates/times by clicking on the relevant subcontractor name
Completion
The subcontractor can either Transfer the full job back or mark the job as ‘Completed and awaiting paperwork’ and you’ll receive a notification to inform you of their update.
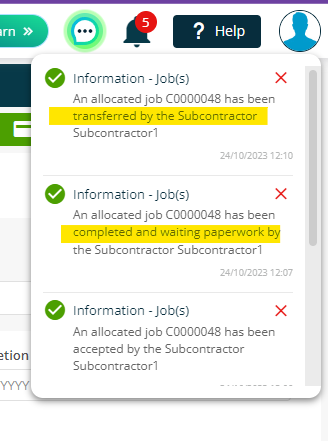
The subcontractor status will also reflect this.
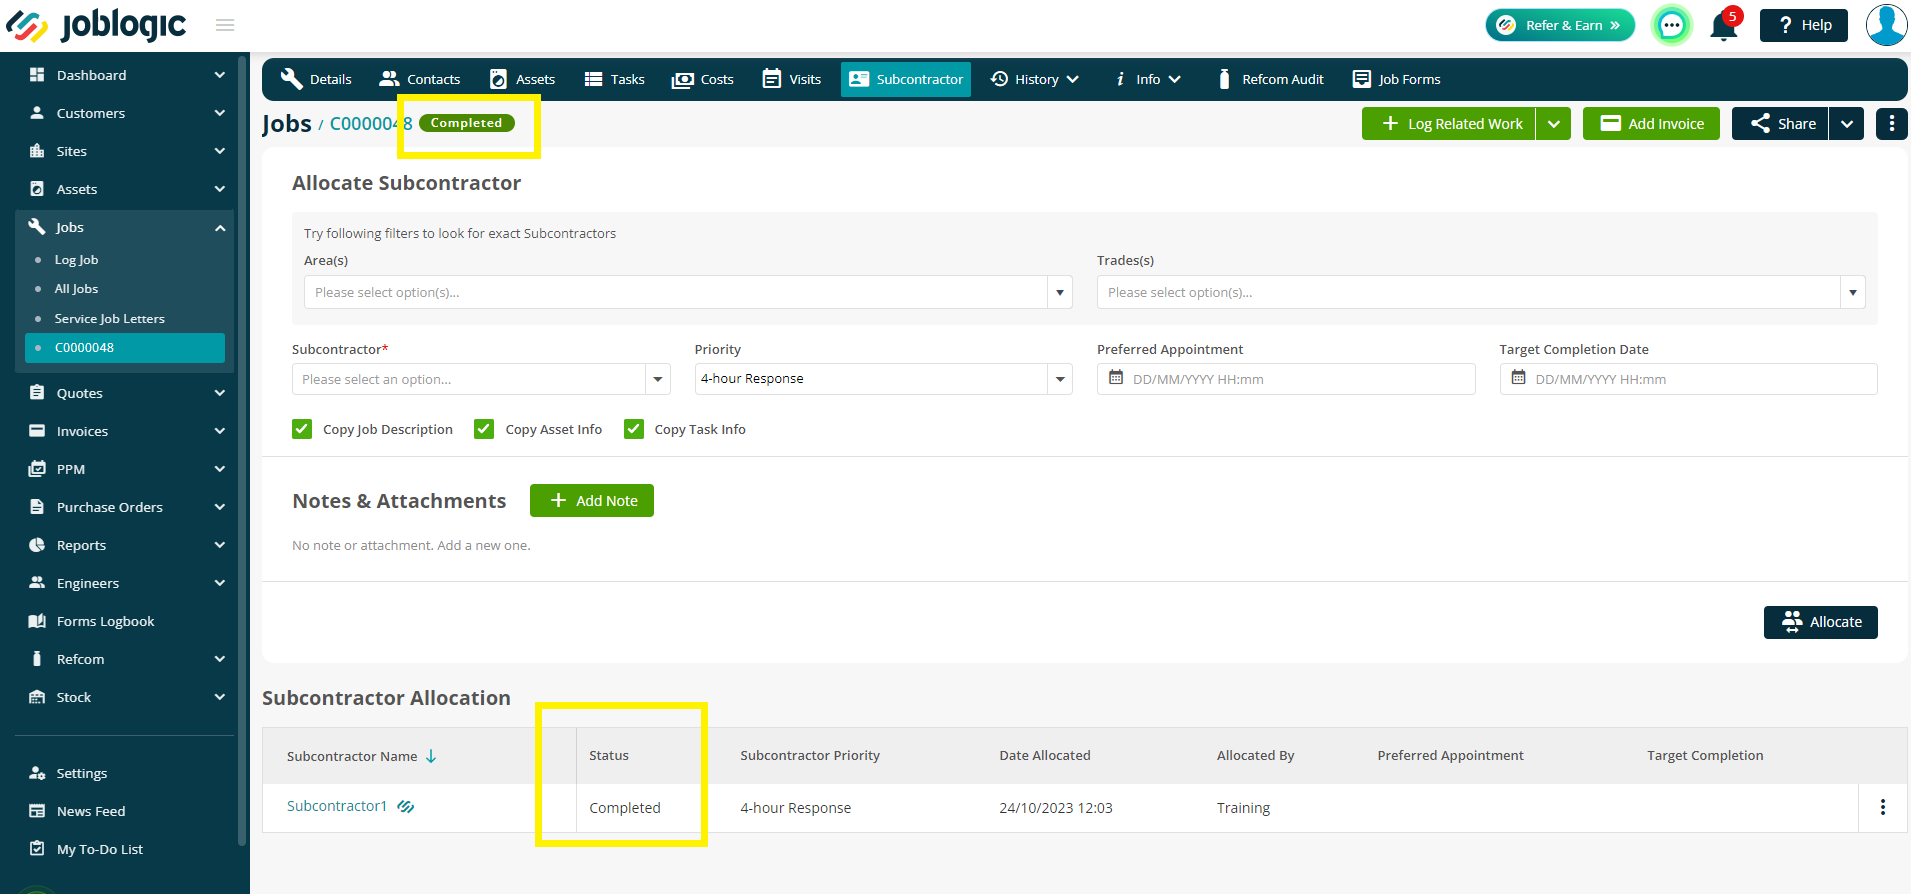
Once the job has been sent back fully, and if all subcontractors have completed their works, the job will be marked as Completed automatically for your convenience.
PPM Jobs
Allocating a job to a subcontractor
There are a couple of ways to add a subcontractor to your PPM visits.
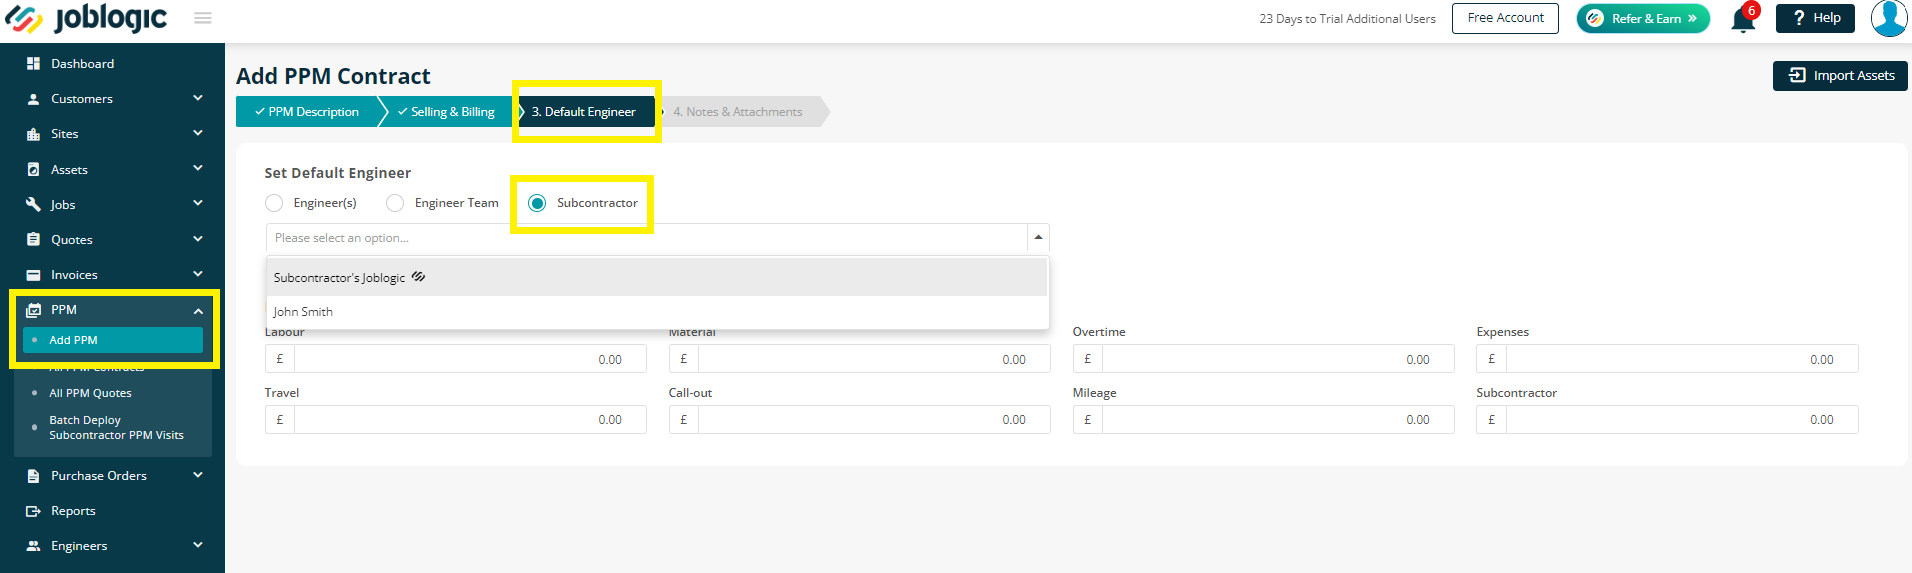
First, you can assign a subcontractor at the creation stage of the PPM Contract.
If you click Add PPM and continue through the first couple of pages, as normal, you’ll come to the Default Engineer page. Here, you can choose to assign a subcontractor – and any visits that are set up will be allocated to this subcontractor.
Your linked subcontractors will be identified via the joblogic logo next to their name
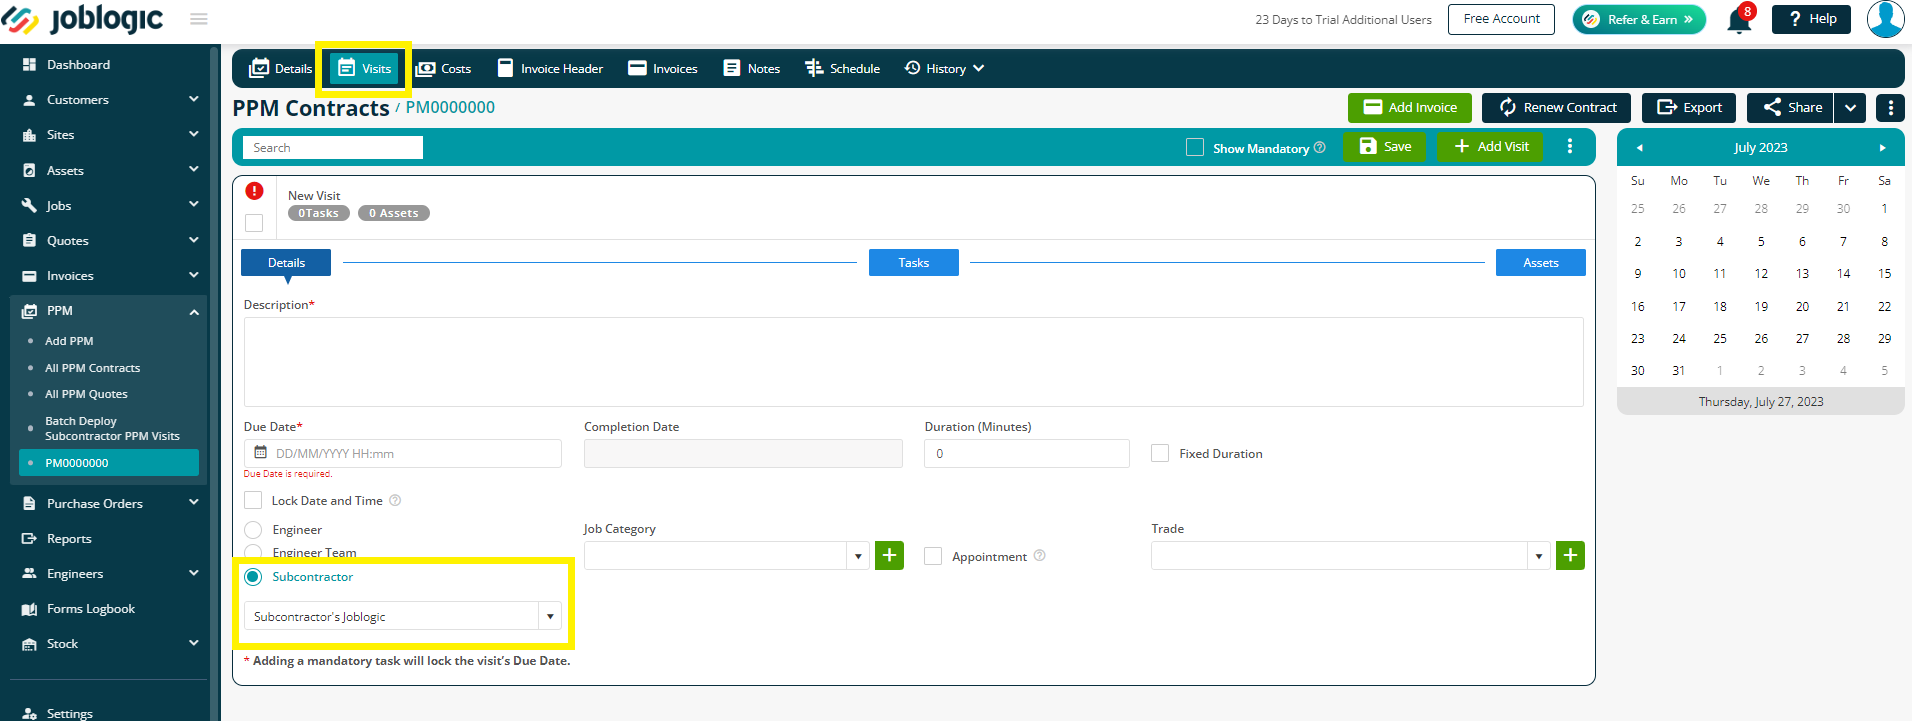
Secondly, you can set up the contract without assigning visits, or a default engineer.
Once the contract is generated, you can click into the Visits tab and click ‘’Add Visit’’
Here, you will be able to set up your visit, and choose to assign a subcontractor.
Alternatively, you can leave the engineer/subcontractor blank at this point. Once the jobs are generated, you can click into the job via Jobs > All Jobs and assign subcontractors as per the section above.
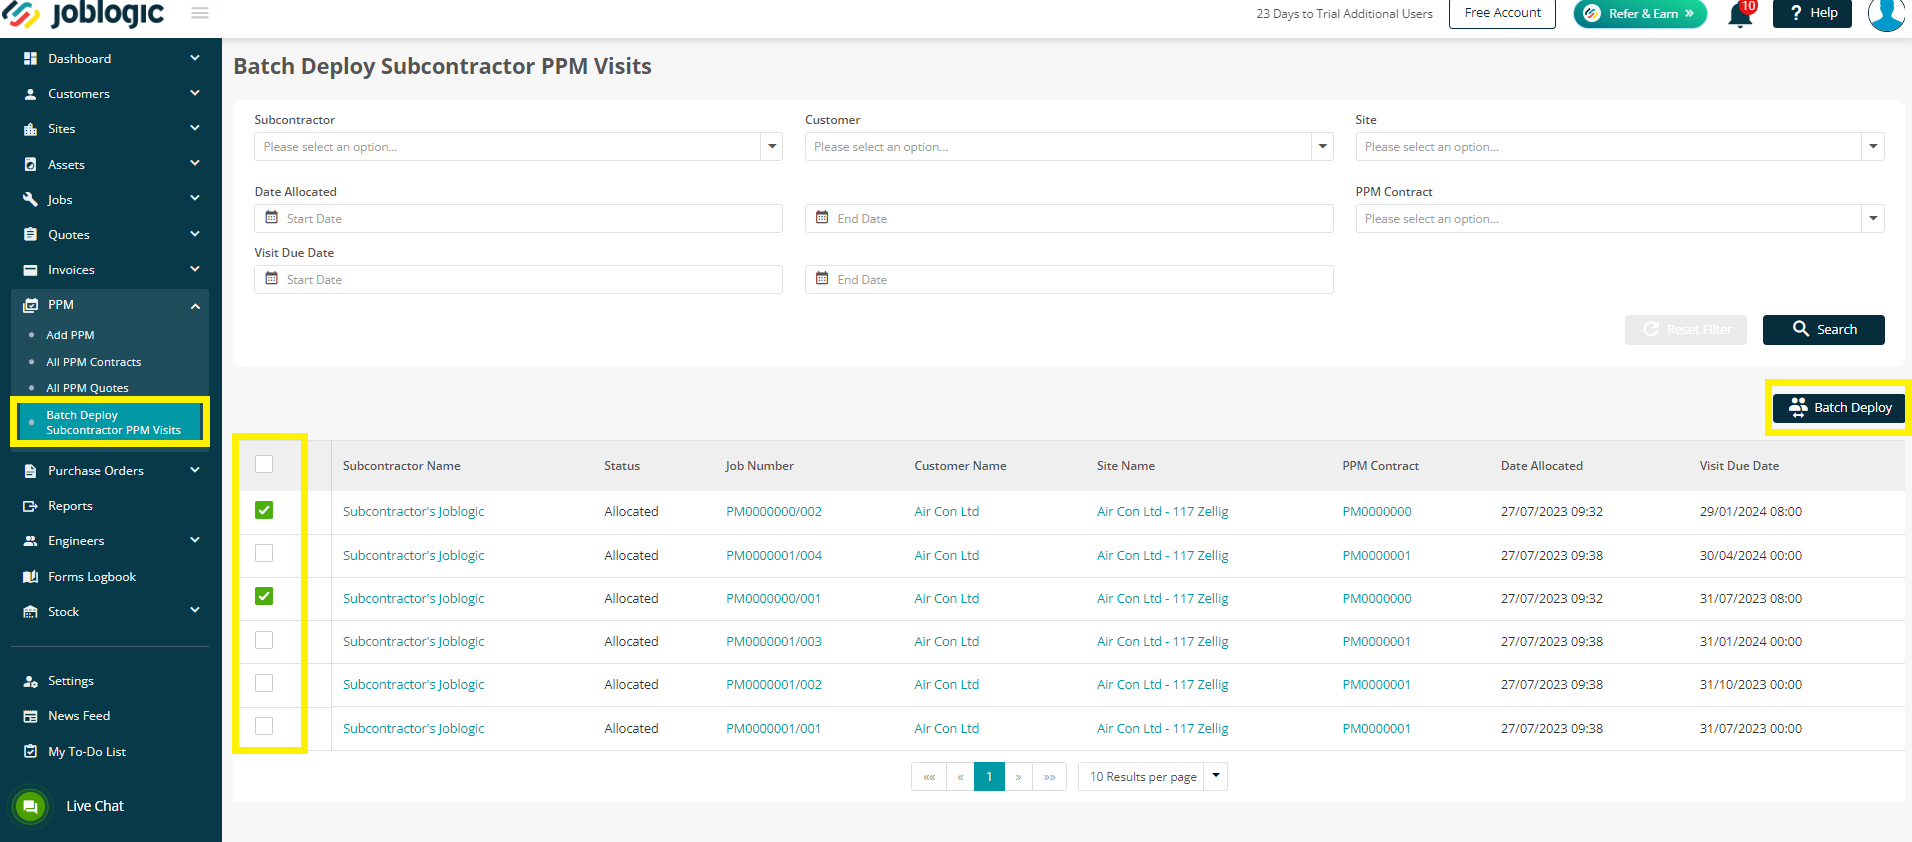
Batch deploying jobs to your subcontractor
Once you have allocated your subcontractor to your contracted jobs, you have the option to Batch Deploy these in one go, rather than go through them individually.
To do this, click PPM > Batch Deploy Subcontractor PPM Visits
Here, you can use the filters if required, and then tick the visits you would like to deploy
Please keep in mind, you will only be able to do this per subcontractor and cannot batch deploy for multiple contractors at once.
When you click the Batch Deploy button, a Purchase Order Details screen will pop up.
Here, you can check the details over, and tick to Send PO’s if required.
Click Save when you are ready
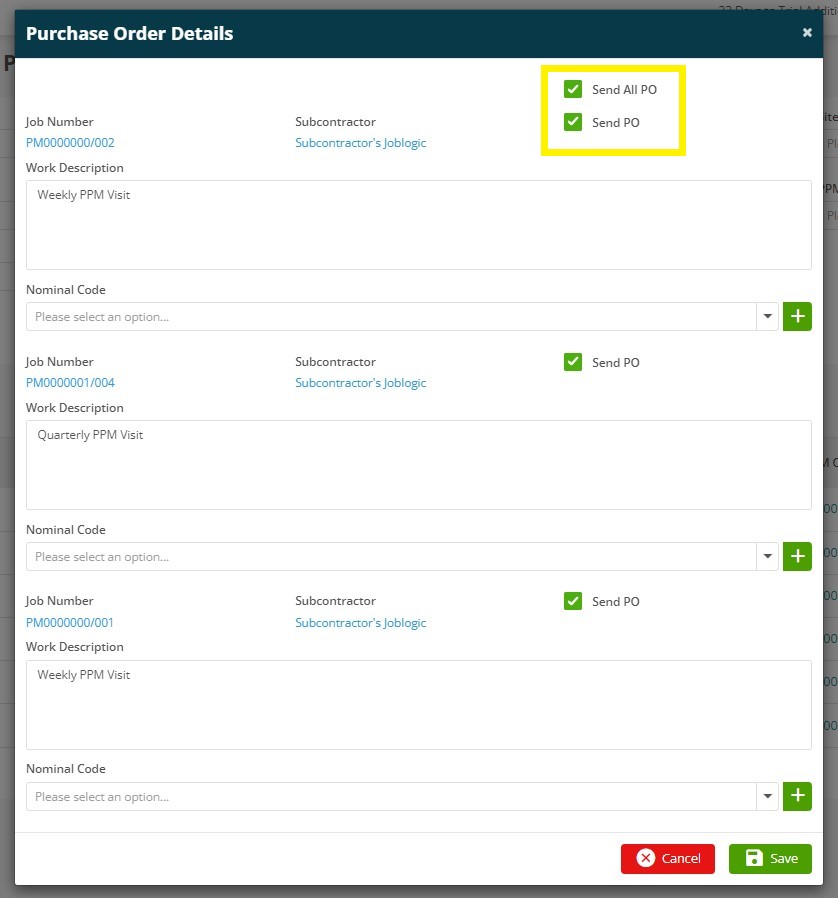
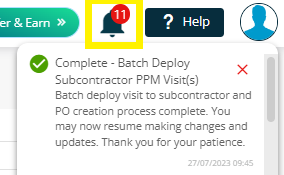
The system will send a notification to you, to confirm the visits have been deployed, and the PO’s have been sent, if relevant.
Alternatively, you can still deploy these jobs manually / individually via the job
Further Support
For further information or assistance with the above, contact our Support Team on 0800 326 5561 or email support@joblogic.com. Alternatively, our Customer Success Management team can be reached by emailing customersuccess@joblogic.com
Publishing Details
This document was written and produced by Joblogic’s Technical Writing team and was last updated on the date specified above. Be aware that the information provided may be subject to change following further updates on the matter becoming available. Additionally, details within the guide may vary depending on your Joblogic account’s user permissions.