Introduction
This guide will detail how to receive, complete and transfer jobs on your joblogic account.
Receiving jobs
You’ll receive a notification via the bell icon when you have been sent a job
You can either click the link via the notification, or go to Jobs > All Jobs to view the list and click on the relevant job number

You’ll be able to view the details, but won’t be able to do anything until you have Accepted the job
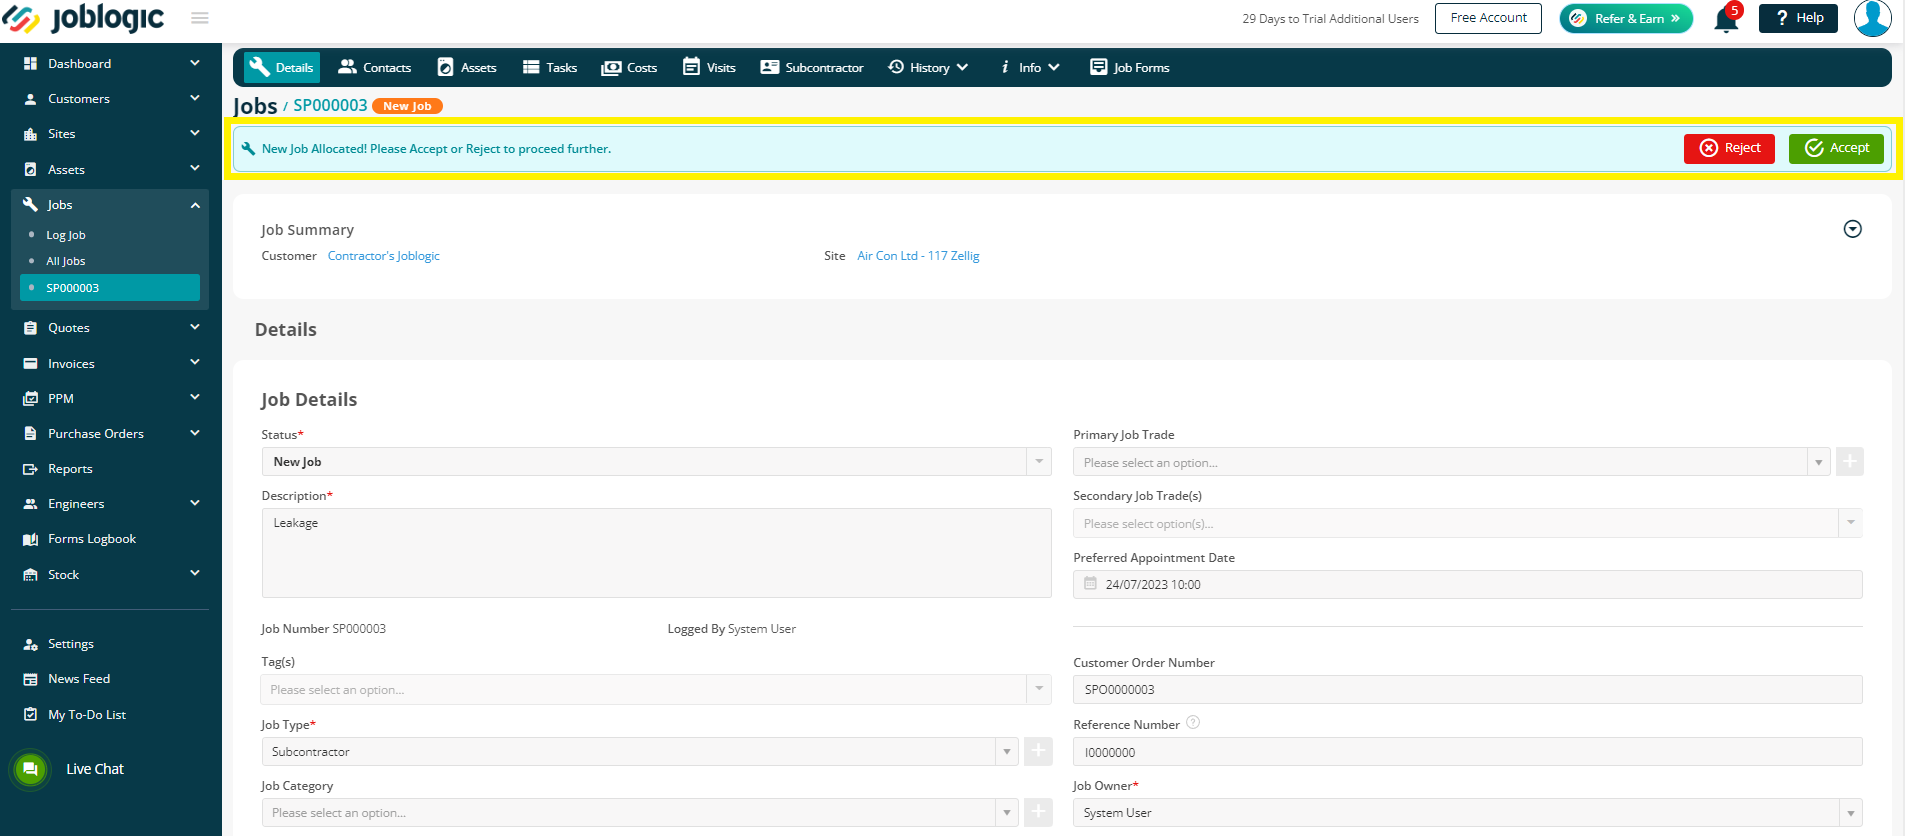
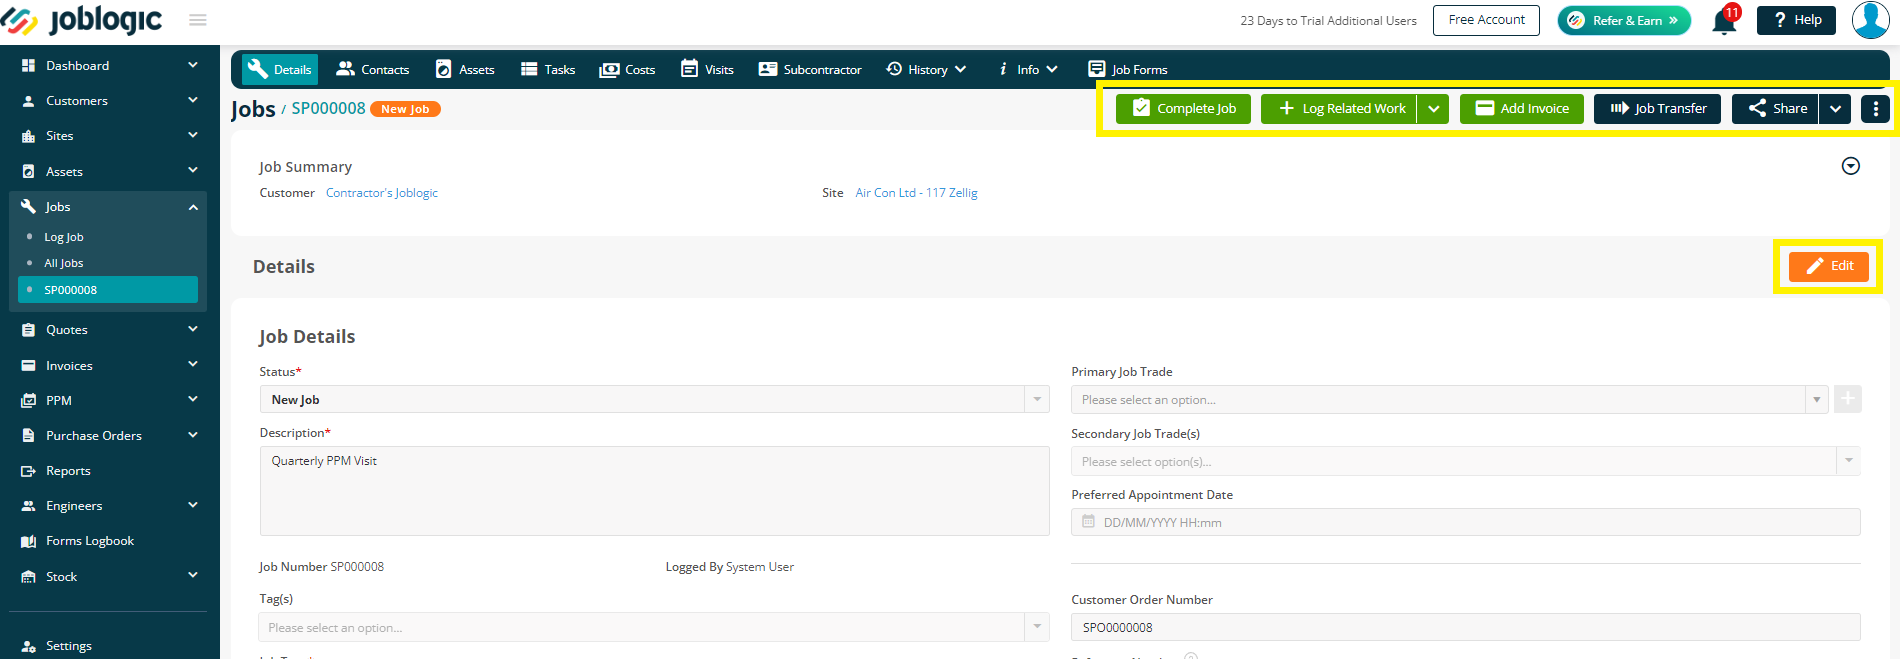
When you have accepted a job, you’ll get full access to all information, and functions, such as editing details, adding invoices and completing the job
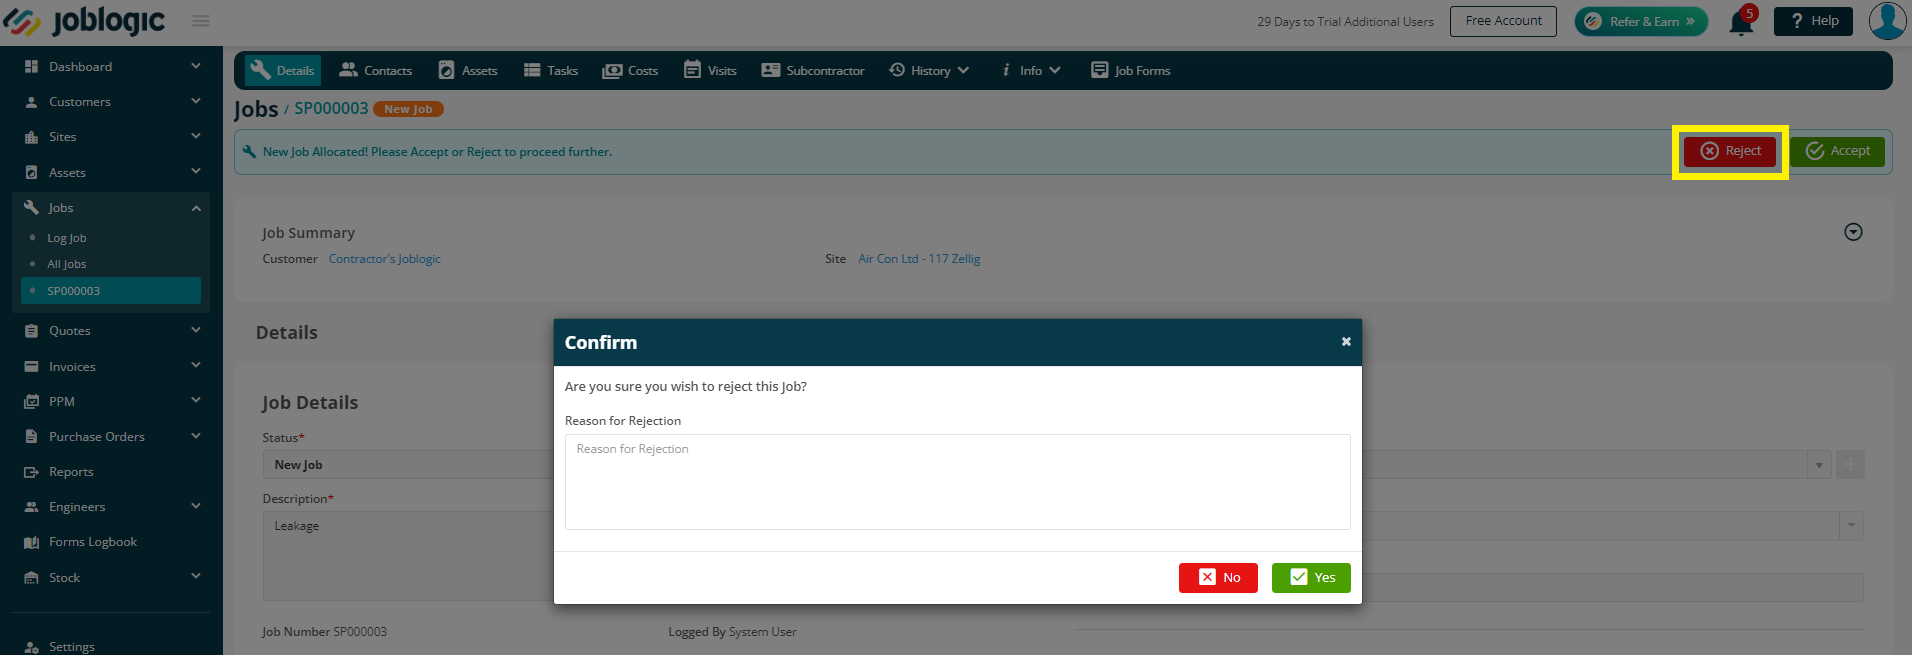
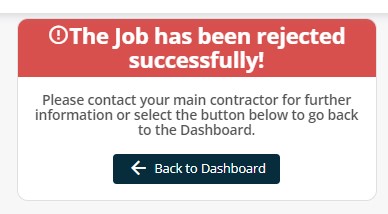
If you choose to Reject it, you’ll be asked to confirm the rejection and enter a reason, however this is not mandatory. Click Yes and you’ll be redirected.
The job has now been removed from your job list.
Transferring jobs
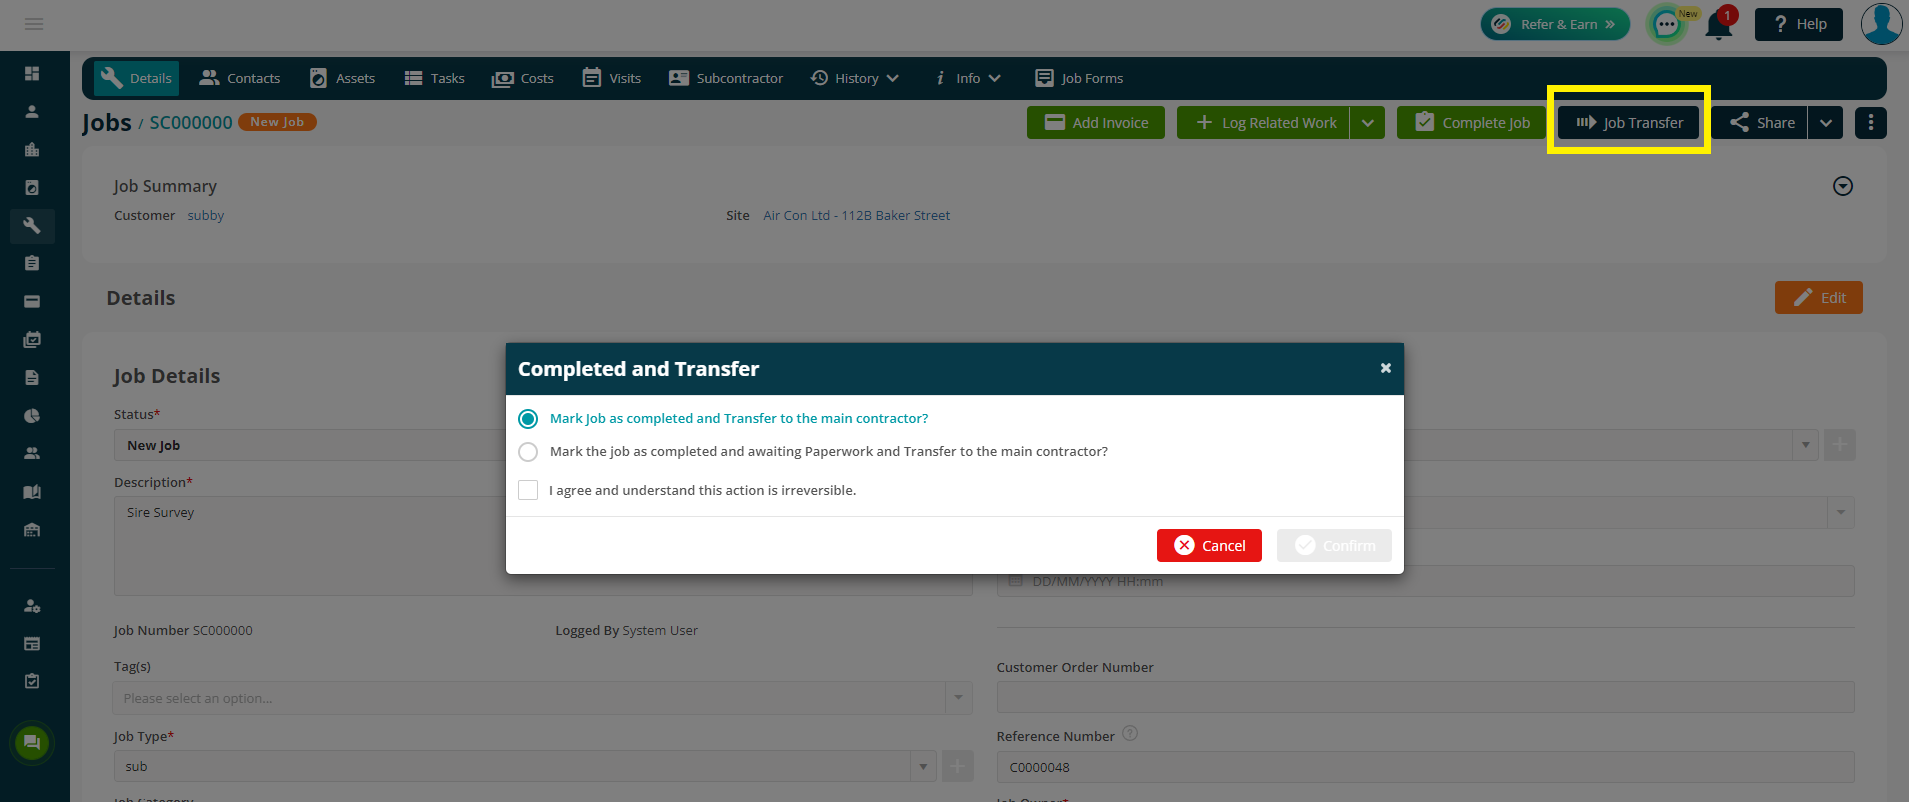
When you have completed the works, click the Job Transfer button to send the job back to your main contractor.
You’ll have two options here:
- Mark Job as completed and Transfer to the main contractor
- Mark the job as completed and awaiting Paperwork and Transfer to the main contractor
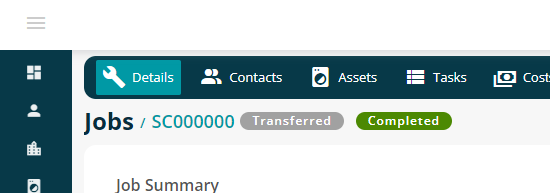
1. Mark Job as completed and Transfer to the main contractor
If your job is fully completed and ready to be transferred, choose this first option.
Your job will then show two status labels at the top of the page - ‘’Transferred’’ and ‘’Completed’’
You can still make changes to your job however you will not be able to transfer the data up to the main account via joblogic again.
2. Mark the job as completed and awaiting Paperwork and Transfer to the main contractor
If your job is complete but you do not have all of the paperwork ready just yet, you can choose the second option.
This will allow you to send the current available data up to the main contractor, but leave the job open for you to send more details later.
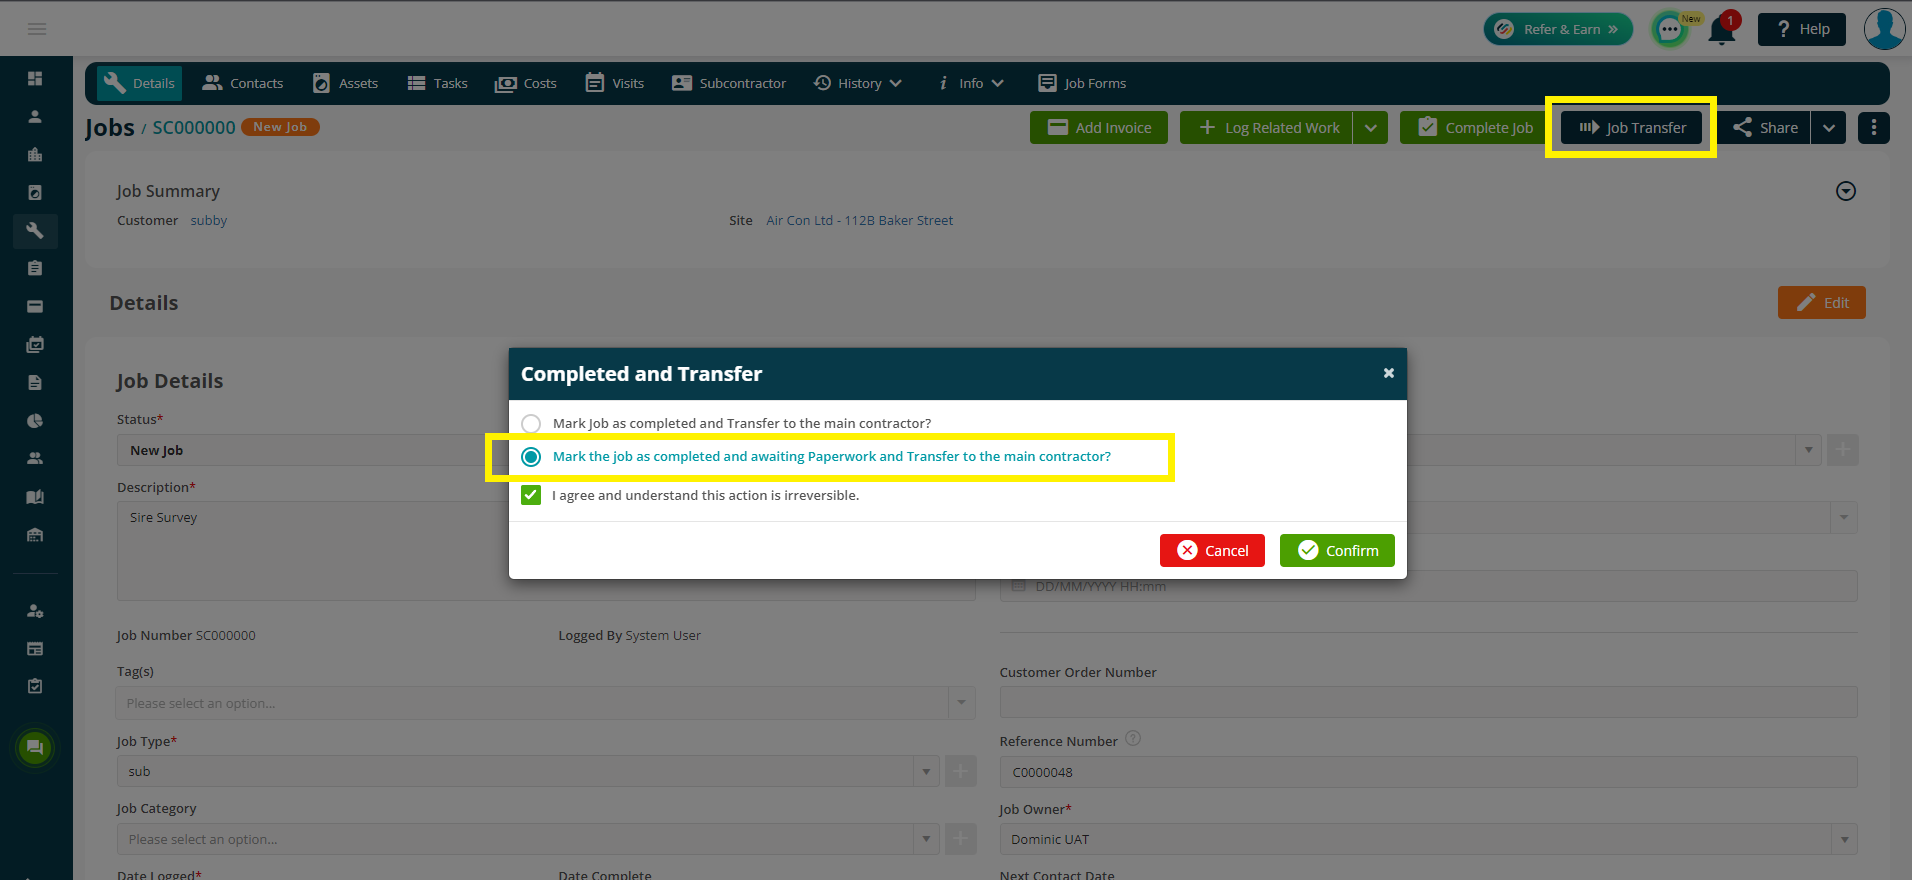
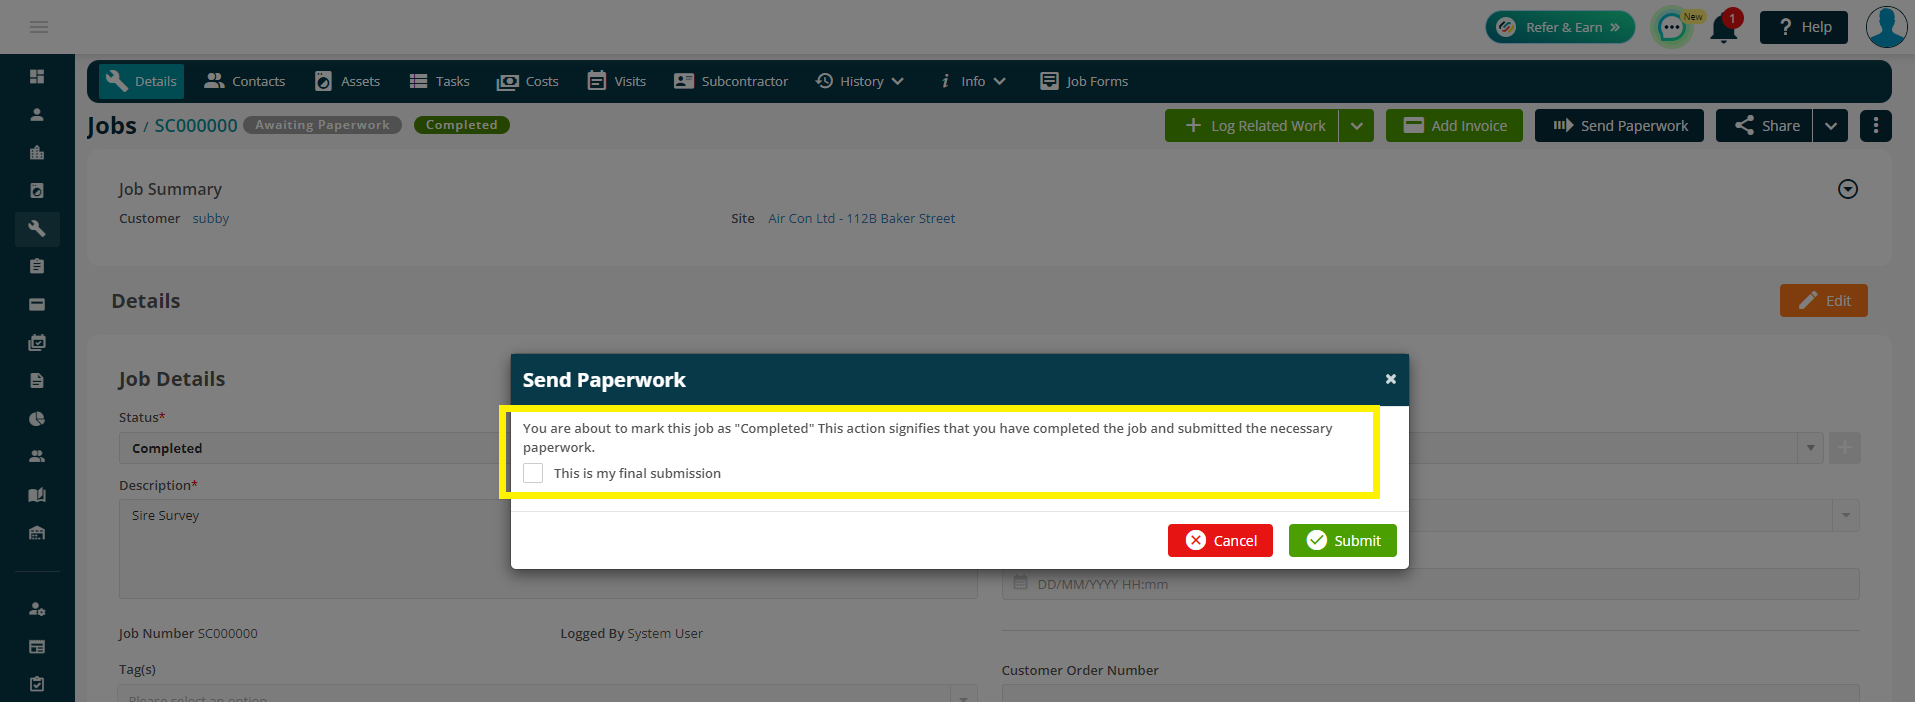
Your job will now show the statuses ‘Awaiting Paperwork’ and ‘Completed’
You’ll also have a ‘Send Paperwork’ button in the top right
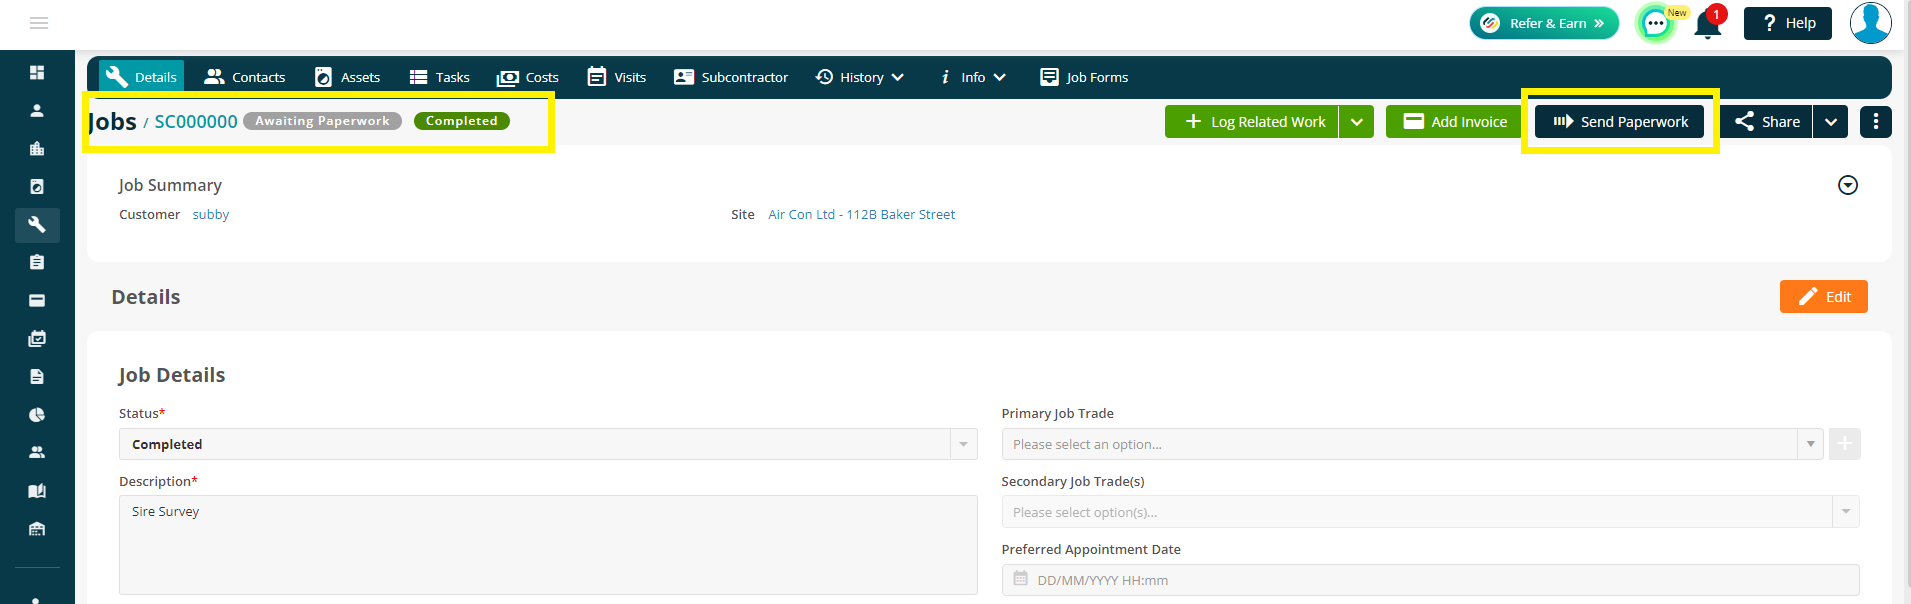
Clicking the Send Paperwork option will allow you to resend the job details up to your main contractor.
If you then tick ‘This is my final submission’ you are confirming that all details are present, and you will no longer be able to send further information via the transfer.
Further Support
For further information or assistance with the above, contact our Support Team on 0800 326 5561 or email support@joblogic.com. Alternatively, our Customer Success Management team can be reached by emailing customersuccess@joblogic.com
## Publishing Details
This document was written and produced by Joblogic’s Technical Writing team and was last updated on the date specified above. Be aware that the information provided may be subject to change following further updates on the matter becoming available. Additionally, details within the guide may vary depending on your Joblogic account’s user permissions.