Introduction
Once the SOR feature is setup and all the required data is imported, the back office users will have the ability to implement the SOR functionality across different areas of the Joblogic system.
At Customer Level
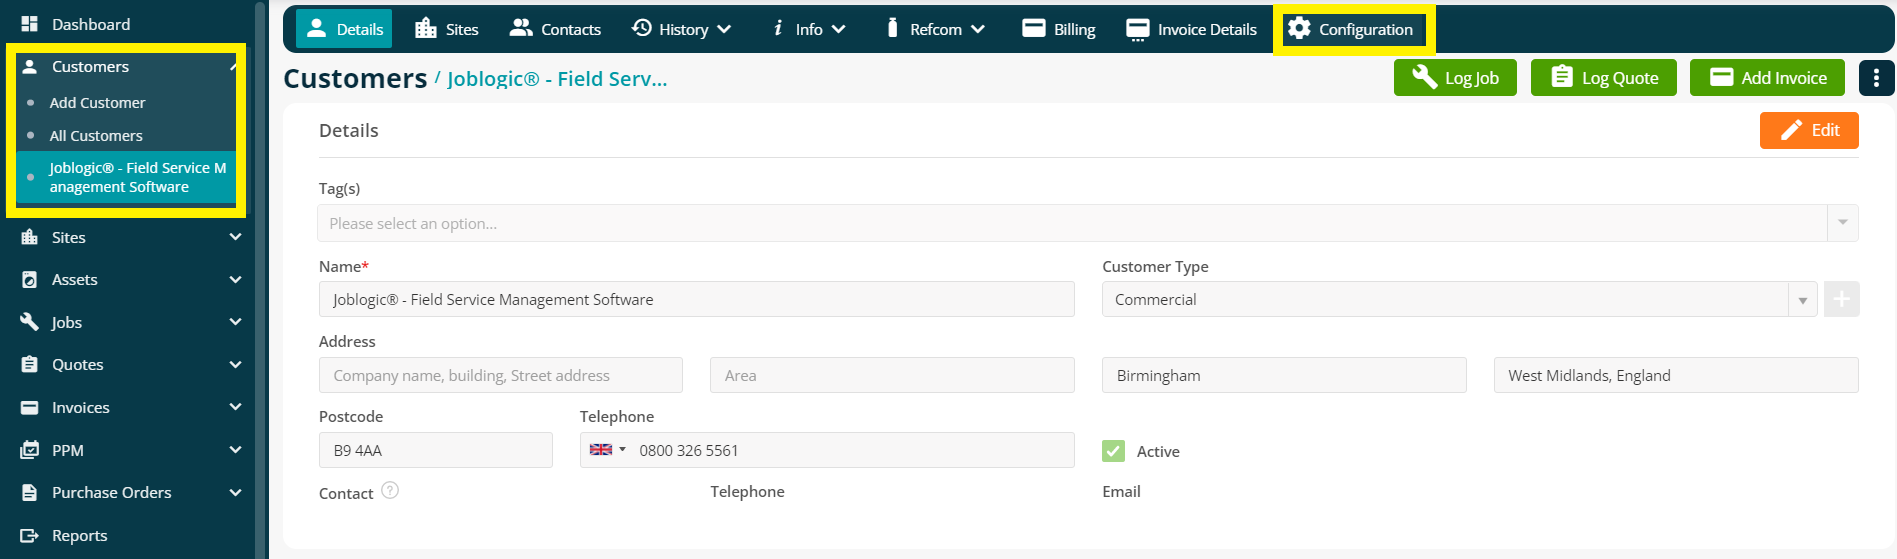
The SOR function at customer level can be used from within the ‘Configuration’ page.
To do this, navigate to the ‘Configuration’ page by selecting a customer from the ‘All Customers’ list.
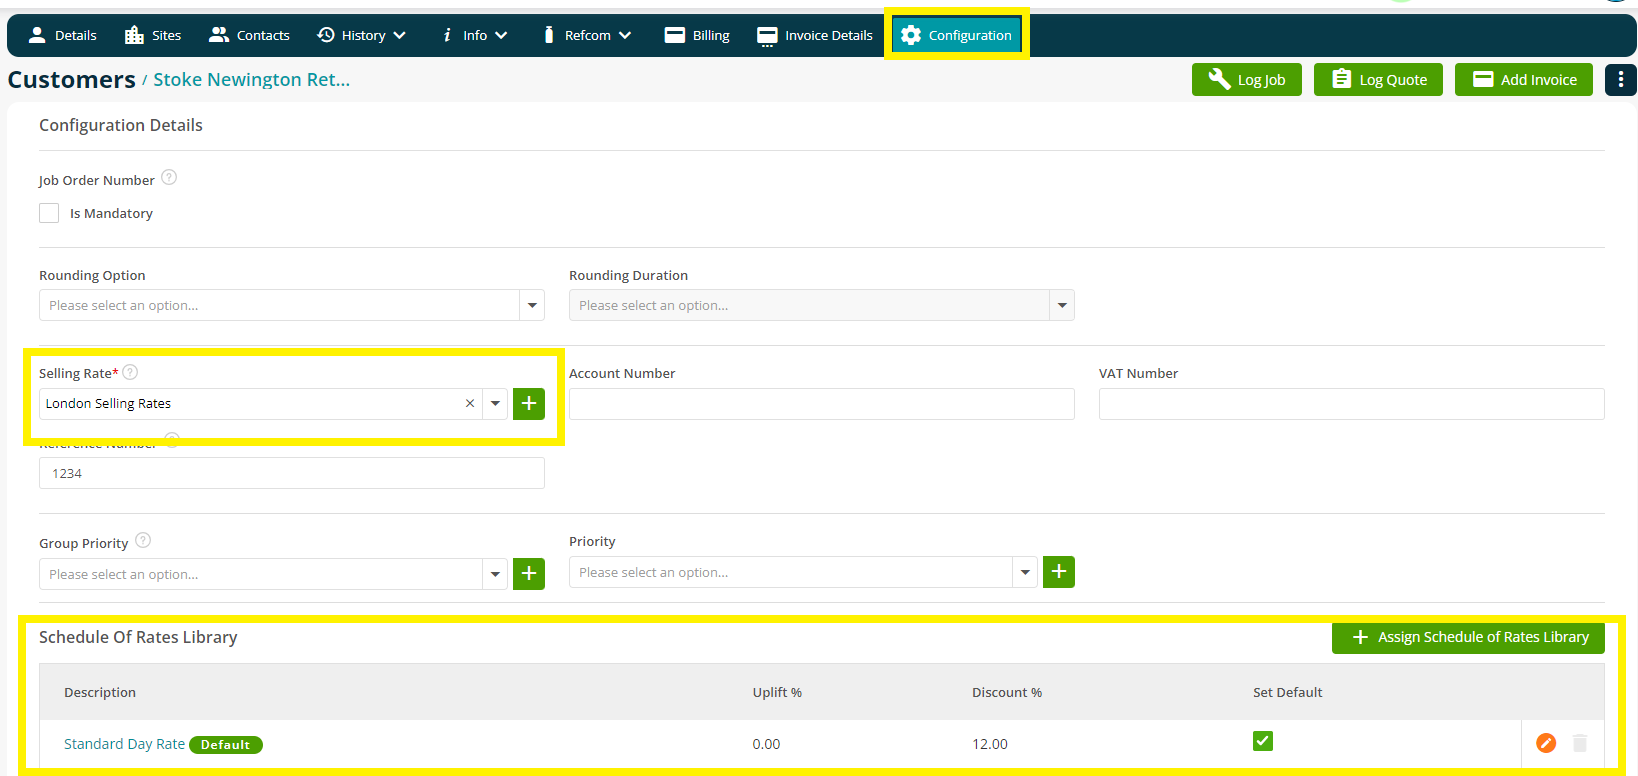
Within the configuration page, you can click the ‘Selling Rate’ dropdown to assign a specific ‘Schedule of Rates’ selling rate and add the relevant ‘Schedule of Rates Library’ for this customer.
Please note that you can assign more than one SOR library to a customer)
You also have the option to assign the relevant SOR Tax Rate and Document Templates from this page.
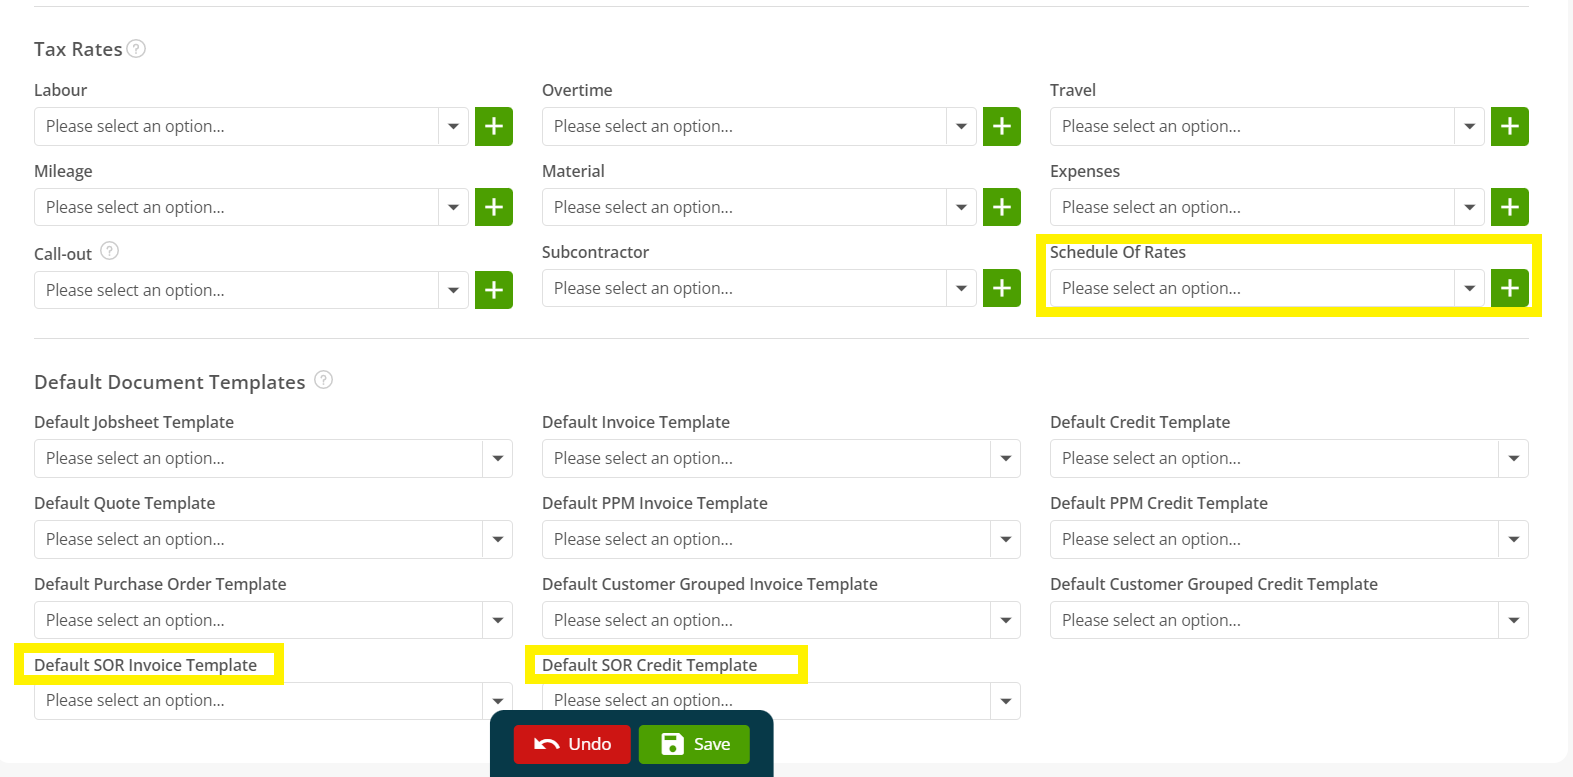
Upon making the required changes, click the save button to apply them.
Please be aware that the changes made to the configuration page of a specific customer, automatically overrides the default settings.
At Job Level
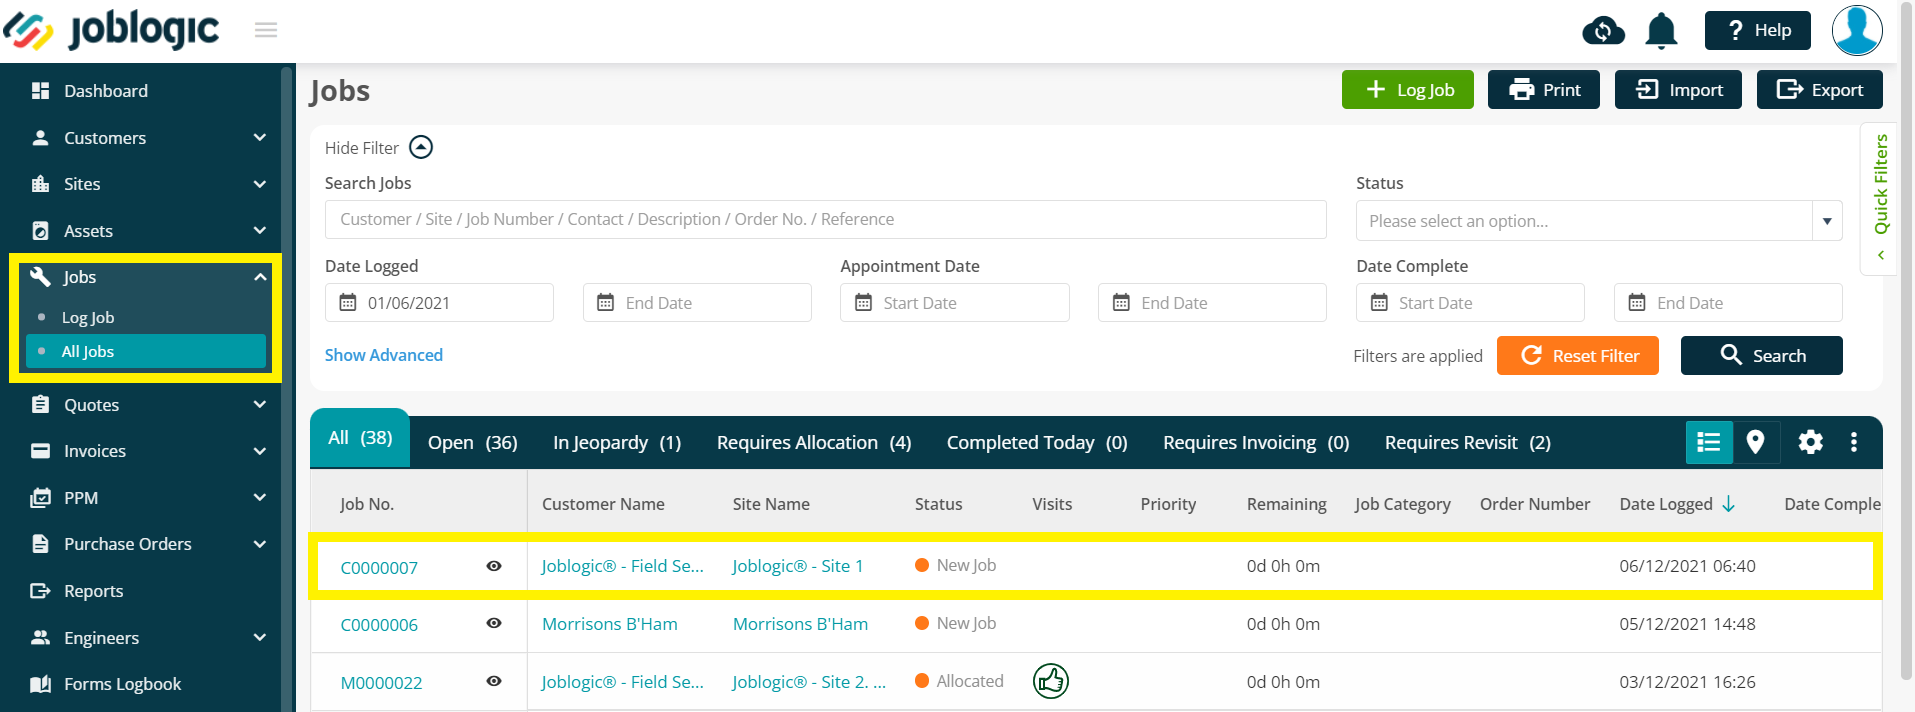
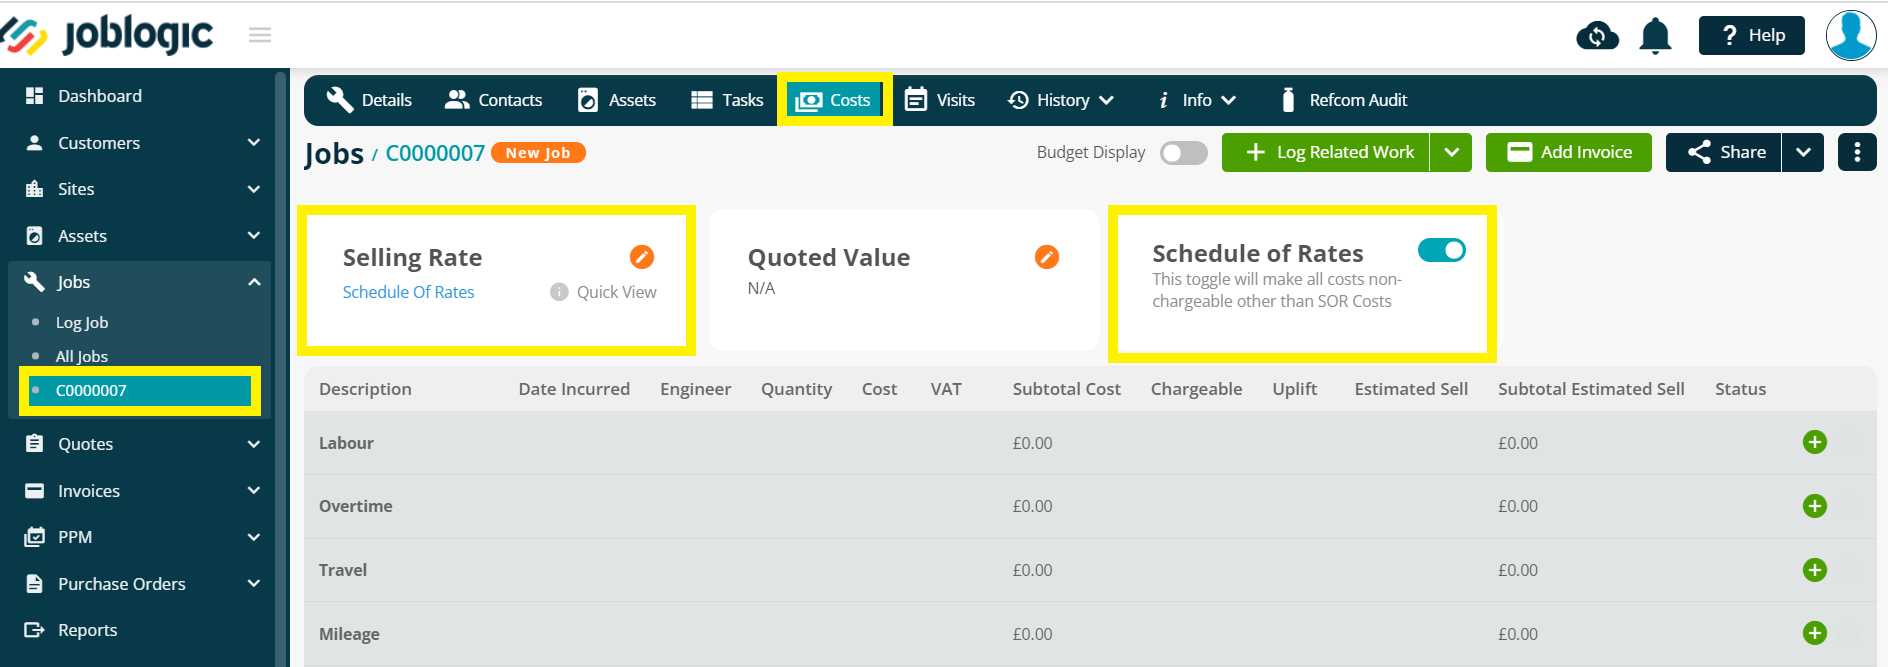
The SOR function at Job level can be used from within the ‘Costs’ page of the job.
To try this, select a job from the ‘All Jobs’ page and click open the ‘Costs’ tab of the job.
Within the ‘Costs’ page, the Selling Rate is automatically set to ‘Schedule of Rates’ (as per what is assigned within the customer configuration page).
However, if you want to ensure that only the SOR costs are applied, you can switch the ‘Schedule of Rates’ toggle bar ON, which will override all the costs by marking them as non-chargeable.
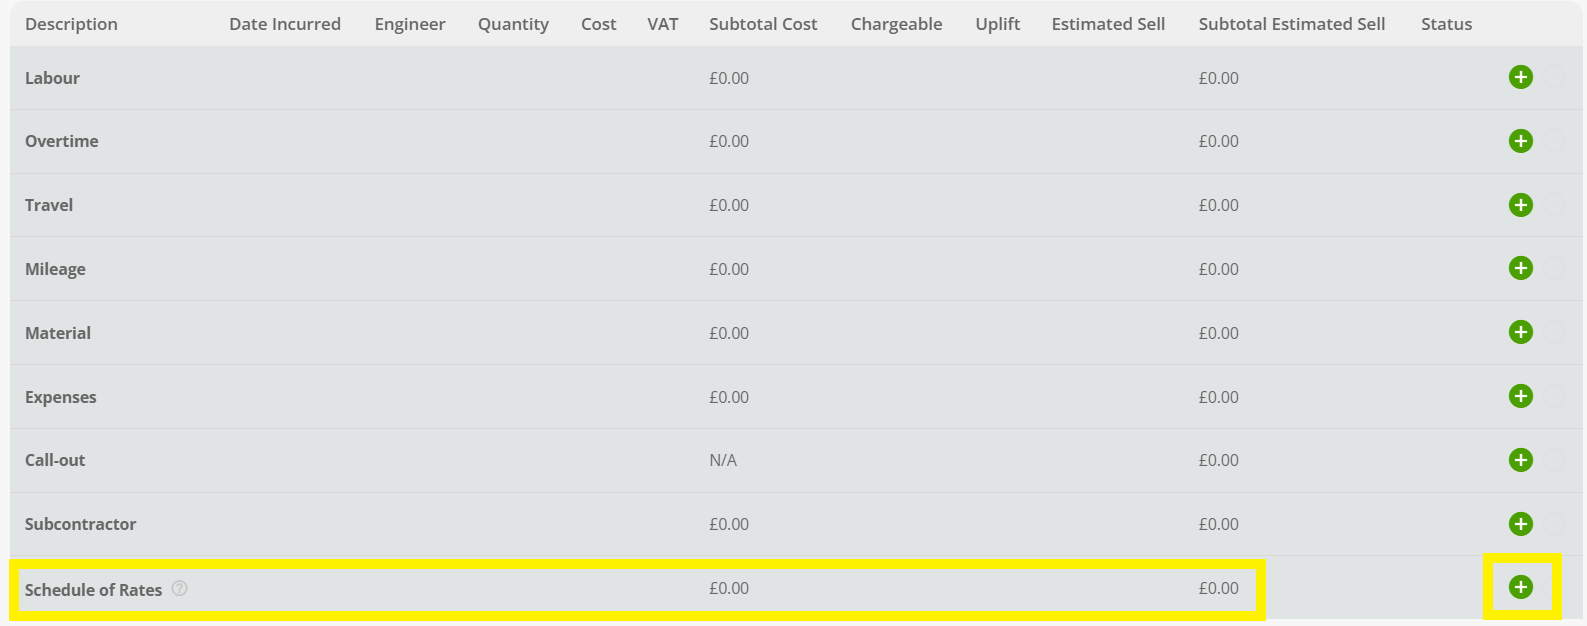
There is also an option to add SOR cost lines within the costs page. This can be done by clicking the green (+) sign against the SOR cost line.
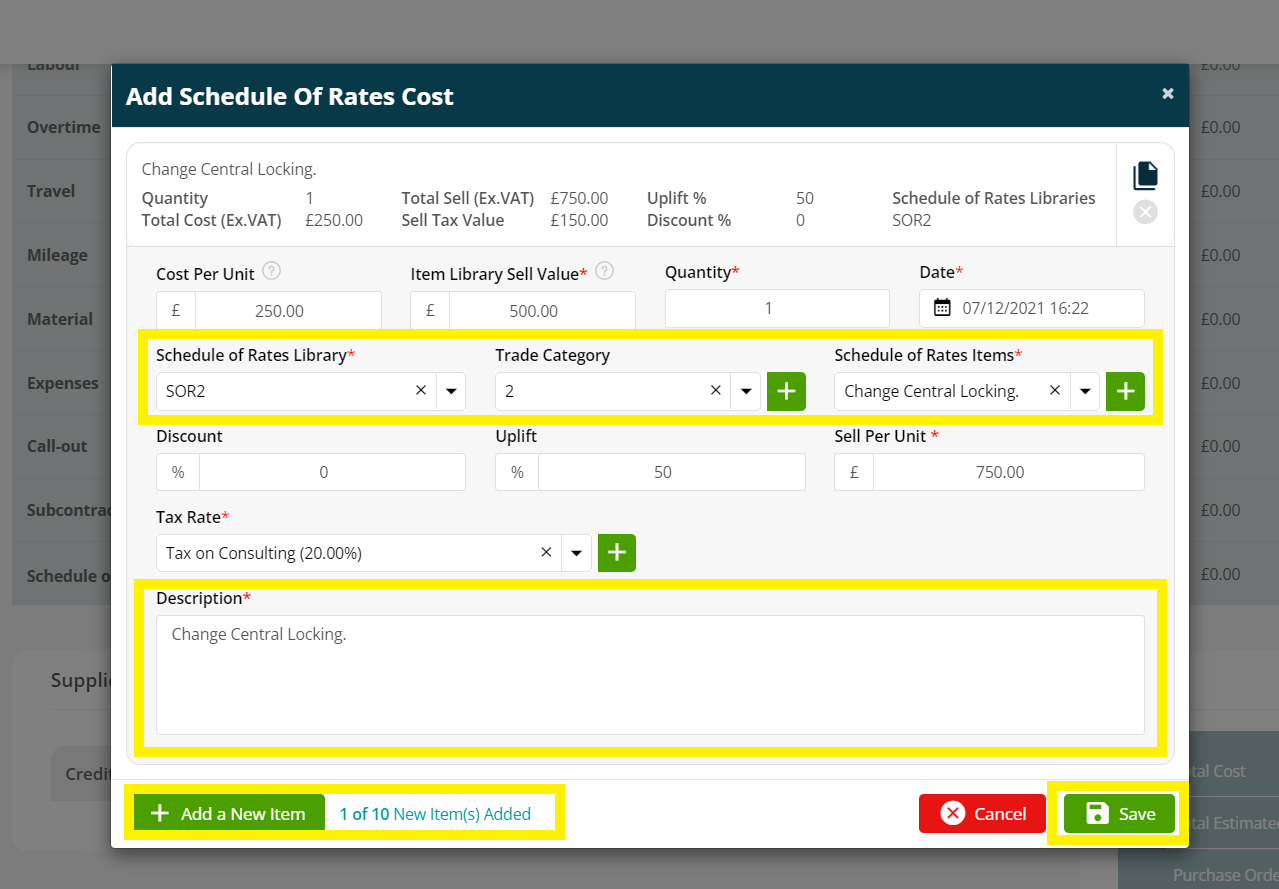
You will then be presented with a ‘Add Schedule of Rates Cost’ pop-up window, where you can choose the approriate SOR Library(if there is more than one library assigned to this customer), Trade Category(optional), SOR Items, and more.
You can also add additional cost lines by clicking the ‘Add a New Item’ button at the bottom left of the window and upon adding the required details, click the ‘Save’ button to confirm.
At Invoice Level
When a draft invoice is raised for an SOR job, the cost details of the job such as the Description, Price, Quantity, SOR Uplift%/Disc%, etc. are automatically imported onto the invoice.
But unlike other invoices, you will not be able to add or edit a cost line from within the invoice page. Therefore, any additional SOR cost lines must be added from within the ‘Costs’ page of the job, which can then be imported onto the invoice by clicking the ‘Import Costs’ button.
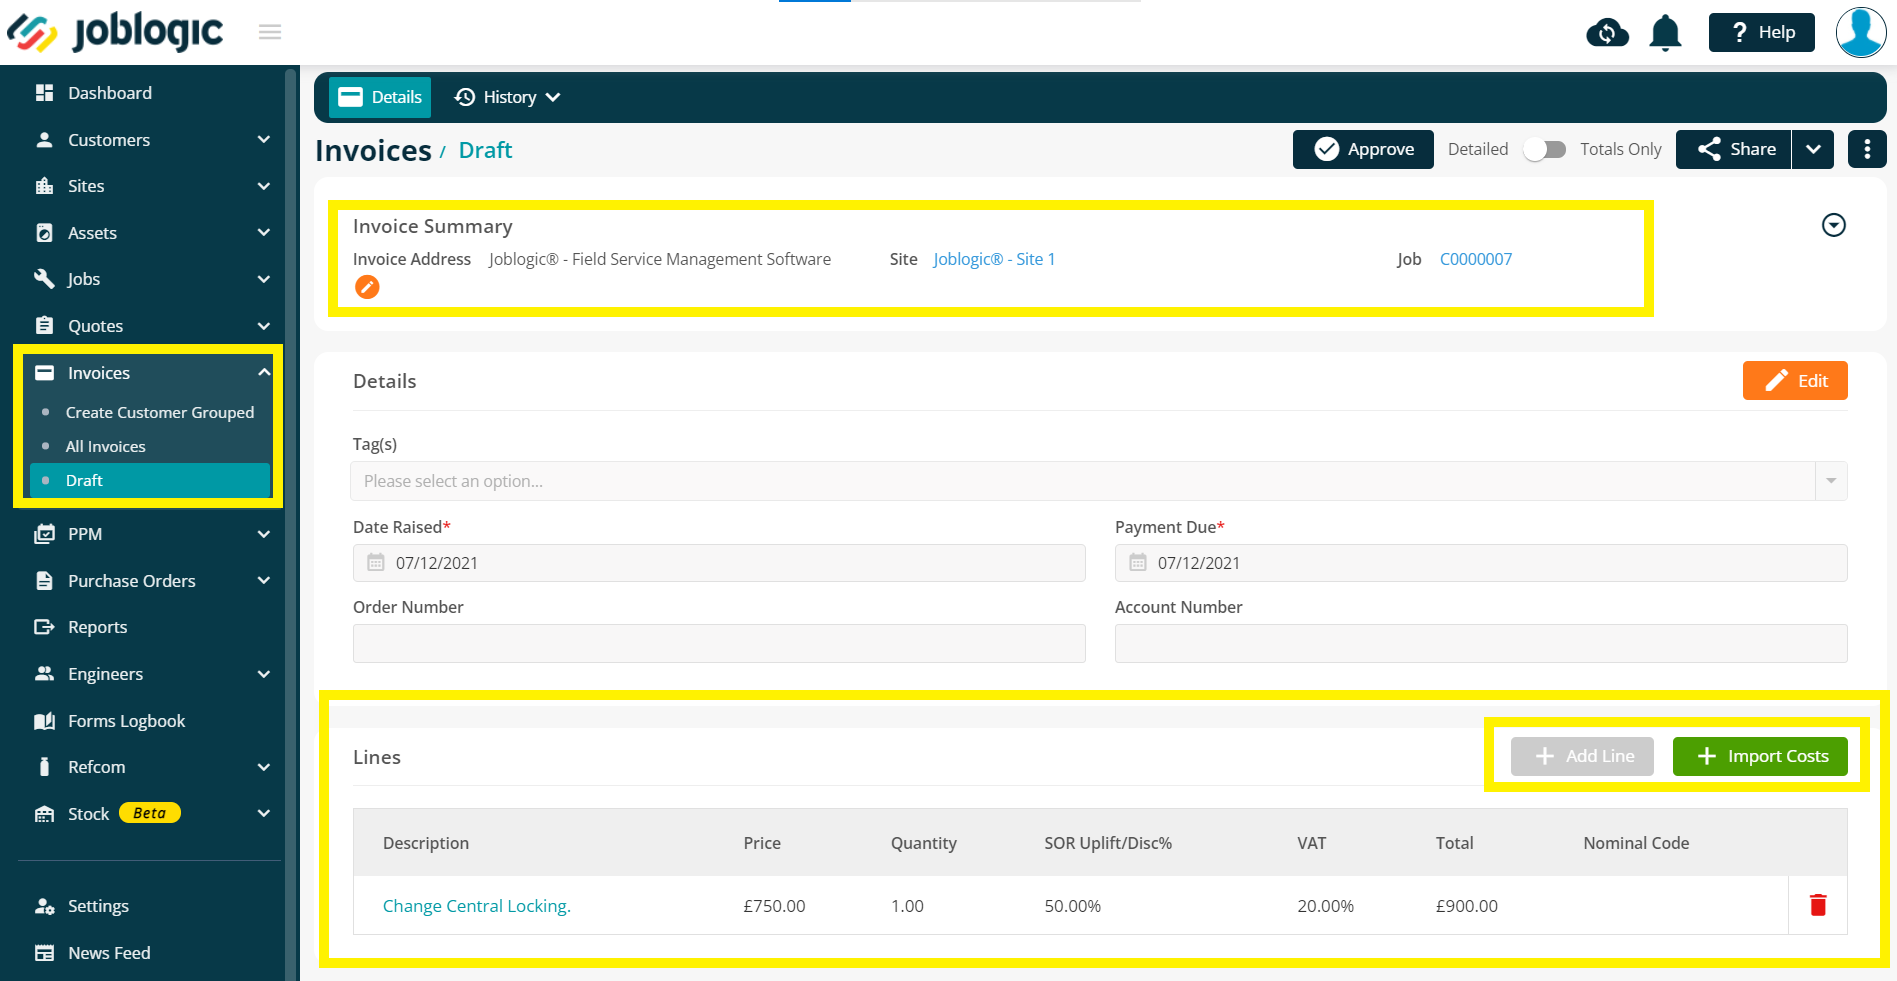
Upon making the required changes, the invoice can be shared using the ‘Share’ dropdown at the top right corner of the page.
Note: Raising an invoice for jobs that include chargeable cost line items, along with SOR cost line items, will automatically generate an SOR invoice to ensure SOR invoices are recorded separately.
SOR - Document Templates
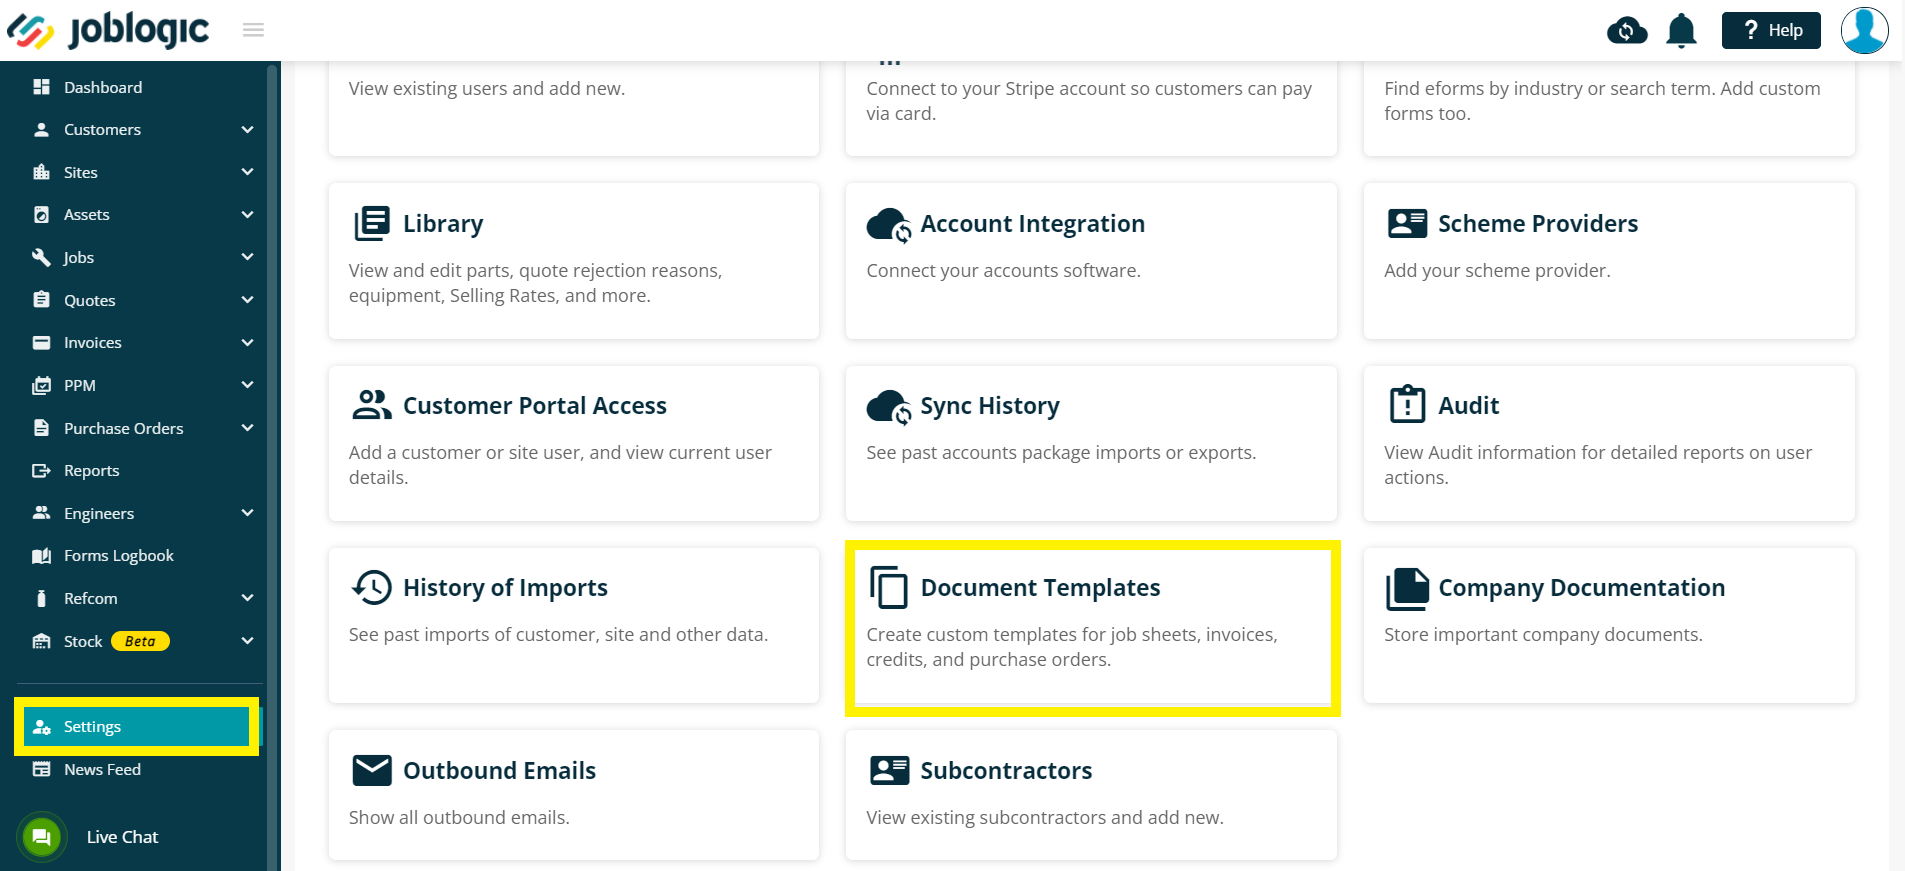
To further support the invoicing function of the SoR feature, bespoke document templates called SOR Invoice and SOR Credit have been created.
To access these templates, navigate to the ‘Document Template’ section by clicking ‘Settings’ within the left navigation pane.
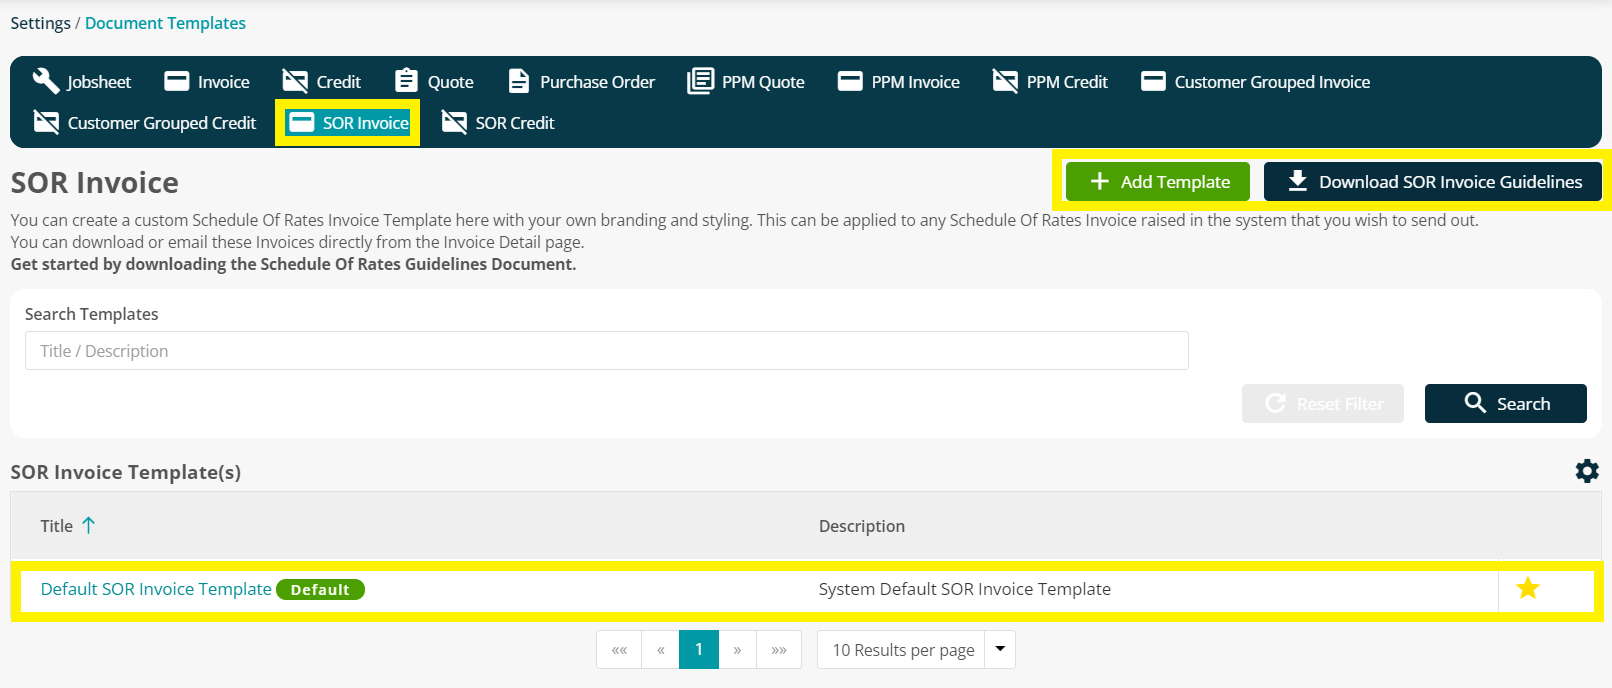
Within the document template page, click the ‘SOR Invoice’ tab to view the SOR invoice template. If you wish to update/make changes to the template, you may do so by referring to the instructions on ‘SOR Invoice Guidelines’.
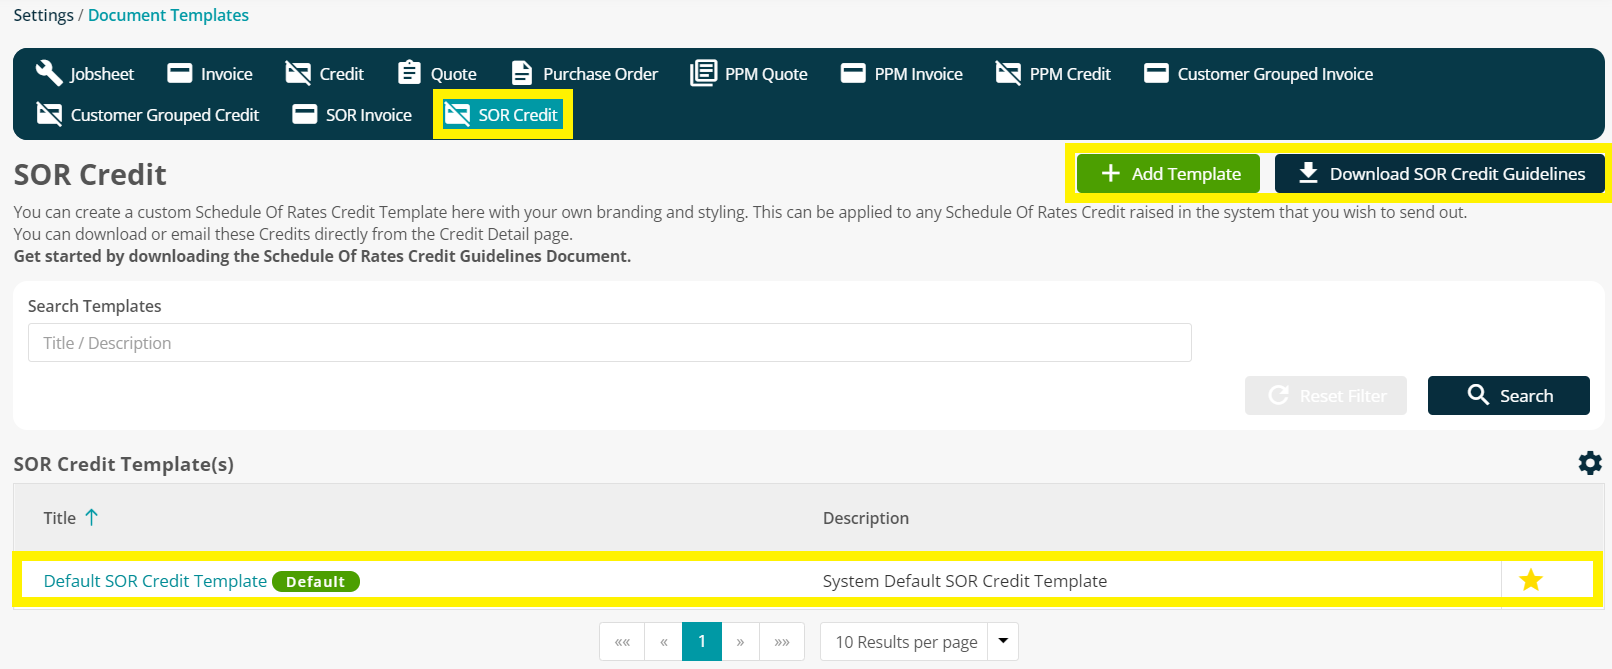
Similarly, within the document template page, click the ‘SOR Credit’ tab to view the SOR credit template. If you wish to update/make changes to the template, you may do so by referring to the instructions on ‘SOR Credit Guidelines’
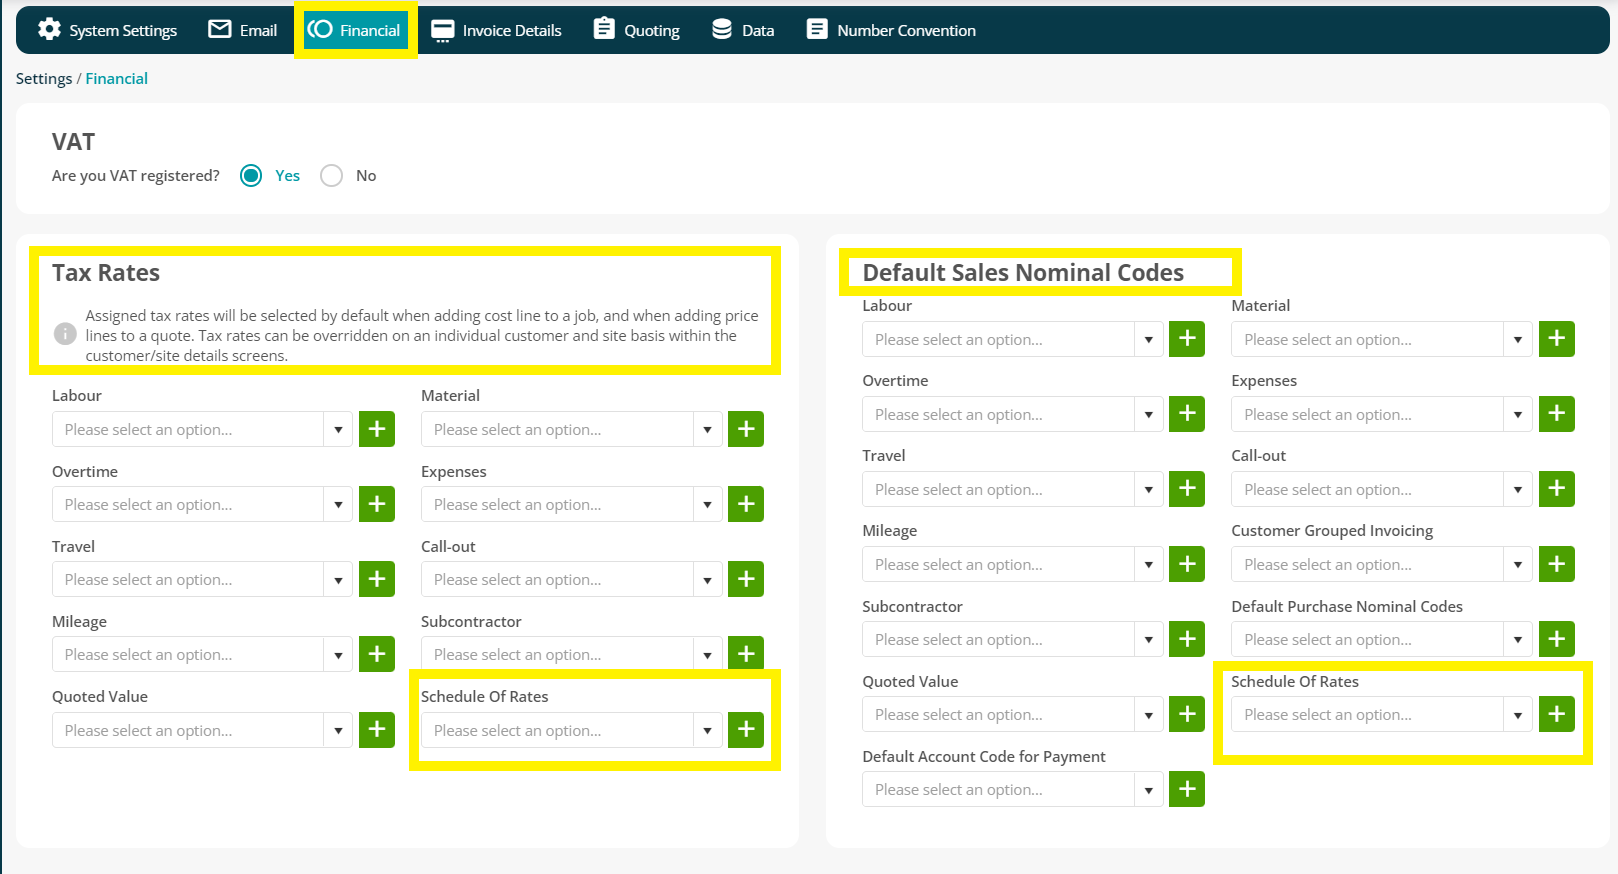
SOR - Financial Data
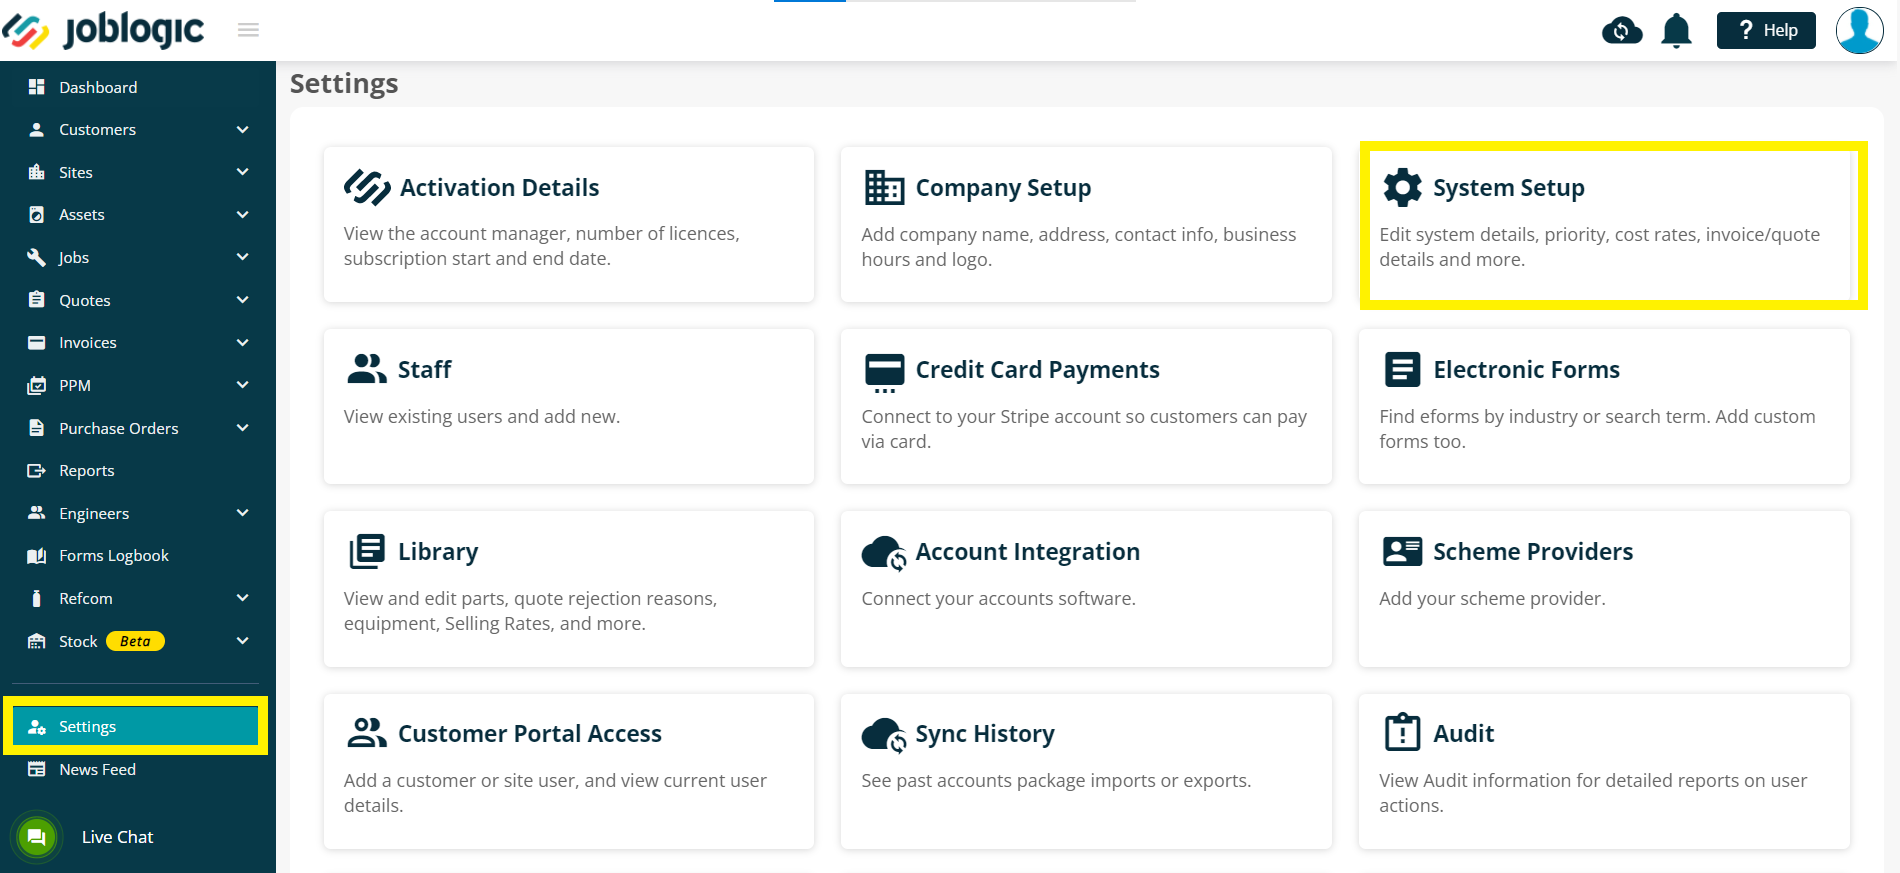
To support the financial side of the SoR feature, a default ‘Tax Code’ field and a default ‘Sales Nominal Code’ field have been added to the system.
To access this section, navigate to the ‘System Setup’ section by clicking ‘Settings’ within the left navigation pane.
Within the system setup page, click the ‘Financial’ tab, to view the SoR Tax Code and SoR Sales Nominal Code dropdowns menu.
Further Support
For further information or assistance with the above, contact our Support Team on 0800 326 5561 or email support@joblogic.com. Alternatively, our Customer Success Management team can be reached by emailing customersuccess@joblogic.com
Publishing Details
This document was written and produced by Joblogic’s Technical Writing team and was last updated on the date specified above. Be aware that the information provided may be subject to change following further updates on the matter becoming available. Additionally, details within the guide may vary depending on your Joblogic account’s user permissions.