Introduction
Joblogic provides the ability to create a live integration/synchronisation (sync) with your accounts packages*. This user guide will detail how to connect your account and conduct a live sync.
*The live sync is currently available for Xero, Quickbooks and Sage50.
If you use another accounts package or want to transfer any Purchase Invoices, you can use the Report module to export/import your data - please click here to check out the guide on how to do this.
Connecting to your Accounts package
The first step is to set up the connection between Joblogic and your chosen accounts package.
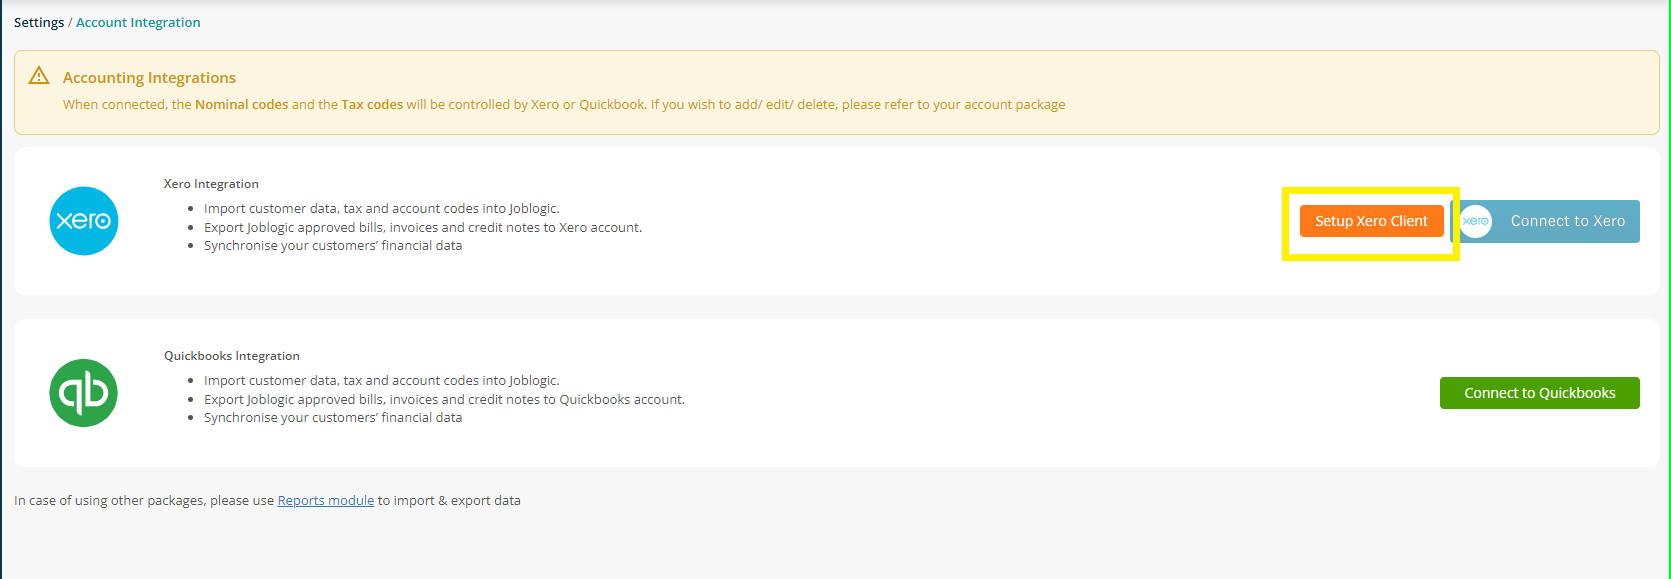
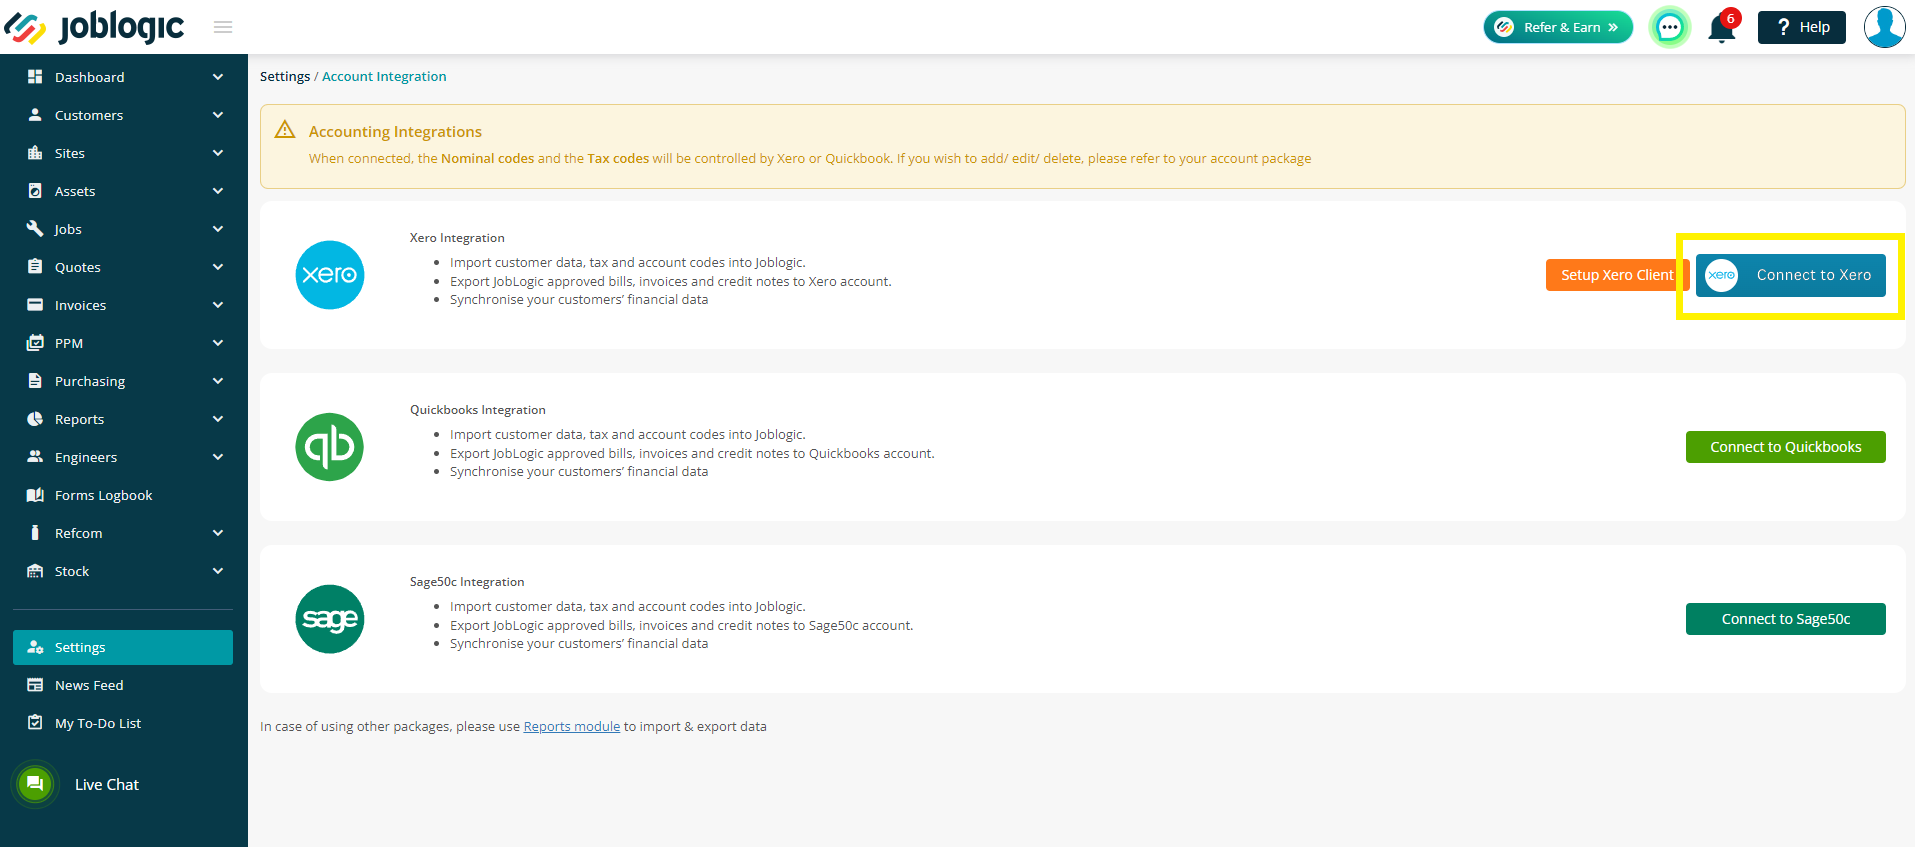
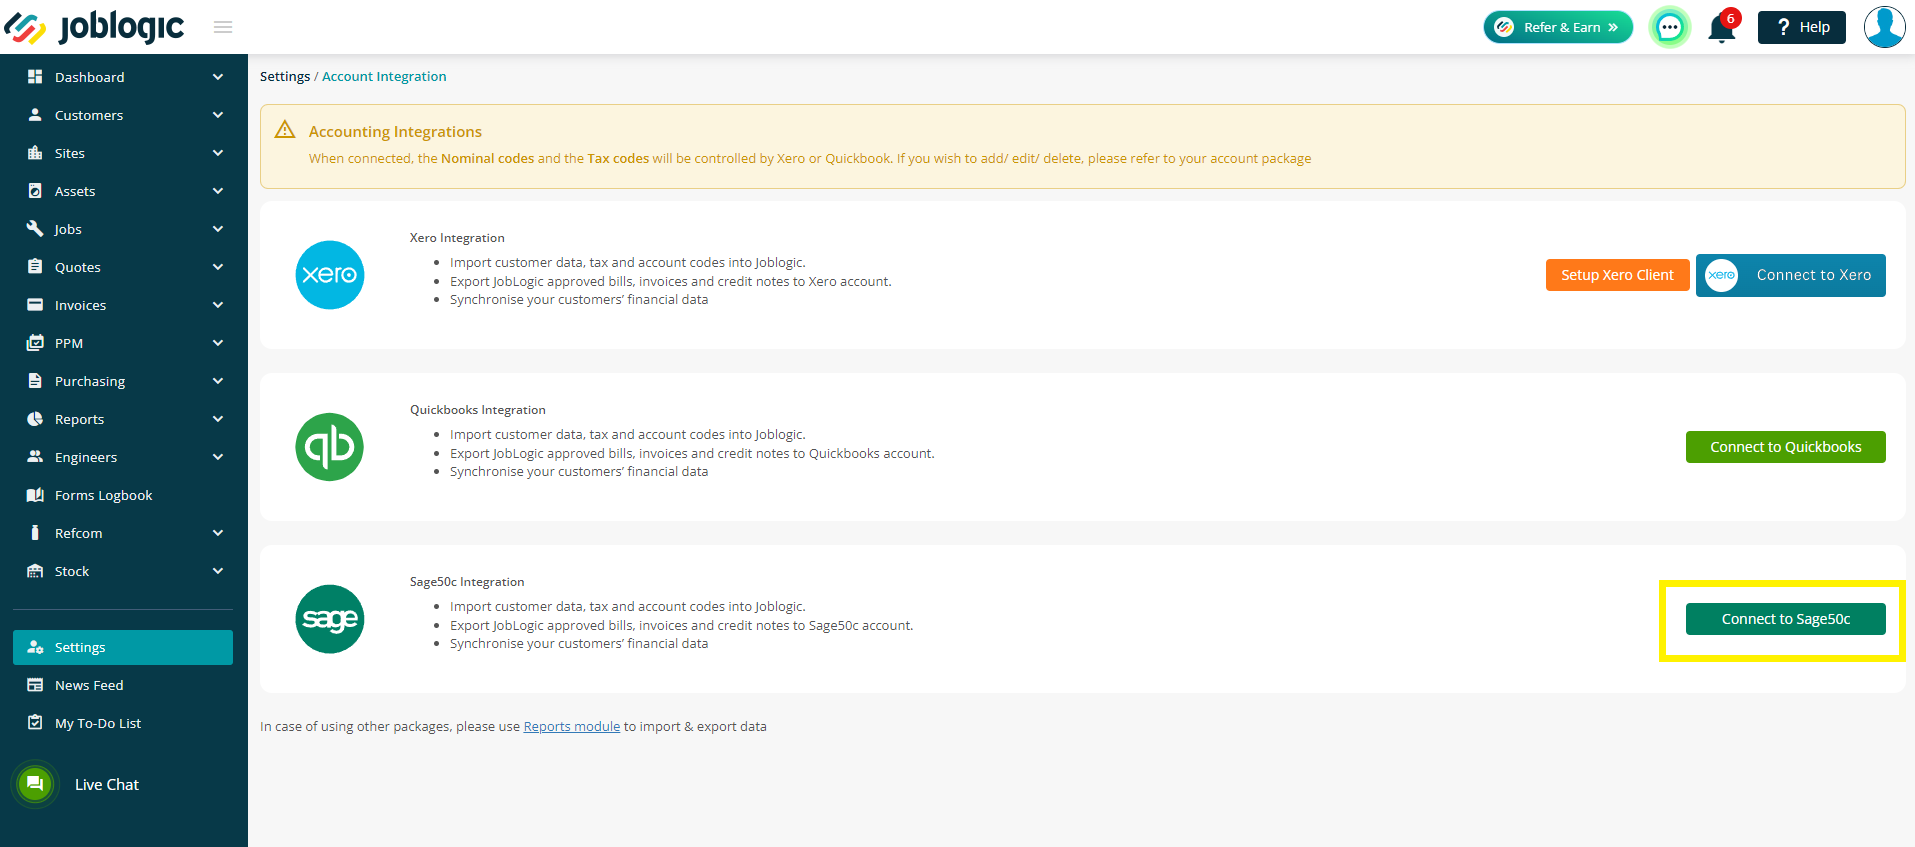
To do this, click through to Settings > Accounts Integration

Xero
In order to connect to Xero, you will first need to click ‘Setup Xero Client’ to create the link between Xero and Joblogic. You will not be able to click 'Connect to Xero' until the setup is complete.
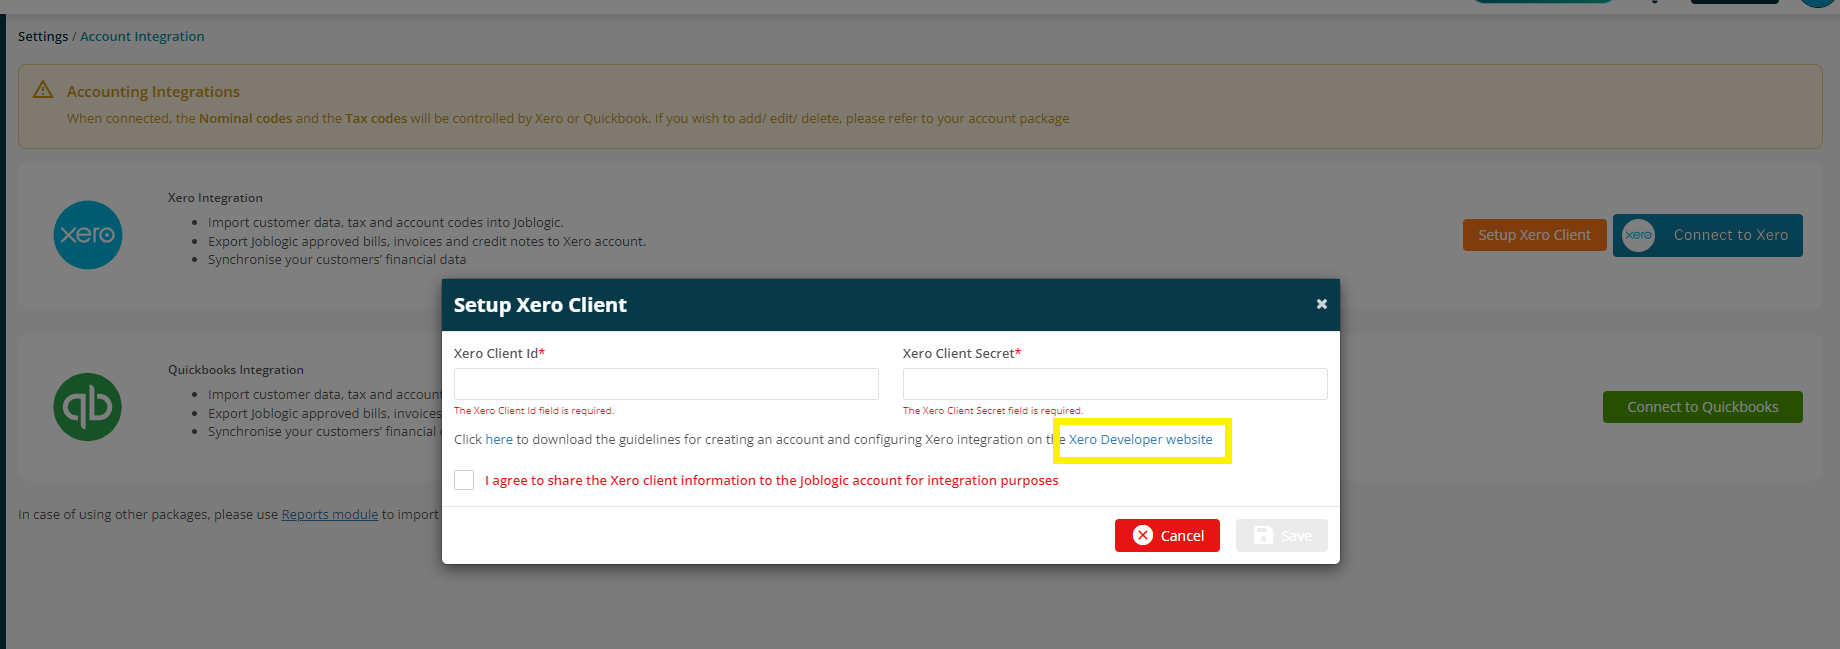
App Set up
Next, you’ll be asked to enter your Xero Client ID and Xero Client Secret.
To get this information you’ll need to set this up via the Developer app on Xero. You can click the link ‘Xero Developer Website’ to navigate to the specified page.
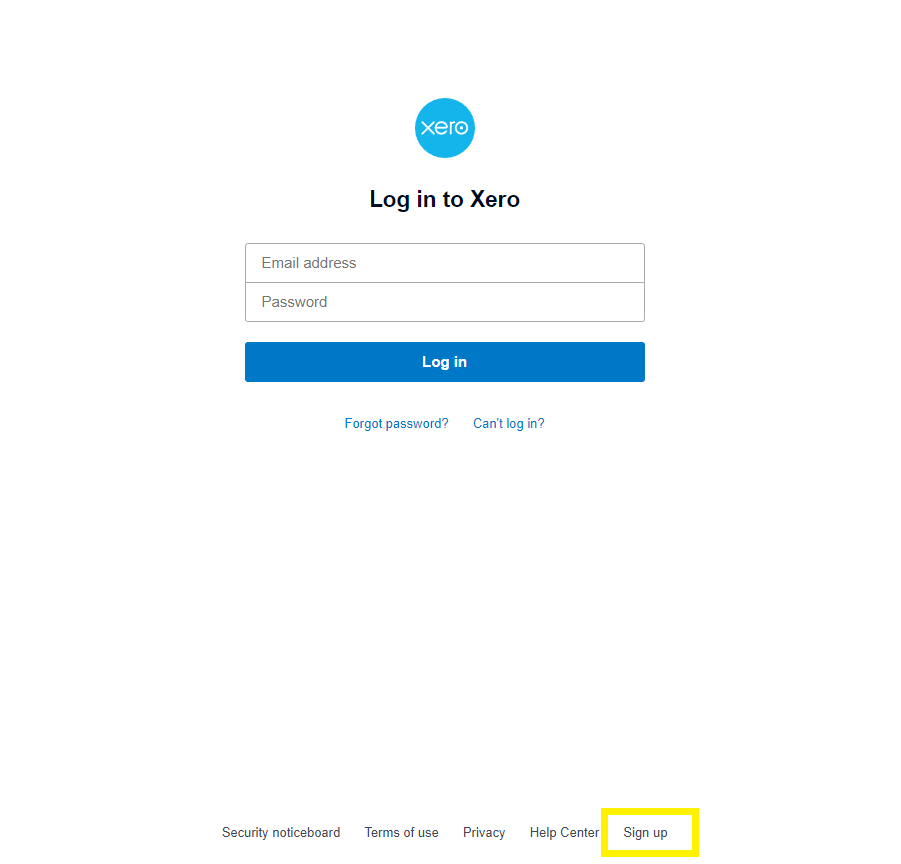
You will need to log into your Xero account here. If you do not yet have a Xero account you will need to Sign Up.
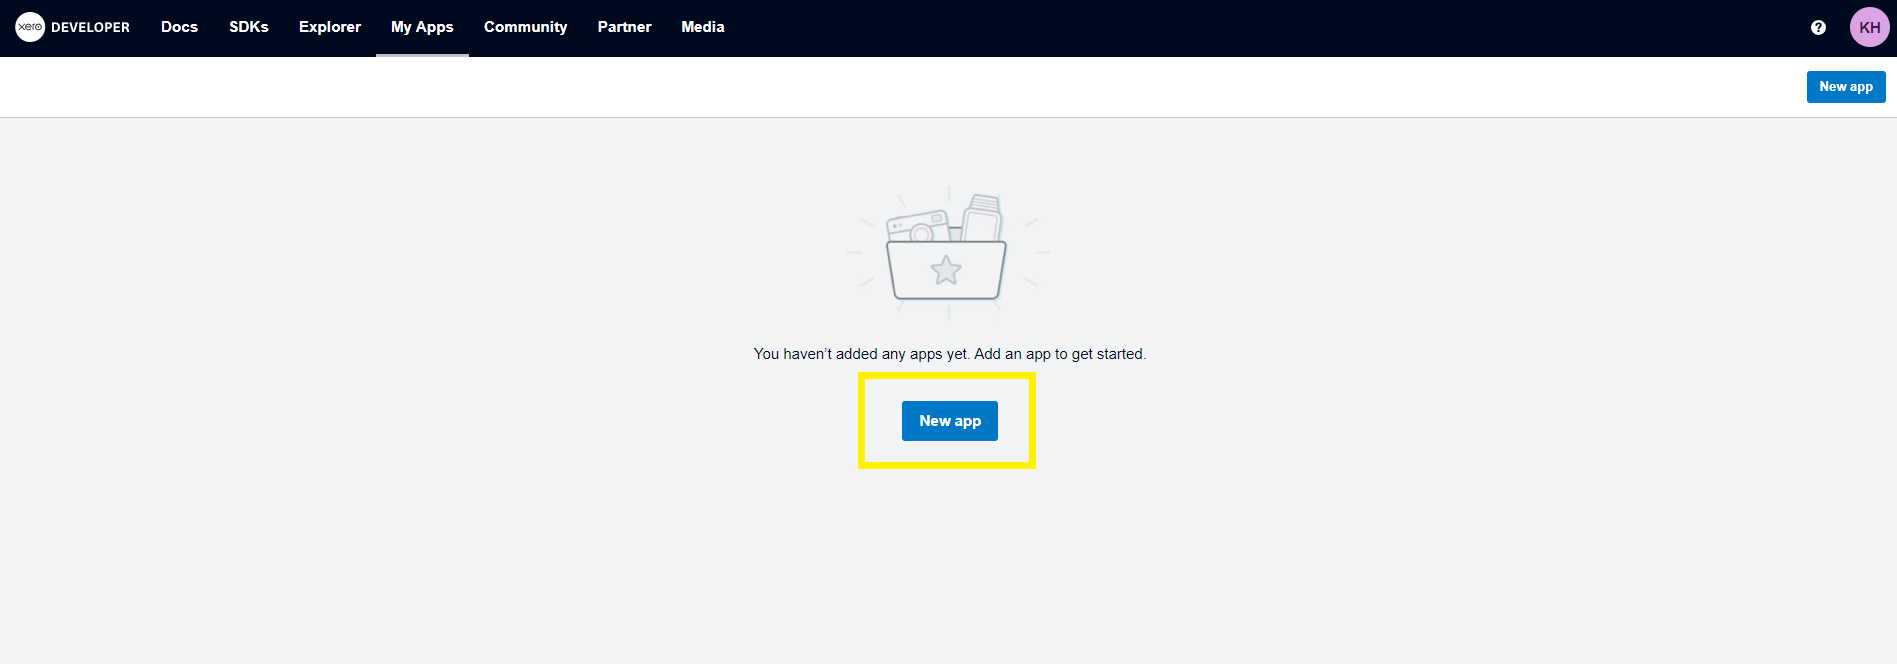
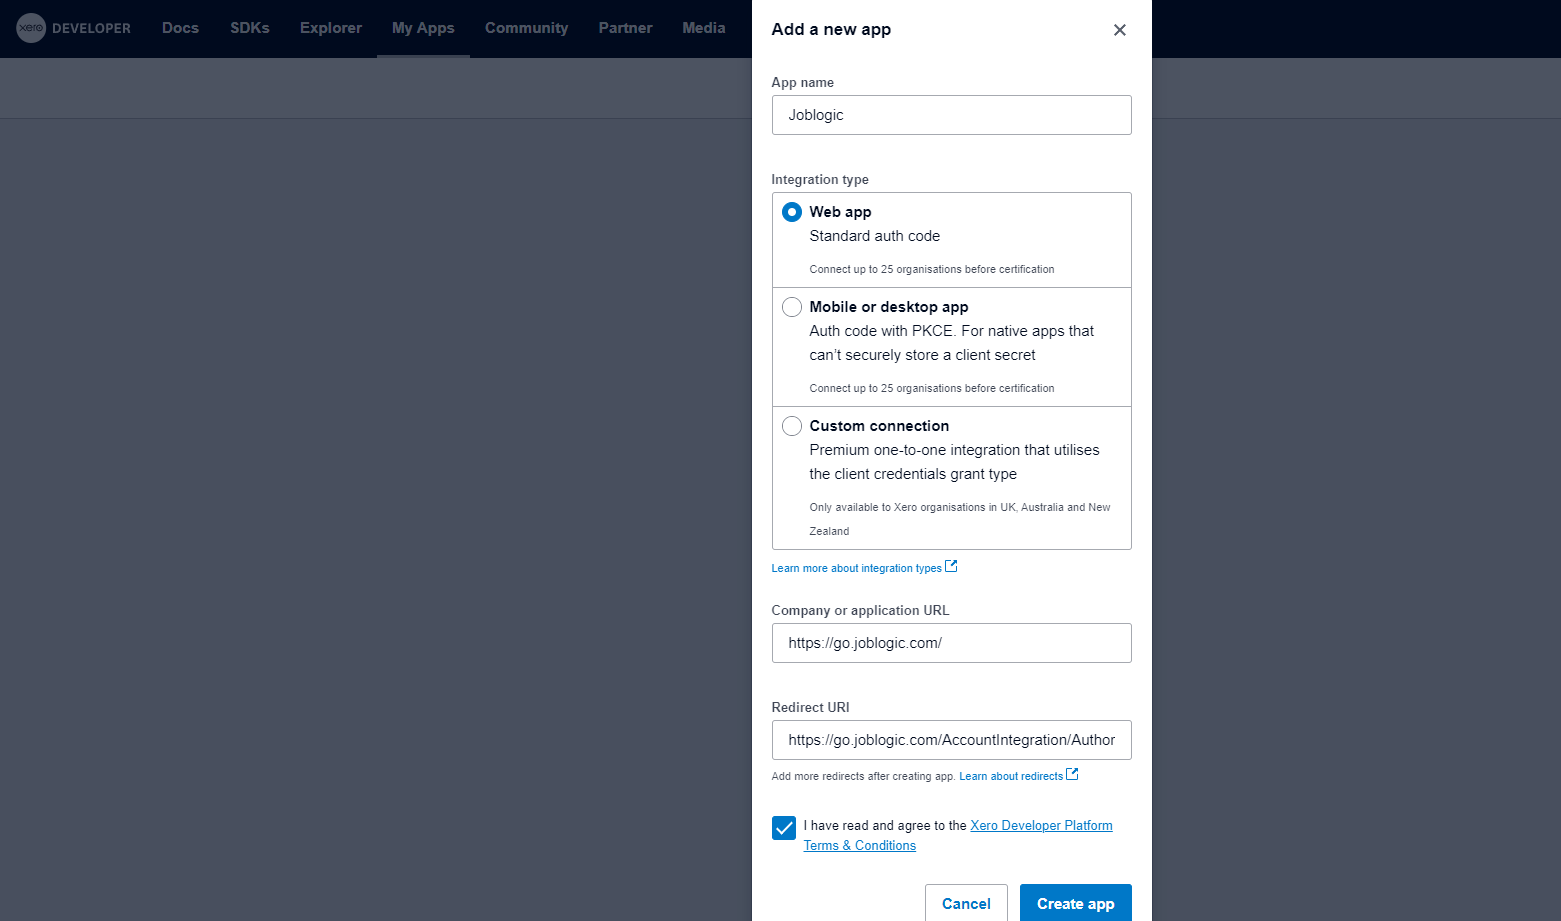
Once you are signed in, click ‘New App’ and then fill in the details as follows:
App Name – Joblogic (this can be set up however you like, using 'Joblogic' as an example)
Integration Type – Web App
Company or Application URL - https://go.joblogic.com/
Redirect URI - https://go.joblogic.com/AccountIntegration/AuthorizeXeroOAuth2Callback
Tick ‘I have read and agree to the Xero Developer Platform Terms and Conditions’
Click ‘Create App’
App Configuration
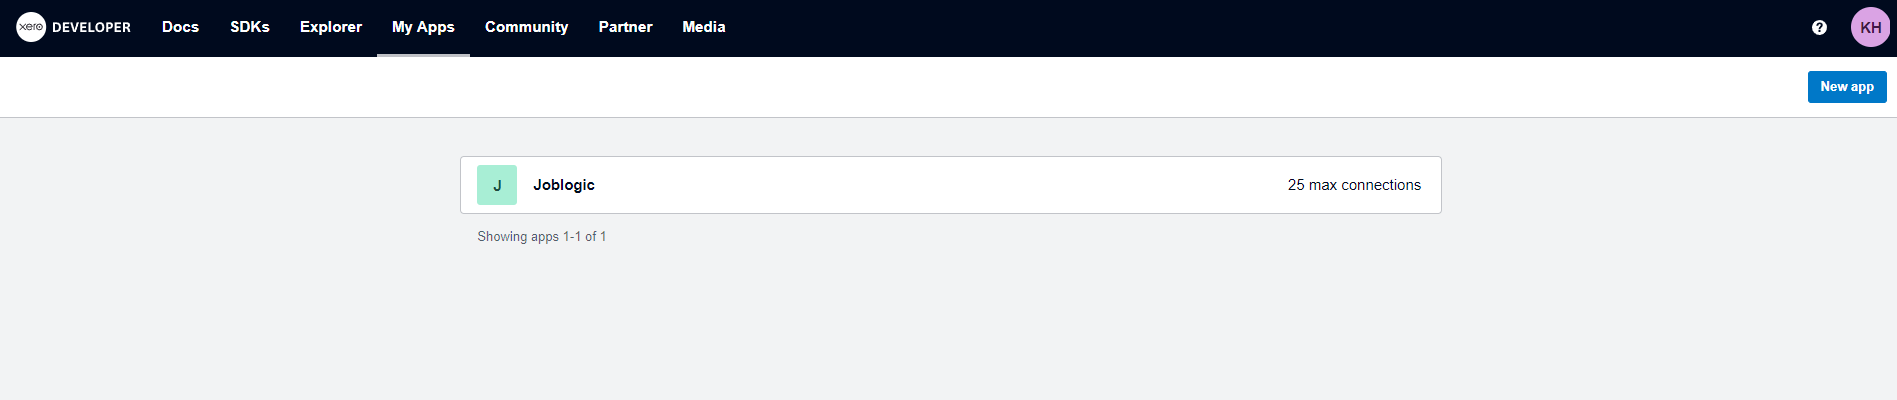
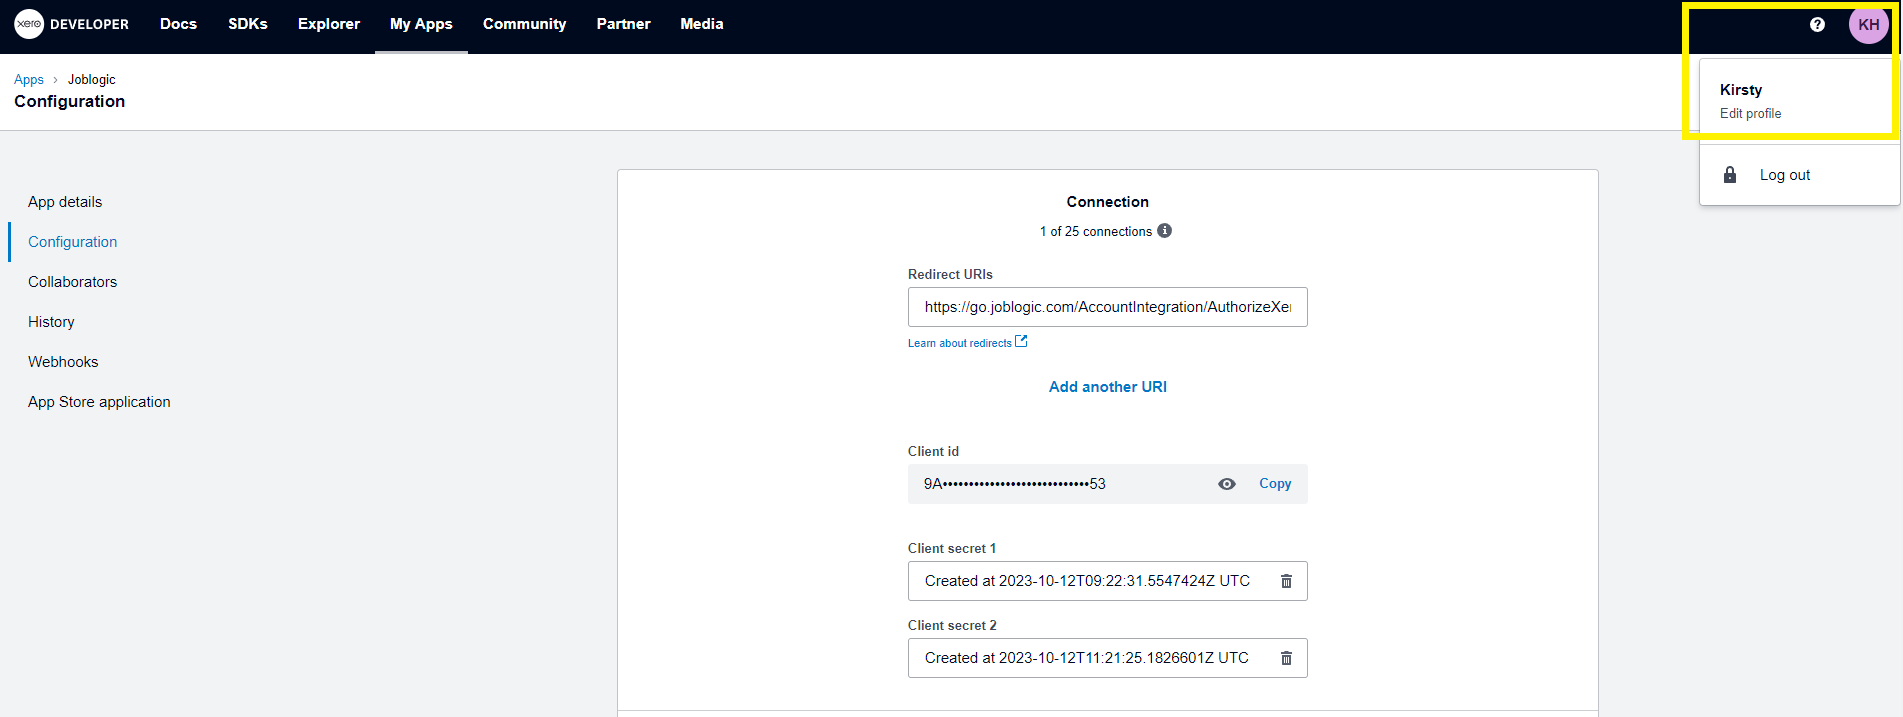
Now that the app has been created, you should be able to click on your Joblogic app and then navigate to Configuration.
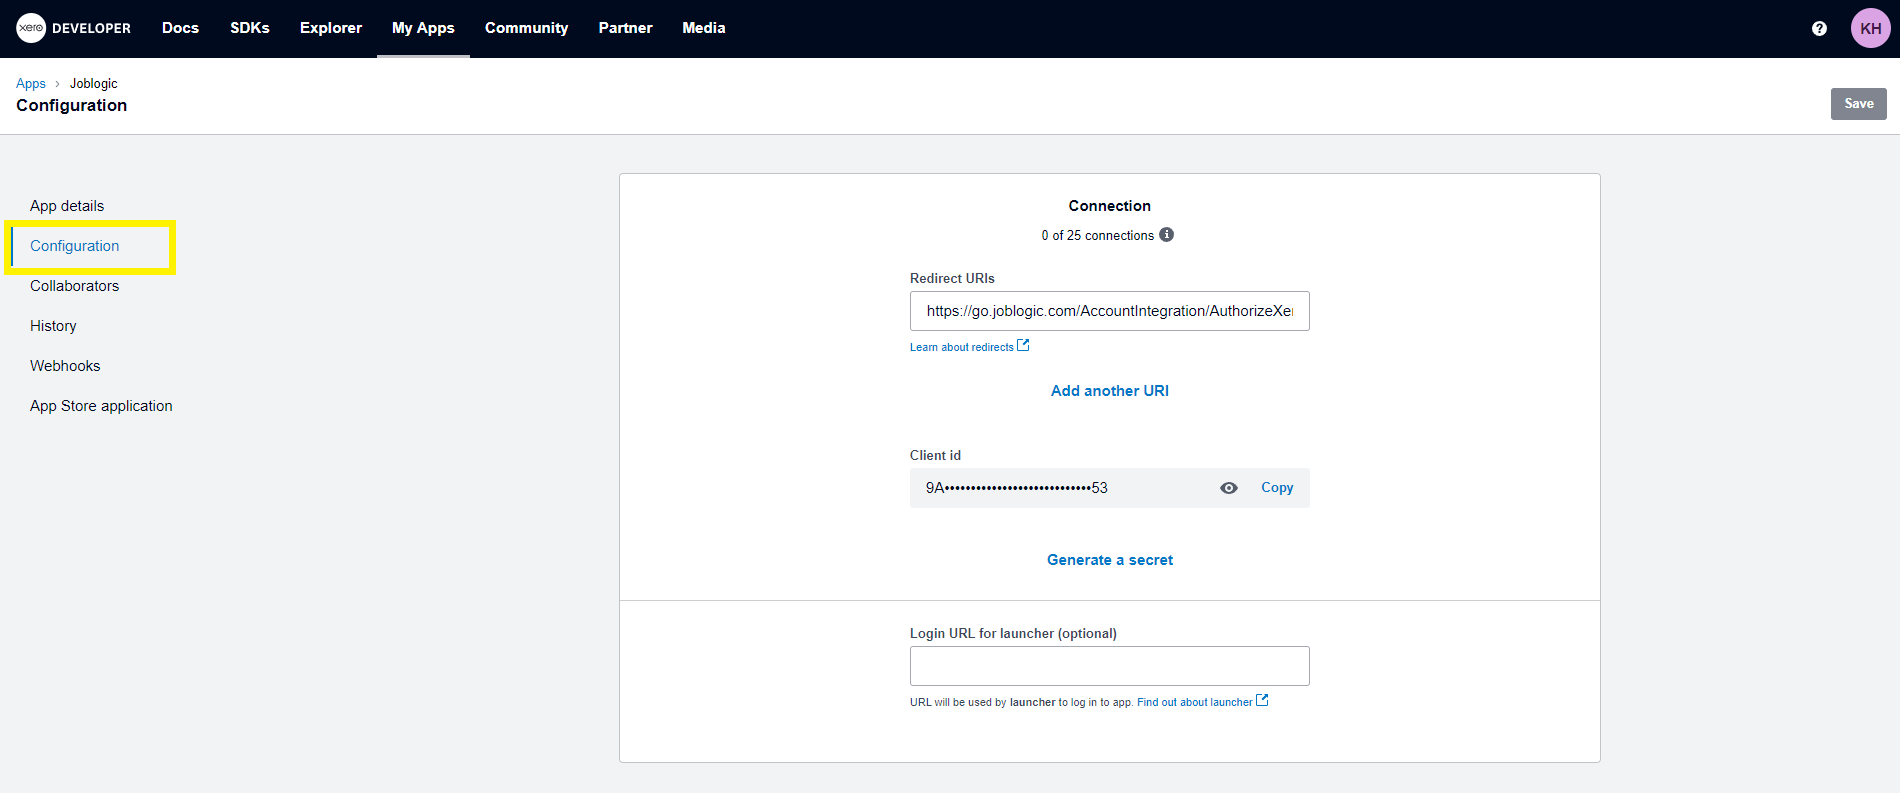
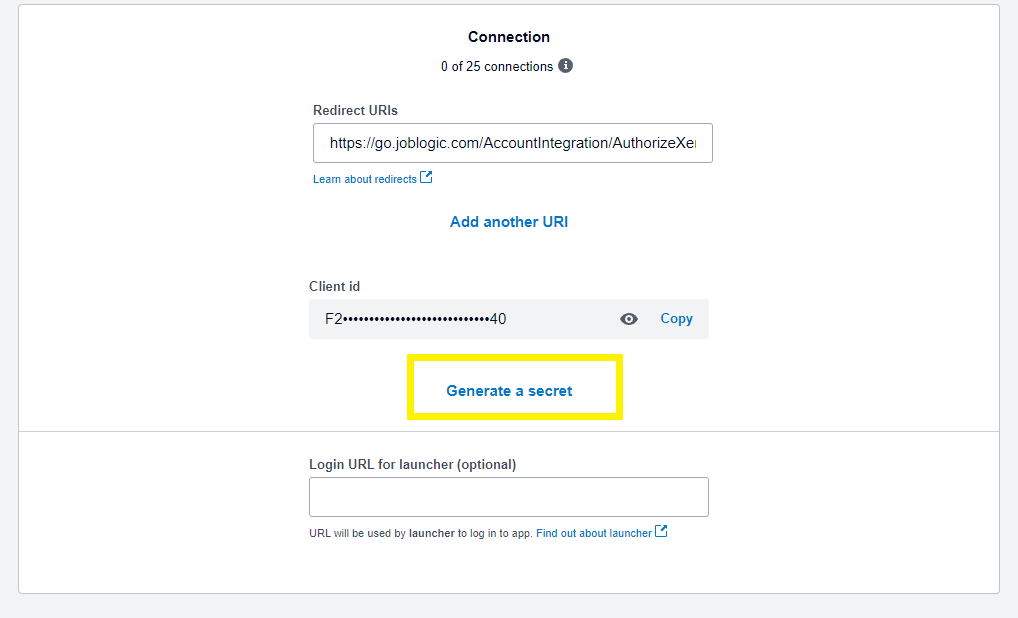
Client ID and Secret
Copy the Client ID and enter this into the relevant field on Joblogic
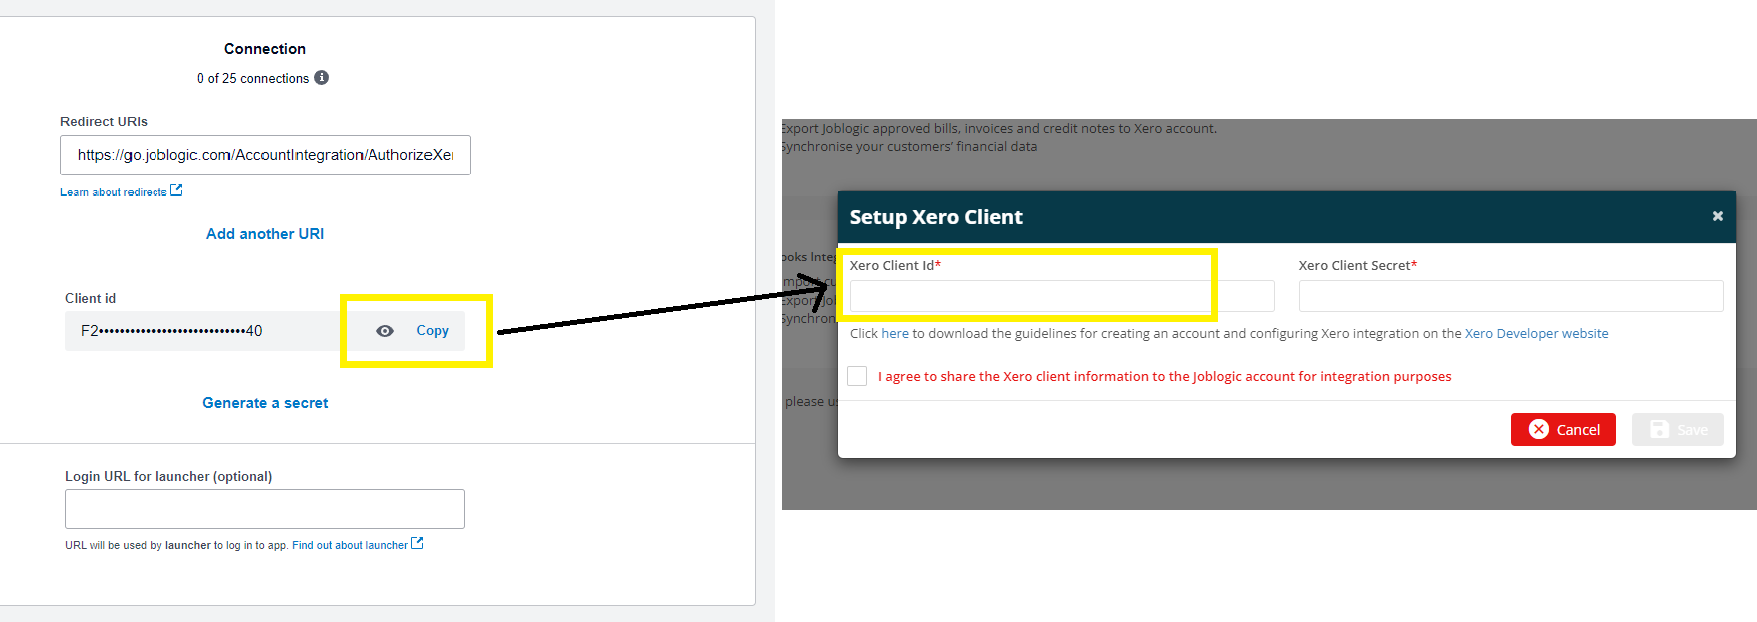
Finally, click ‘Generate a secret’ and then copy this into Joblogic too

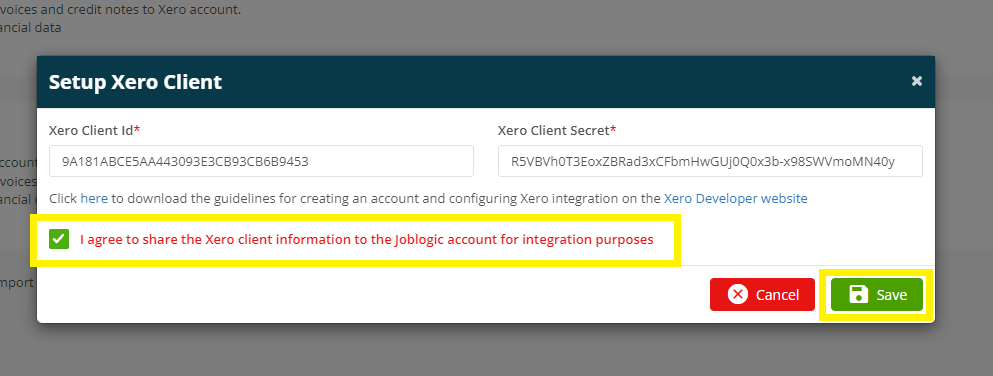
Tick ‘’I agree to share the Xero client information to the Joblogic account for integration purposes’ to confirm you are ok with Joblogic storing the information. We will not use this data for anything else.
Then click Save.
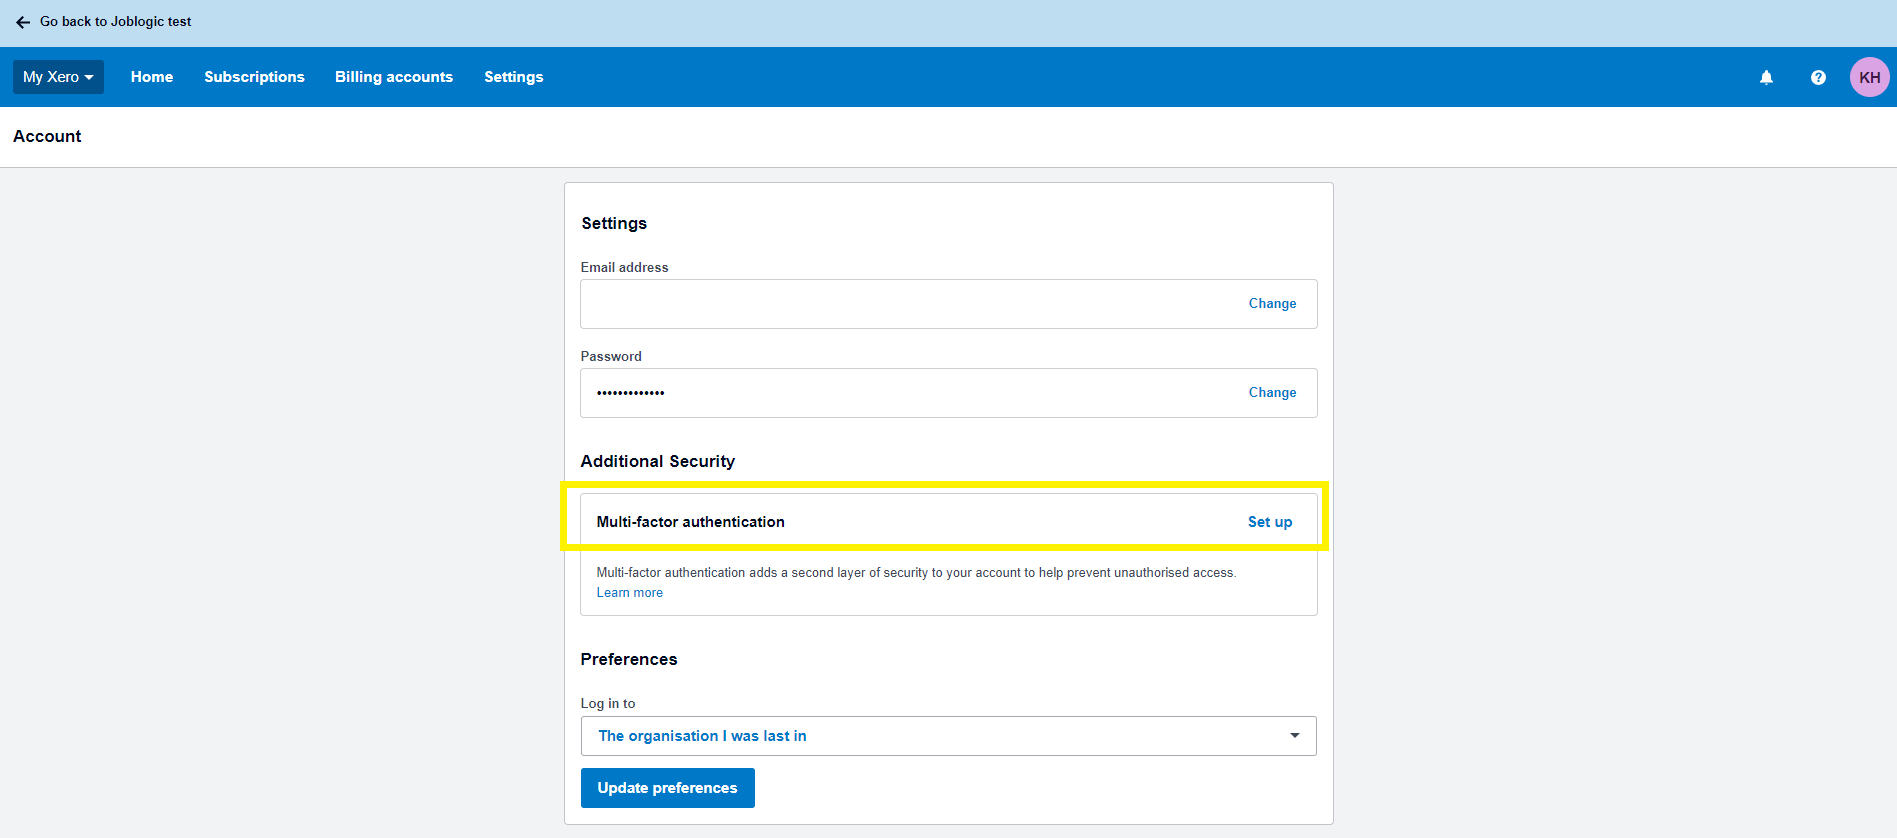
Multi-Factor Authentication
If you haven’t already, you’ll also need to make sure that your Xero account is set up with Multi Factor Authentication.
To do this, firstly navigate to your user profile in the top right and then select Edit Profile
Next, click ‘Set up’ next to the Multi-Factor Authentication option
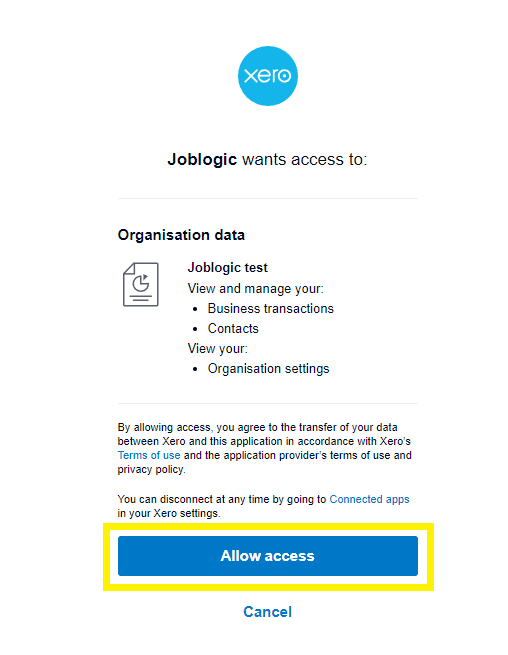
Connect to Xero
Now that this is all set up, you’ll be able to click the ‘Connect to Xero’ button and then ‘Allow Access’
''Joblogic wants access to:''
This will display as per the App Name you set up earlier
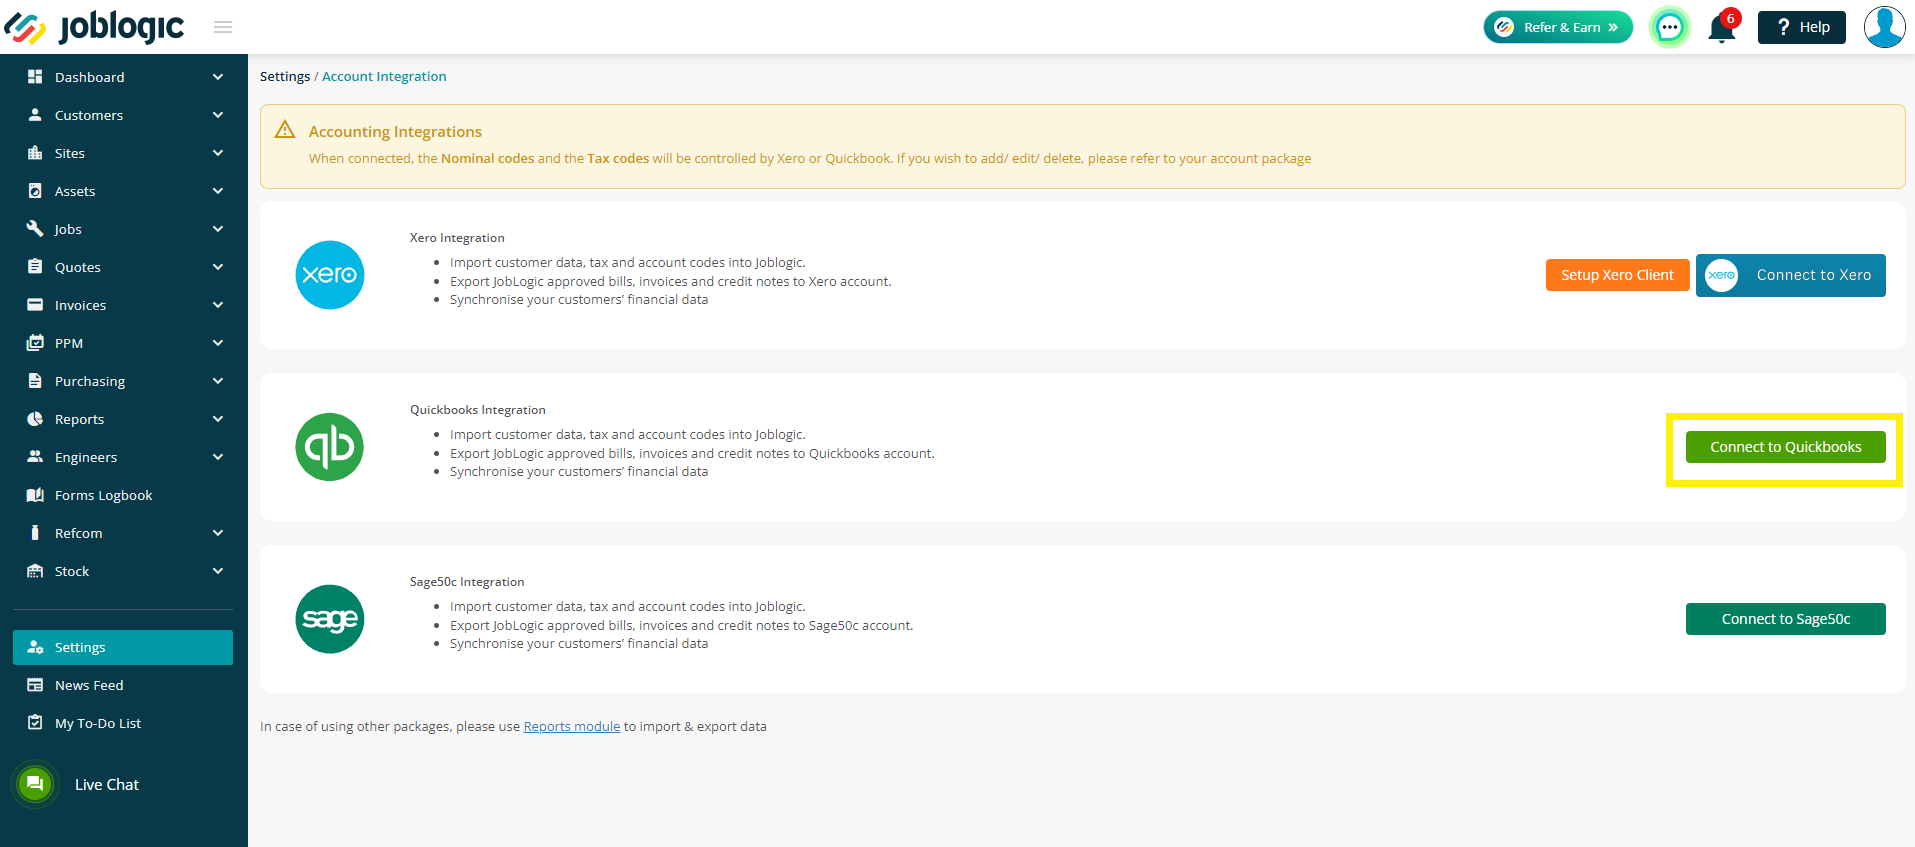
Quickbooks
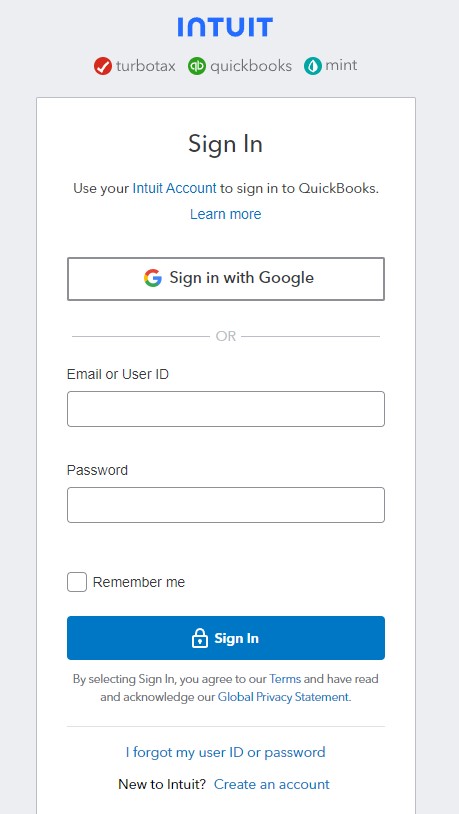
To connect to Quickbooks, simply click the ‘’Connect to Quickbooks’ button.
You will then be asked to enter your credentials for the accounts package so the two can be synced.
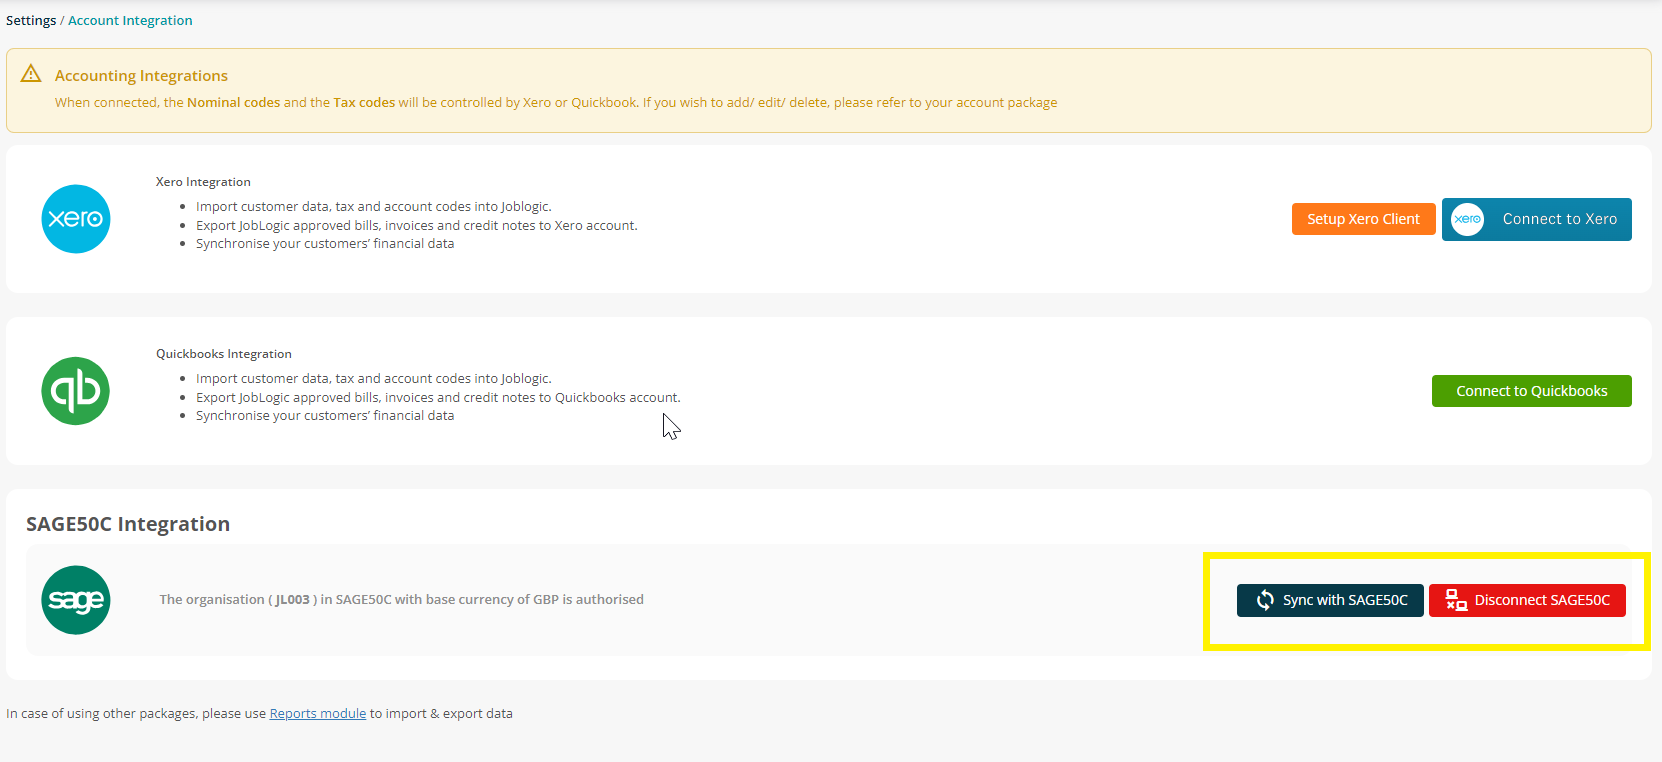
Sage50
If you would like to utilise the Sage50 Integration, please contact your Customer Success Manager for more information and pricing.
To connect your Sage50 account, please make sure Sage50 is already installed on your machine.
Click ‘Connect to Sage50c’ to get started.
You’ll be presented with a new screen and a set of instructions
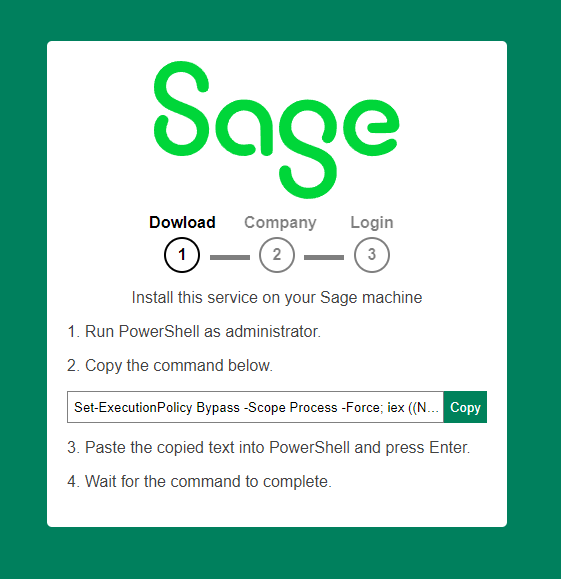
To run Powershell as administrator, firstly search for Powershell on your machine
Next, right click and then select Run as Administrator
Here, you will need to enter admin details, or ask a member of staff with the relevant access to do this for you

Now, you can copy the link, paste it into the Powershell window and then press Enter on your keyboard
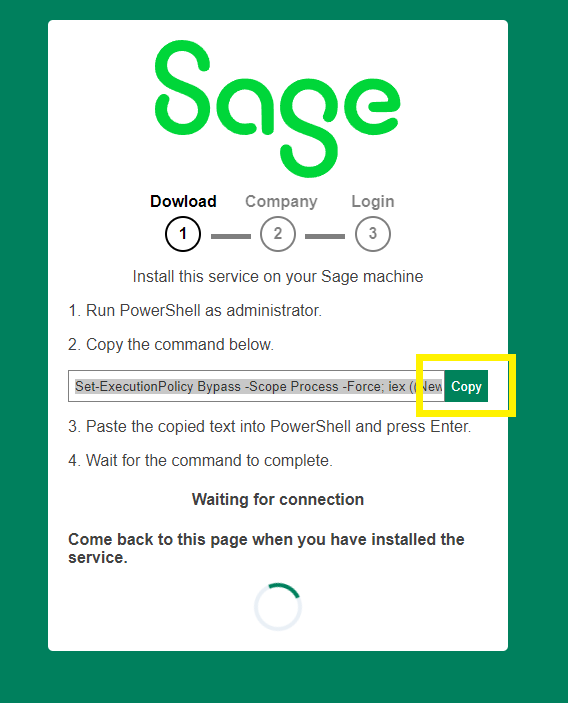

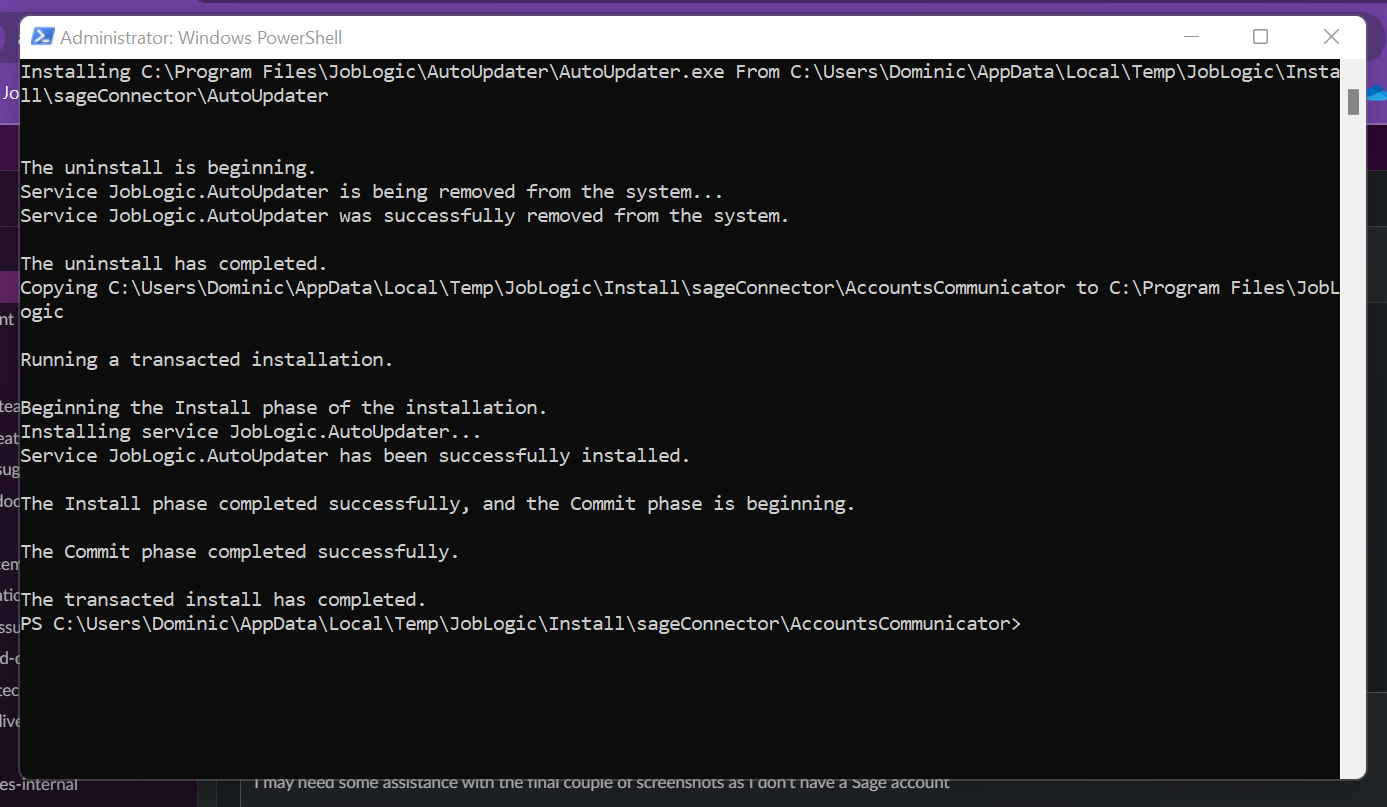
Wait for this to complete. Your screen will look like this:
The Sage Connection screen should now move on to point 2, where you can select the Sage account you wish to sync with
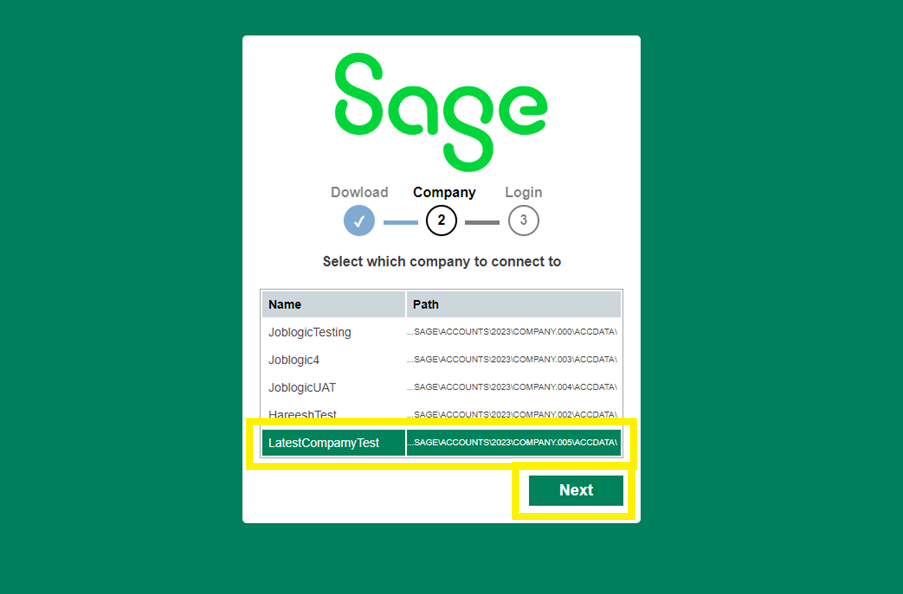
Finally, you will need to log into your Sage account to complete the connection

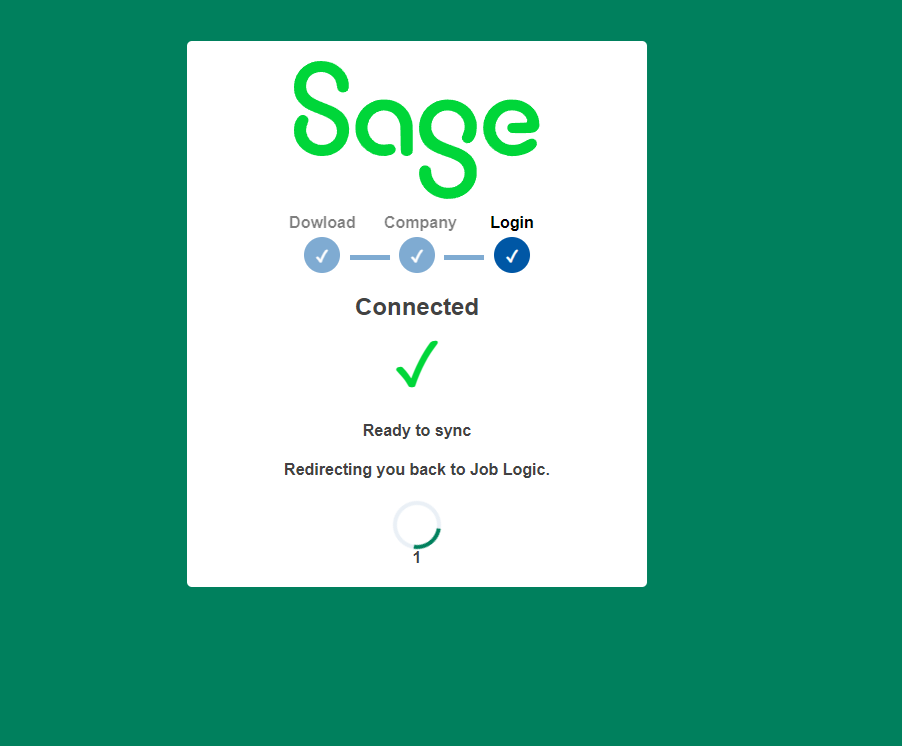
You’ll then be redirected back to joblogic where you can start a sync as required
For a more in depth look into the Sage50 connection, click here to read our guide.
Syncing your data
When you are connected, you’ll have a couple of options for syncing data.
We will use Xero as an example here:
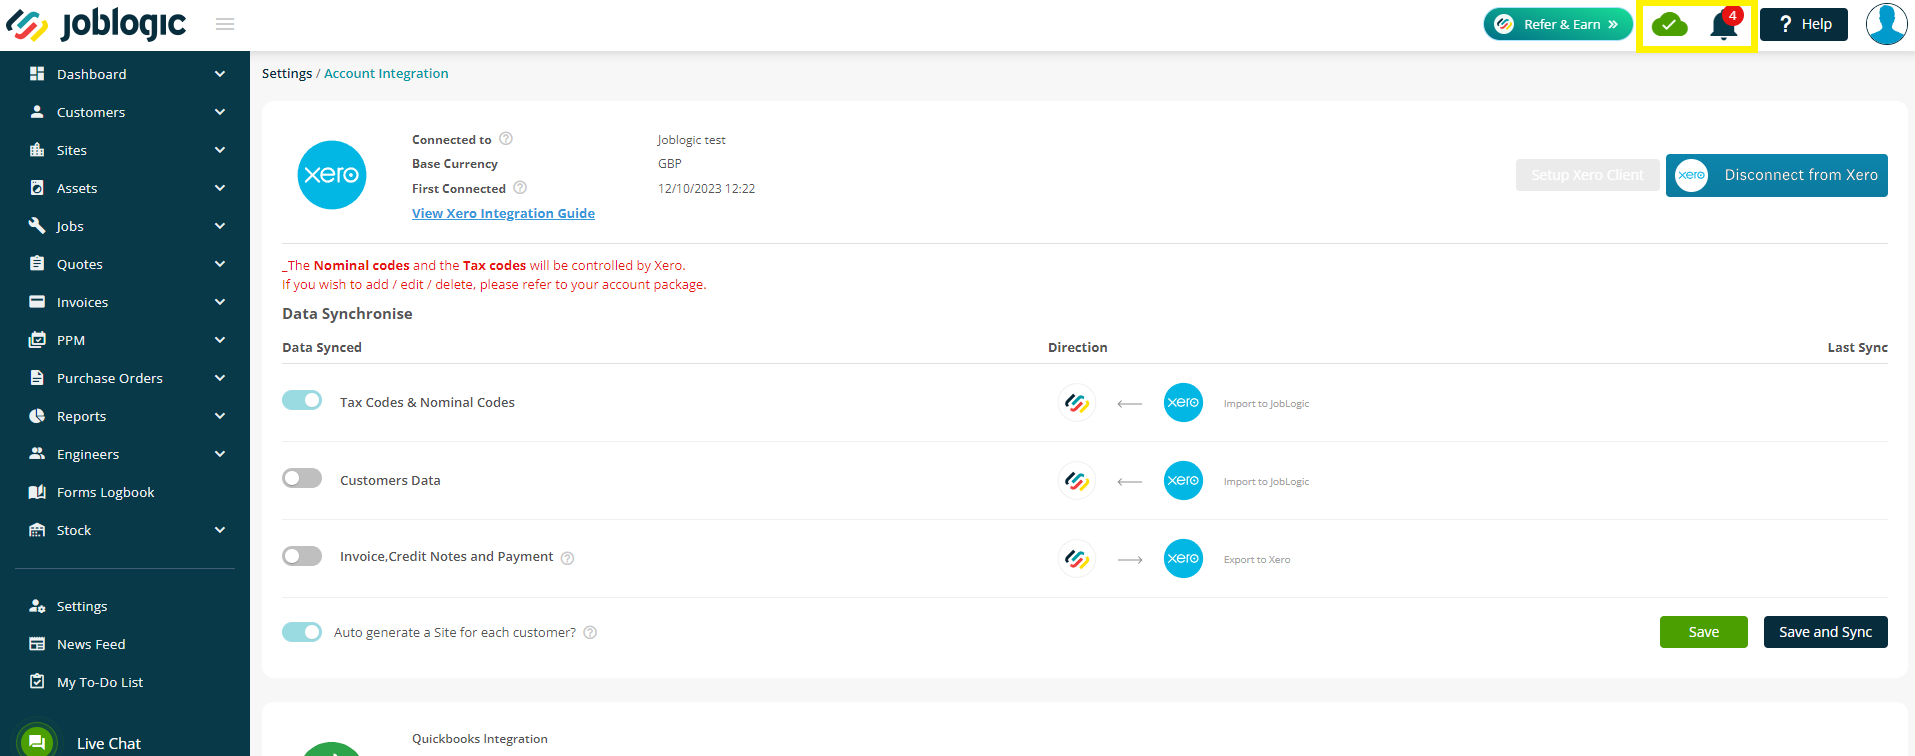
You can sync your Tax Codes & Nominal Codes as well as your Customer Data from Xero into Joblogic
You can sync Sales Invoices, Credits and Payments from Joblogic to Xero.
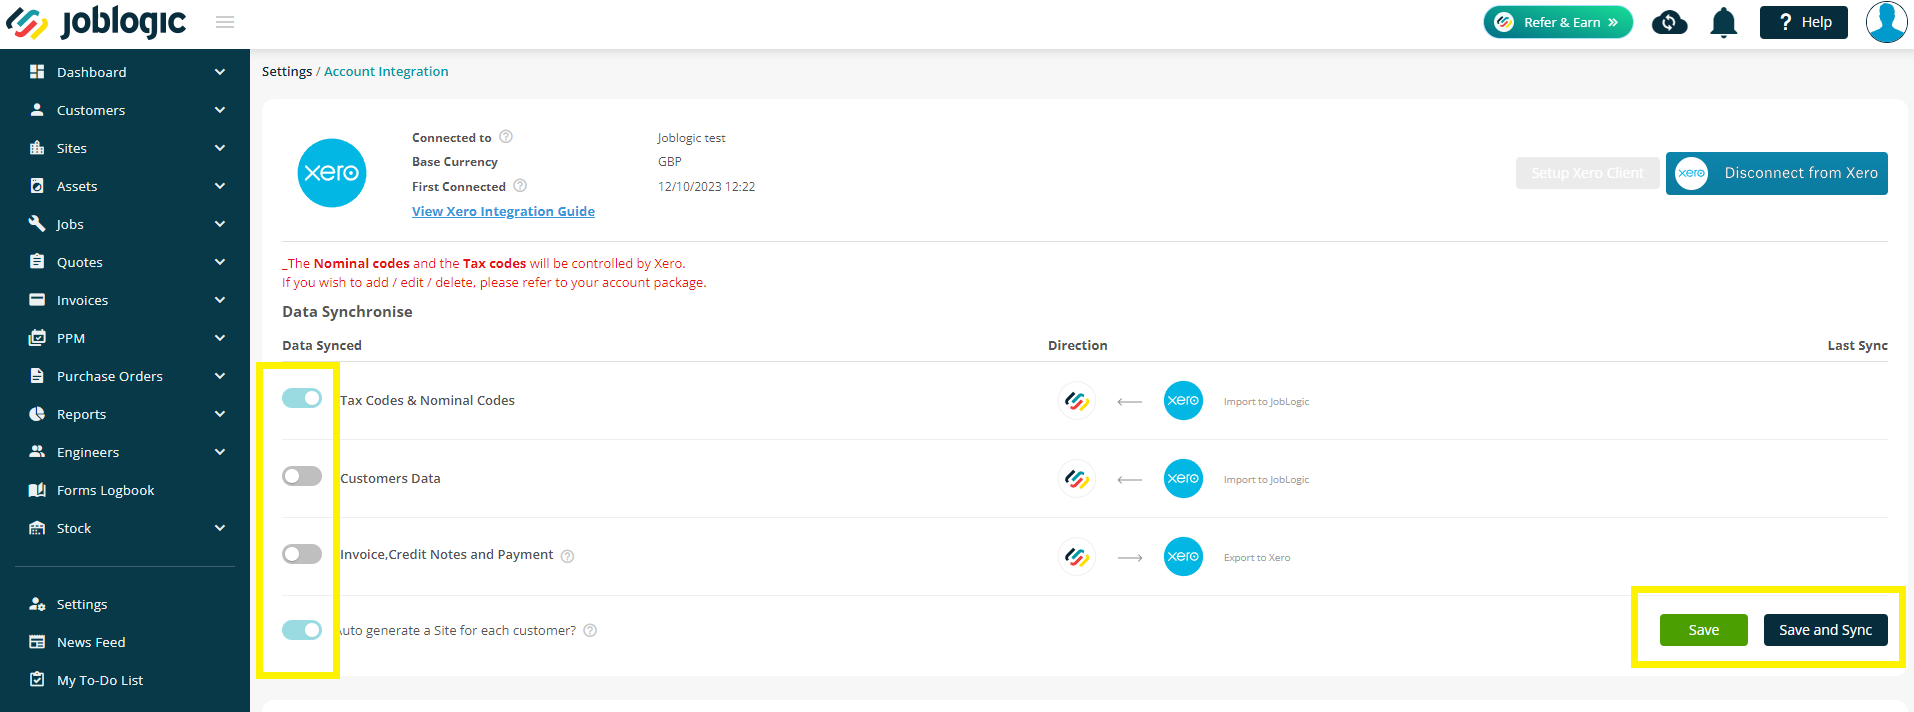
If you are ready to proceed, click the Save & Sync button.
The next pop up will confirm what you are about to sync and the number of files - again, if you are happy, click Proceed.
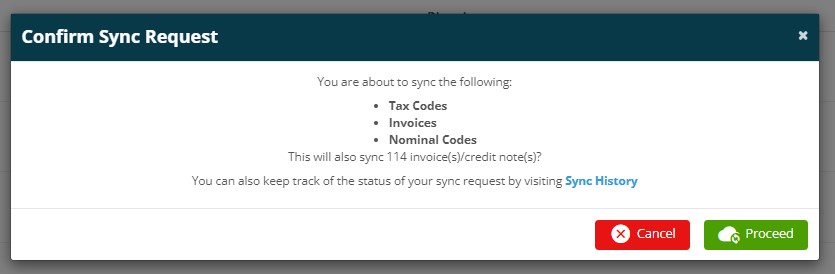
The sync will now take place in the background and you can continue to work as normal while this is happening.
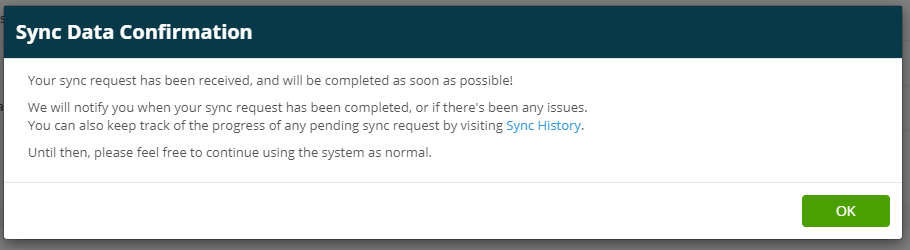
Once the sync has been completed, you will receive a notification via the bell icon at the top of your page to confirm whether it was successful or not.
Errors when Syncing
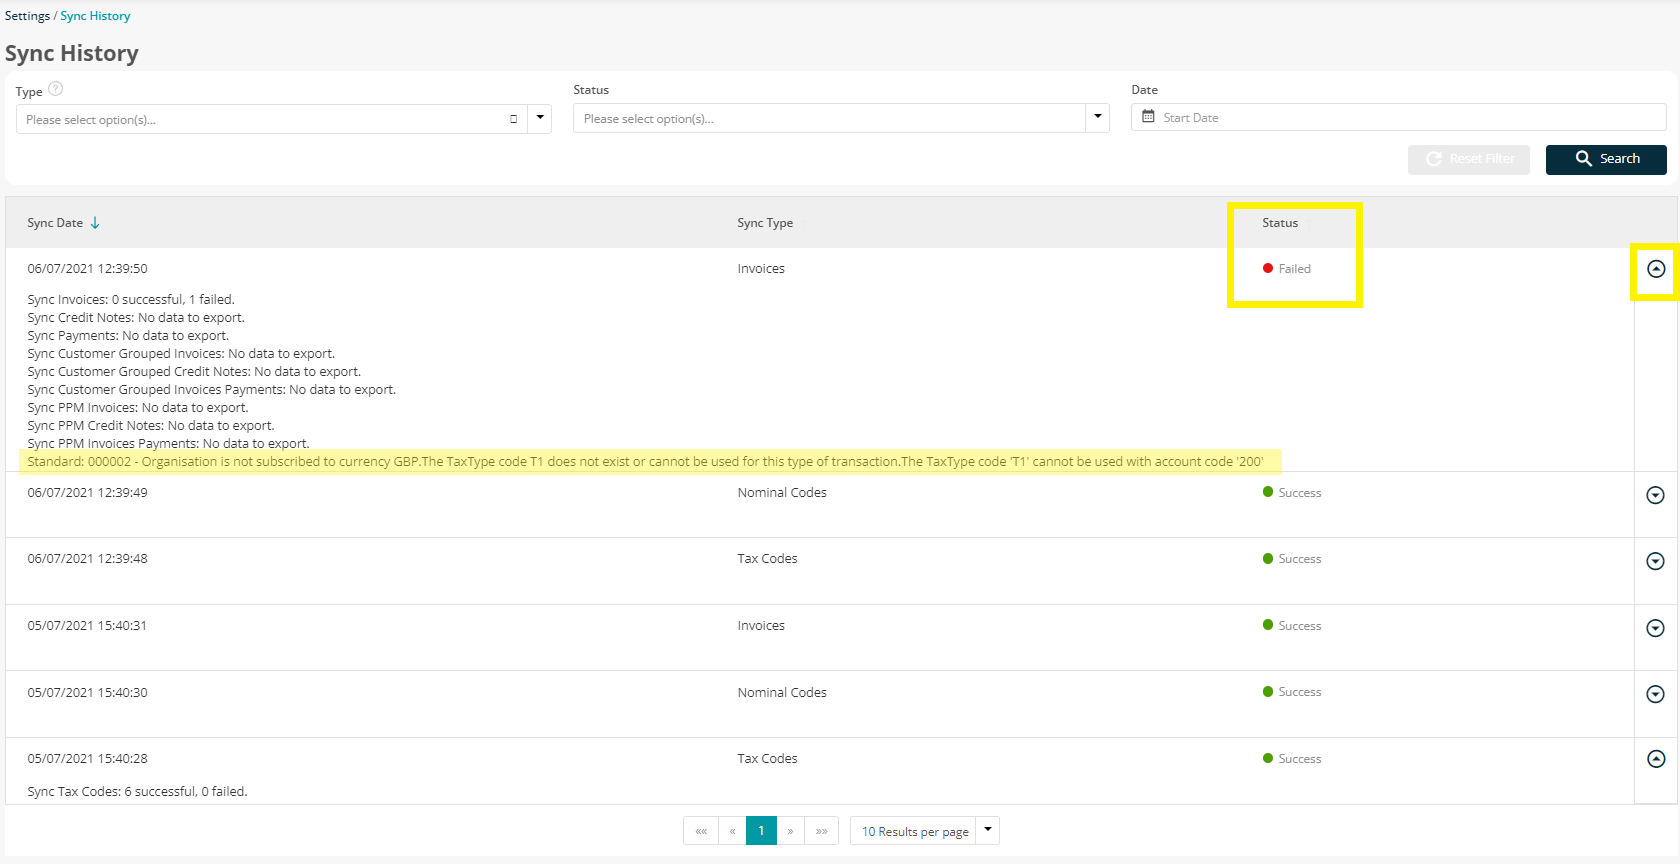
If your notification is showing that the import has failed, you can go to Settings > Sync History to check out the errors.
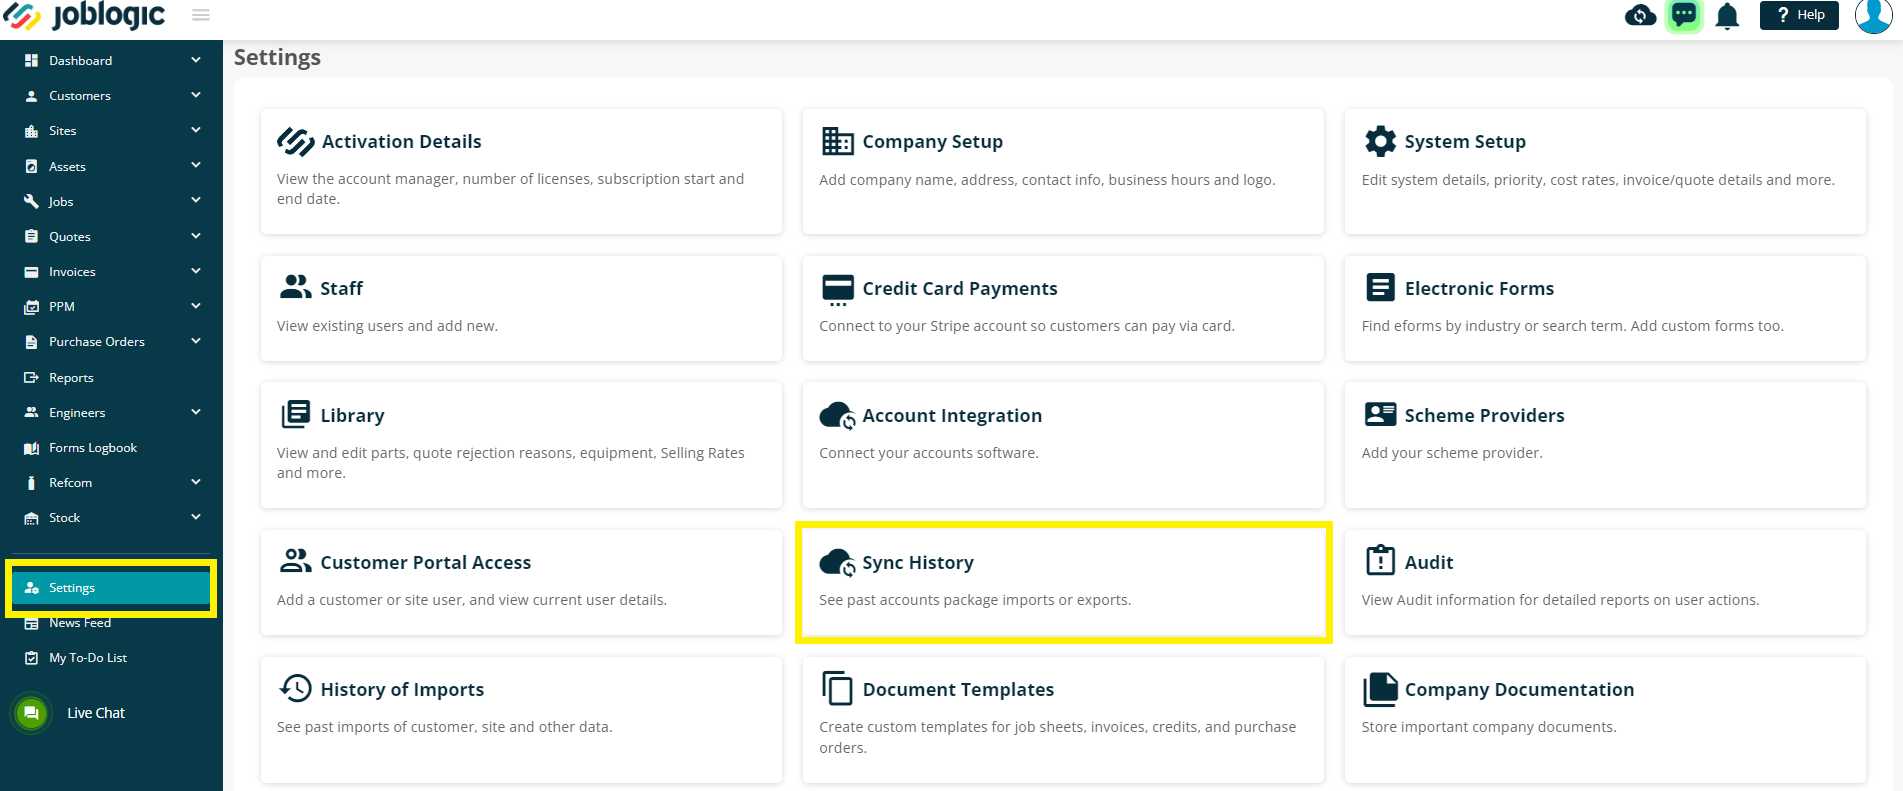
You will see a list of all sync attempts you have made, including any failed attempts
To view further details, click the arrow on the far right - this will then show you which items have failed, along with an error message.
If you are not sure on the meaning of the error messages, please click here to check out our ‘FAQs’ on errors, alternatively contact your account manager or the support team as per the details below.
Further Support
For further information or assistance with the above, contact our Support Team on 0800 326 5561 or email support@joblogic.com. Alternatively, our Customer Success Management team can be reached by emailing customersuccess@joblogic.com
Publishing Details
This document was written and produced by Joblogic’s Technical Writing team and was last updated on the date specified above. Be aware that the information provided may be subject to change following further updates on the matter becoming available. Additionally, details within the guide may vary depending on your Joblogic account’s user permissions.