- 30 Apr 2024
- 2 Minutes to read
- Print
- PDF
Invoicing a Job
- Updated on 30 Apr 2024
- 2 Minutes to read
- Print
- PDF
Introduction
Invoicing is a crucial step within Joblogic which allows users to streamline the billing process and maintain accurate financial records. This user guide will walk you through the steps for successfully creating and sending invoices for completed jobs.
Prerequisites
Before you begin, ensure that you have:
Logged into your Joblogic account with the necessary user permissions.
Completed the relevant job tasks and updated the job’s status to "Completed" or equivalent.
Invoicing a Job
Log in to your Joblogic account.
From the dashboard, navigate to the "Jobs" module.
Locate the completed job within the Jobs module that you wish to invoice. You can use the search filter options to locate the completed job.
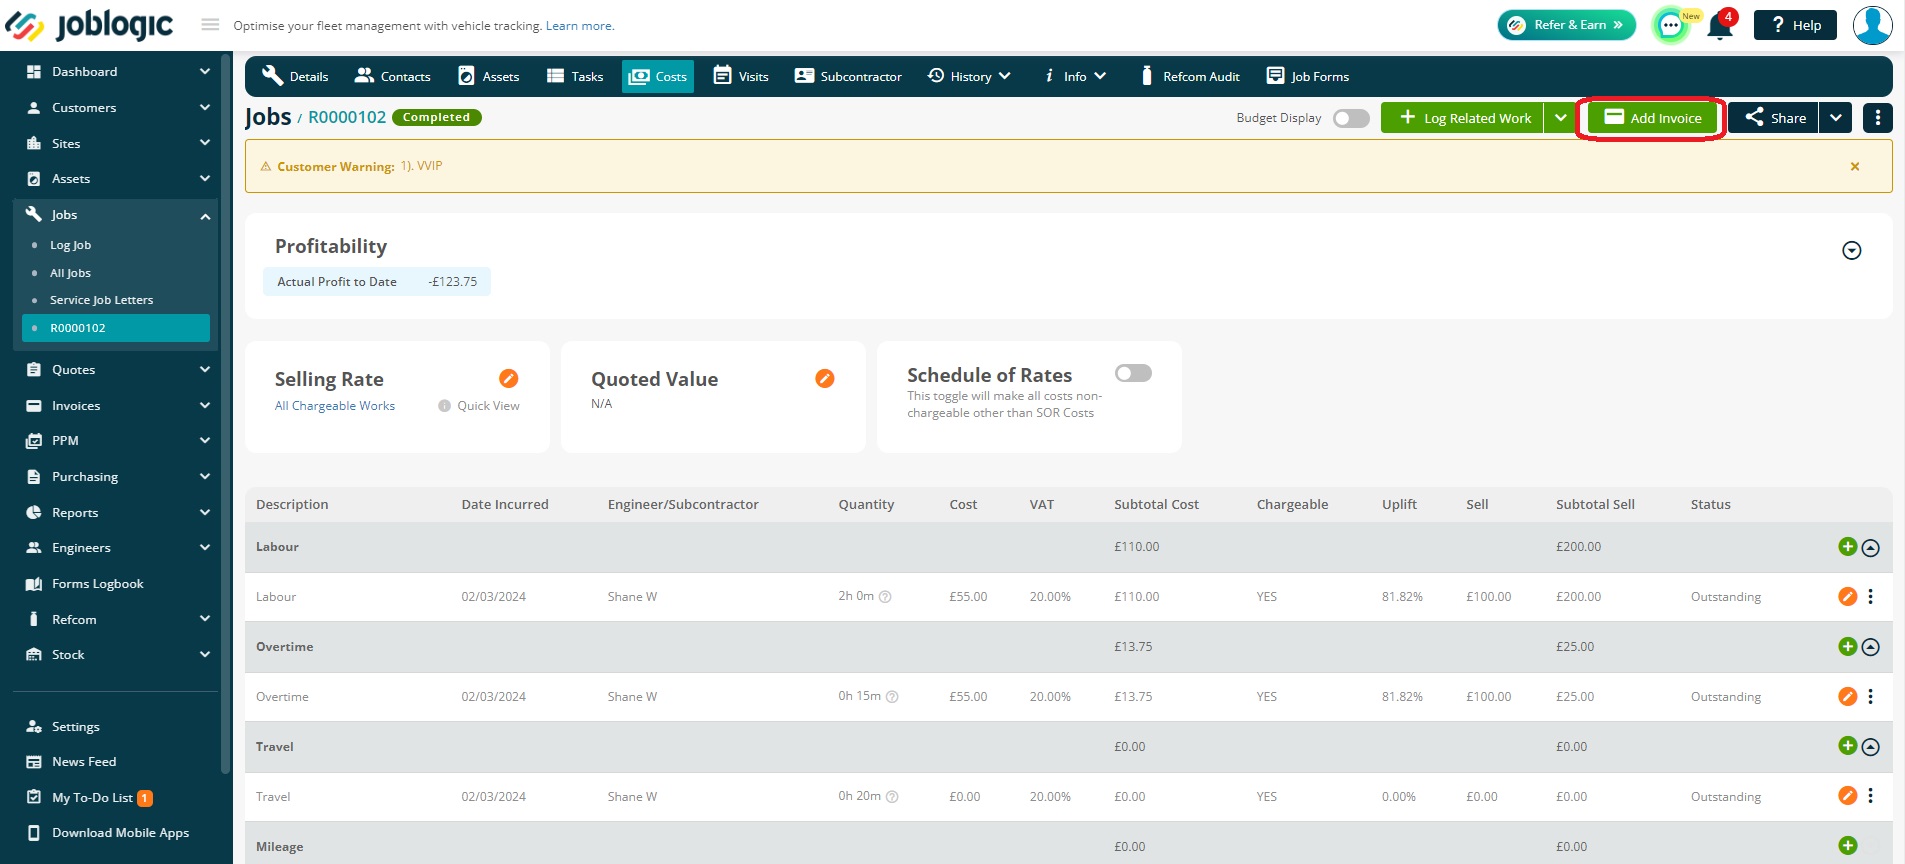
Click on the job to open its details page and navigate to “Costs” tab.
Verify that all the relevant job costs are accurate and up-to-date.
Click on “Add Invoice” to initiate the invoicing process.
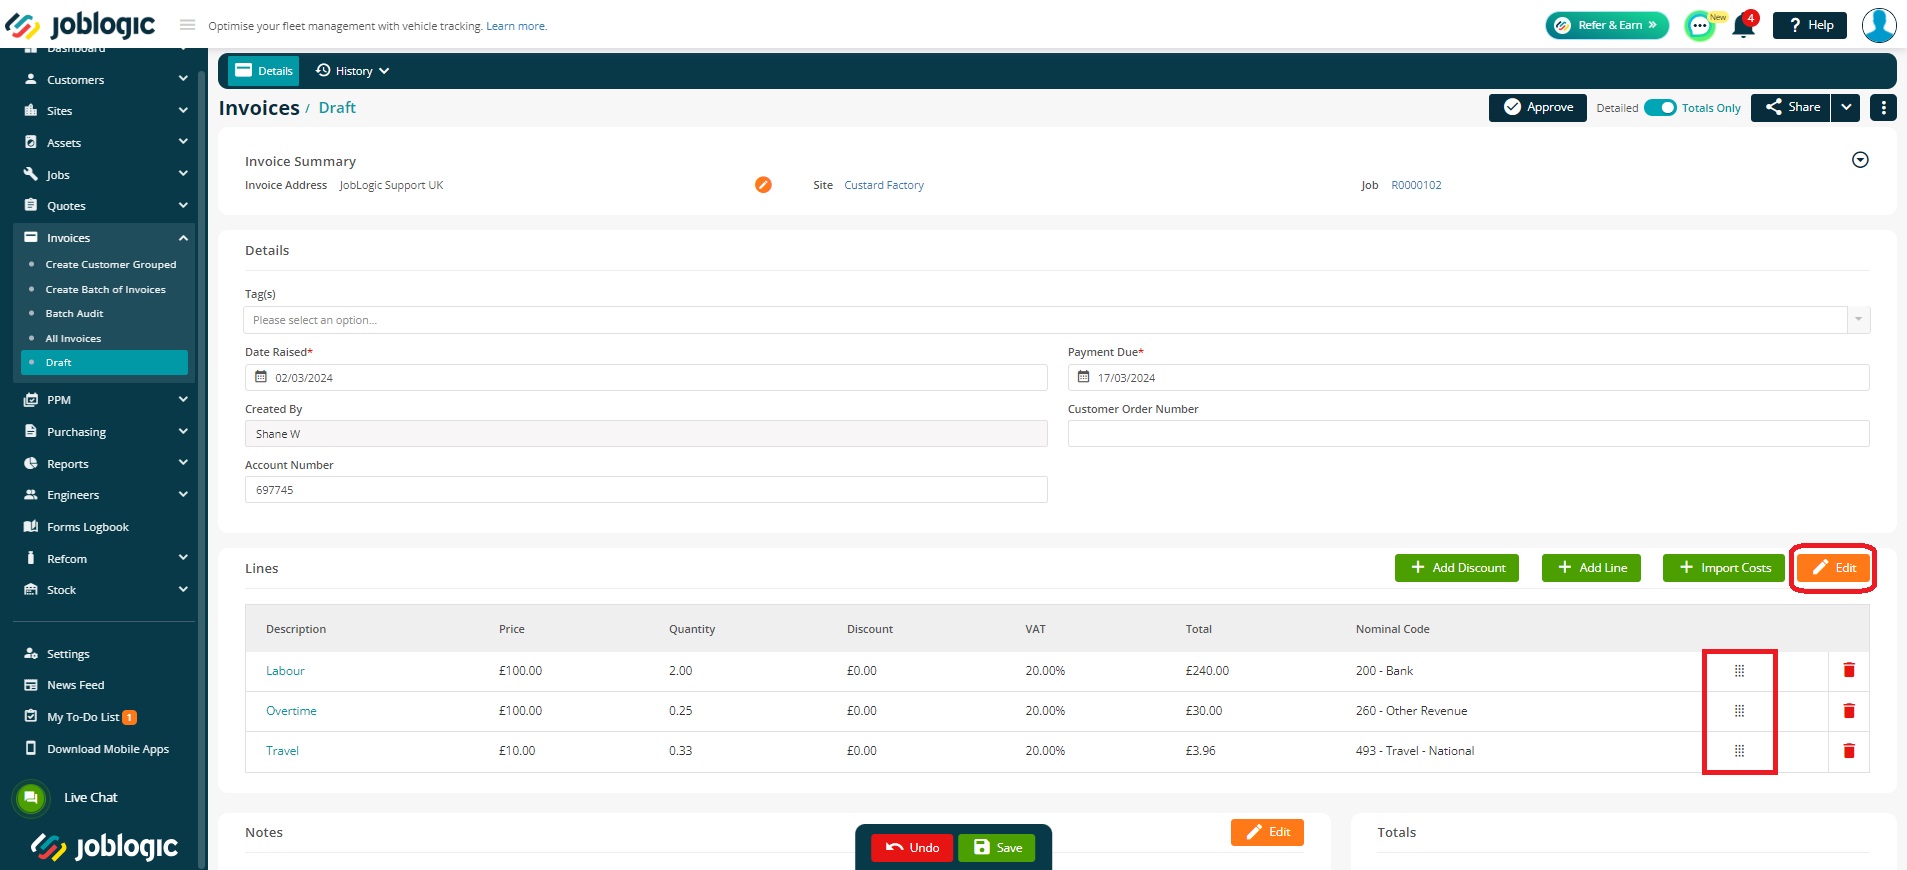
The system will generate a draft invoice based on the cost information.
Review and ensure that all line items, quantities, rates, and other details are accurate before pressing the approve button.
Adjust the sequence of lines, if required by holding the vertical dots icons and moving up & down.
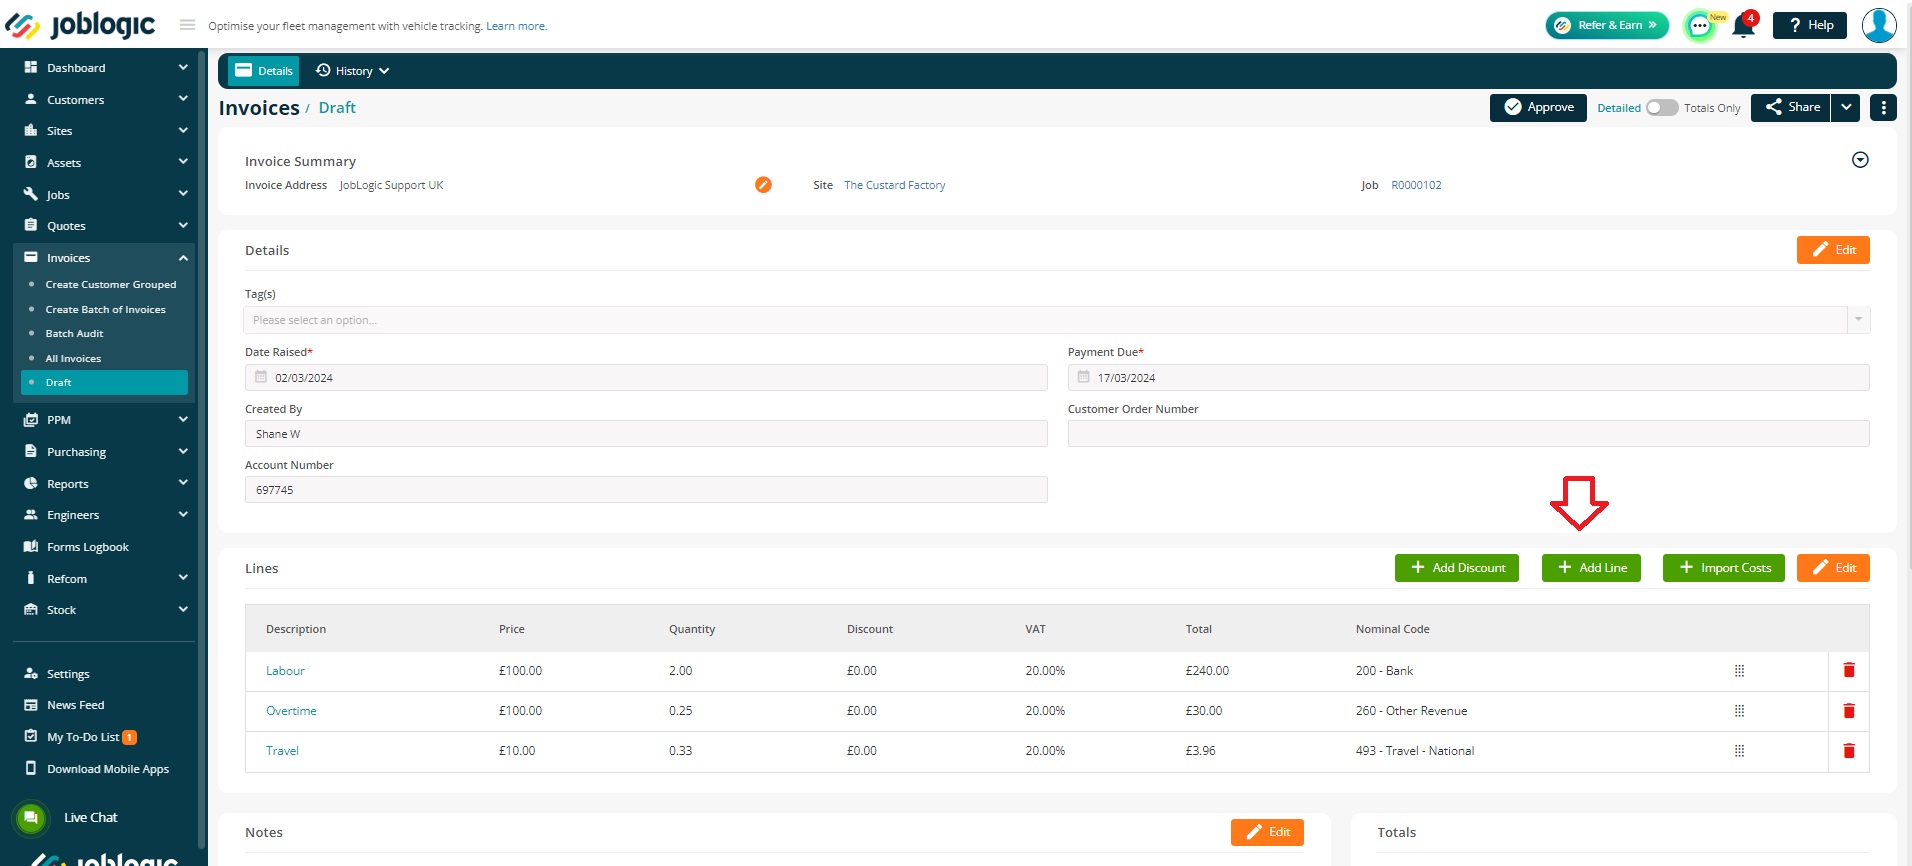
If there are additional items or charges not automatically included, use the "Add Line" option to include them in the invoice.
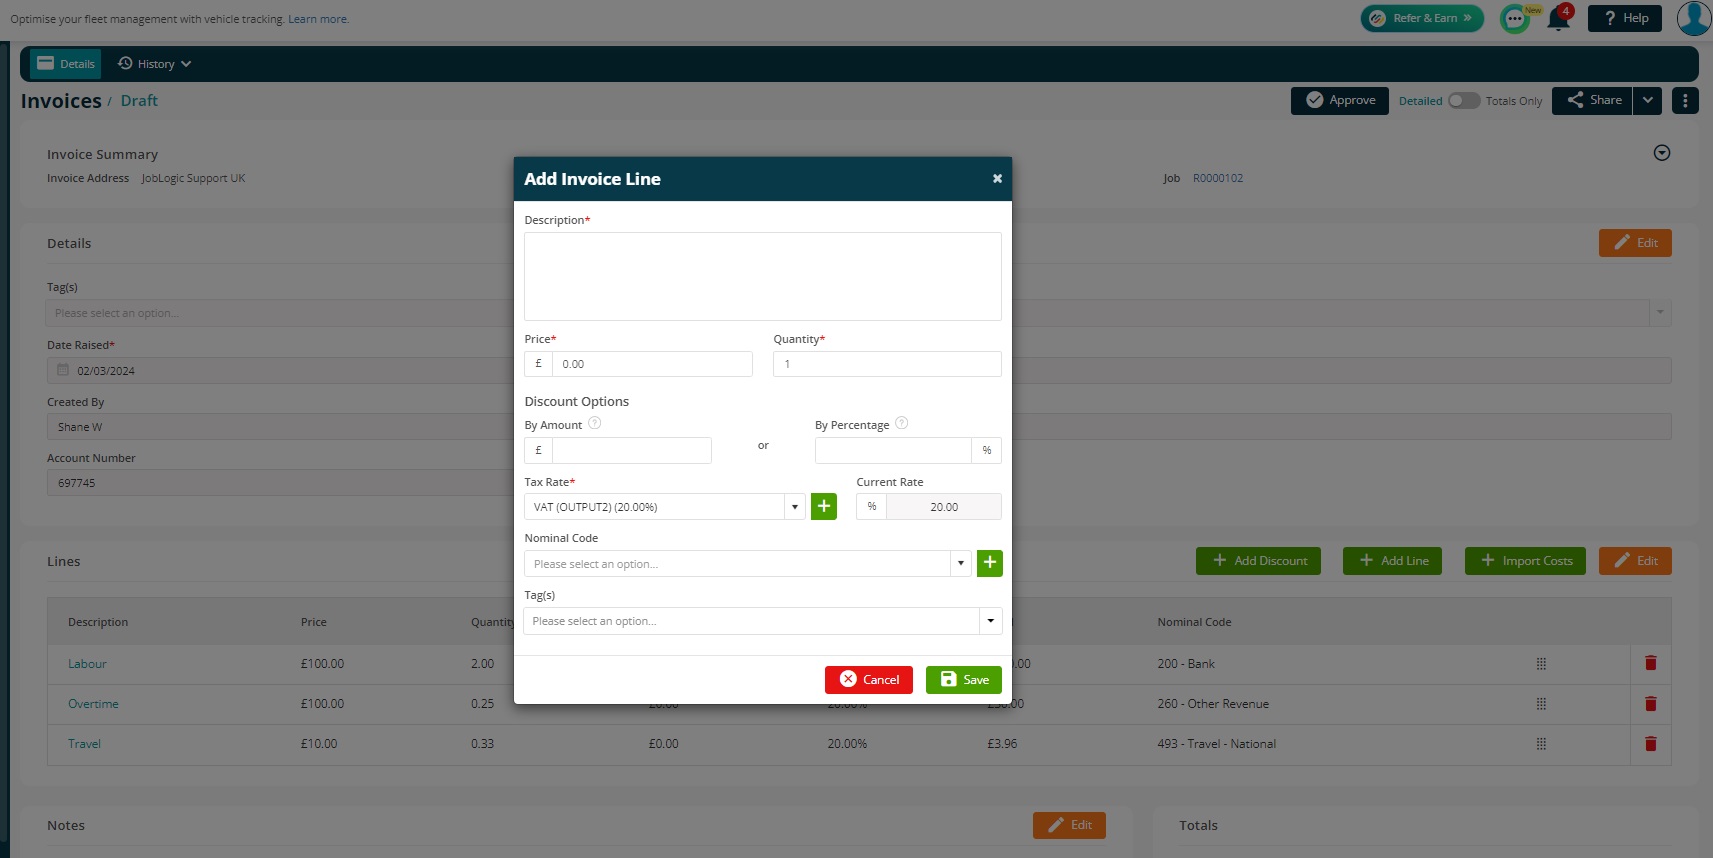
If you want to add a discount on the whole invoice, then use the “Add Discount” option.
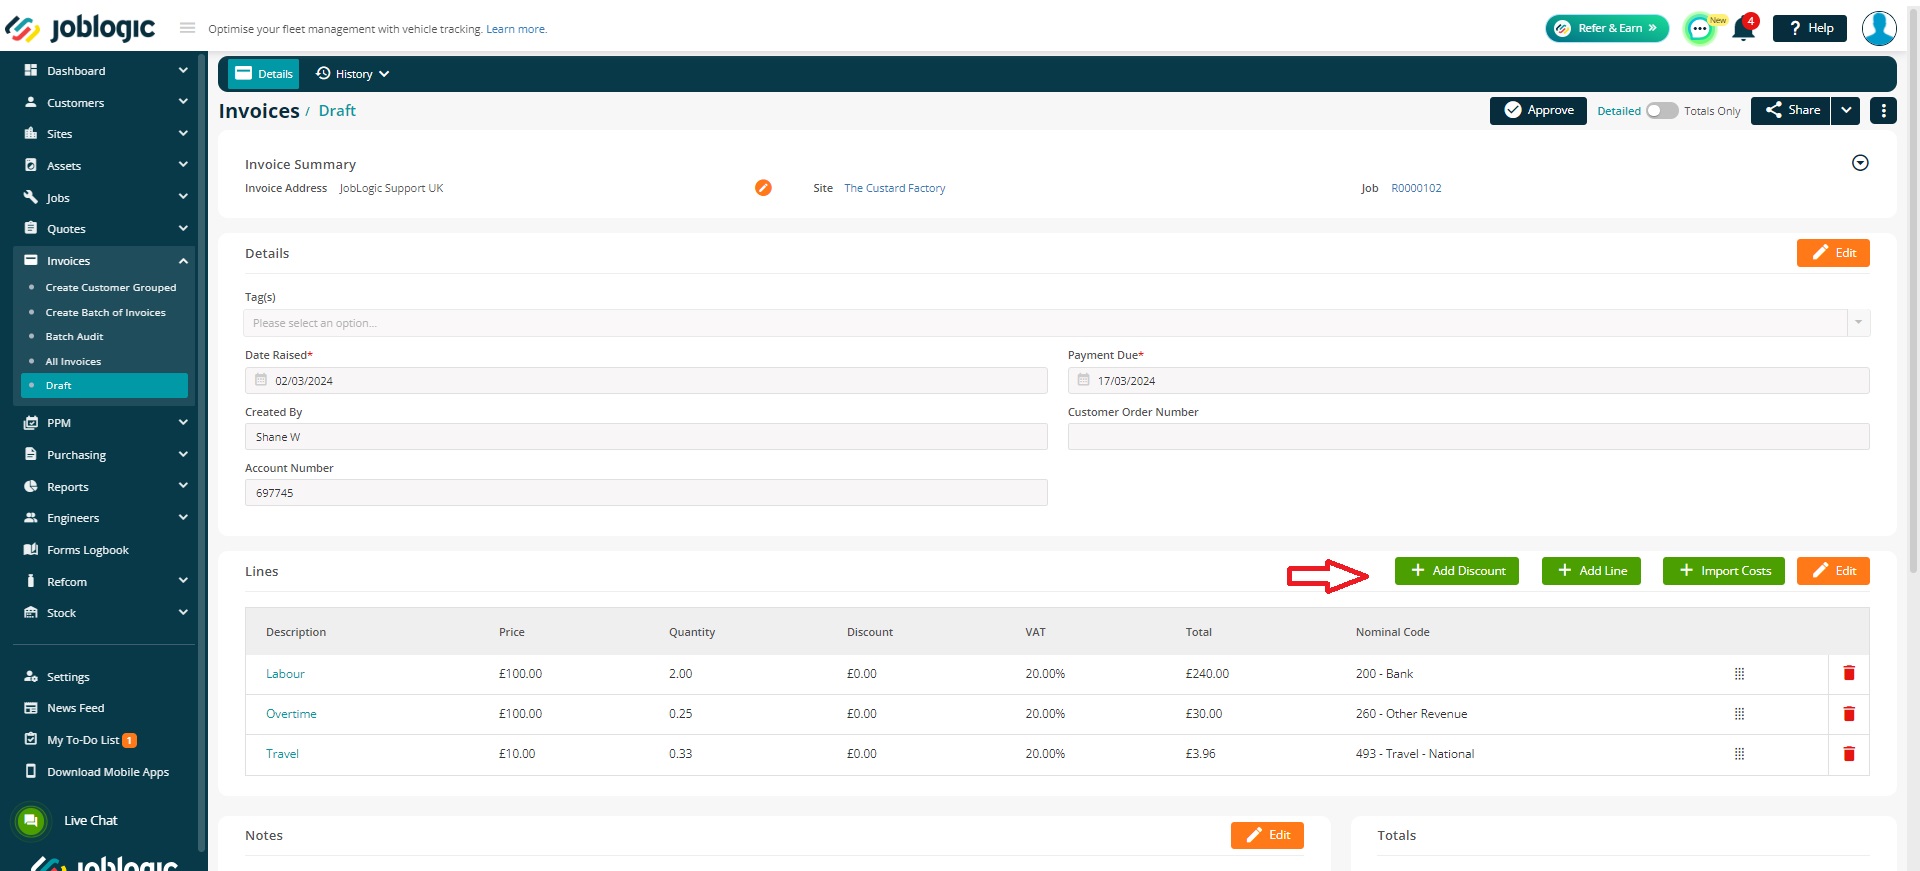
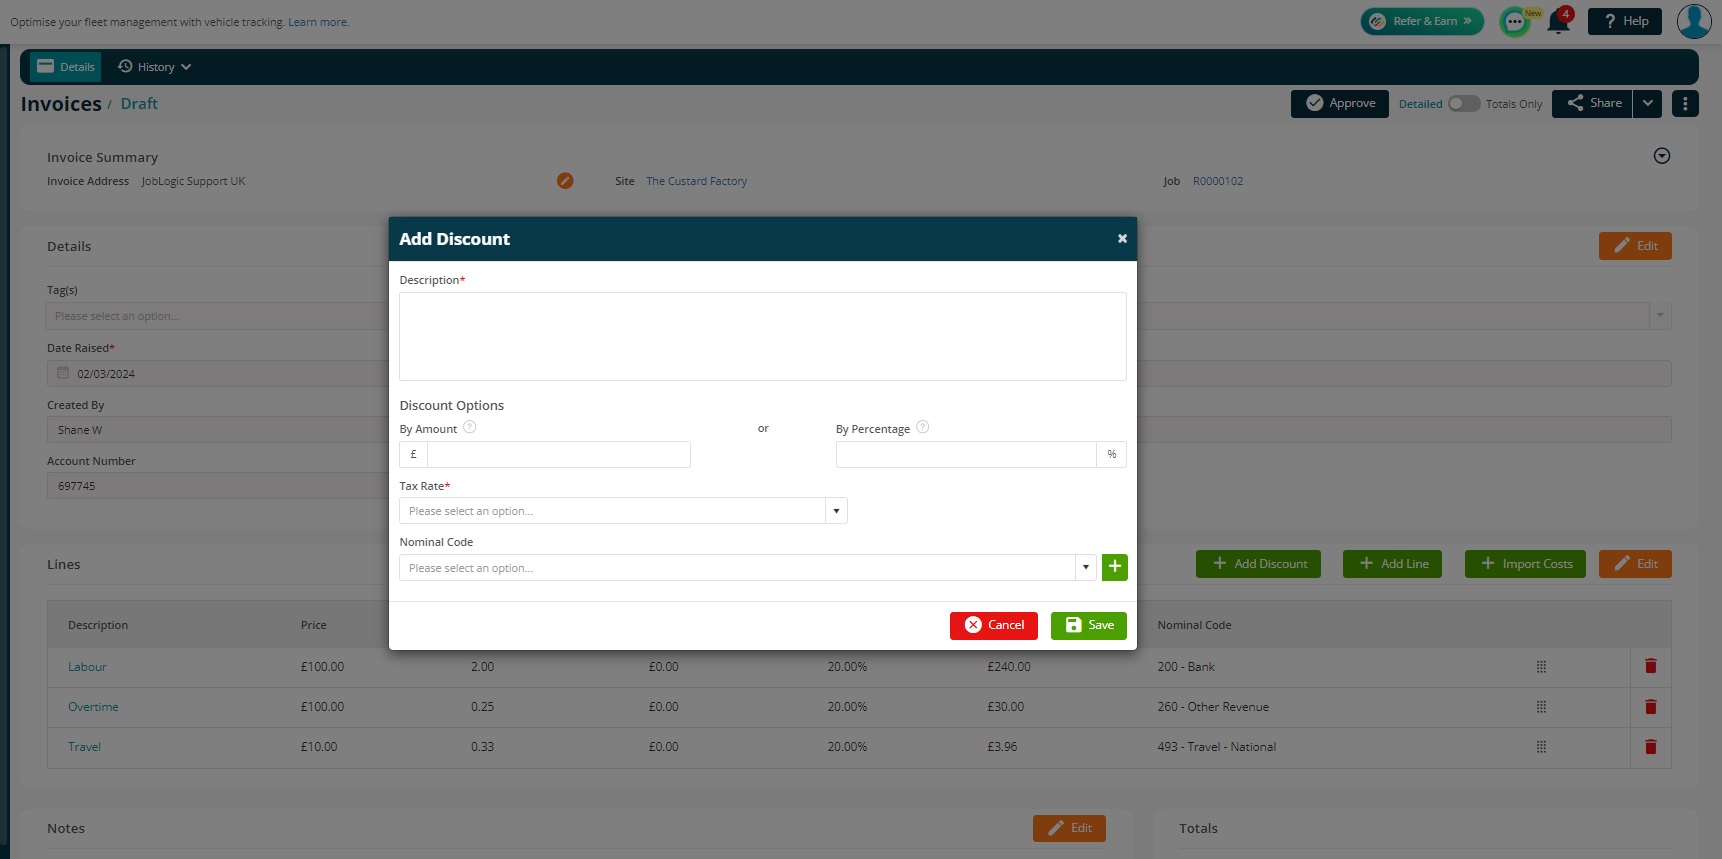
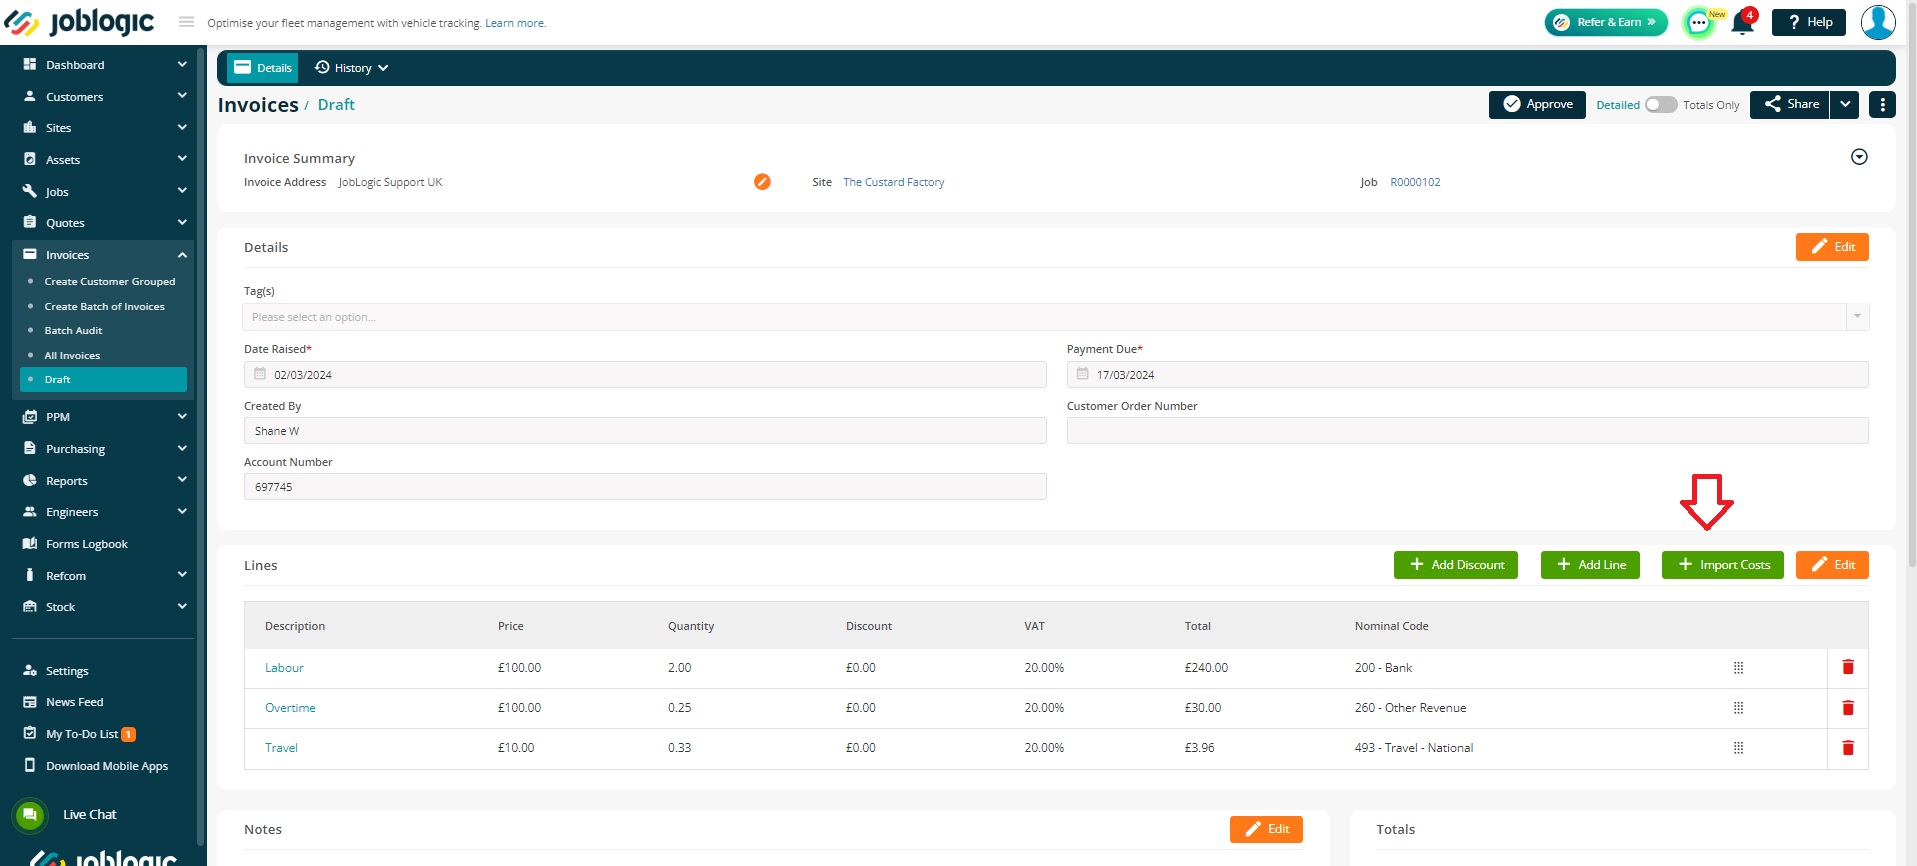
If there are additional costs that have been added to the job since the draft invoice was generated, the “Import Costs” button can be used to add the additional job costs to the draft.
Once you are happy with the draft invoice, click the Approve button. The system will generate the invoice with an invoice number.
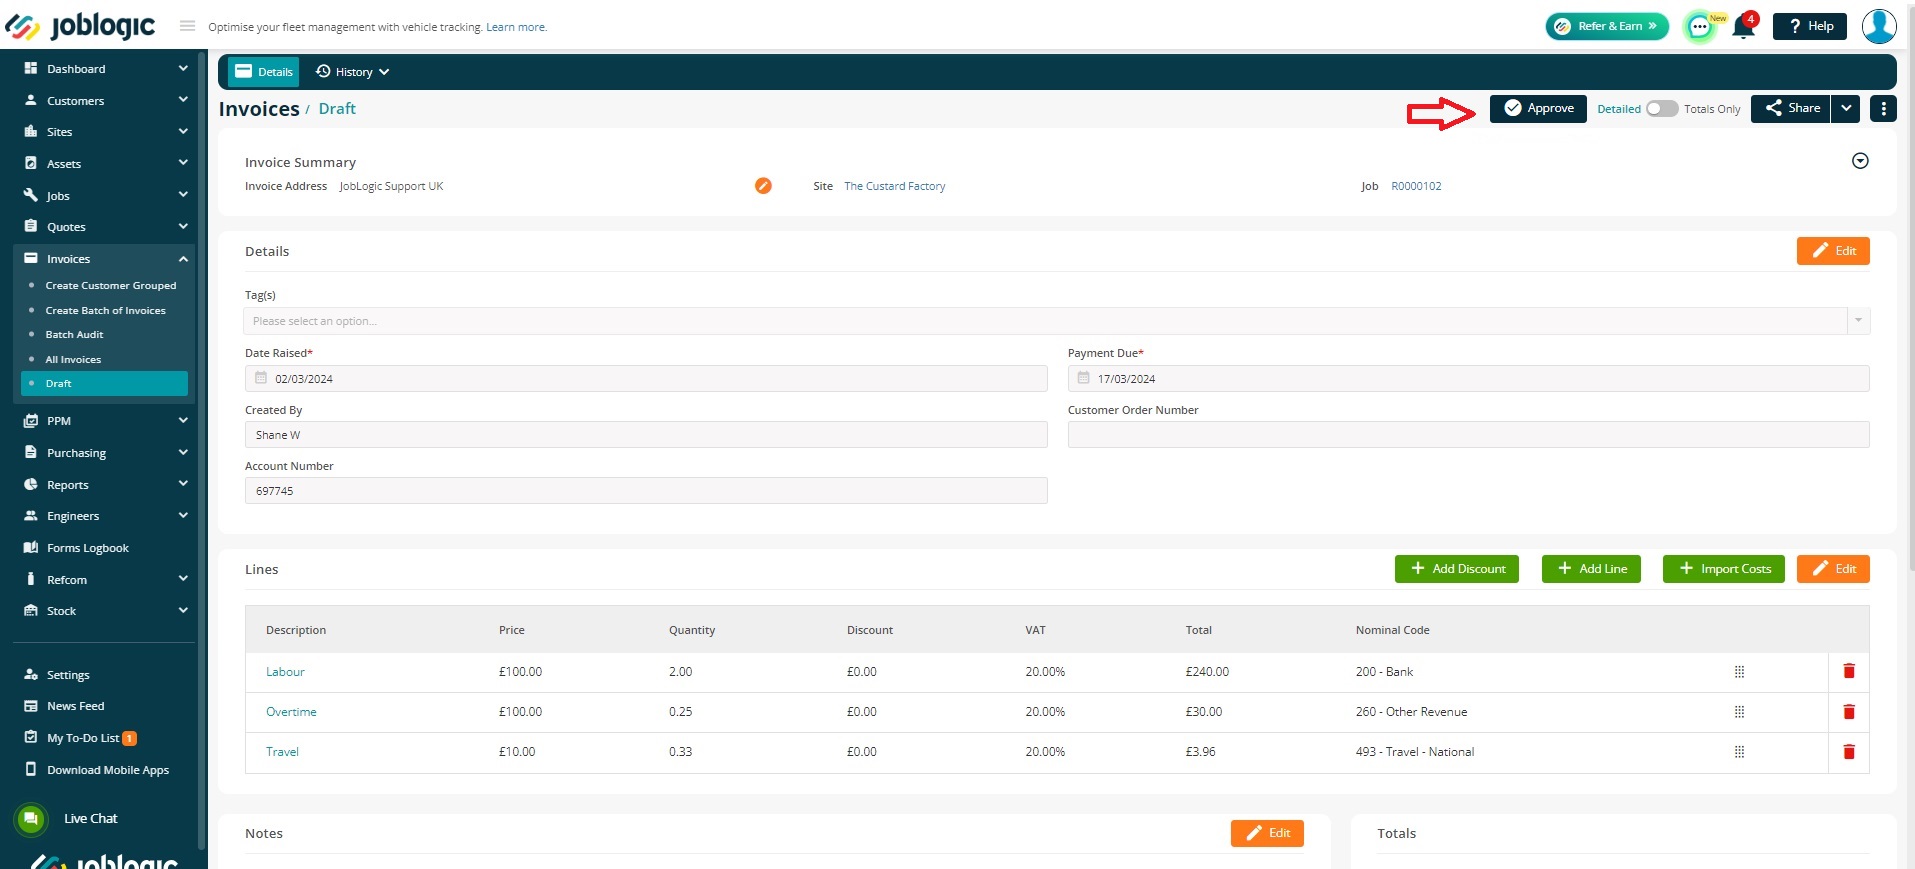
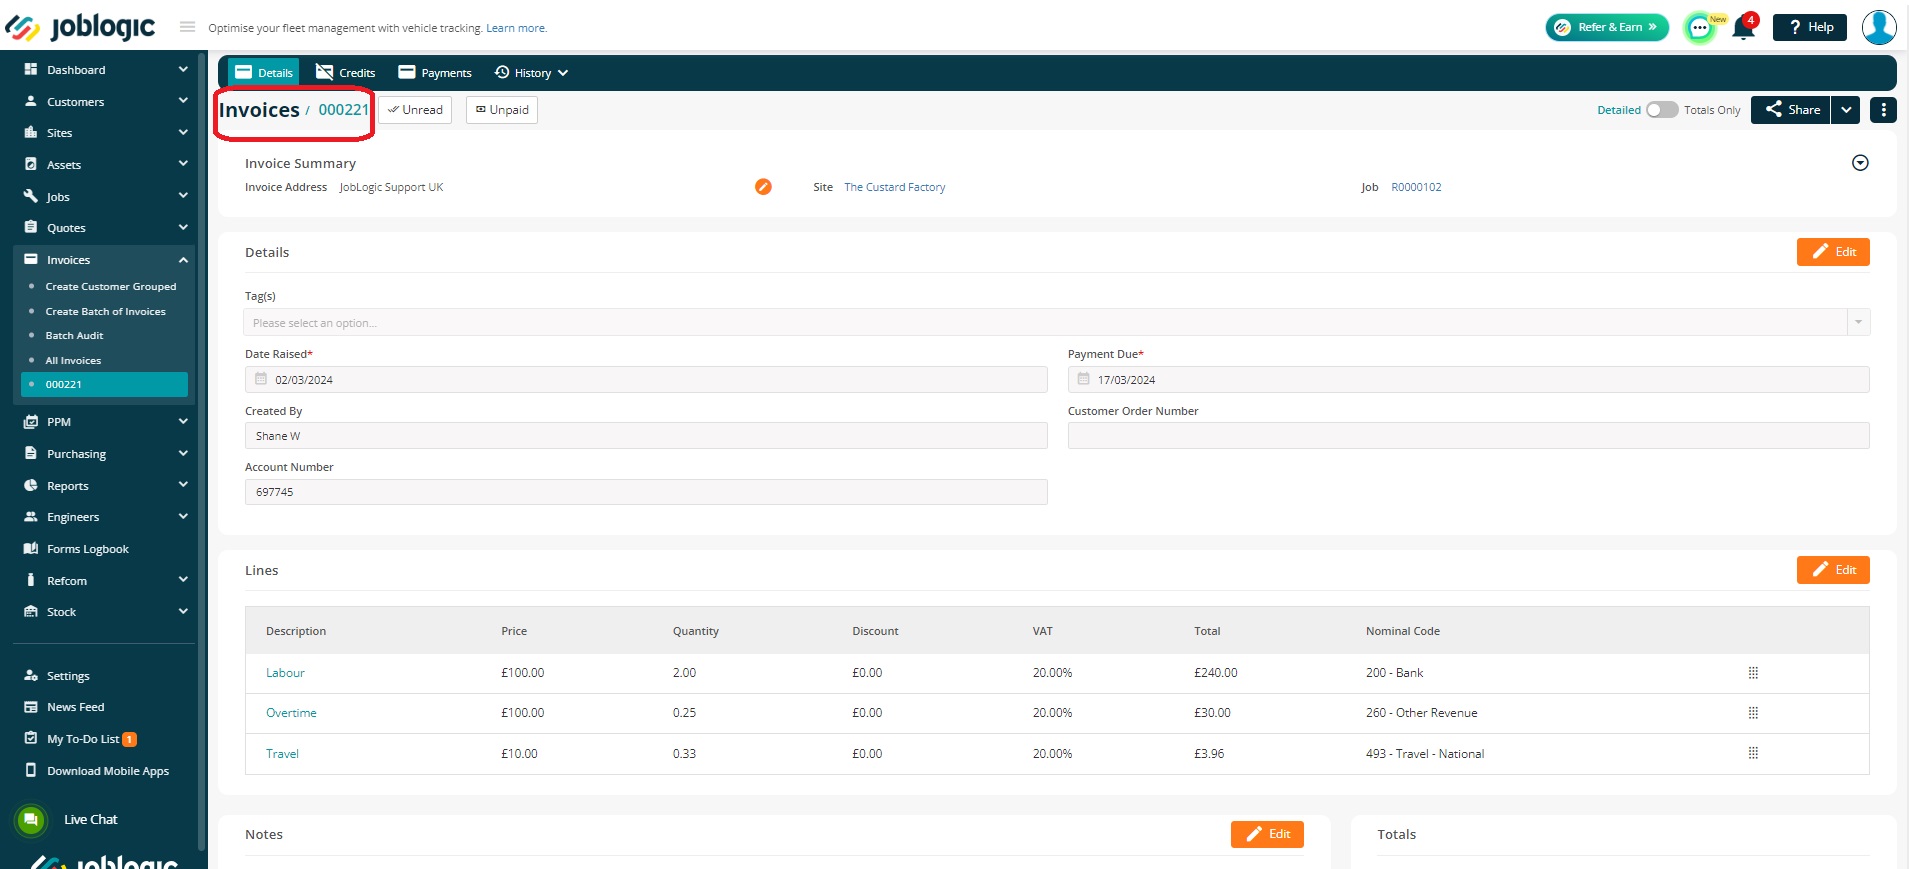
Note: Once the invoice is approved, you cannot edit the invoice lines except for their nominal codes.
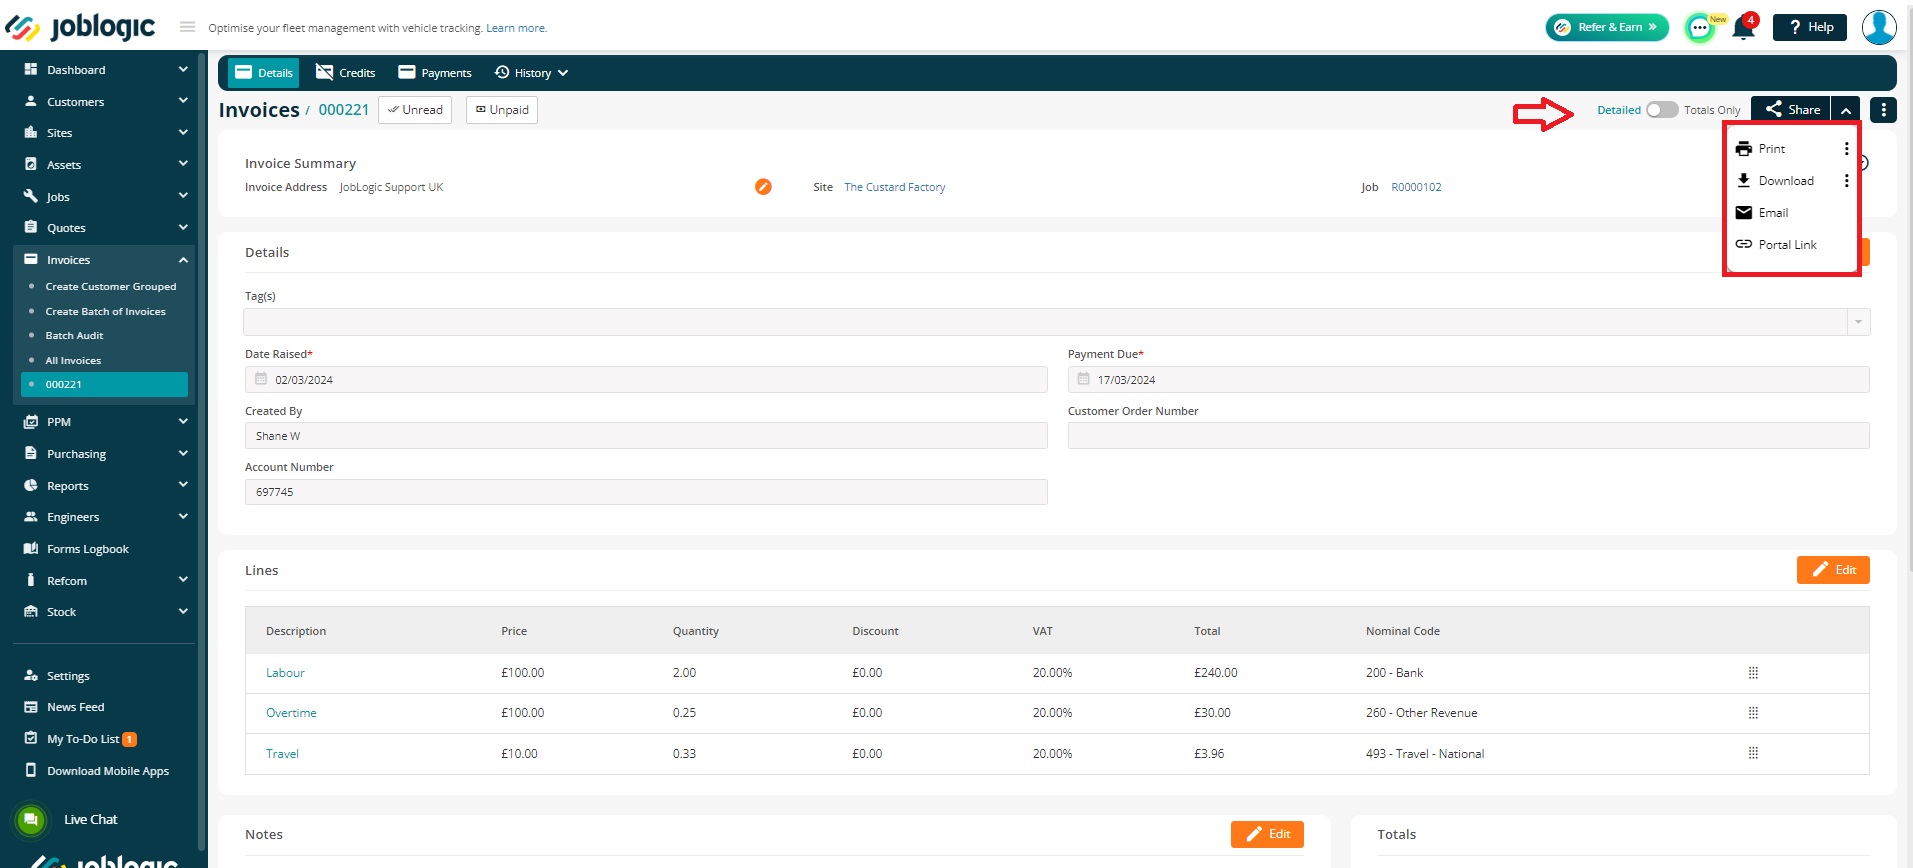
You can view, email or download the invoice using the Share option and choose the “Detailed” or Totals Only view accordingly.
Further Support
For further information or assistance with the above, contact our Support Team on 0800 326 5561 or email support@joblogic.com. Alternatively, our Customer Success Management team can be reached by emailing customersuccess@joblogic.com
Publishing Details
This document was written and produced by Joblogic’s Technical Writing team and was last updated on the date specified above. Be aware that the information provided may be subject to change following further updates on the matter becoming available or new releases within the system. Additionally, details within the guide may vary depending on your Joblogic account’s user permissions and settings or the electronic device being used.

