Introduction
This user guide will detail how to Add an Asset individually within your Joblogic account.
Adding an Asset Individually
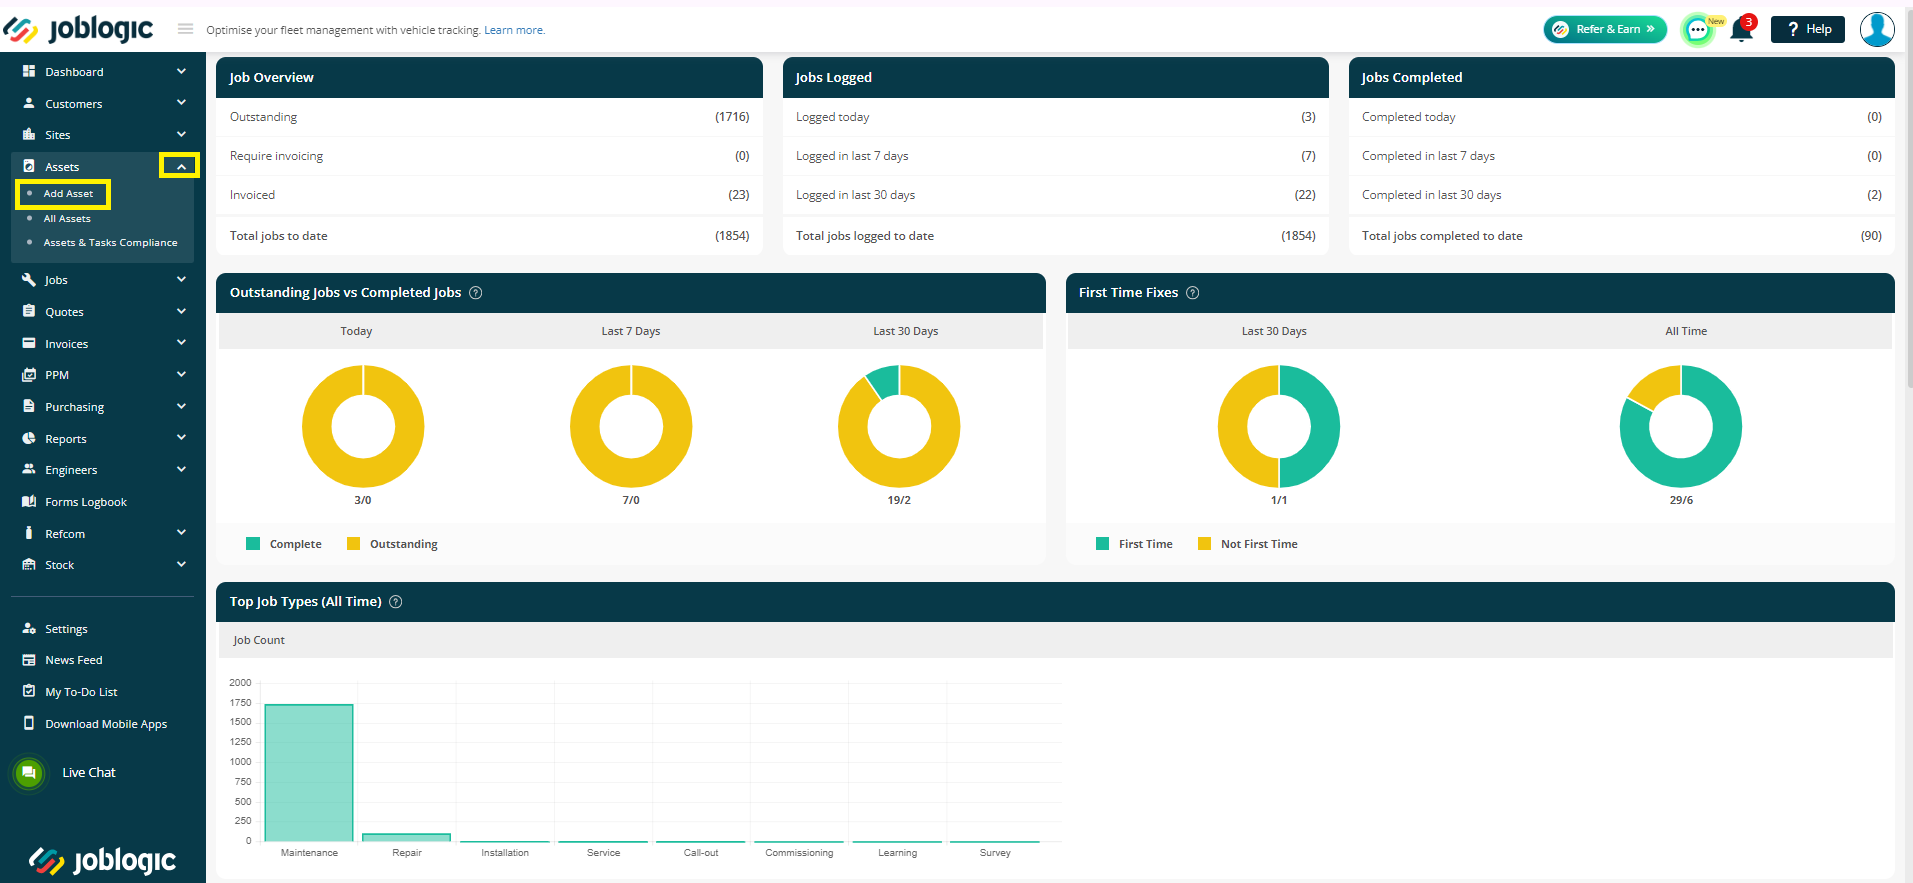
To add a new asset into Joblogic, access the 'Assets' section using the menu on the left-hand side. Select 'Add Asset' by clicking the dropdown arrow to expand the asset options.
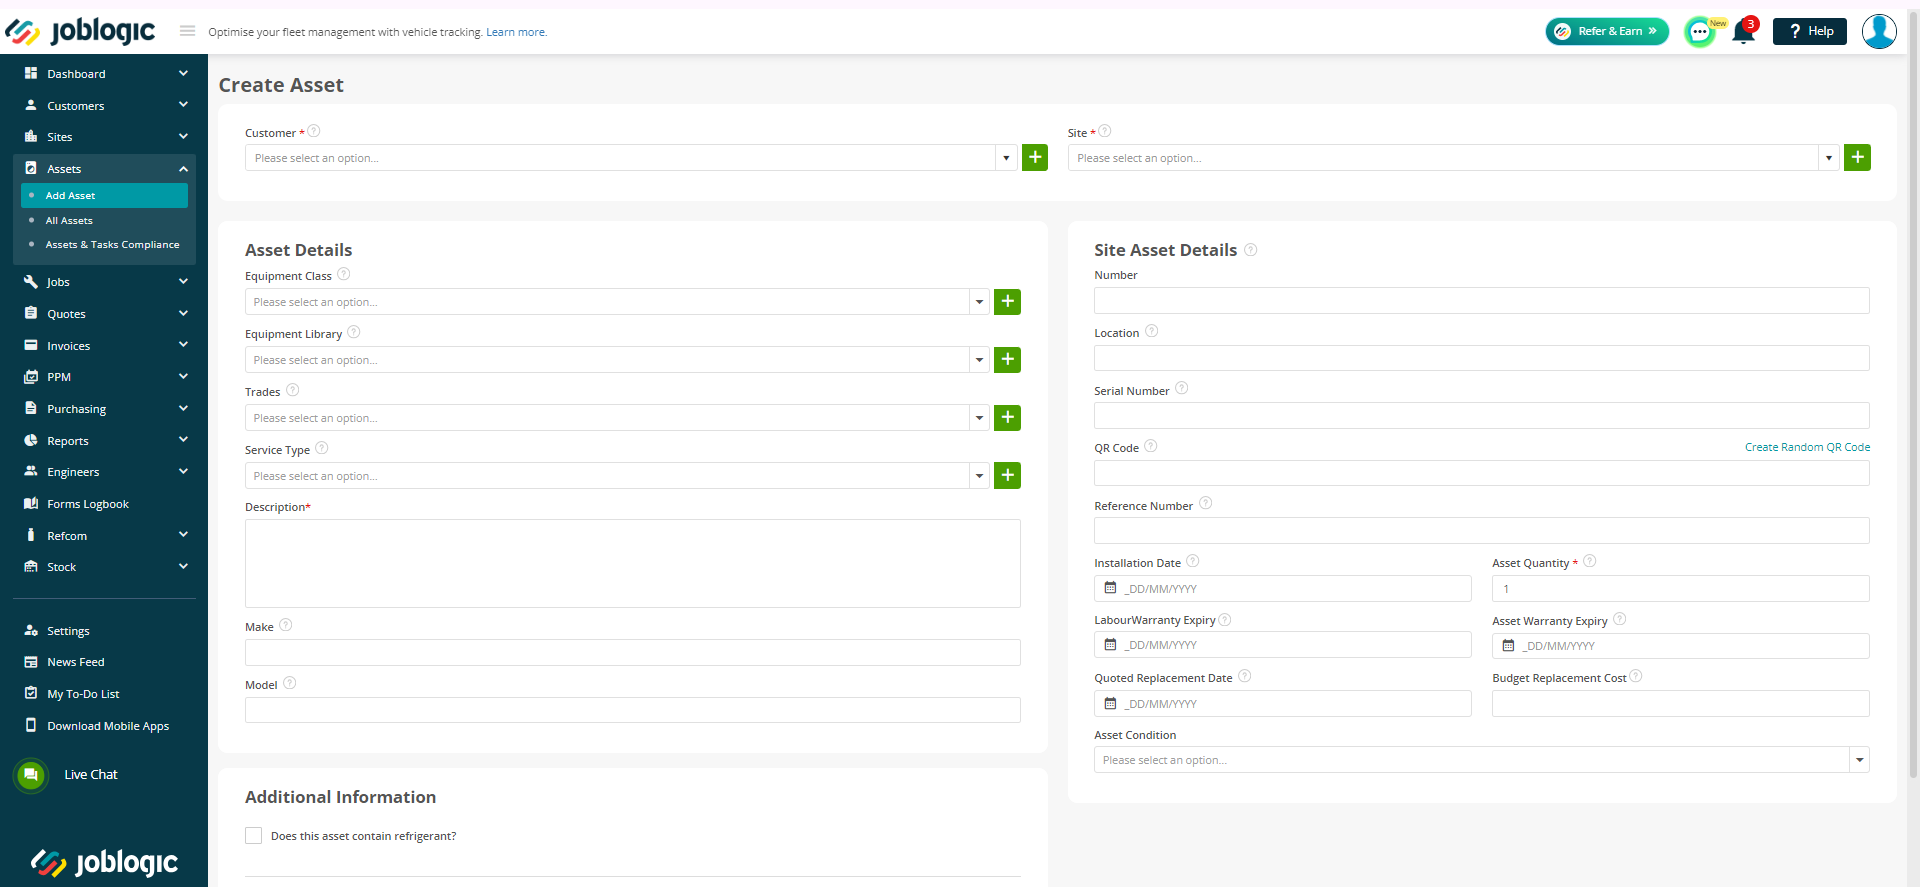
You will then be directed to the ‘Add Asset’ page whereby you can fill in the Asset’s details.
When adding a new Asset, some fields will be mandatory. These are determined by the red asterisk against a field name.
In this case, the Customer Name, Site Name and the Asset description are mandatory.
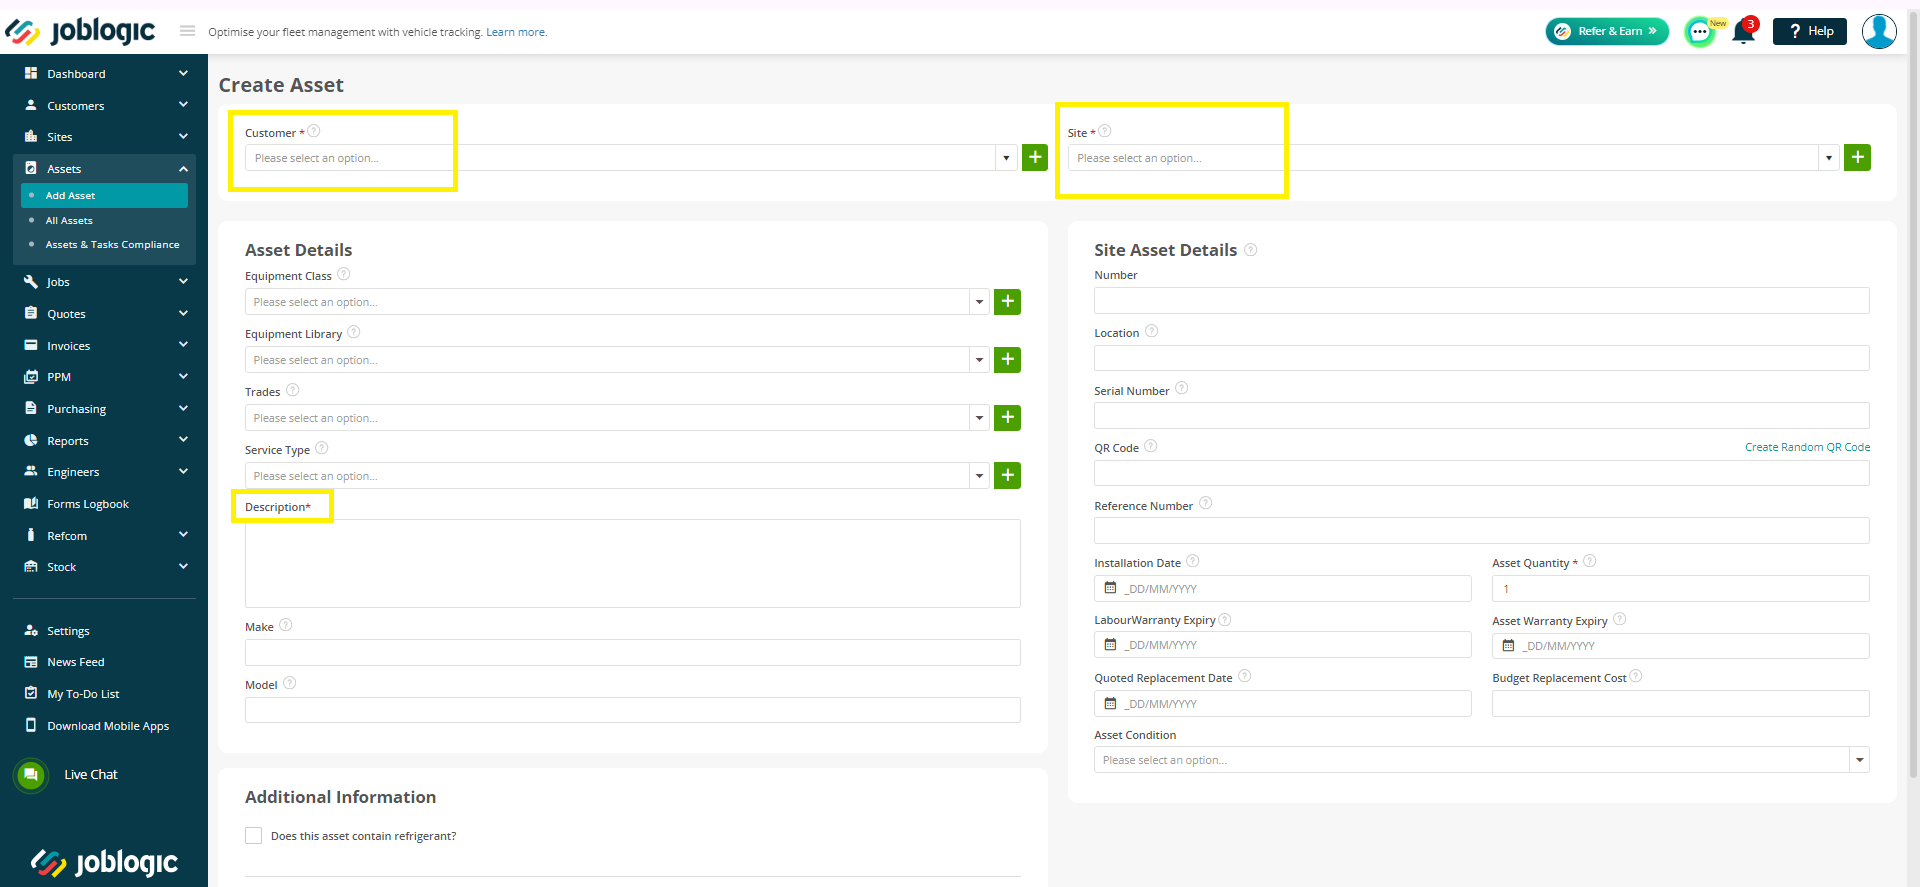
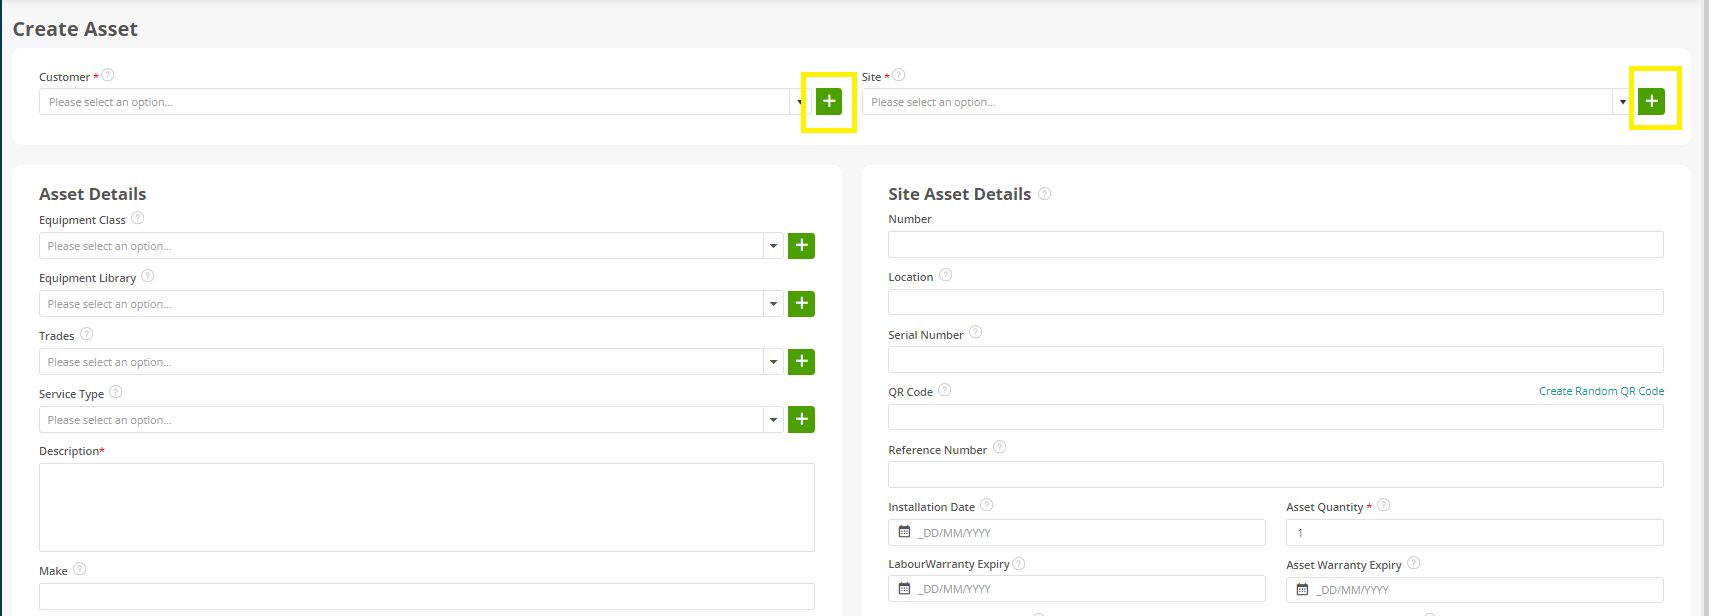
Select the customer and the site that the asset belongs to from the dropdown list. If the customer or site do not yet exist in the system, they can be created via the ‘quick add’ plus icon.
The 'Create Asset' screen is divided into two sections: Asset Details, and Site Asset Details.
Asset Details: These are the asset’s general details. They can also be defined as the Equipment Details, as these would not change if installed on a site or not. If the Equipment already exists in your system, details can be inherited by selecting that equipment piece from the Equipment Library.
Site Asset Details: This is the individual asset’s specific information such as where on the site the asset is located (The boiler room, the meeting room, floor 1 maintenance room etc.) or it’s unique identification number(s)
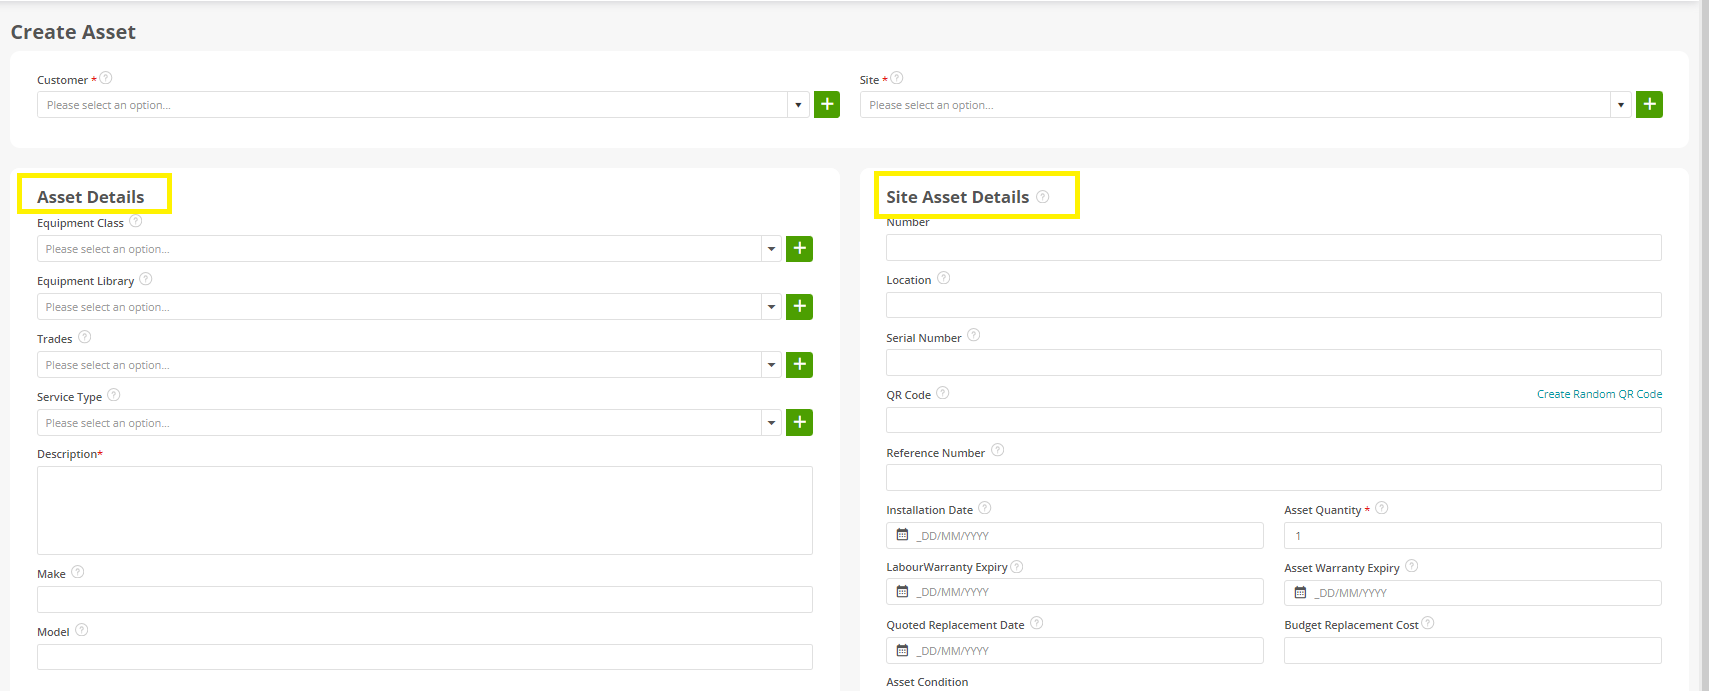
A definition/example of each Asset Details field can be found below:
Equipment Class: This field allows you to categorise your Assets. For example, if the asset is an Air Conditioner, you can add the category as 'Air Conditioners'.
Equipment Library: A database/library of commonly used or registered assets. These can be added to any site for the user to then add additional fields.
Trades: Trades link jobs, engineers and assets to specific types of work. By assigning trades you gain the ability to identify which engineers are well-suited for various types of jobs/asset work.
Service Type: Service types enable the incorporation of a list of tasks necessary to service the asset. Each has specific timescales assigned to a particular asset for planned maintenance.
Description: Allows you to Add the Name of the Asset, for instance "Standard outdoor wall mounted air conditioning 7KW". You can also add further defining details for it.
Make: Allows you to add the name of the 'Manufacturer'.
Model: Record the 'Model' of the asset such as 'AOYG24KMTA'.
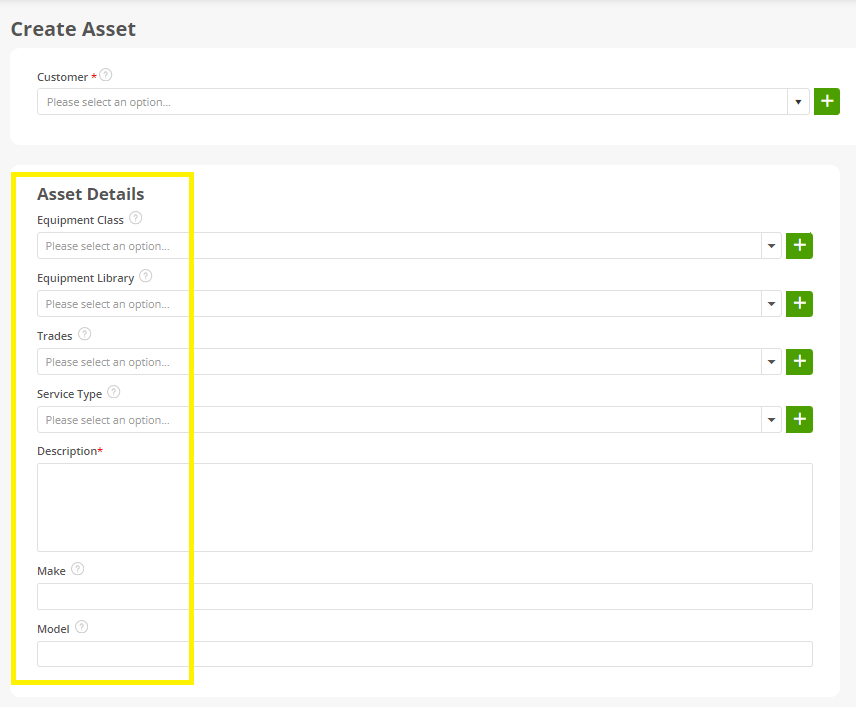
A definition/example of each Site Asset Details field can be found below:
Number: An identification number such as the unique number assigned to the asset by the Site manager.
Location: Record the area that the asset is situated on the Site.
Serial Number: This can contain numbers, letters and other typographical symbols. It can also act as a secondary identification number field.
QR Code: You can enter the existing QR Code assigned to the asset here or create a new QR code. QR codes are used to allow the engineer to easily locate the asset by scanning the sticker via the Mobile Application.
Reference Number: Enter a custom reference number here. It can also act as a further identification number field.
You can add the 'Installation Date of the Asset (the day it was installed on Site) for your records and to help indicate service and maintenance work dates.
Asset Quantity: The number of pieces of equipment fitted. Normally, only 1 is recorded when a serial number is entered, but this can be increased if the asset consists of multiple compartments.
Labour Warranty Expiry: The warranty against any labour for the Asset. If you have a written guarantee on any work to being carried out, enter it’s expiry date here.
Asset Warranty Expiry: A new asset normally holds a manufacturer’s written guarantee. This warranty is specifically against the Asset itself, provided by the manufacturer and promises to repair or replace an asset within a specific period.
Quoted Replacement Date: This is the quoted end of life date for the Asset. The set time and date that the Asset should be replaced.
Budget Replacement Cost: This is the expected cost that the Customer would incur to replace this Asset.
Asset Condition: The state of the asset. This pertains to the health of the asset and simultaneously gives visibility on how soon the asset might need a next service or replacing.
Once the details are added, select save and the Asset will be added into the Joblogic system.
Further Support
For further information or assistance with the above, contact our Support Team on 0800 326 5561 or email support@joblogic.com. Alternatively, our Customer Success Management team can be reached by emailing customersuccess@joblogic.com
Publishing Details
This document was written and produced by Joblogic’s Technical Writing team and was last updated on the date specified above. Be aware that the information provided may be subject to change following further updates on the matter becoming available or new releases within the system. Additionally, details within the guide may vary depending on your Joblogic account’s user permissions and settings or the electronic device being used.