Introduction
This user guide will detail how to log an asset via the mobile application (app).
Permissions
There is an account setting which allows engineers to add new assets for sites via the app. To get this permission enabled for your Joblogic account, contact our support team via chat (within the back-office system), Email (Support@joblogic.com) or call (0800 326 5561).
Note: Having this change applied will implement it for all mobile users under the Joblogic account. We can not turn it off for one mobile user and on for another.
Logging an Asset via the app
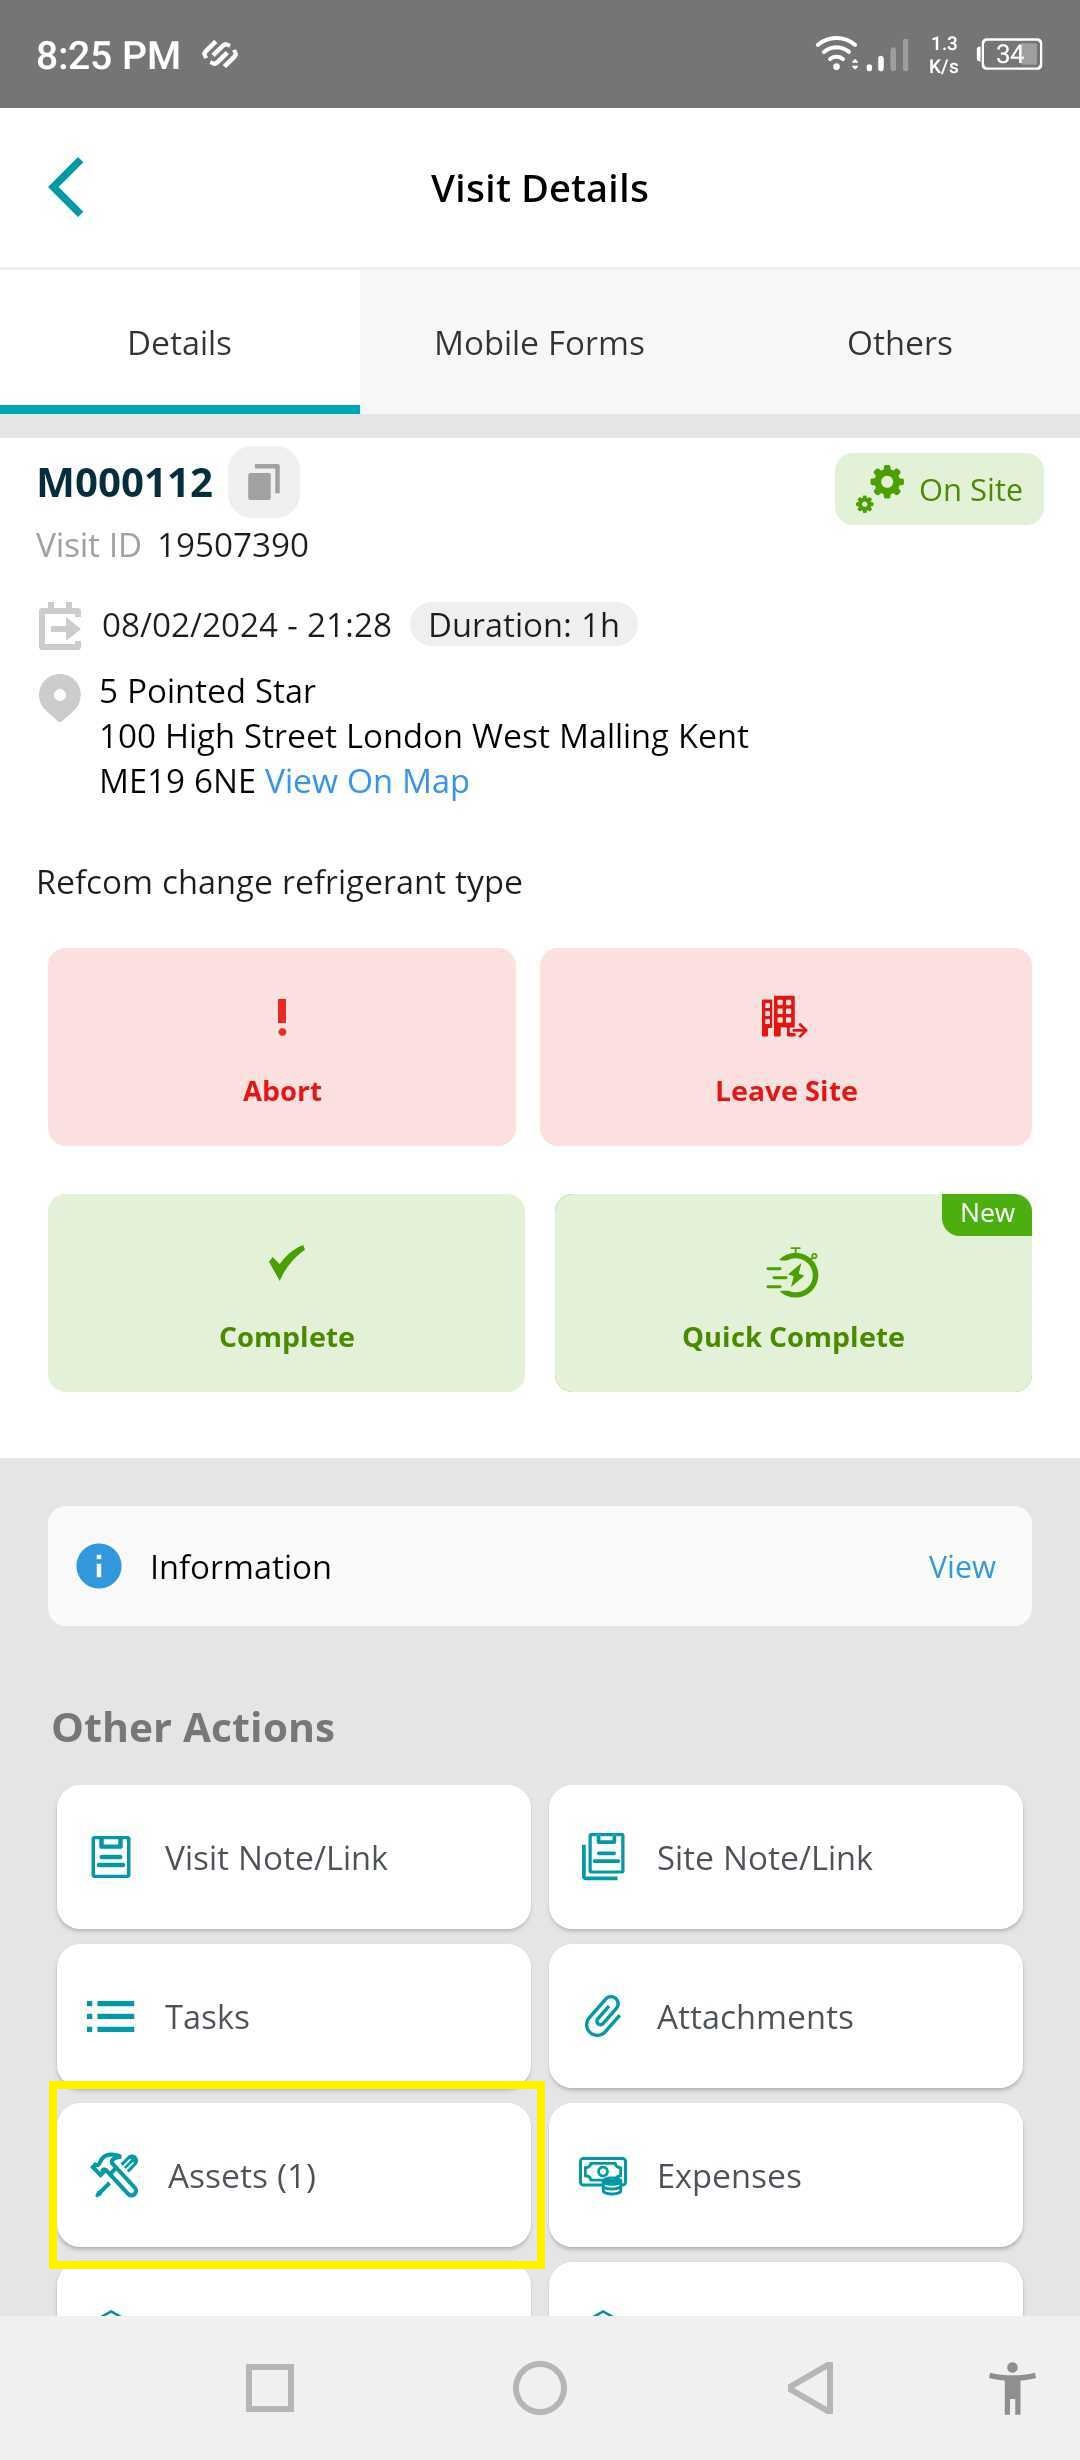
Once marked as onsite for the visit, select the ‘Assets’ option under the ‘Visit Details’ area.
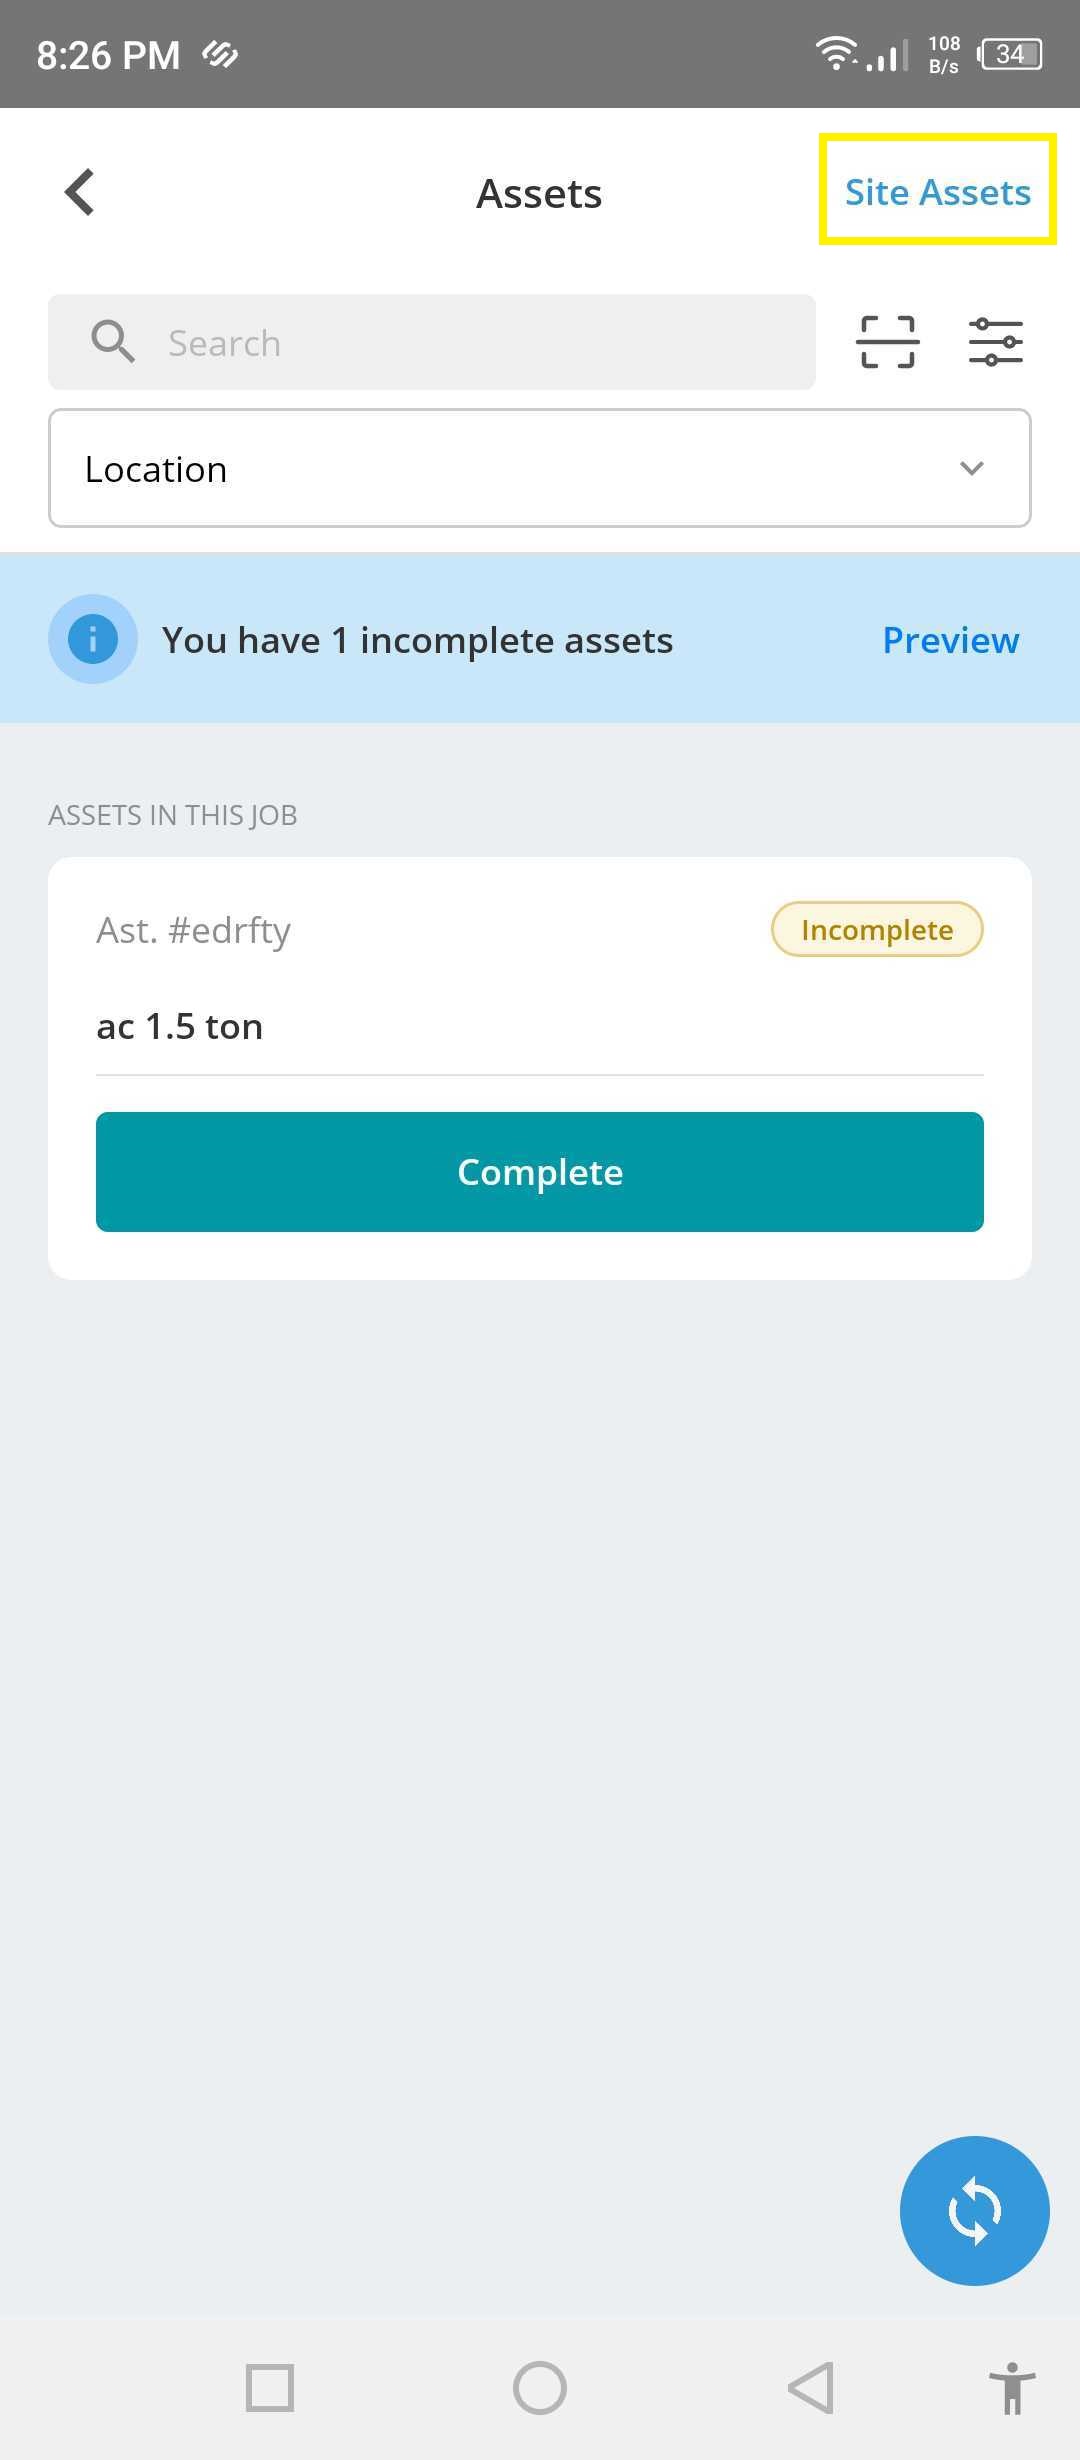
Select ‘Site assets’ in the top right corner.
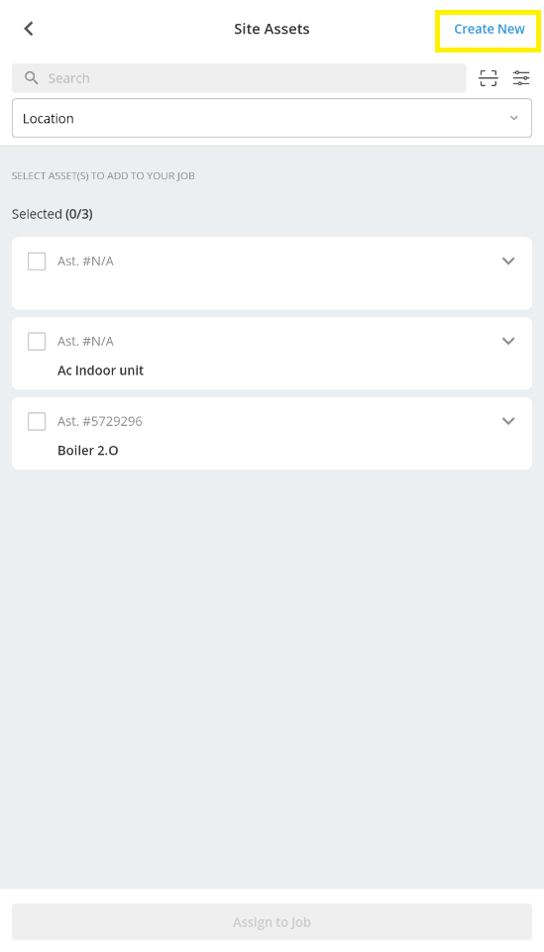
Select ‘Create New’.
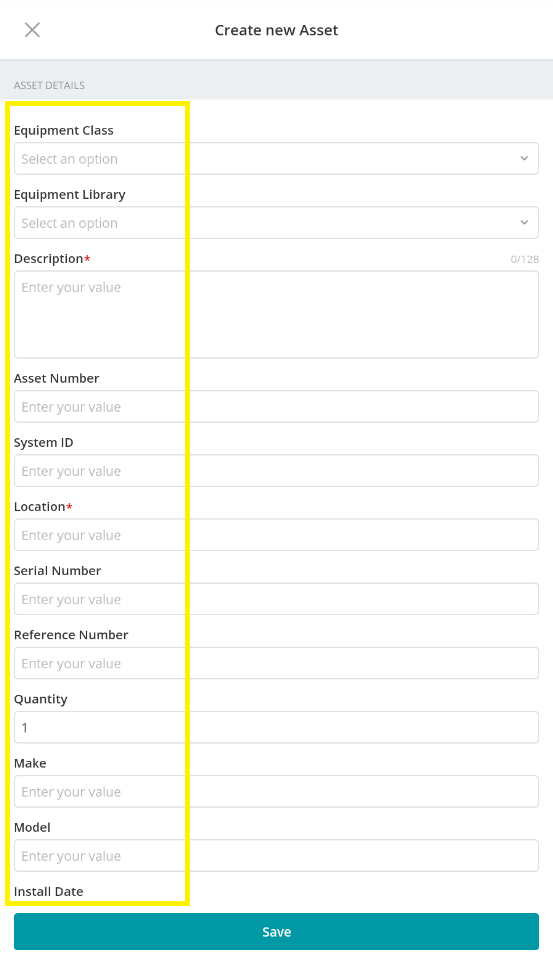
Fill out the asset’s details.
Equipment Class: This field allows you to categorise your Assets. For example, if the asset is an Air Conditioner, you can add the category as 'Air Conditioners'.
Equipment Library: A database/library of commonly used or registered assets. These can be added to any site for the user to then add additional fields.
Description: Allows you to Add the Name of the Asset, for instance "Standard outdoor wall mounted air conditioning 7KW". You can also add further defining details for it.
Number: An identification number such as the unique number assigned to the asset by the Site manager.
Location: Record the area that the asset is situated on the Site.
Serial Number: This can contain numbers, letters and other typographical symbols. It can also act as a secondary identification number field.
Reference Number: Enter a custom reference number here. It can also act as a further identification number field.
Asset Quantity: The number of pieces of equipment fitted. Normally, only 1 is recorded when a serial number is entered, but this can be increased if the asset consists of multiple compartments.
Make: Allows you to add the name of the 'Manufacturer'.
Model: Record the 'Model' of the asset such as 'AOYG24KMTA'.
Install Date: You can add the 'Installation Date of the Asset (the day it was installed on Site) for your records and to help indicate service and maintenance work dates.
Asset Warranty Expiry: A new asset normally holds a manufacturer’s written guarantee. This warranty is specifically against the Asset itself, provided by the manufacturer and promises to repair or replace an asset within a specific period.
Notes: Used for any additional details or points to add about the asset.
QR Code: You can enter the existing QR Code assigned to the asset here using the scan tool on your mobile device or create a new QR code. QR codes are used to allow the engineer to easily locate the asset by scanning the sticker via the Mobile Application.
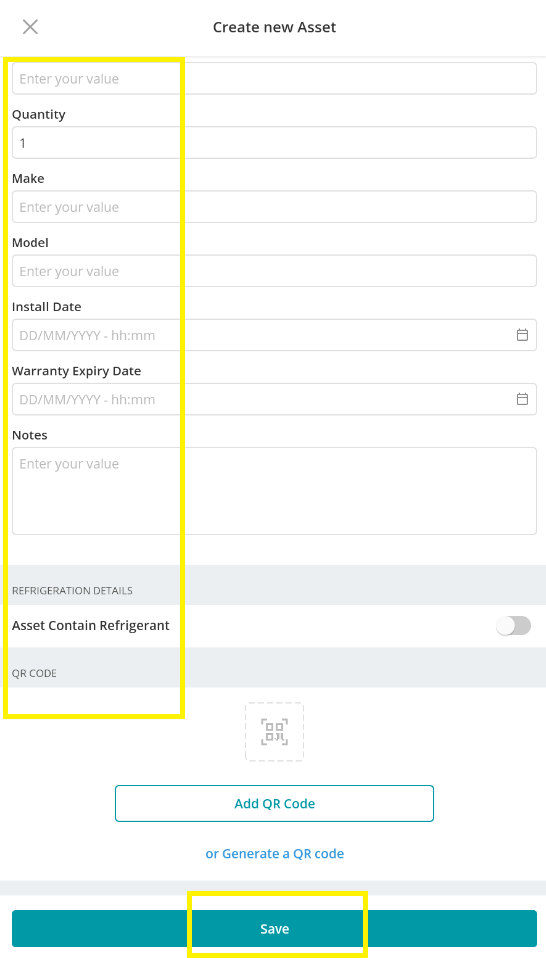
Press ‘Save’ and the asset will log under the Site Assets area.
Further Support
For further information or assistance with the above, contact our Support Team on 0800 326 5561 or email support@joblogic.com. Alternatively, our Customer Success Management team can be reached by emailing customersuccess@joblogic.com
Publishing Details
This document was written and produced by Joblogic’s Technical Writing team and was last updated on the date specified above. Be aware that the information provided may be subject to change following further updates on the matter becoming available or new releases within the system. Additionally, details within the guide may vary depending on your Joblogic account’s user permissions and settings or the electronic device being used.