Introduction
The Lone Worker Advanced app is designed to enhance the safety of engineers working alone or in high-risk environments.
This user guide will help you navigate the app’s features, including real-time monitoring, emergency alerts, and customisable notifications, ensuring you can use it effectively to safeguard your team.
Adding your engineers
To get started, you'll need to add your engineers to the monitoring page.
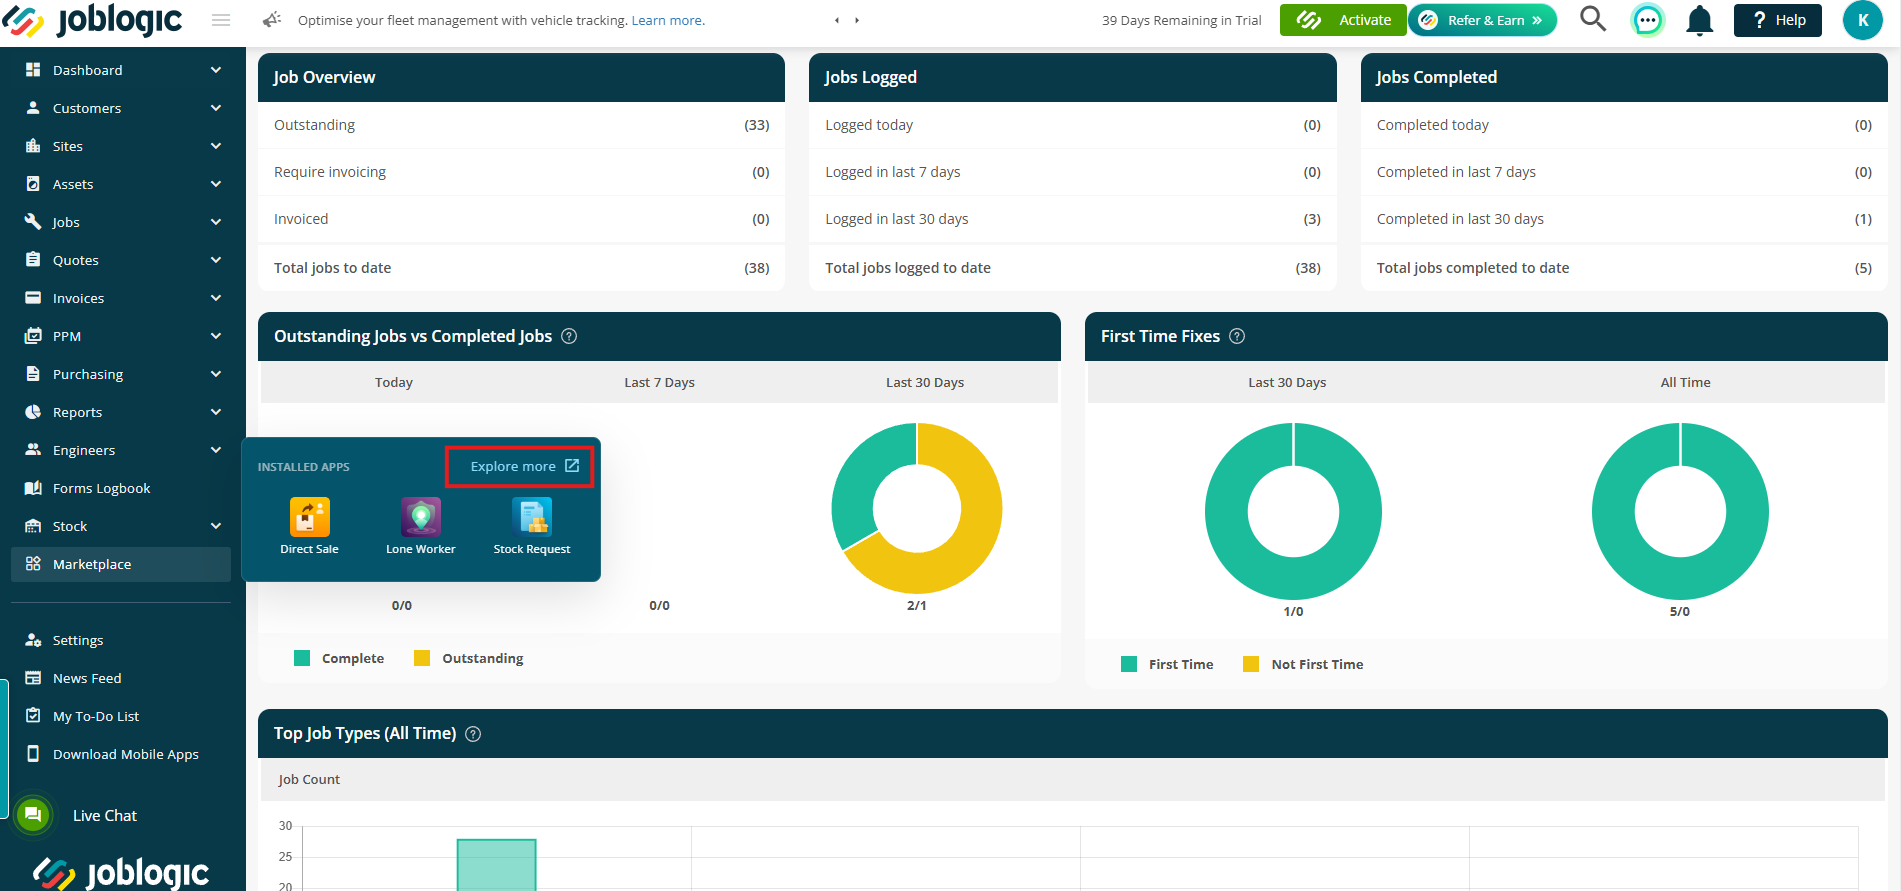
To do this navigate to Marketplace and click Explore More
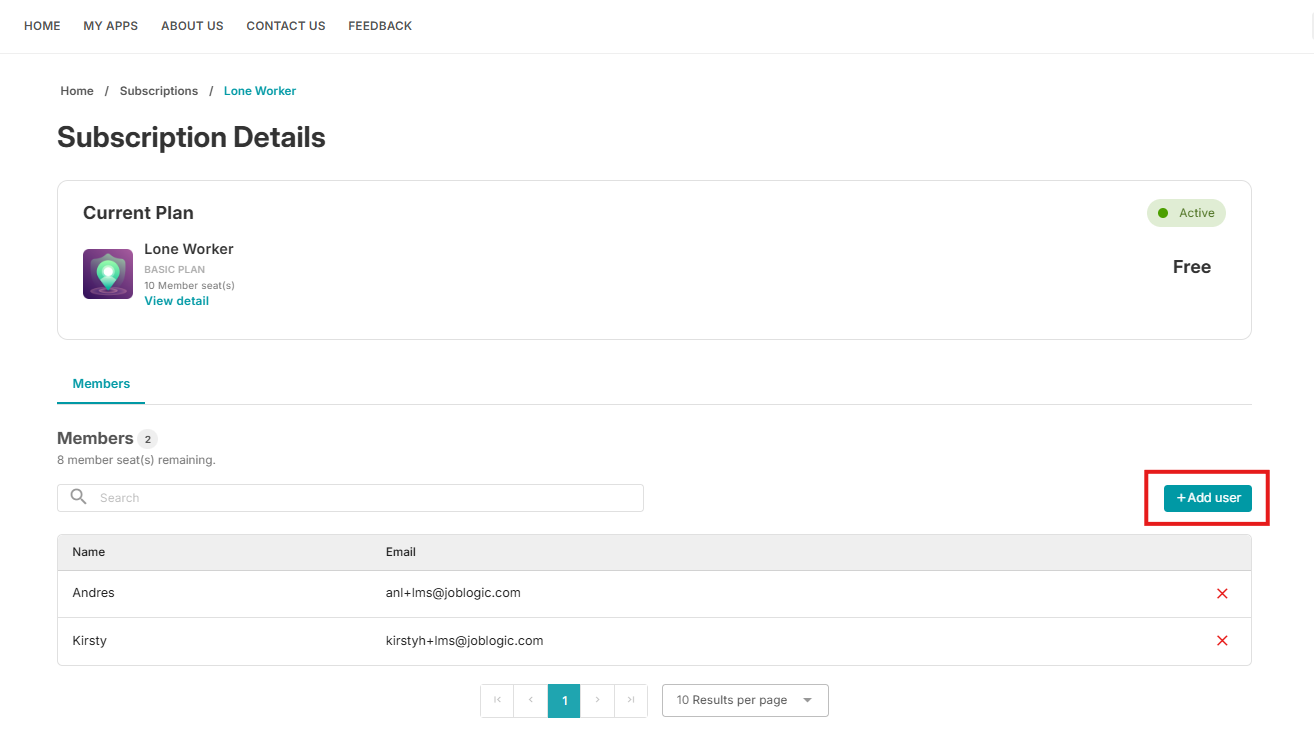
From within your Lone Worker App screen on the Marketplace, click Manage your subscription
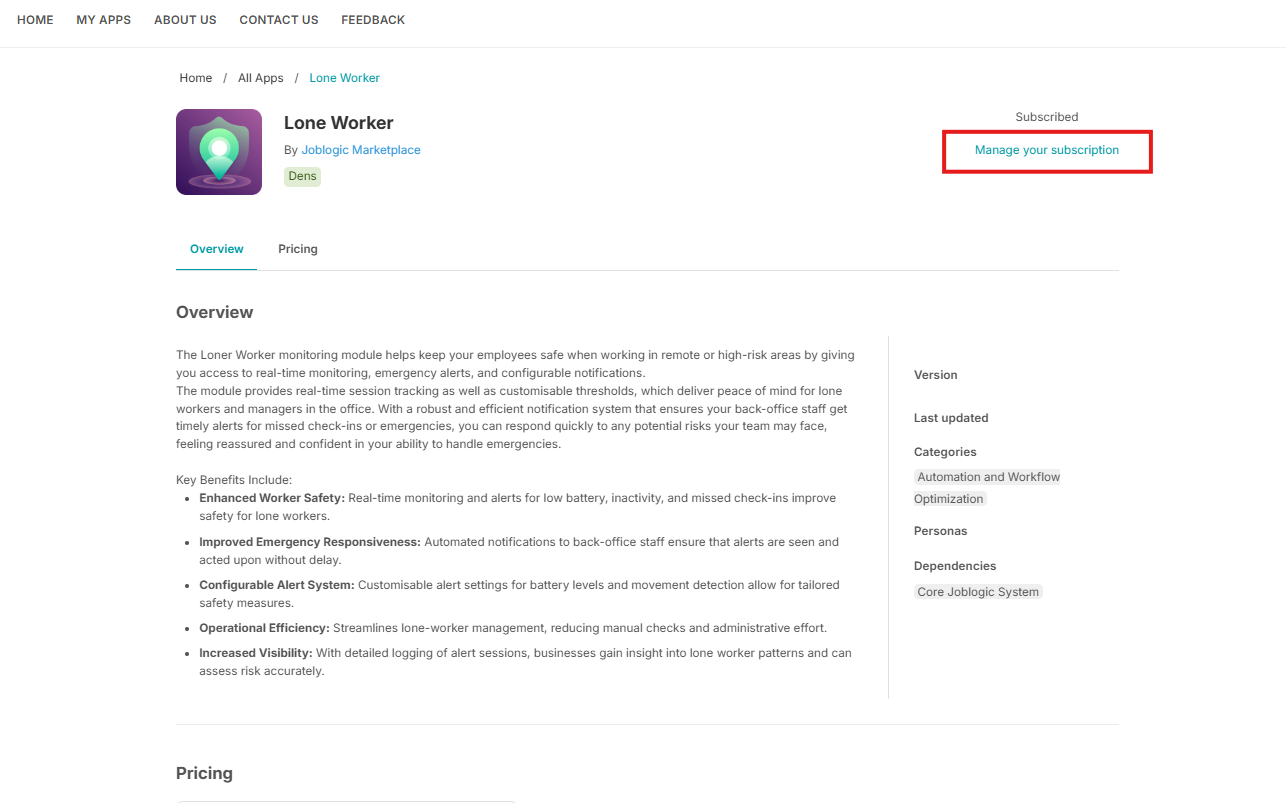
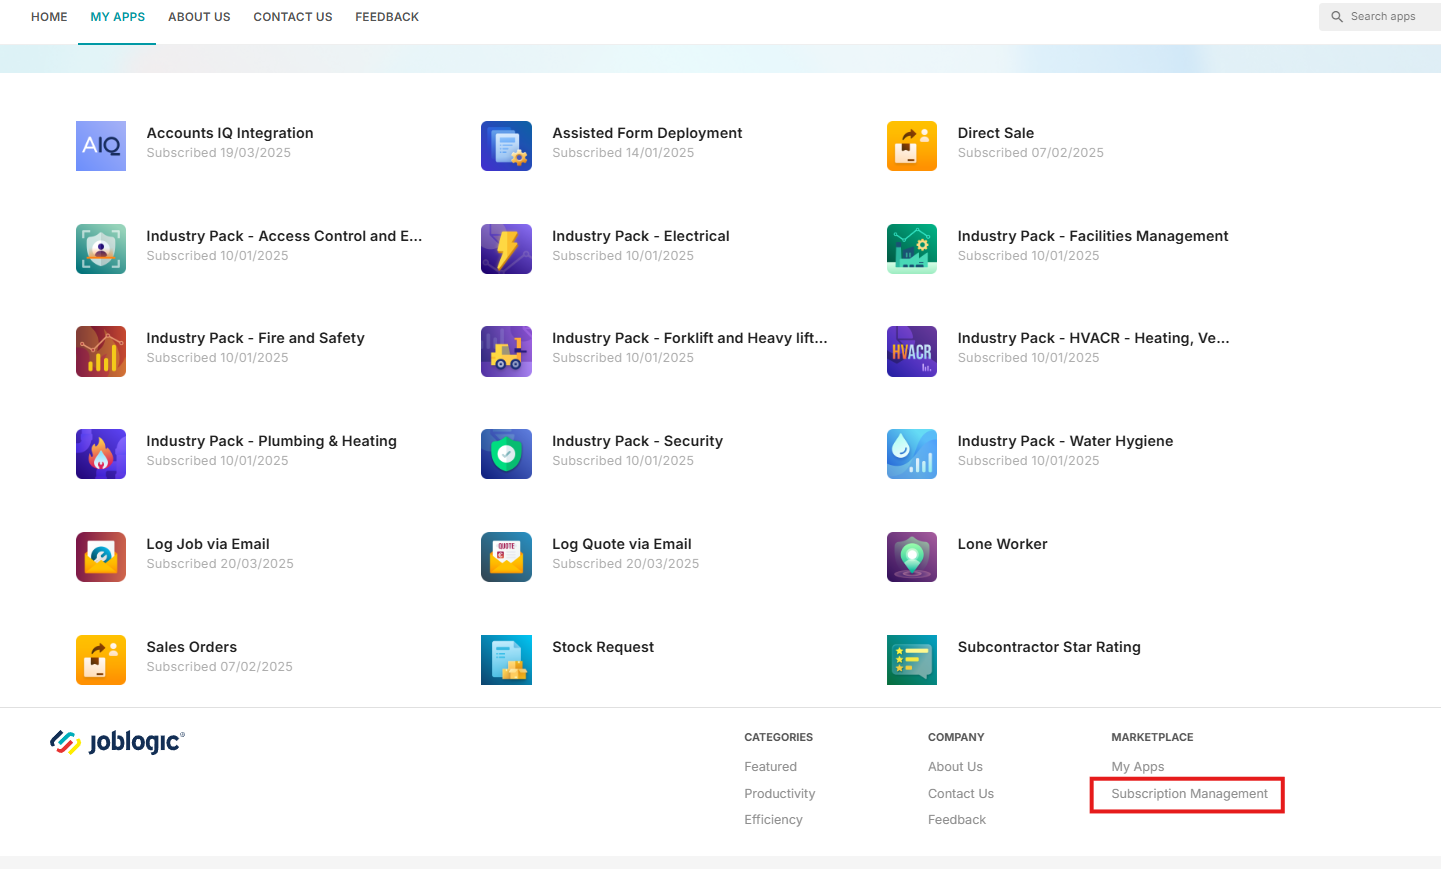
Alternatively, scroll to the bottom of the page and select Subscription Management.
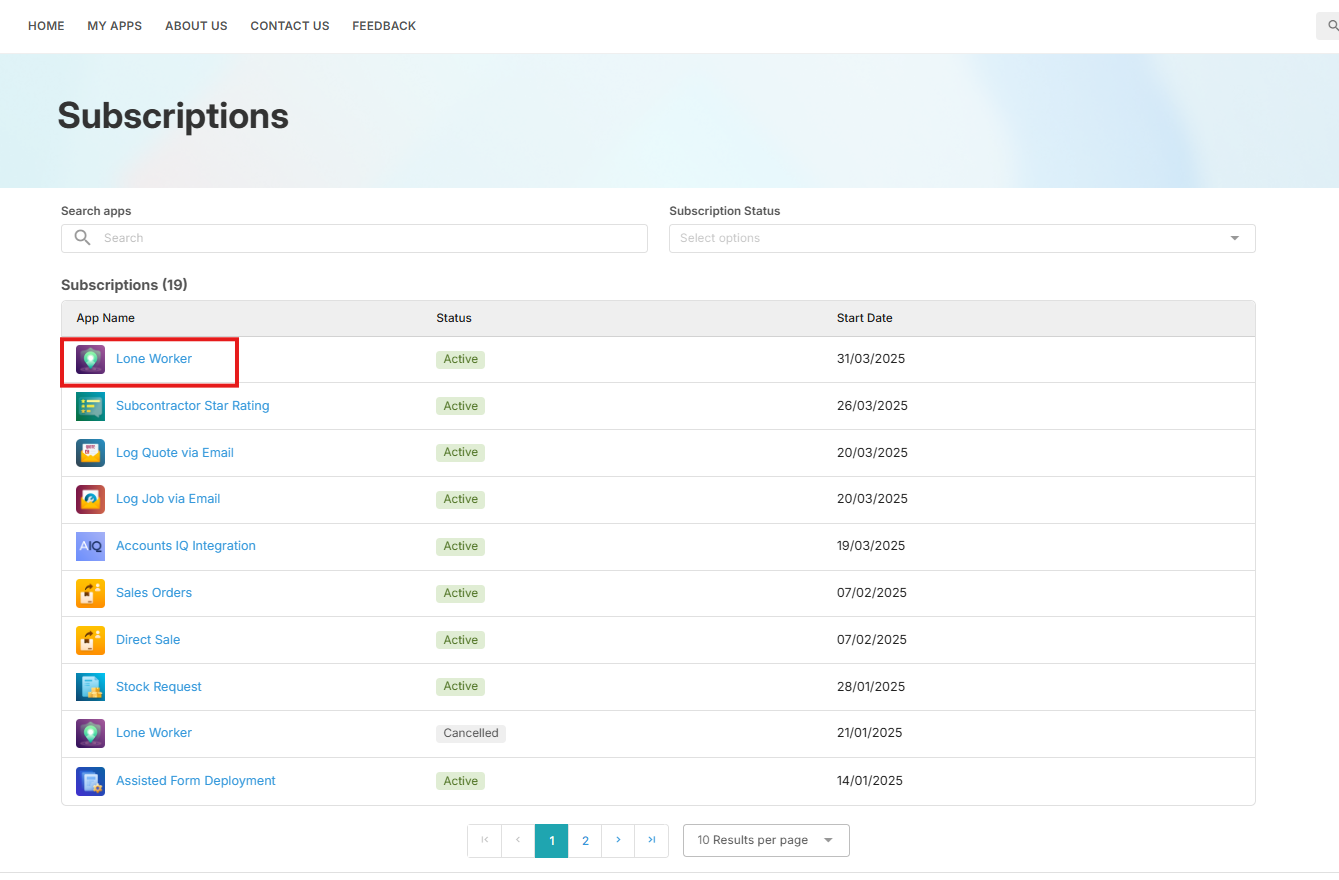
Click the Lone Worker app
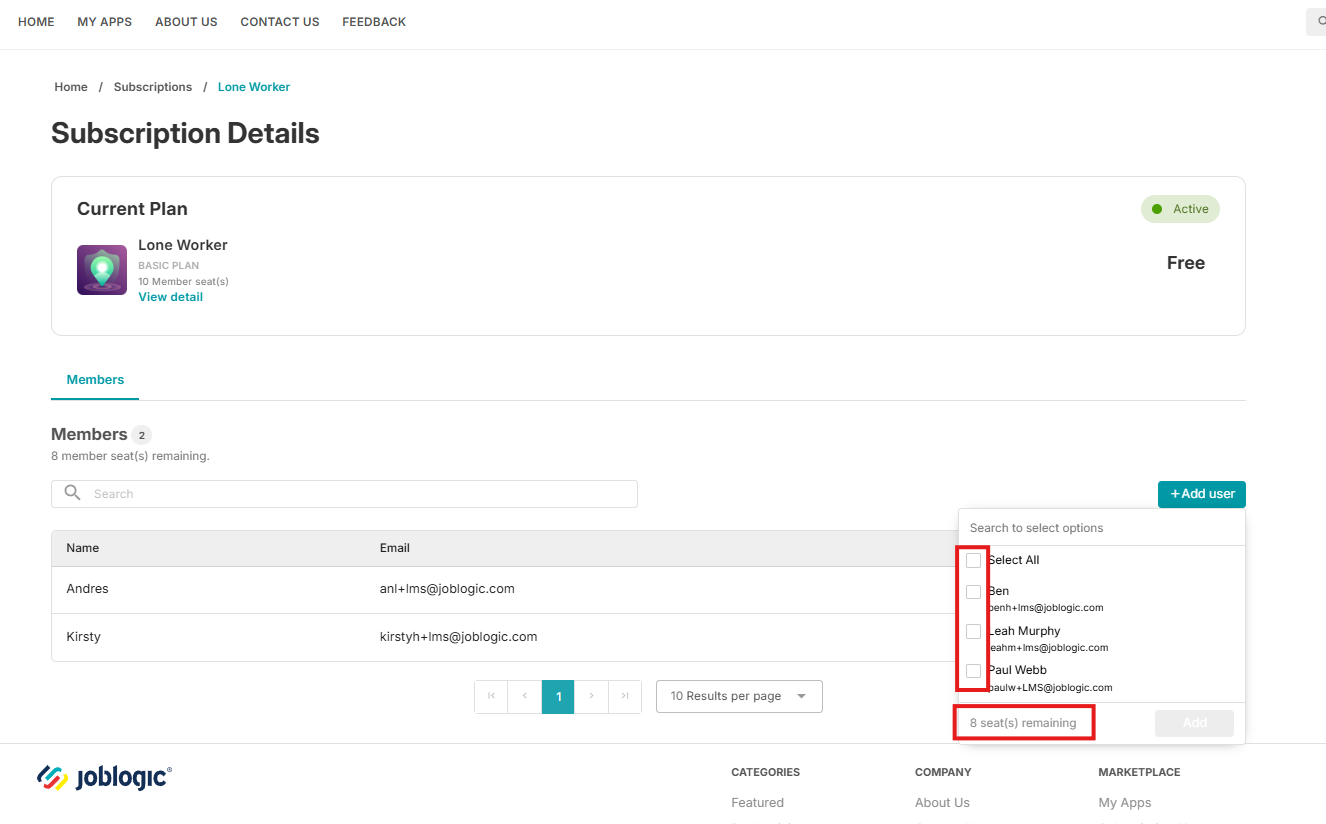
Click Add User to begin assigning engineers
Tick the users you want to enable for Lone Worker monitoring. The number of users you can select will depend on the available seats in your subscription.
Once added, your engineers will be able to access the app and start Lone Worker sessions as needed
How to access the Lone Worker module
Click the Marketplace option on the main menu and then click Lone Worker

Back office set up / monitoring
You’ll start on the Safe Monitor page, where managing your team’s sessions is simple and efficient. From configuring default settings to customising individual sessions and alerts, everything you need to keep your team safe is right here.
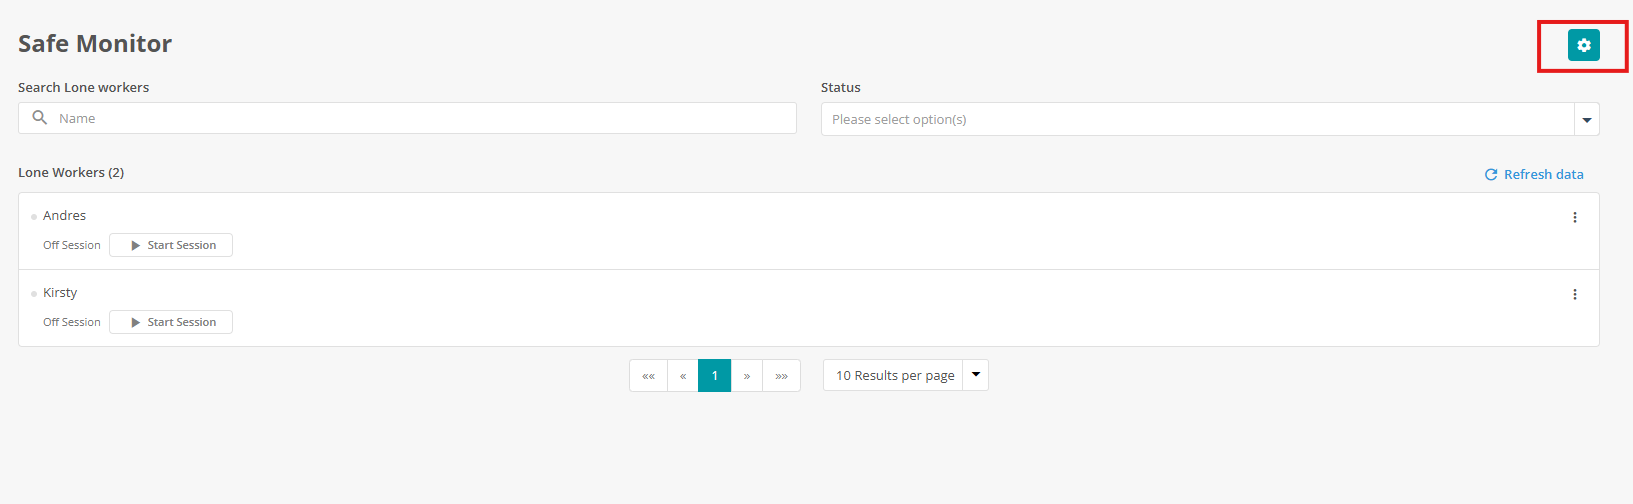
Safe Monitor Page
The first page will provide you with a list of the engineers you have set up.
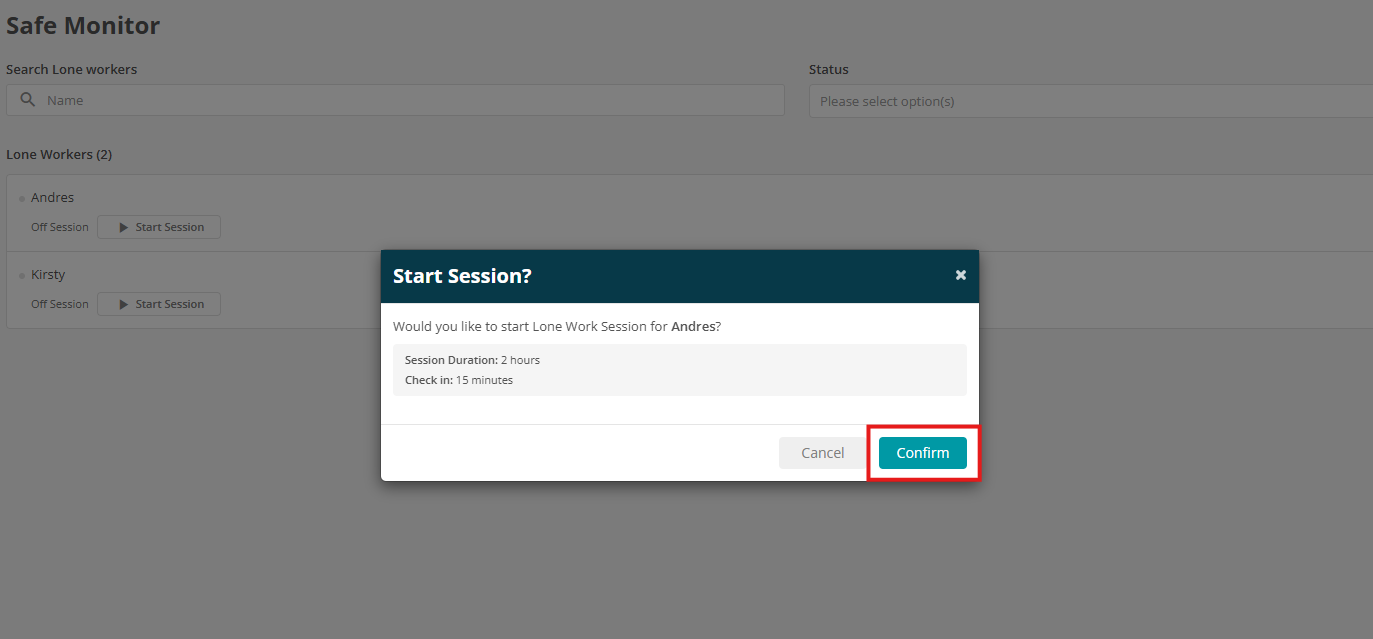
Here, you can start a session for an individual engineer

The Session Duration and Check in will be based on the configuration, which is discussed next. Click Confirm to start the session
You can configure their Lone Worker settings by clicking the three dots next to their name
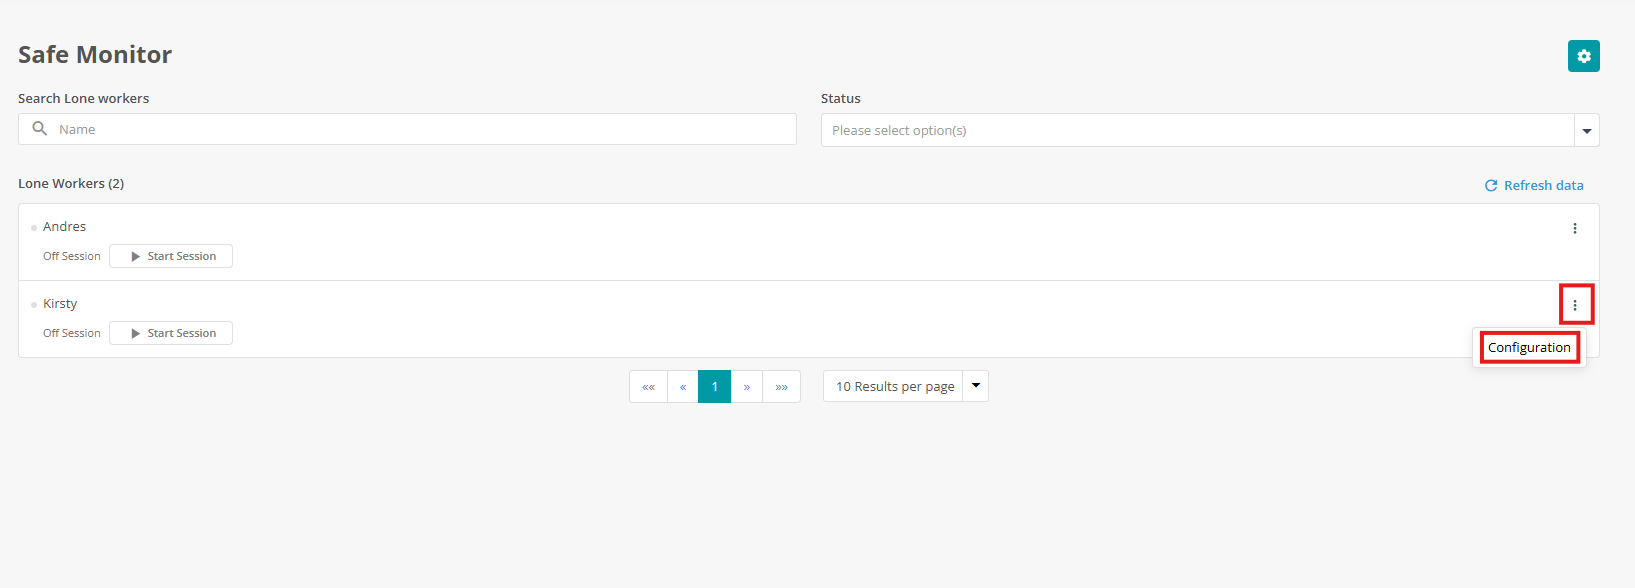
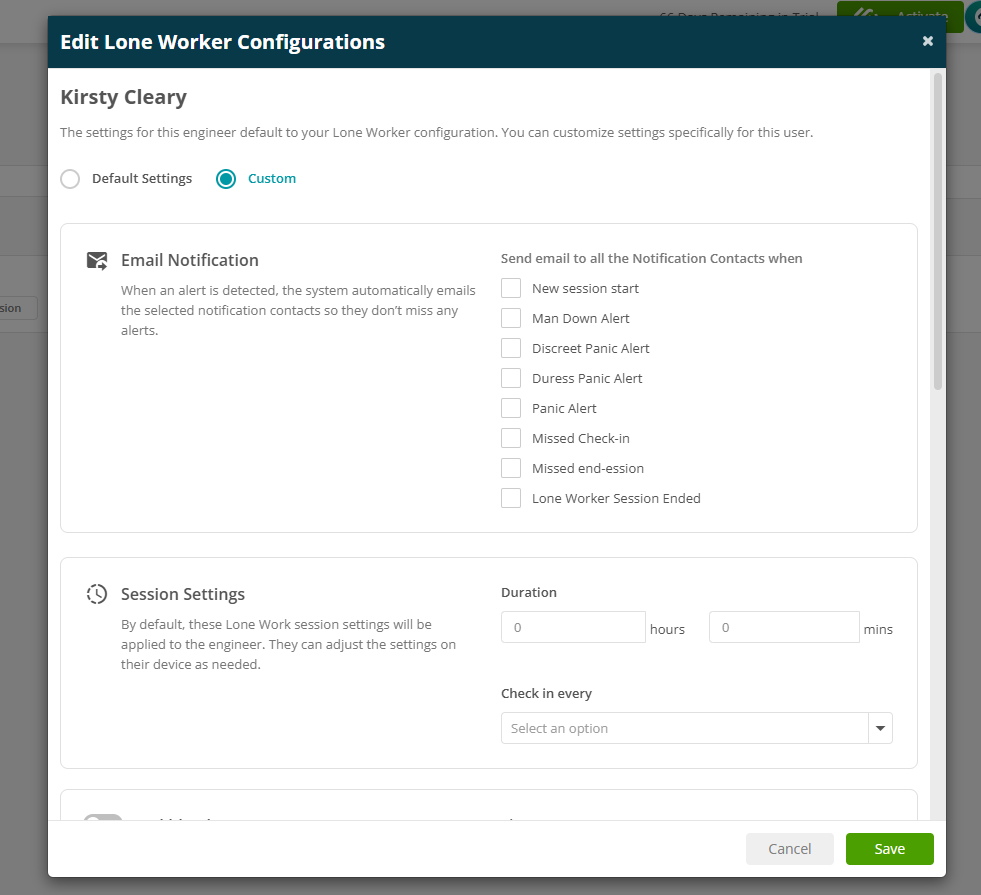
Here you can decide if the engineer will use the Default Settings or Custom settings
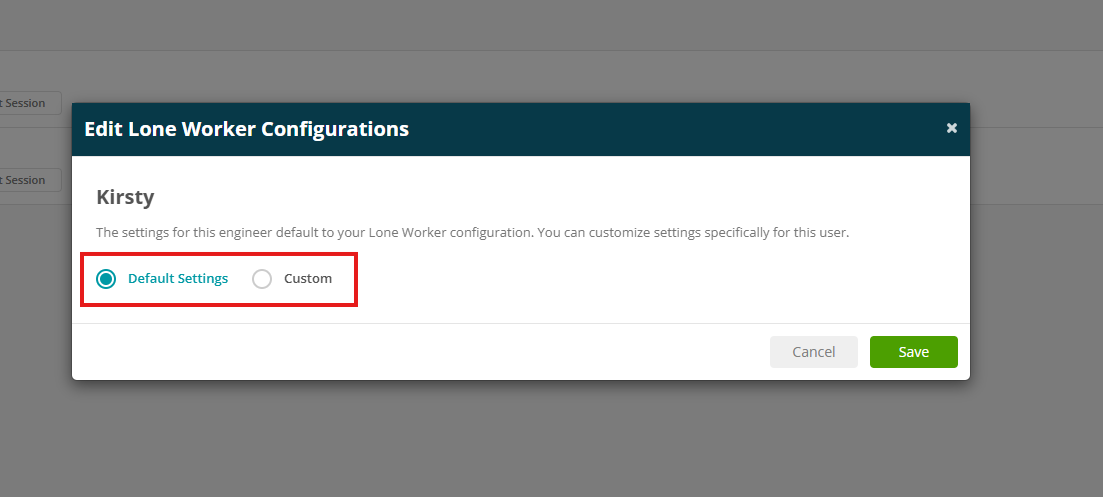
Custom settings will allow you to set individual Session Settings and Alerts
Configuration
To set up your default configuration settings, click the Settings icon in the top right
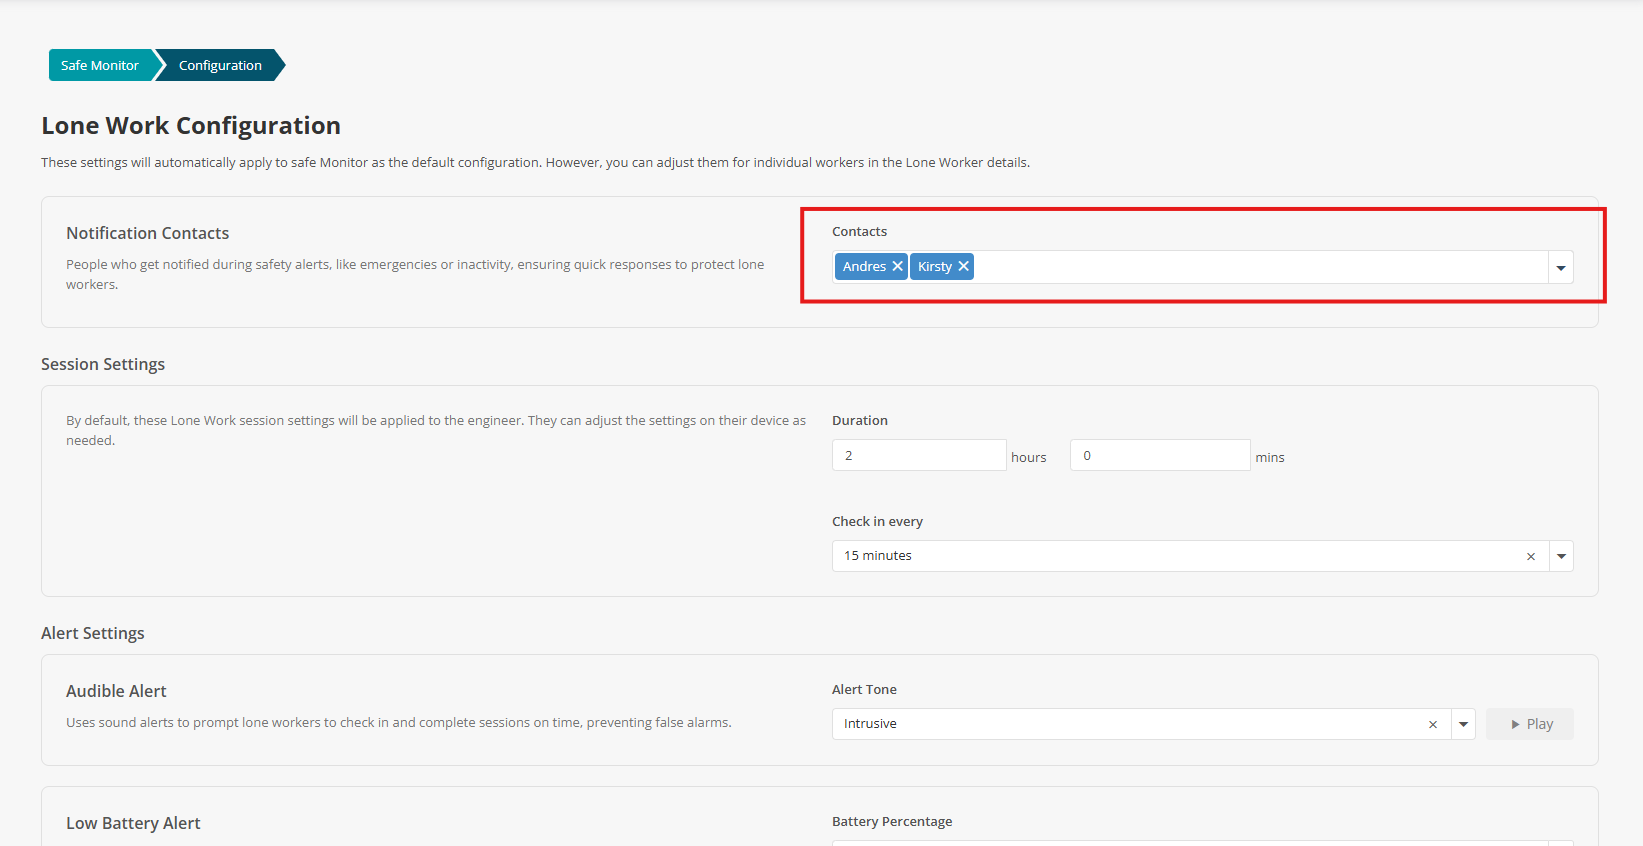
Set up Notification Contacts to decide who gets notified during safety alerts, such as emergencies or inactivity.
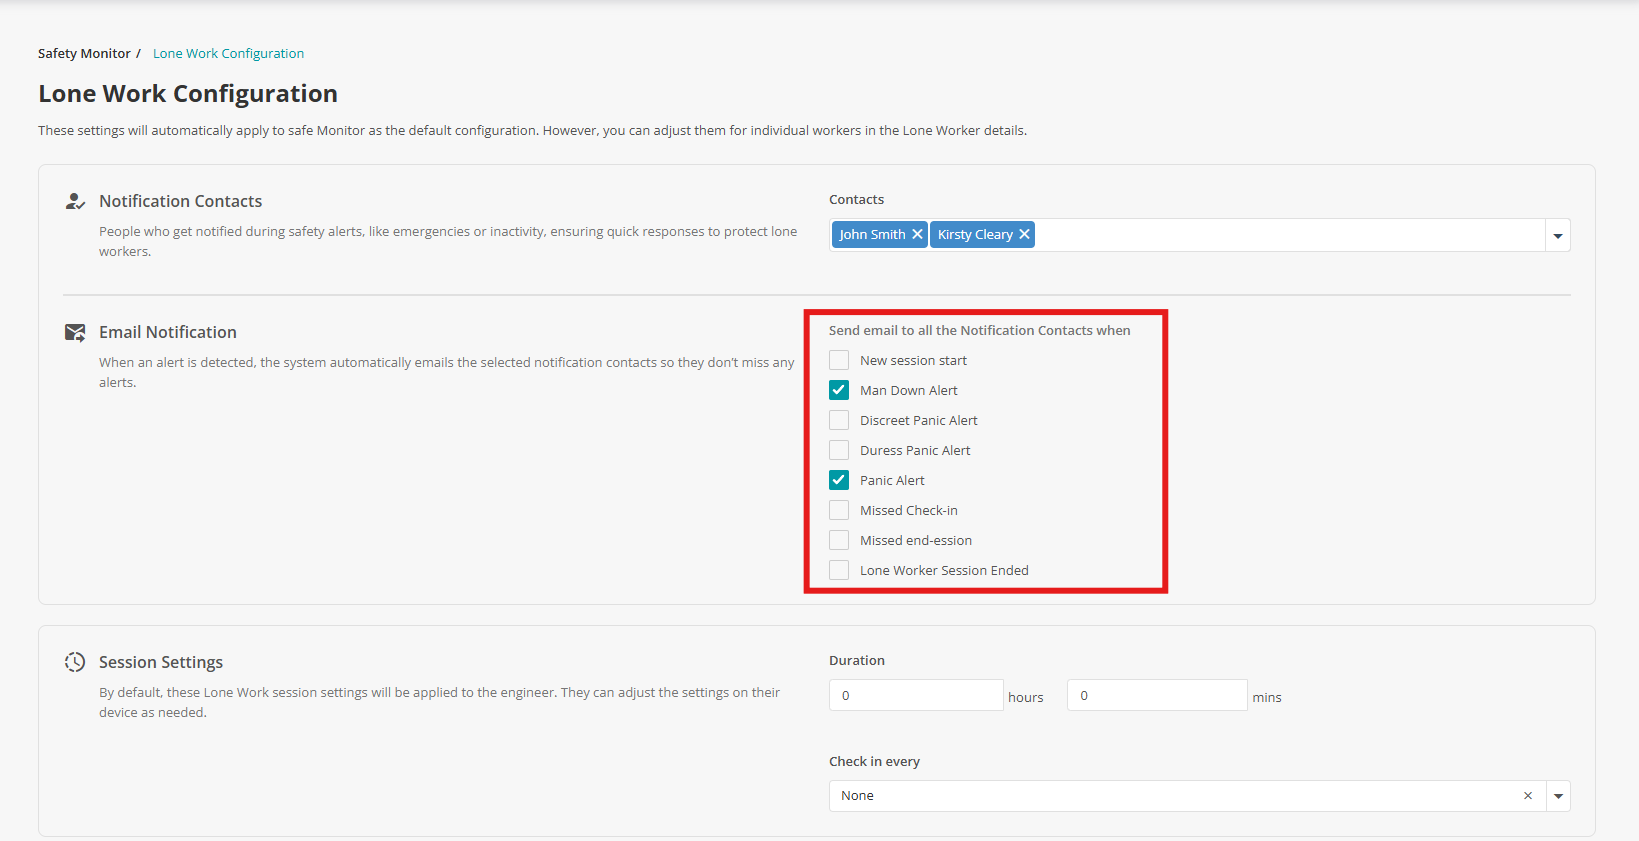
You can also set up email notifications by ticking the events you’d like to be notified about.
Emails will be sent to the contact(s) selected above.
This improves visibility and ensures quicker response times in the event of an incident.
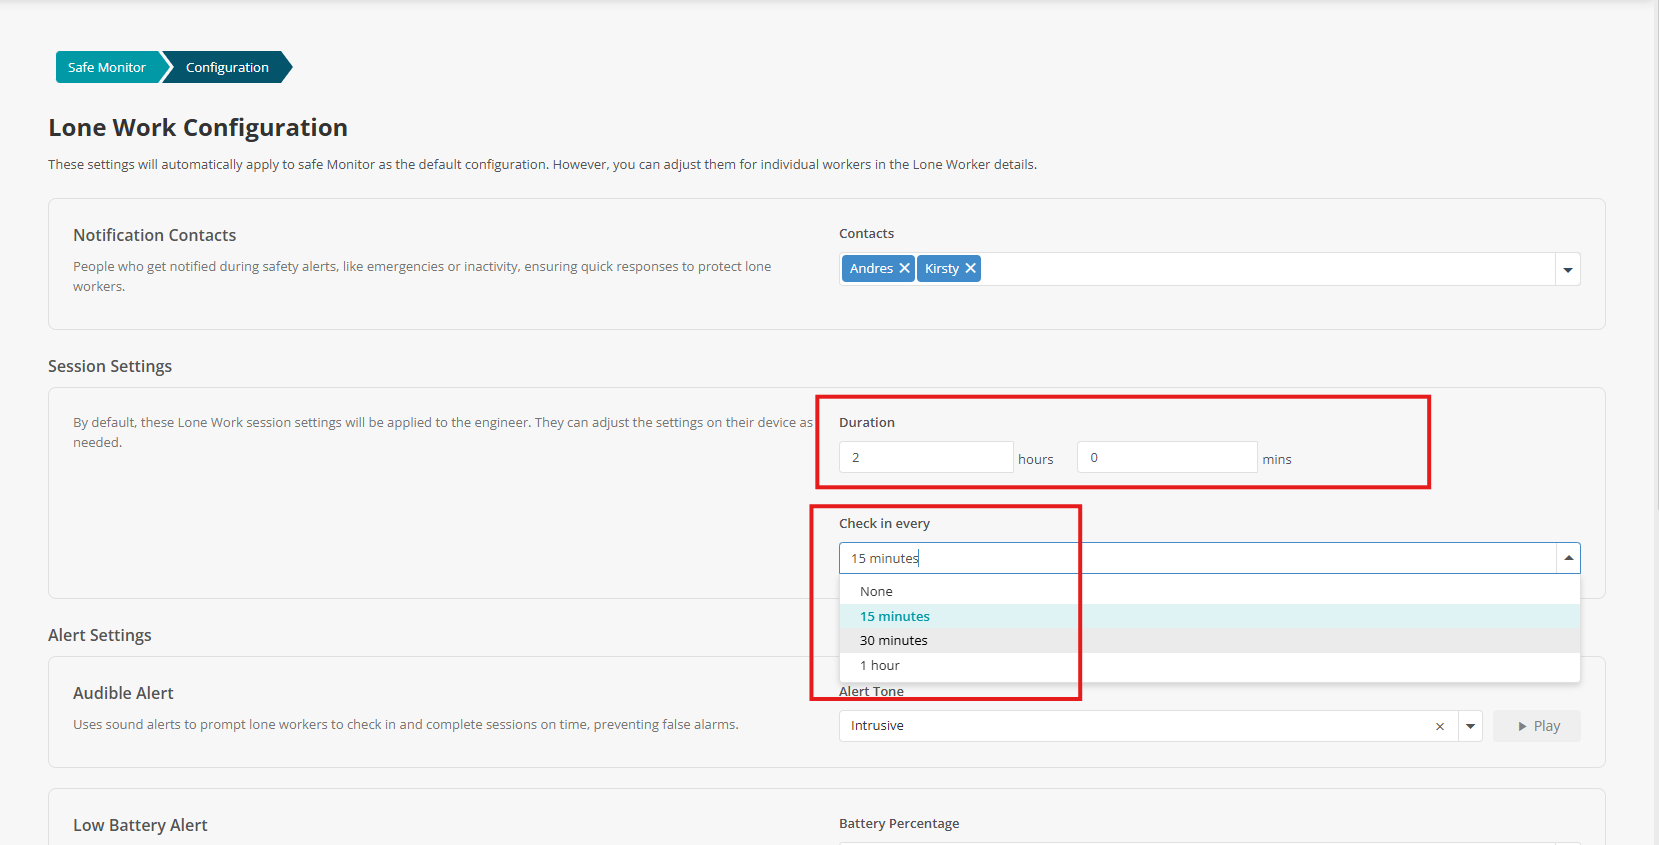
Select your preferred Duration and Check-In intervals.
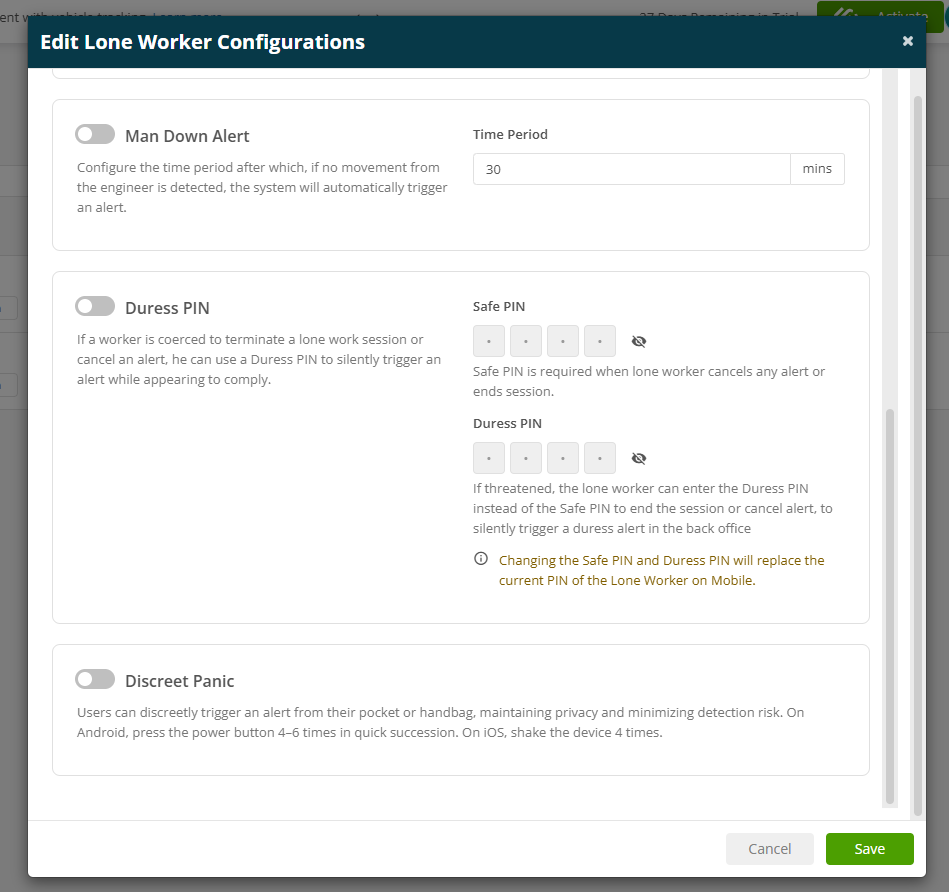
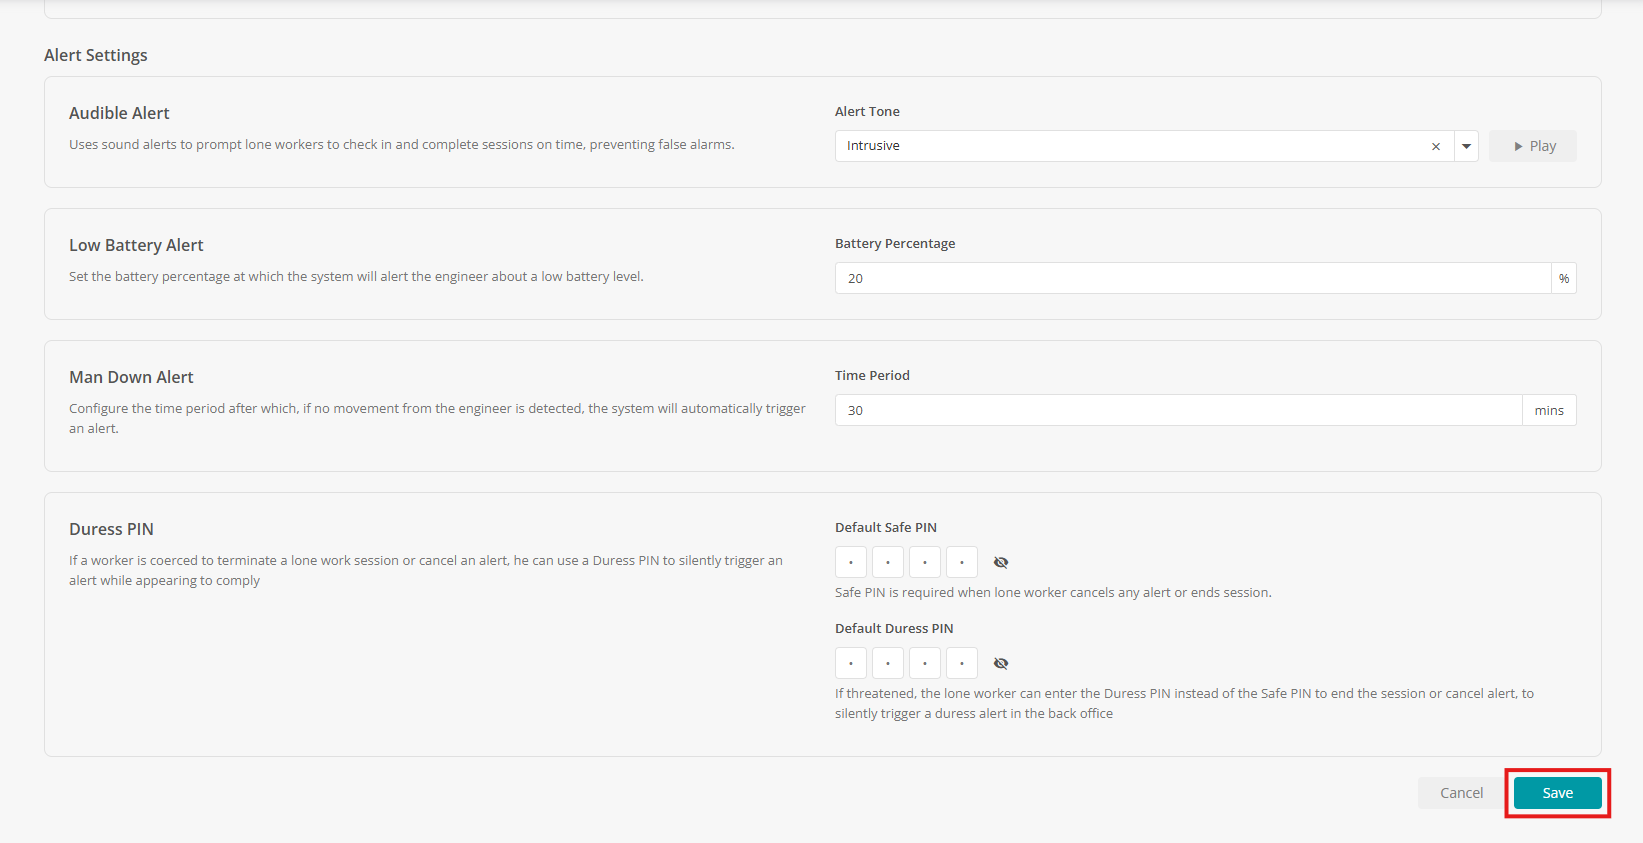
And finally, choose your Alert Settings.
Here you can set Audible Alerts, Low Battery Alerts, Man Down Alerts and a Duress Pin.
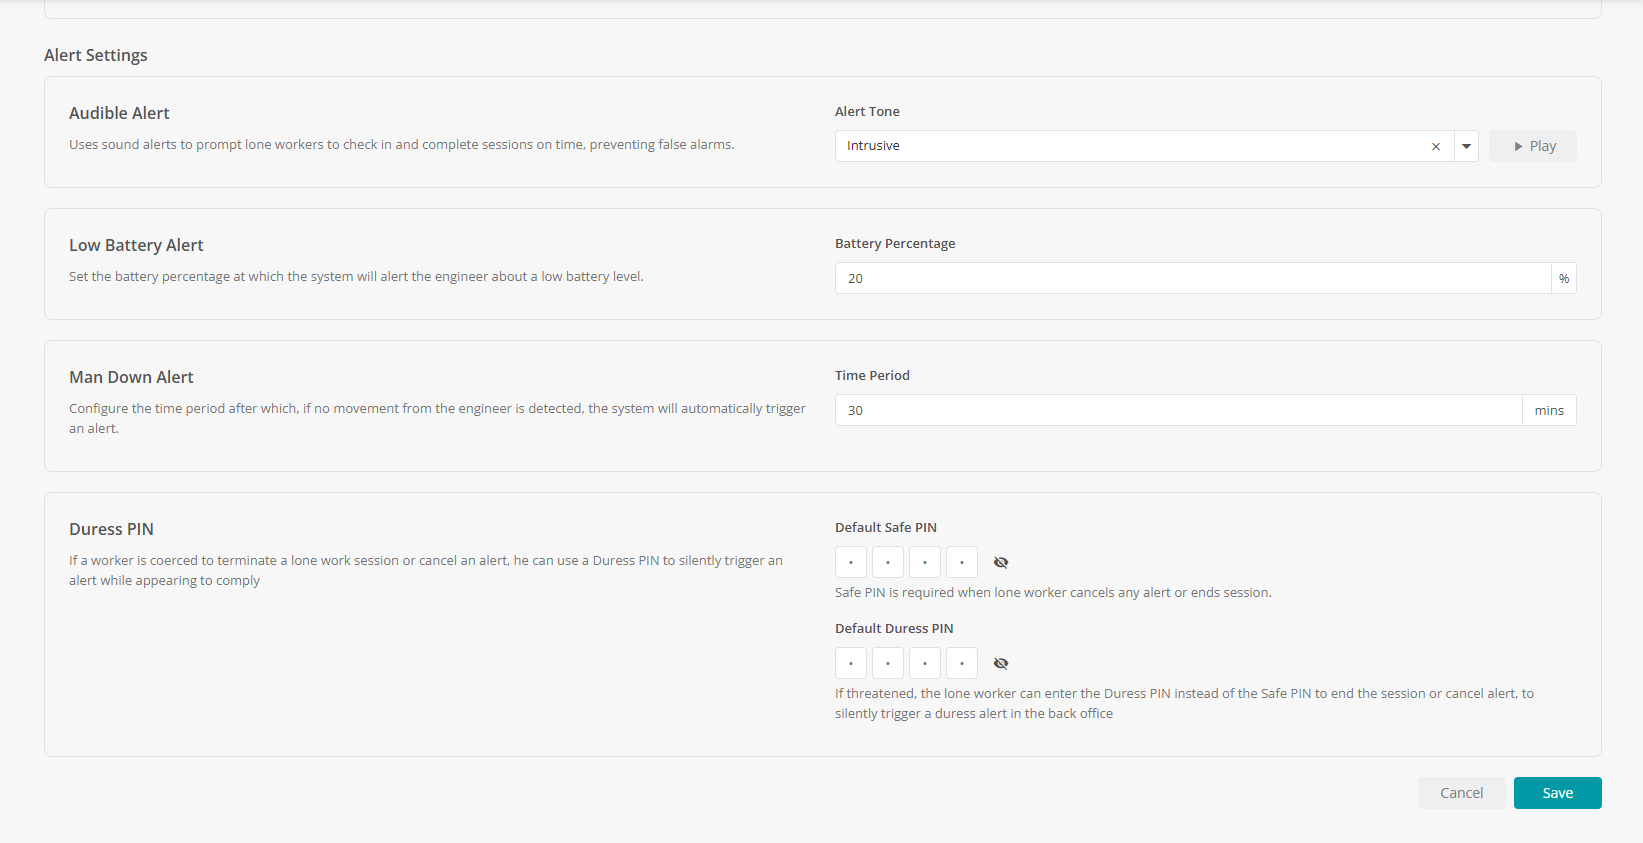
Click Save to confirm your default Configuration settings
Mobile App
The Lone Worker feature in the Joblogic Mobile App allows engineers to stay safe while working alone by enabling session timers, alerts, and emergency panic functions.
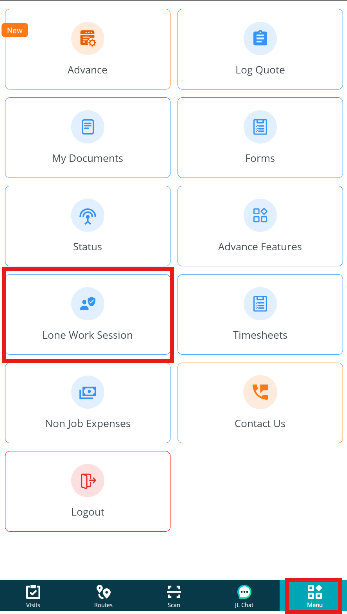
To view or start a Lone Worker session on the mobile app, navigate to the Menu, and select Lone Work Session
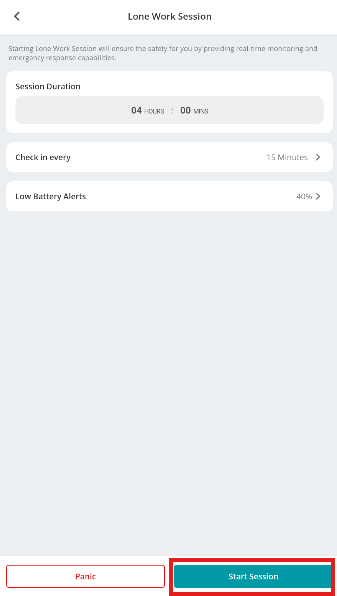
From this screen, you can configure the Session Duration, Check-In Intervals, and Low Battery Alerts to suit your needs.
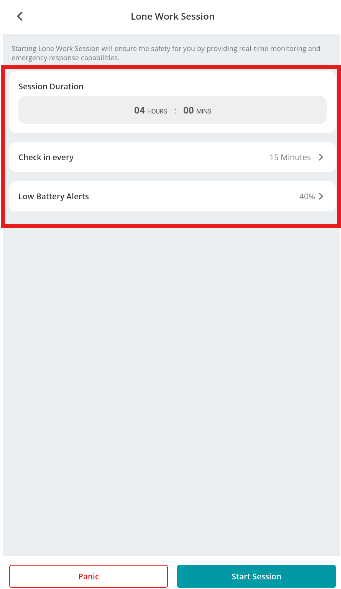
Once everything is set, click Start Session to begin.
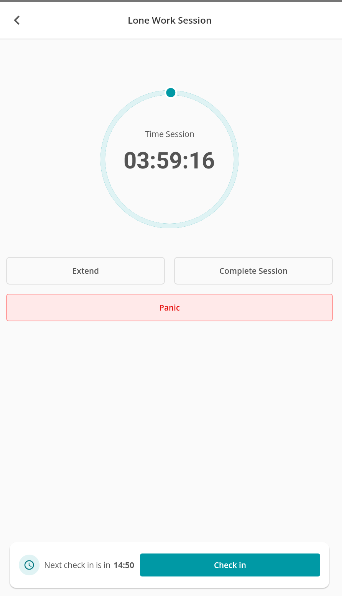
Your Lone Work session is now active. The session timer will be displayed here, along with options to Extend, Complete, or activate Panic if needed.
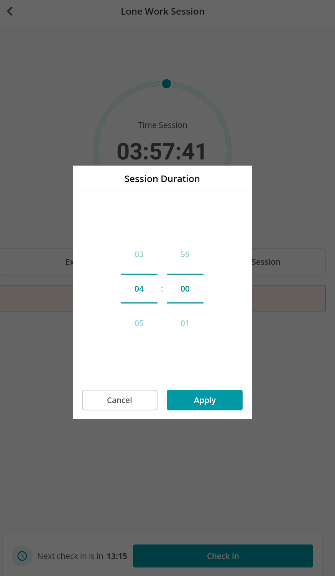
To extend the session time, click the Extend button, select your new duration, and then click Apply to confirm.
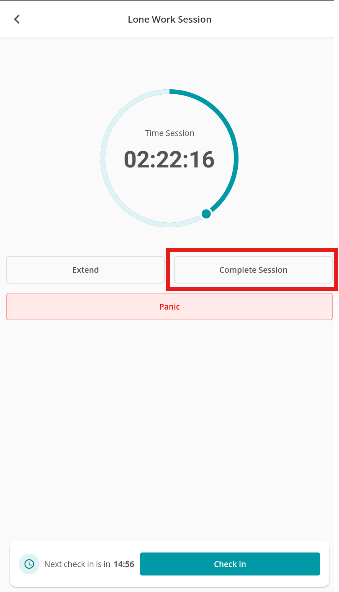
You can complete the session at any time by simply clicking Complete Session
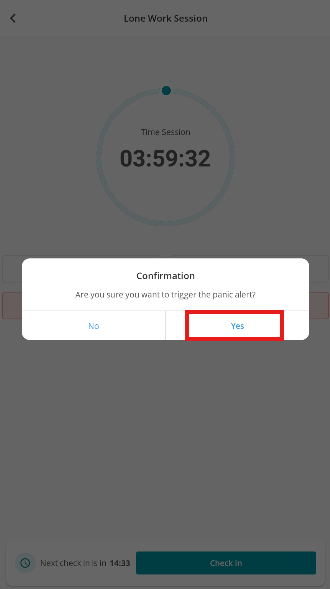
If there is an issue, you can trigger a Panic alert by clicking the Panic button
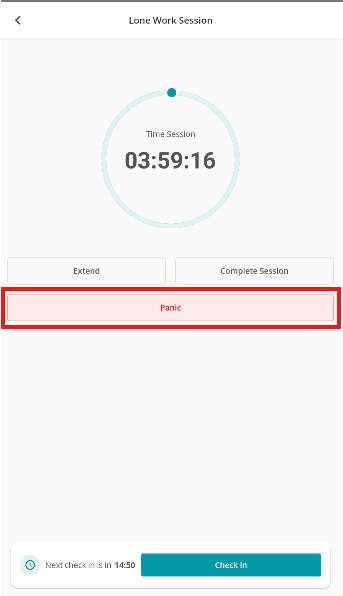
You will then need to confirm this alert
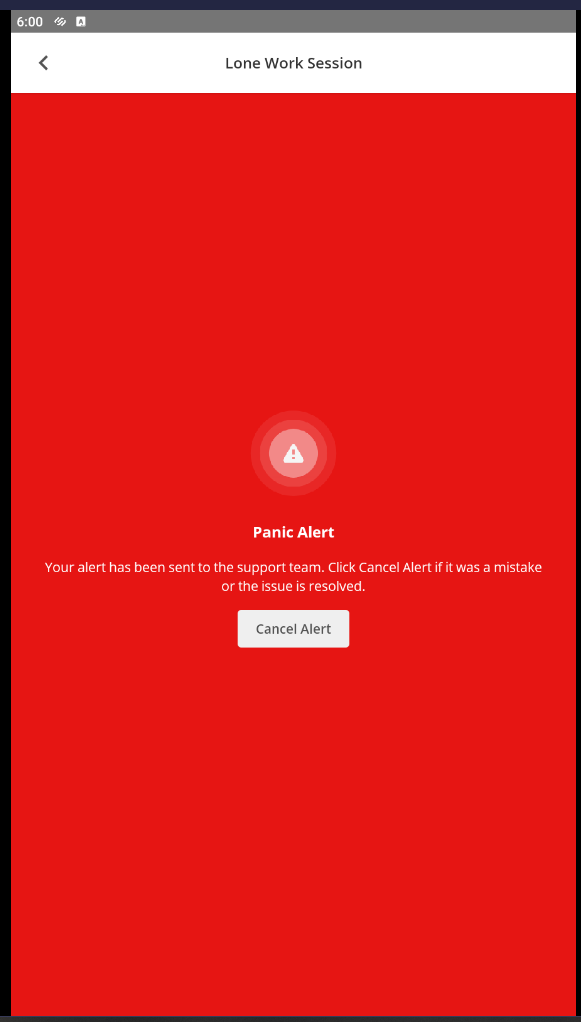
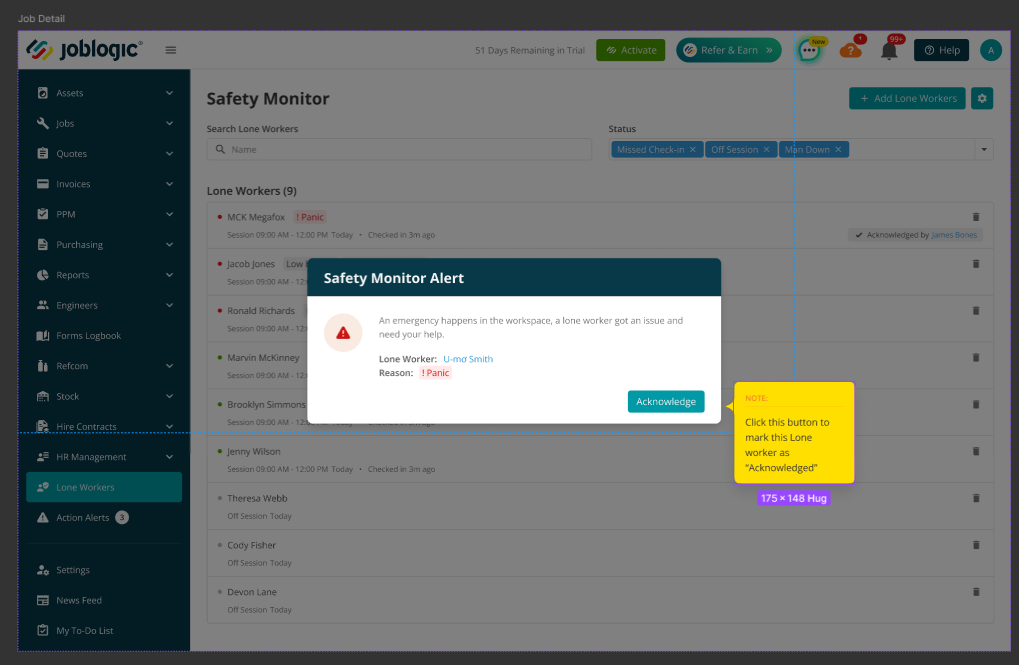
A notification will be sent to the back-office users who have been set up as Notification Contacts.
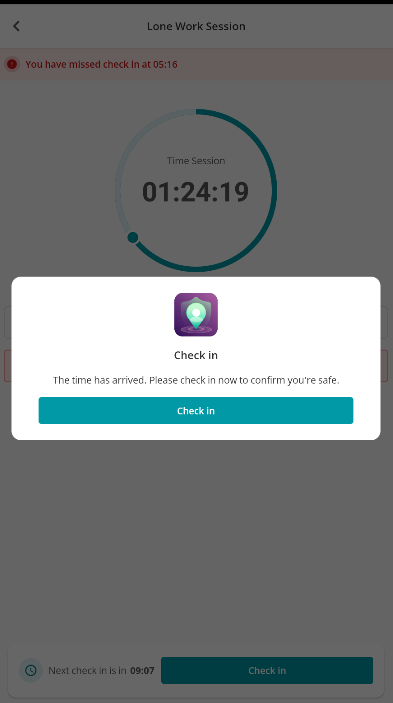
Although your check-in intervals are pre-set, you can check in at any time within that timeframe. Once you’ve checked in, the timer resets and starts counting down from the interval you’ve configured.
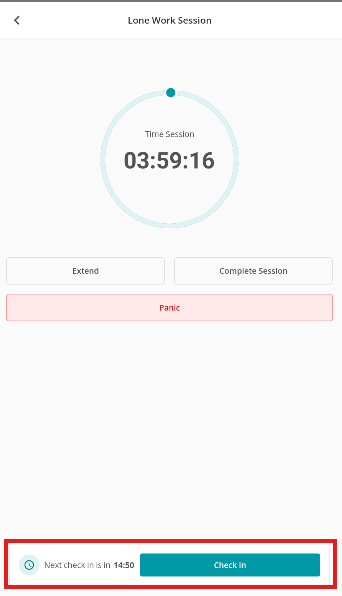
When your check-in is due, an alert will pop up on your screen to remind you.
Alternatively, when a subscribed engineer marks themselves as On-site for a job in the mobile app, they will see a toggle for Lone Worker Visit.
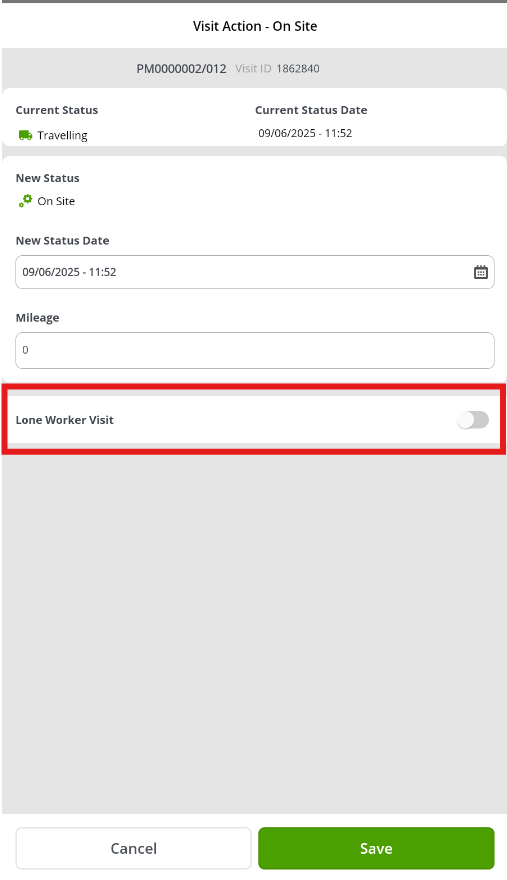
If this is toggled on, the lone worker session will start automatically, using the default settings defined by the back office.
This helps ensure the lone worker feature is activated consistently, without the engineer needing to manually enable it.
Note:
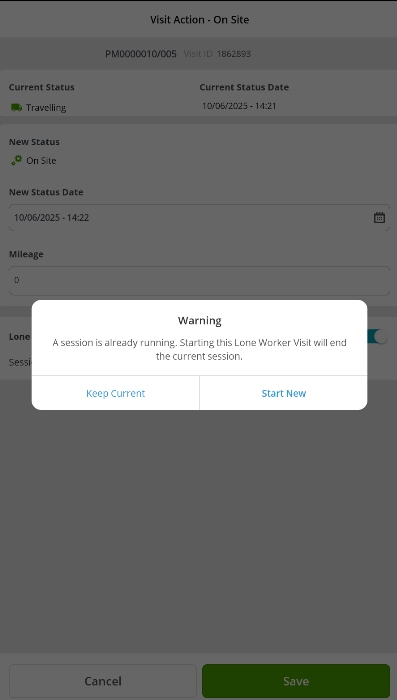
If an engineer attempts to start a lone worker session on a new job while an existing session is active on another visit, a warning message will appear.
Keep Current: The current lone worker session (e.g., on Job 1) will remain active.
Start New: The existing lone worker session will end, and a new session will begin on the new job (e.g., on Job 2).
Further Support
For further information or assistance with the above, contact our Support Team on 0800 326 5561 or email support@joblogic.com. Alternatively, our Customer Success Management team can be reached by emailing customersuccess@joblogic.com
Publishing Details
This document was written and produced by Joblogic’s Technical Writing team and was last updated on the date specified above. Be aware that the information provided may be subject to change following further updates on the matter becoming available. Additionally, details within the guide may vary depending on your Joblogic account’s user permissions.