Introduction
The Microsoft 365 Integration in Joblogic is designed to streamline your communication and scheduling workflows by connecting your Joblogic system with your Microsoft account.
This integration allows you to link both personal Microsoft 365 mailboxes and shared mailboxes, send emails directly from Joblogic using your chosen email address, and synchronise job-related visits with Outlook calendars.
Emails sent from Joblogic will be delivered from your selected Microsoft 365 mailbox, with replies received in your Microsoft inbox as normal.
This guide walks you through the key features and setup steps required to get the most out of your Microsoft 365 integration in Joblogic.
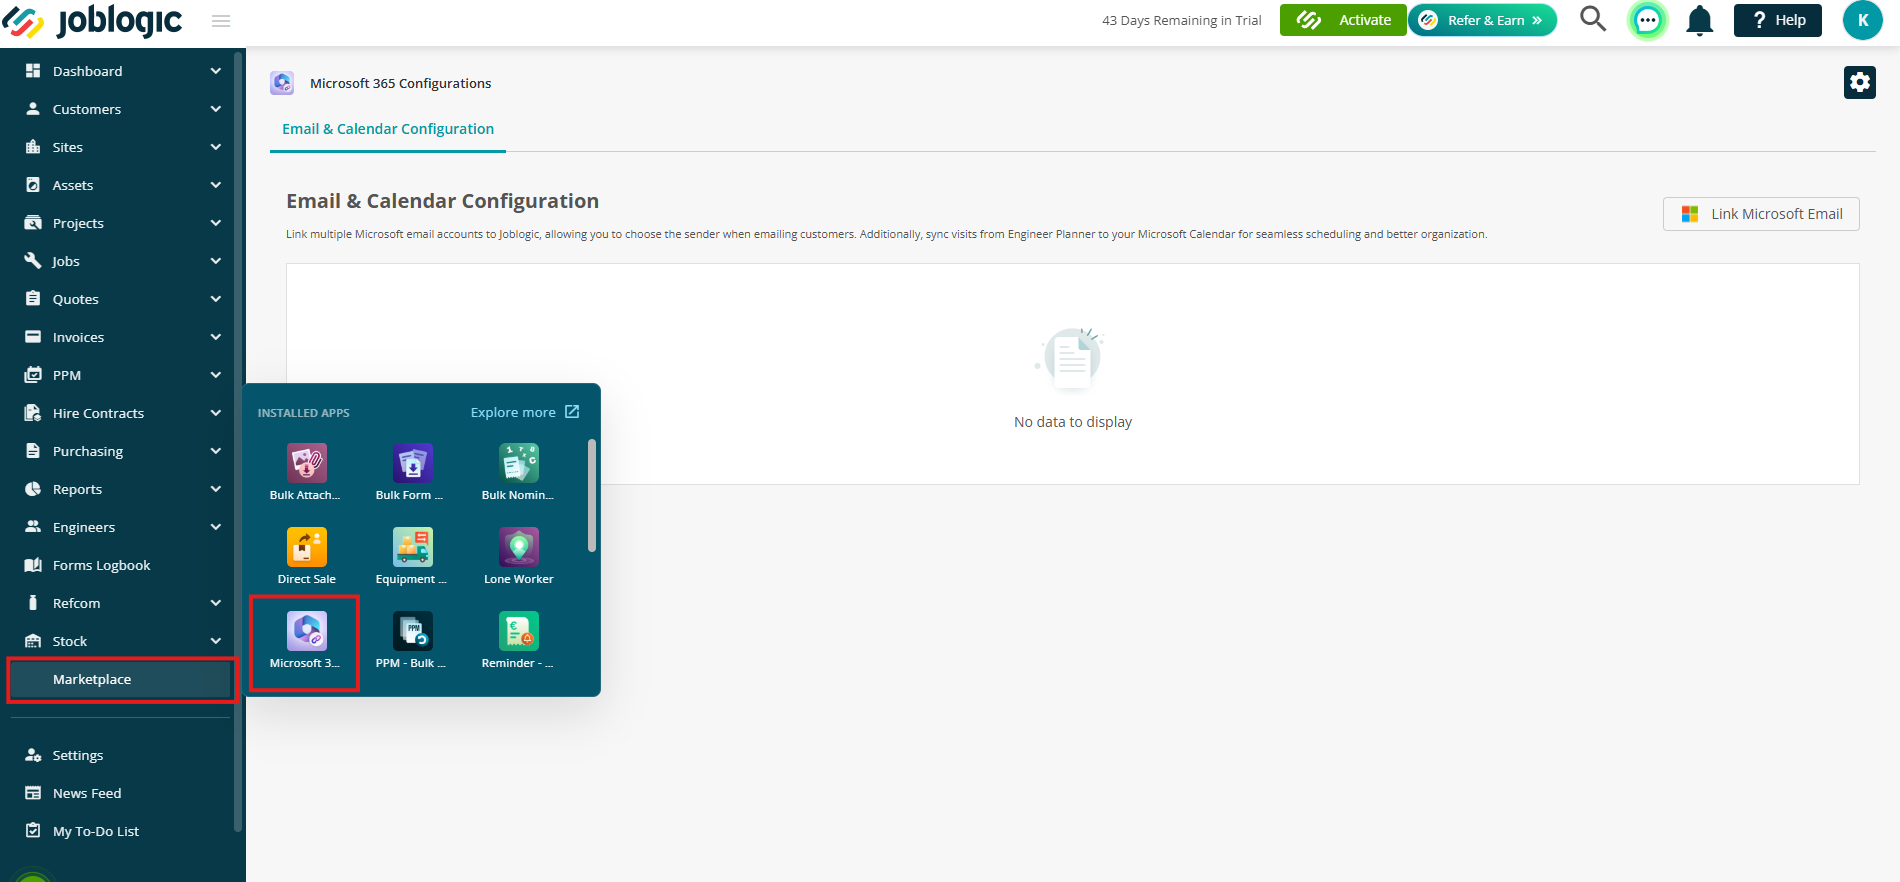
How to access the Microsoft 365 module
Click the Marketplace option on the main menu and then click Microsoft 365.
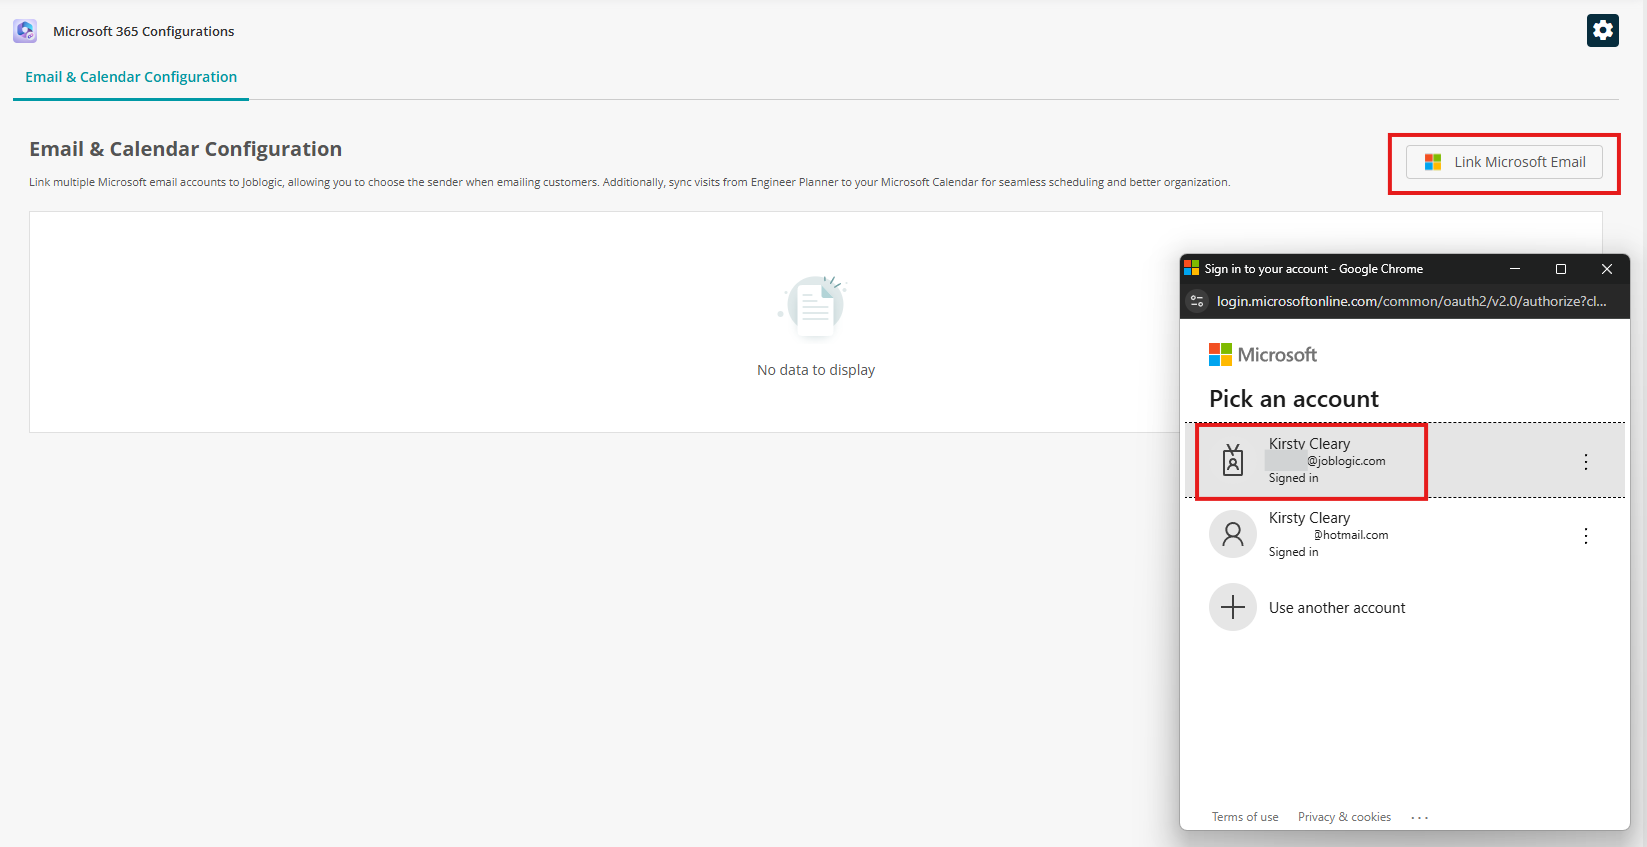
Linking your Microsoft account
To get started, click Link Microsoft Account. If your email address appears, simply select it, otherwise, enter your Microsoft login details to continue.
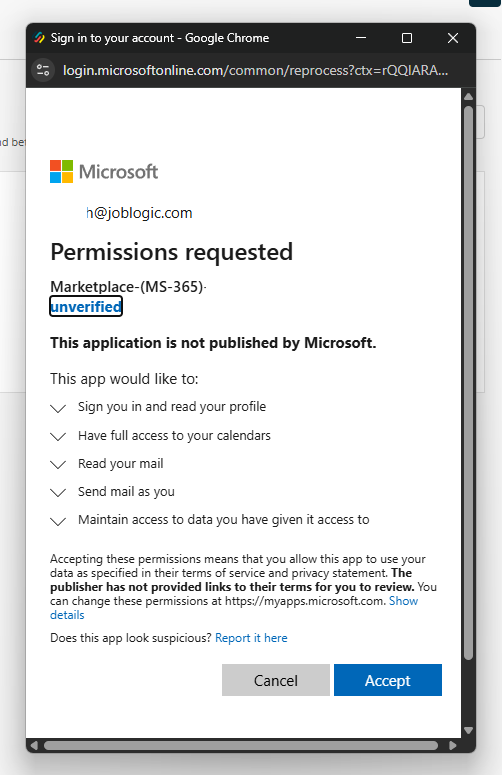
Accept the permission request to confirm access and complete the connection.
You can also link a shared Microsoft 365 mailbox by entering the shared mailbox login credentials. Once connected, the shared mailbox can be used to send emails, search email history, and view emails directly from within Joblogic.
The same shared mailbox can be linked by multiple Joblogic users, allowing teams to collaborate using a single shared email address.
Using Shared Mailboxes
Shared mailboxes allow multiple Joblogic users to access and work from the same Microsoft 365 email address.
Once a shared mailbox has been linked, you can:
- Send emails from the shared mailbox address.
- Search and view emails within the shared inbox.
- Allow multiple Joblogic users to connect to the same shared mailbox.
- Maintain mailbox access for other users if one user chooses to unlink their account.
This makes it easier for teams to manage enquiries, customer communications, and shared departmental inboxes directly from Joblogic.
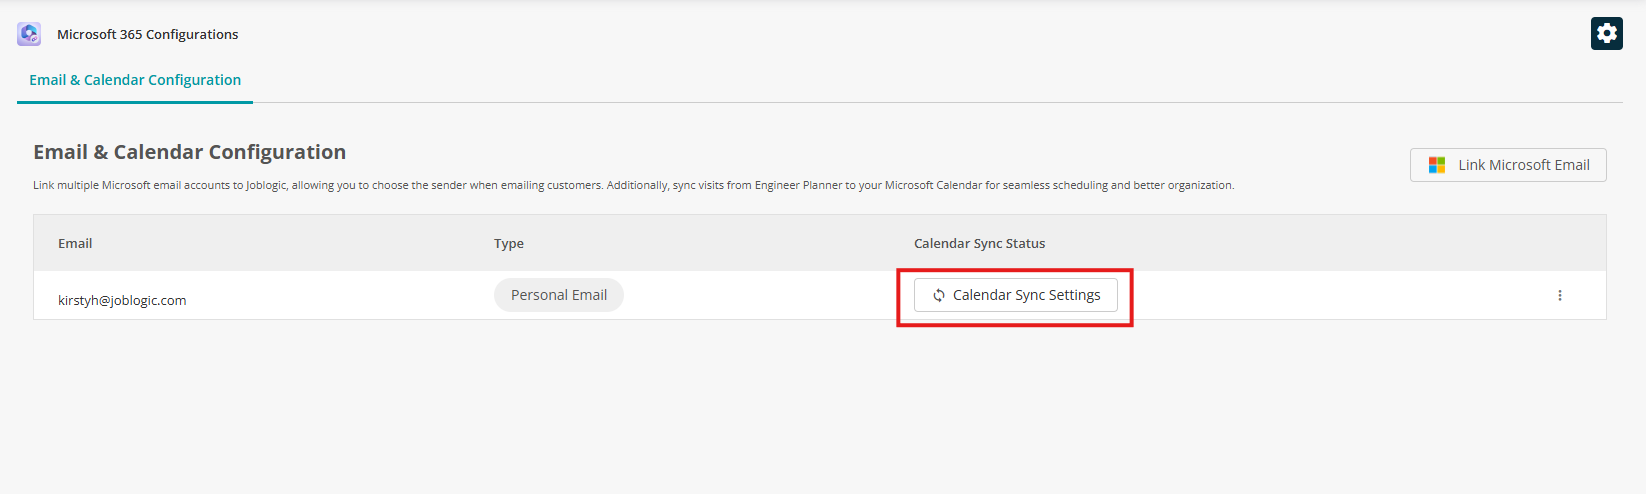
Calendar Sync Settings
Next up, let’s get your Calendar Sync setup.
Click the button next to the email account you'd like to configure
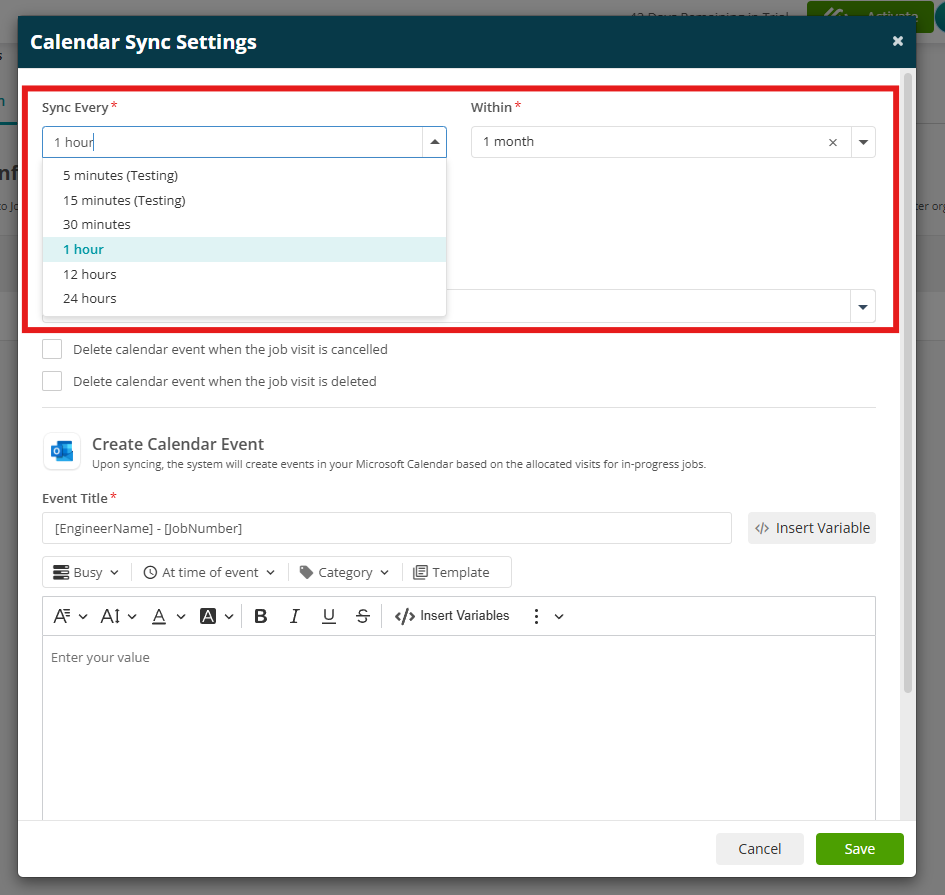
Sync Frequency
Decide how often you’d like your calendar to sync with Joblogic. Just choose the interval that works best for you.
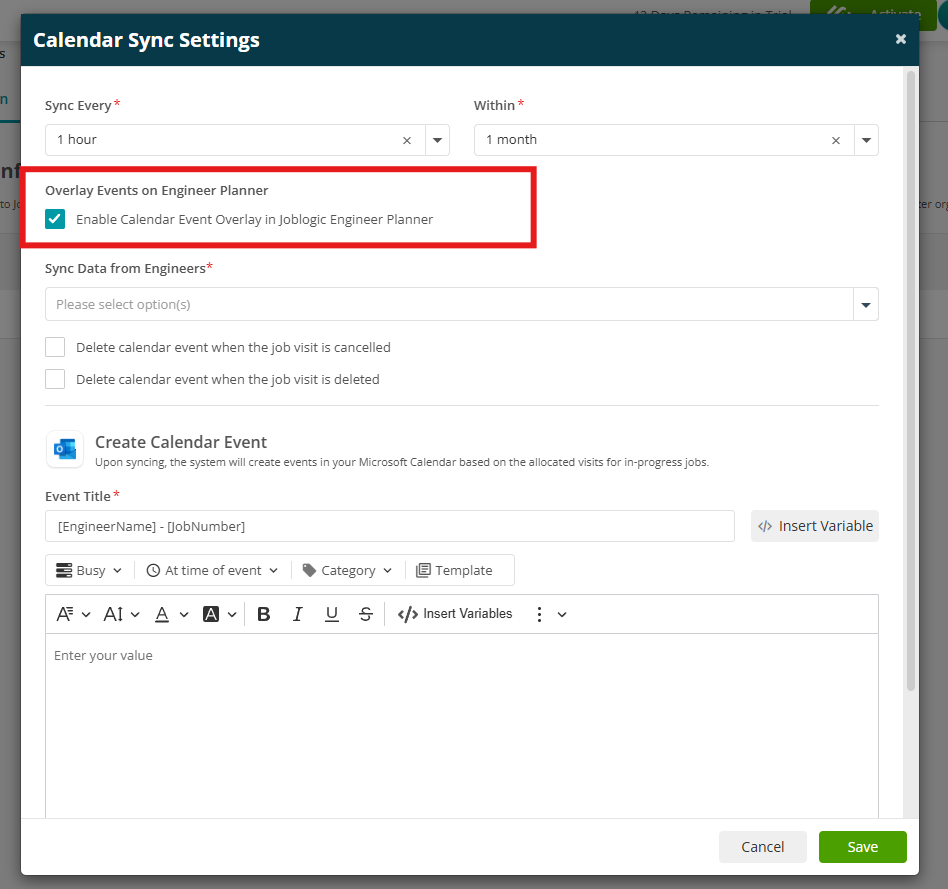
Overlay Events on Engineer Planner
Want to see your calendar events directly on the Engineer Planner? Tick this box to overlay them, so everything appears in one clear view—no need to switch between screens.
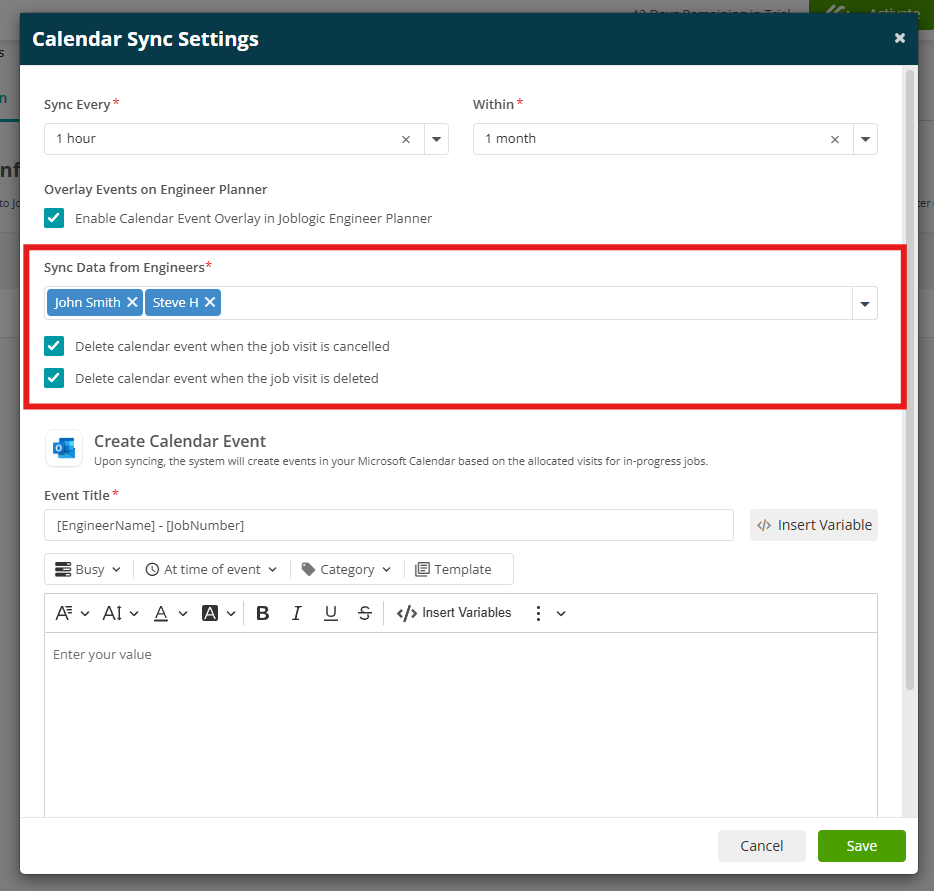
Sync Data from Engineers
Pick which engineers you’d like to sync data for. You can customise this to suit your team setup.
You can also choose to automatically delete calendar events if a visit is cancelled or removed—just tick the box to enable this.
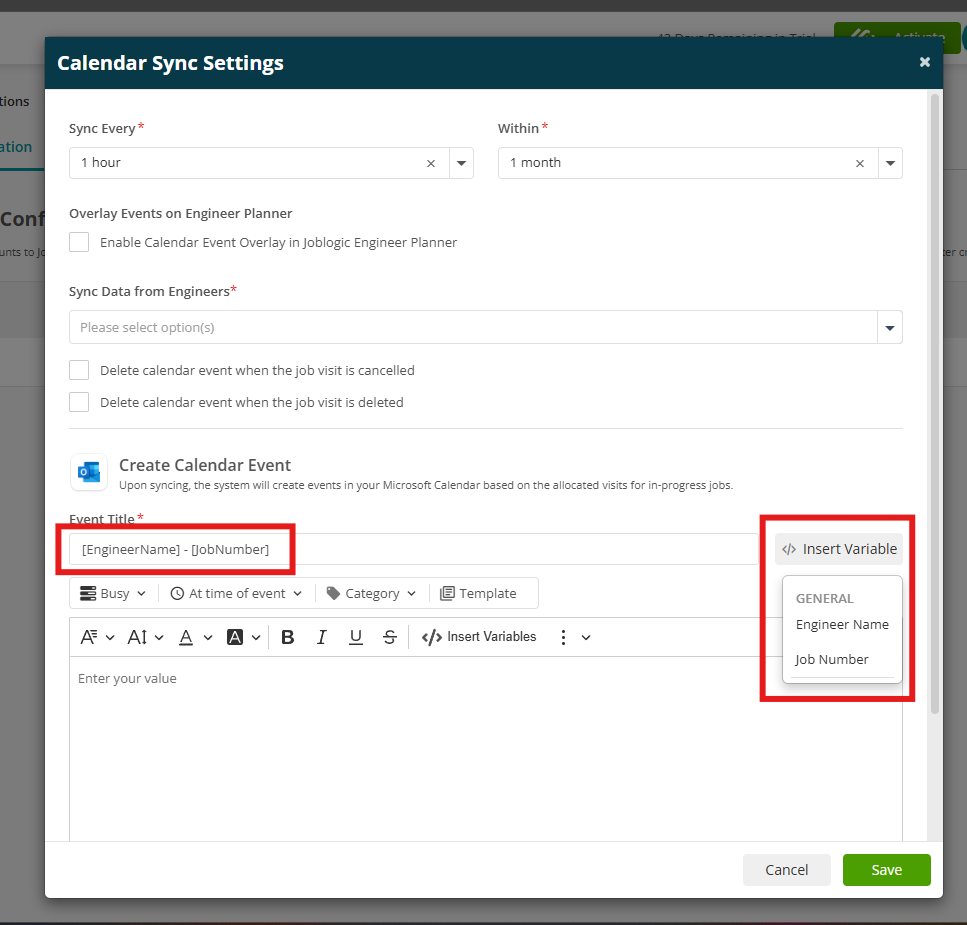
Create Calendar Event
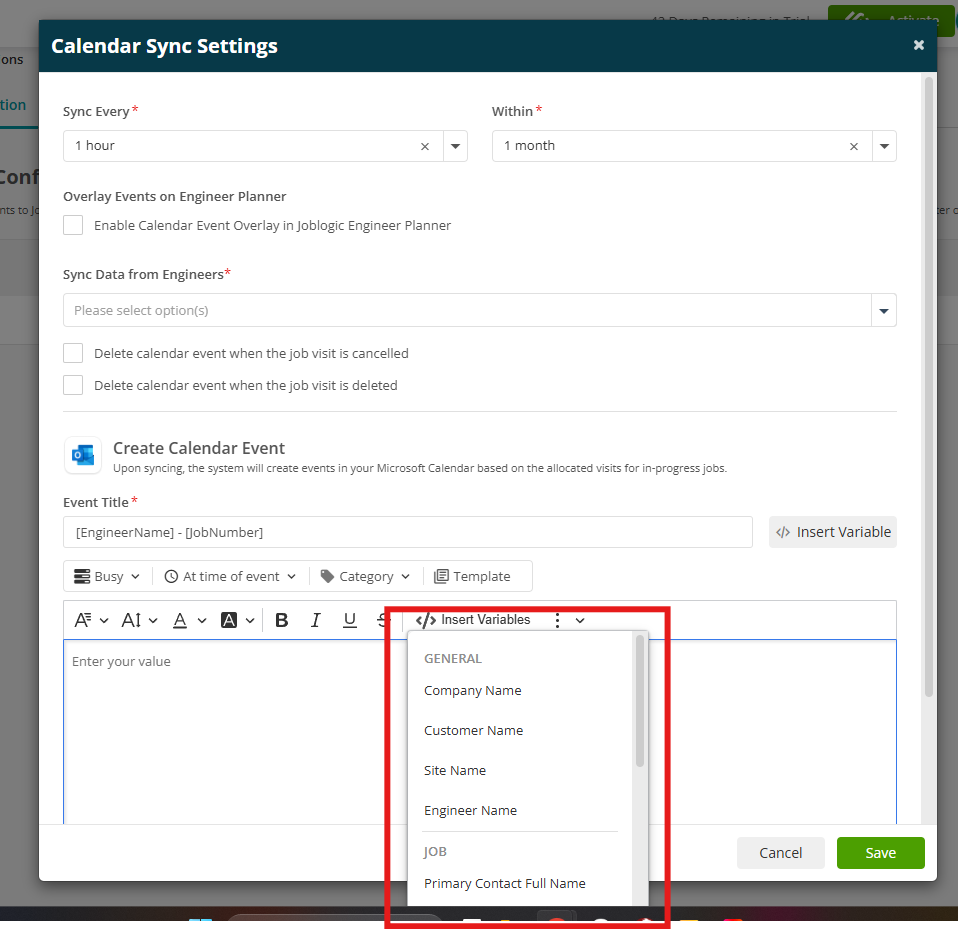
Here’s where you can set up the event details for your synced calendar items—like the event title, description, reminders, and more.
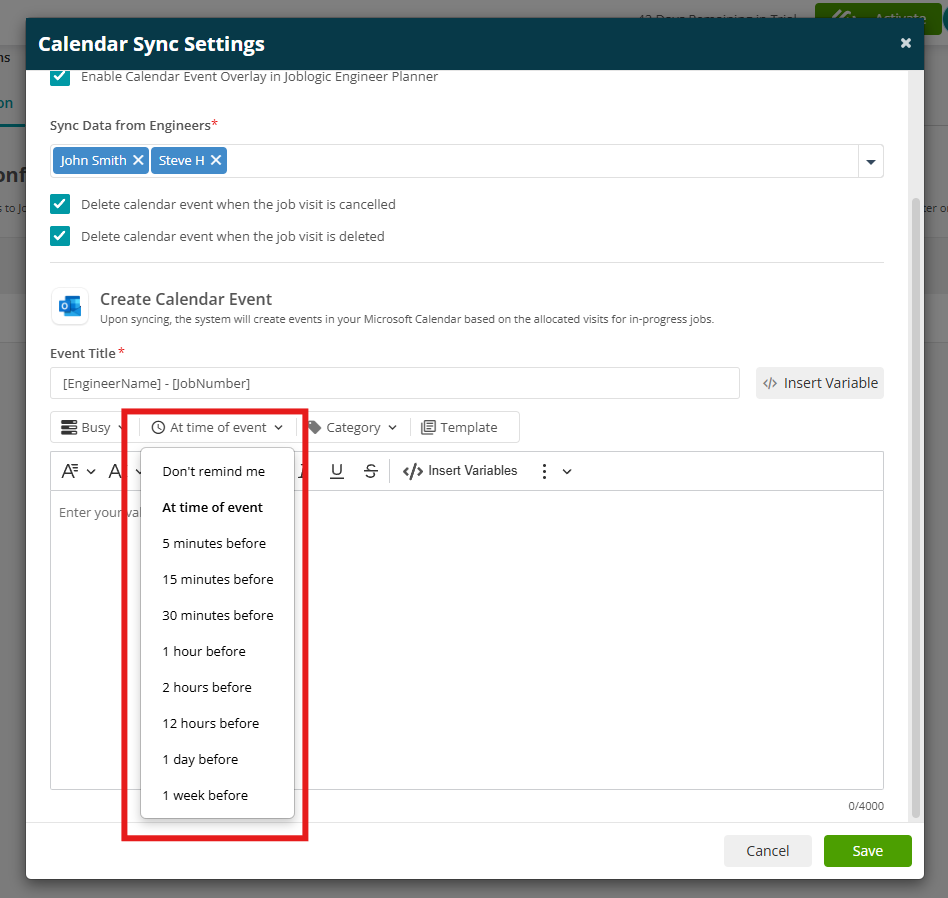
You’ll also see an Insert Variable option for the title and body. This lets you pull in live data from Joblogic to personalise your calendar events automatically.
Click Save once you’ve filled in your details - your calendar sync settings will then be ready to go!
Shared Mailbox Calendar Sync
When multiple users sync the same shared mailbox calendar, Joblogic checks whether a visit has already been synced by another user using that mailbox before creating a new calendar event.
This prevents duplicate calendar events from being created when several users are working from the same shared mailbox.
Overlaying Calendar Events on Your Planner
On the Planner page (Engineers > View Planner), simply use the Show Calendar toggle to display any synced calendar events directly alongside your scheduled visits—making it easier to see everything in one view.
Email From notifications
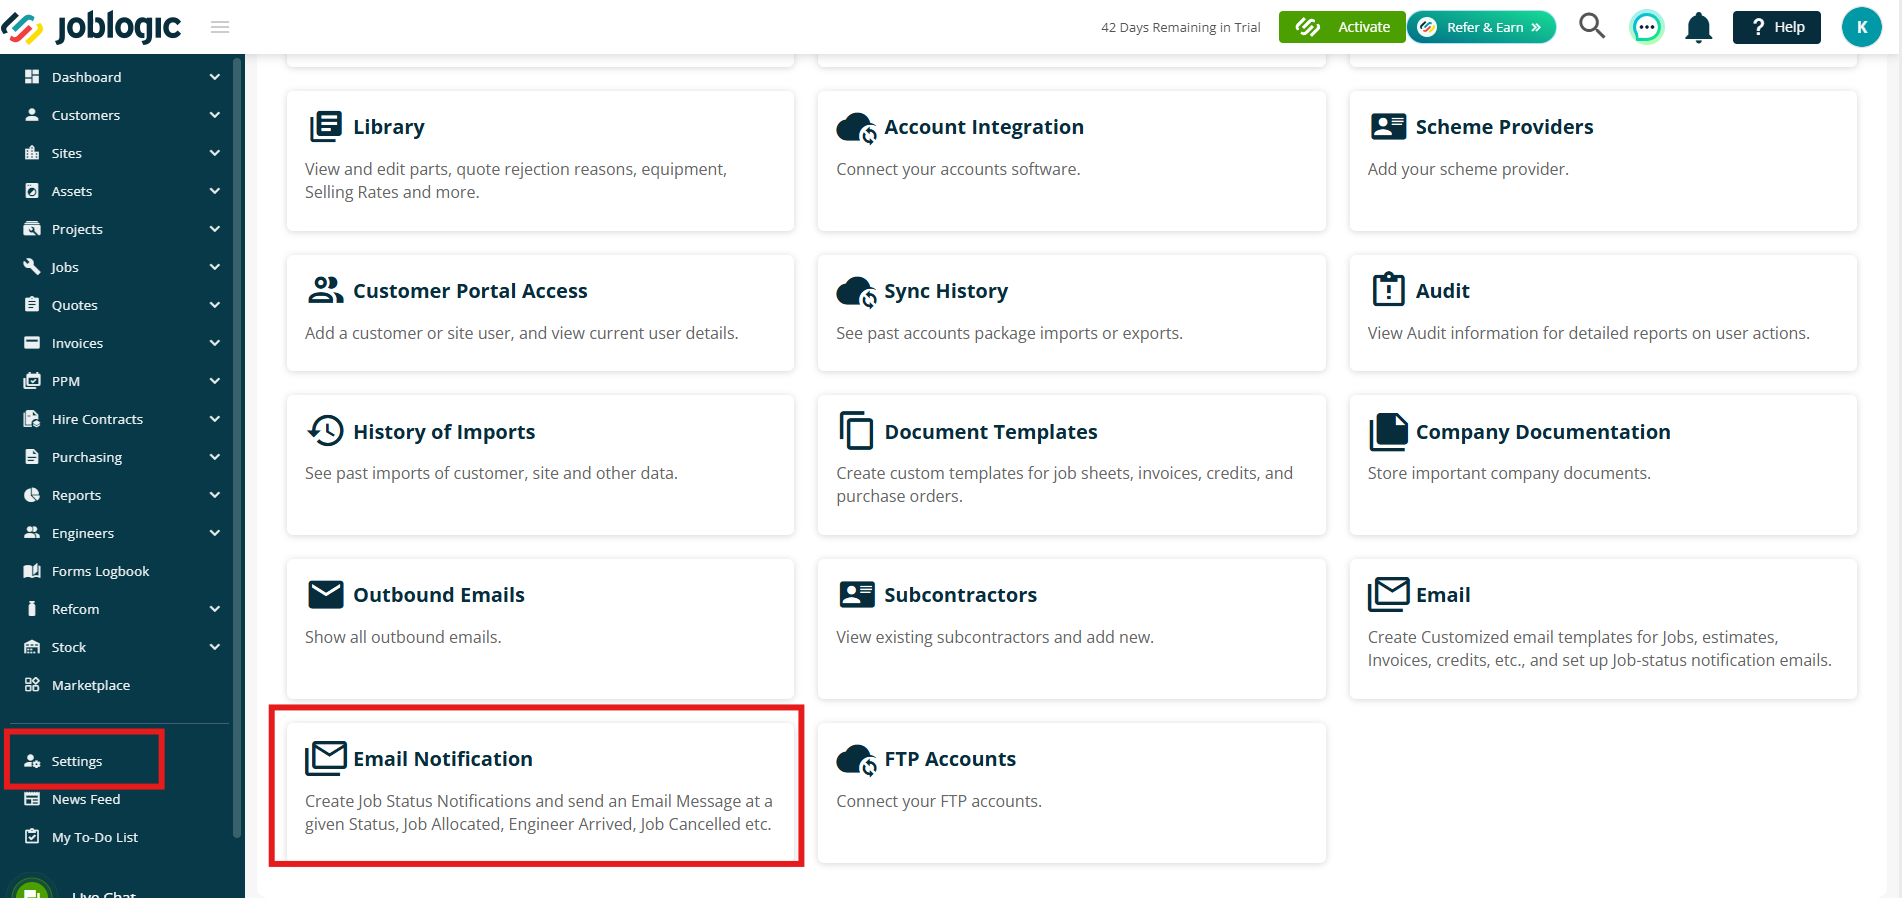
You can set a default Email From address for system-generated email notifications—making your communications more personal and professional.
Just head to Settings > Email Notifications
Next, select the event you'd like to customise, then pick your preferred Email From address from the dropdown.

Sending Emails from Joblogic
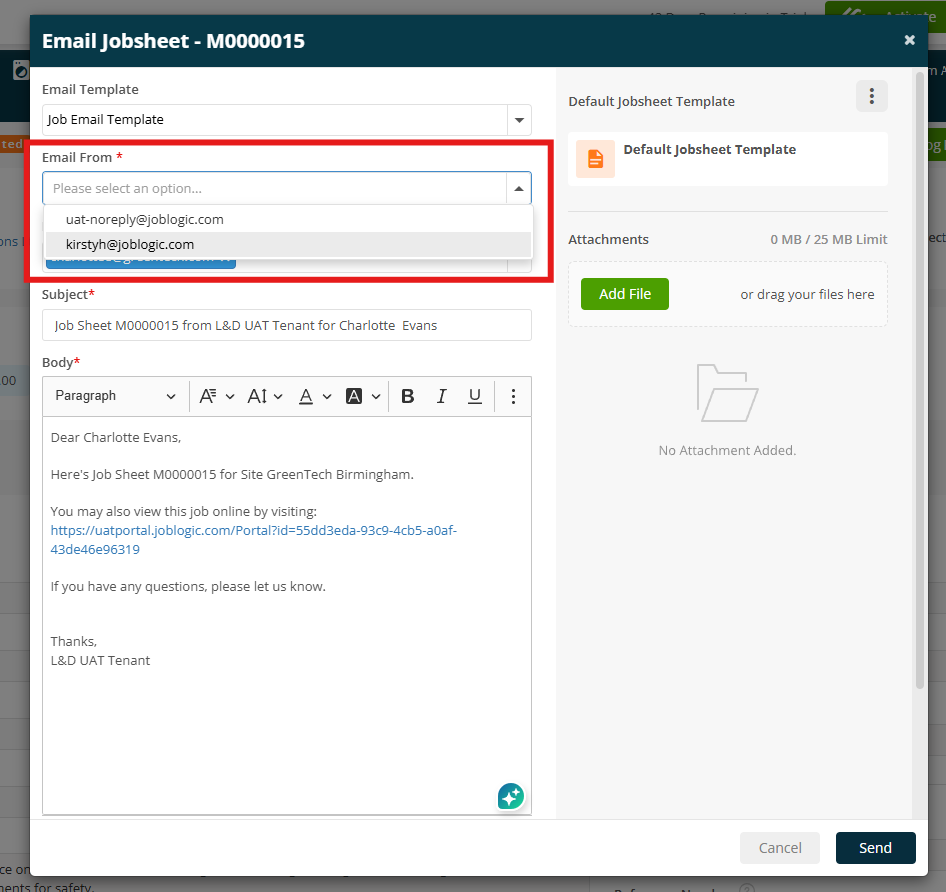
When sending emails from anywhere in Joblogic, you now have the flexibility to choose which email address it comes from. No more being stuck with noreply@joblogic.com.
To get started, click Share > Email. In this example, we’ll use a Job screen:
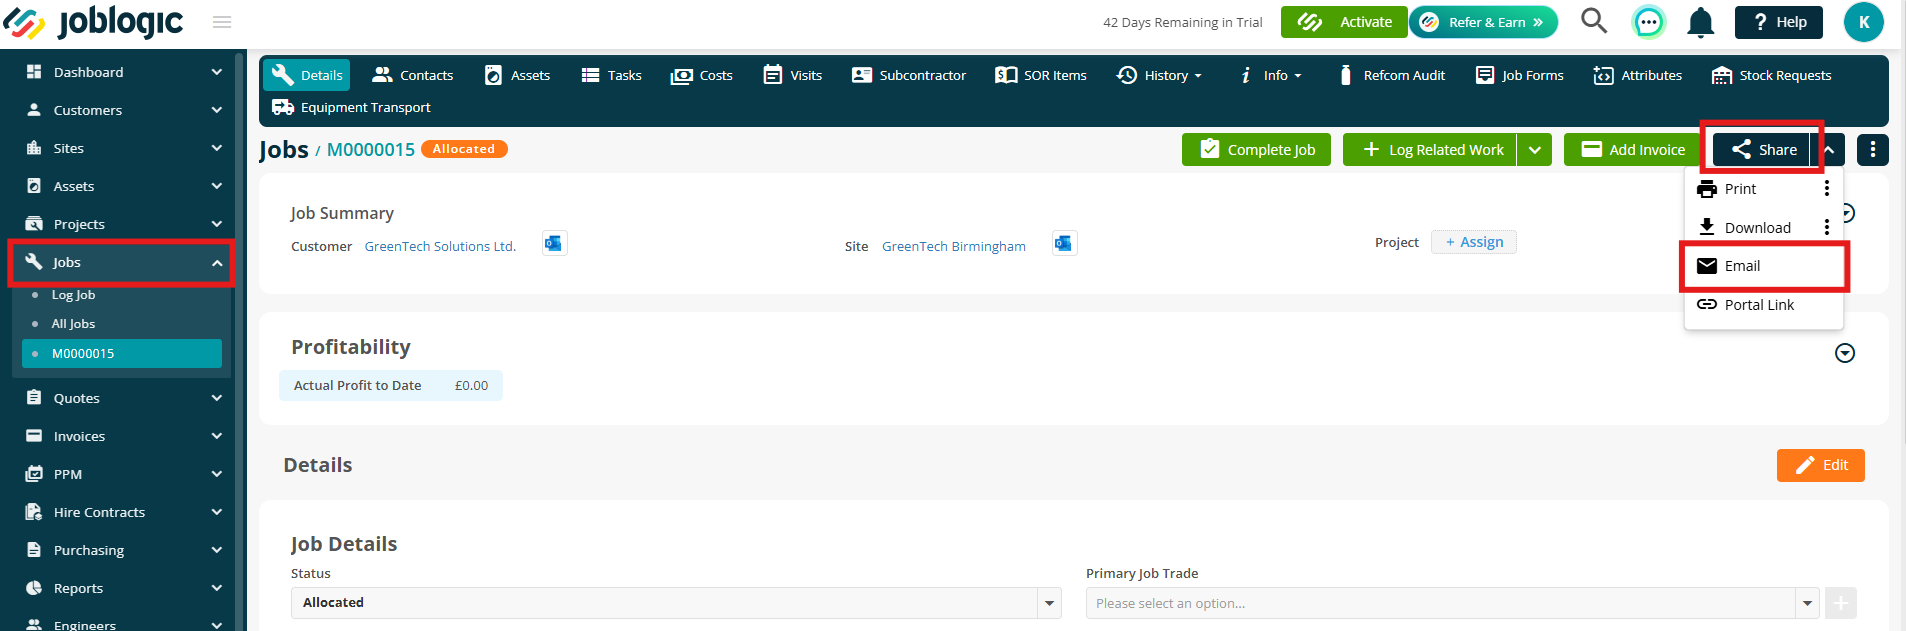
From the Email From dropdown, pick any of your synced email accounts, then continue sending as normal.
This gives you more control and keeps communication personal and consistent with your company’s branding, while replies continue to be managed in your Microsoft 365 inbox.
Further Support
For further information or assistance with the above, contact our Support Team on 0800 326 5561 or email support@joblogic.com. Alternatively, our Customer Success Management team can be reached by emailing customersuccess@joblogic.com
Publishing Details
This document was written and produced by Joblogic’s Technical Writing team and was last updated on the date specified above. Be aware that the information provided may be subject to change following further updates on the matter becoming available. Additionally, details within the guide may vary depending on your Joblogic account’s user permissions.