Introduction
The Mobile Timesheets Plus app is a powerful tool designed to give engineers more control over their time management while improving team visibility. Engineers can view and manage their own timesheet entries and, uniquely with the Plus version, view other engineers’ entries within their team—all from within the Joblogic mobile application.
This user guide explains how to use the Mobile Timesheets Plus app and highlights how it differs from the standard Mobile Timesheets functionality.
Note: This feature requires that the Joblogic Mobile App is updated to version 1.157.0 or higher on both Android and iOS devices.
Key Differences from Standard Mobile Timesheets
Mobile Timesheets Plus builds on the standard Mobile Timesheets module by introducing enhanced usability and greater team functionality. The key differences include:
1. Built with Flutter Technology
Mobile Timesheets Plus is developed using Flutter, a cutting-edge mobile development framework by Google. Flutter allows the app to run more smoothly and consistently across all devices.
In simple terms: The Plus version feels quicker, looks cleaner, and doesn’t rely on redirecting users to a web-based timesheet view like the standard version does.
This leads to:
-
Faster screen load times
-
A modern, native app interface on both Android and iOS
-
Fewer bugs or inconsistencies between devices
2. View Team Timesheets
With the Plus version, users can view the timesheet entries of all engineers assigned to the same team. This is particularly useful for:
-
Team leaders or supervisors who need oversight on time tracking
-
Collaborative teams who want visibility on what others are doing
-
Improving scheduling and resource coordination
Note: This functionality is not available in the standard Mobile Timesheets feature.
Using the Timesheets App
Once you have logged into the Joblogic Mobile App, select the ‘Menu’ option and then choose the ‘Timesheet’ button.
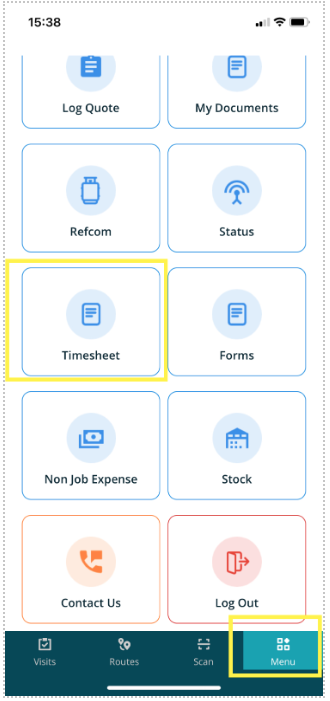
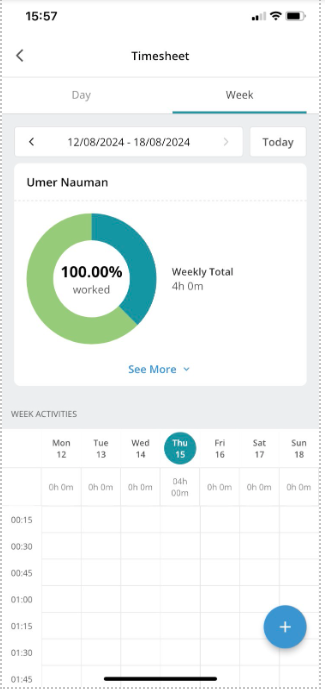
You will be presented with a Day view of your Timesheet, with the option to choose Week view too.
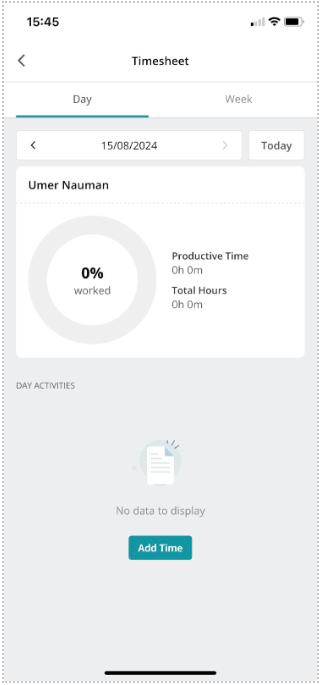
Adding a New Timesheet Entry
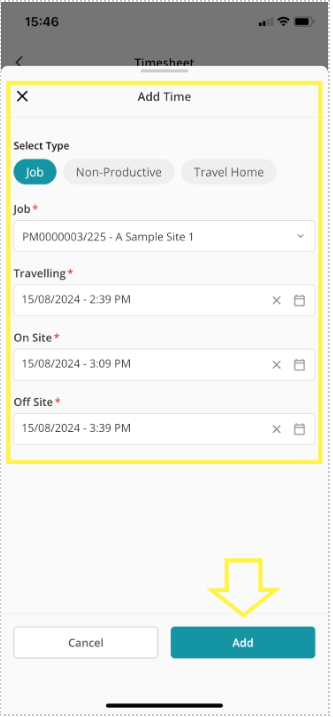
To add a new time sheet entry for yourself, select the ‘Add Time’ button within the day view area.
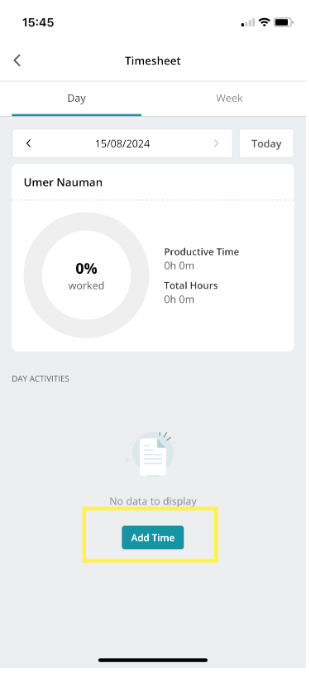
Fill in the details of the time entry and select the Add button.
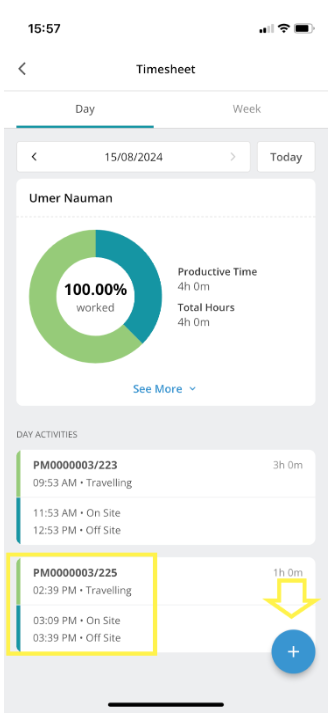
The time entry will then be logged within your timesheet. Any further additions can be made via the ‘+’ icon on either the day or week view.
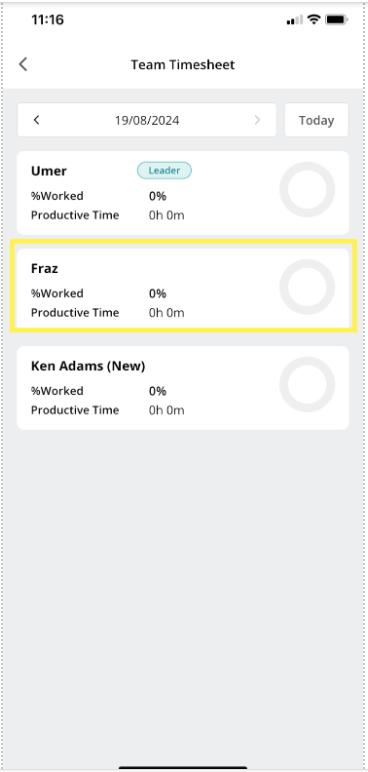
Viewing Engineer Team Timesheets
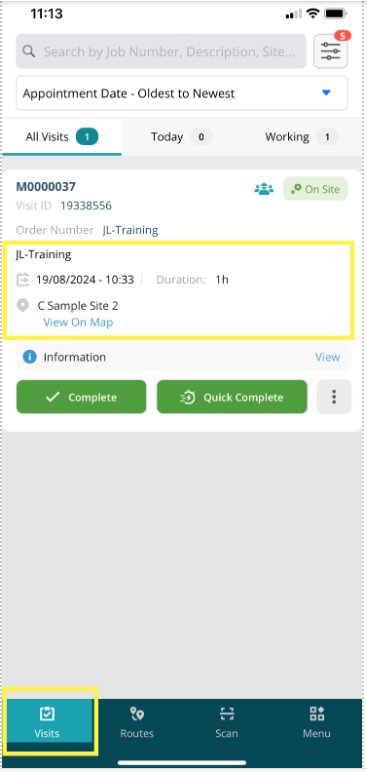
You can also view engineer team timesheet entries. To do this, navigate to the Visits tab, and select the applicable visit.
Click the ‘Team Timesheet’ button under the ‘Other Actions’ header.
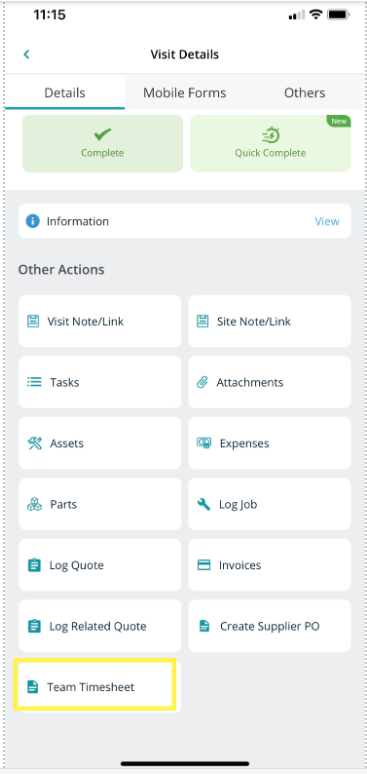
Each team member’s timesheet will be listed and can be viewed in more detail by selecting each as applicable.
Best Practices
-
Always double-check your time entries before submitting to ensure accuracy.
-
Use Week View regularly to identify any missed time.
-
Keep descriptions clear and concise — especially if used for job costing or reporting.
-
Update your mobile app frequently to benefit from performance improvements and new features delivered via Flutter.
Further Support
For further information or assistance with the above, contact our Support Team on 0800 326 5561 or email support@joblogic.com. Alternatively, our Customer Success Management team can be reached by emailing customersuccess@joblogic.com.
Publishing Details
This document was written and produced by Joblogic’s Technical Writing Team and was last updated on the date stated above.
Please note:
The information provided may be subject to change following updates to the system or new app releases.
Details within this guide may vary depending on your Joblogic account’s user permissions and settings or the device being used to access the platform.