Introduction
The Joblogic system features a ‘Parts Library’ that holds all of your parts information within the system, enabling users to access the information via the Back-office and Mobile App. This user manual details a step-by-step breakdown of how to ‘Add a Part Individually’ and how to ‘Import a Full List of Parts’ onto the Joblogic system.
Adding a Part Individually
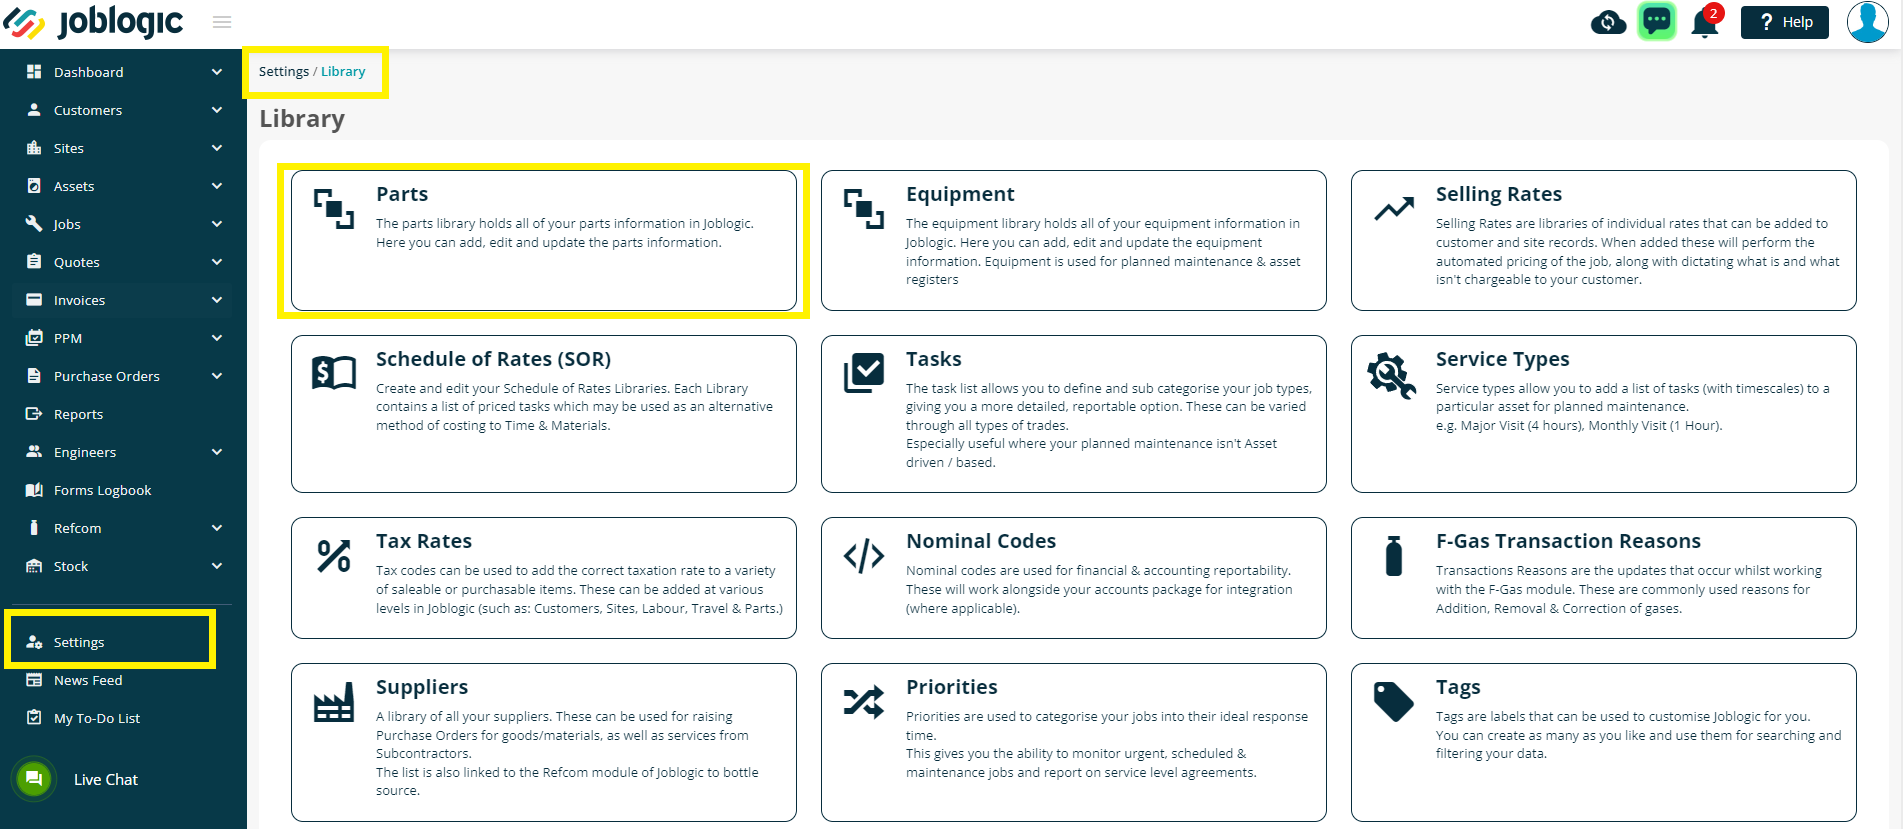
To add an individual part, navigate to the Parts page via Settings > Library > Parts
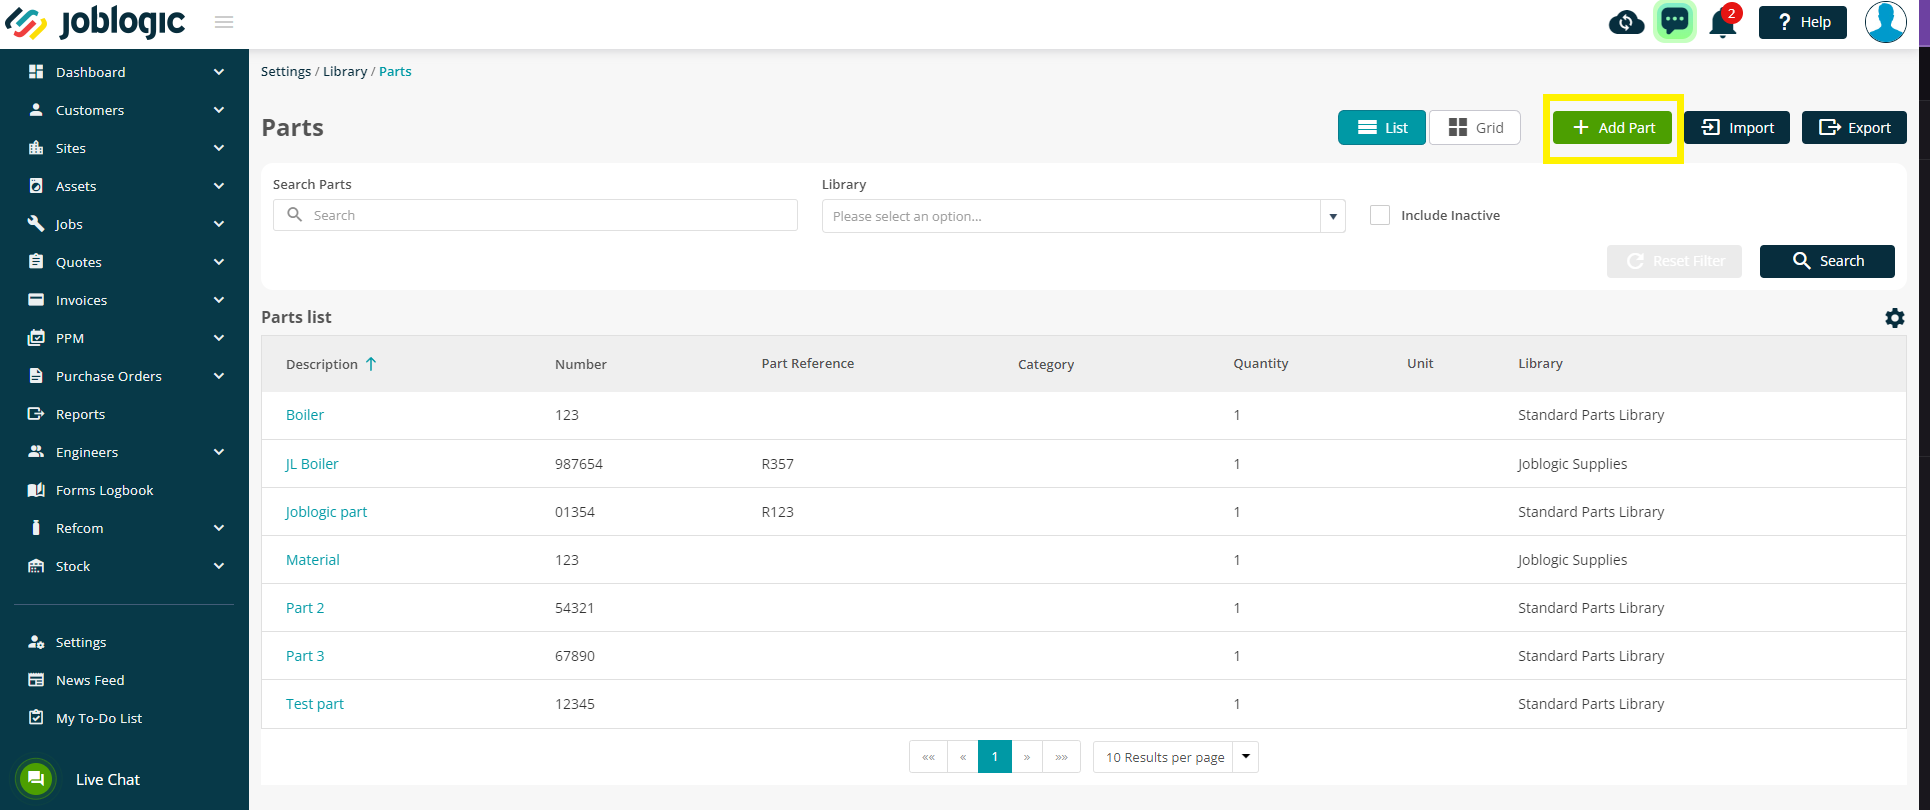
This will direct you to the main page, where a full ‘Parts List’ with details can be viewed. The parts list can be filtered using the ‘Search Filter’ at the top of the page and can be exported into an Excel spreadsheet using the ‘Export’ button.
In order to add an individual part, click the ‘Add Part’ button at the top, and you will be directed to the Add part page.
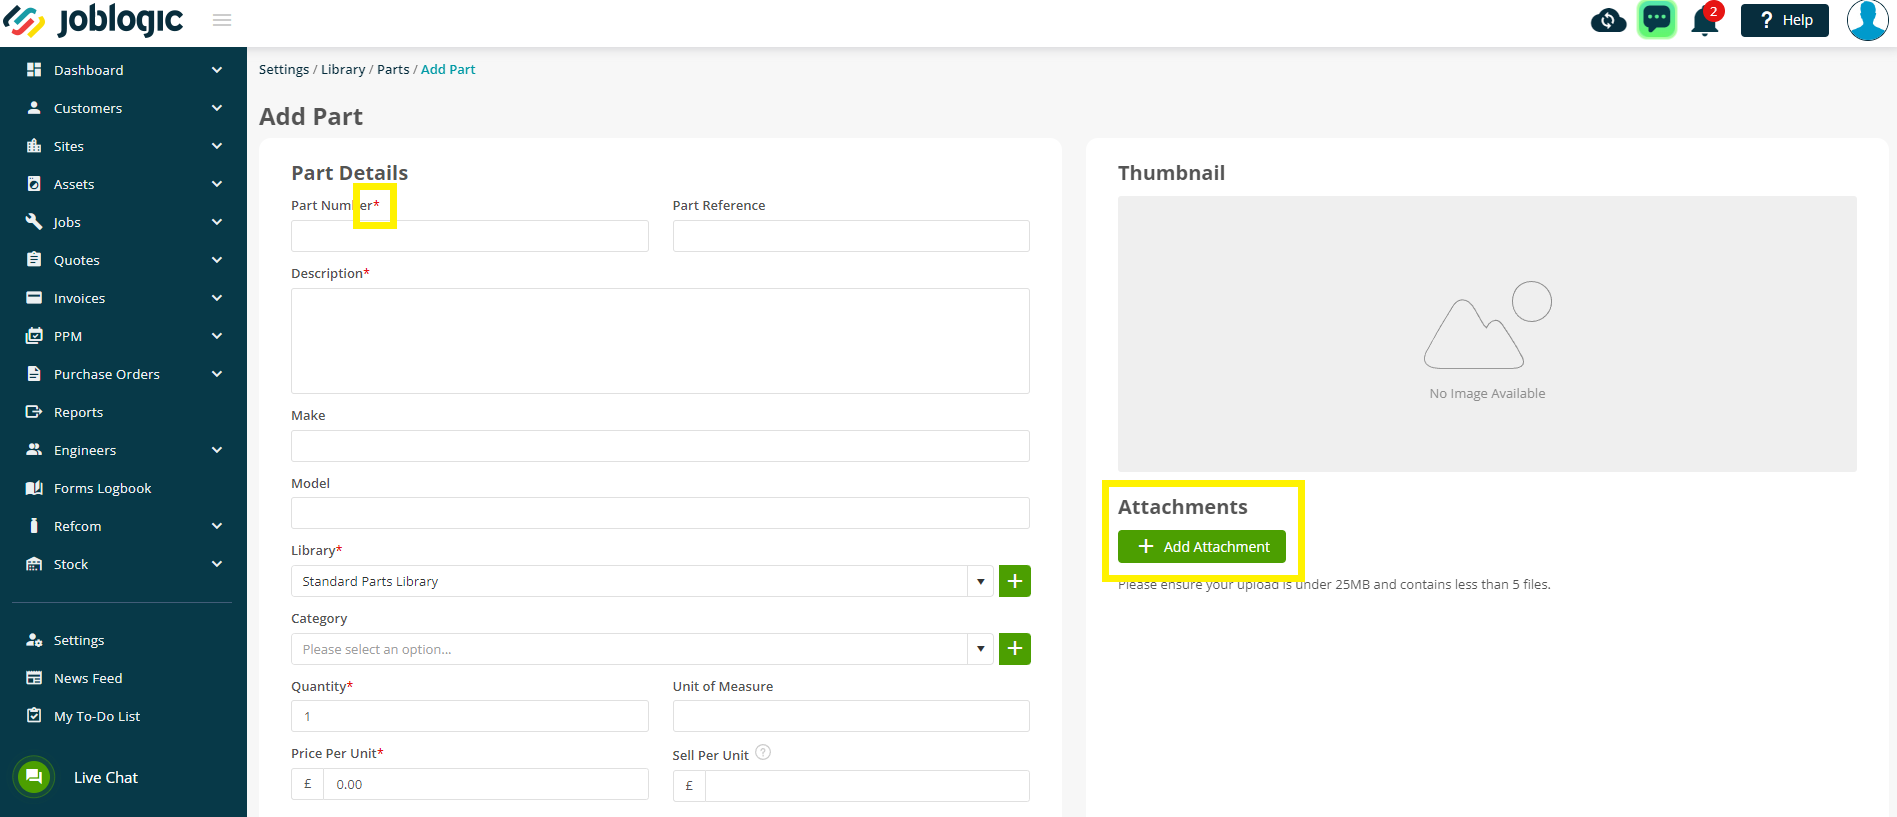
You also have the option to add a thumbnail of the part by clicking the Attachment option on the right side of the page.
Any field with a red asterix is mandatory and will need to be filled in before you can save the new Part.
Upon adding the required information, click the ‘Save’ button and a new part will be added to the parts list.
Importing Parts List
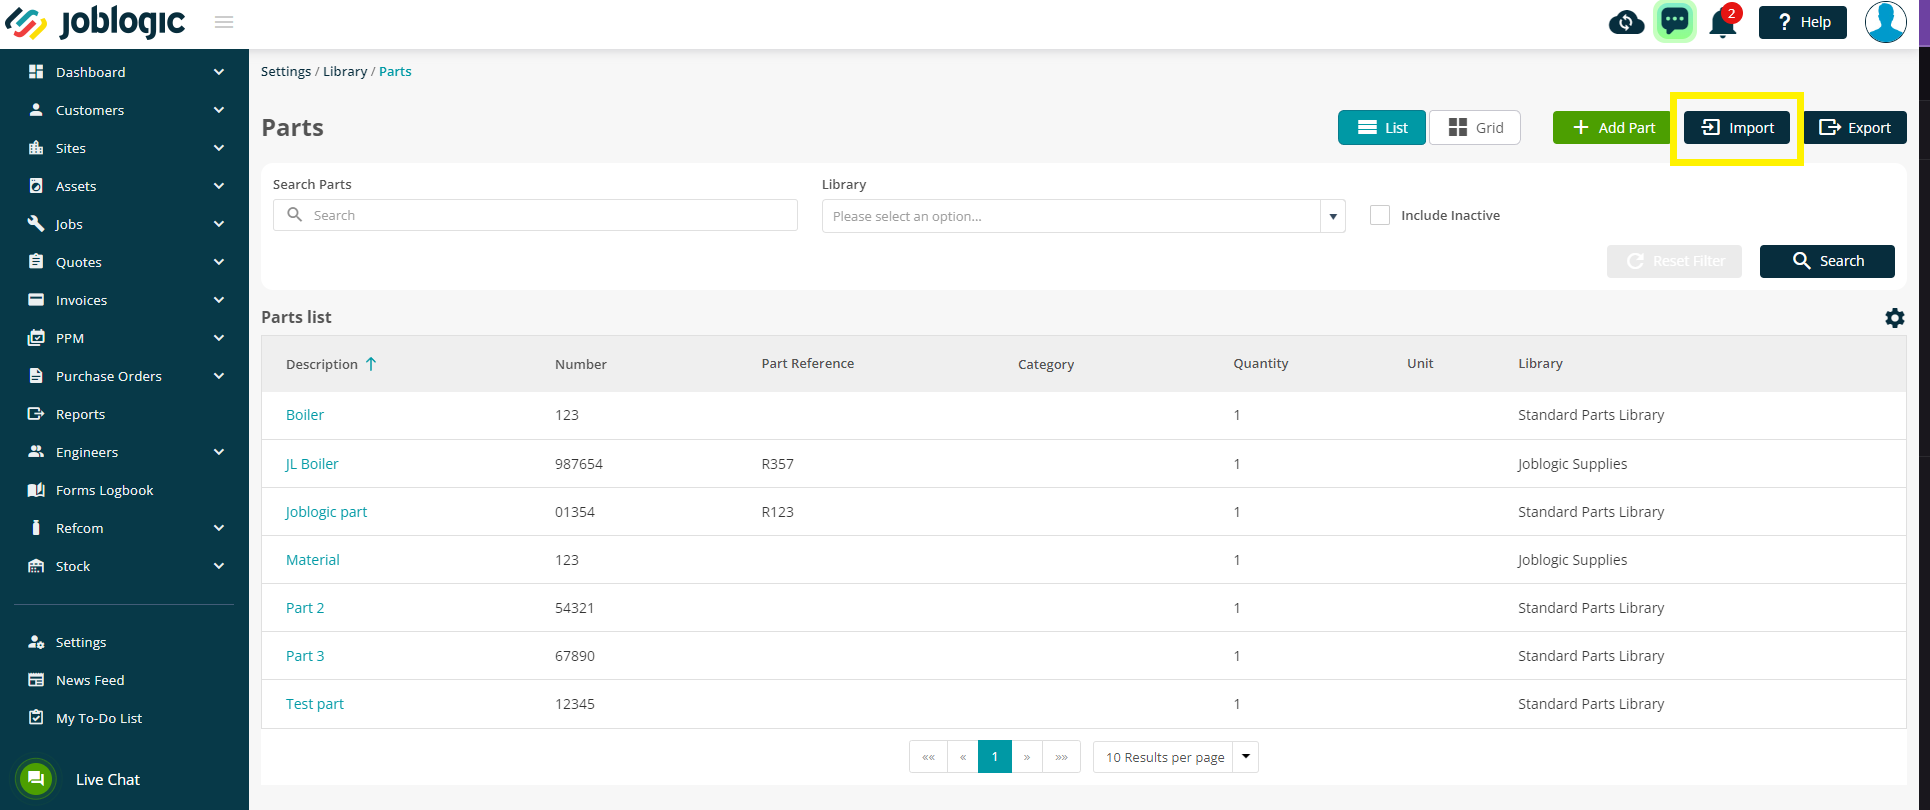
In order to import parts information in bulk, click the ‘Import’ button at the top of the page.
You will be presented with the ‘Import Part(s)’ pop-up window, with options to ‘Download Template’ and ‘Upload Template’.
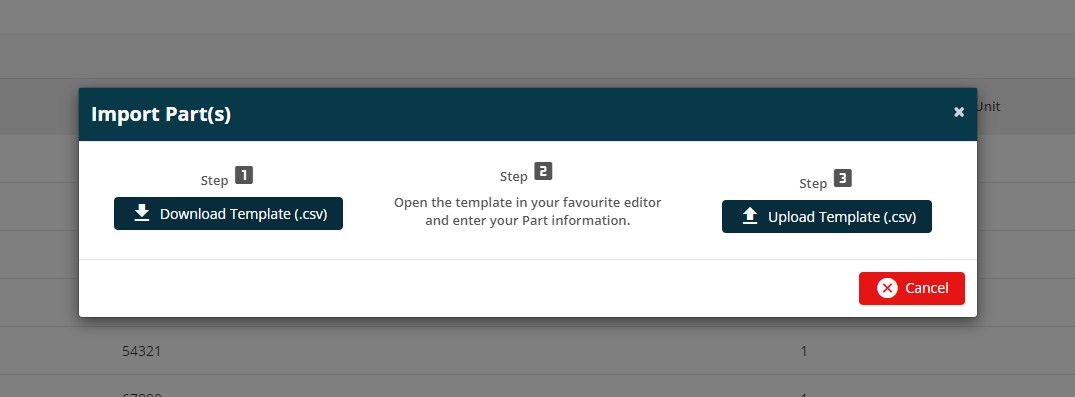
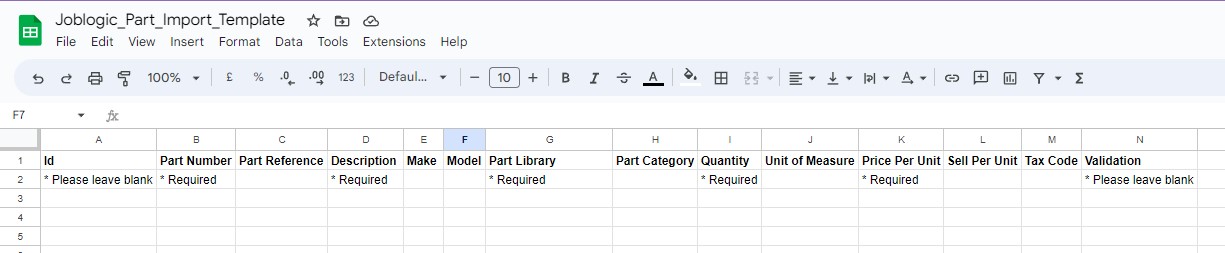
Download the import template and open it using MS Excel (suggested) or any other editor to populate parts information. Please follow the instruction on each column of the spreadsheet when filling in the details, ensuring that any mandatory fields that are marked as Required are filled in.
Do not amend the column headers or ordering
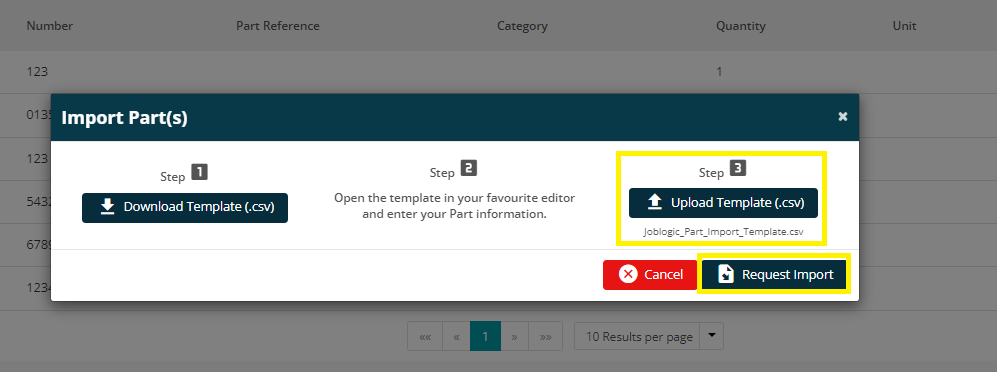
Once you have populated the template, save the file* to your local drive/machine and navigate back to the ‘Import Part(s)’ pop-up window.
*The file will need to be saved as a .csv file in order for the importer to accept it.
Then click the ‘Upload Template’ button and choose the file that was saved to the local drive/machine for upload. Now click the ‘Request Import’ button to proceed with the import and click ‘OK’ on the confirmation pop-up window.
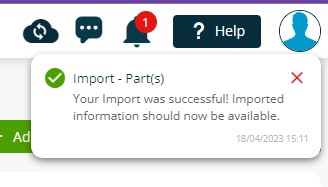
Once the import process is complete, the system automatically notifies you via the ‘Notification Bell’ icon and the new imported parts are added to the Parts List.
Further Support
For further information or assistance with the above, contact our Support Team on 0800 326 5561 or email support@joblogic.com. Alternatively, our Customer Success Management team can be reached by emailing customersuccess@joblogic.com
Publishing Details
This document was written and produced by Joblogic’s Technical Writing team and was last updated on the date specified above. Be aware that the information provided may be subject to change following further updates on the matter becoming available. Additionally, details within the guide may vary depending on your Joblogic account’s user permissions.