Introduction
Passed to Accounts is the moment when invoices move from regular business operations to the accounting department. It symbolizes a critical juncture in the lifecycle of financial transactions within any organization.
In this comprehensive guide, we will dive deep into what exactly "Passed to Accounts" means in Joblogic, why it's essential, and the step-by-step process for ensuring invoices are correctly designated as such.
Understanding this process is vital for anyone involved in financial management as it streamlines operations and ensures accuracy in accounting records. So, let's unpack this concept together and empower you with the knowledge to effectively manage this pivotal aspect of financial workflow.
What is Passed To Accounts?
"Passed to Accounts" refers to marking an invoice as transferred to the accounts department/Package (Xero, QuickBooks Sage, etc.) and preventing it from being synced again from Joblogic to Xero.
This action is done to avoid duplicate transfers and ensures proper accounting records. Once an invoice is marked as "Passed to Accounts," it indicates that the invoice has already been transferred to the accounting system and should not be synced again.
Mostly, this is done when live sync is not being used and invoice data is manually transferred to the accounting system/package using reports from Joblogic. However, if you are using Live sync, sometimes you may need to mark some invoices as passed to accounts when the information/invoice already exists in the accounting package/software or when it comes to Purchase invoices.
How to Mark Invoices as Passed to Accounts
When it comes to Invoices and marking them as passed to accounts then both Sales and Purchases invoices are considered.
Currently in the Live Sync, purchase invoices are not considered therefore reports are still used. For both kinds of invoices, we have standard reports available for Xero, QuickBooks, and Sage.
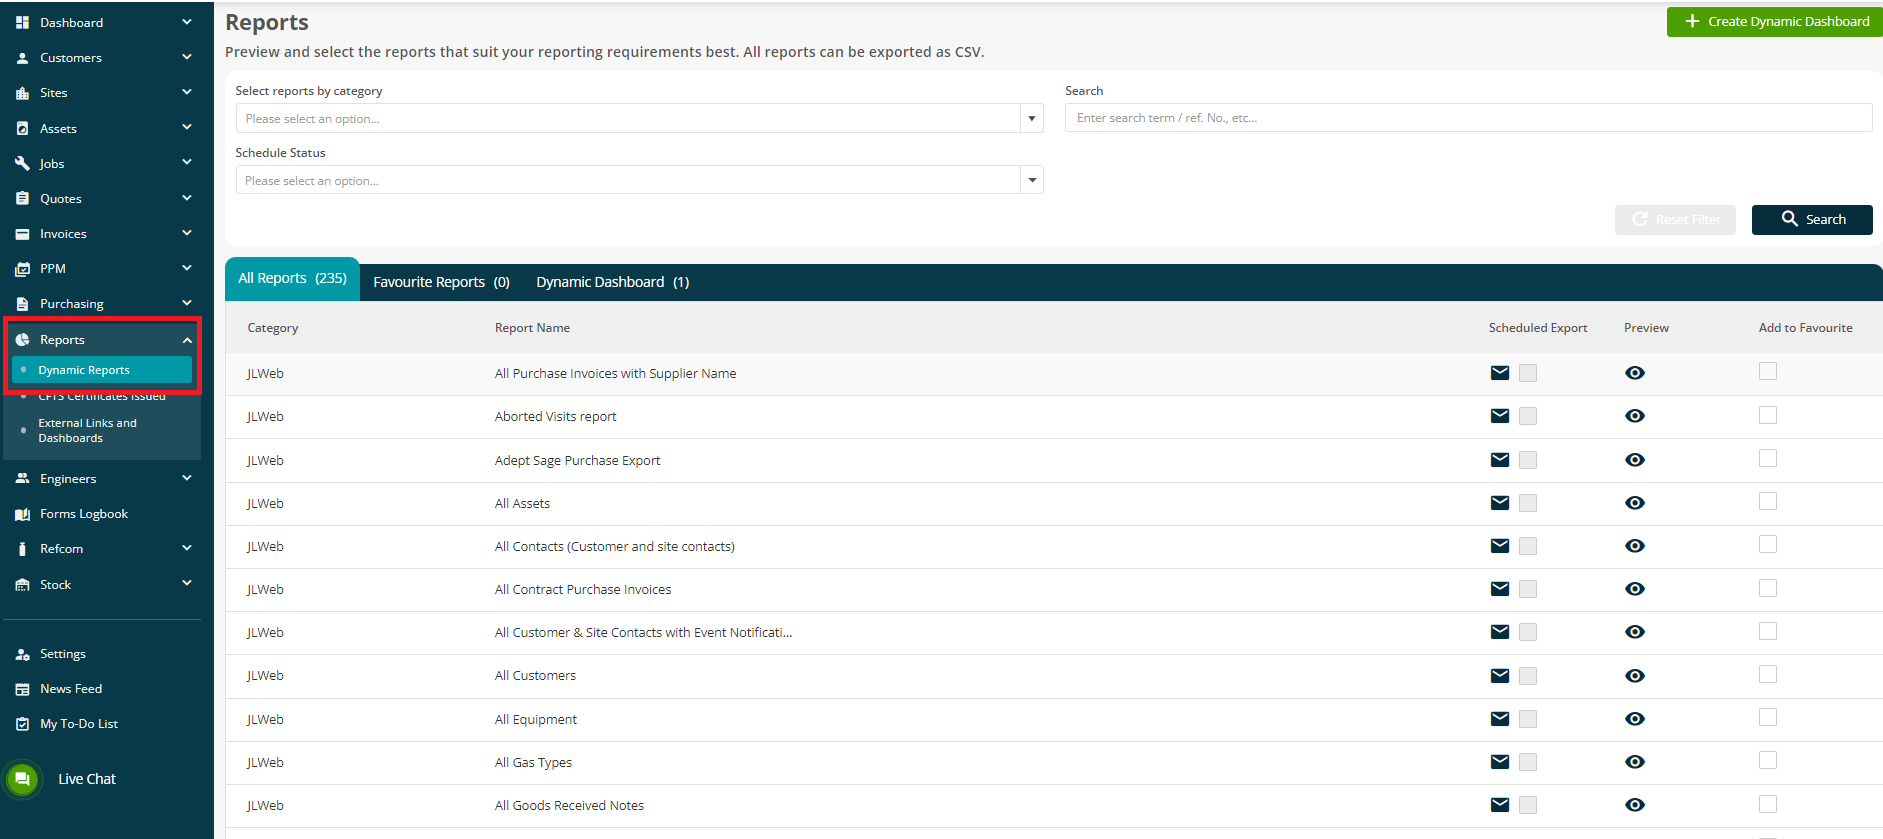
Navigate to Reports > Dynamic Reports, to start this process.
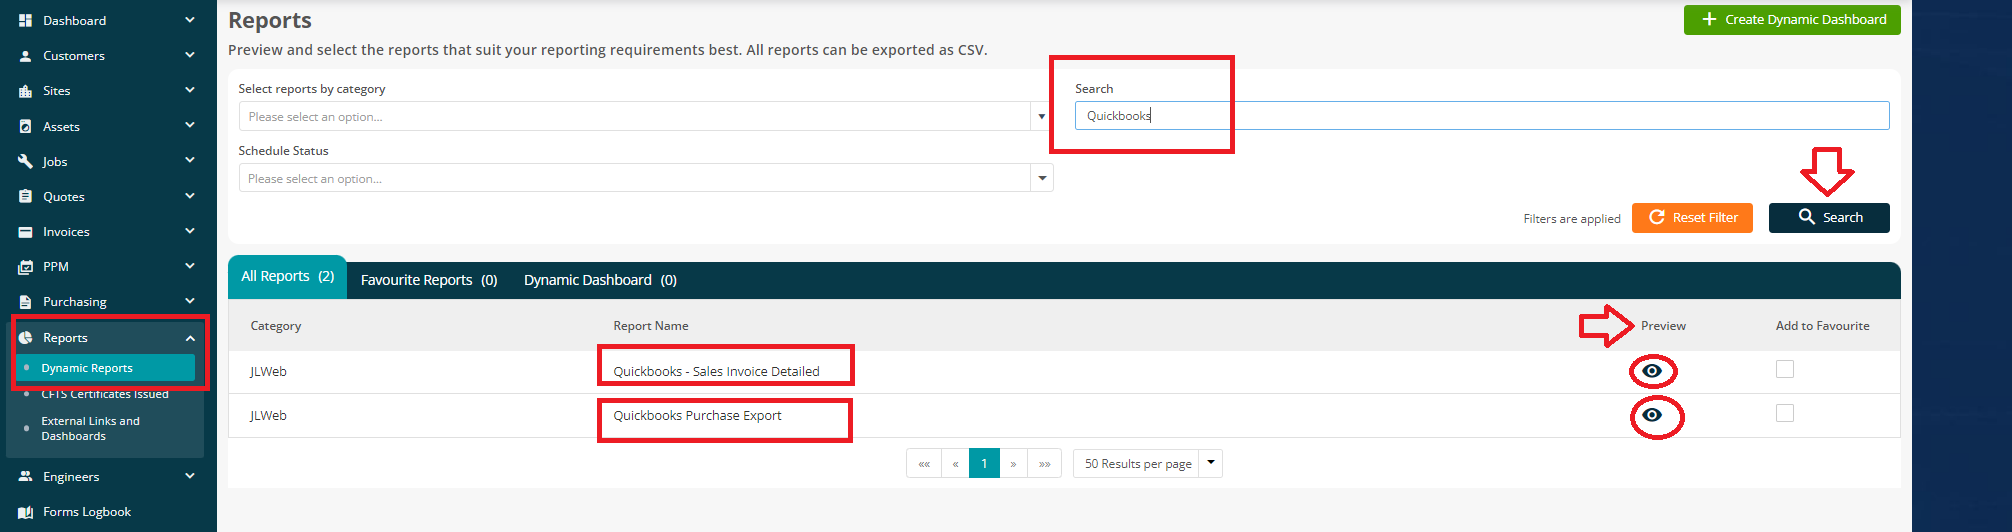
On the search field, type the name of the accounts package which is being used. In this example we will use ‘Quickbooks’.
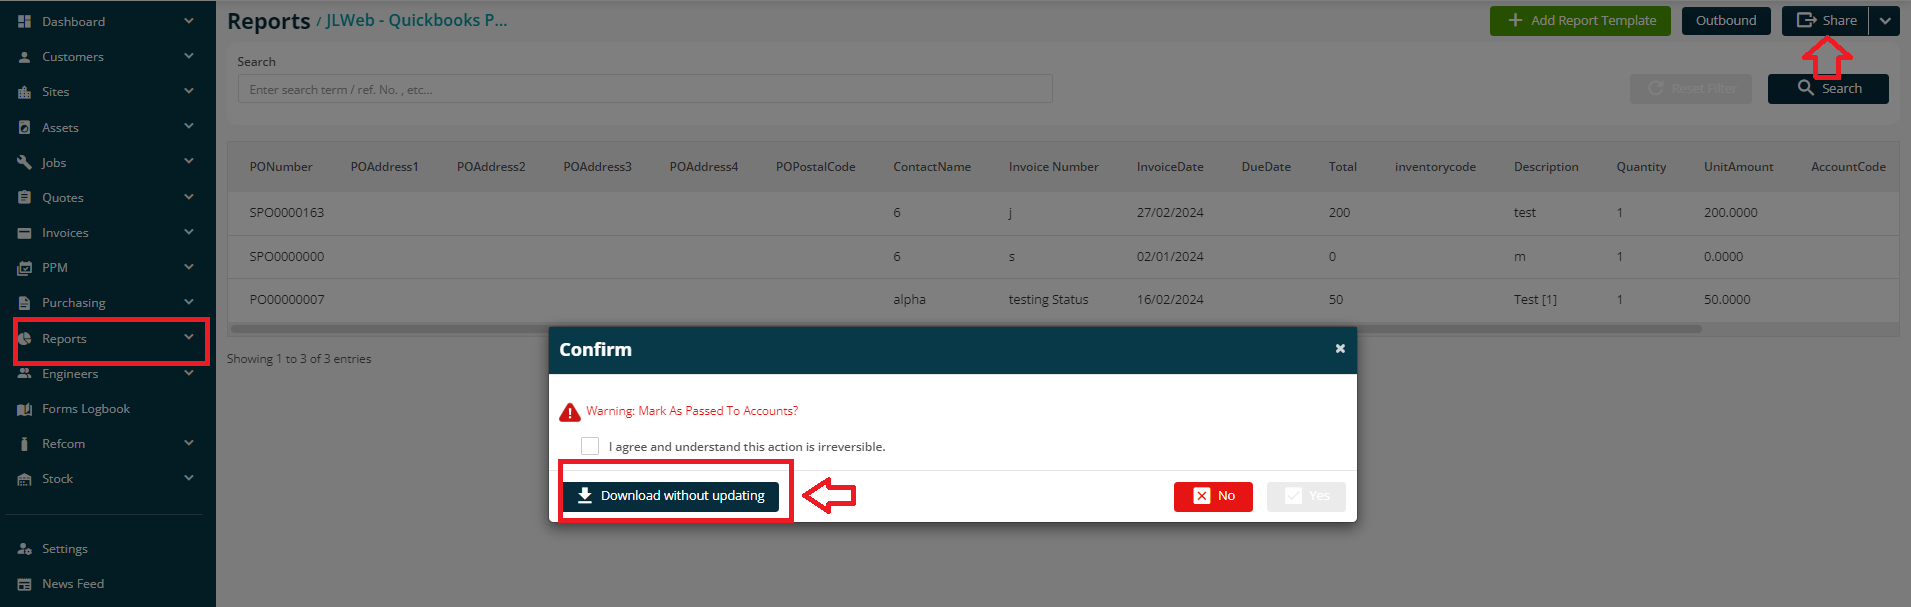
Click on the search button which will then list the available reports for QuickBooks for both Sales and Purchases invoices. Next, click on the eye icon to preview your chosen report.
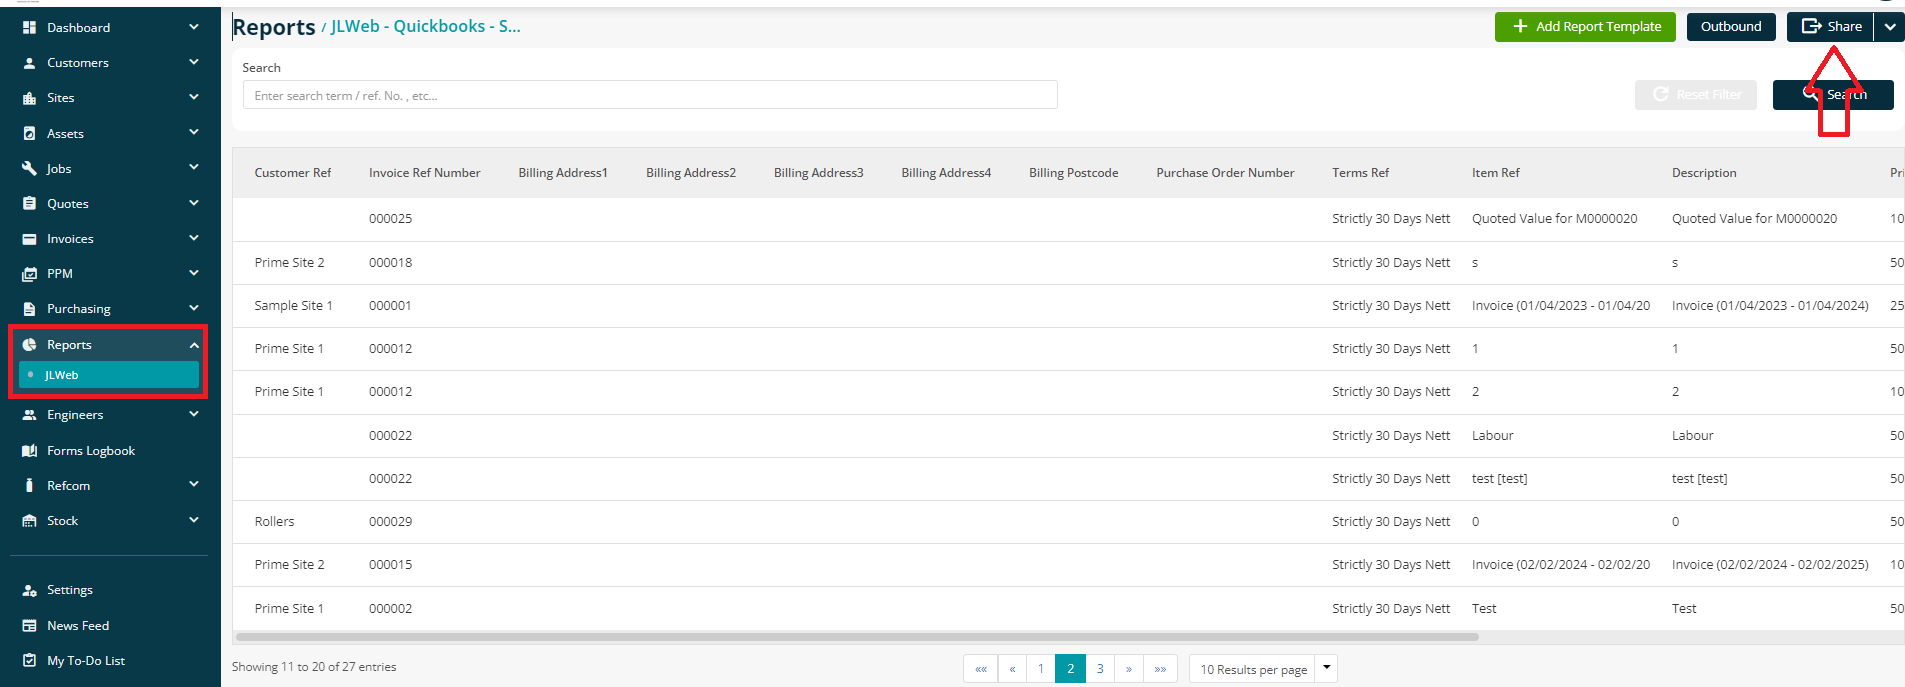
Navigate to the top right corner of the page and click on the share button.
A new pop-up box will appear with a check box option stating ‘I agree and understand this action is irreversible’
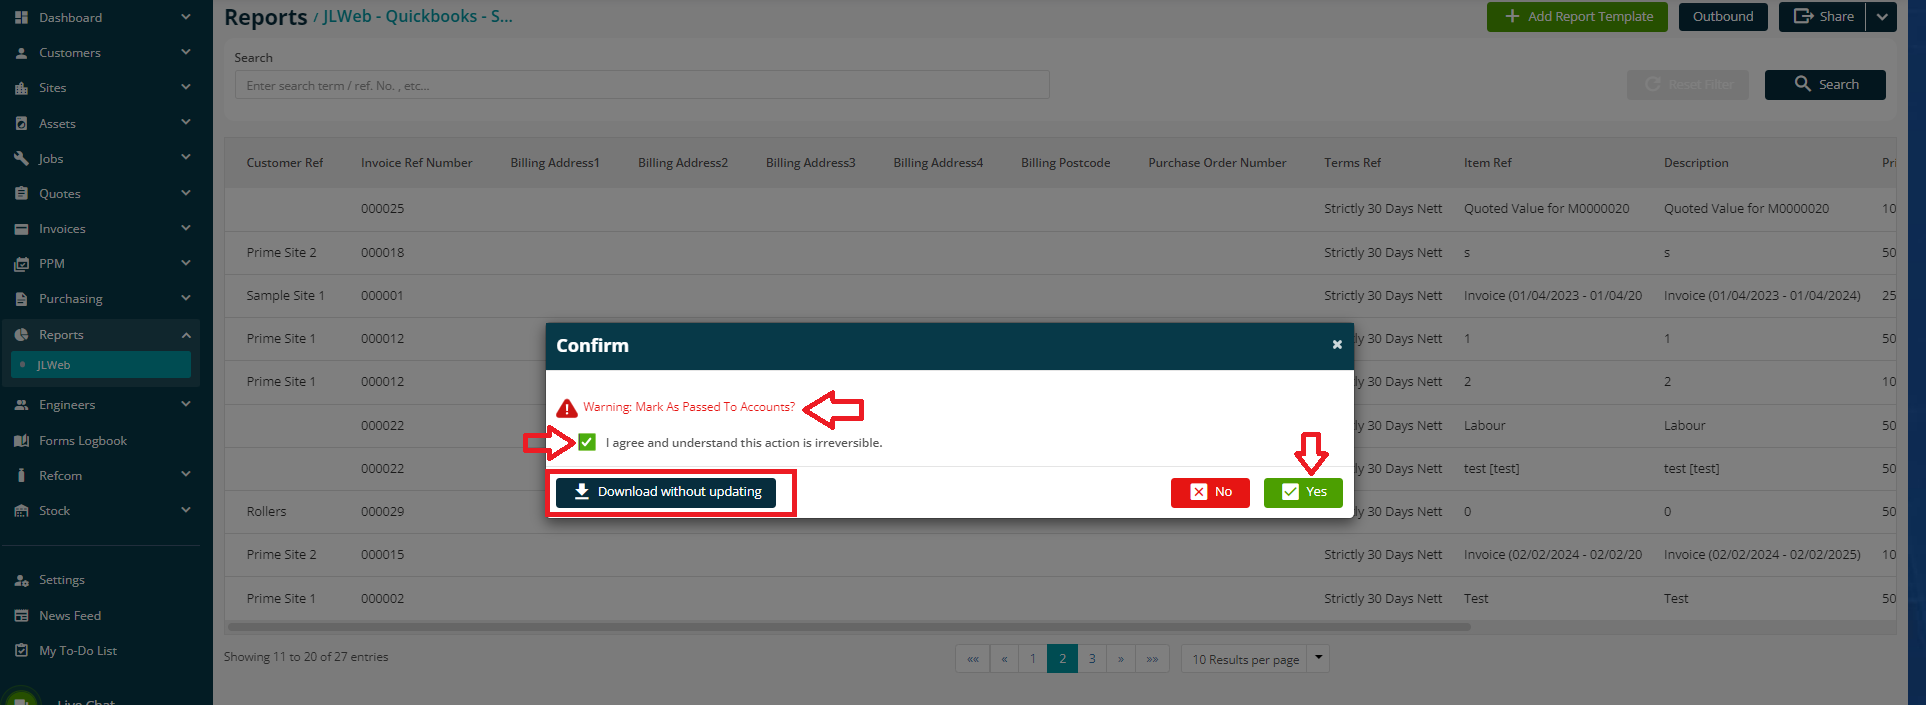
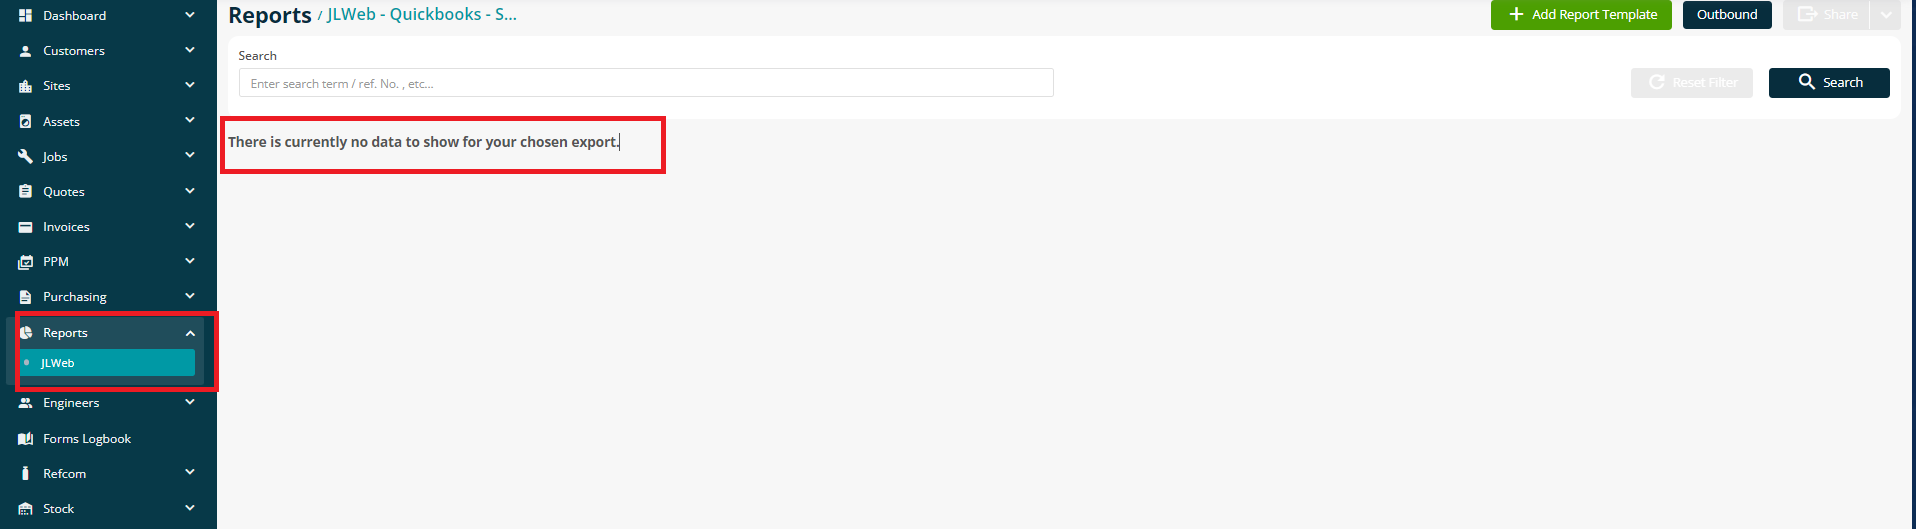
Check mark the box and then click Confirm. Doing this will download the report.
The page will refresh and there will be no data available for the report in Joblogic and it will say ‘There is currently no data to show for your chosen export’
The whole data will be removed from the report and there is no option in the software to revert it but in case the invoices were marked accidentally as passed to accounts, then to revert such invoices, the customer can reach out to Joblogic Support.
At this stage too, you can simply download the report without marking it as passed to accounts. This will mean the data will still be available in your Joblogic report and can be downloaded/marked as passed to accounts at a later date.
Further Support
For further information or assistance on the above, contact our Support Team on 0800 326 5561 or email support@joblogic.com. Alternatively, our Customer Success Managers team can be reached by emailing customersuccess@joblogic.com
Publishing Details
This document was written and produced by Joblogic’s Technical Writing team and was last updated on the date specified above. Be aware that the information provided may be subject to change following further updates on the matter becoming available. Additionally, details within the guide may vary depending on your Joblogic account’s user permissions.