Introduction
Pay Bands and Selling Rates are useful for costing and invoicing purposes, saving you time and allowing the Joblogic system to calculate costs and charges automatically.
This guide will explain the two options and also help you to set them up correctly and efficiently.
Pay Bands
Pay Bands allows you to store different cost rates for different times. These can then be applied to the Working Hours sections of the Company, Engineer and Customer pages.
Setting up your Pay Bands
To set up a Pay Band, go to Settings > Library > Pay Bands
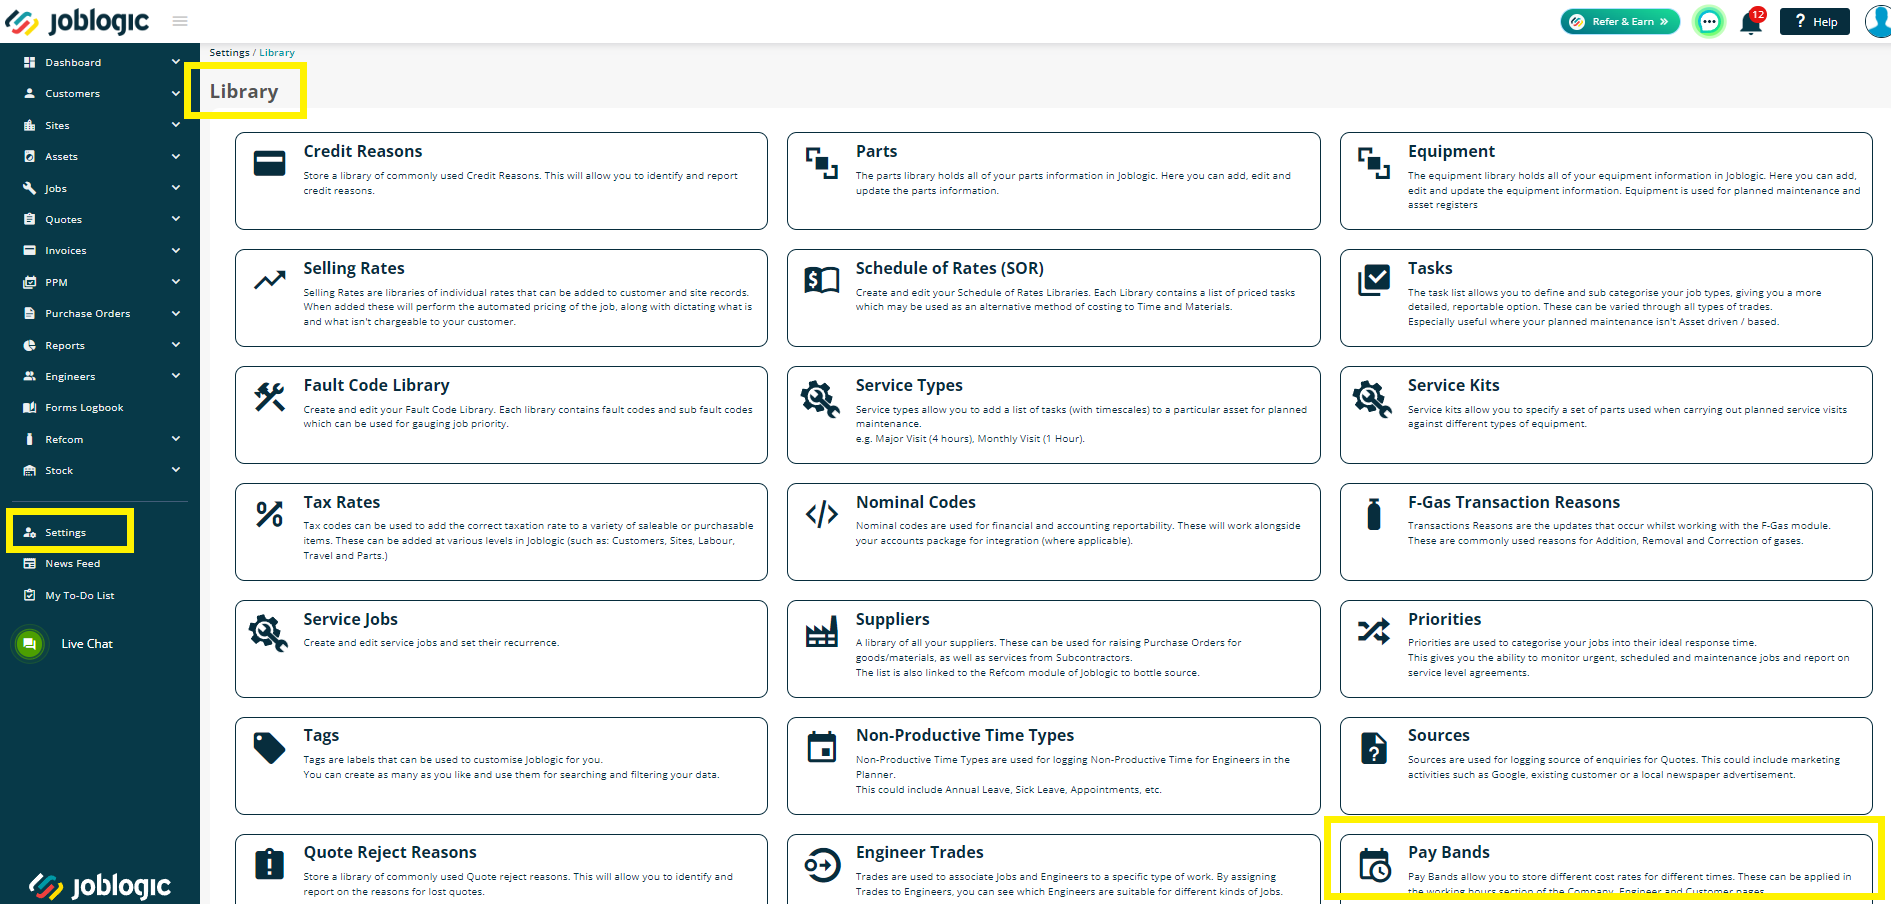
There will be a Basic Pay Band already set up for you and should reflect your ‘In-Hours’ works.
To edit this, click the name Basic, then amend the costs as needed.
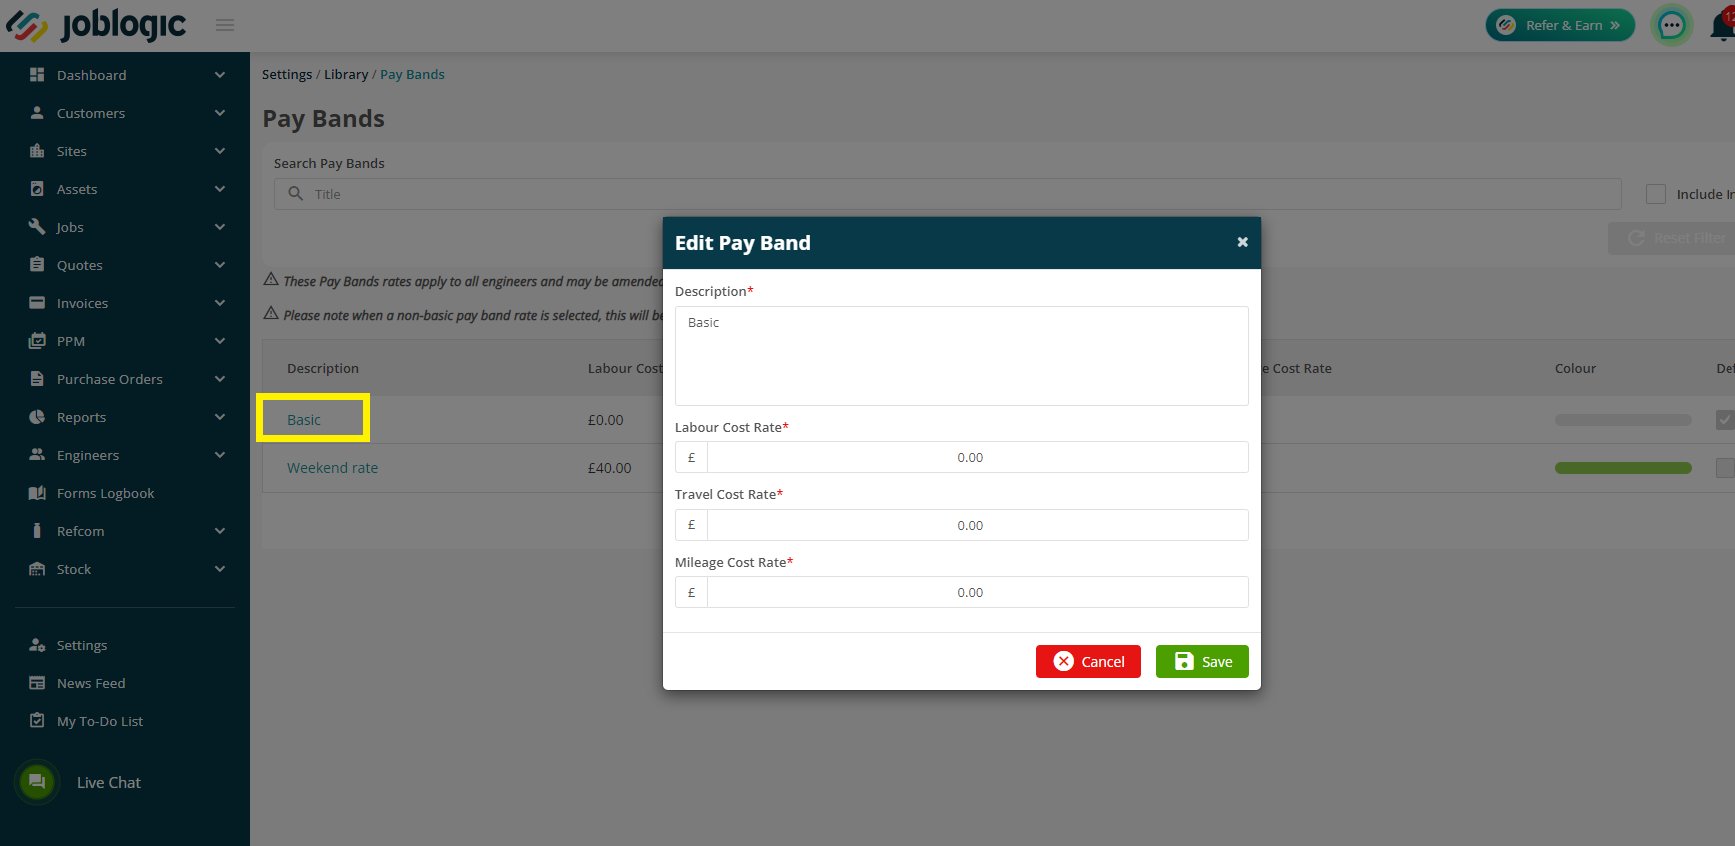
Any extra Pay Bands that are added will reflect in your costs as Overtime.
Pay Band Cost Rates can be edited per Engineer if they cost differing amounts depending on skills, experience, etc, so this screen will just need to reflect the standard costs if any.
To add a new item, click Add Pay Bands.
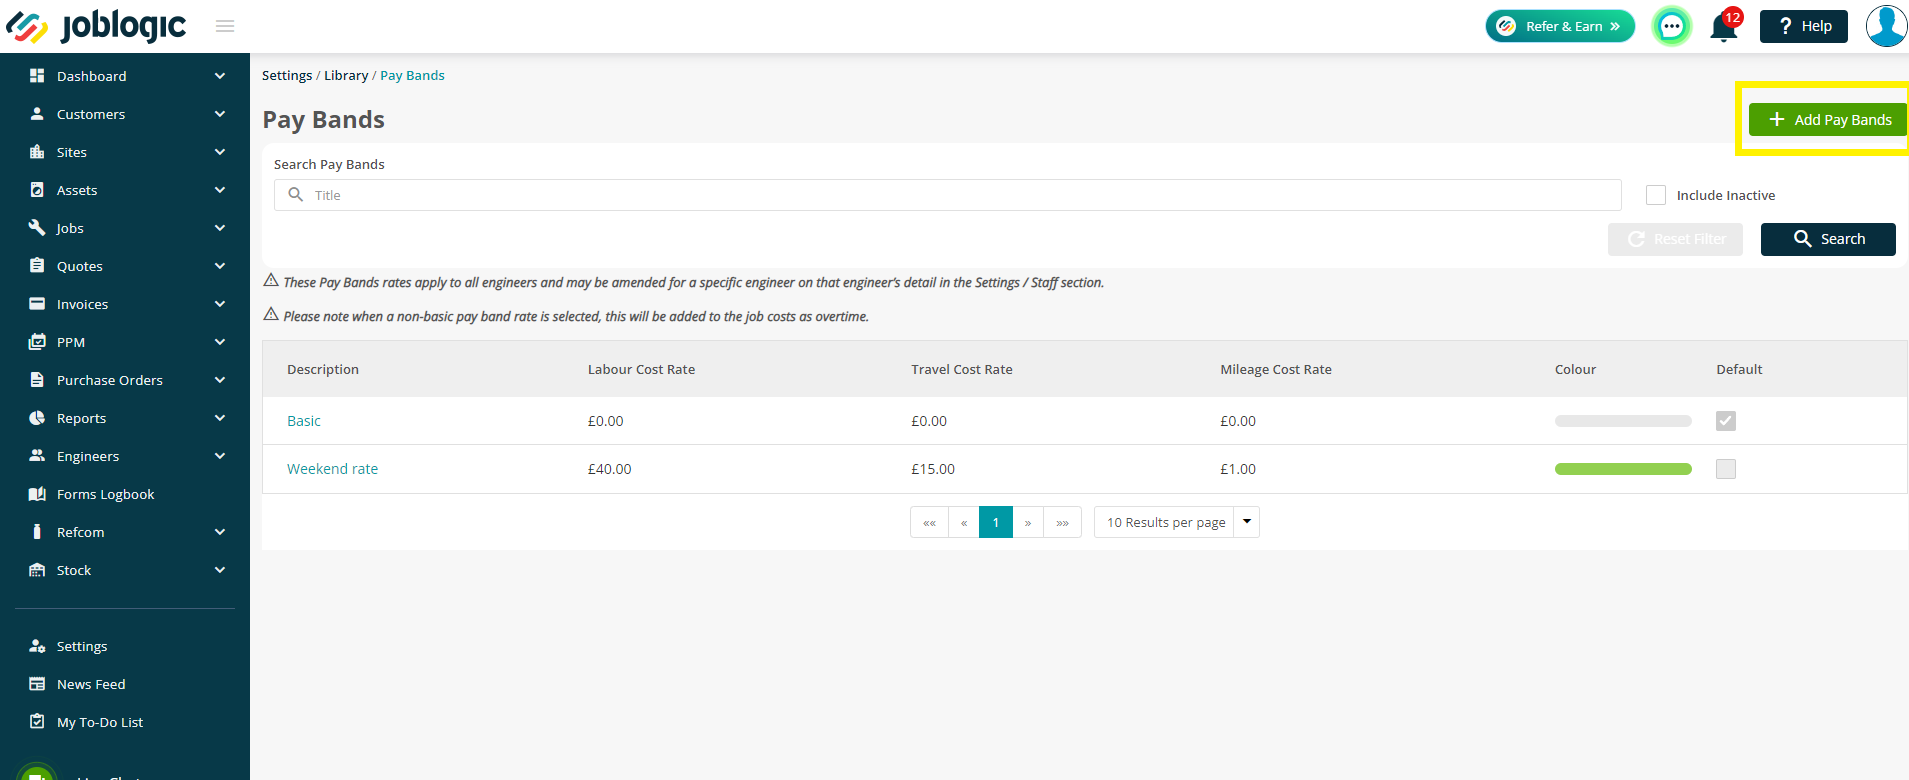
Enter the Description (name of your Pay Band, i.e. Overtime, Weekend, Overtime 4am-7am, Overtime 6pm – 11pm, etc) and your Costs, if you wish to at this stage.
You will also need to choose a Colour to represent the Pay Band on the Pay Band Times planner which we will cover later in the guide.
Click Save.

System Settings
To set the Pay Bands at the System level, go to Settings > System Set up > Financial tab
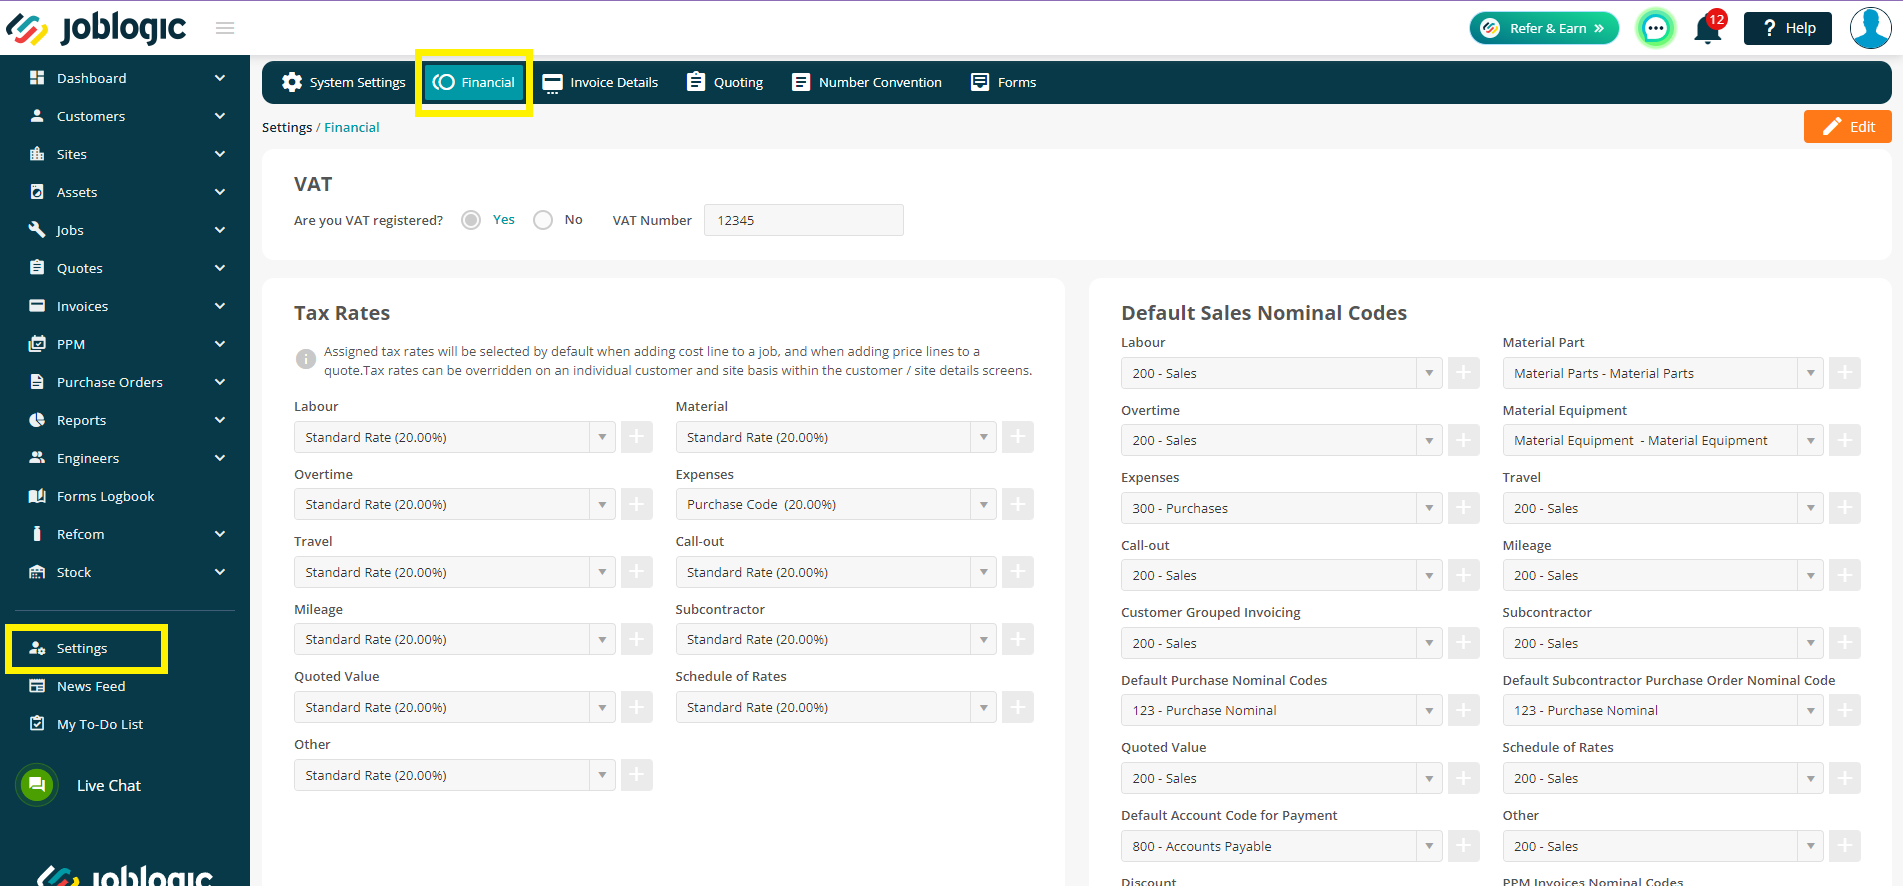
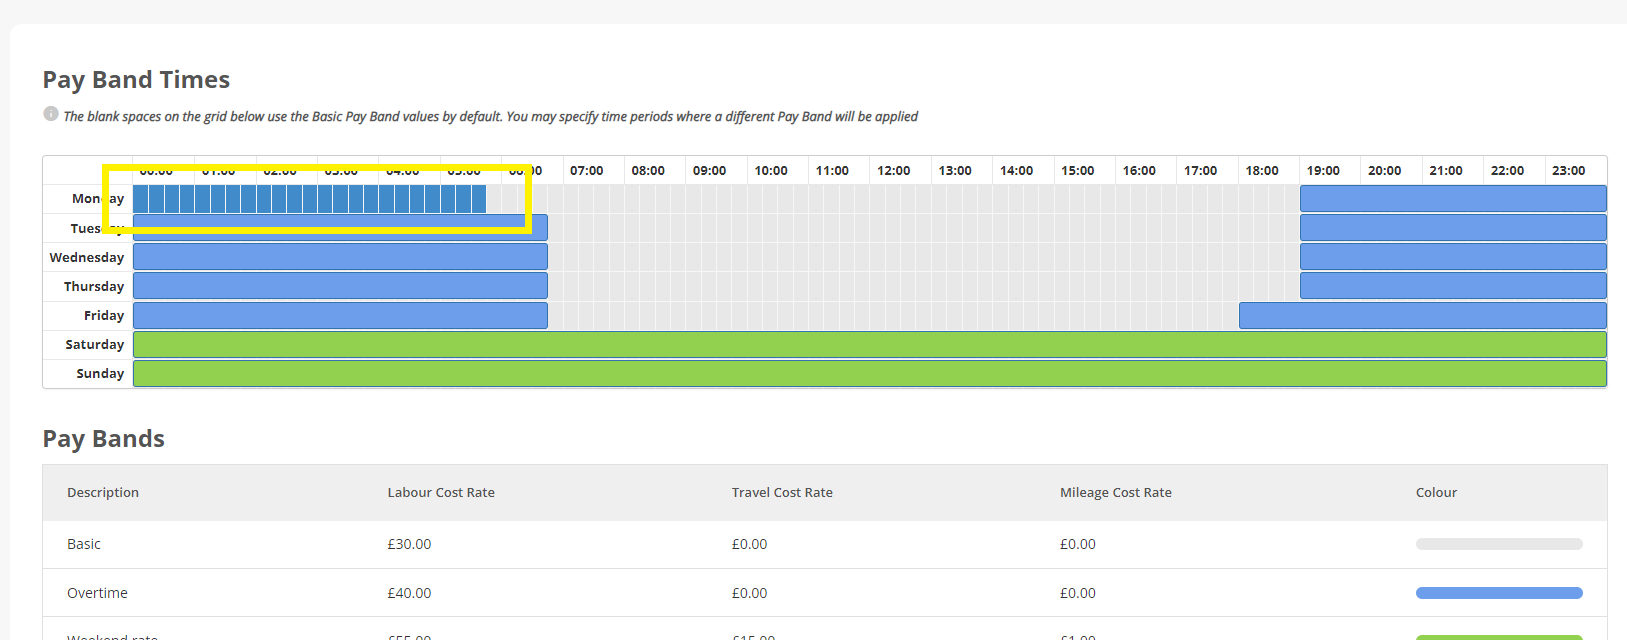
You won’t be able to edit any of the Cost Rates on this page, but you can set up your Basic and Overtime hours on the Pay Band Times grid.

Keep in mind the grey area will always be Basic. You do not need to do anything here, just leave your basic hours blank and the Basic Pay Band will be applied automatically.
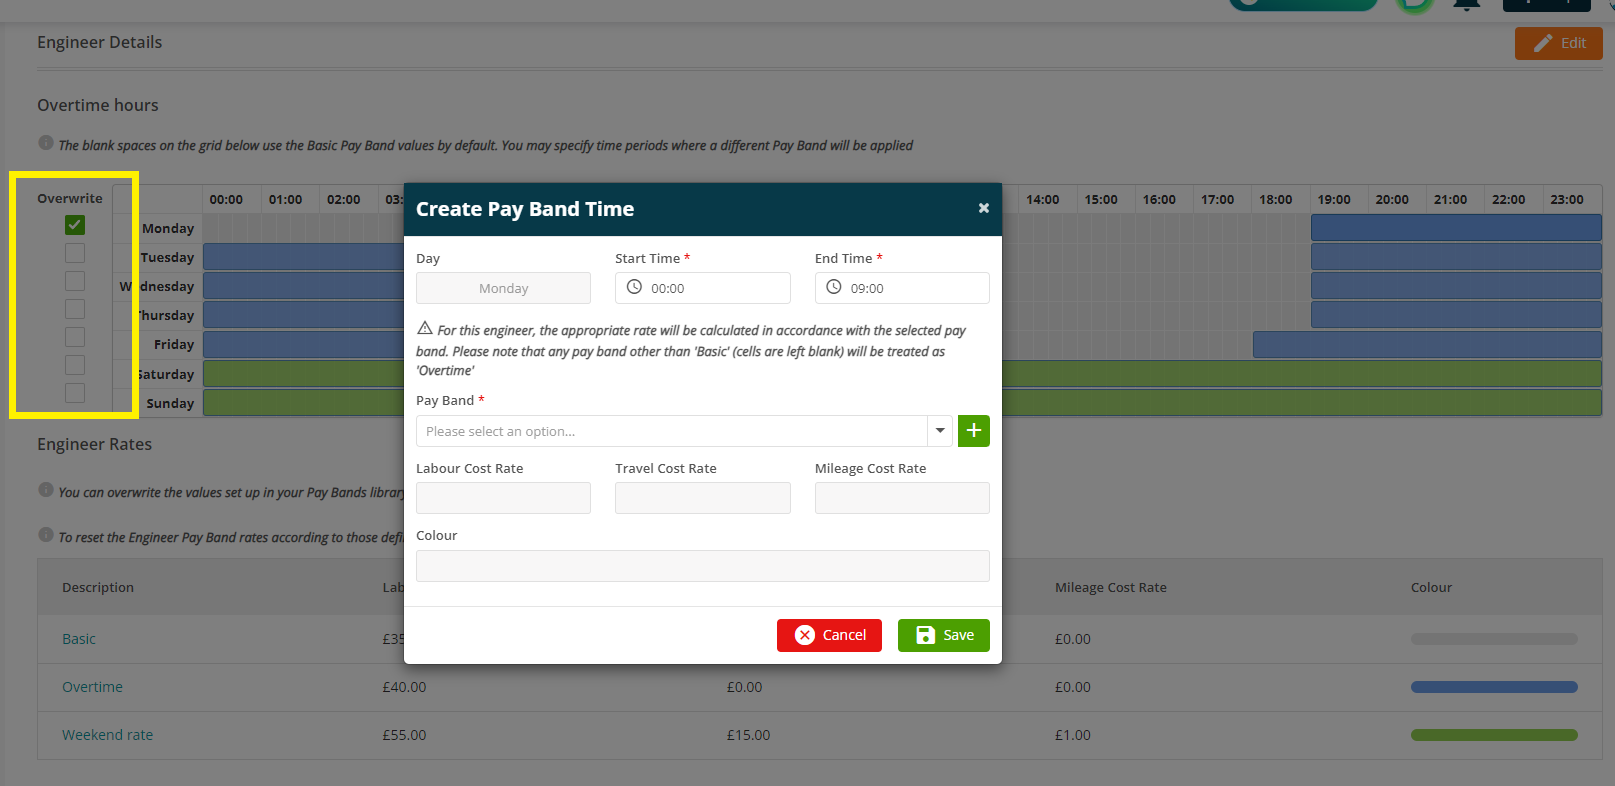
To assign an Overtime Pay Band to your grid, click into the grid at your starting point and drag to the relevant end point.
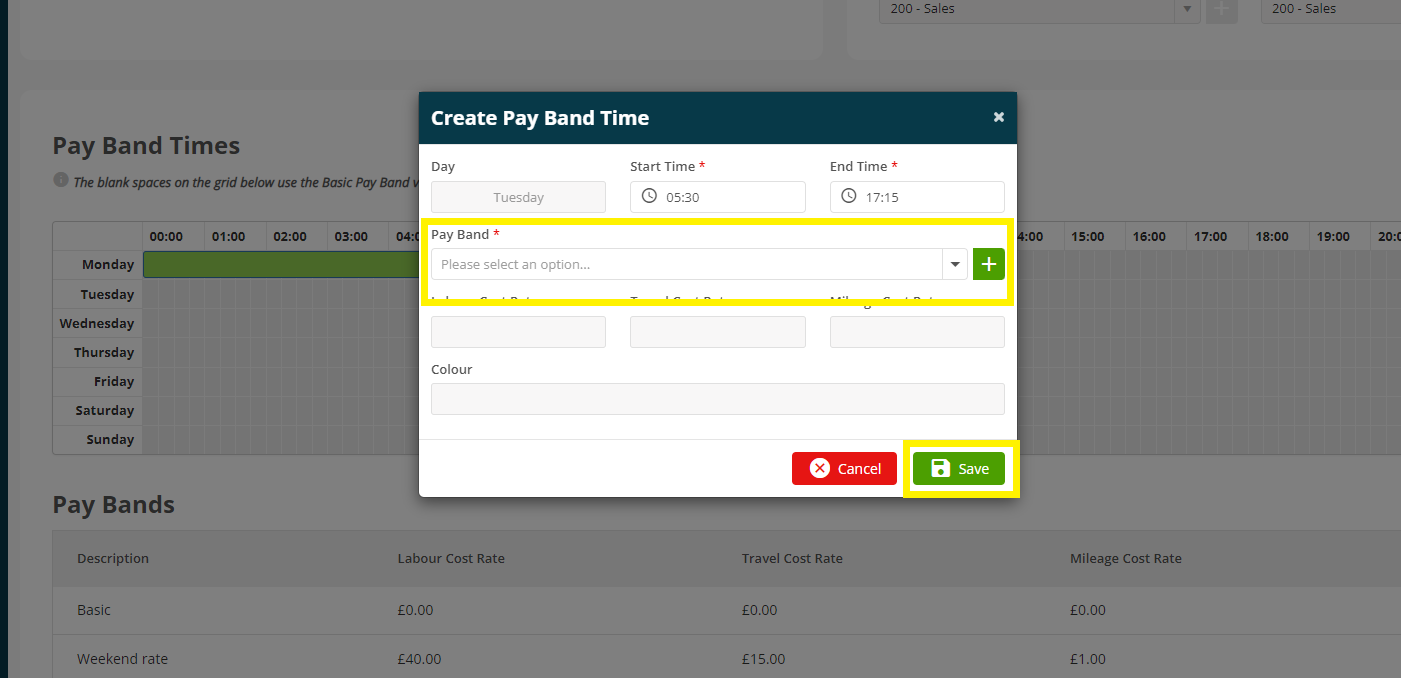
You will now be able to Create Pay Band Time. Choose your Pay Band from the dropdown and then click Save.
Alternatively, you can add a brand new Pay Band to your library by clicking the green + button.
Do the same with the rest of the grid, as needed.

If you need to amend or delete, simply click on the coloured bar.
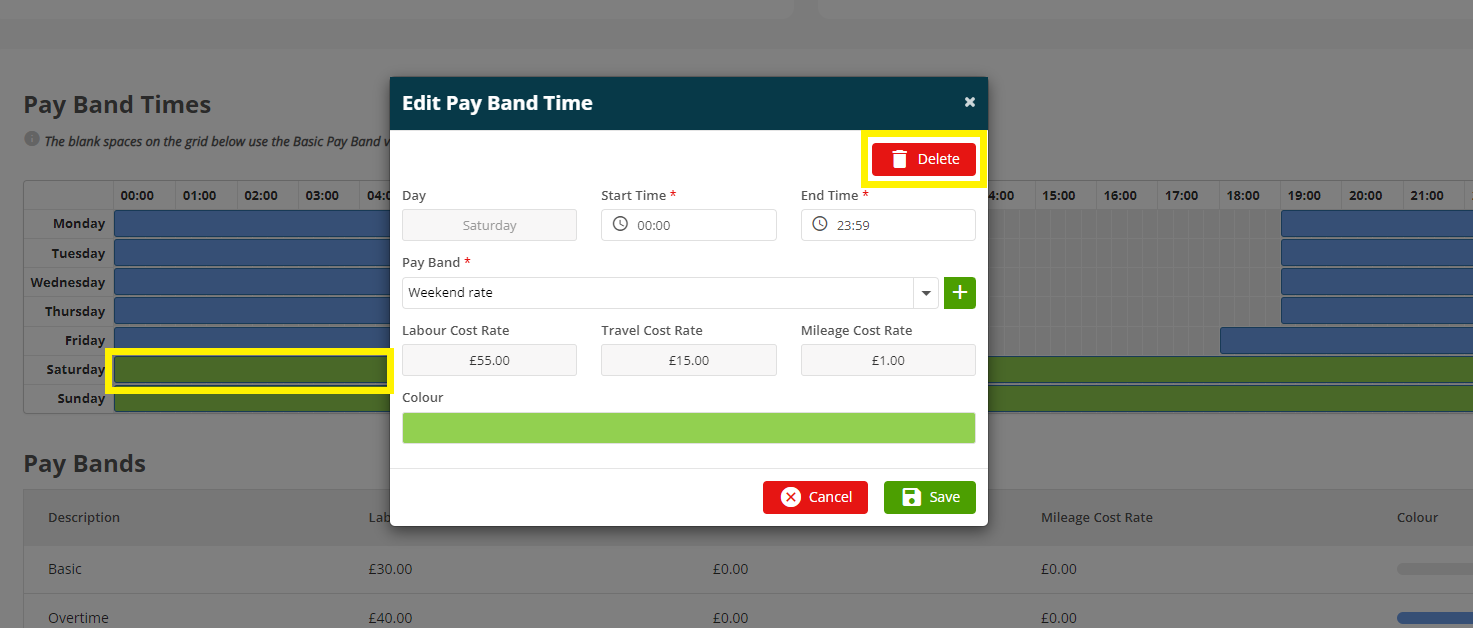
Alternatively, you can drag the bar further along to amend the time straight into the grid.
Staff Settings
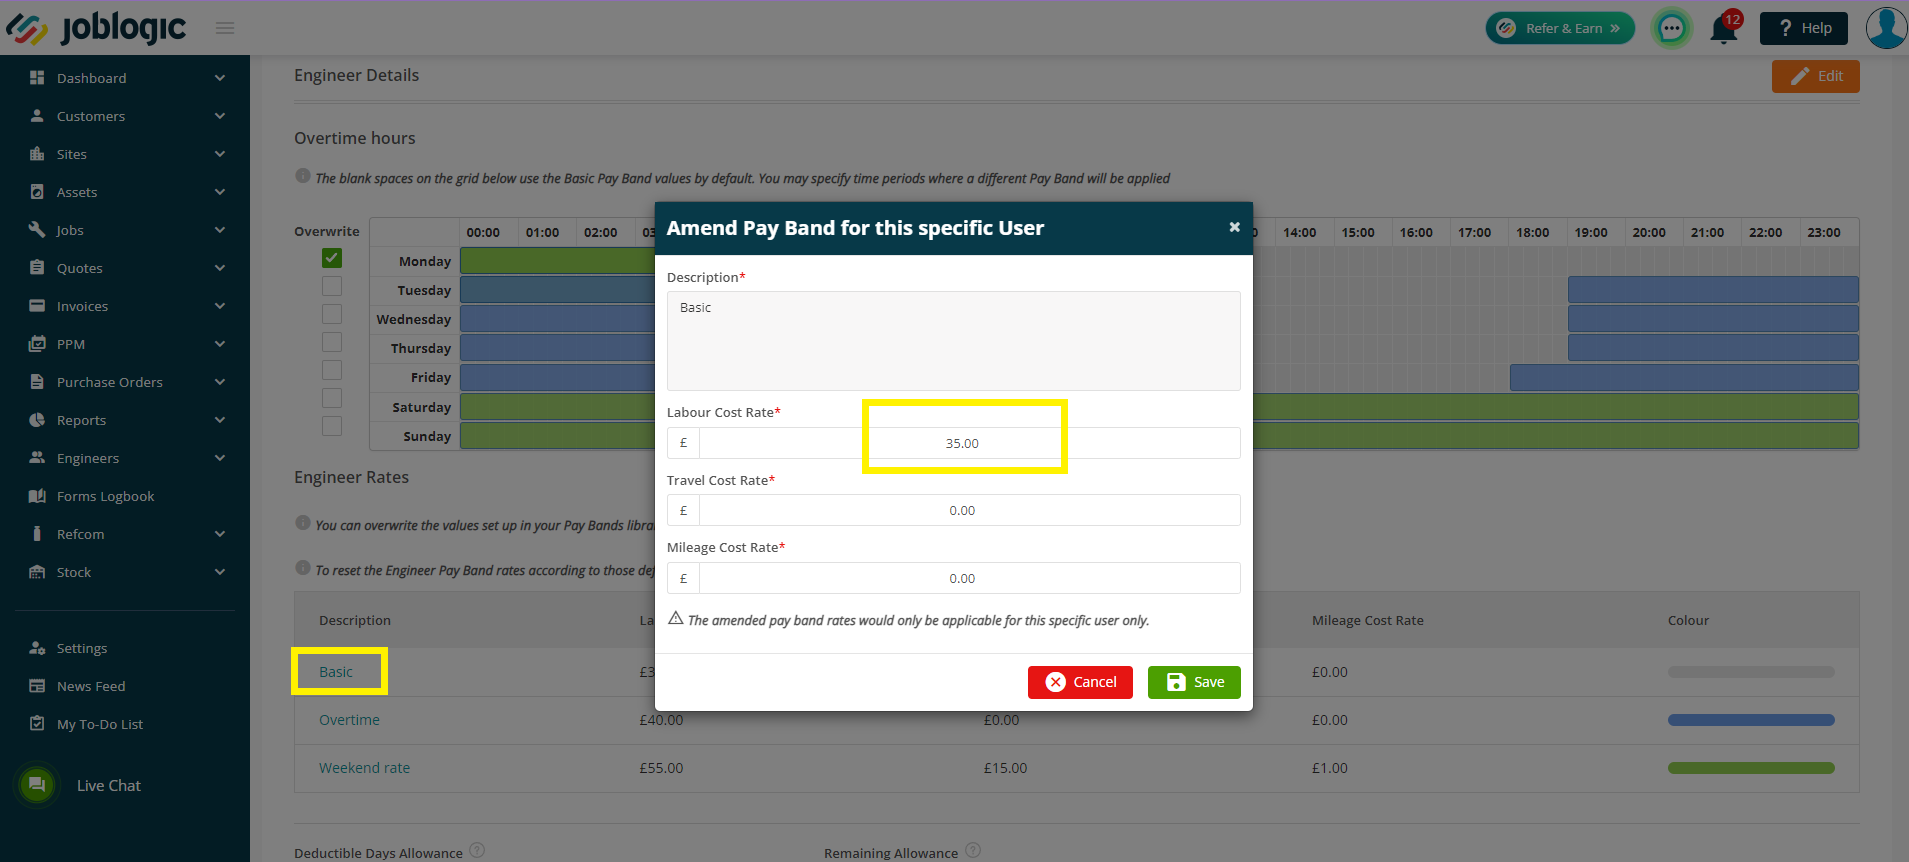
Pay Bands can also be assigned on an individual Engineer basis via Settings > Staff > choose staff member > Engineer Detail.
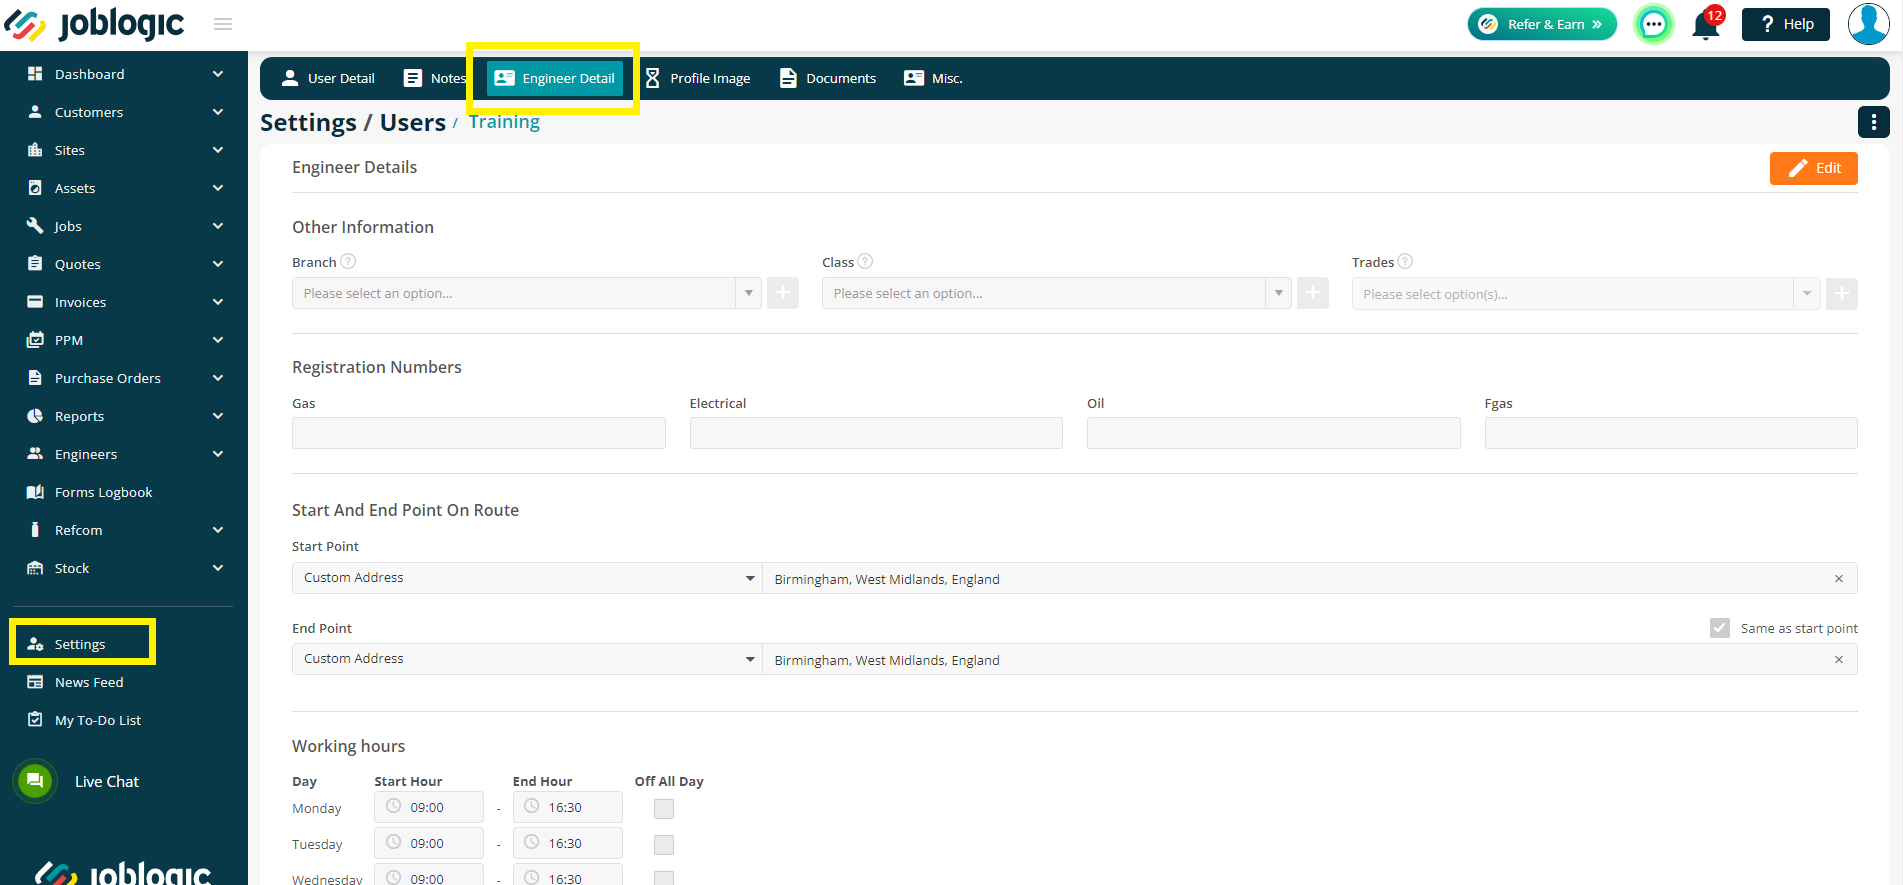
This is where you can overwrite the Pay Bands if your engineers have different Costs Rates. This will only take effect on the individual engineer page and will not change anything set up in the Library or System levels.
To do this, click on the Pay Band Description and then amend the Rates.
If you also need to amend any Overtime times, you can do so by ticking Overwrite and changing the blocks.
Customer Settings
To assign a Pay Band at Customer level, click through to Customers > All Customers > choose customer > Configuration
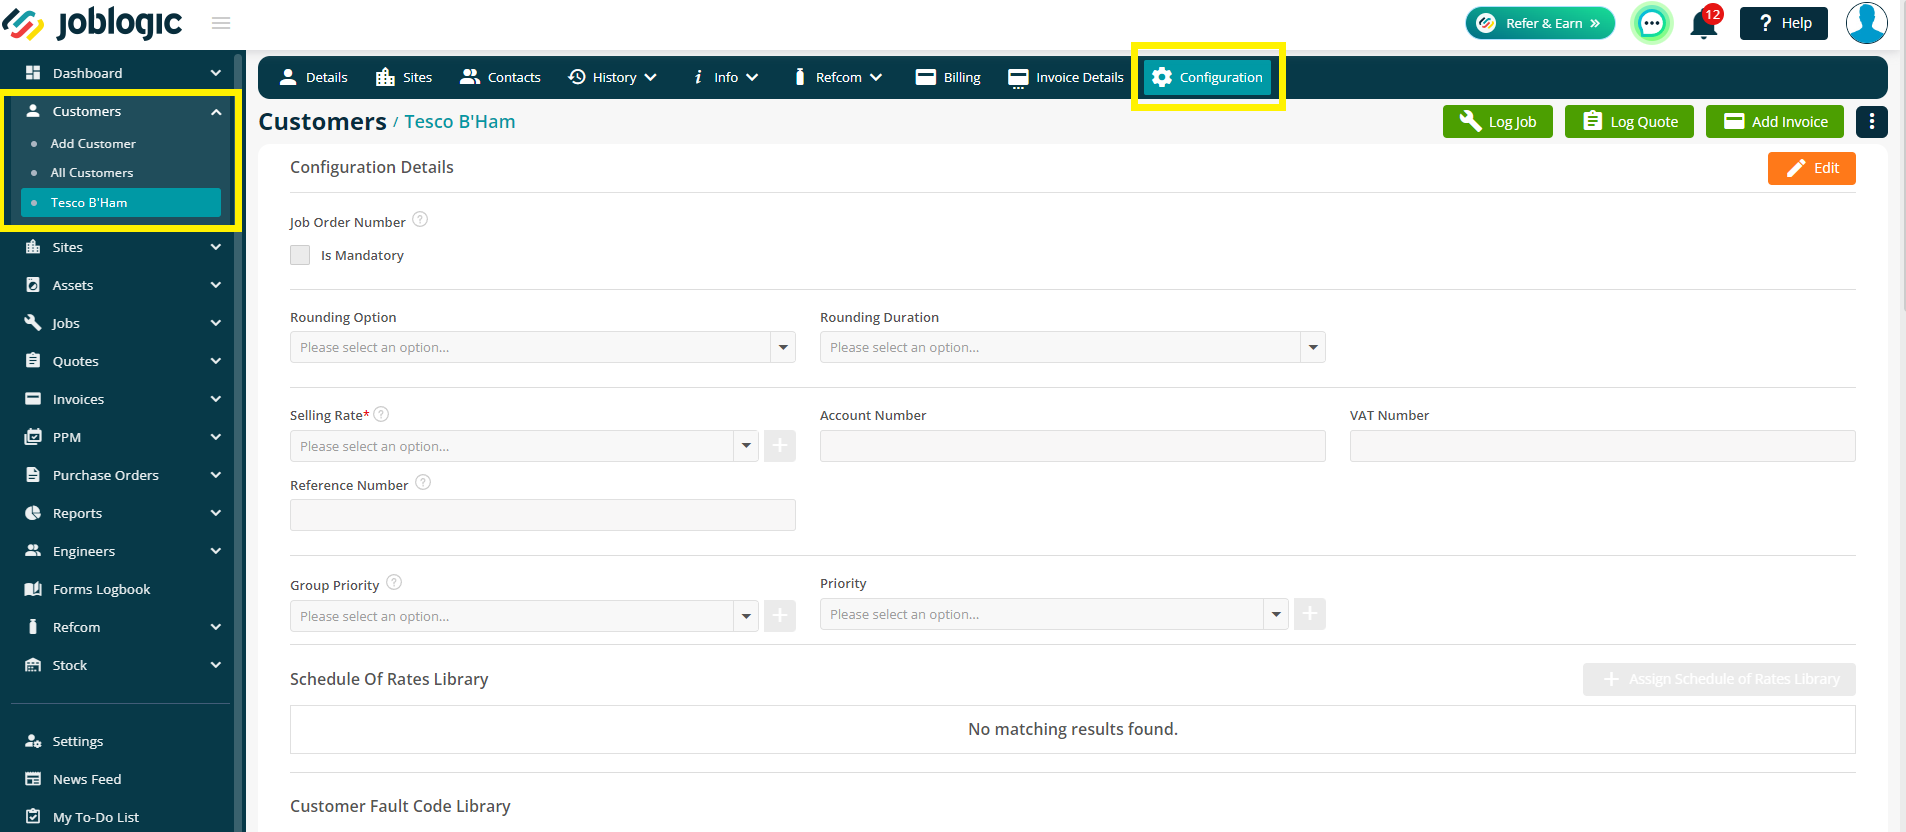
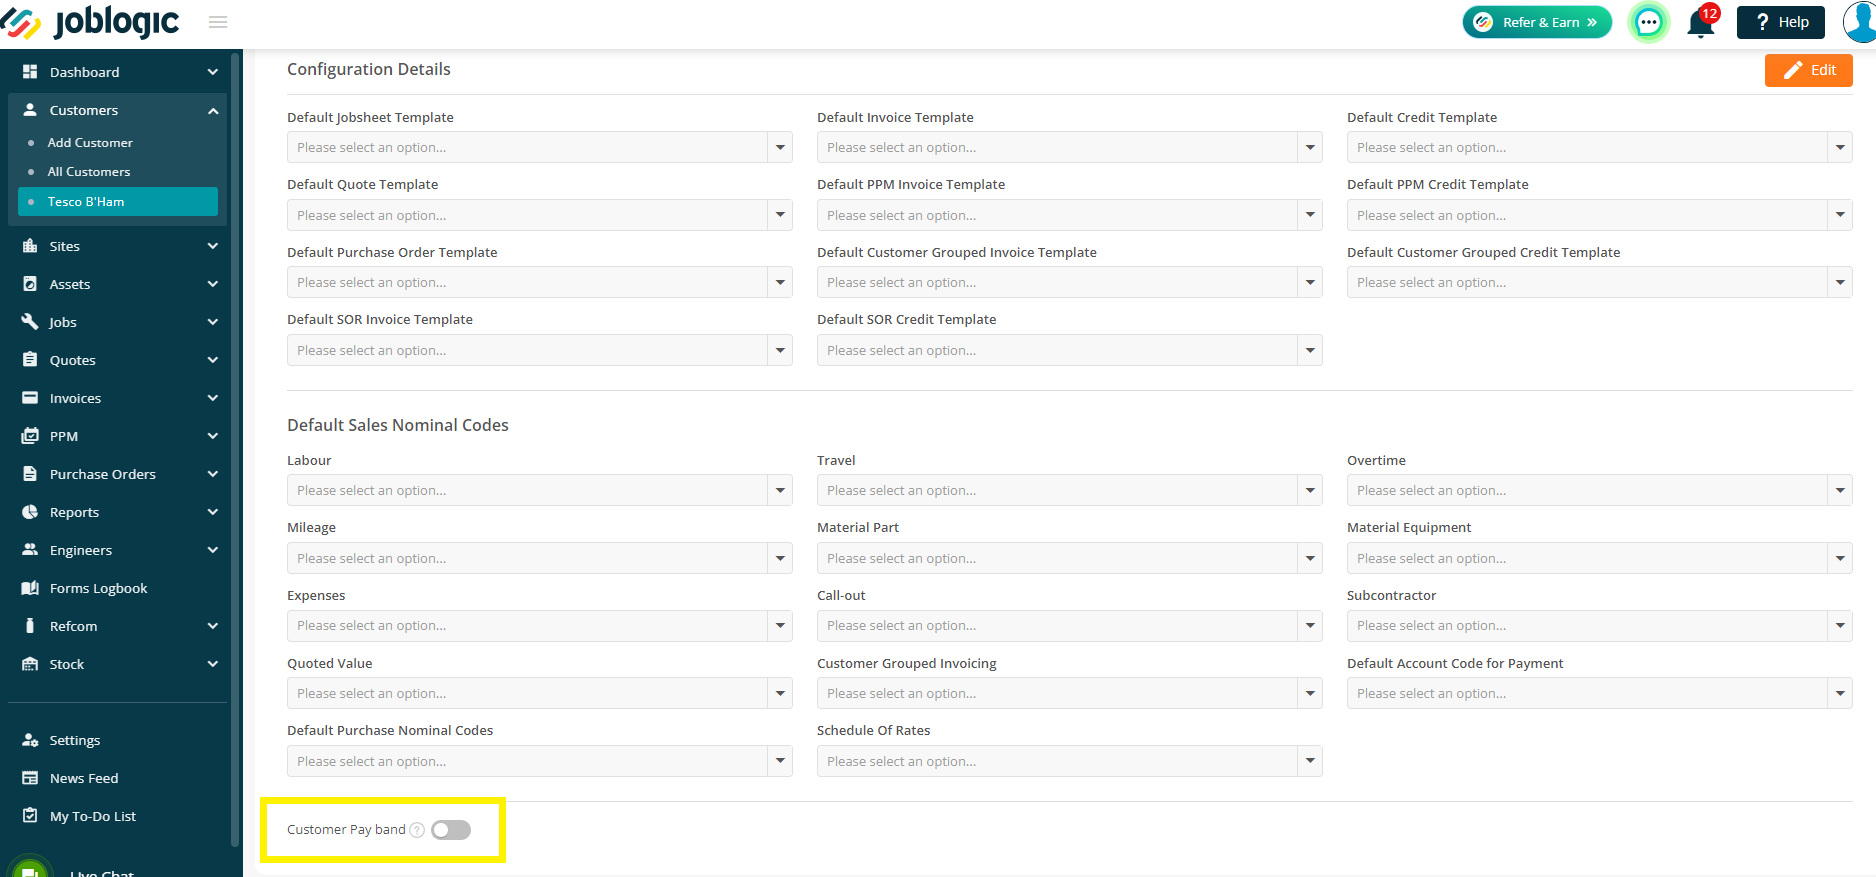
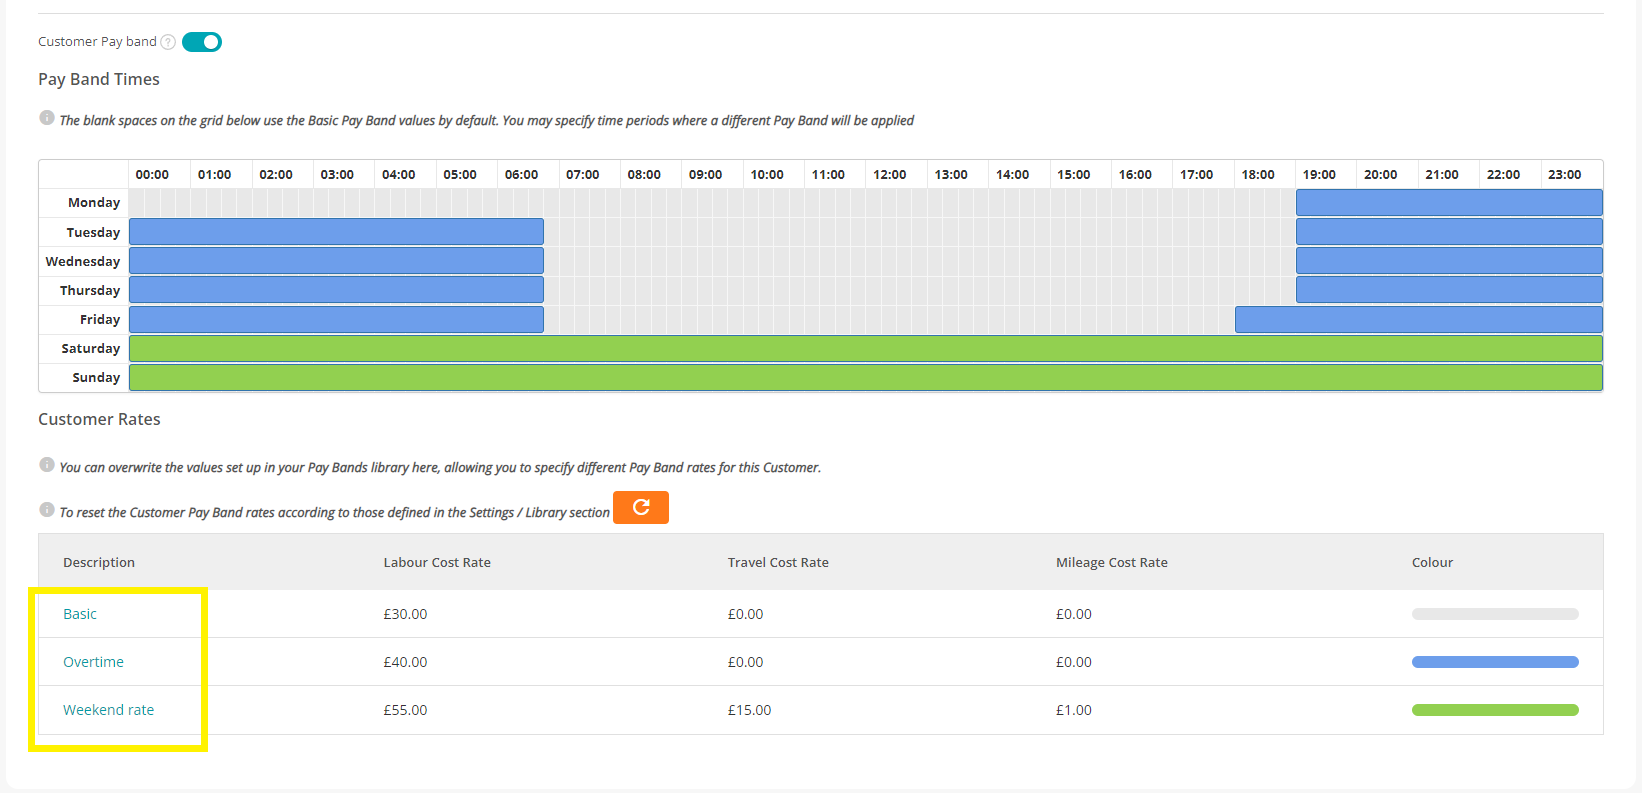
Next, scroll to the bottom of this page to toggle on the Customer Pay Band option.
Doing this will override the settings set up at System and Engineer levels.
As above, you can now amend the Times and the Rates as required.
Selling Rates
Selling Rates are libraries of individual rates that can be assigned at Customer or Site level.
You can set these rates based on your Engineer Trades and Pay Bands.
These rates will be reflected in the Job Costs screen, relating to what you are going to charge your customer.
To set these rates, you will first need to make sure your Pay Bands are set as above, and your Engineer Trades are set up in your Library (Settings > Library > Engineer Trades)
Setting up your Selling Rates
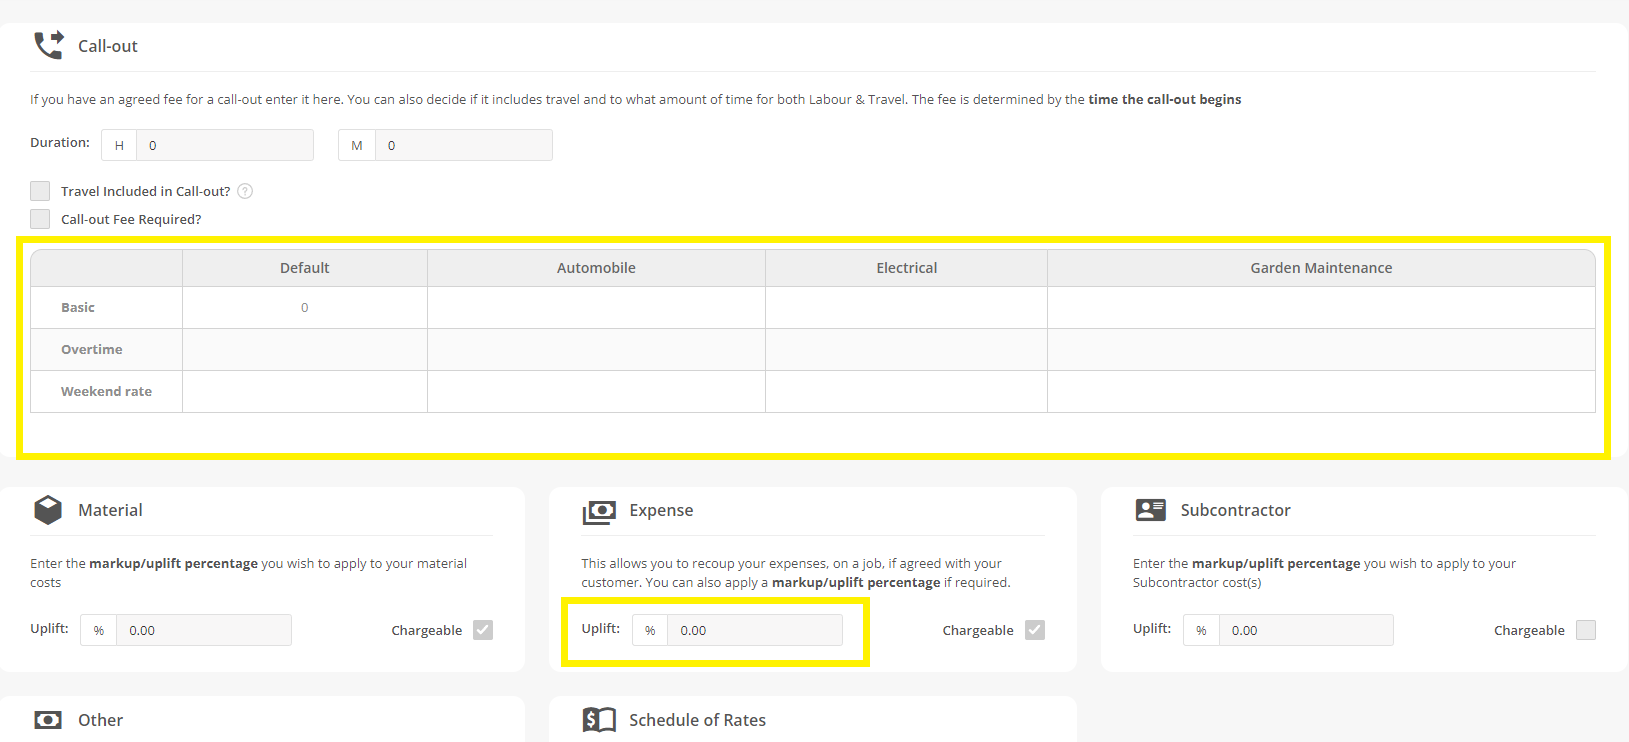
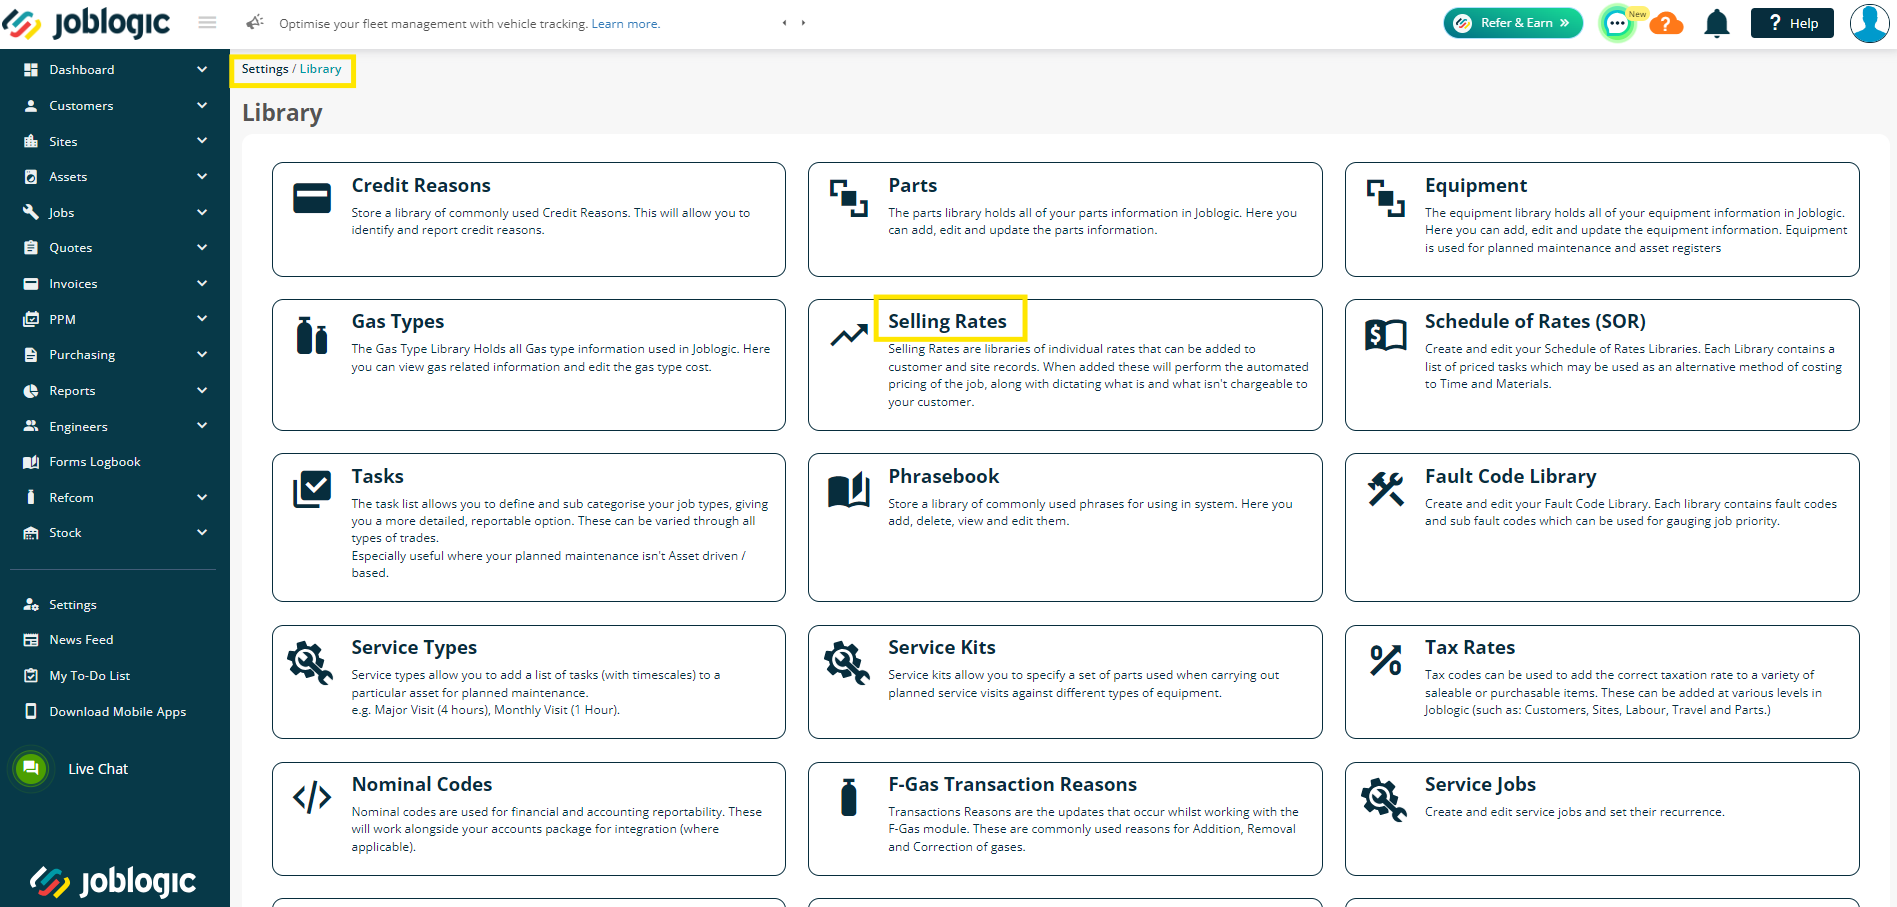
Next, you can navigate to Settings > Library > Selling Rates.
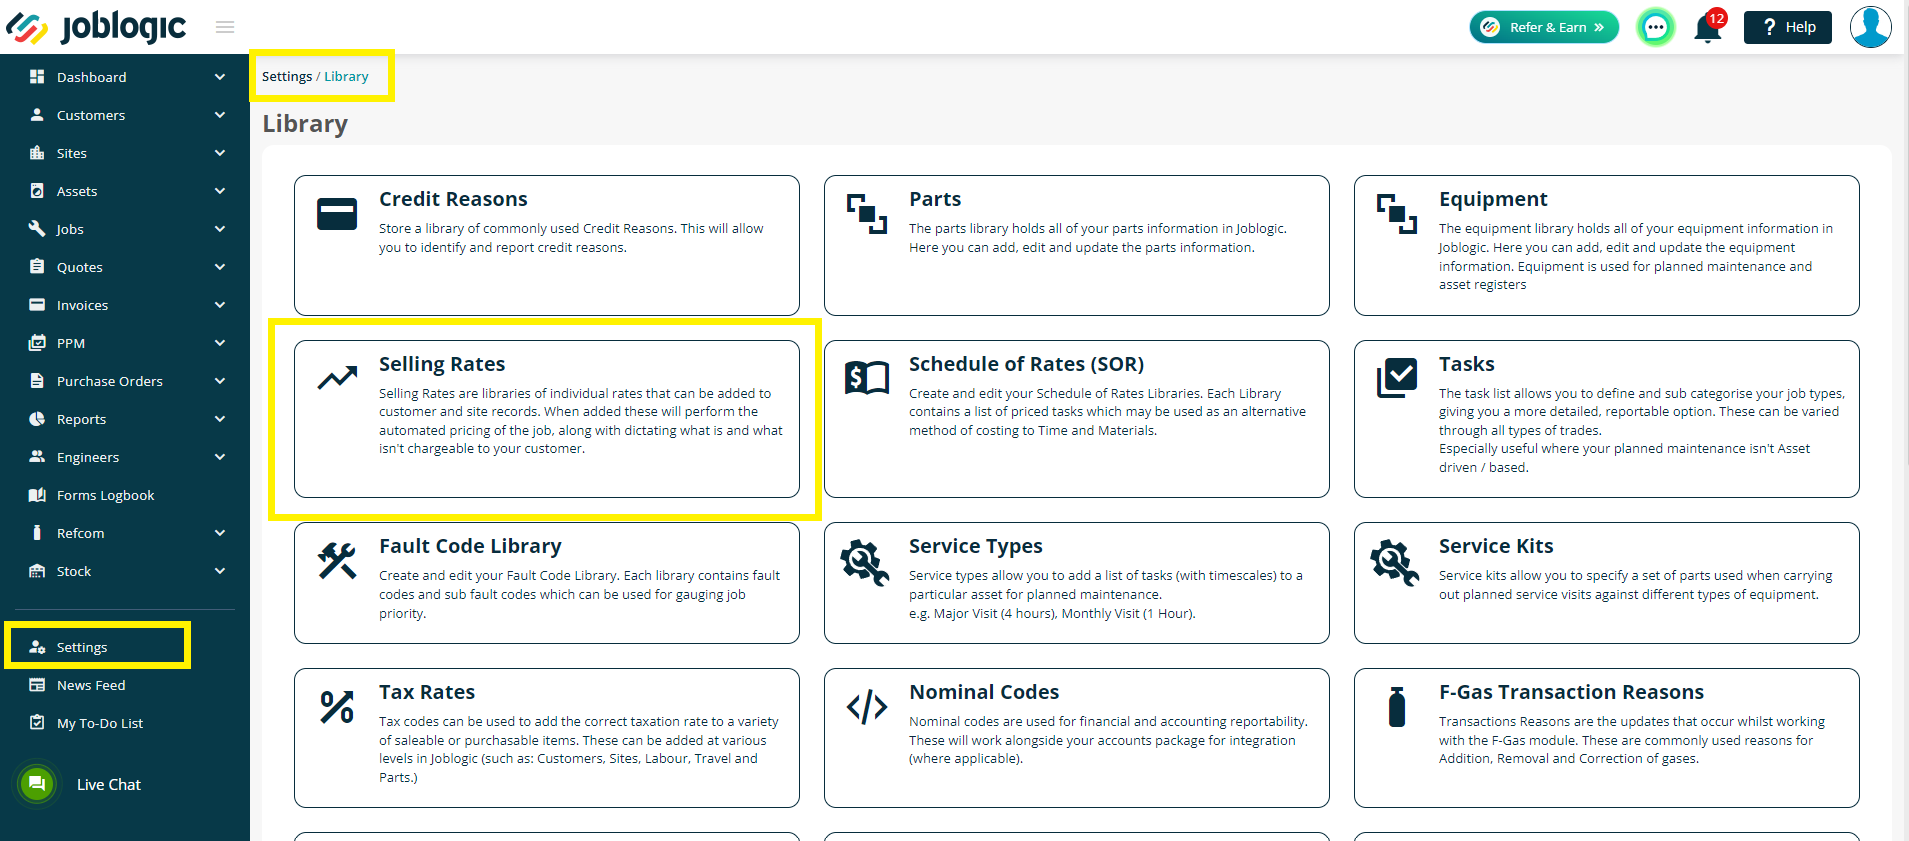
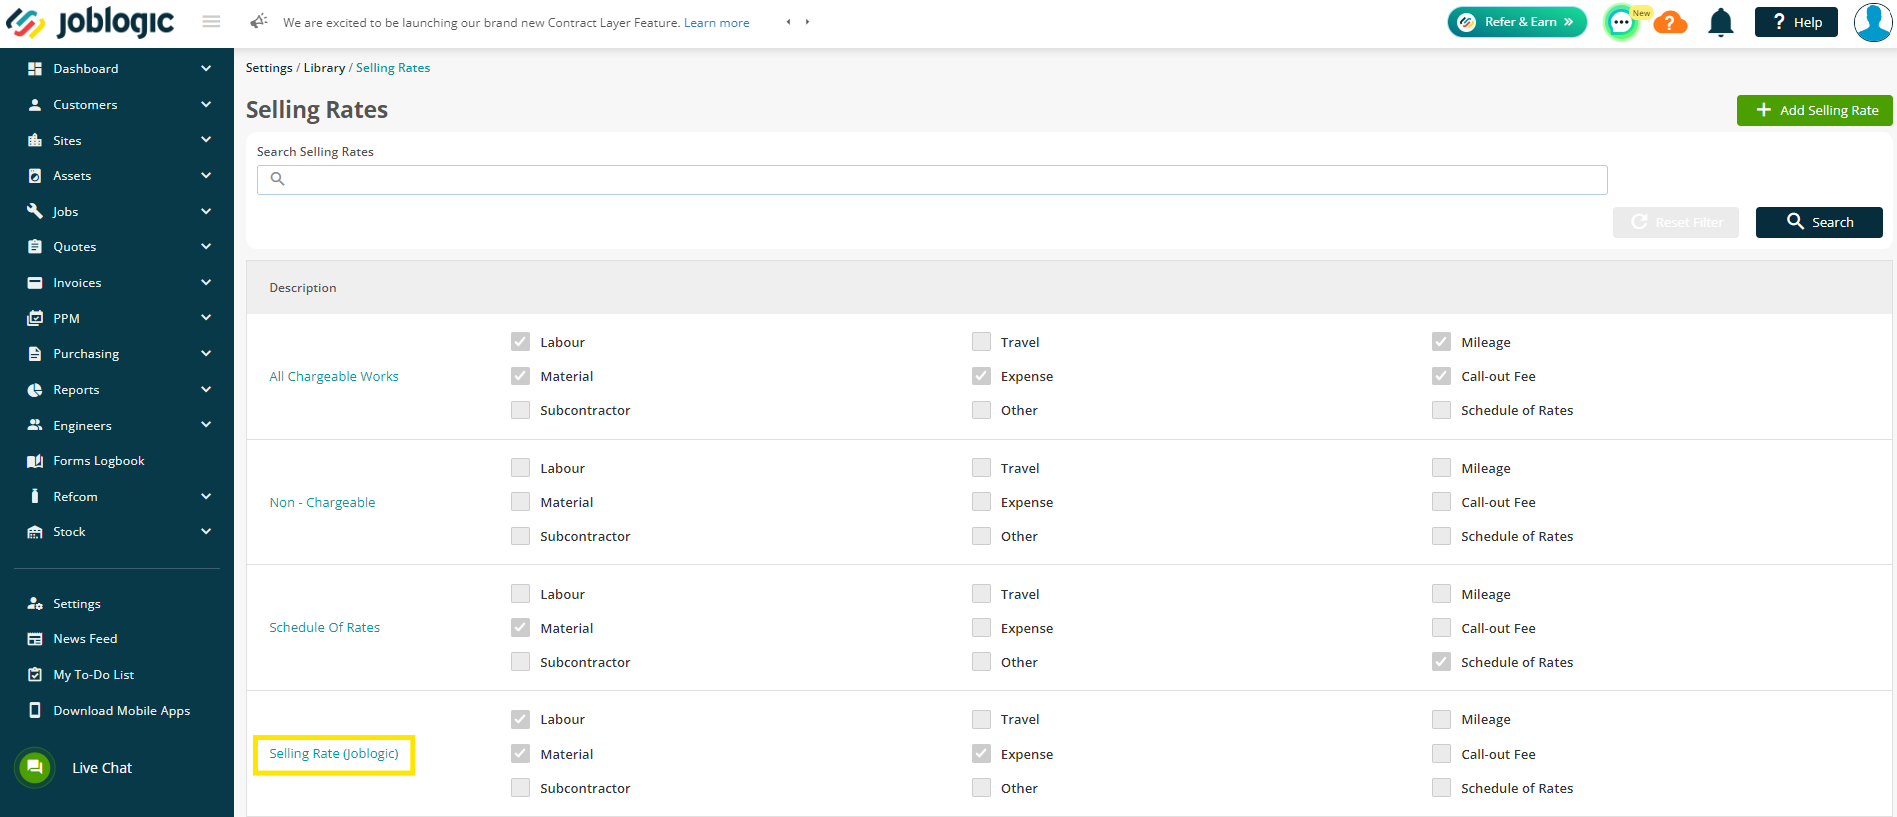
You’ll see a couple of default Selling Rates already in the list here. You can choose to edit an existing Rate or add a new Rate.
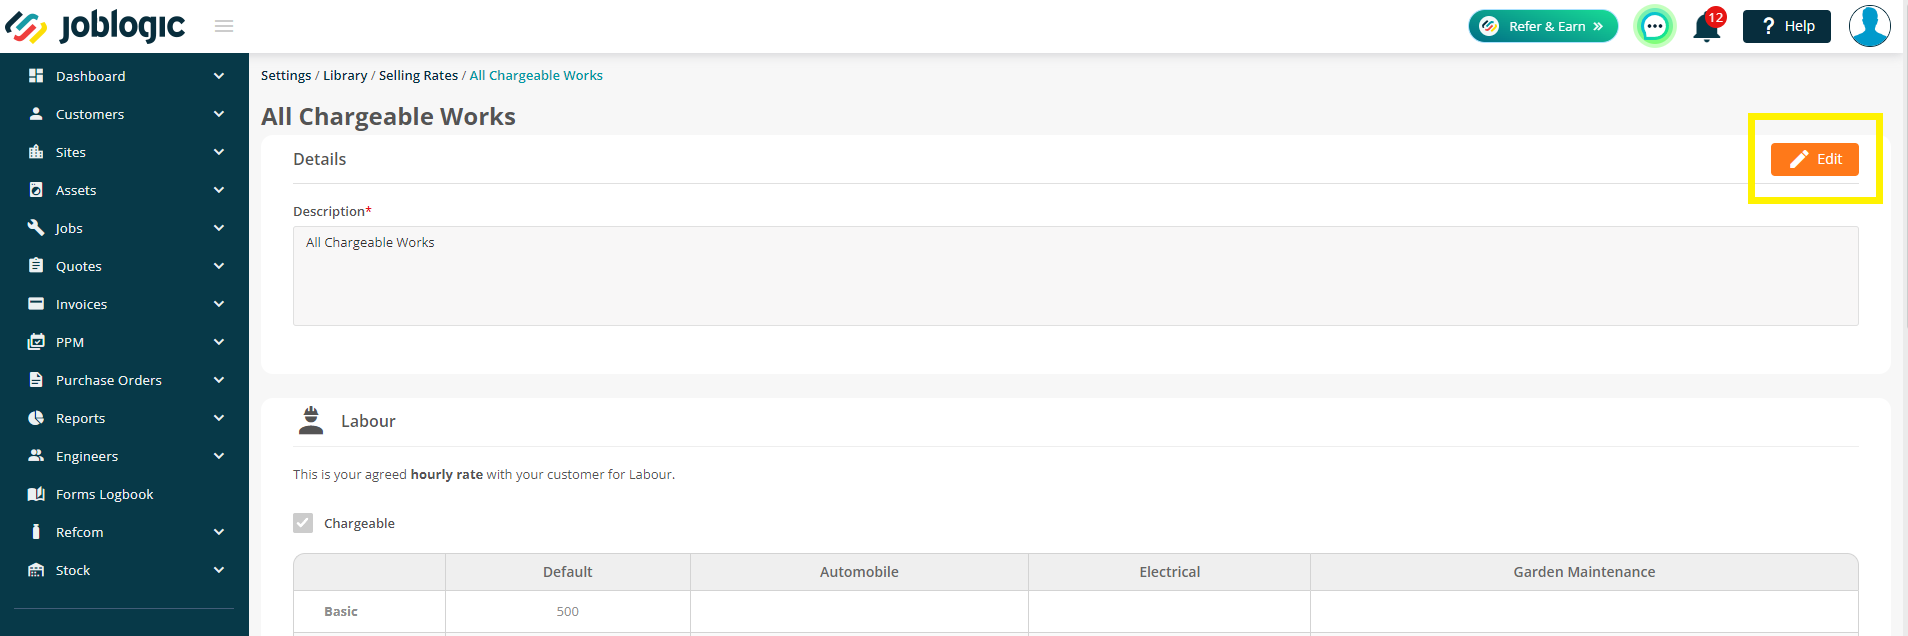
To edit an existing rate, click the name under the Description header.
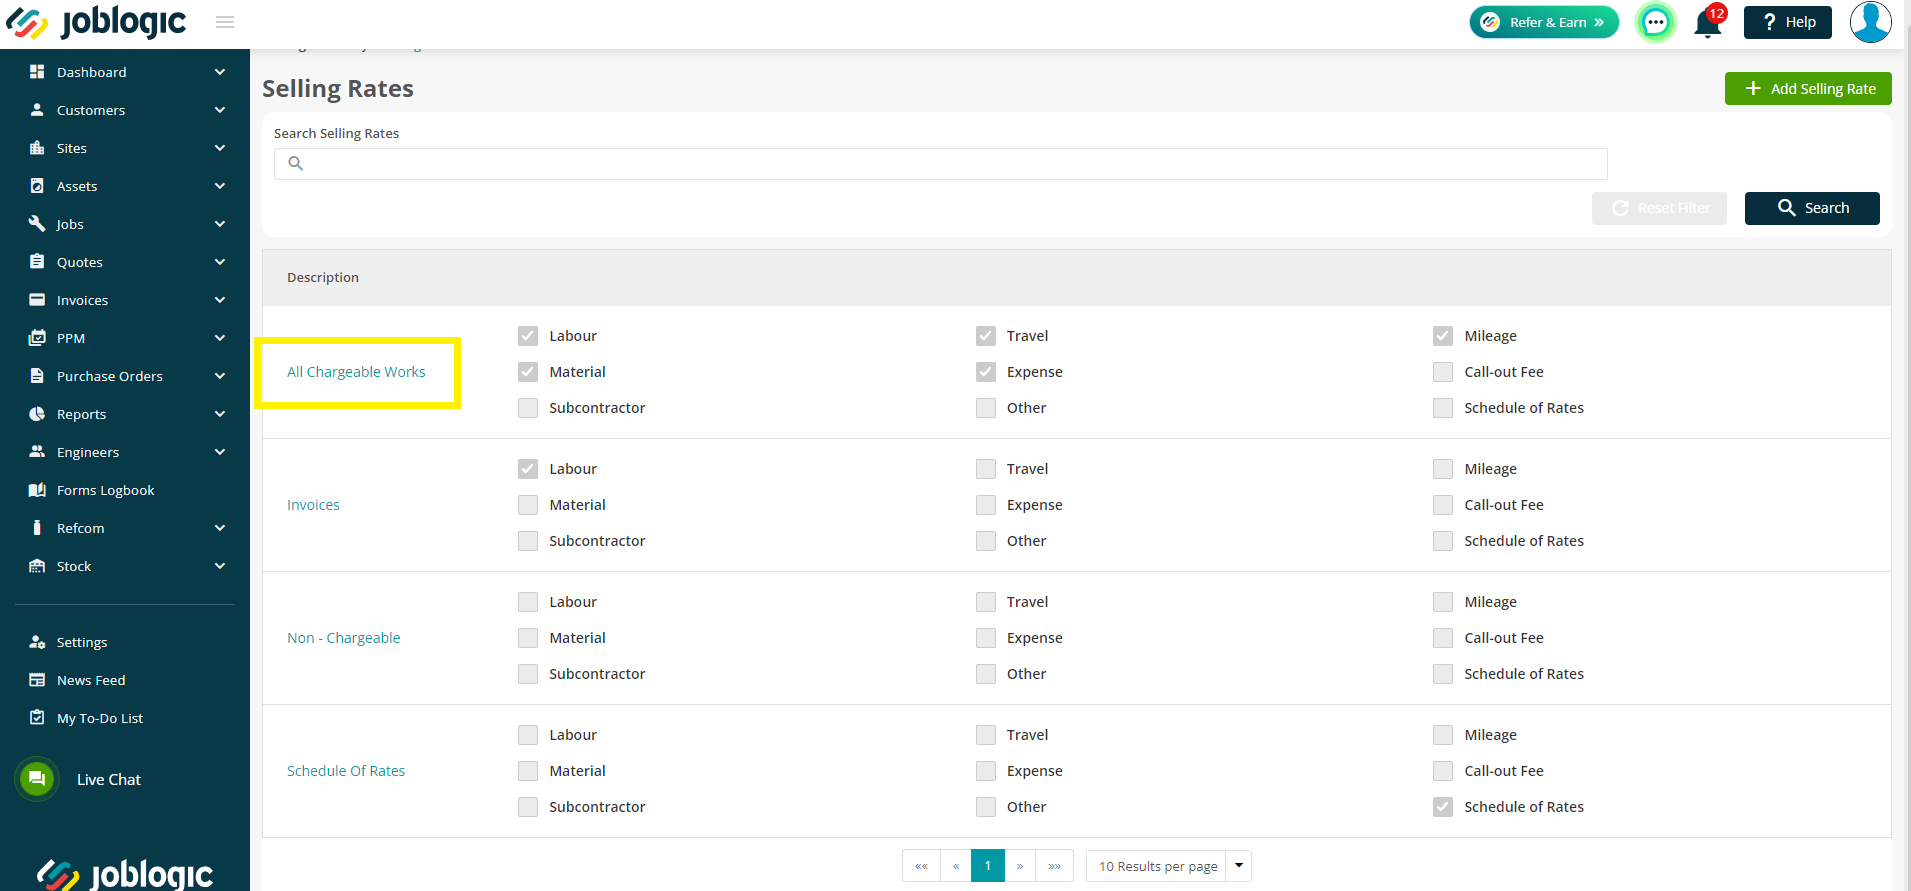
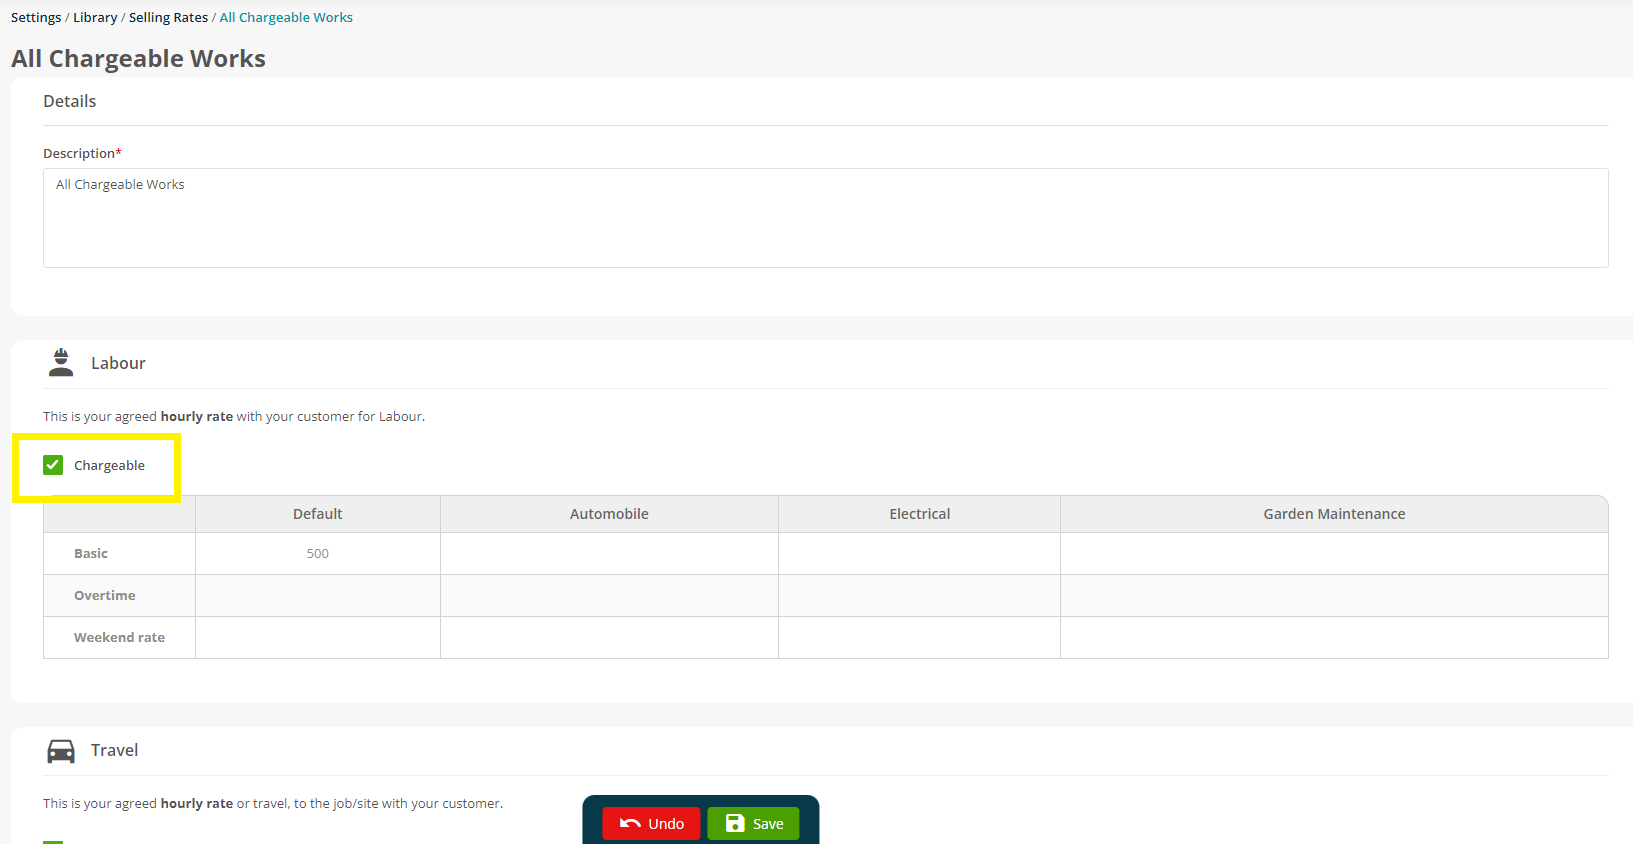
The following Cost types have a table structure where you can assign rates to each Pay Band (down the left) and Trade (across the top). - Labour, Travel, Mileage and Call-out
The following Cost types have an uplift option - Material, Expense, Subcontractor, Other & Schedule of Rates
Click Edit in the top right to start amending Rates within the tables.
If you want any cost types to be non-chargeable, untick the Chargeable box.
To edit / add an amount within the table, simply click the space. The Edit Selling Rate Grid Value box will then pop up for you to populate.
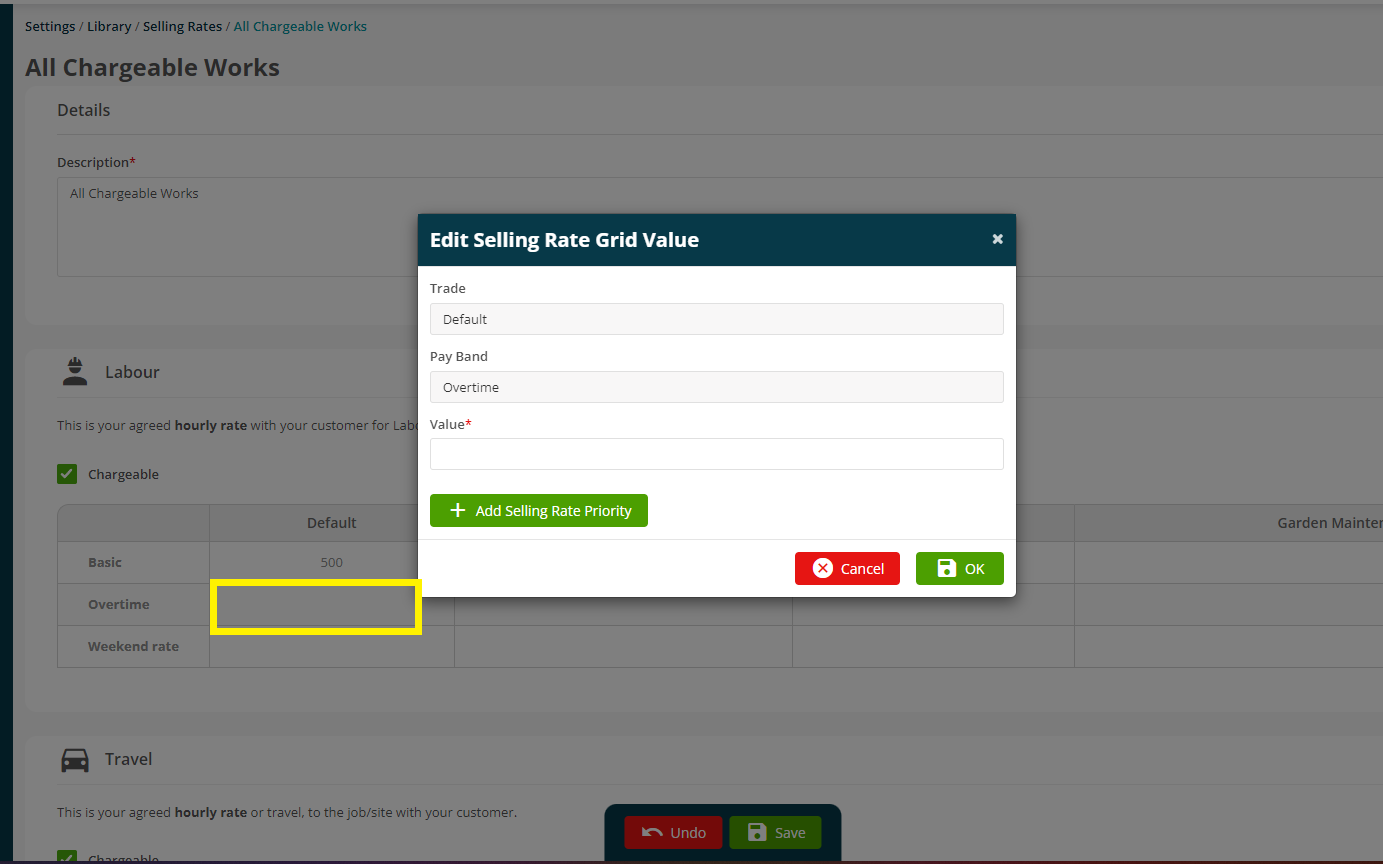
If you wish to assign different values depending on Priority level, click the Add Selling Rate Priority button.
You can then choose your Priority from the drop down and enter a Value as needed.

Fill in the rest of the grid and Cost Types as required before finally clicking Save.
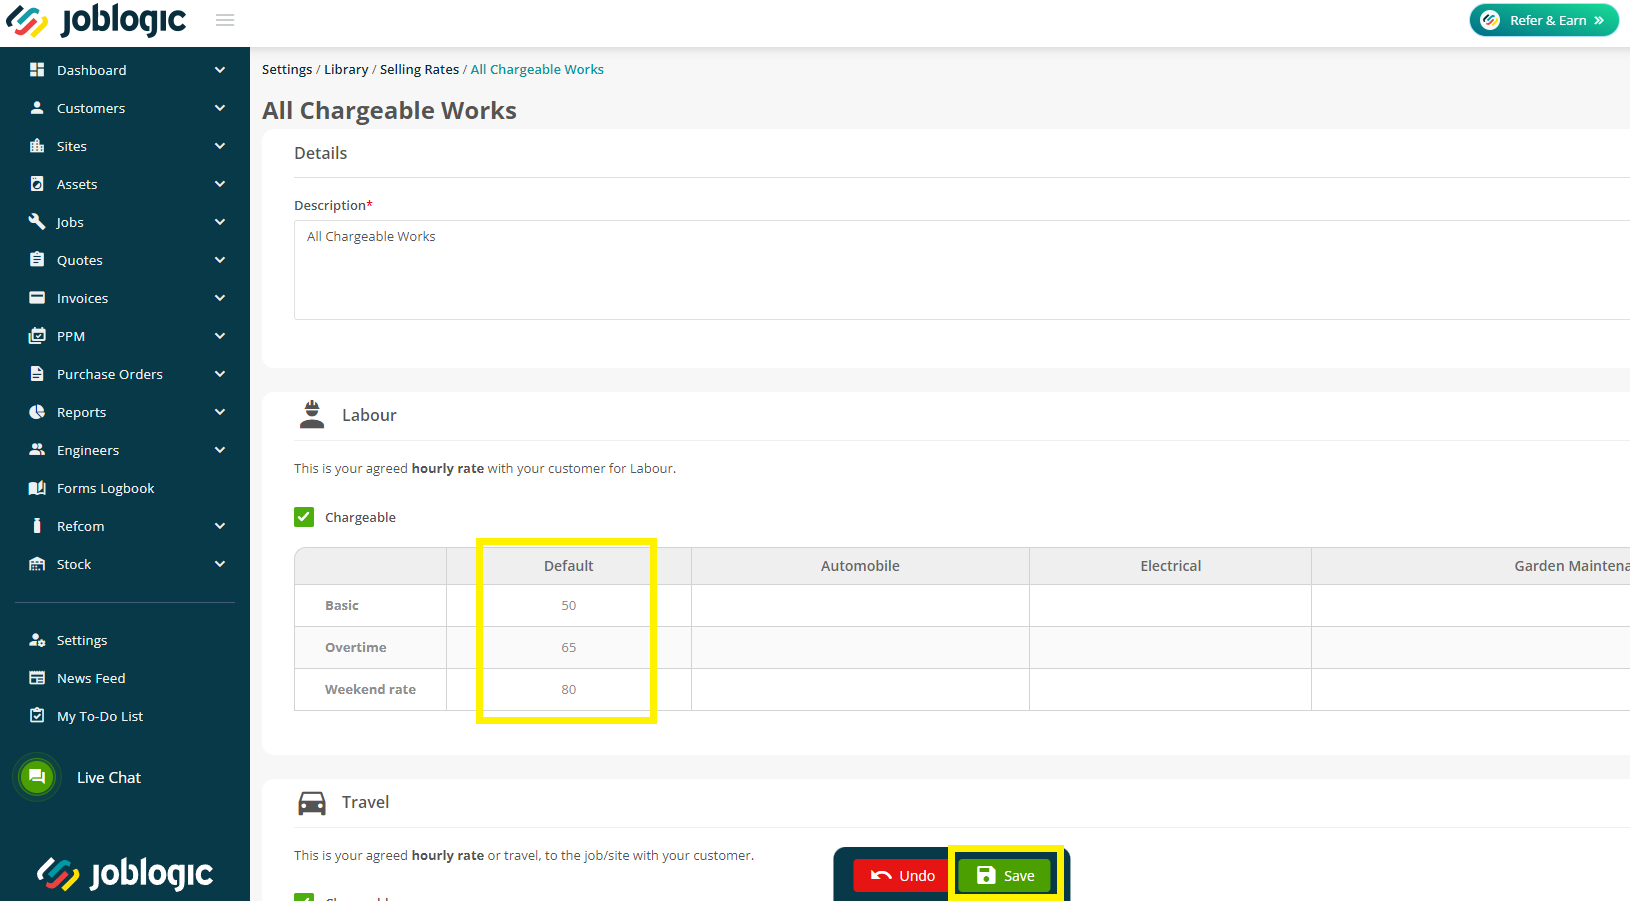
If you do not charge different amounts for each trade, you will only need to enter details under the Default header.
Setting Default Selling Rates
Once the selling rates are set up, you can choose to assign a default to the System settings or certain Customers and Sites, if required.
System level
To set a system wide default, navigate to Settings > System Set up.

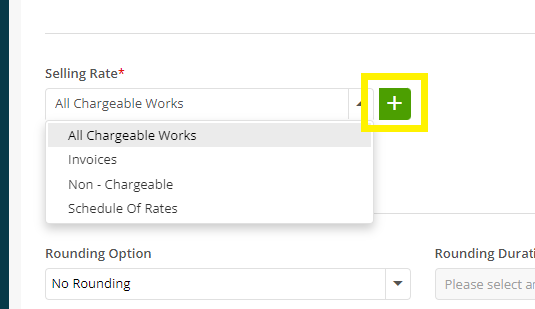
Next, click Edit and then choose from the Selling Rate dropdown as required.

You can add a new Rate here by clicking the green + button.
Customer / Site level
If you wish to assign different Rates to a particular Customer or Site, click through to:
Customers > All Customers > choose customer > Configuration tab
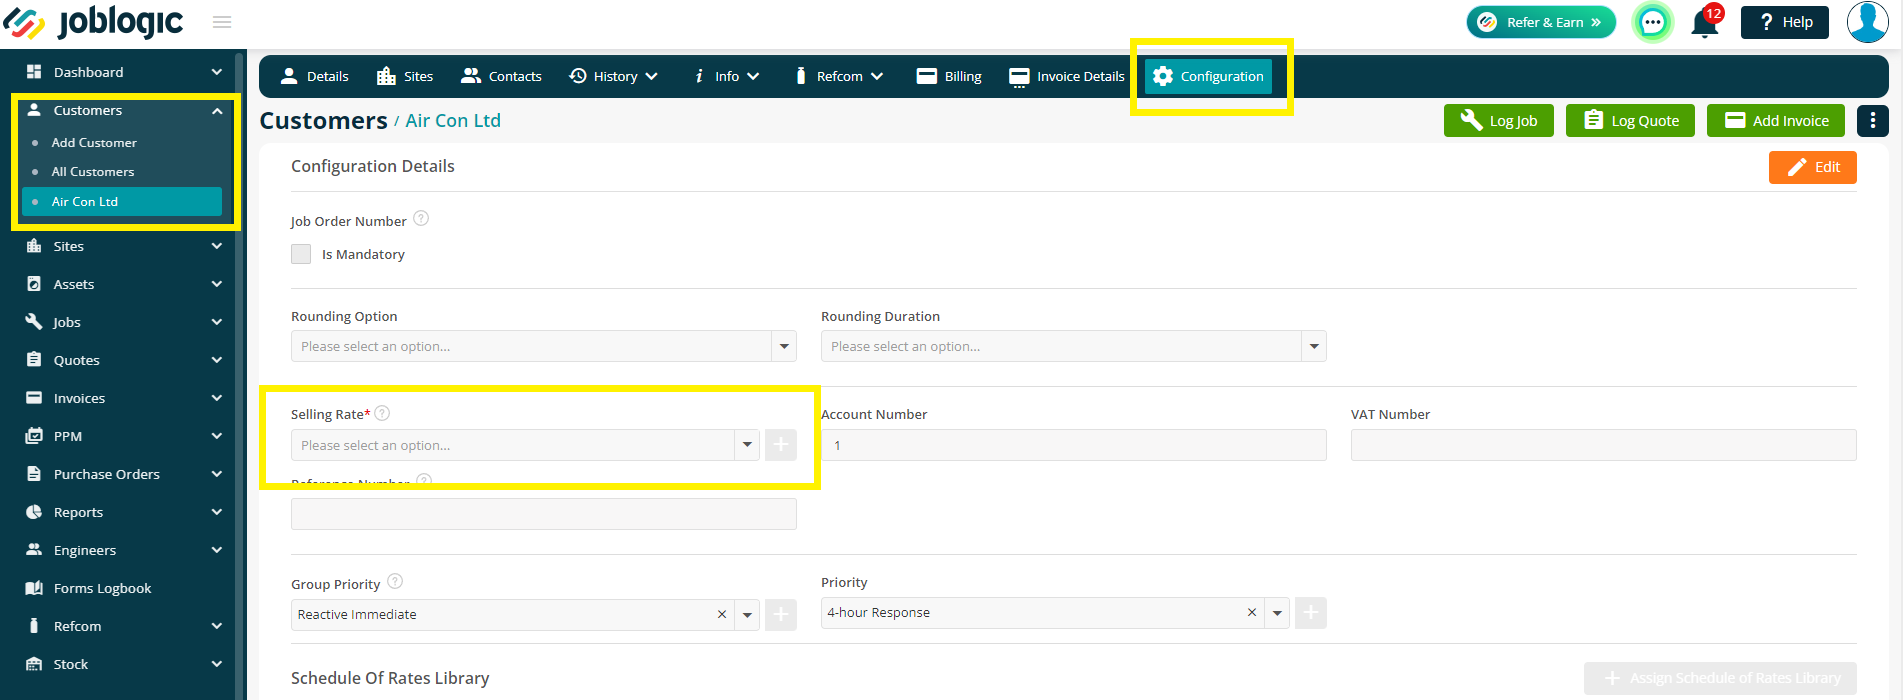
Sites > All Sites > choose site > Configuration tab

Choosing a default at Customer level will automatically apply it to all sites underneath, so there is no need to edit each site, if they are all to be the same.
Jobs
These Rates will then be applied automatically to jobs, depending on the relevant defaults, the time of the visit and the trade (if applicable).
To see the full Cost/Sell breakdown based on your Pay Band and Selling Rate set up, navigate to Jobs > All Jobs > choose job > Costs tab
Deleting a Selling Rate
There may be occasions where you have set up a selling rate incorrectly or created a duplicate and need to delete them from your system.
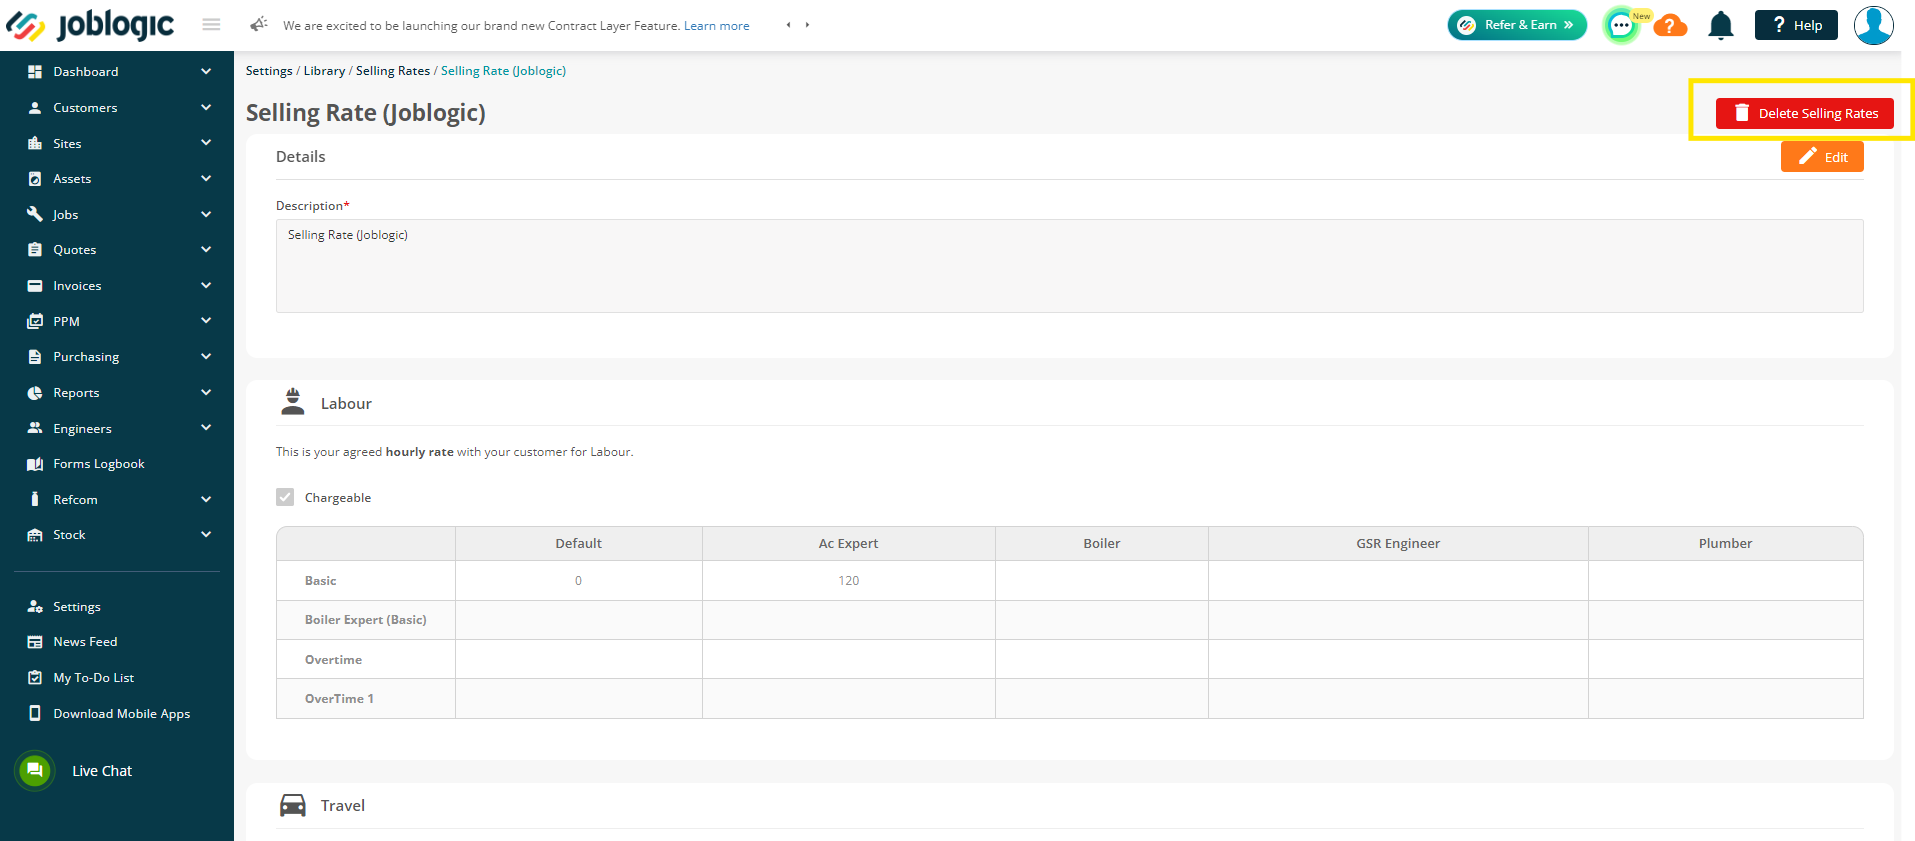
To delete a selling rate, access the selling rate area (under Settings > Library > Selling Rates)
Click onto the name of the Selling Rate that you want to delete.
Click on to the 'Delete Selling Rates' button at the top of your page.
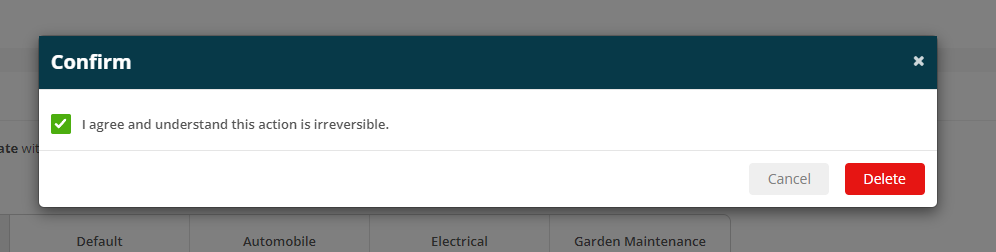
Once selected, a confirmation screen will be displayed. The 'Delete' button will not become active until you have checked the box to agree that you understand that this action is irreversible.
Deleting the selling rate will remove both the item and the data permanently and this cannot be undone. Not even by our technical team.
Further Support
For further information or assistance with the above, contact our Support Team on 0800 326 5561 or email support@joblogic.com. Alternatively, our Customer Success Management team can be reached by emailing customersuccess@joblogic.com
Publishing Details
This document was written and produced by Joblogic’s Technical Writing team and was last updated on the date specified above. Be aware that the information provided may be subject to change following further updates on the matter becoming available. Additionally, details within the guide may vary depending on your Joblogic account’s user permissions.