Introduction
Welcome to the Route Scheduler guide for the Planner. This tool allows you to anticipate and organize engineer visits efficiently by planning optimal routes each day.
This guide outlines how to estimate travel times and streamline routes for improved time management and enhanced control over your engineers' workdays.
Set up
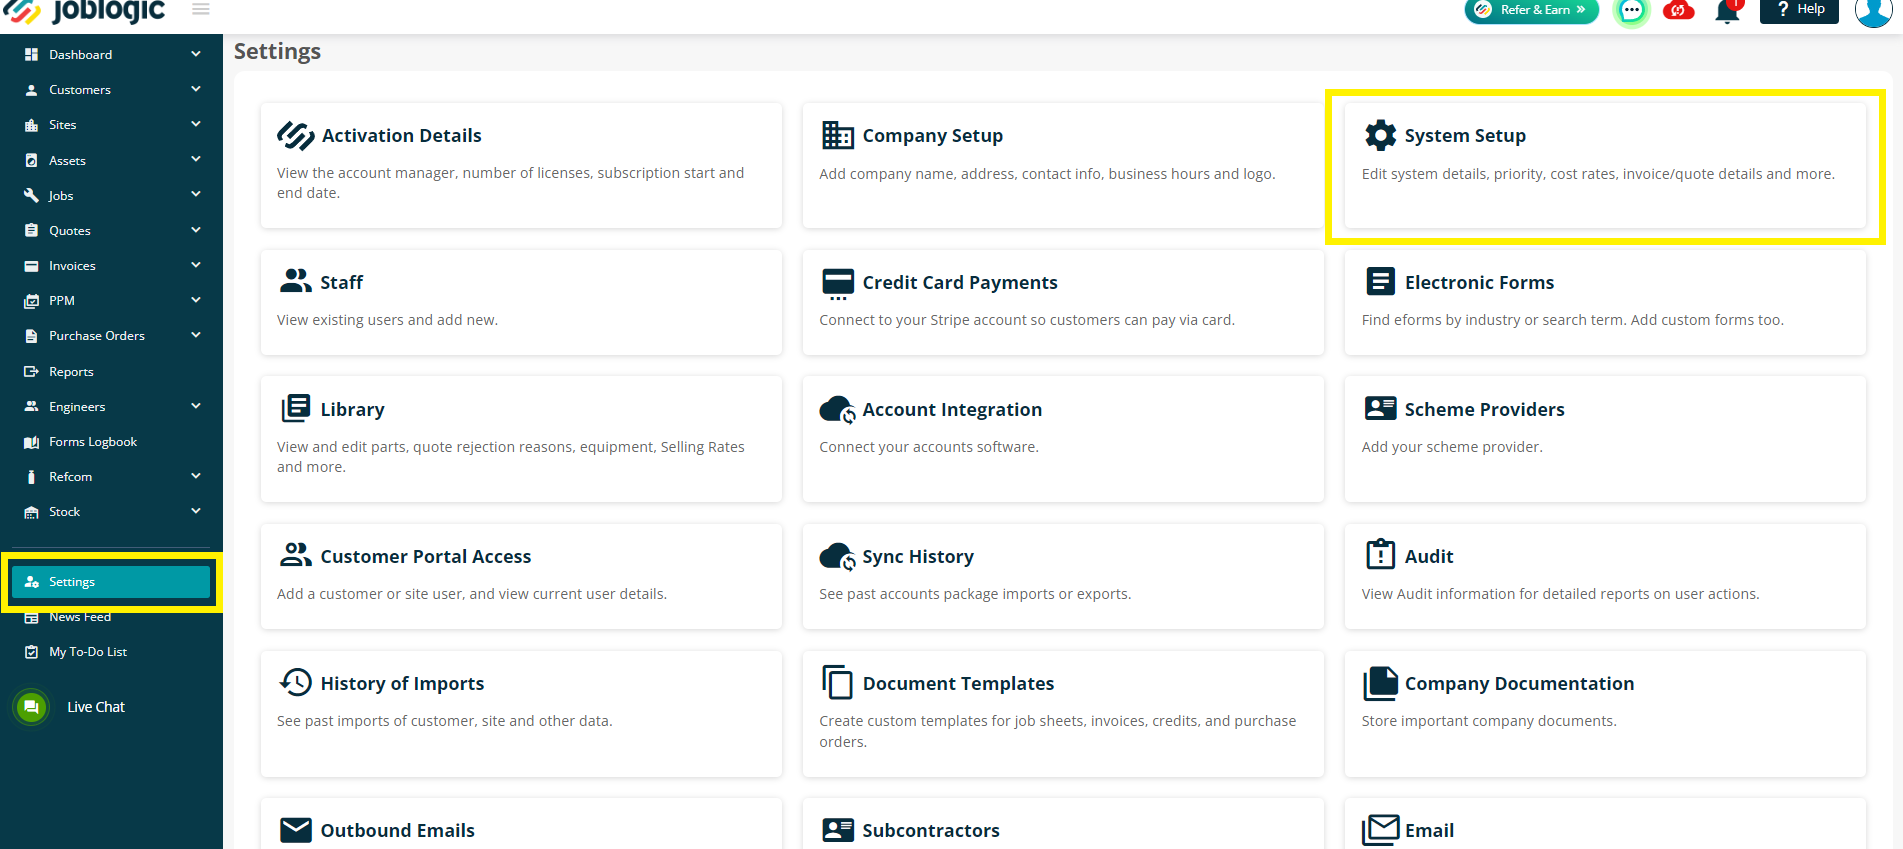
To enable the option for the route scheduler, click Settings > System Settings
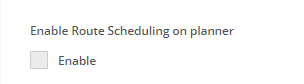
Next, click Edit and scroll down to ‘Enable Route Scheduling on planner’. Tick this and click Save
Start/End Address set up
Setting up your engineer’s start and end address will aid in your route planning.
To set this up, go to Settings > Staff > name > Engineer Details
Next, click edit and click the dropdown under Start And End Point On Route.
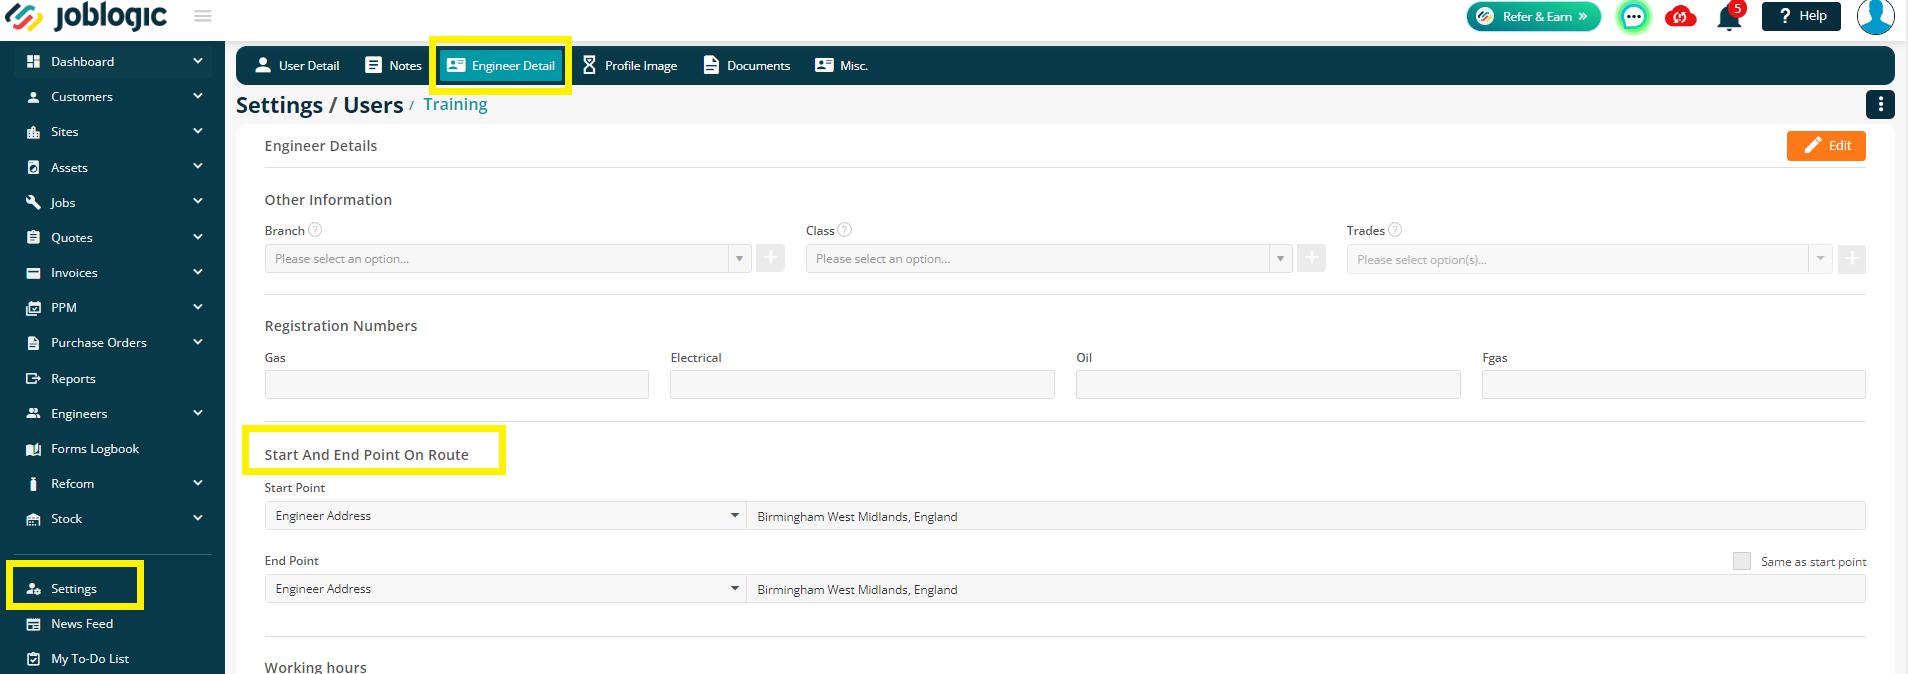
Here, you will have 3 options to choose from:
Engineer Address – This will be the engineer address you set up against their user
Office Address – This will be the address set up in Settings > Company Setup
Custom Address – This provides you with the option of manually choosing a different address

This can also be changed on the planner, on a day-by-day basis. See below for more information on this.
Planner
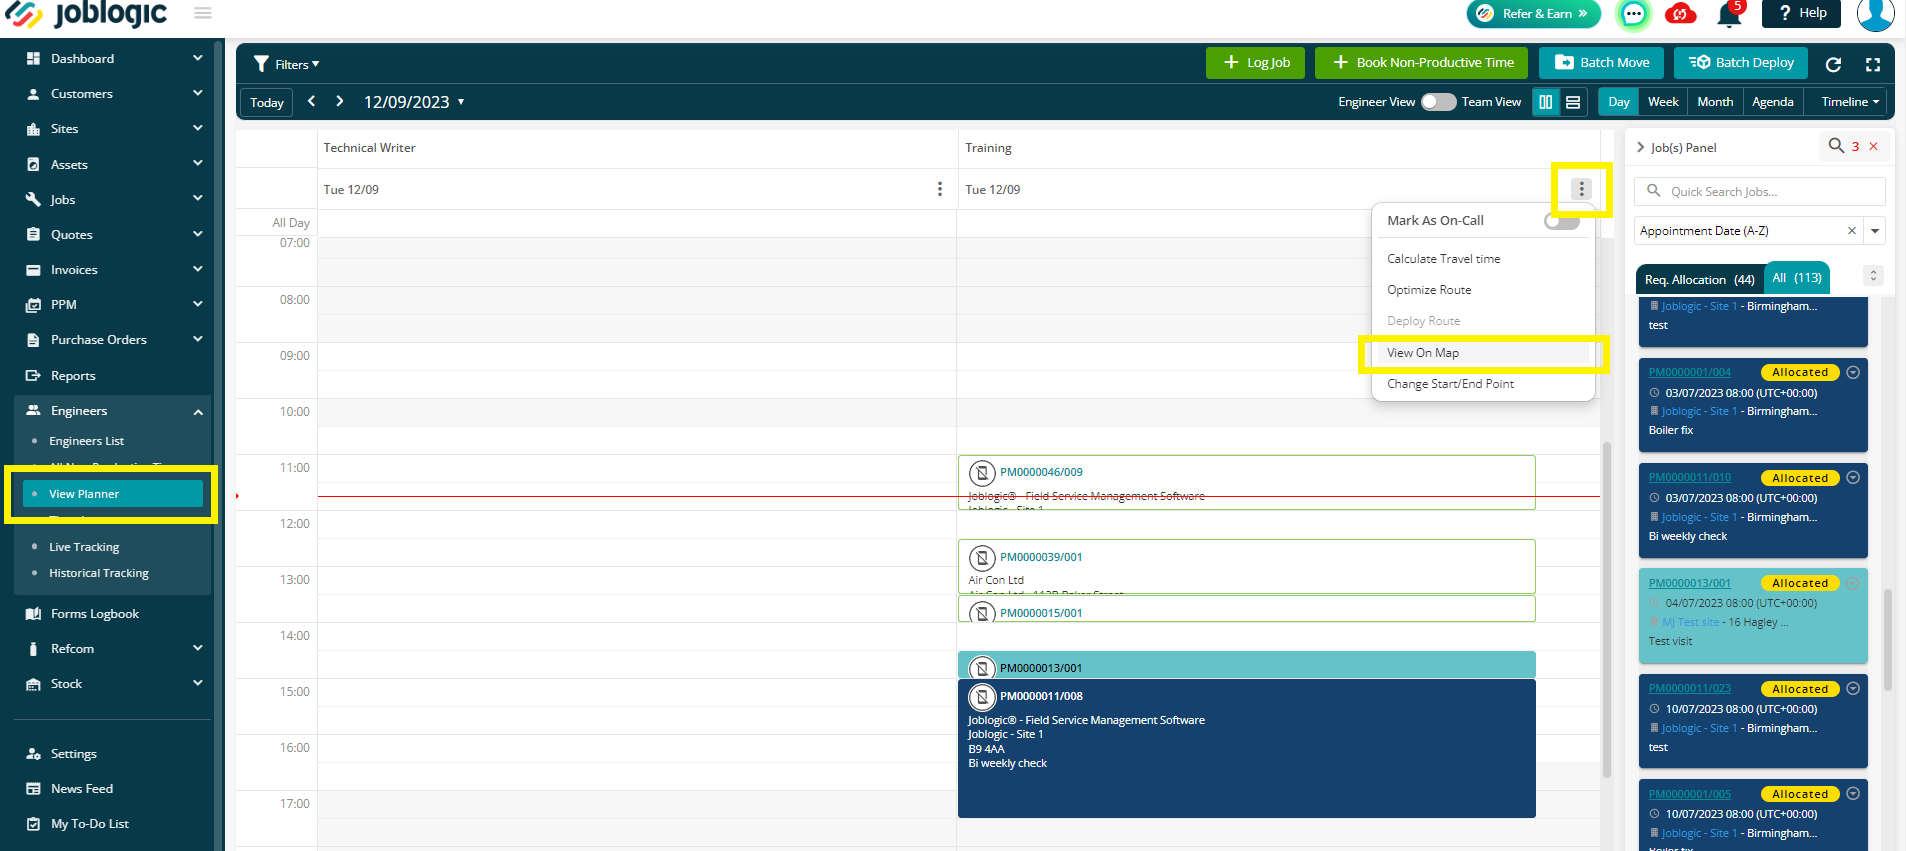
To access the new options, go to Engineer > View Planner
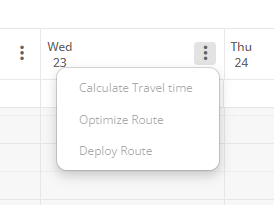
Next to each day, against each engineer, you’ll see three dots – click this to see 3 options.
The three dots will only show in Day or Week view, and in the Vertical view only.
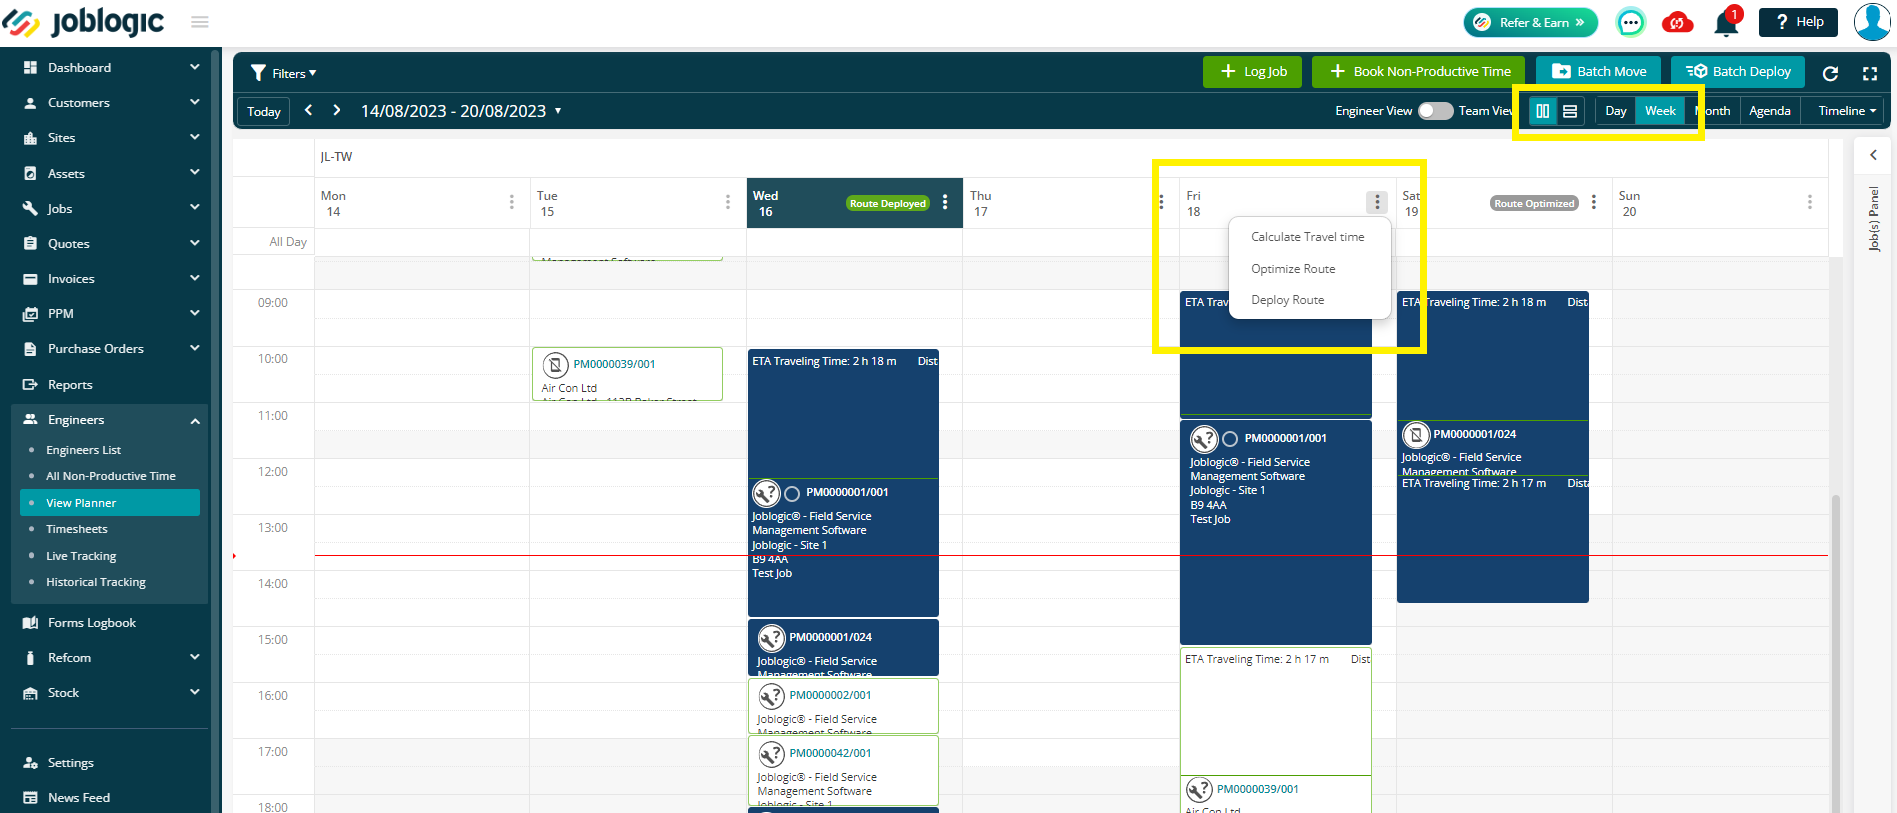
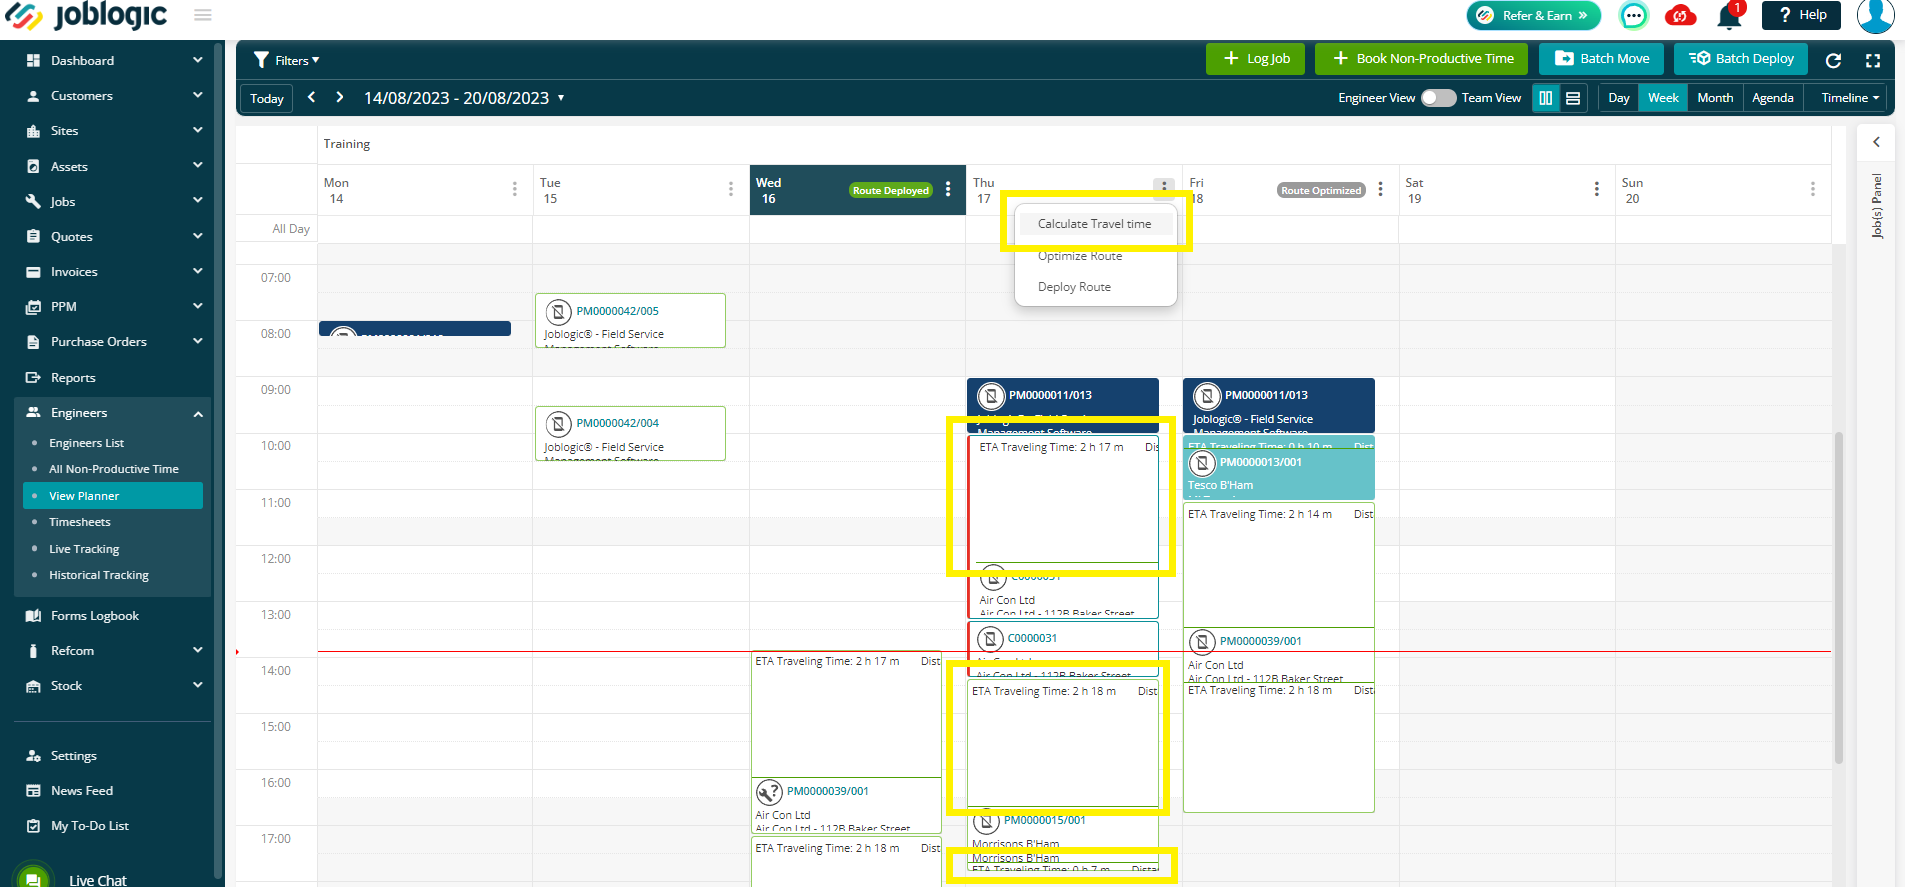
Calculate Travel Time -
This feature computes estimated mileage and distances for visits, displaying travel markers on the planner. The start/end points are based on the engineer's address in Settings > Staff.
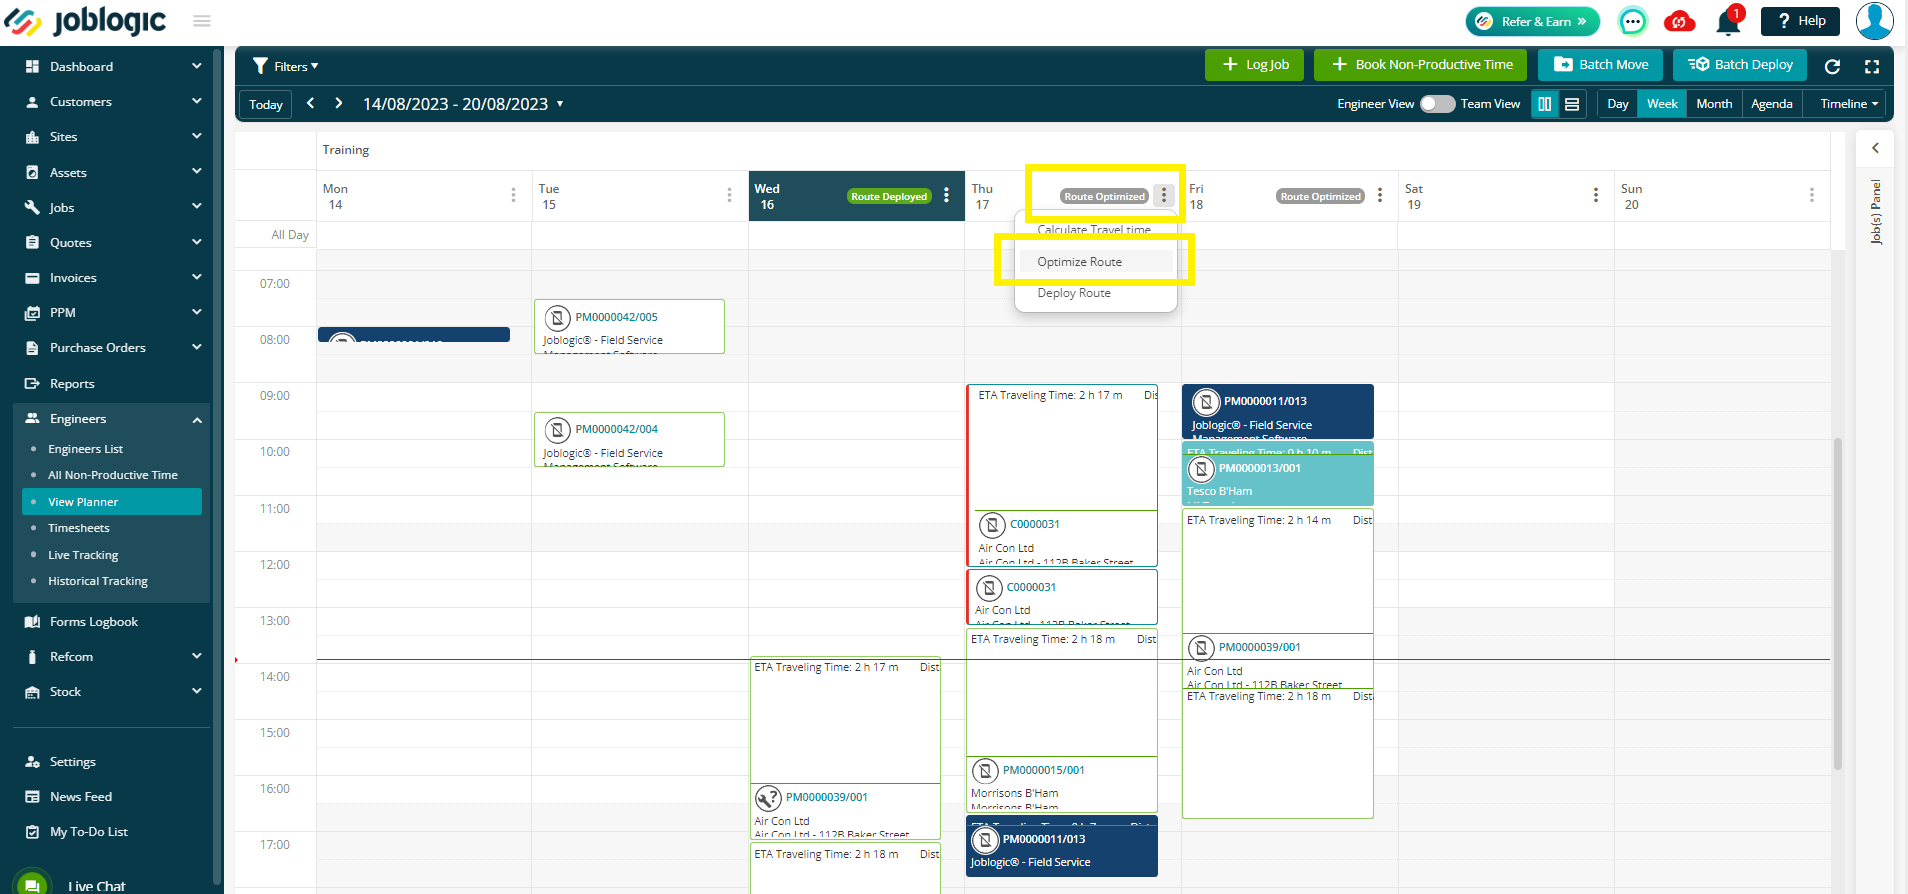
Optimise Route -
This option will reorder the route to provide the optimal route for the day
You’ll see a ‘Route Optimised’ tag next to the day, when this option has been successfully implemented.
If there are too many visits to fit into the day, the system will acknowledge this and move some visits to the next day
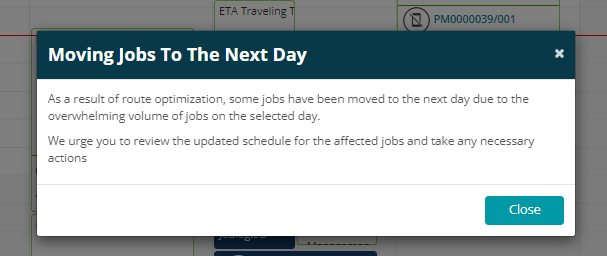
These visits will all move to 00:00 the next day, where you can calculate travel time and optimise route again
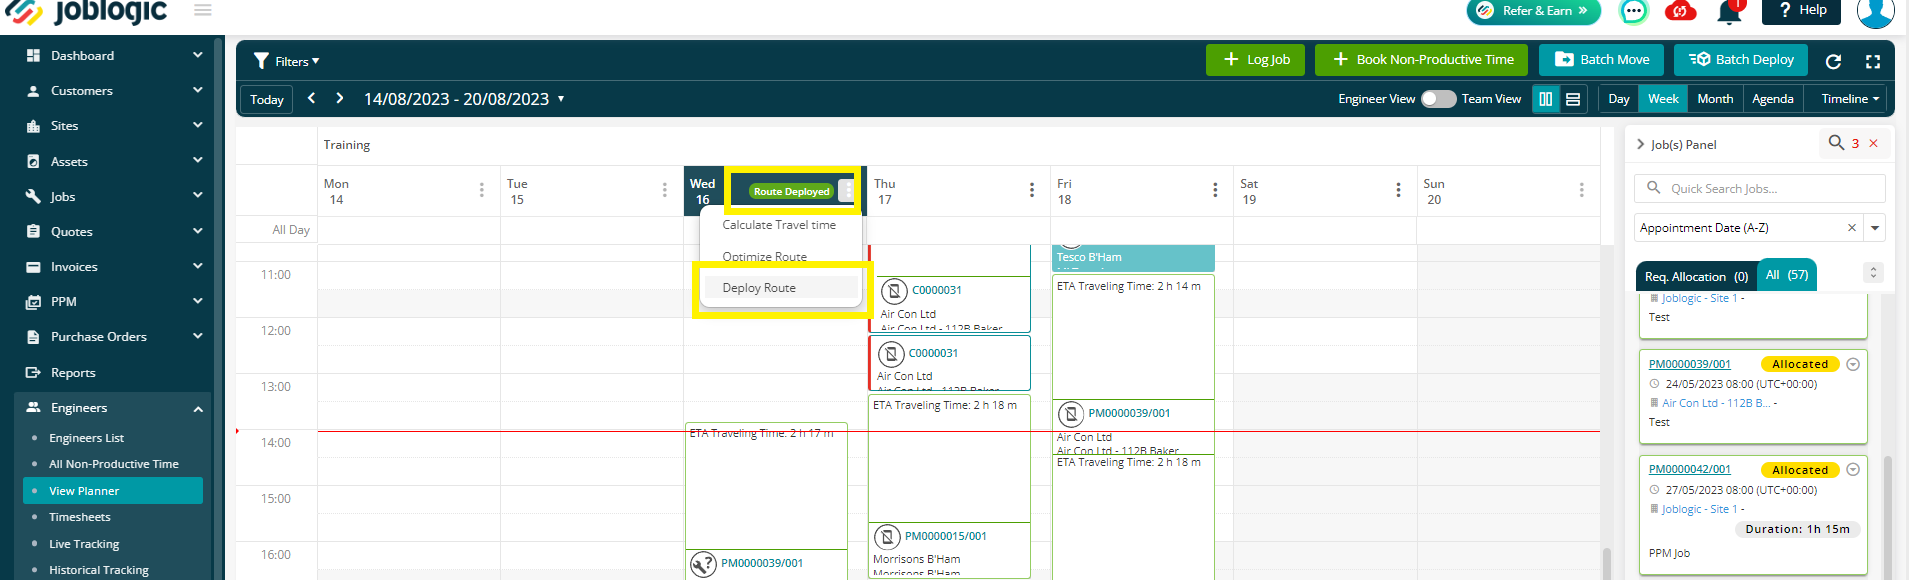
Deploy Route -
Deploy Route is only enabled once either of the above options have been utilised.
This option will deploy the visits to the engineer, in the order you have organised here.
The day on the planner will then show a tag for ‘’Route Deployed’’
View On Map -
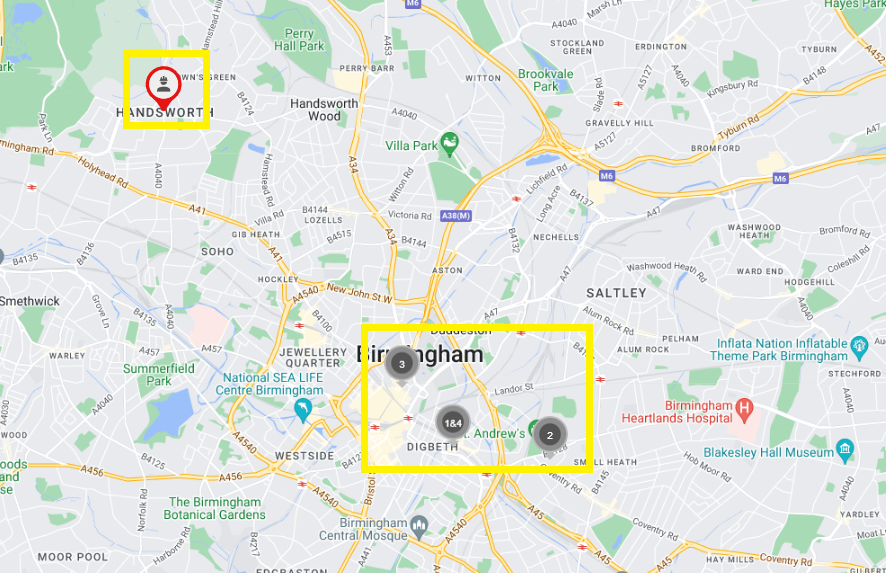
You can view the visits on a map for easy visualisation of your engineer’s route.
If you click this option before optimising, you’ll see your engineer’s start/end point, plus their visits numbered in order of their current position on the planner.
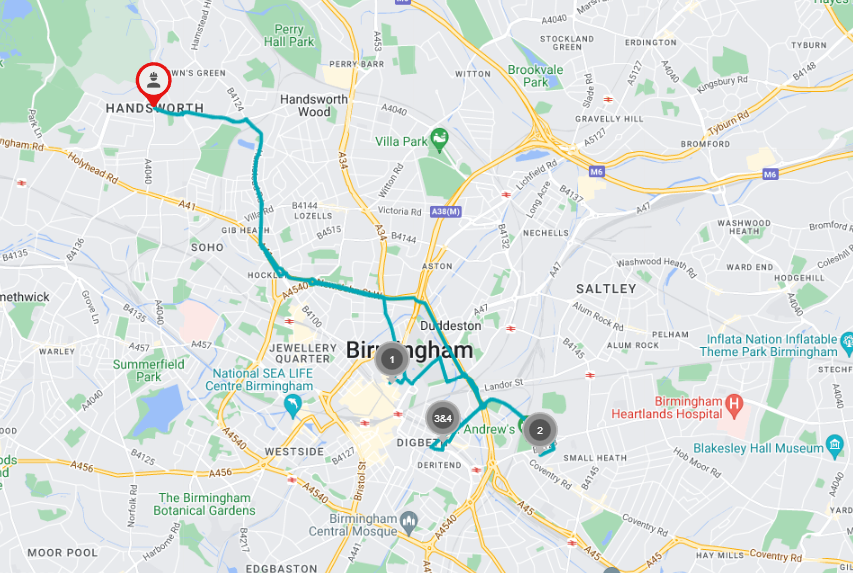
Once you have optimised your route, you can click View On Map to see the actual route, including a line, linking the start/end point and the visits together.
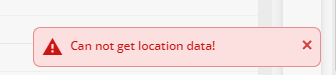
If there are no visits, or the addresses are not correct, you’ll receive an error message: Can not get location data
Change Start/End Point -
As mentioned above, you can set up a start and end address for each engineer for easier route scheduling, however you can also amend this on a day-to-day basis, on the Planner.
To do this, click the three dots next to an engineer, on a given day, and then choose the Change Start/End Point
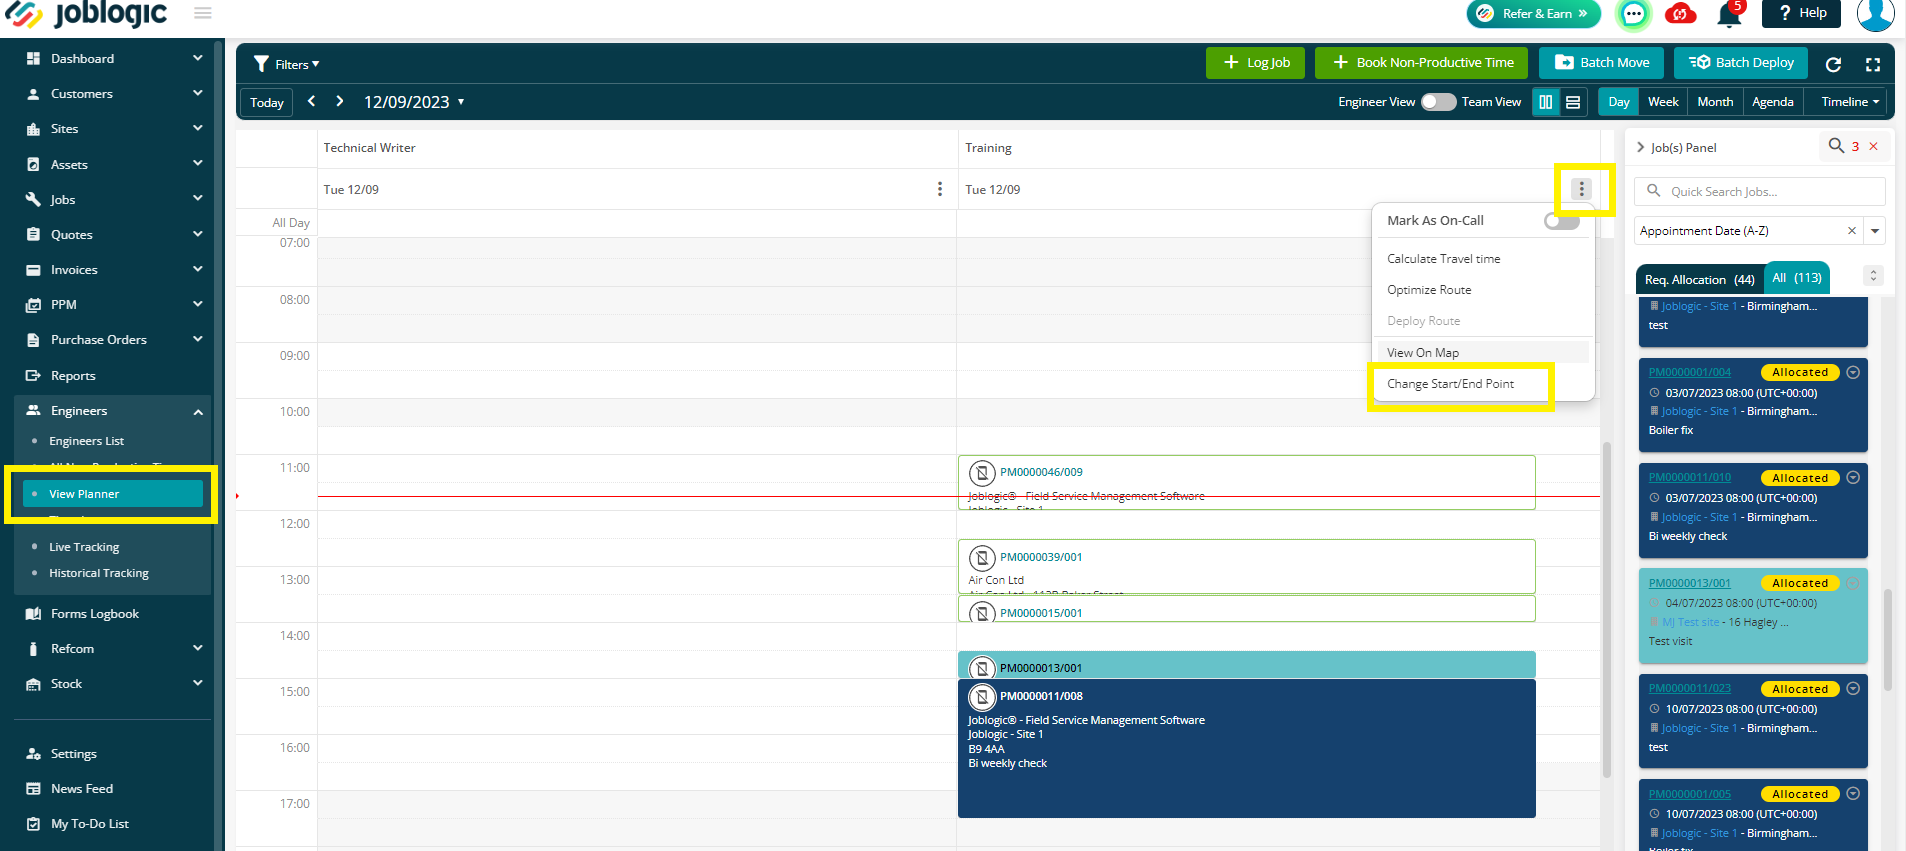
You can then choose if you want to have the route start/end from the Engineer address, Office address, or a Custom address, for that day only.

A few more rules to be aware of :
This feature will not be enabled :
- If the engineer is marked ‘’Off All Day’’
- If the Company Business Hours show ‘Closed’
- If the date is in the past
It will show on days where there are no visits, however when you click on it, the options will be greyed out.
The Calculate Travel and Optimise Route options will only include sites with a valid address
The system will only optimise visits that are in New Job or Accepted status
If you are optimising the current day, the first visit will start from the current time
If you are optimising a future day, the first visit will start from the start of your working day as per your settings
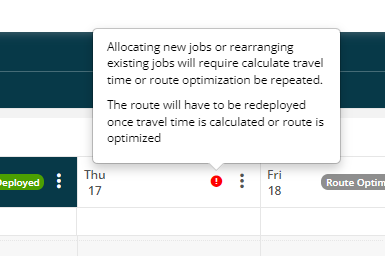
If a route has been calculated/optimised/deployed, and then further manual changes are made, you will receive a conflict warning to inform you to recalculate/reoptimise/redeploy.
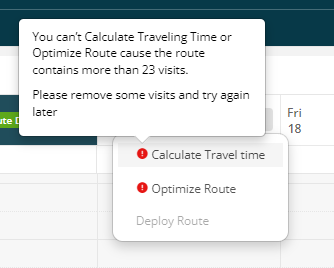
The daily visit limit is 23. If you try to ‘Calculate Travel Time’ or ‘Optimise Route’ with over 23 visits, you will receive a warning message - ‘’You can’t Calculate Travelling Time or Optimise Route because the route contains more than 23 visits’’
Further Support
For further information or assistance with the above, contact our Support Team on 0800 326 5561 or email support@joblogic.com. Alternatively, our Customer Success Management team can be reached by emailing customersuccess@joblogic.com
Publishing Details
This document was written and produced by Joblogic’s Technical Writing team and was last updated on the date specified above. Be aware that the information provided may be subject to change following further updates on the matter becoming available. Additionally, details within the guide may vary depending on your Joblogic account’s user permissions.