Introduction
Planned Preventative Maintenance or PPMs are a great way to monitor and service your sites and assets.
In Joblogic you can set up a PPM Quote to send to your customers before they commit to their contract.
This user guide will detail how to create a PPM Quote and get you started with helpful tips to maintain your sites and assets.
Adding a PPM Quote
To create a contract, choose PPM > Add PPM from the menu on the left.
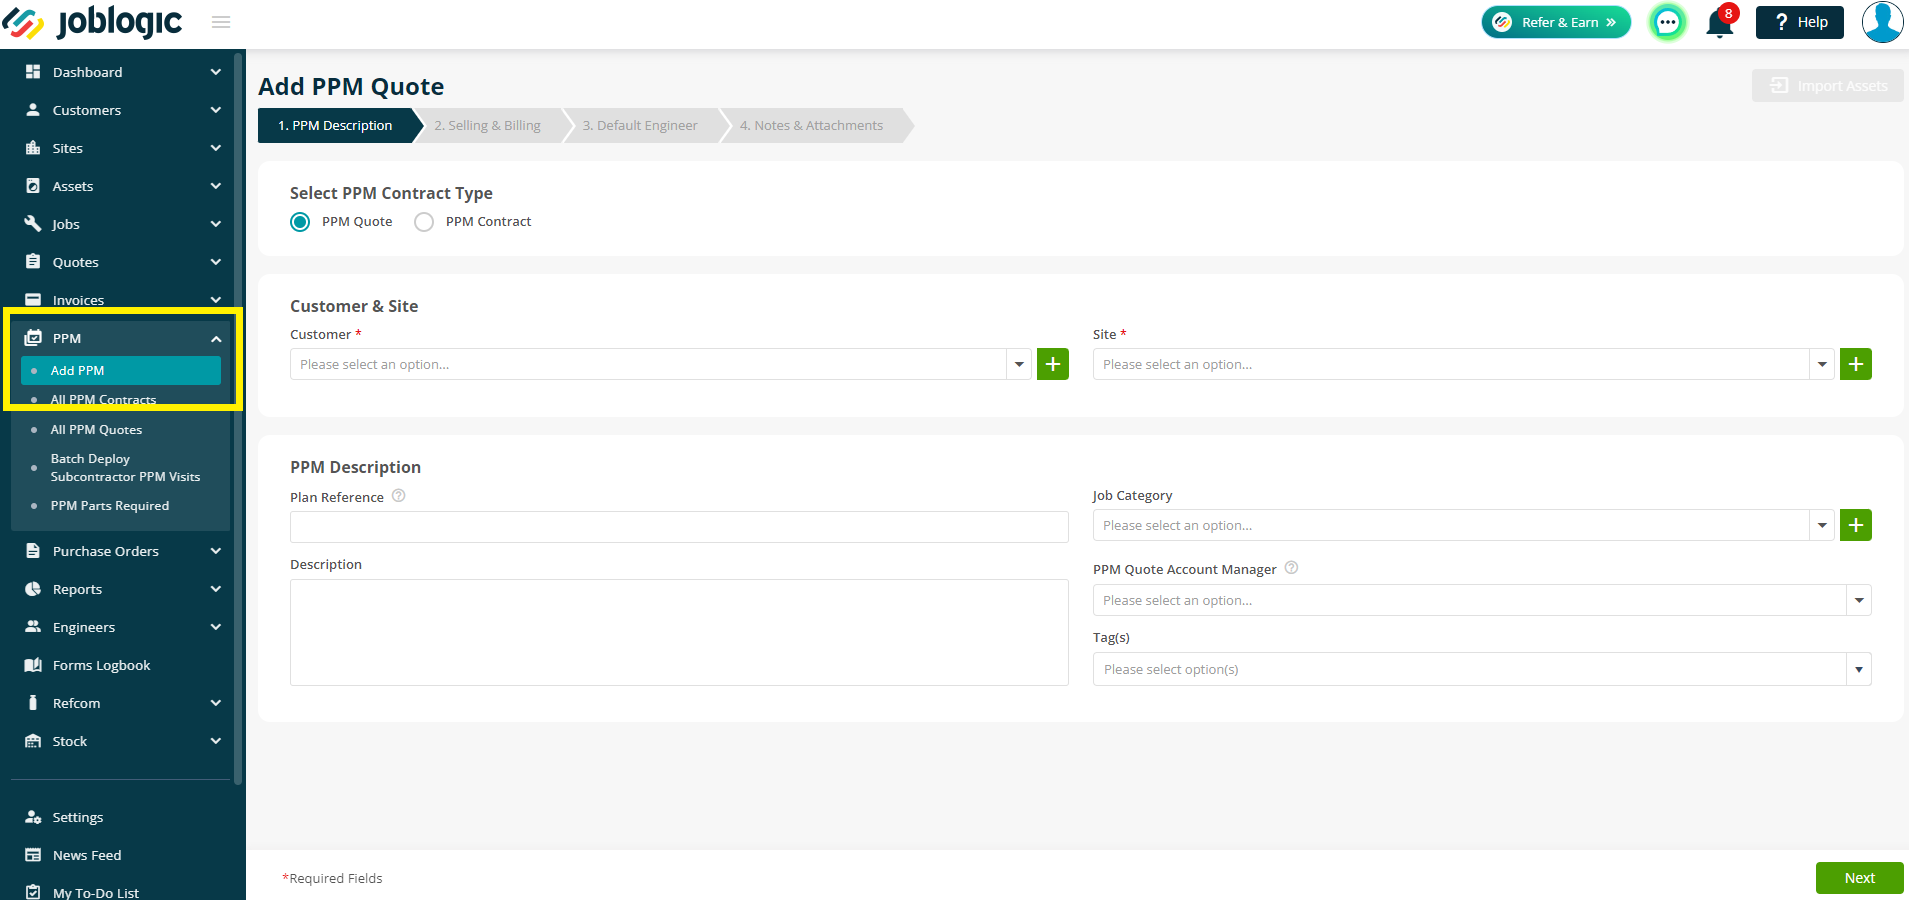
PPM Description page
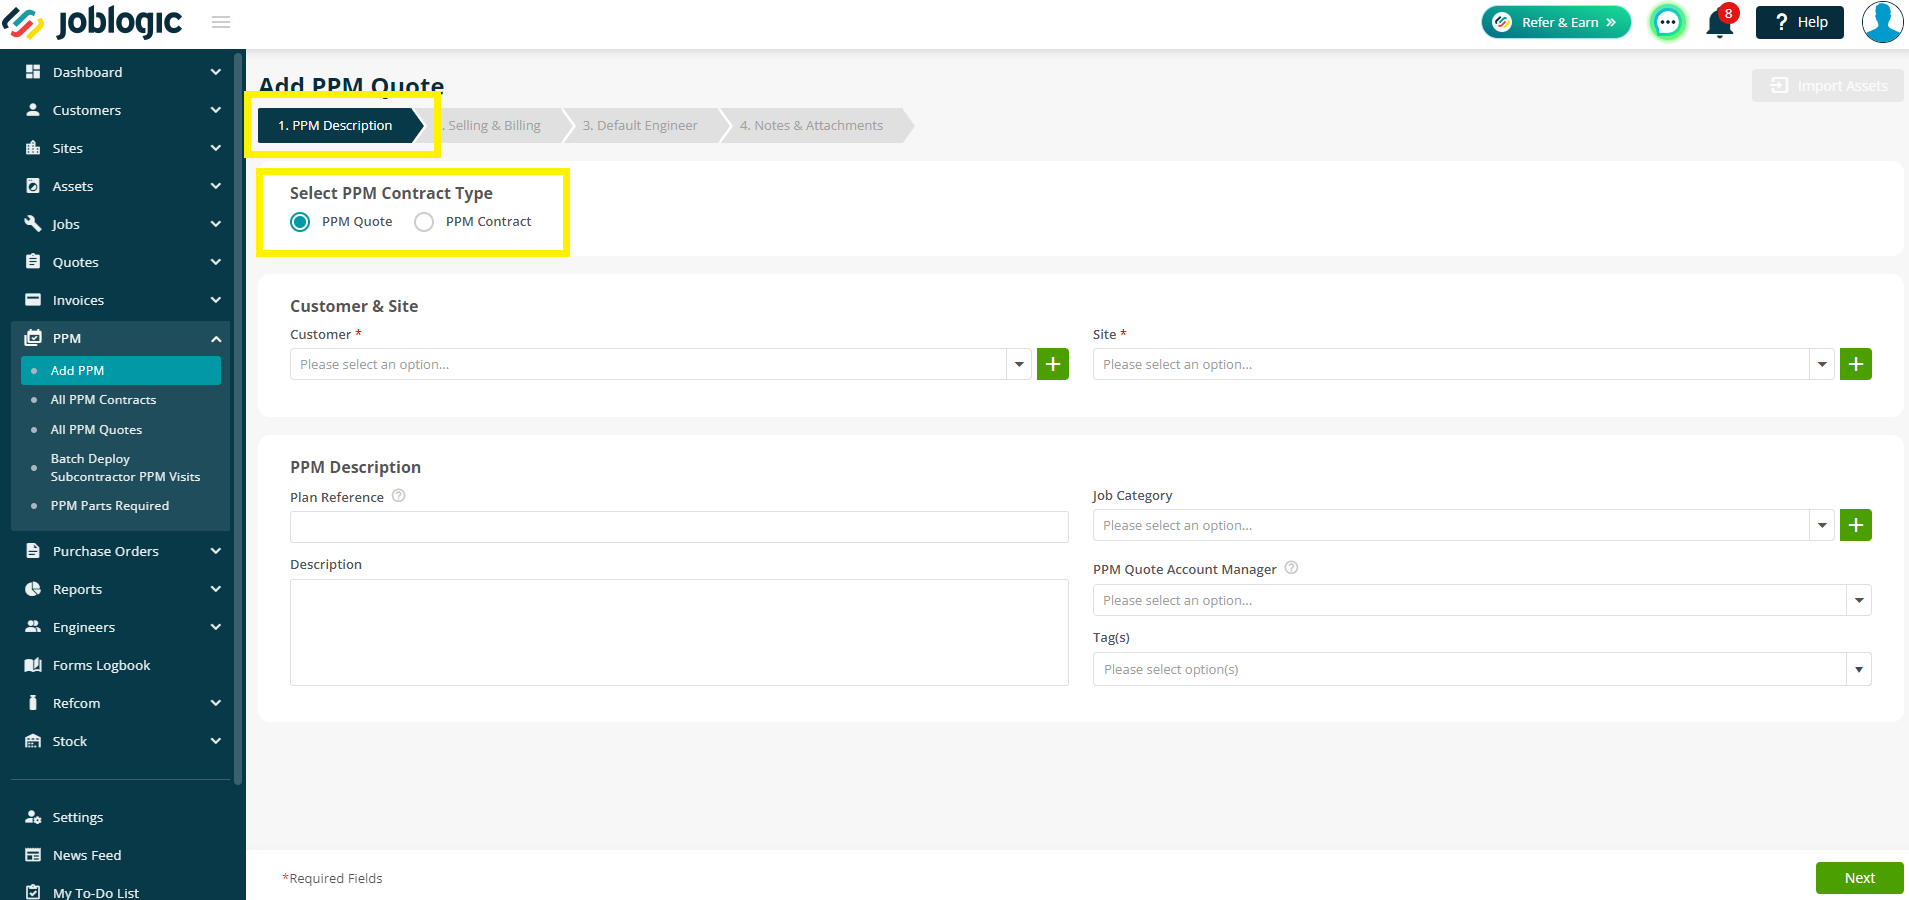
This will direct you to the ‘PPM Description’ page. This is page one of four used to set up your PPM Quote. Firstly, choose your PPM type – PPM Quote
Next, choose the Customer and Site you want the eventual contract set up against. These are mandatory fields and will need to be filled in to continue.
You can enter details into the rest of the fields as required and then click Next.
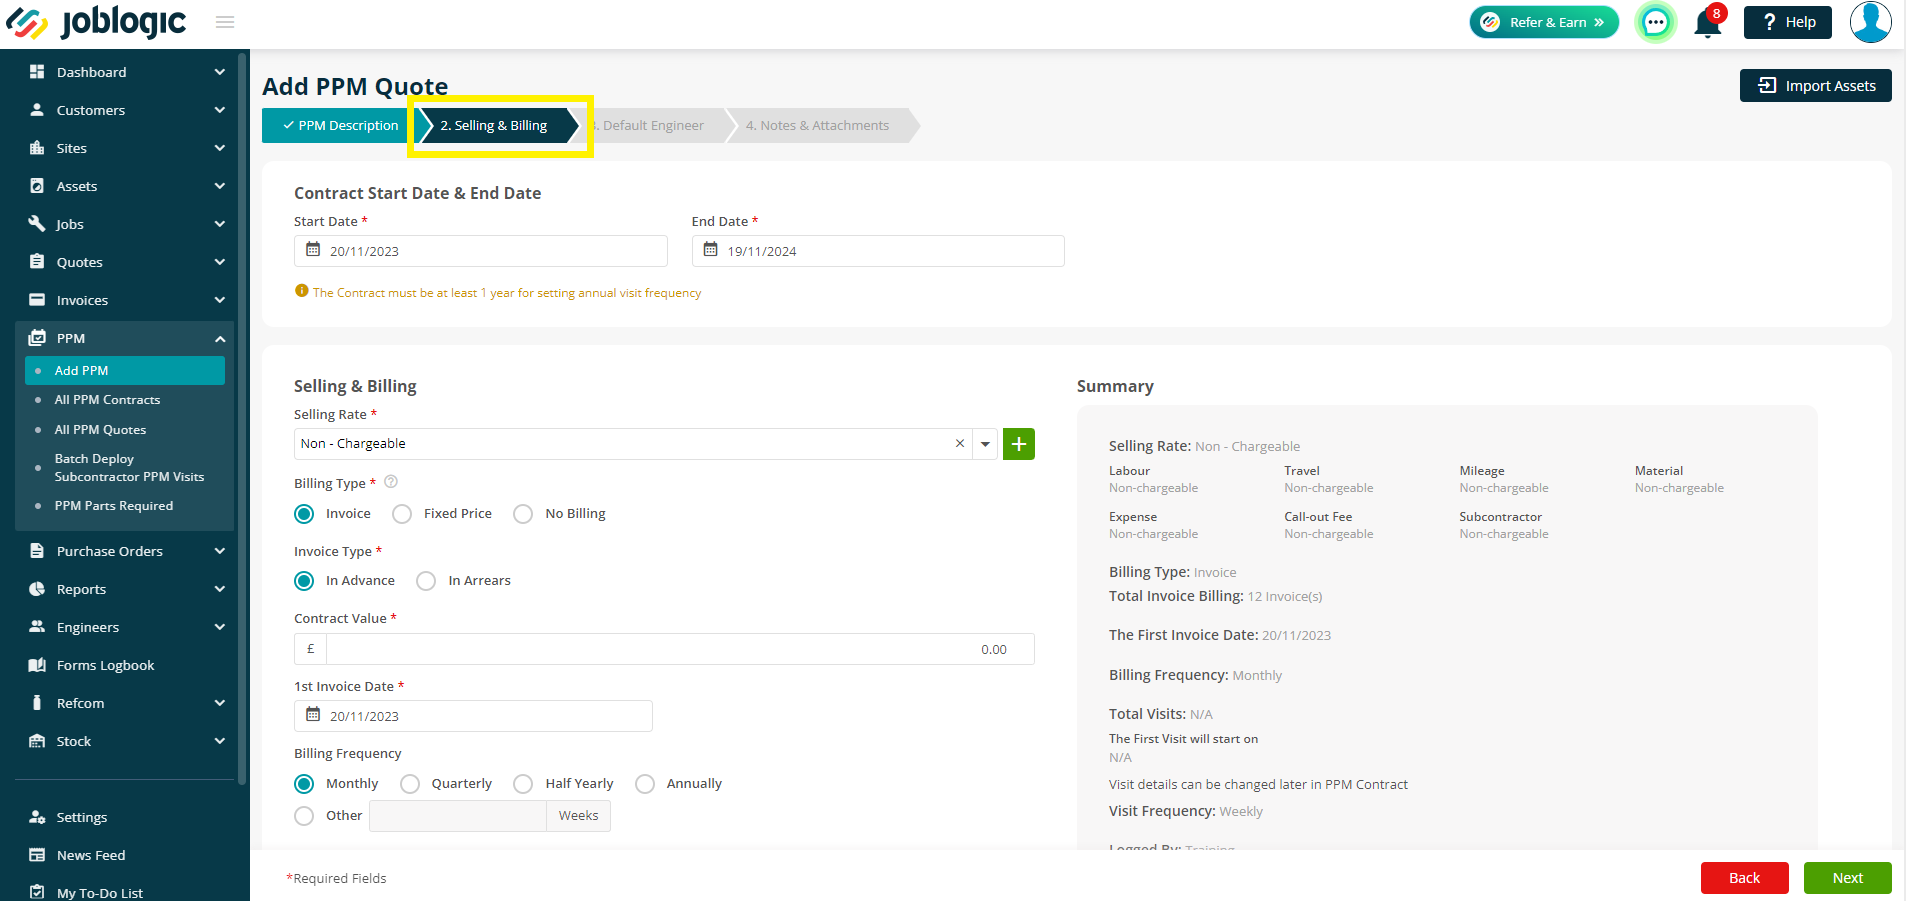
Selling & Billing
The second page is your Selling & Billing page where you can set up the contract invoice and visit details for your Quote. There are a few mandatory fields on this page. You can read more about the Invoice Billing Type here and the Fixed Price Billing Type here.
Firstly, you will need to enter the Start Date & End Date of the contract.
Next up is the Selling Rate - It is advised to use the ‘Non-Chargeable’ selling rate if your invoice prices will not be directly determined by the costs of the jobs within the contract. However, chargeable selling rates can be used if you wish to import any costs from the job to invoices based on those selling rates.
The guides above are more detailed but as a short overview for Billing Type, use Invoice if you wish to Invoice the contract on a set frequency, I.e. Monthly, Quarterly, etc and use Fixed Price if you wish to set one price per individual visit.
The Visit Frequency is not mandatory and can be left until the quote is accepted if you prefer.
If you do wish to add your visits at this stage, simply choose your 1st Visit Date, and the Visit Frequency.
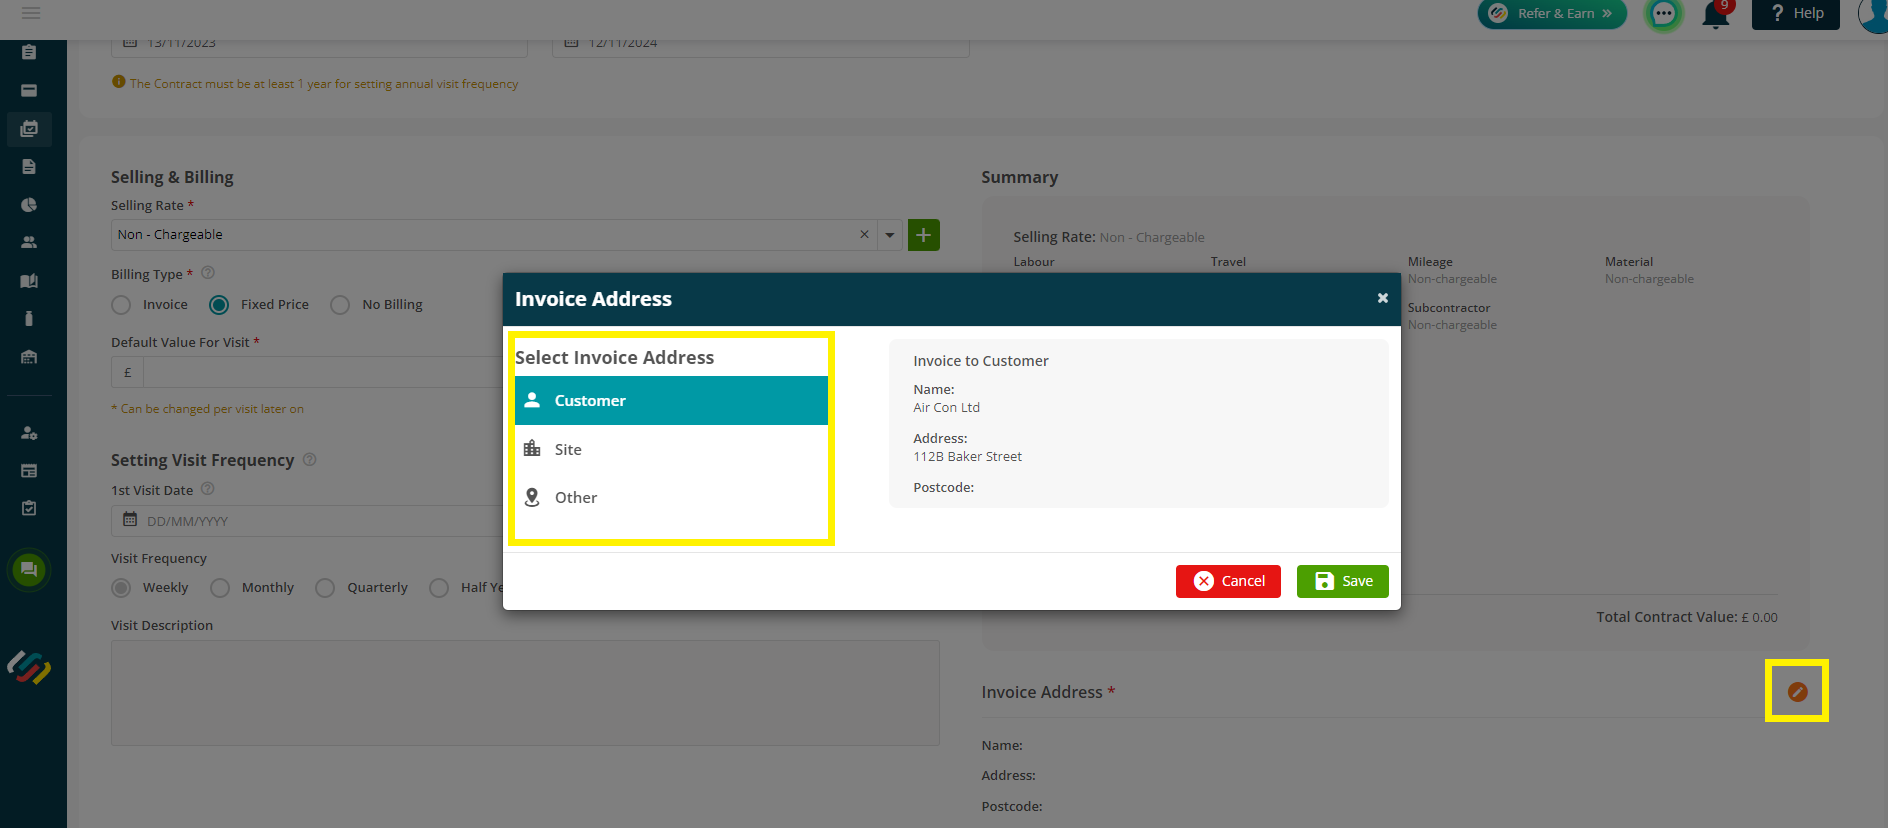
If you have chosen a Billing Type other than No Billing, you will also need to enter an Invoice Address. Click the orange edit icon on the right to choose from Customer Address, Site Address or Other to manually enter an address.
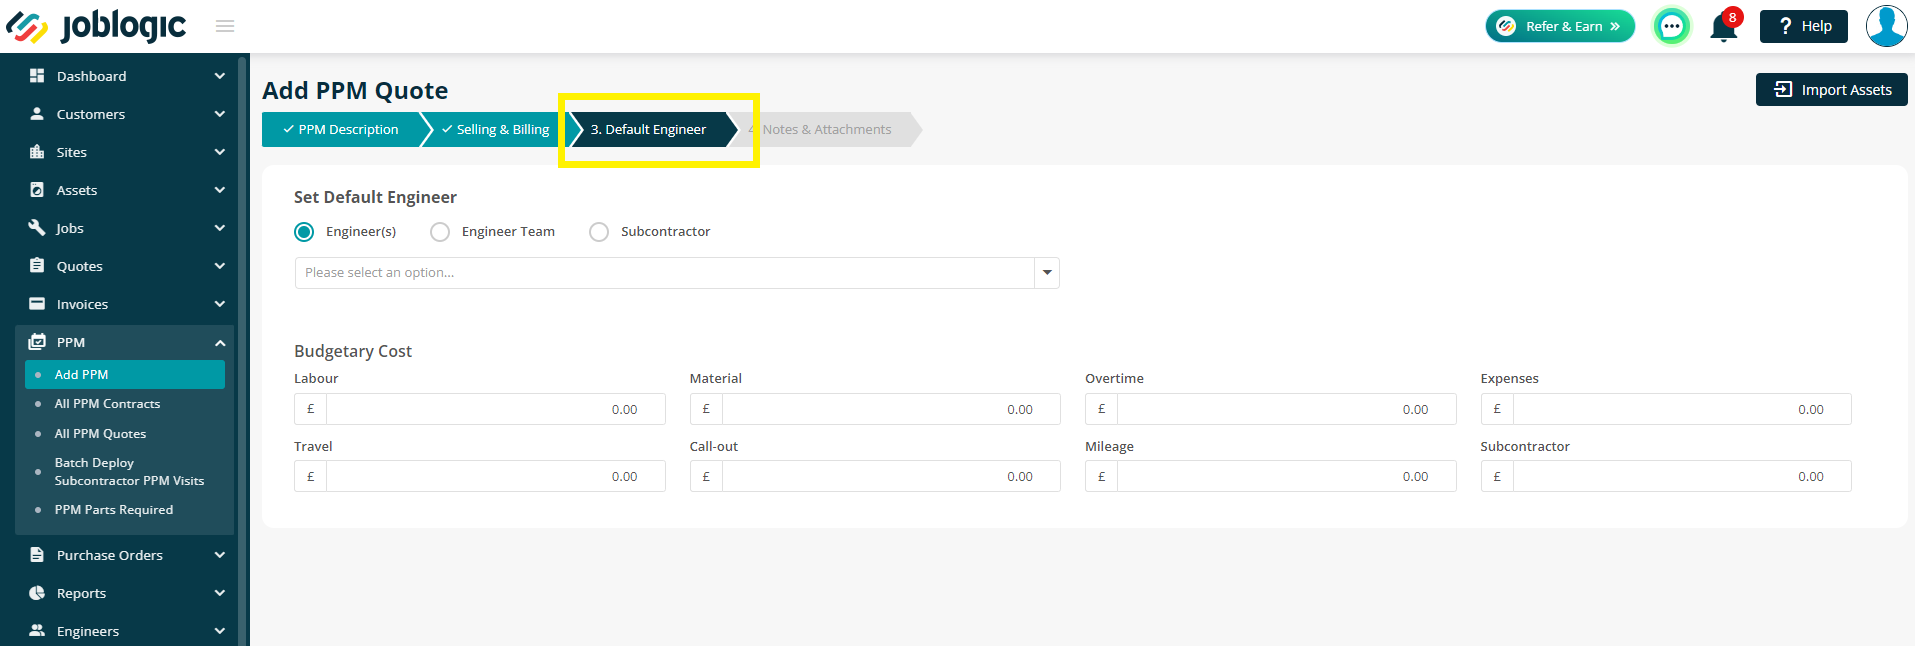
Default Engineer
Nothing on the Default Engineer page is mandatory and you can skip it at this stage if you prefer.
You can, however, choose a default Engineer, Engineer Team or Subcontractor to assign to all visits created under the eventual contract.
Leaving this blank will allow you to assign the job based on engineer availability closer to the time, if the Quote is accepted.
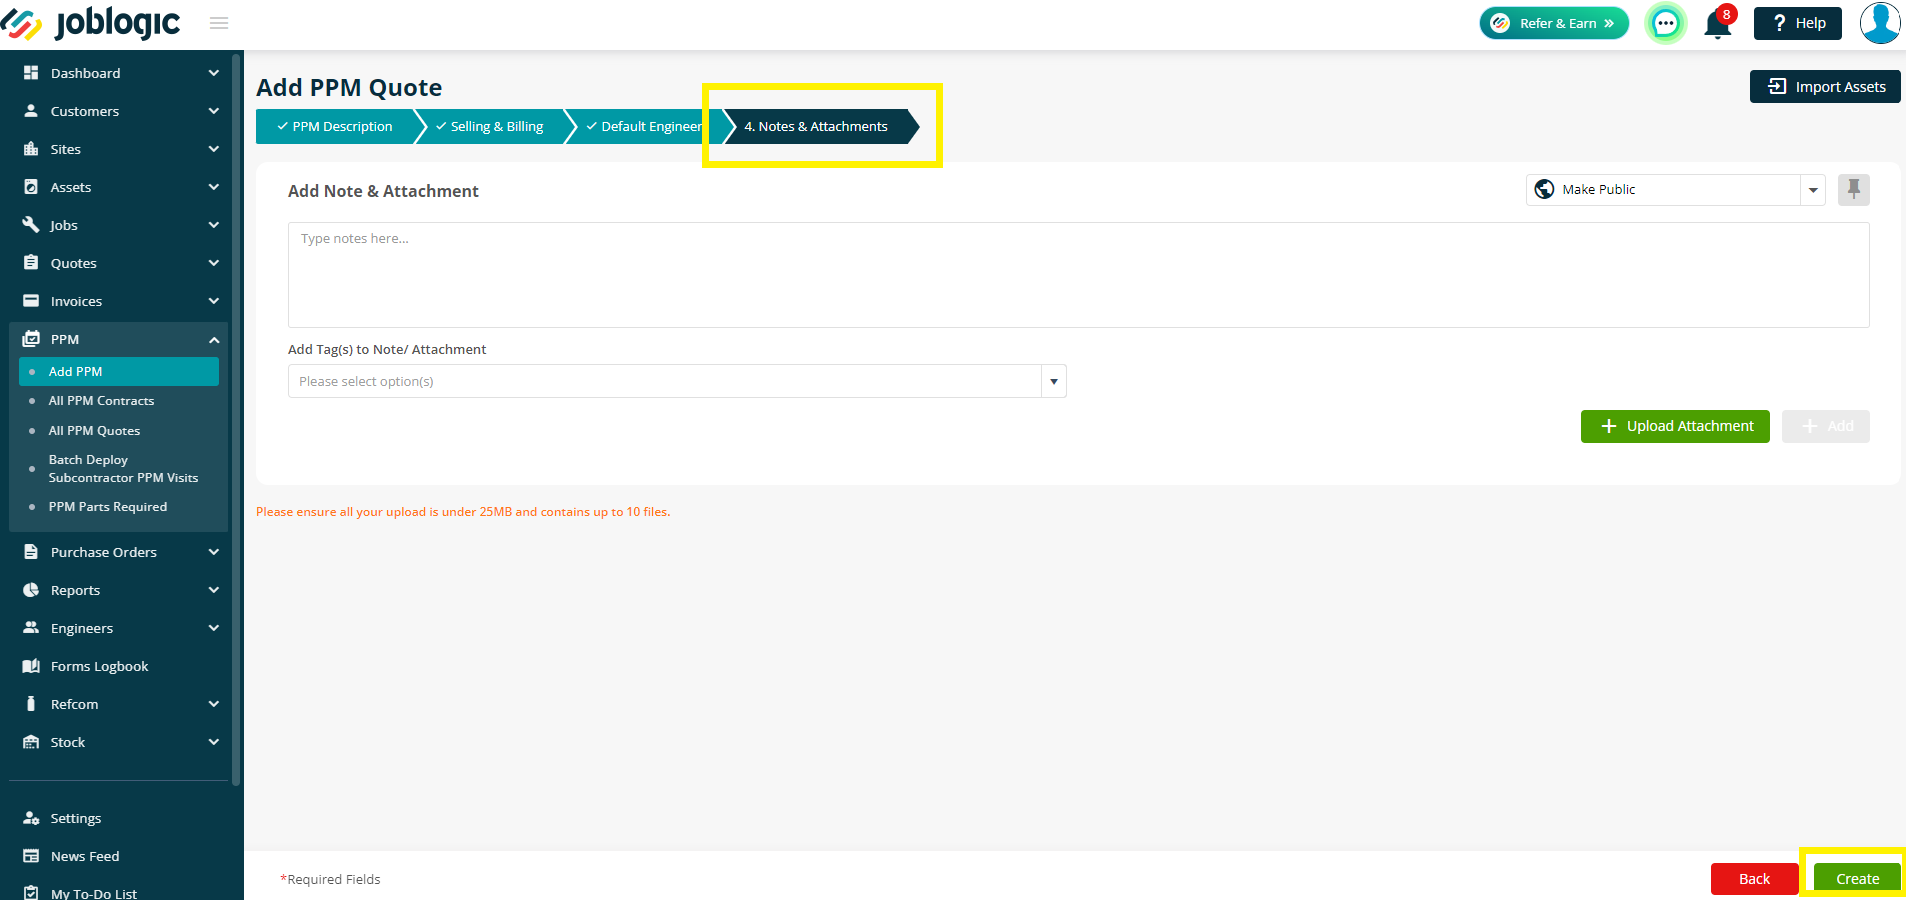
Notes & Attachments
The final page is the “Notes & Attachments” page. This is where you can add any notes or attachments that relate to the whole contract. They can be added to individual jobs as normal later too, if required.
And finally, click Create to generate your Quote. You'll be redirected to the PPM Quote details as soon as it has generated.
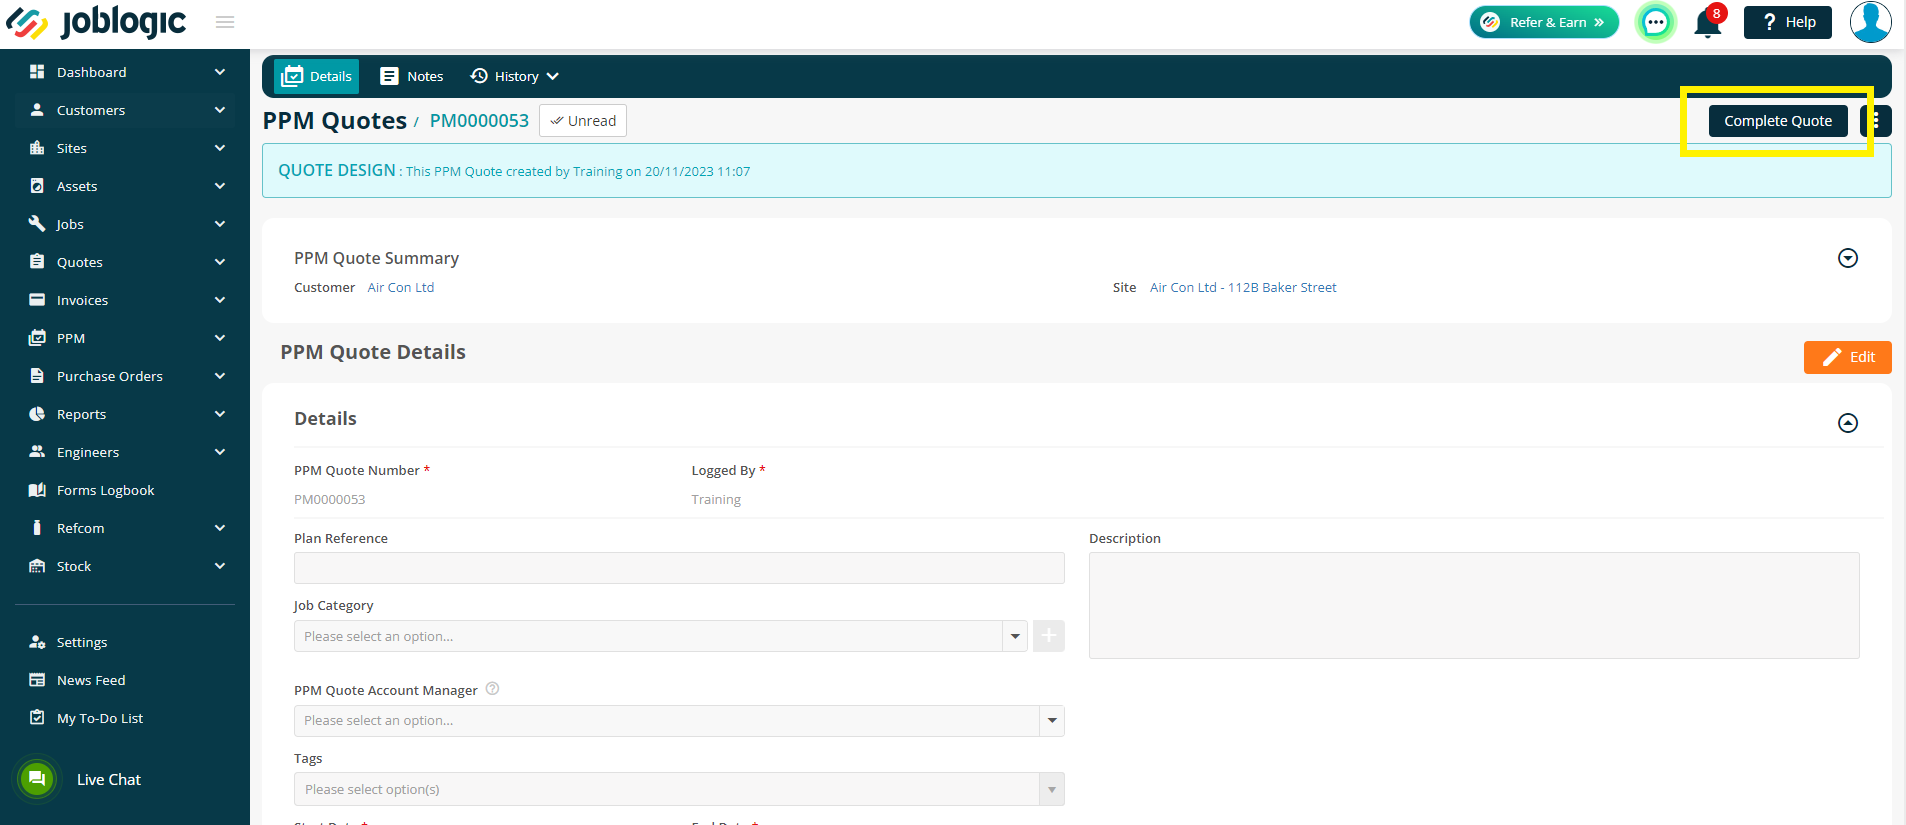
Next Steps with your PPM Quote
Once the Quote has been created, you have the option to make any final changes by clicking the Edit button. When you are happy, click Complete Quote in the top right.
Now, you'll have a number of new options:
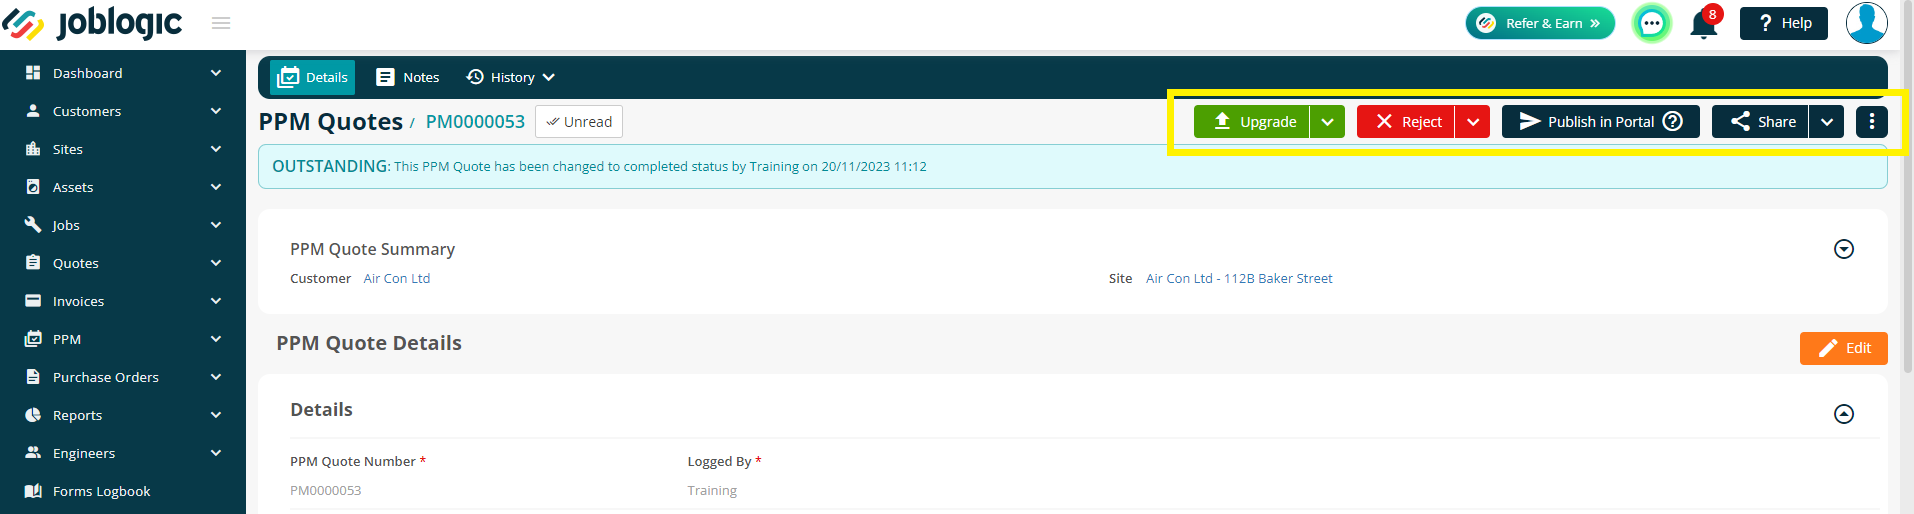
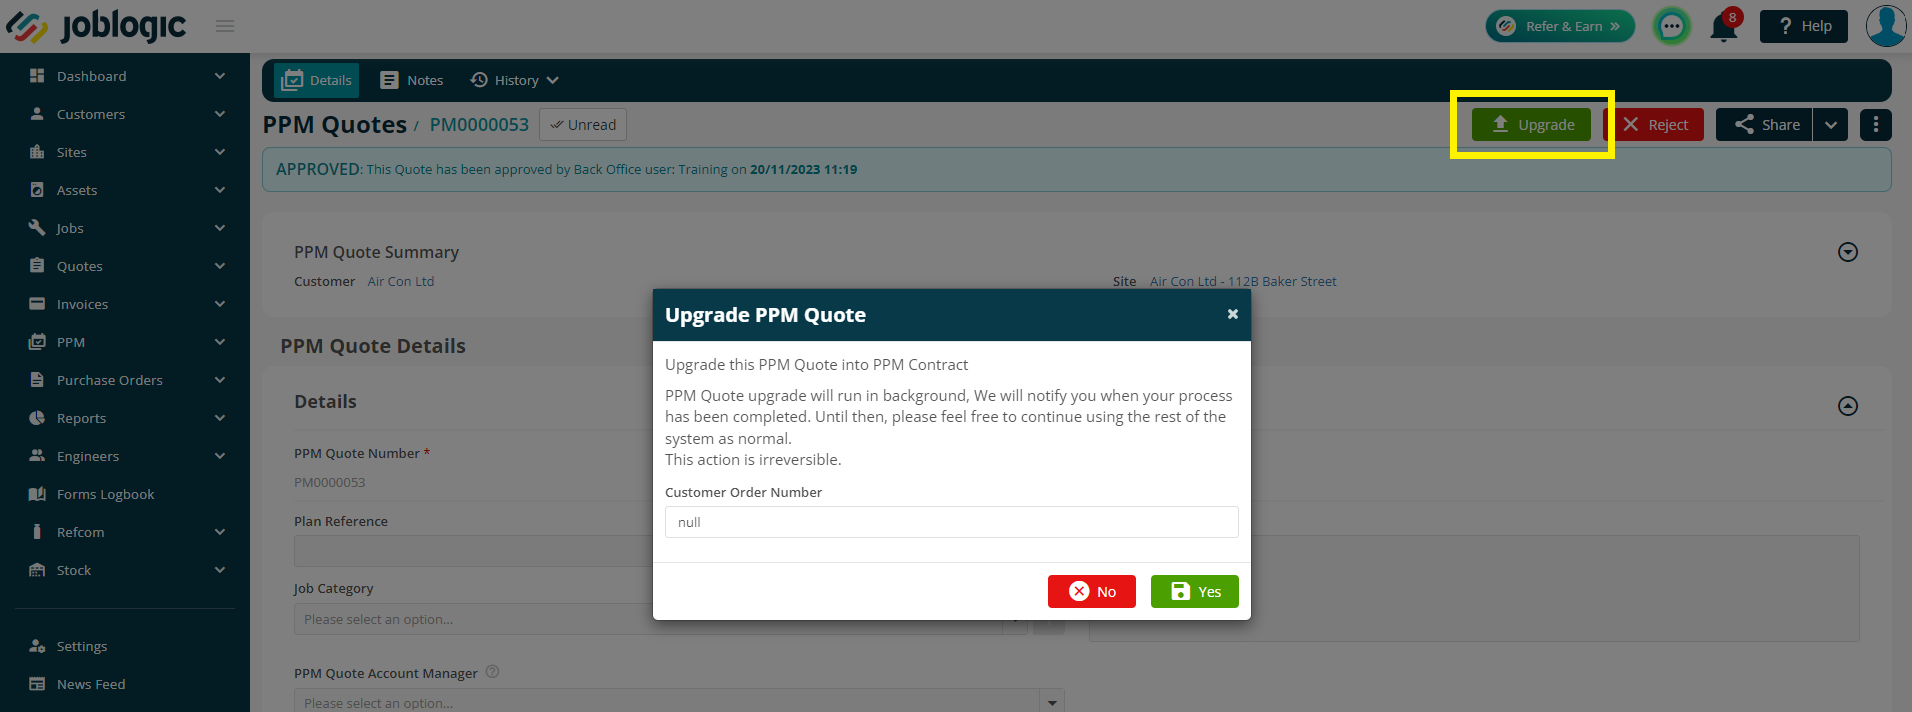
Upgrade / Approve
- You can choose to Upgrade the Quote to a Contract, or choose the dropdown arrow to Approve the Quote.
- Approving the Quote will change the status, but will not create a Contract at this stage.
- You will need to click the Upgrade option to turn the Quote into a Contract.
- When a Quote is Approved, it can no longer be Cancelled, only Rejected.
Approve
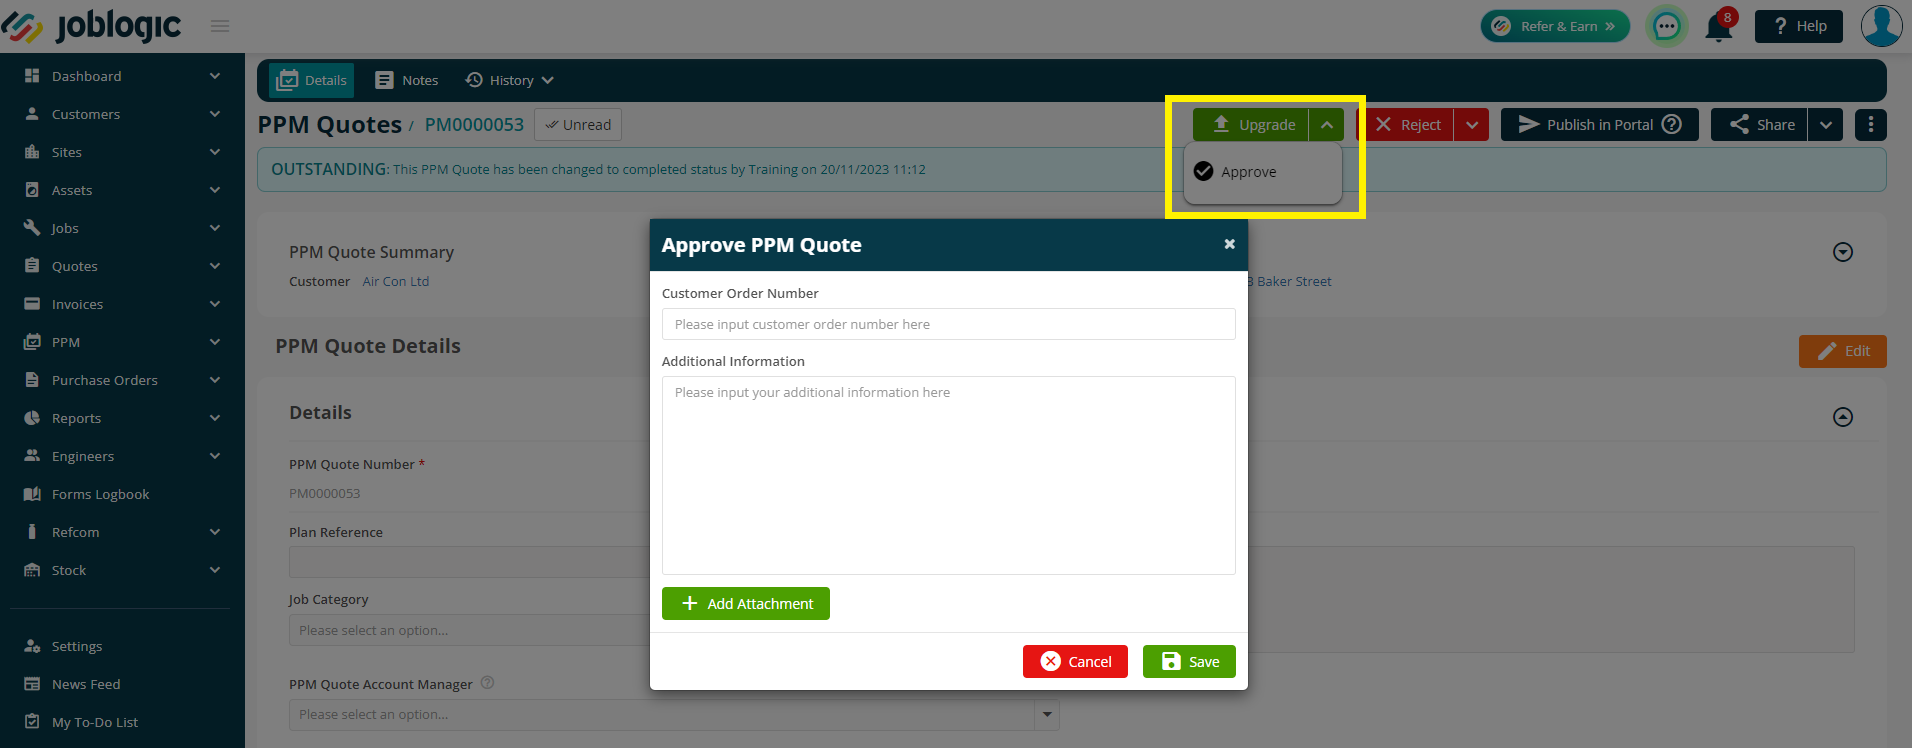
Upgrade
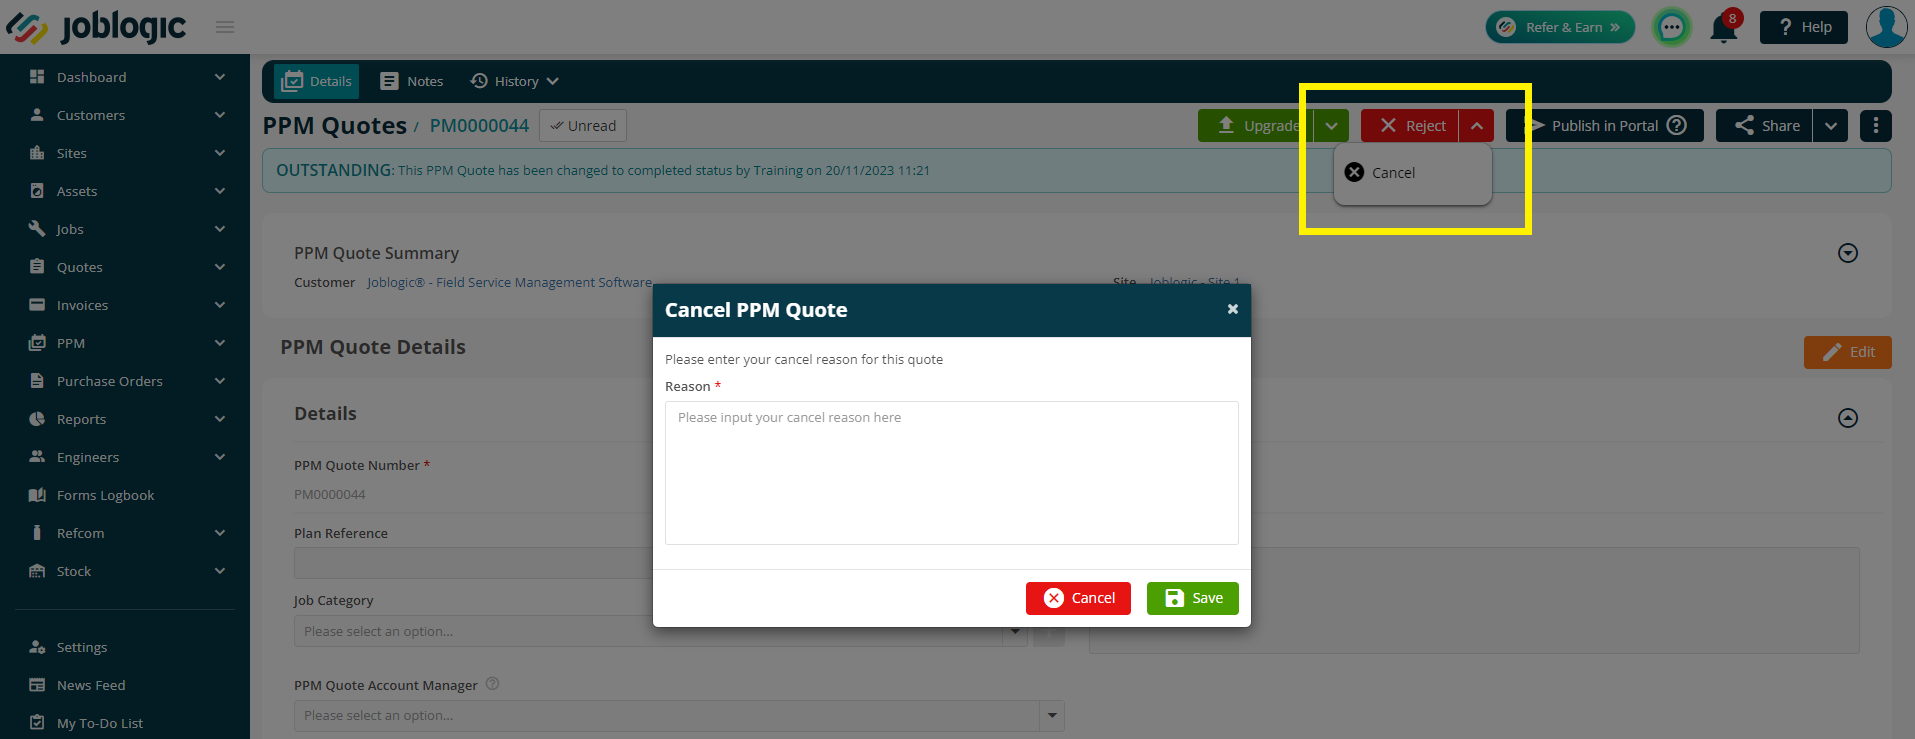
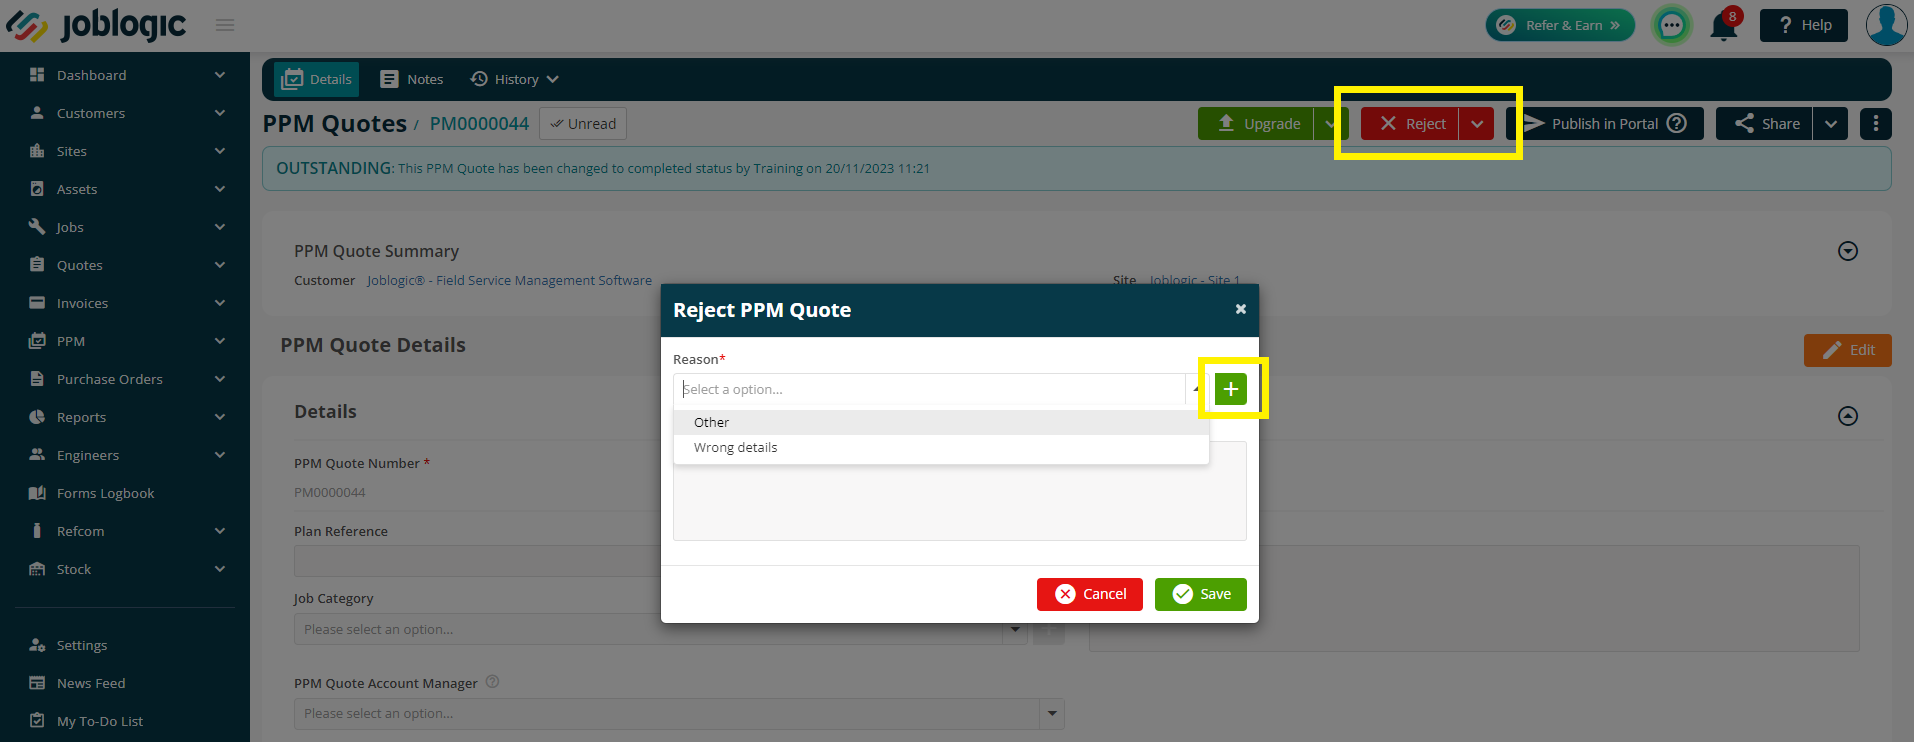
Reject / Cancel
- You have the option to Cancel or Reject the quote, and provide a reason.
- If the quote is Cancelled, it will stay in your records, but nothing further can be done with it
- If the Quote is Rejected, you'll need to provide a Reason that is set up in your library (Settings > Library > Quote Reject Reasons)
- You can choose the Green plus button to add a new reason here, if you wish.
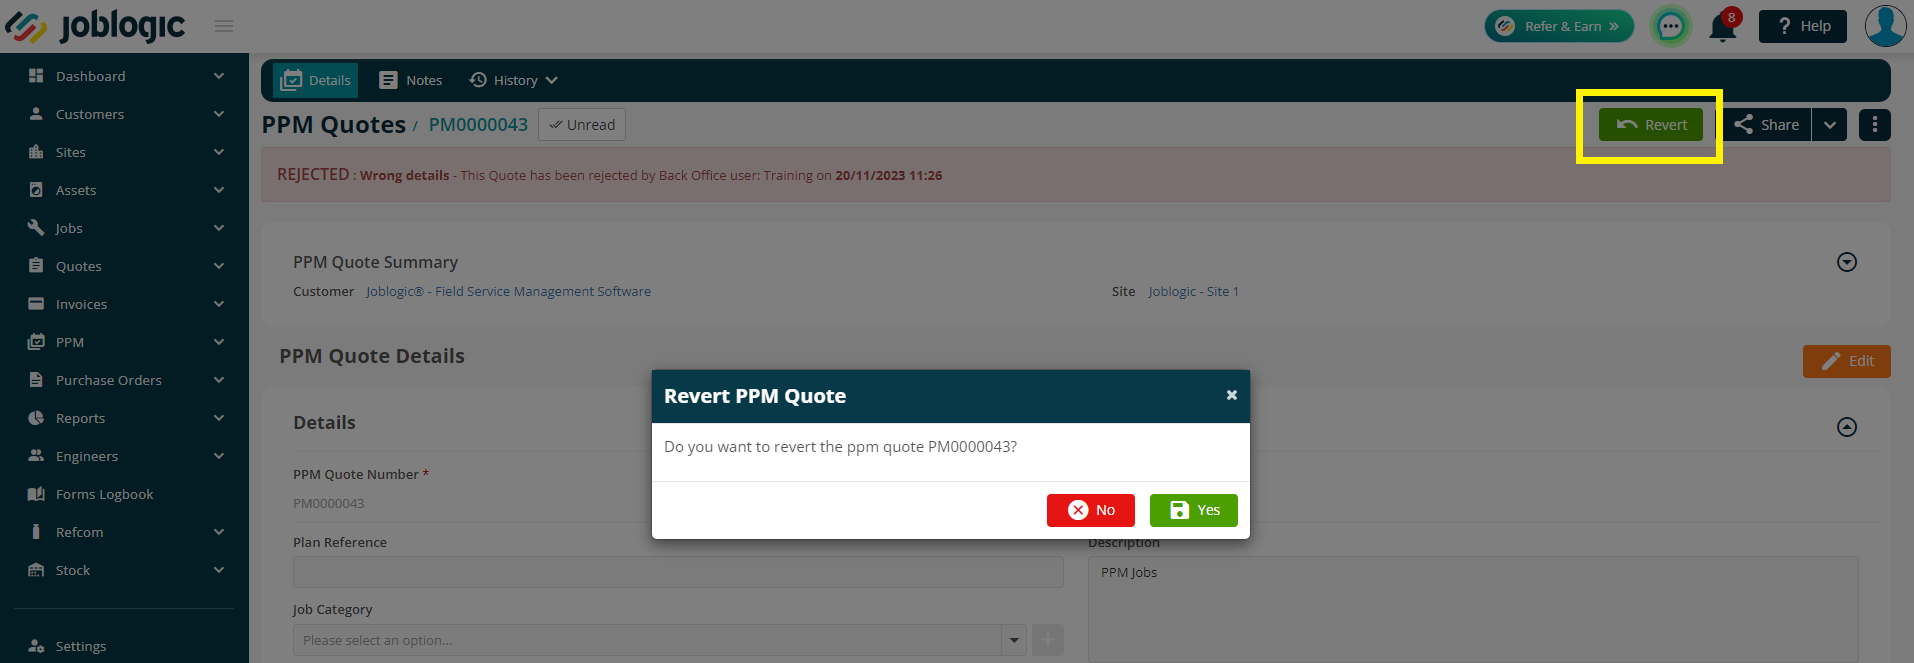
- If a Quote is Rejected, it can be Reverted back by choosing the Revert button at the top of the page.
Cancel
Reject
Revert
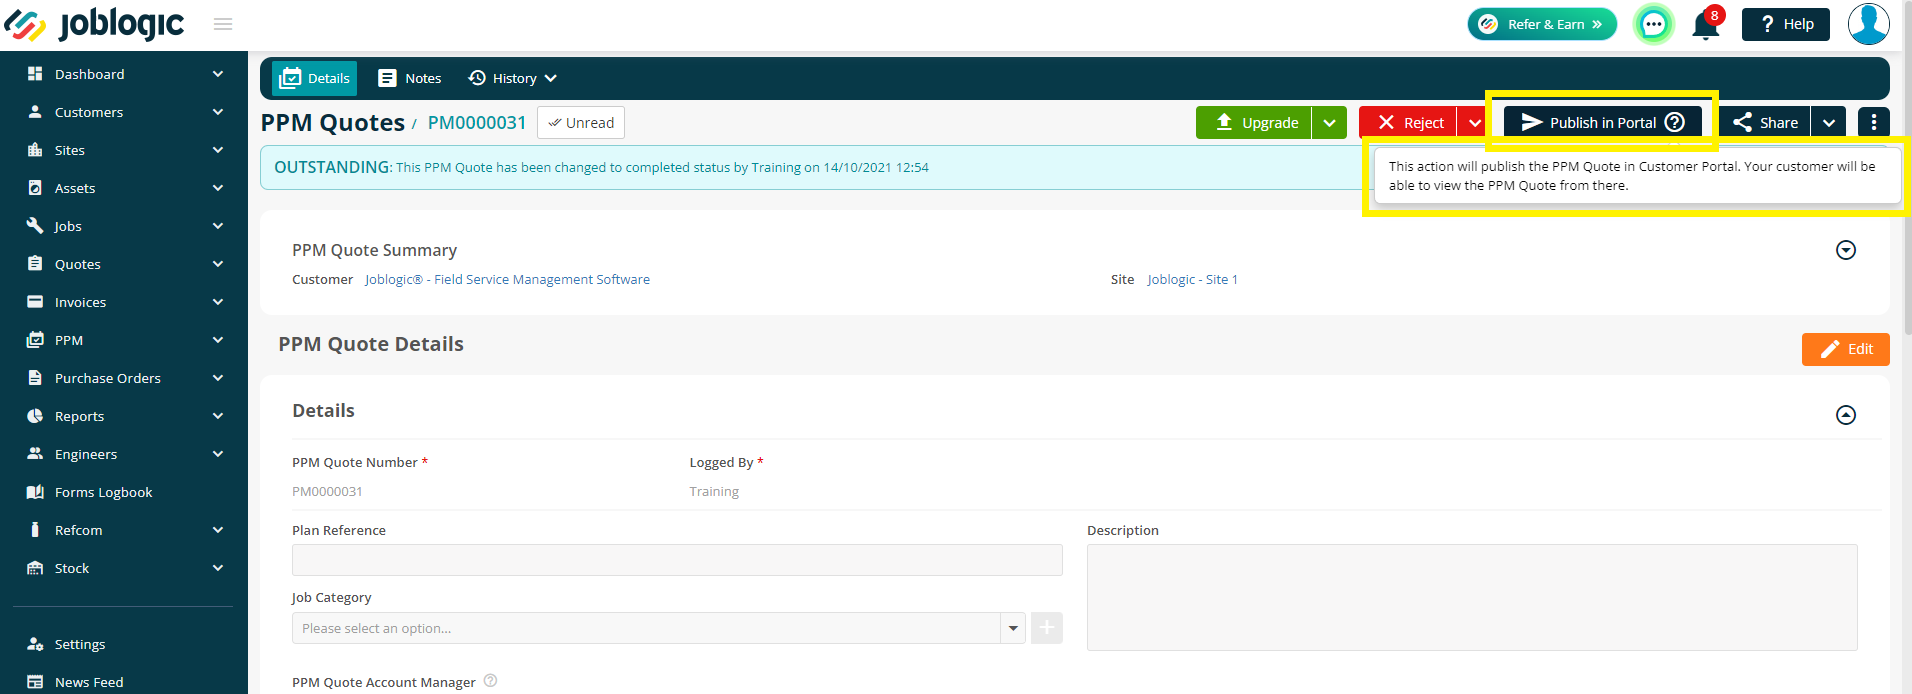
Publish in Portal
- You can send the PPM Quote to the Customer Portal when you are ready. It will only show up on their portal once you have clicked Publish in Portal.
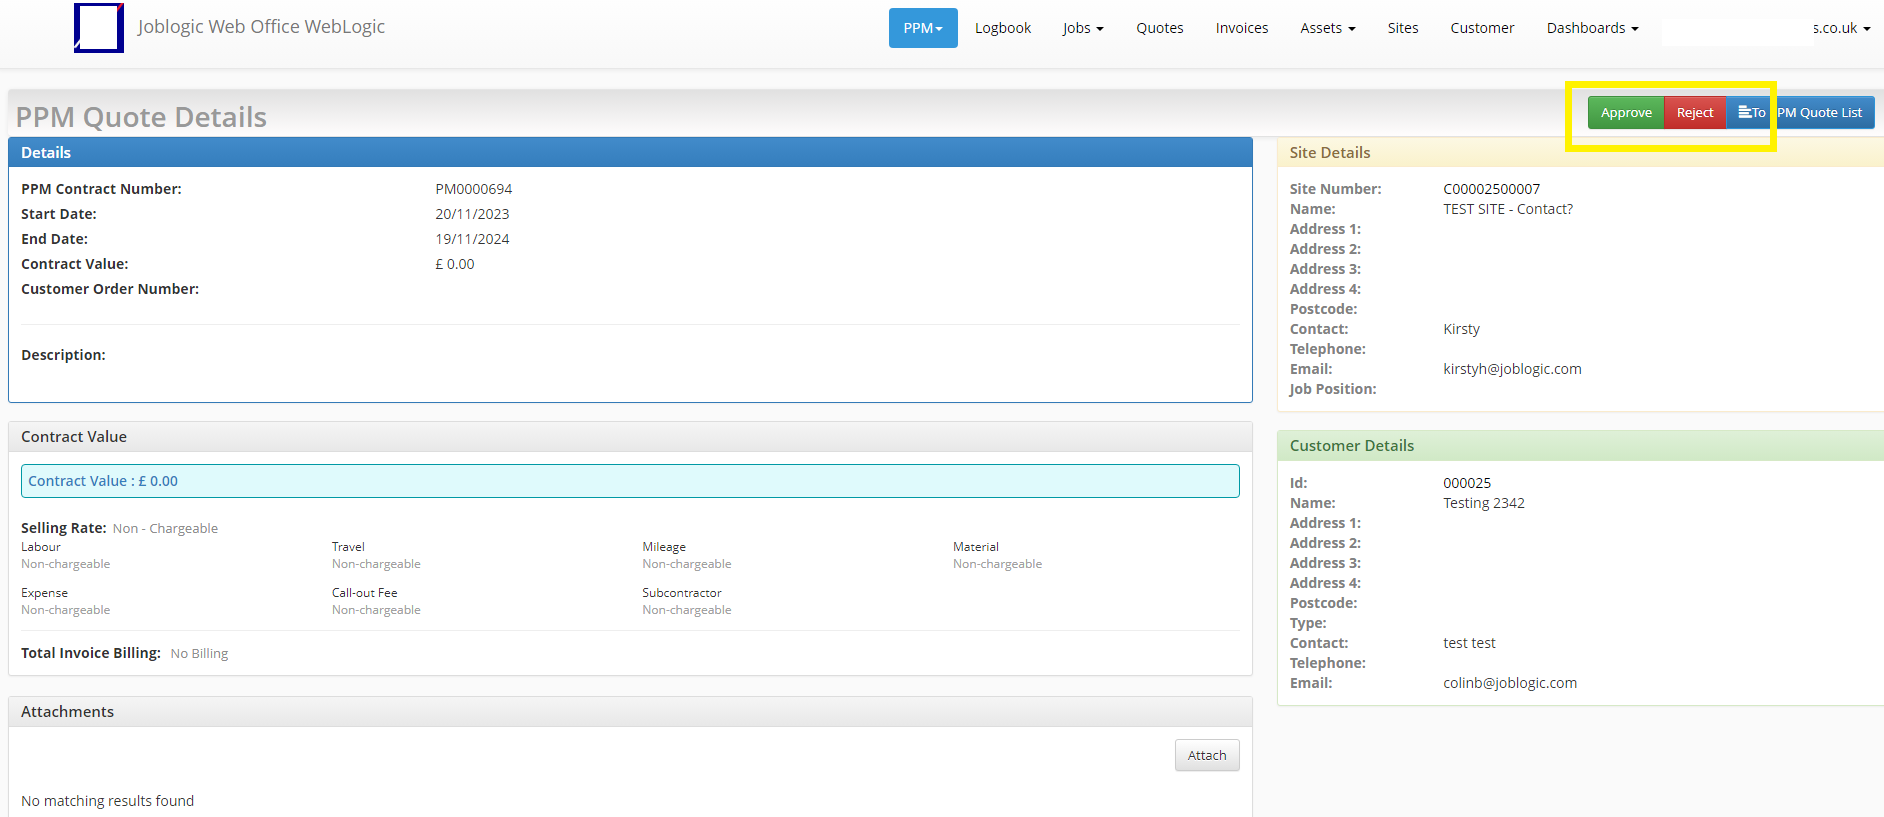
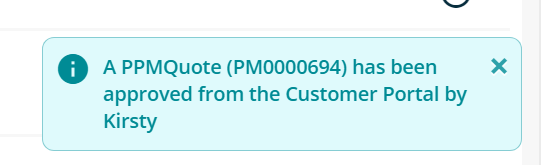
- From here, they can also Accept / Reject the Quote themselves. You'll then receive a notification to confirm that a Quote has been approved via the Portal.
- To read more about the Customer Portal side, click here.
Publish button
Customer Portal view
Notification in back office
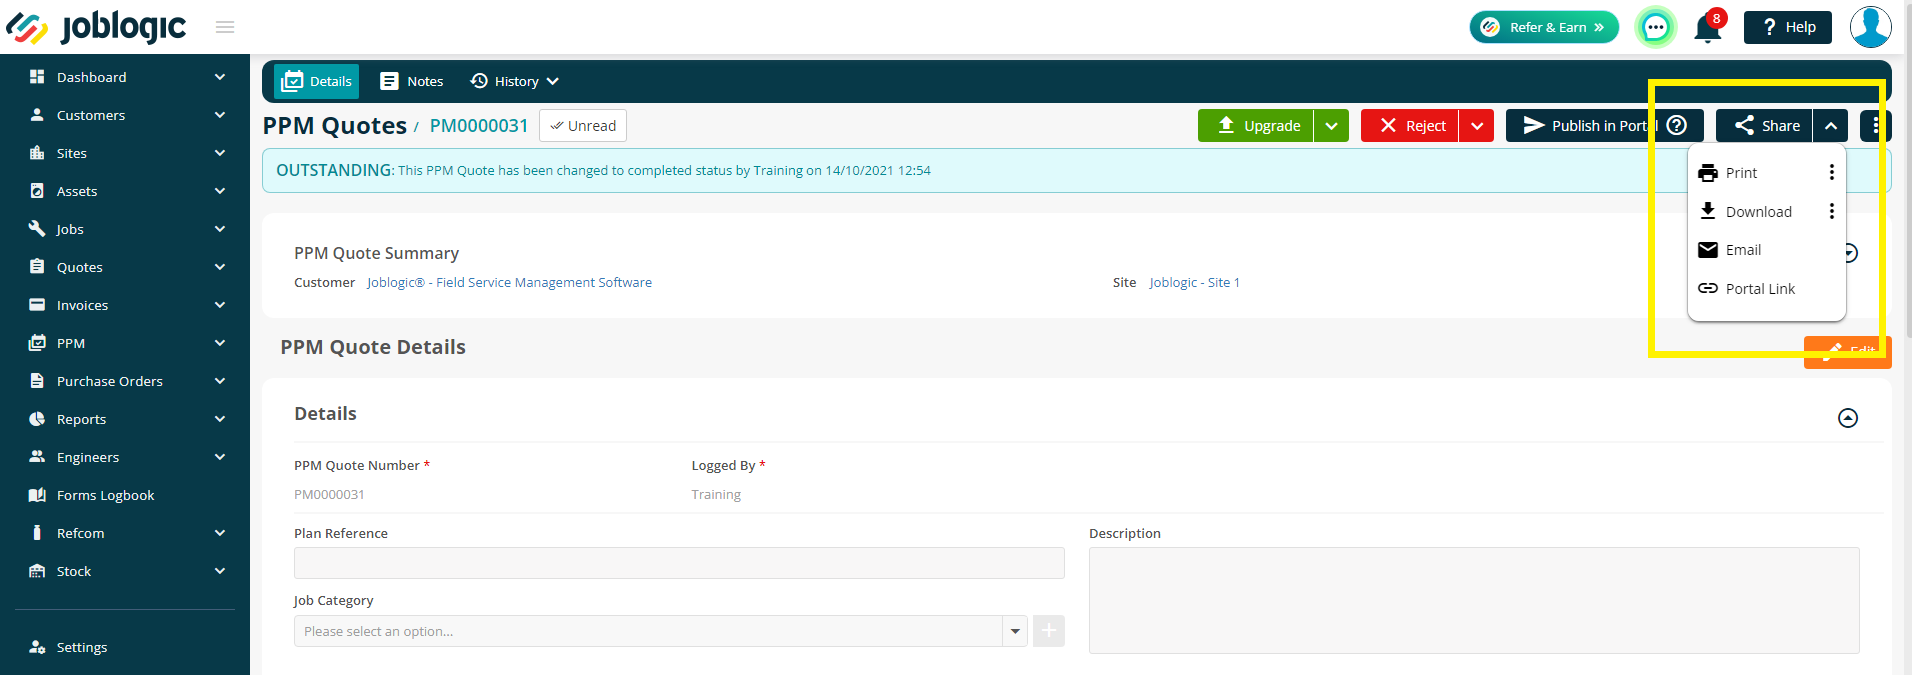
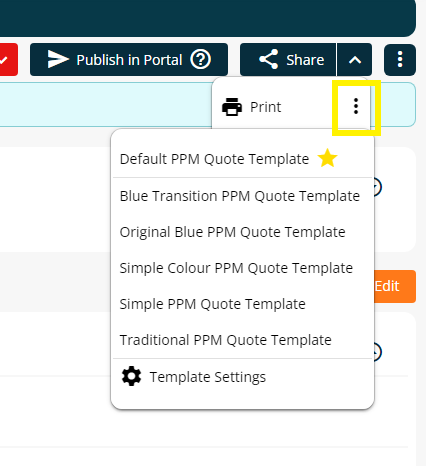
Share
- To Share the Quote, you can either Print, Download or Email.
- Clicking the text will allow you to send the default template that is set up via Settings > Document Templates.
- Alternatively, you can click the three dots next to the text to choose a different template.
Further Support
For further information or assistance with the above, contact our Support Team on 0800 326 5561 or email support@joblogic.com. Alternatively, our Customer Success Management team can be reached by emailing customersuccess@joblogic.com
Publishing Details
This document was written and produced by Joblogic’s Technical Writing team and was last updated on the date specified above. Be aware that the information provided may be subject to change following further updates on the matter becoming available. Additionally, details within the guide may vary depending on your Joblogic account’s user permissions.