- 23 Jan 2026
- 3 Minutes to read
- Print
- PDF
Project Milestones
- Updated on 23 Jan 2026
- 3 Minutes to read
- Print
- PDF
Introduction
The Joblogic Projects module supports the planning and delivery of project-based work, helping teams manage projects of varying size and duration within a single system.
It provides visibility over budgets and progress, while supporting common project billing requirements such as staged payments, retention invoices, and milestone- or time-based billing for fixed-price projects.
Projects can be structured using milestones, which represent key points within a project’s timeline. Milestones can be used to group related jobs, track progress, and support activities such as reviews, budget checks, or defined stages of work.
This user guide explains how to create and manage project milestones, associate jobs to them, and use milestones to support structured project workflows within the Joblogic back-office system.
Milestones Library
Milestones can be saved and reused across projects using the Milestones Library.
This allows commonly used milestone structures to be applied consistently, reducing repetitive setup and supporting standardised project delivery.
When setting up milestones for a project, saved milestone templates can be selected and applied as required.
To set this up head to Settings > Library > Project Milestone
.png)
Click Add Project Milestone to add a new one.
.png)
Add your Milestone Name (and description if applicable), and click Save.
.png)
Setting a Project Milestone
To add a project milestone, navigate to the relevant project:
Projects > All Projects > select the required project, then select the Milestones tab.
Click Add Milestone in the top-right corner of the page.
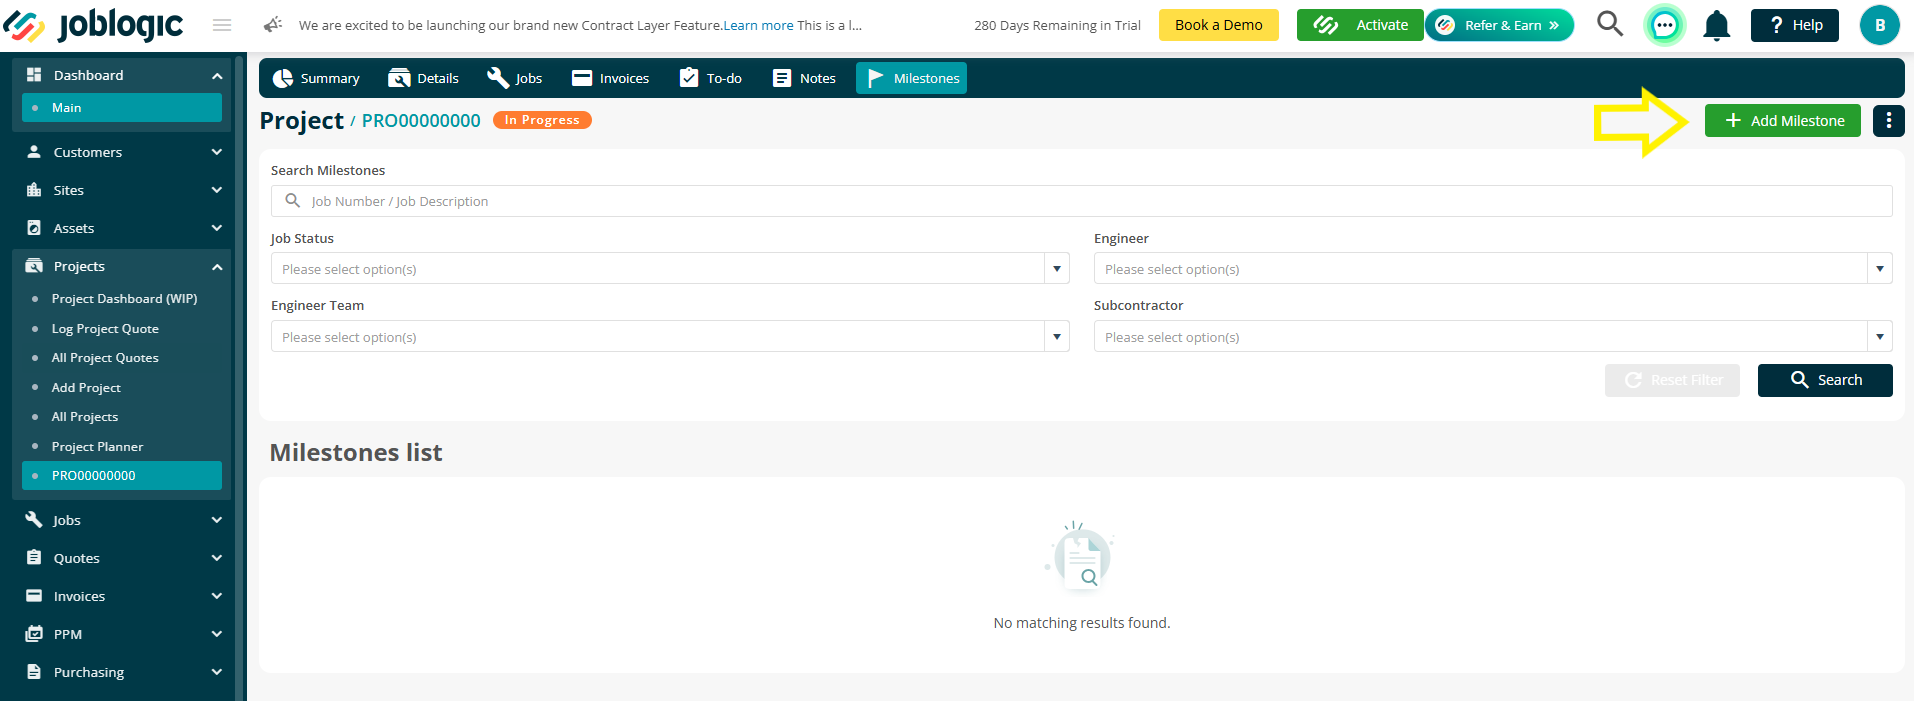
An Add Milestone screen will appear, where you can select a milestone from the library list, or click the green plus button to add a new Milestone.
Enter an Expected Completion Date and then click Save.
.png)
The Milestone will then show up in the Milestone list against the project:
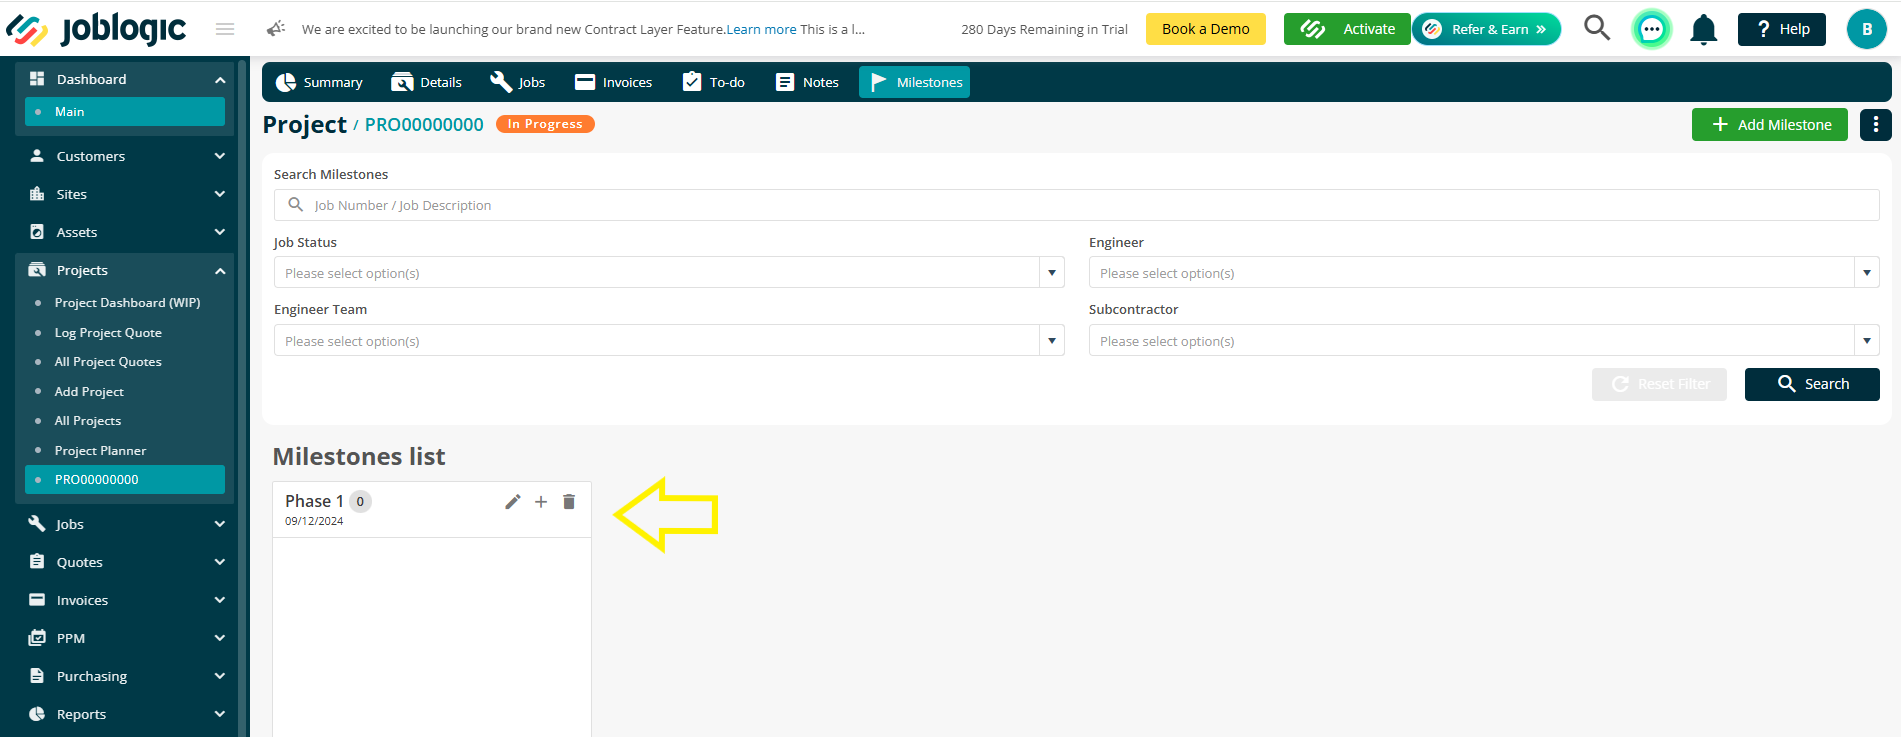
Once a milestone has been created, existing project jobs can be associated with it. Jobs must already exist within the project before they can be linked to a milestone.
Associating Jobs to a Milestone
To associate jobs with a milestone, click the + icon next to the relevant milestone.
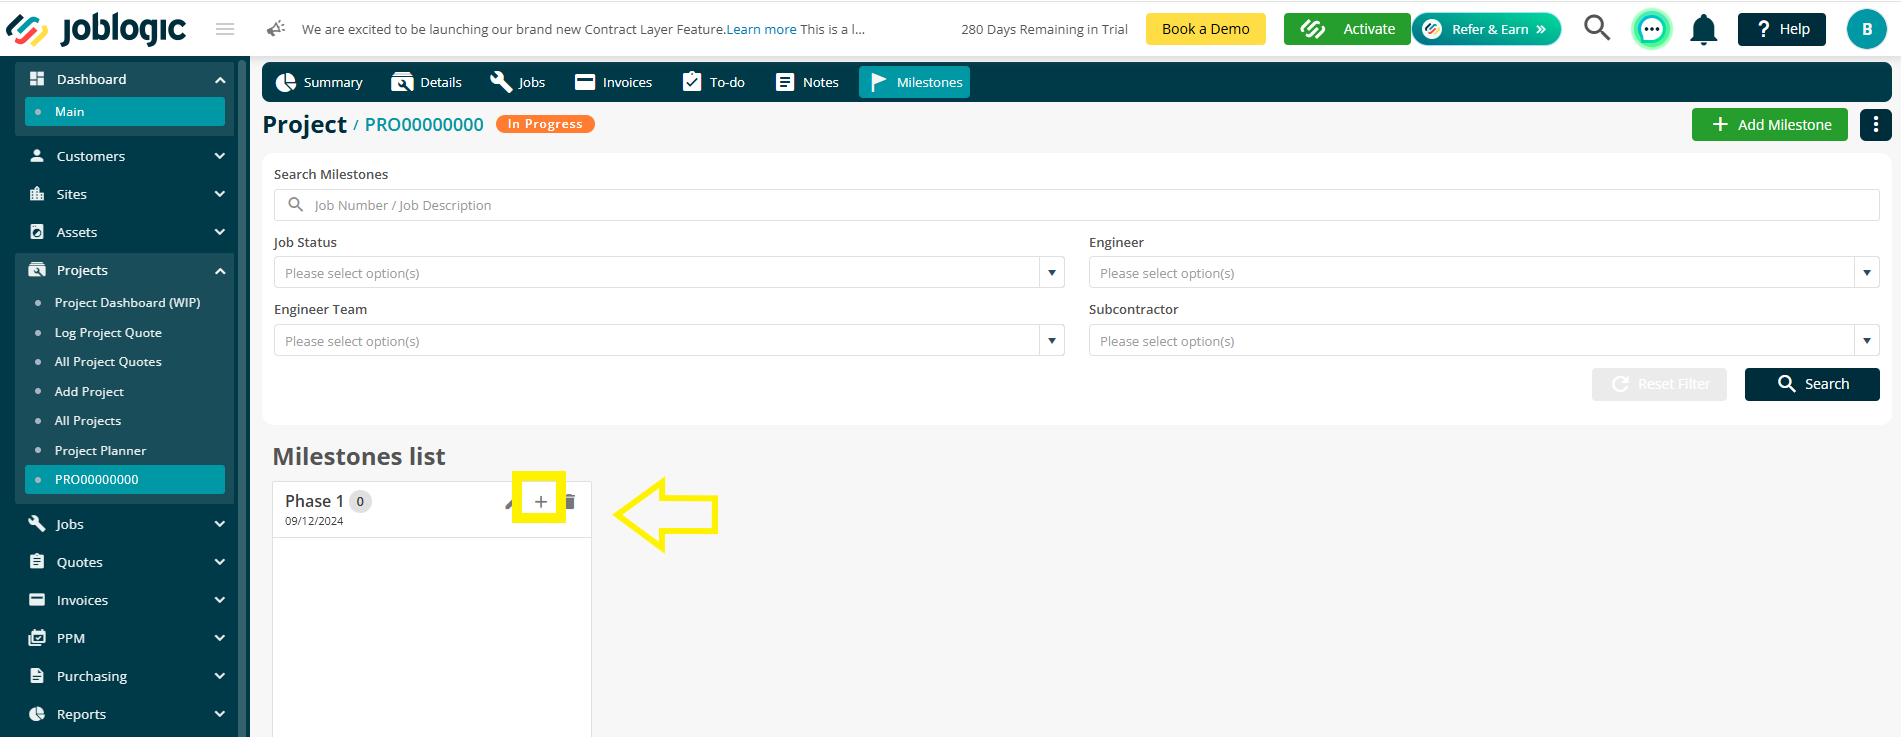
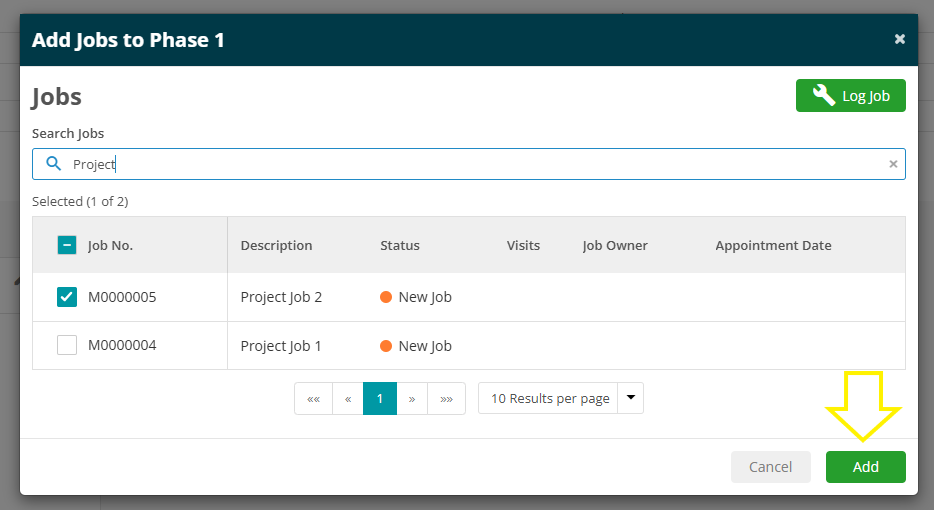
The Add Jobs to Milestone window will appear, displaying a list of jobs already logged against the project.
Select the jobs you want to associate using the relevant tick boxes. To select all jobs, use the Job No. checkbox. If required, use the Search Jobs field to search or filter the list.
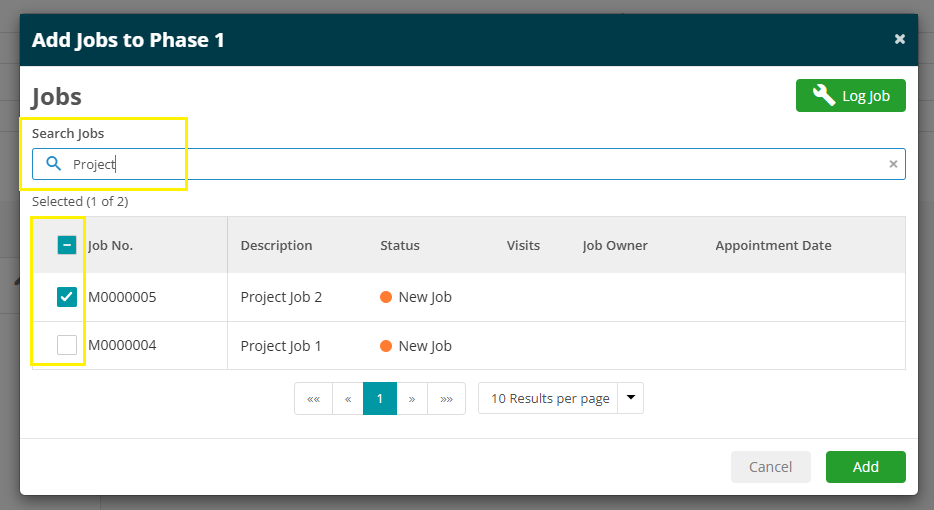
Once all required jobs have been selected, click Add to associate them with the milestone.
The selected jobs will then appear within the milestone.
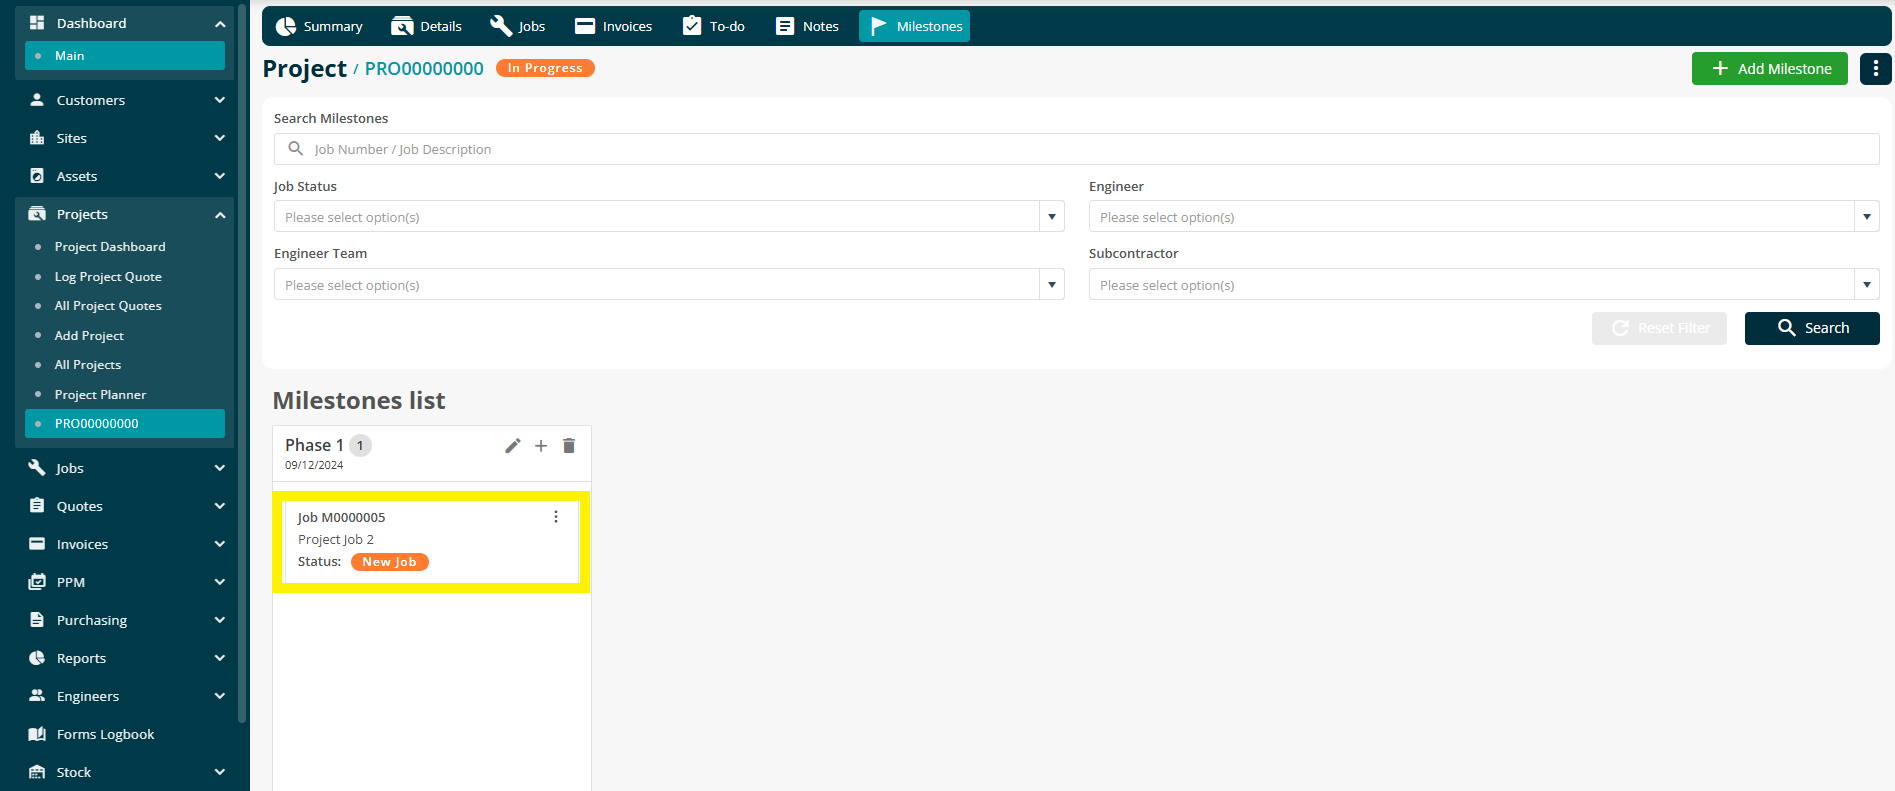
Jobs within a milestone can be reordered to reflect the preferred sequence of work. To change the order, drag and drop jobs within the milestone list. The order you set will be preserved.
.png)
Jobs can also be associated to a milestone at the point of logging the job. The below details this process.
Associating a Job to a Milestone when Logging a Project Job
Please see our How to Log a Job user guide for general details on job logging with Joblogic.
Project jobs can also be associated with a milestone at the point of job creation.
To log a project job, navigate to the project:
Projects > All Projects > select the required project, then select the Jobs tab.
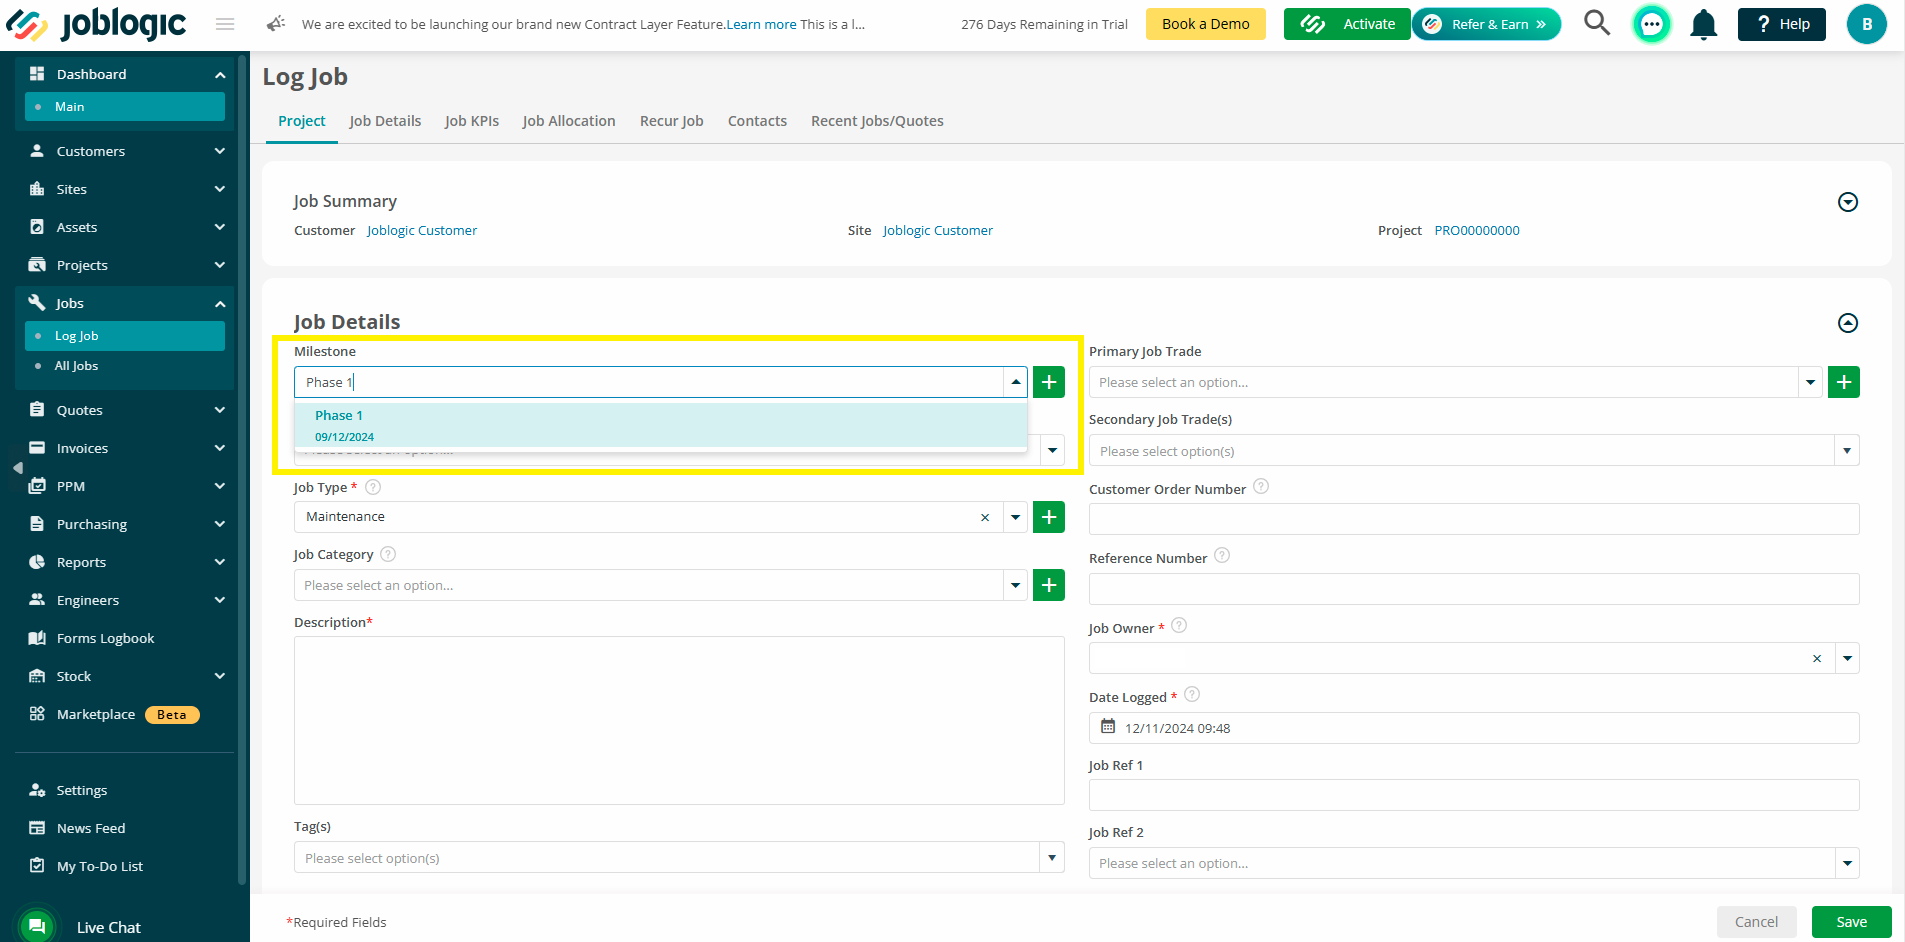
Click Log Job to open the job creation screen.
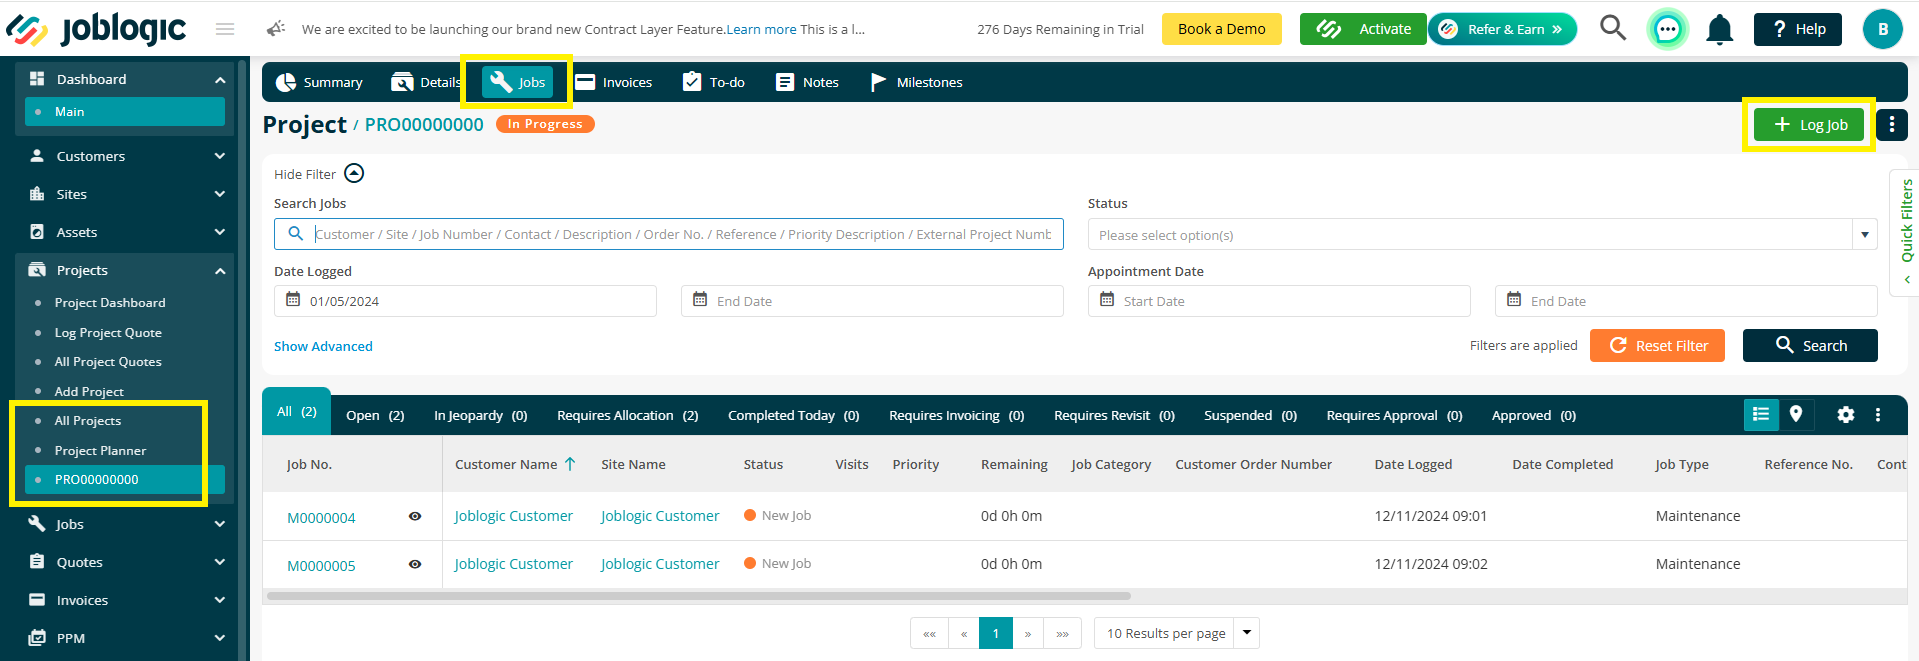
Logging a project job follows the same process as logging a standard job, with the addition of a Milestone field.
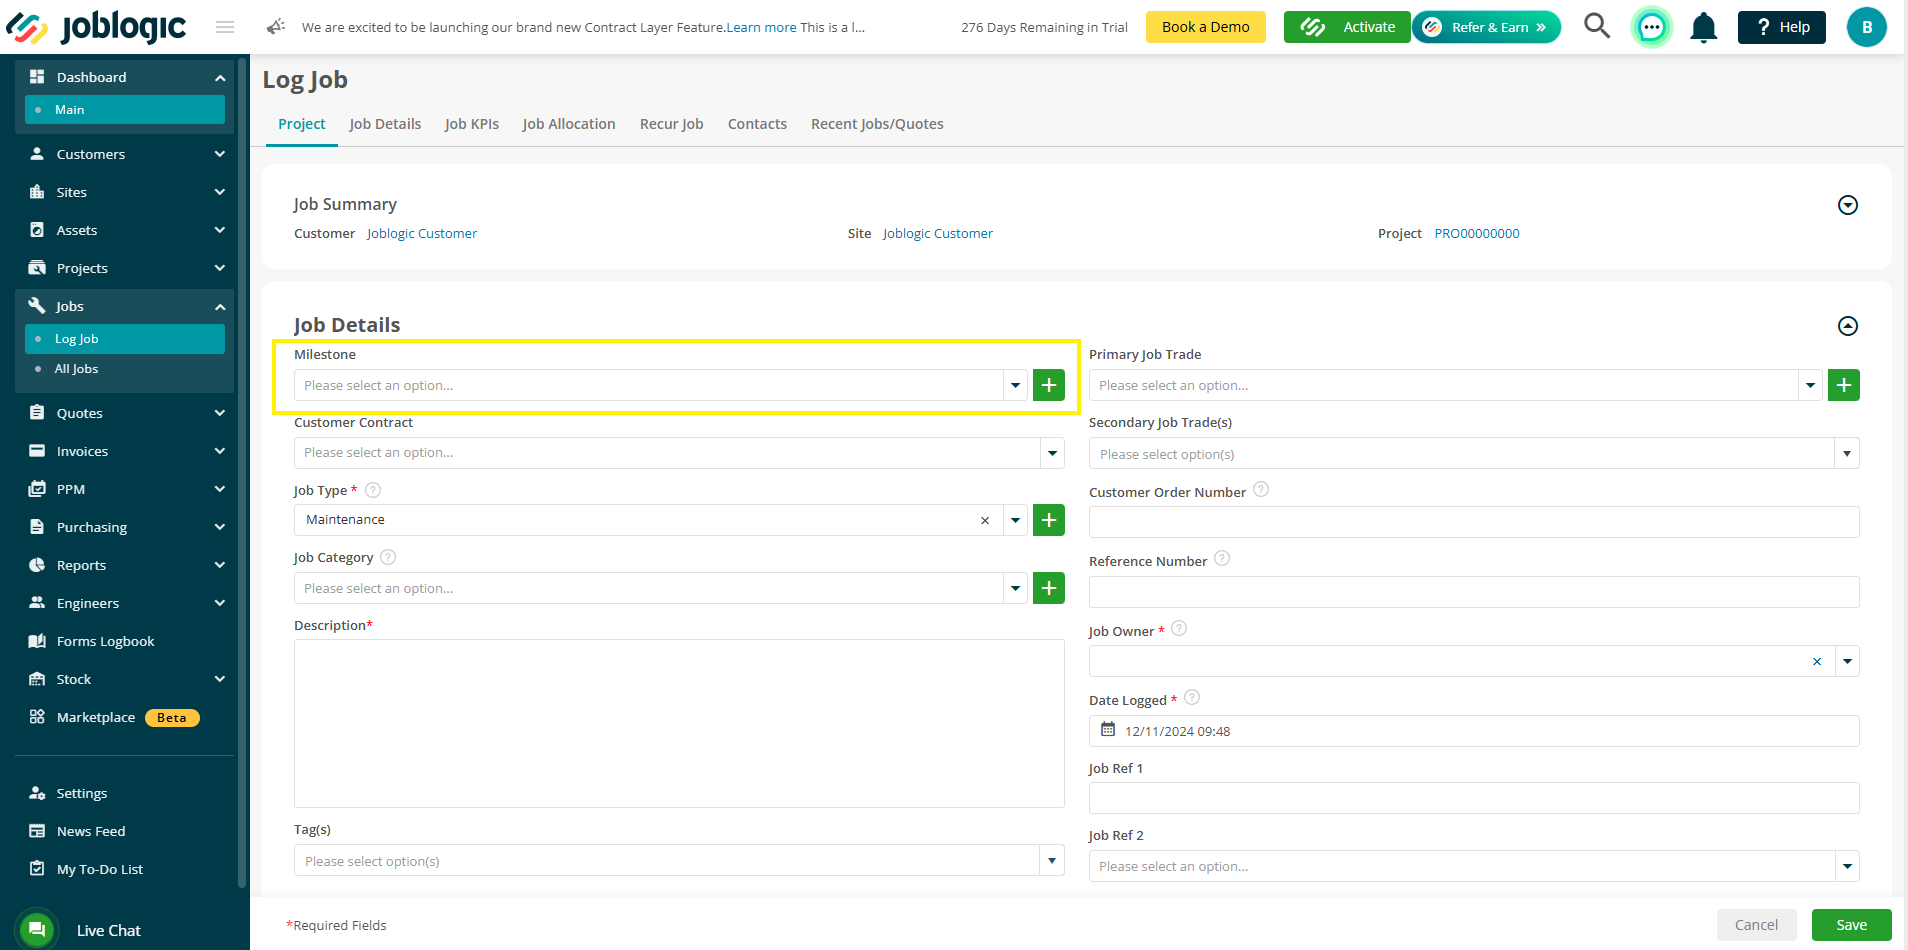
Use the Milestone field to select the relevant milestone for the job before saving.
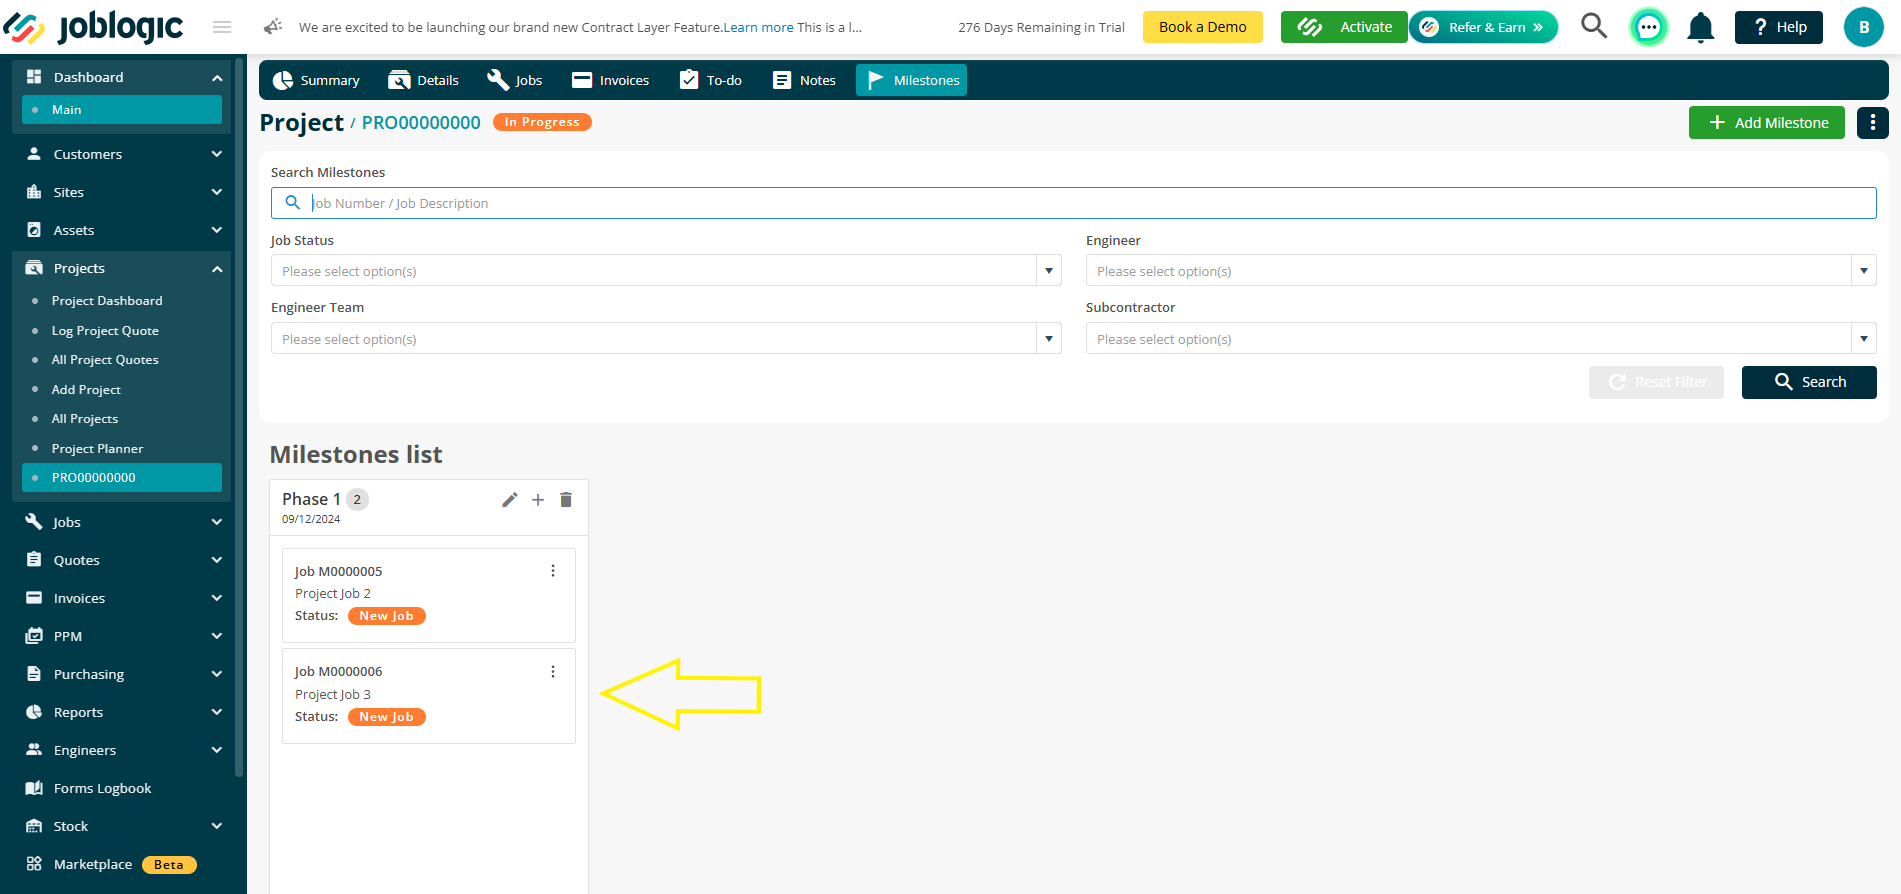
Once the job has been created, it will appear under the selected milestone.
Billing and Milestones
For fixed-price projects, billing can be aligned to either a monthly schedule or individual project milestones.
This allows invoices to be raised based on time periods or milestone completion, depending on how the project has been structured.
Aligning billing with milestones can help support staged payments and provide clearer alignment between project progress and invoicing.
.png)
.png)
For more information on applications and fixed price billing, click here.
Further Support
For further information or assistance with the above, contact our Support Team on 0800 326 5561 or email support@joblogic.com. Alternatively, our Customer Success Management team can be reached by emailing customersuccess@joblogic.com
Publishing Details
This document was written and produced by Joblogic’s Technical Writing team and was last updated on the date stated above. Be aware that the information provided may be subject to change following further updates on the matter becoming available or new releases within the system. Additionally, details within the guide may vary depending on your Joblogic account’s user permissions and settings or the electronic device being used.

