Introduction
The Prospect Management marketplace app (application) allows users to record, track, and manage potential customers (prospects) before they are converted into active customers. This is very useful for supporting lead tracking and enables the raising of quotes for prospects while ensuring that only active customers are used for job and invoice creation.
This user guide explains how to use the Prospect Management feature and how it differs from the general system when switched on. It includes how to mark a customer as a prospect, how to import and export prospects, as well as how to manage customer statuses and access new reports.
Note: This app is not a separate app under the marketplace area. Instead, the feature and its functions are merged into the Joblogic system in general.
Purpose of the Feature
The purpose of the Prospect Management feature is to better help service and sales teams track and manage potential customers within the Joblogic system before they convert to active clients. By introducing the concept of “Prospect” status, users can now store and engage with leads by logging quotes, without prematurely including them in operational workflows such as job scheduling, invoicing, or contract management.
This ensures a cleaner separation between leads and live customers, improves reporting and sales tracking, and supports a more structured sales pipeline within the system. Once a prospect has been successfully converted (typically upon winning a quote) their status can be updated to “Active Customer” allowing for full operational engagement while non-converted potential customers remain stored as prospects.
Marking a Customer as a Prospect
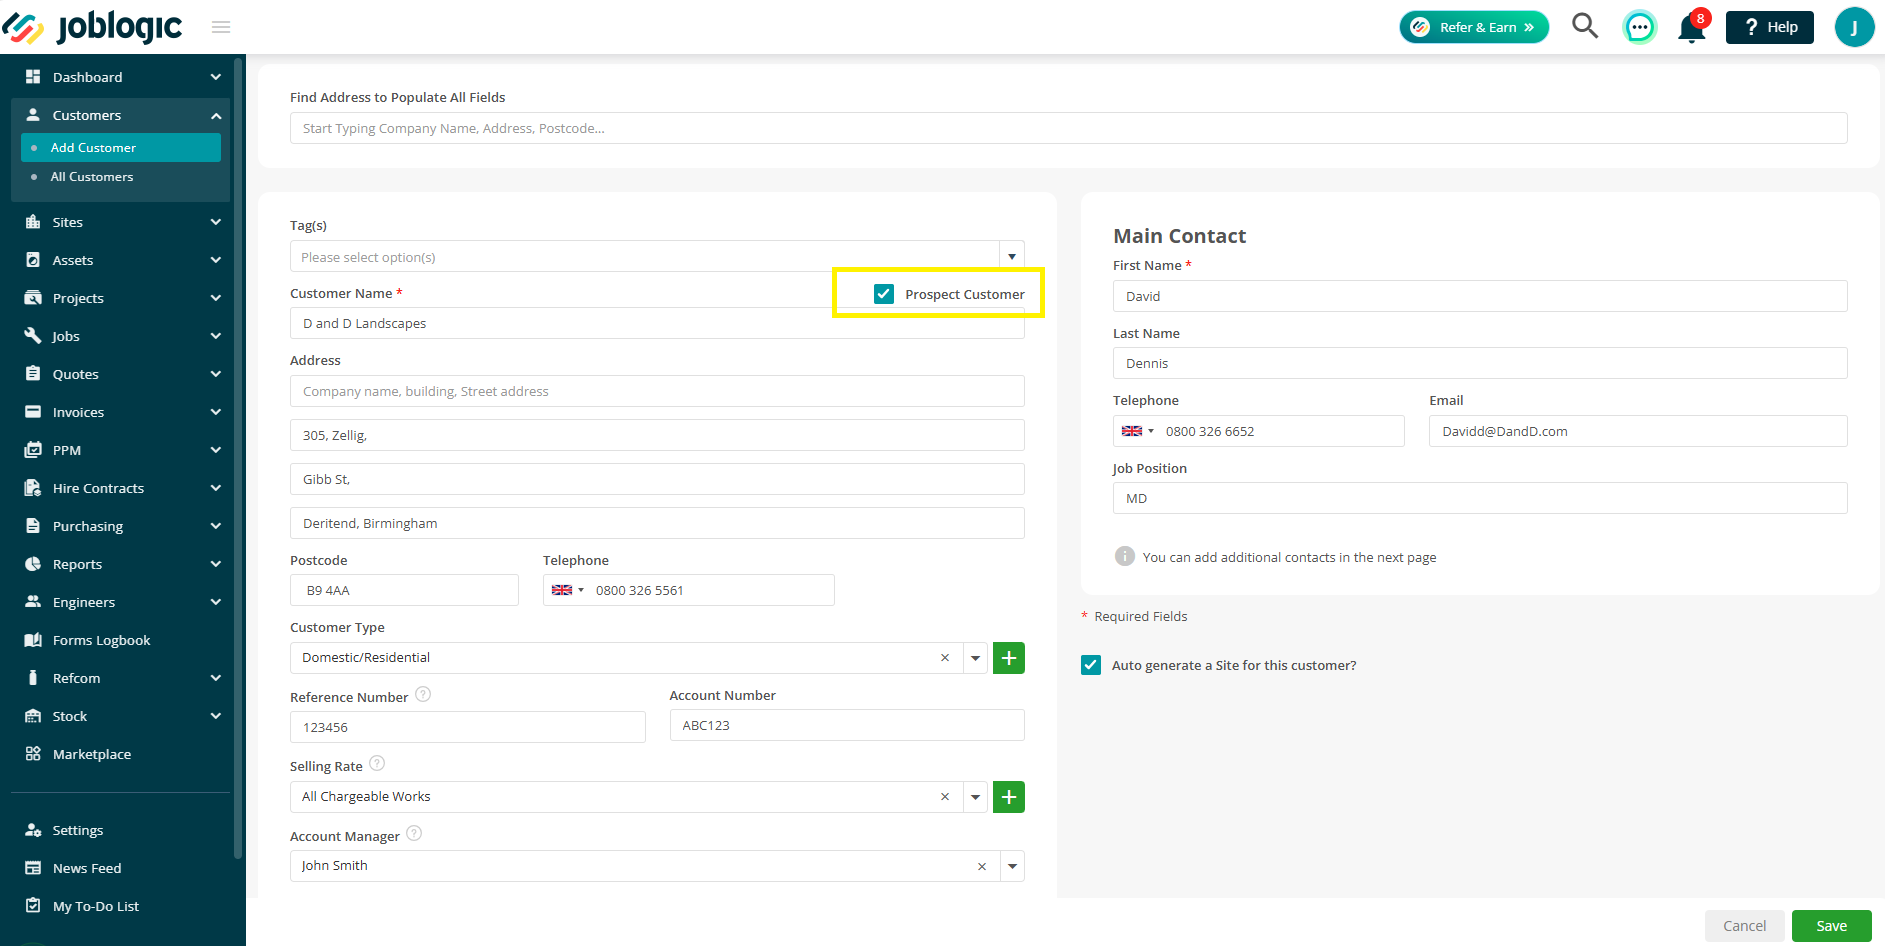
When adding a new customer via the back-office, prospect management users have the option to mark the customer as a "Prospect Customer". See here for more details on how to add a customer.
-
A checkbox labelled "Prospect Customer" is available on the add customer page.
-
This is unticked by default but if selected, the customer is flagged as a Prospect.
-
Once added, the customer will be labeled as a Prospect customer.
-
Prospect customers can only be used for logging quotes, not jobs, invoices, assets, or PPM contracts.
-
If the option to automatically generate a site is enabled, the generated site will also be marked as a Prospect Site.
-
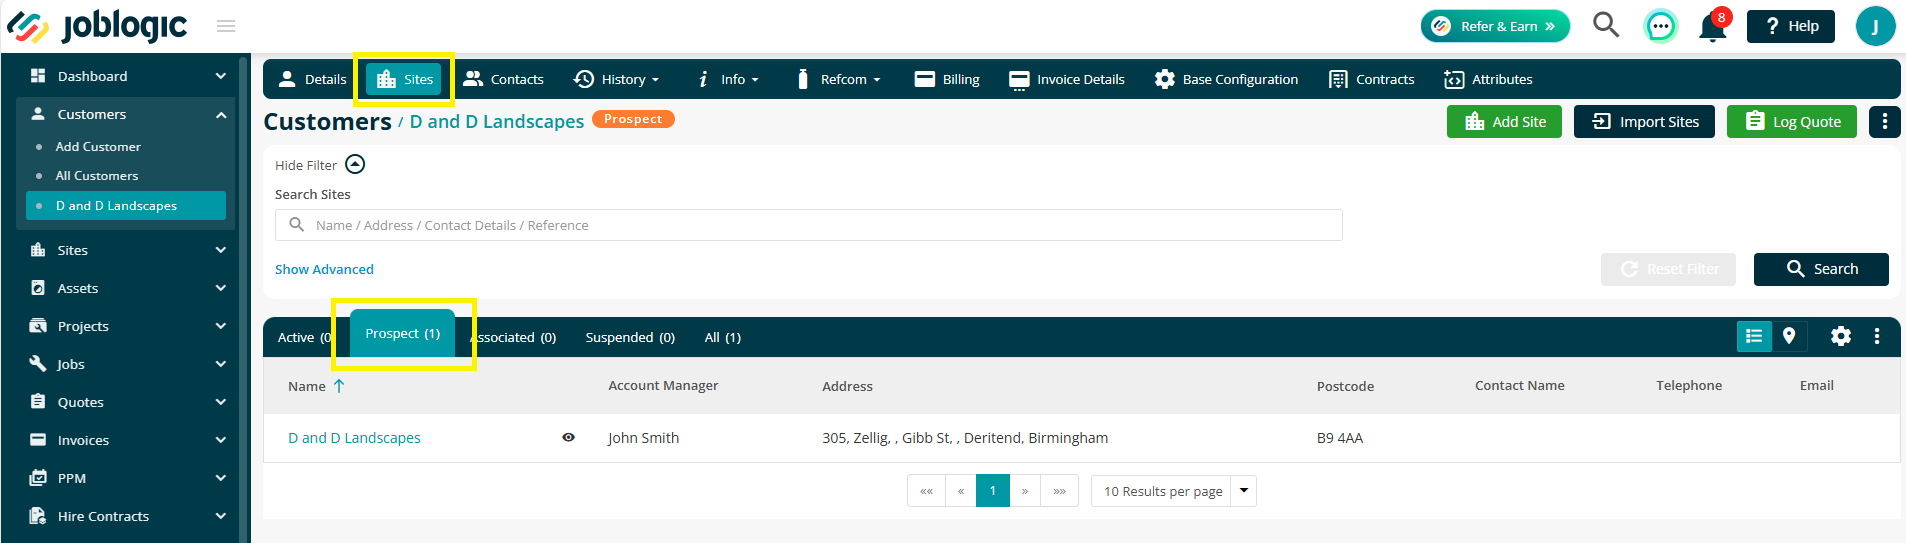
A ‘Prospects’ tab is displayed under the sites area of prospect customers separating any prospect sites from active customer’s ones.
Updating Prospect Customer Statuses
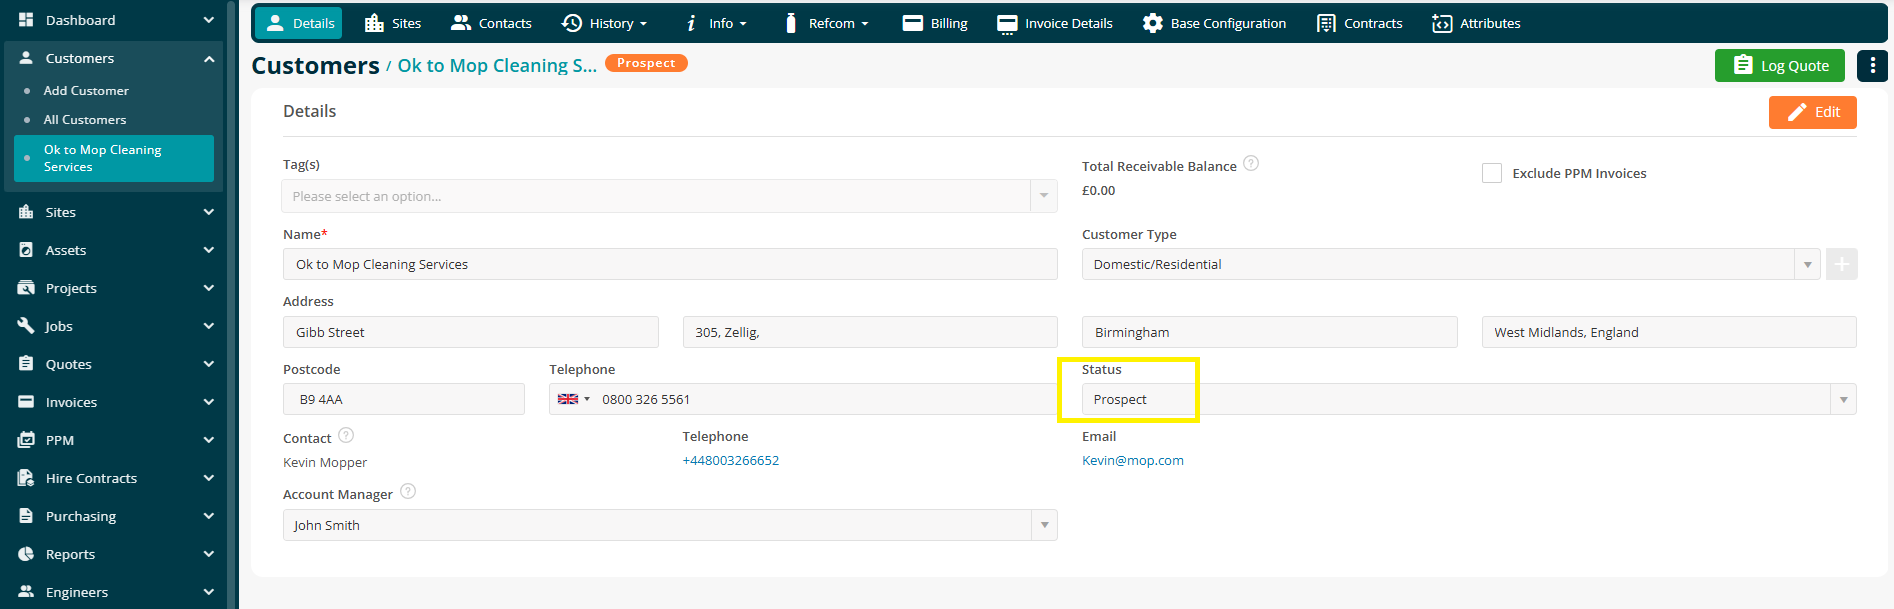
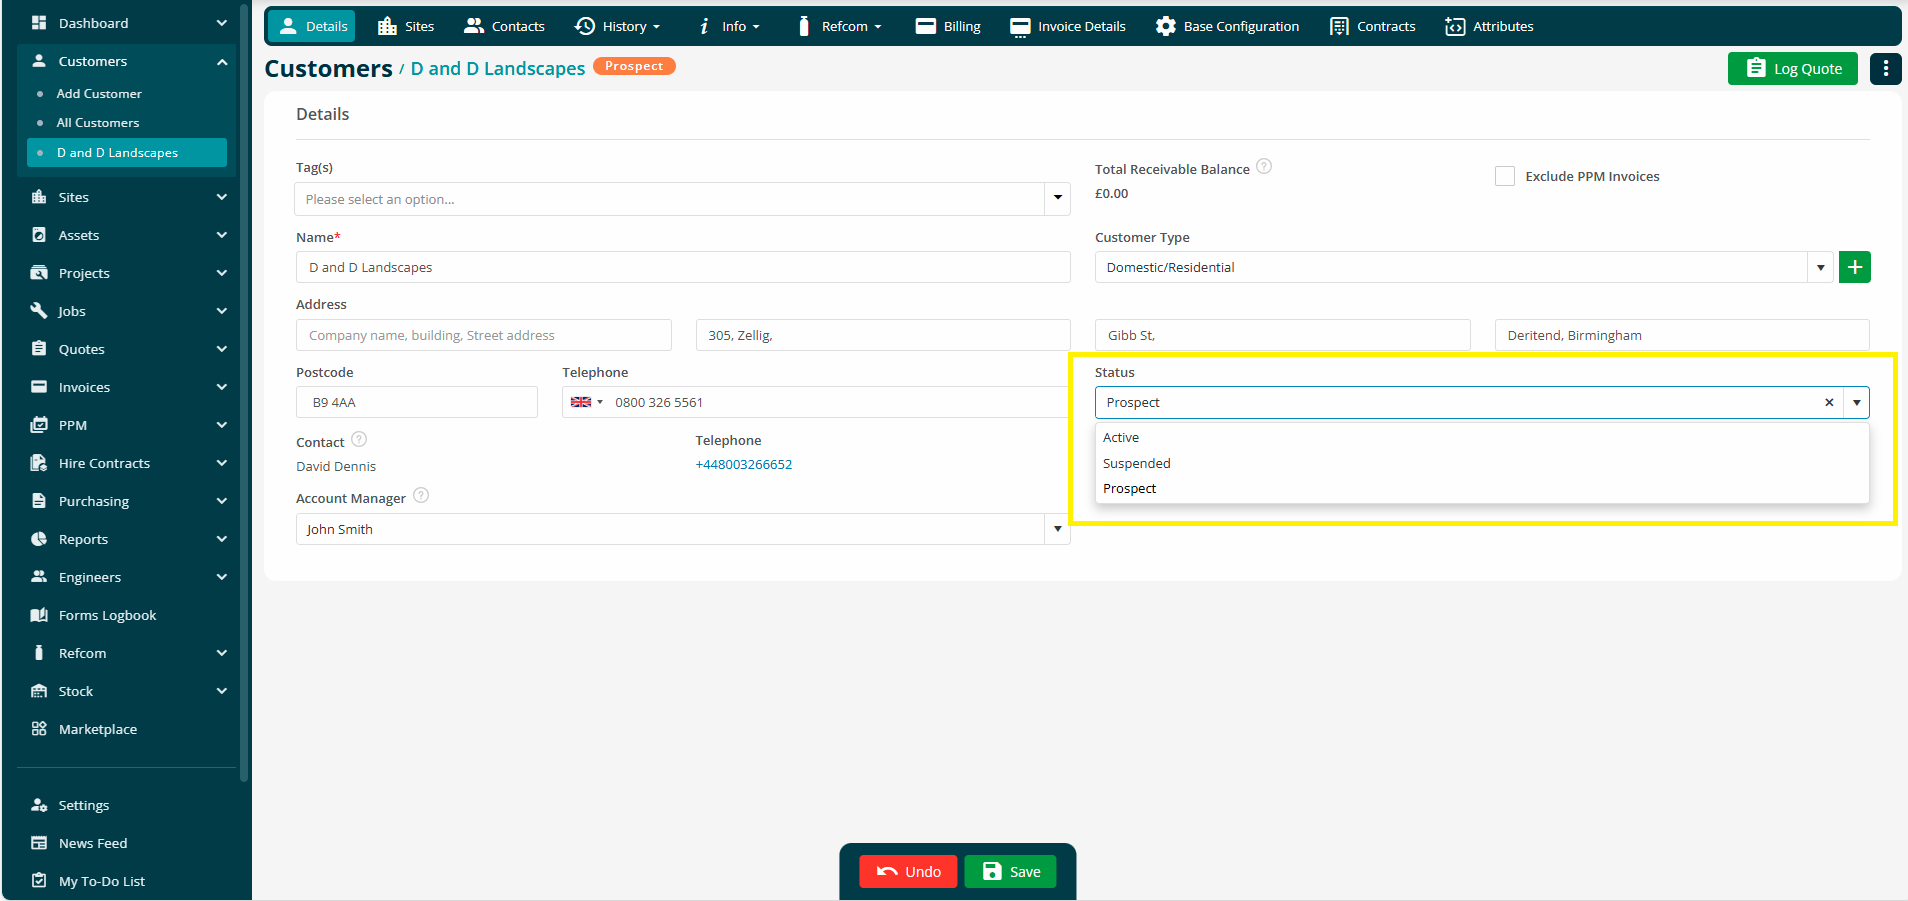
Prospect management users can update an existing customer’s status via the customer’s details screen.
A "Status" dropdown will be available with the following options to covert the prospect to an active customer, if required:
- Active
- Suspended
- Prospect
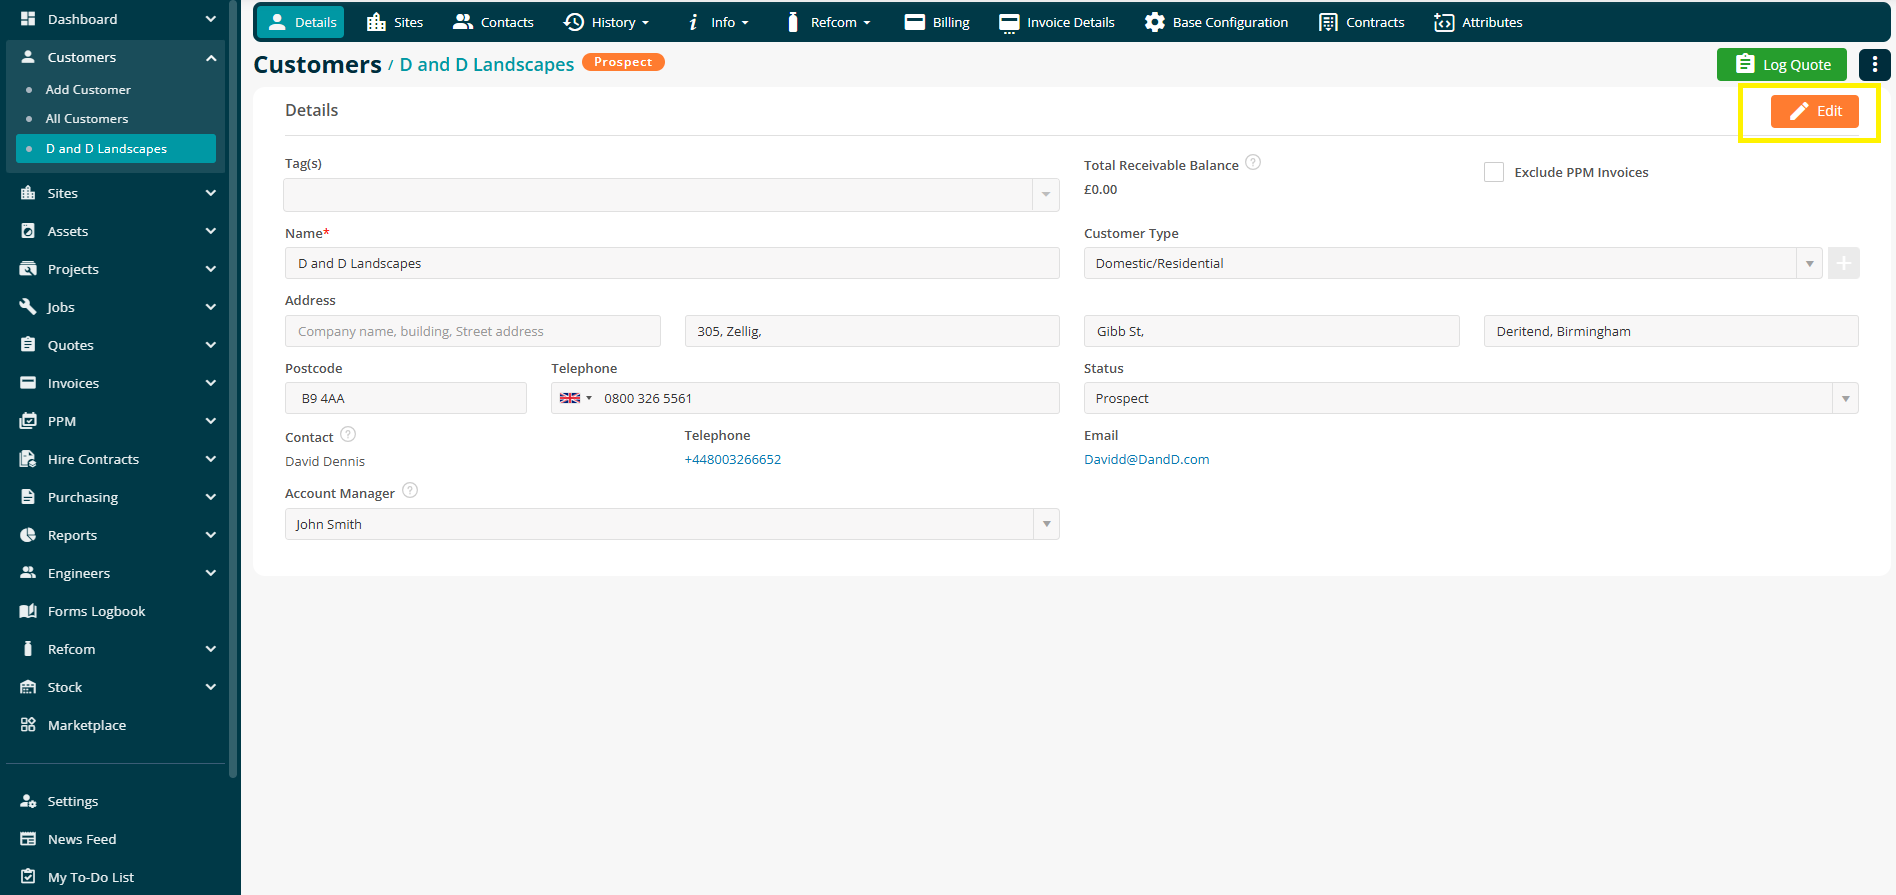
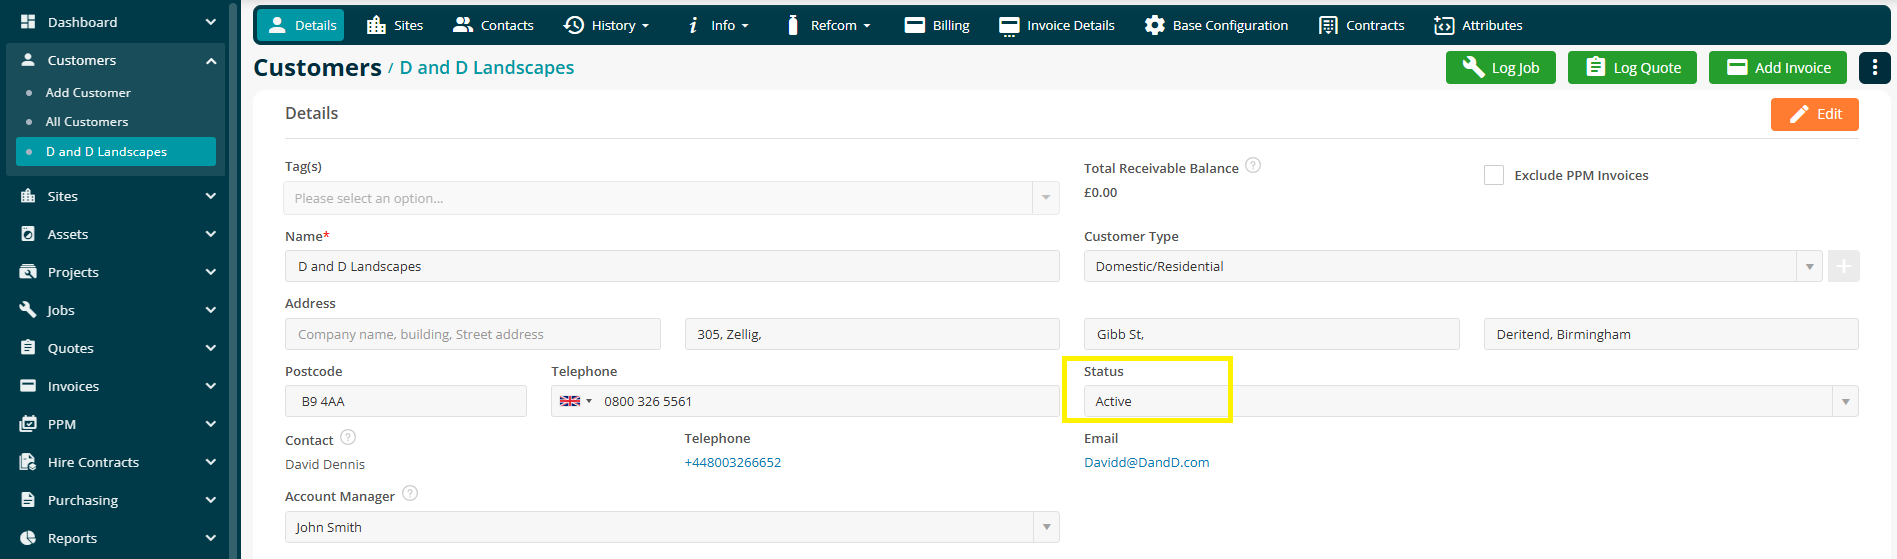
In order to update the prospect customer’s status, select the edit icon from the customer’s details screen, amend the status field to ‘Active’ and select ‘Save’.
Rules and validations to be aware of:
-
Prospect customers/sites are only valid for raising quotes (non-PPM Contract Quotes).
-
Jobs, invoices, assets, PPM contracts and PPM Quotes cannot be created for prospects.
-
Prospect customers/sites cannot be added to the customer portal.
-
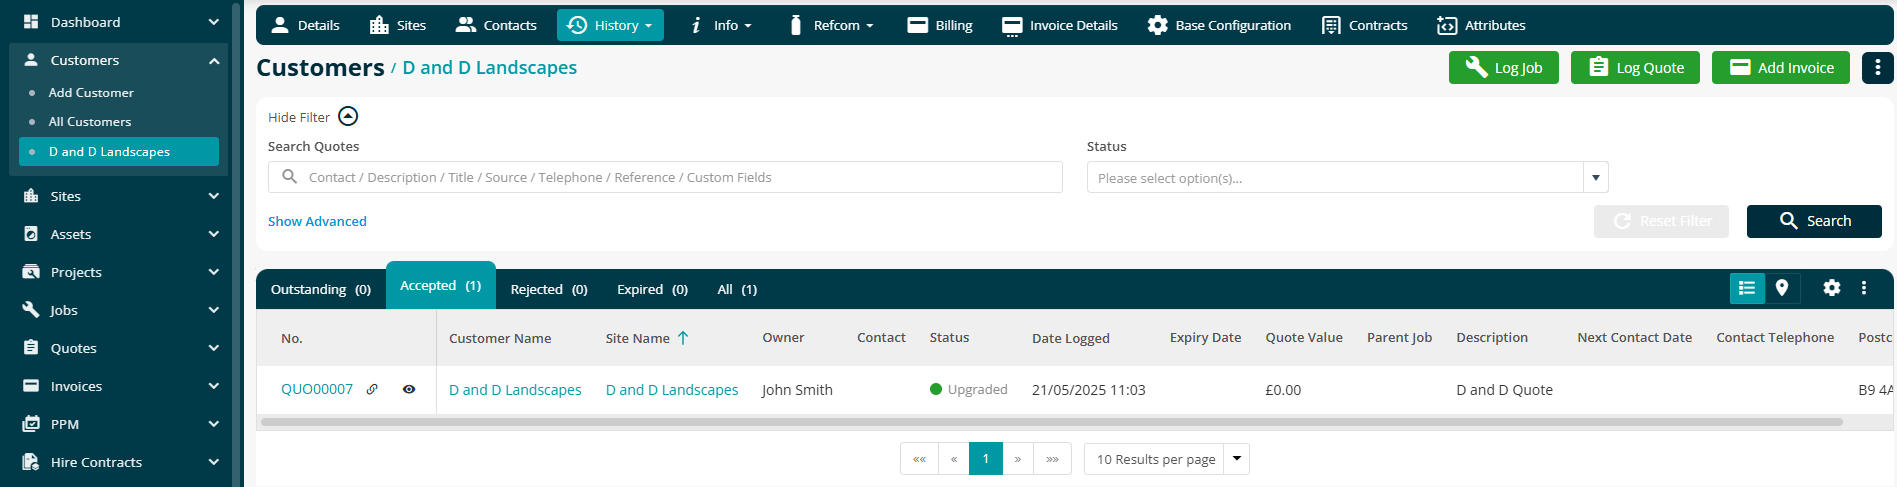
Once a quote is marked as won (upgraded to a job) for a prospect customer, their status will automatically change to Active.
-
As part of this upgrade:
-
The customer status is changed from Prospect to Active automatically.
-
All associated prospect sites are also updated to Active.
-
The customer and sites then become available for jobs, invoices, contracts, and assets.
-
See here for more information on upgrading quotes into jobs.
-
If a prospect customer is manually marked as Active, all associated prospect sites will also be updated to Active as part of the process.
-
You cannot change an Active or Suspended customer back to Prospect.
Importing Prospect Customers
Prospect Management users can bulk import prospects using the existing customer import tool.
-
The import file will include a new column for Customer Status.
-
If the value is set to "Prospect", the imported customer will be marked as applicable.
-
The same rules and validations apply as they do to a customer added manually.

See here for more information on how to import customers into Joblogic.
Exporting Prospect Customers
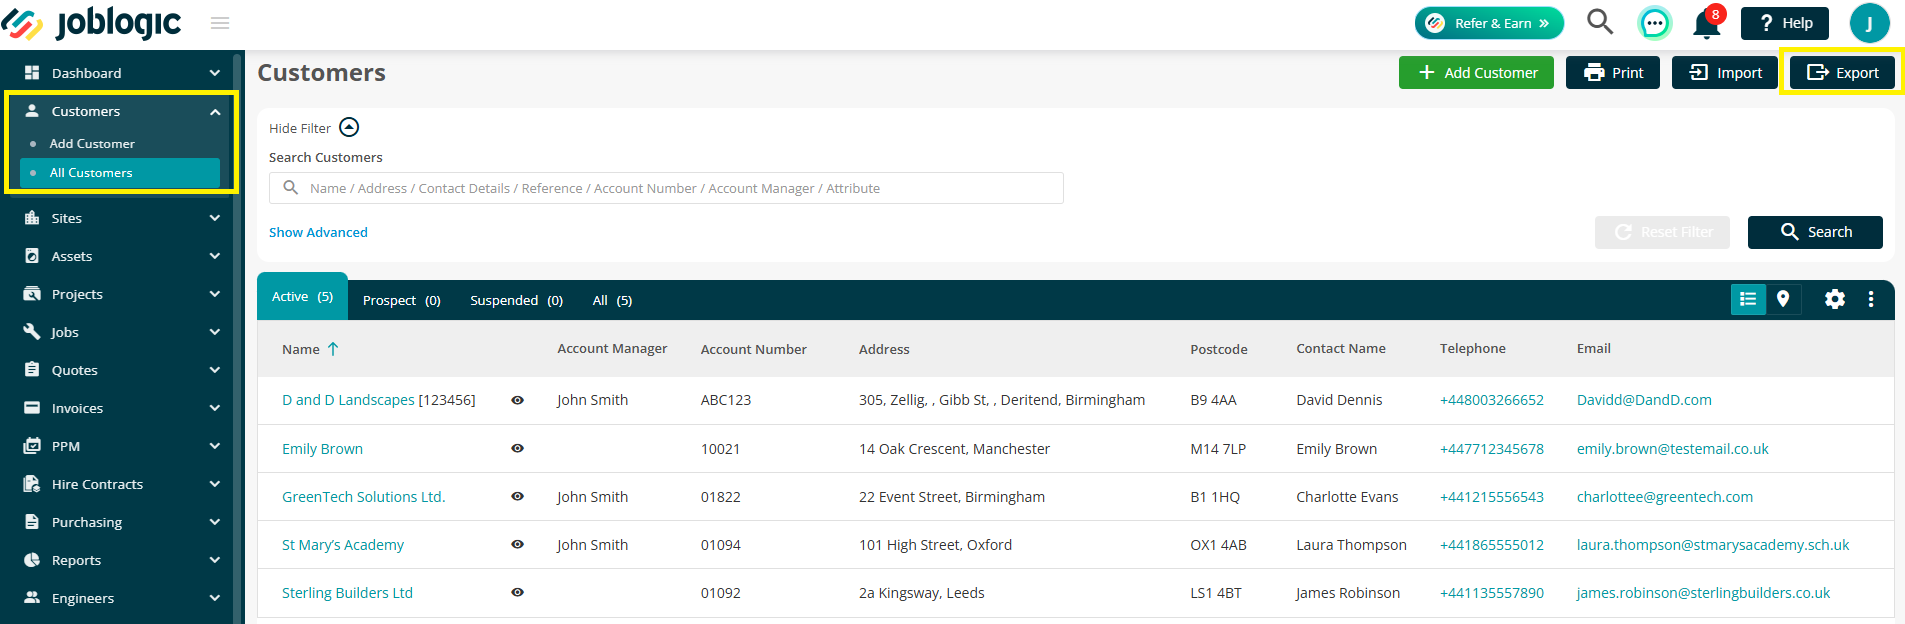
Customer data exports will now include the actual customer status (Active, Suspended, or Prospect), replacing the previous true/false 'Active' column used in non-prospect management Joblogic accounts. This provides clearer reporting and business insight.

- In order to conduct a customer export, navigate to Customers and select All Customers > Export
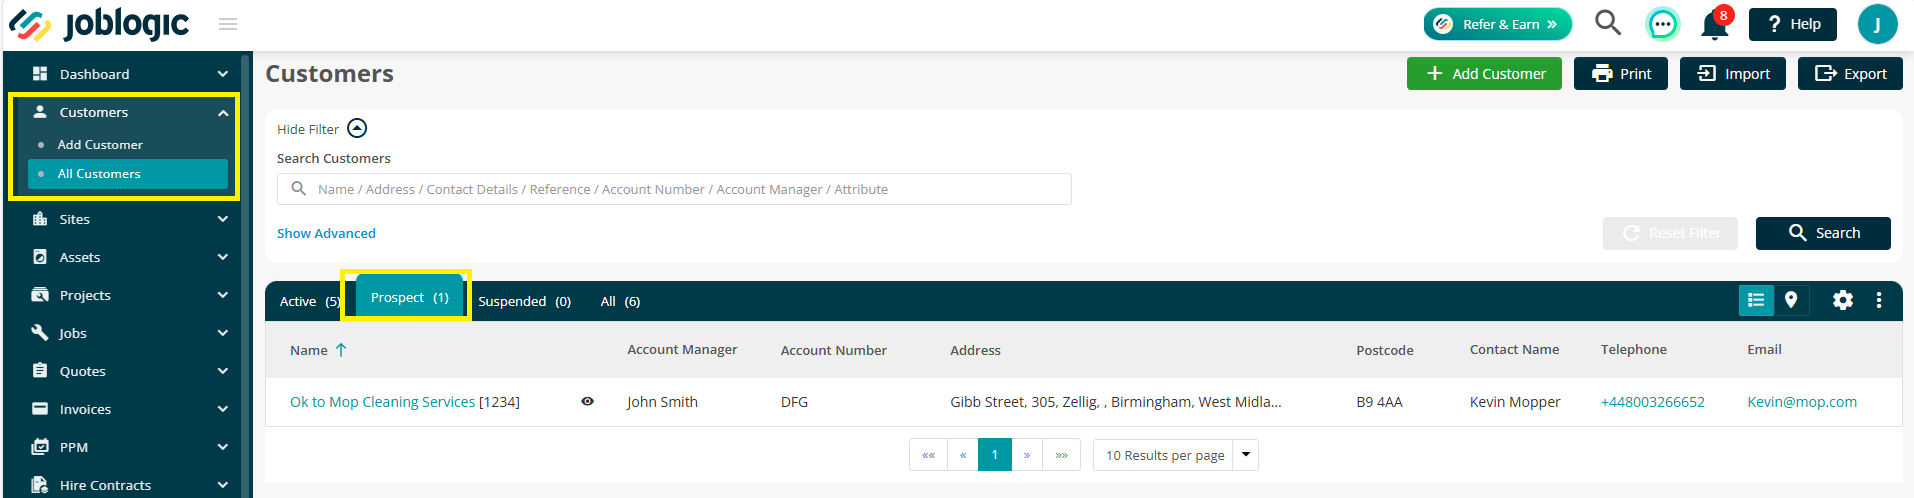
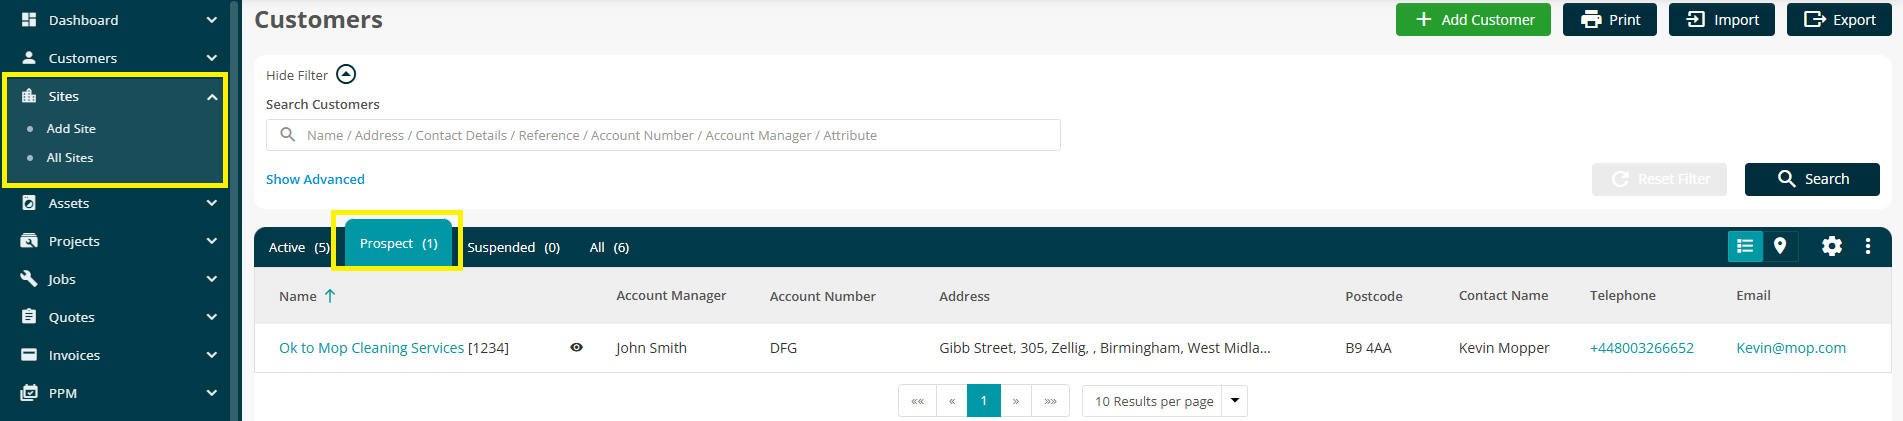
Viewing Prospects in the Customer and Site Lists
To make it easier to manage and review prospects, new ‘Prospects’ tabs are available within the All Customers and Sites lists (Select Customers > All Customers/Sites > All Sites as applicable). These tabs allow users to filter and review prospect records all in one place.
Prospect Reporting
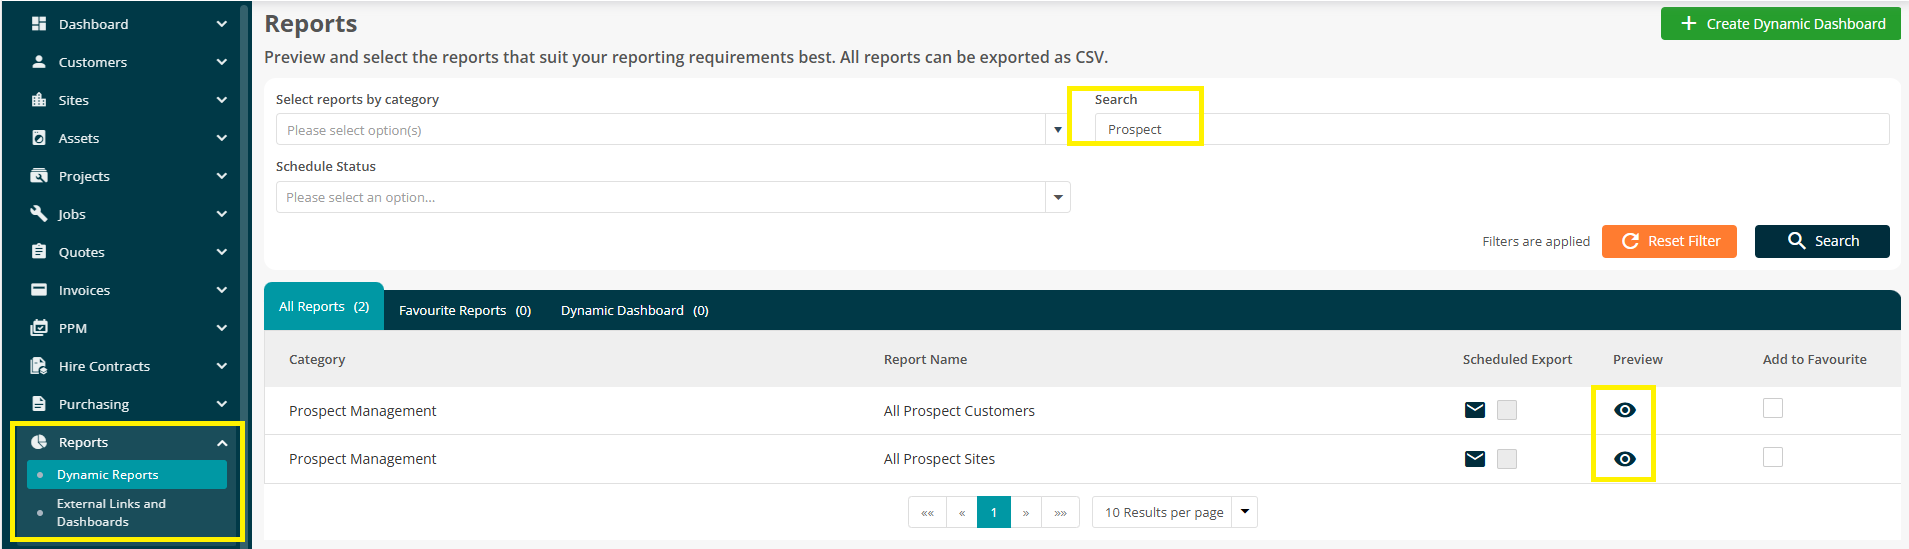
Two new reports have been introduced for prospect management users to support analysis and follow-up of prospect data.
**1. An ‘All Prospect Customers’ Report **
a. Shows only customers with status = Prospect
b. Mirrors the layout of the All Customers report without the "Active" column
2. All Prospect Sites Report
a. Shows only sites with status = Prospect
b. Mirrors the layout of the All Sites report without the "Active" column
To access these reports, navigate to Reports > Dynamic Reports and search each as applicable. Select the ‘eye’ icon to open each report.
Note: Prospect customers and sites do not appear in standard customer/site reports until their status is changed to Active.
Further Support
For further information or assistance with the above, contact our Support Team on 0800 326 5561 or email support@joblogic.com. Alternatively, our Customer Success Management team can be reached by emailing customersuccess@joblogic.com
Publishing Details
This document was written and produced by Joblogic’s Technical Writing team and was last updated on the date stated above. Be aware that the information provided may be subject to change following further updates on the matter becoming available or new releases within the system. Additionally, details within the guide may vary depending on your Joblogic account’s user permissions and settings or the electronic device being used.