Introduction
The Risk Assessment Management (RAMs) module allows our customers to create, manage and attach detailed Risk Assessments as per industry standards directly to jobs, sites and customers within Joblogic.
The feature supports legal compliance, health and safety processes and internal risk management, making risk assessments a core part of the workflow for jobs that require pre-start hazard checks.
Users can create reusable templates, complete assessments in the field or office and track responses over time.
This user guide will detail how to use the RAMs module within the back-office including general functions and setup via the marketplace webpage’s in house app function and against jobs within the JL Web system.
Purpose of the Feature
The RAMs feature is designed to help businesses carry out and record health and safety risk assessments as part of their job workflow.
By enabling teams to create templates, complete/acknowledge assessments on-site and store results digitally, RAMS supports:
-
Legal and regulatory compliance
-
Safer working practices across high-risk job types
-
Clear documentation for audits, tenders or incident investigations
-
Smoother collaboration between engineers and back-office teams
This feature makes it easy to ensure that key safety checks are completed before work begins, helping reduce risk to engineers, clients and the business.
Who Can Use This?
The feature provides functionality for the back-office, the mobile application (app) and the customer portal with:
-
The ability to create RA (Risk Assessment) templates and set rules for them in the back-office for admin and compliance managers/service desk teams
-
The ability to complete risk assessments on-site via the mobile app for engineers
-
The ability to view/audit submitted assessments via both the back-office and customer portal for applicable stakeholders such as operations and HSE (Health and Safety Executive) teams
Key Features
-
Pre-existing risk assessment templates based on applicable industry standards
-
Add your own risk assessment templates
-
Attach assessments to jobs, sites or customers via rules
-
Mobile friendly completion for engineers in the field
-
Restrict job start until RAMs is completed/acknowledged
-
Digital audit trail with date, time and user logs
Using RAMs in the Back-office
Overview
The RAMs module allows Joblogic users to manage risk assessments through a structured, automated process. Admins can set up templates/choose from existing ones, apply deployment rules and require engineers to acknowledge RAMs documents before starting work.
Please note that the RAM’s app is a standalone module. It does not integrate directly into your standard Joblogic mobile forms but does with your job workflows once deployed via rules.
Accessing the app and initial set up
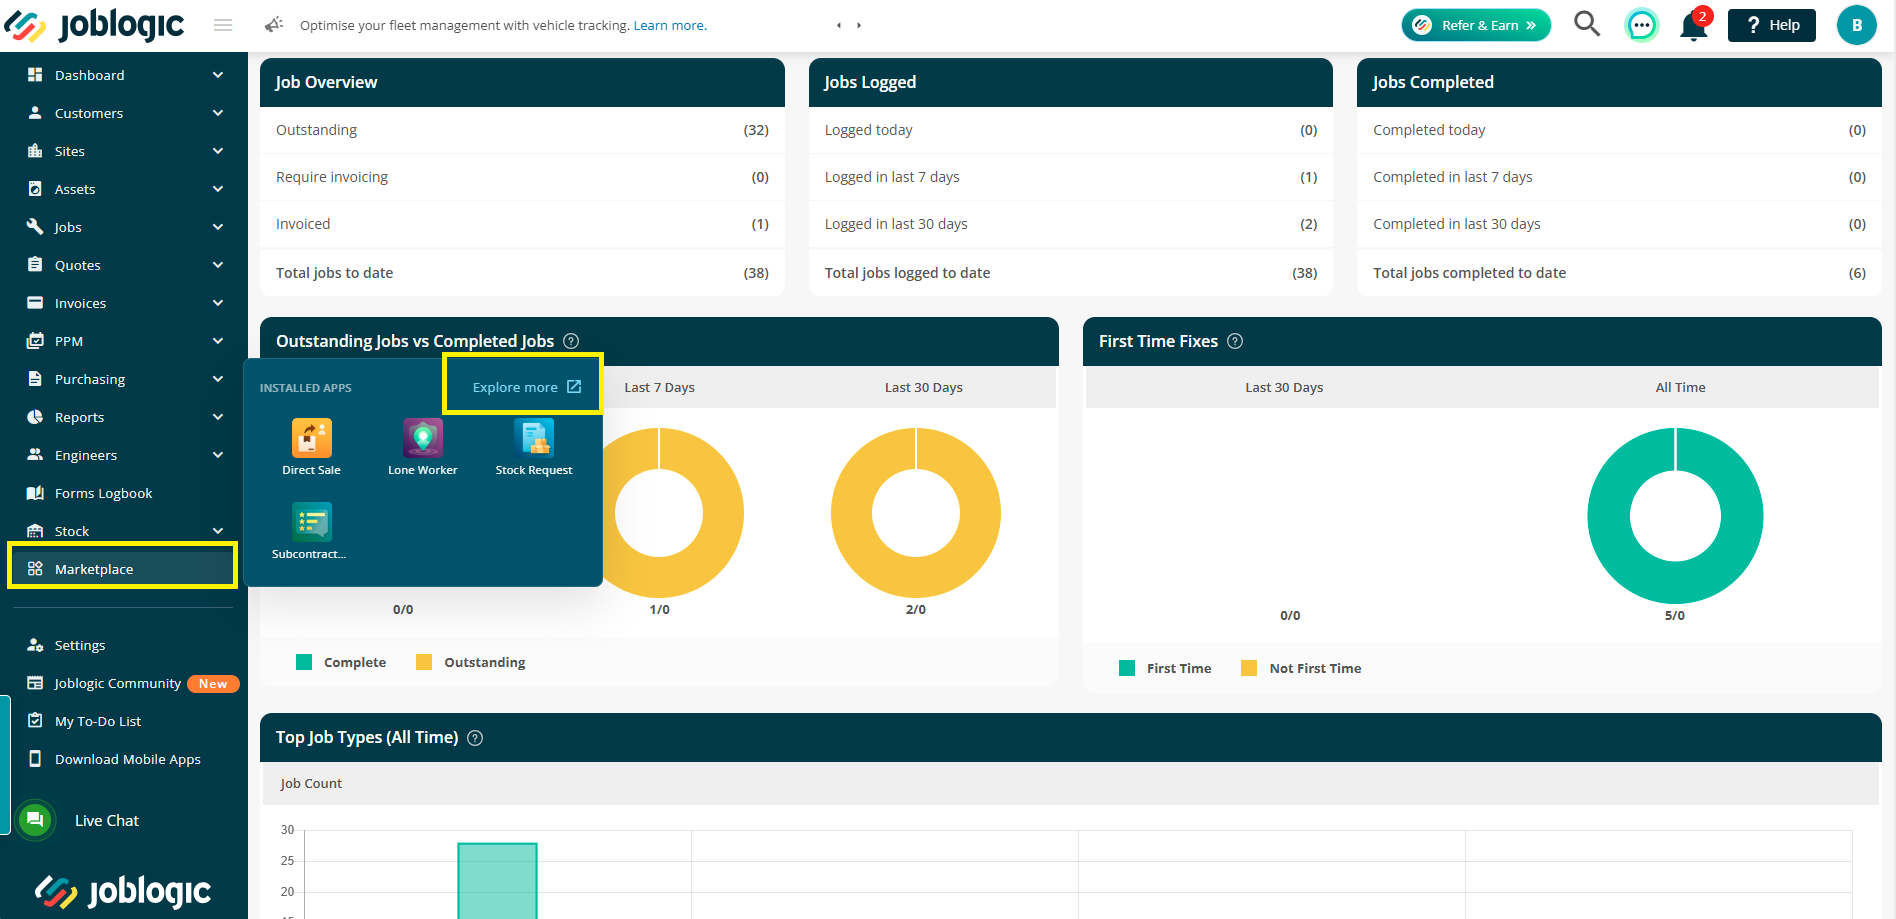
To get started with the RAMs app navigate to the marketplace area within your Joblogic back-office account and select ‘Explore More’.
Note: the app’s settings area is housed within the marketplace webpage app as opposed to the settings area within JL Web.
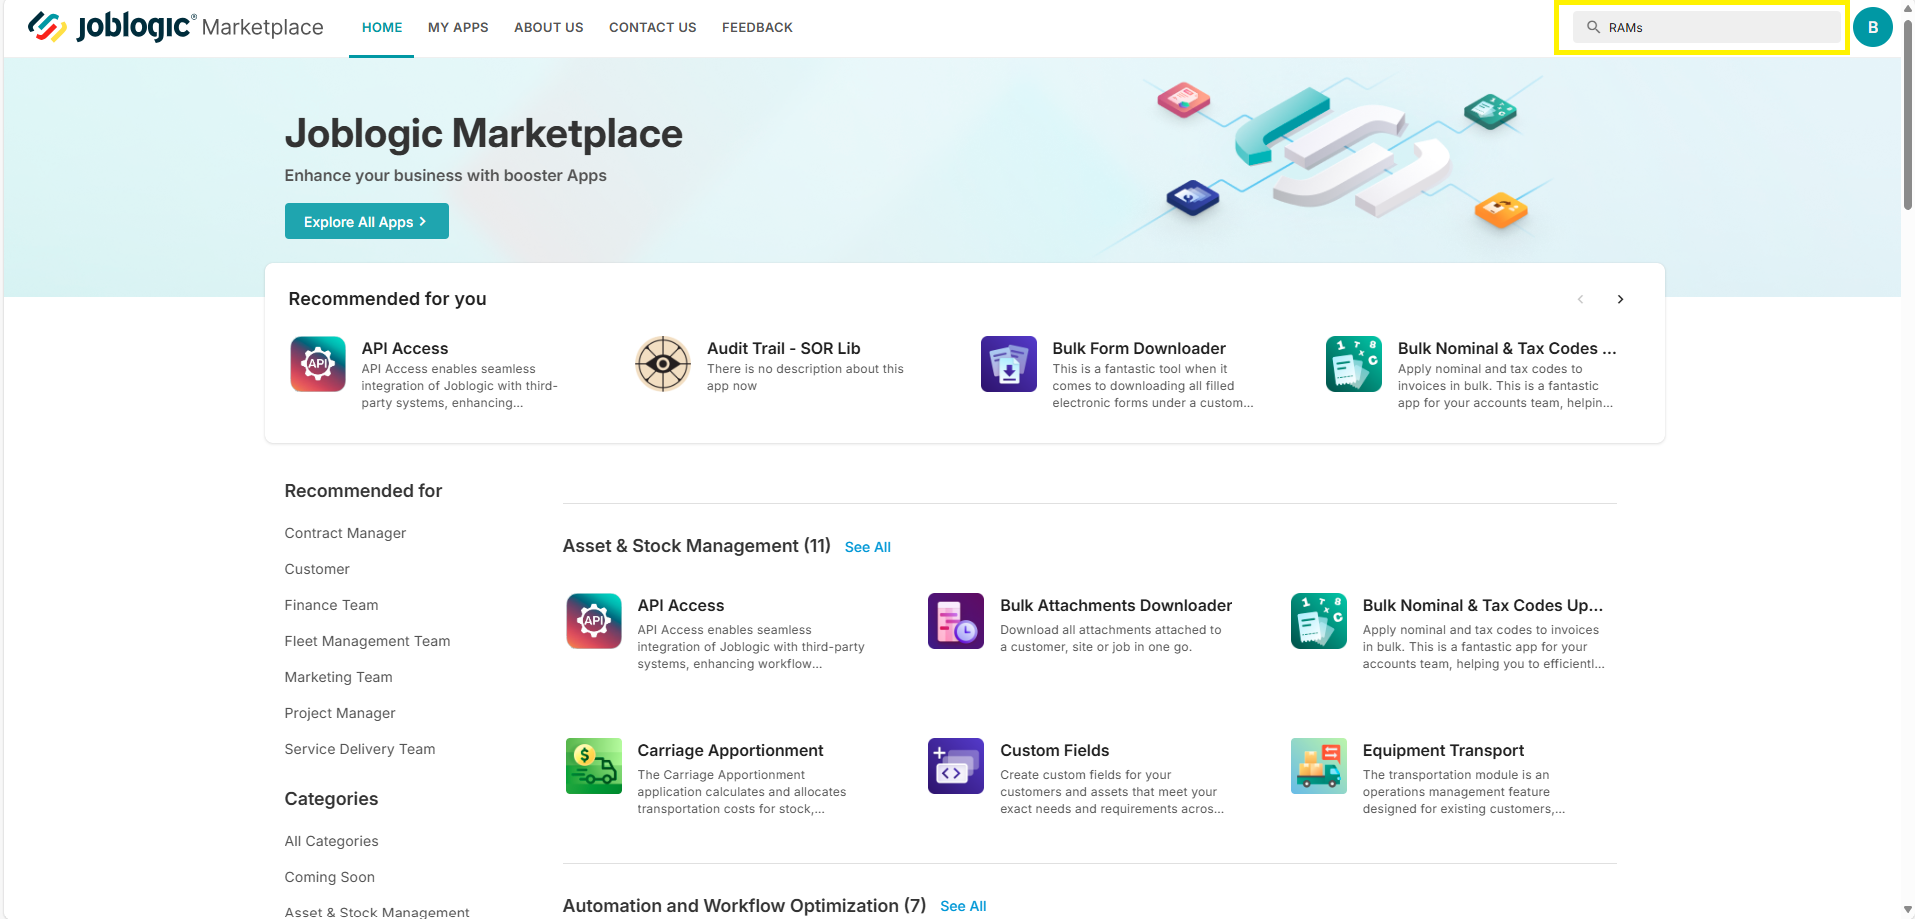
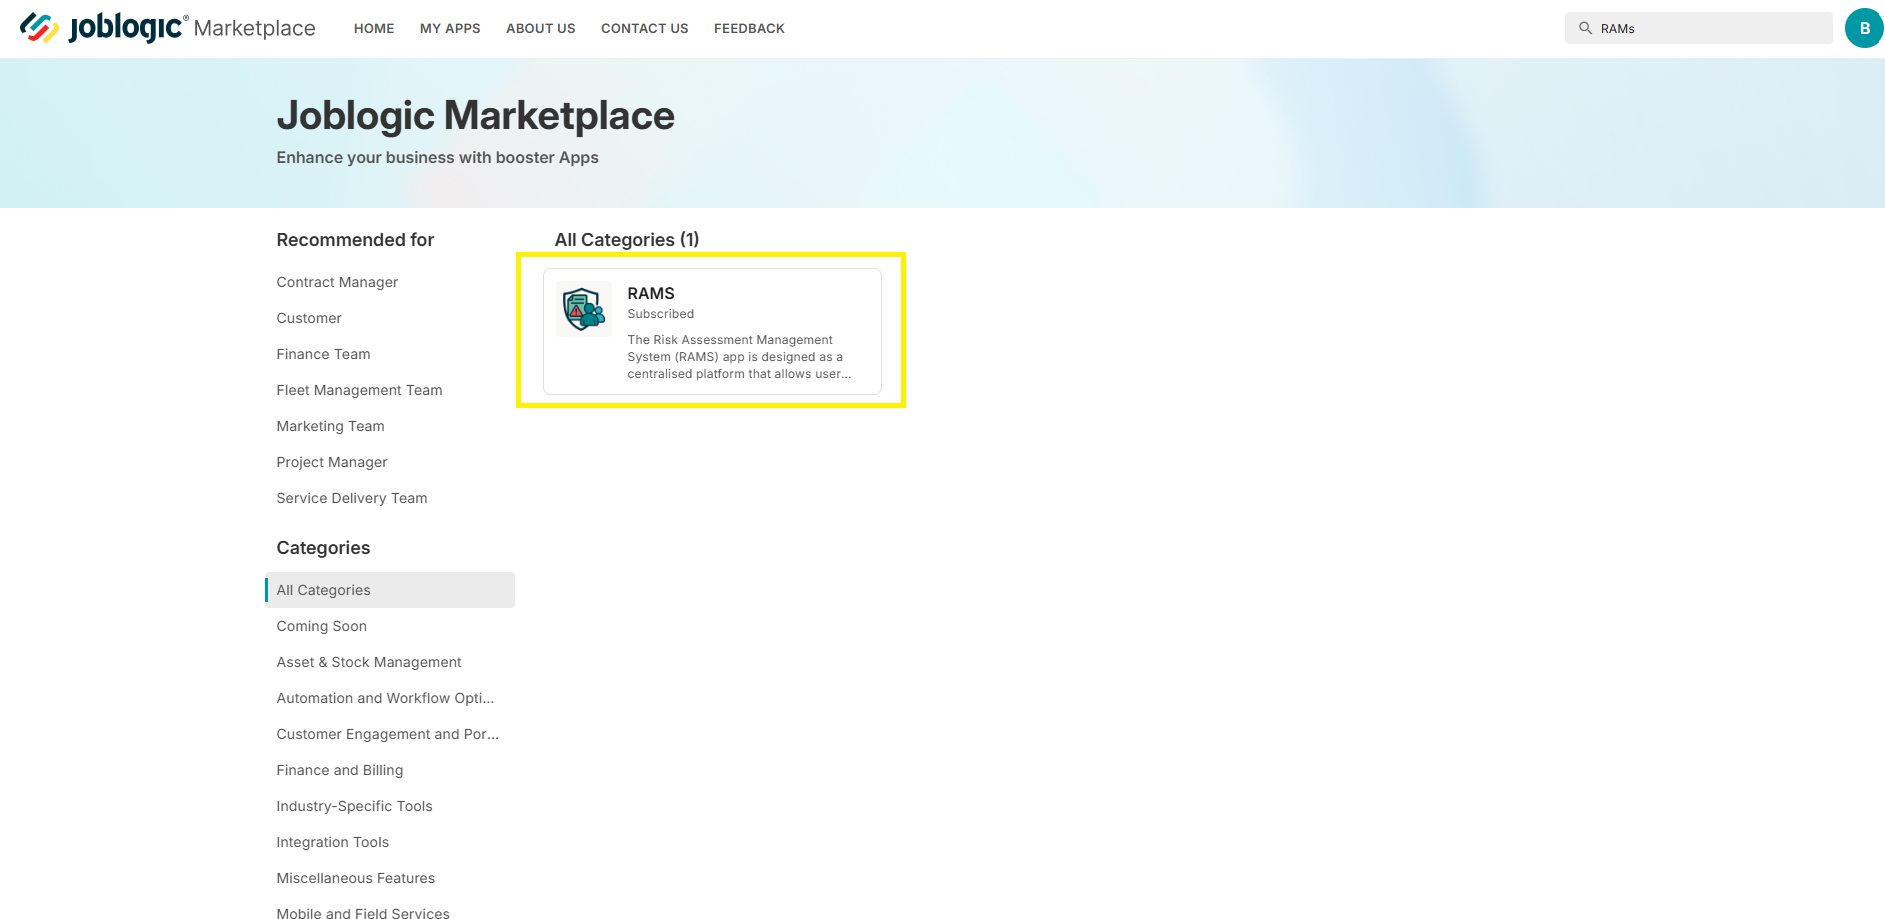
This will direct you to the Joblogic Marketplace area via a new tab. Search for the RAMs app via the search tool and select the app.
Click the ‘Open App’ button.
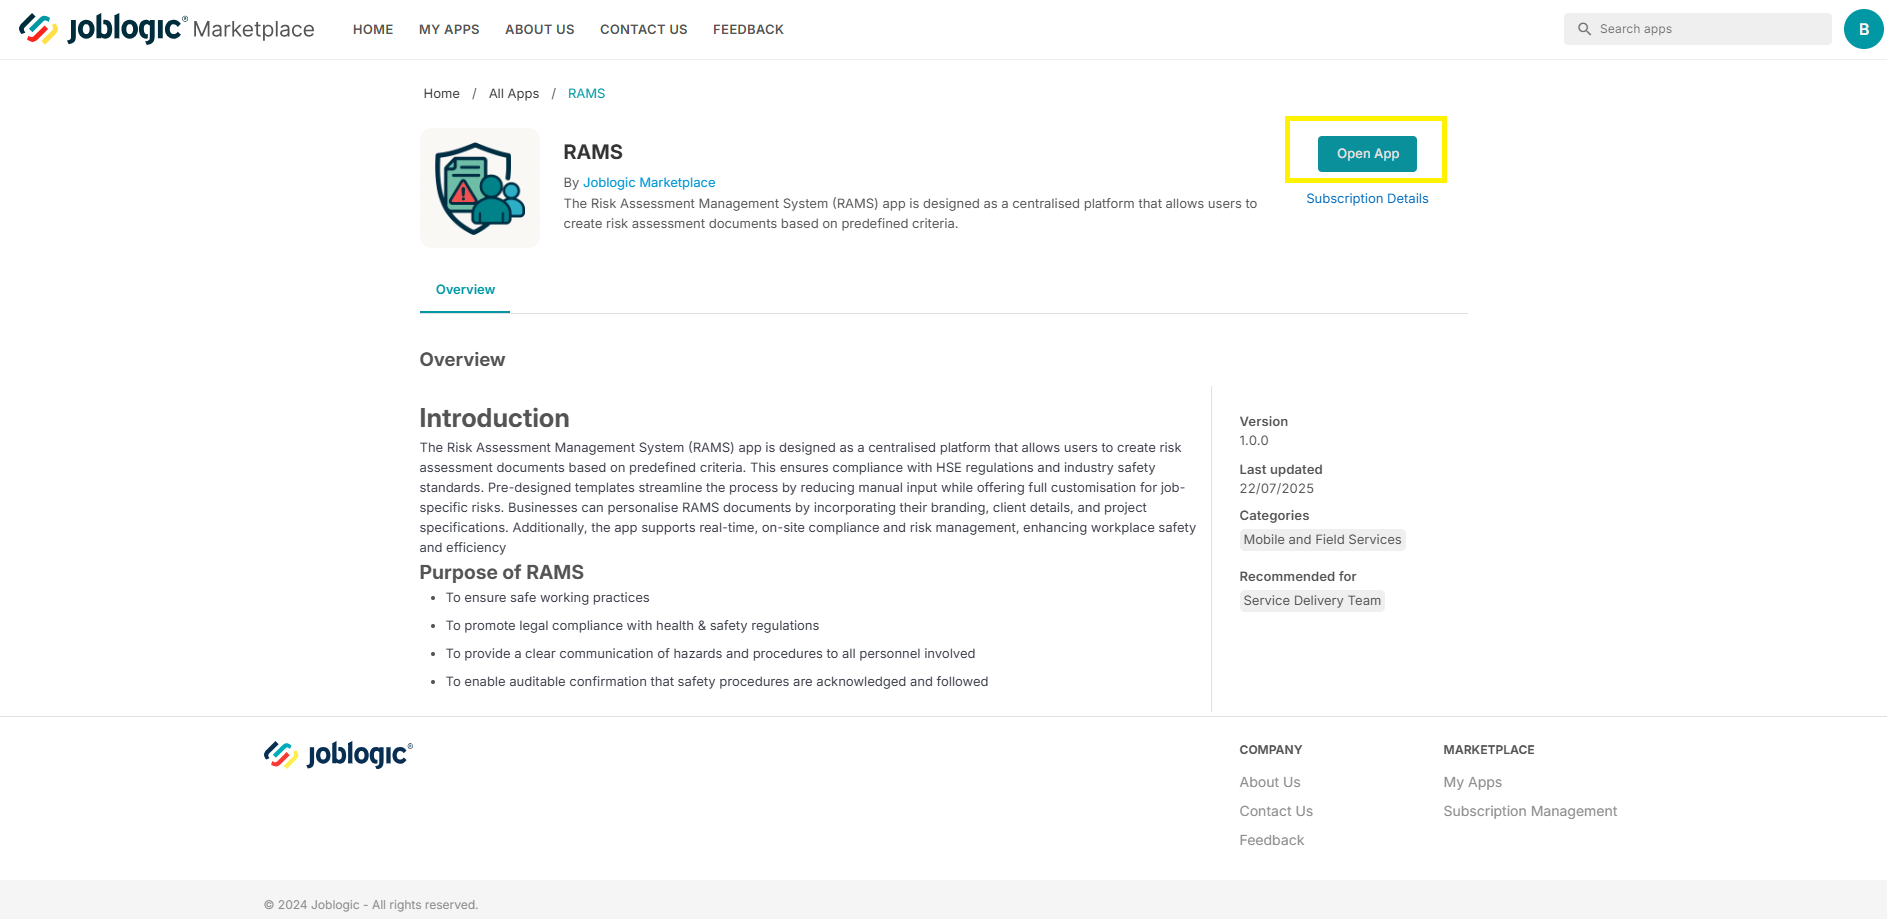
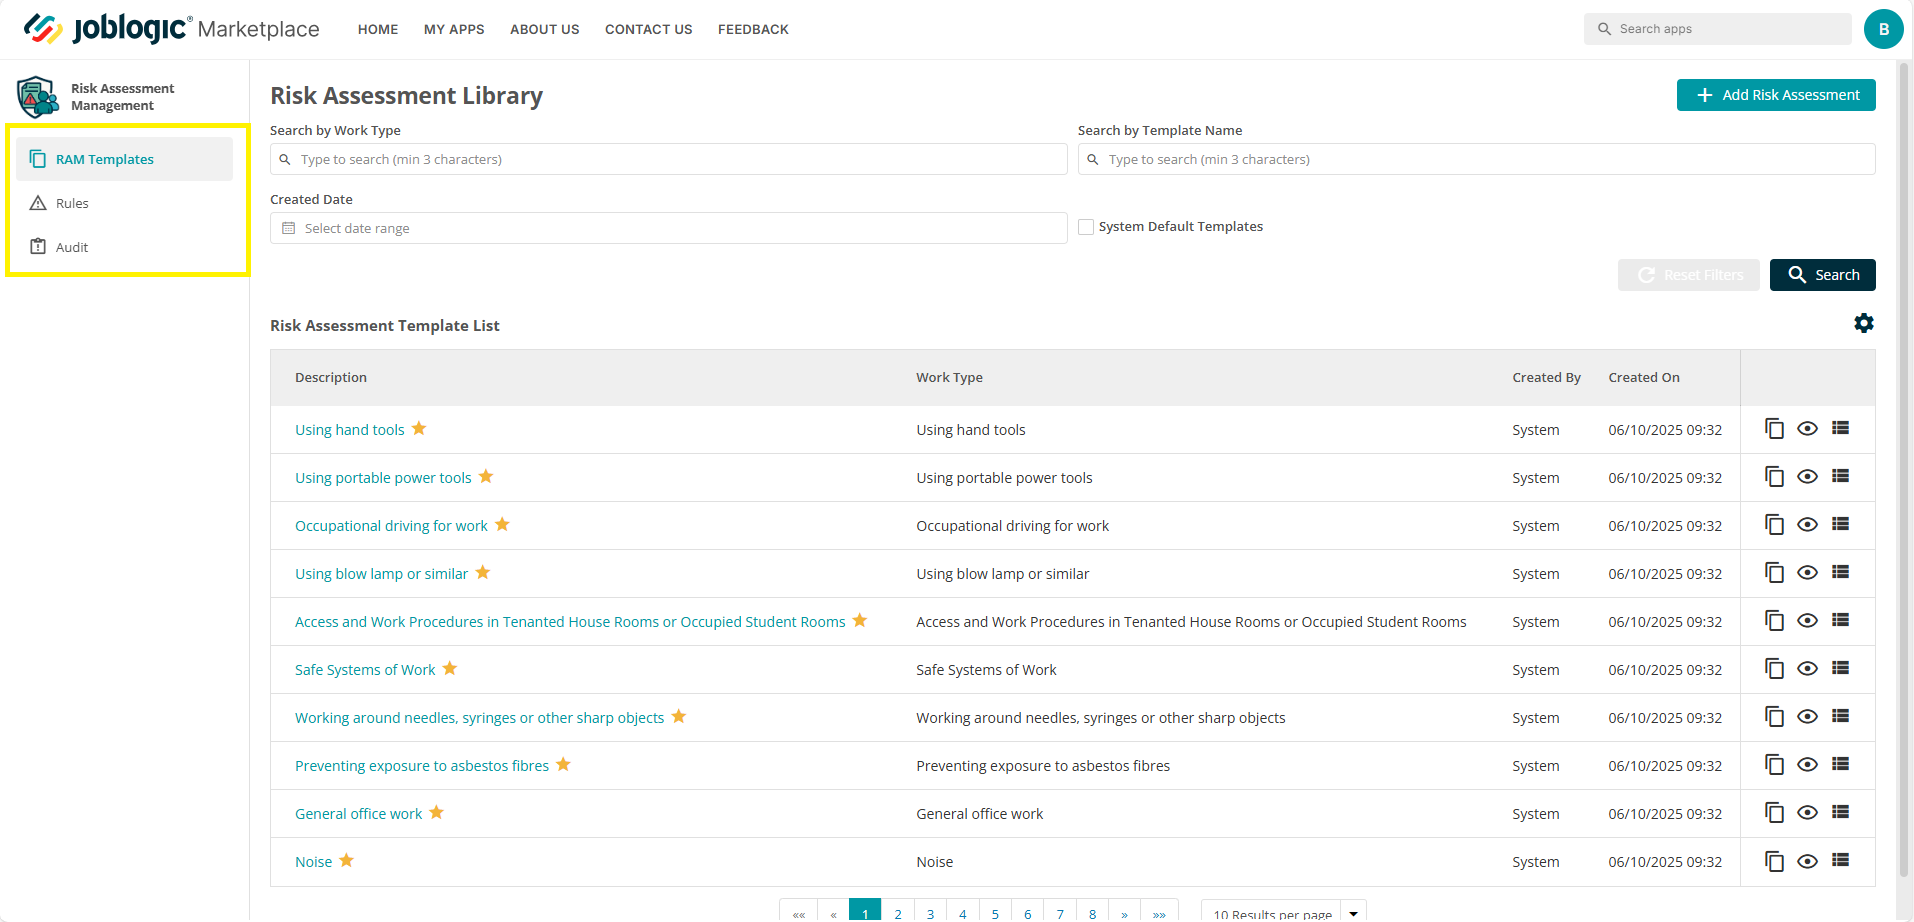
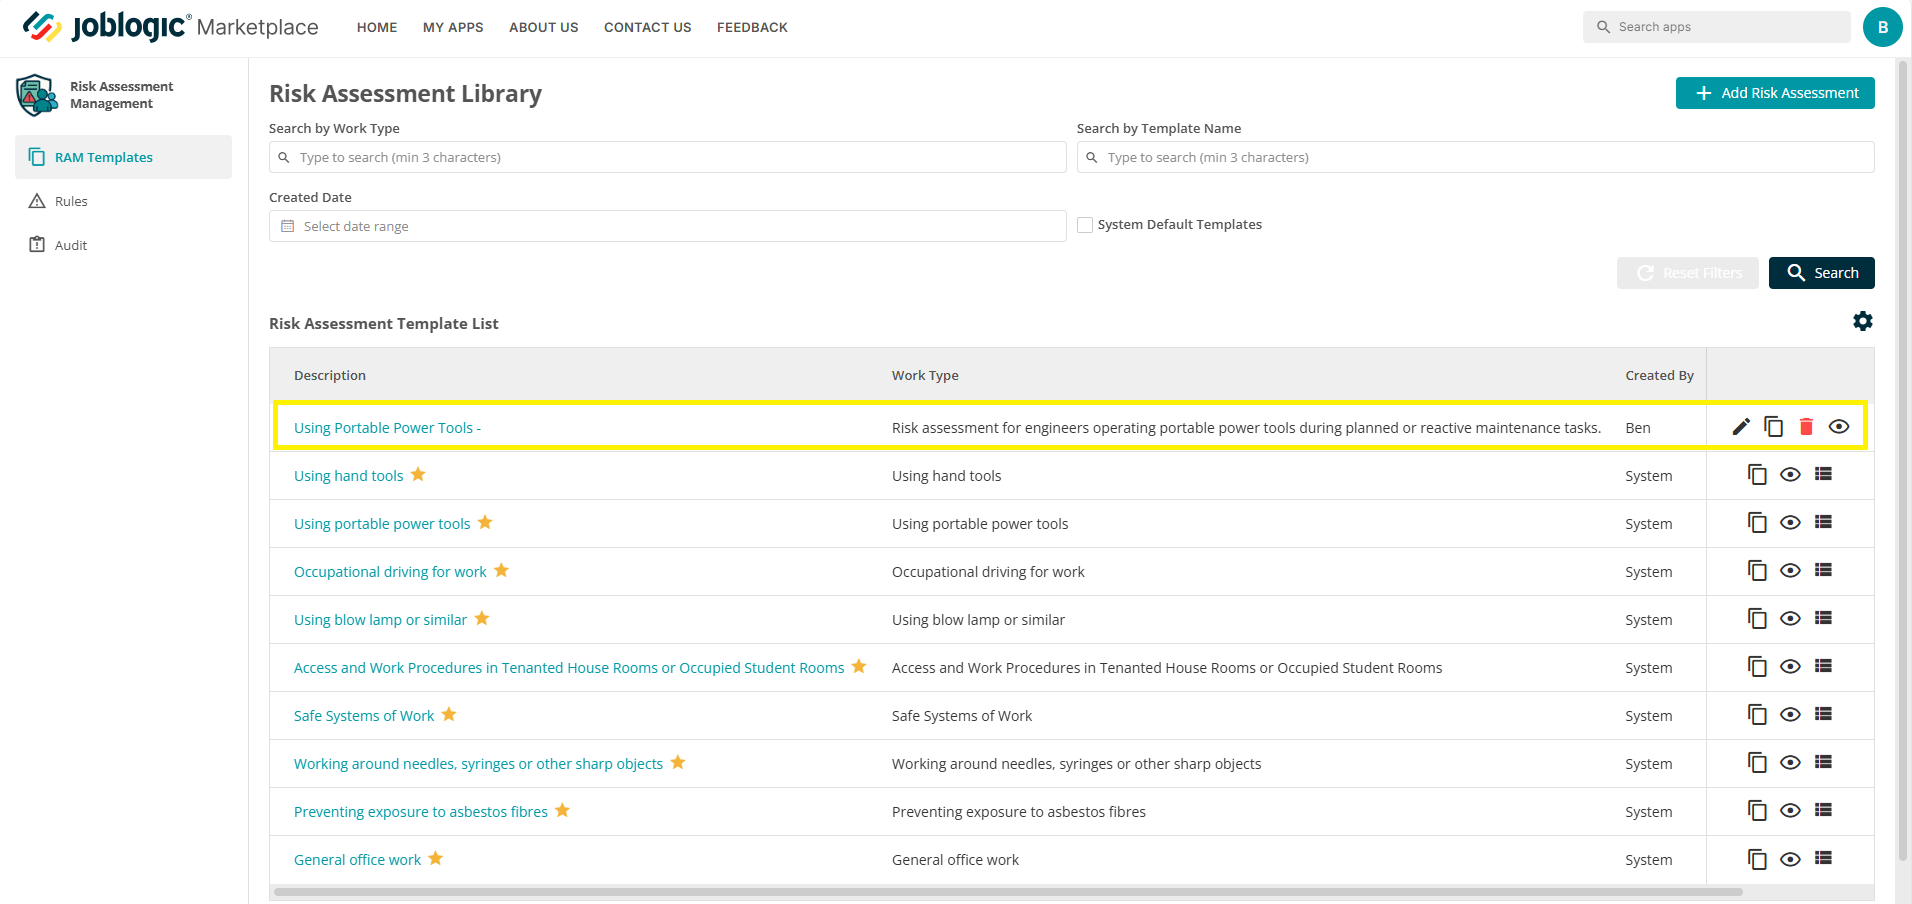
This will direct you to the Joblogic RAMs area. The page is broken up into 3 main sections:
-
A ‘RAM Templates’ area to view our existing templates and add new ones
-
A ‘Rules’ area to configure automated deployment of RAMS templates based on job conditions (e.g. job type, customer, asset)
-
An ‘Audit’ area to track who set up the RAM document and which engineers have acknowledged which RAMs documents, when, and against which jobs, providing a full compliance trail
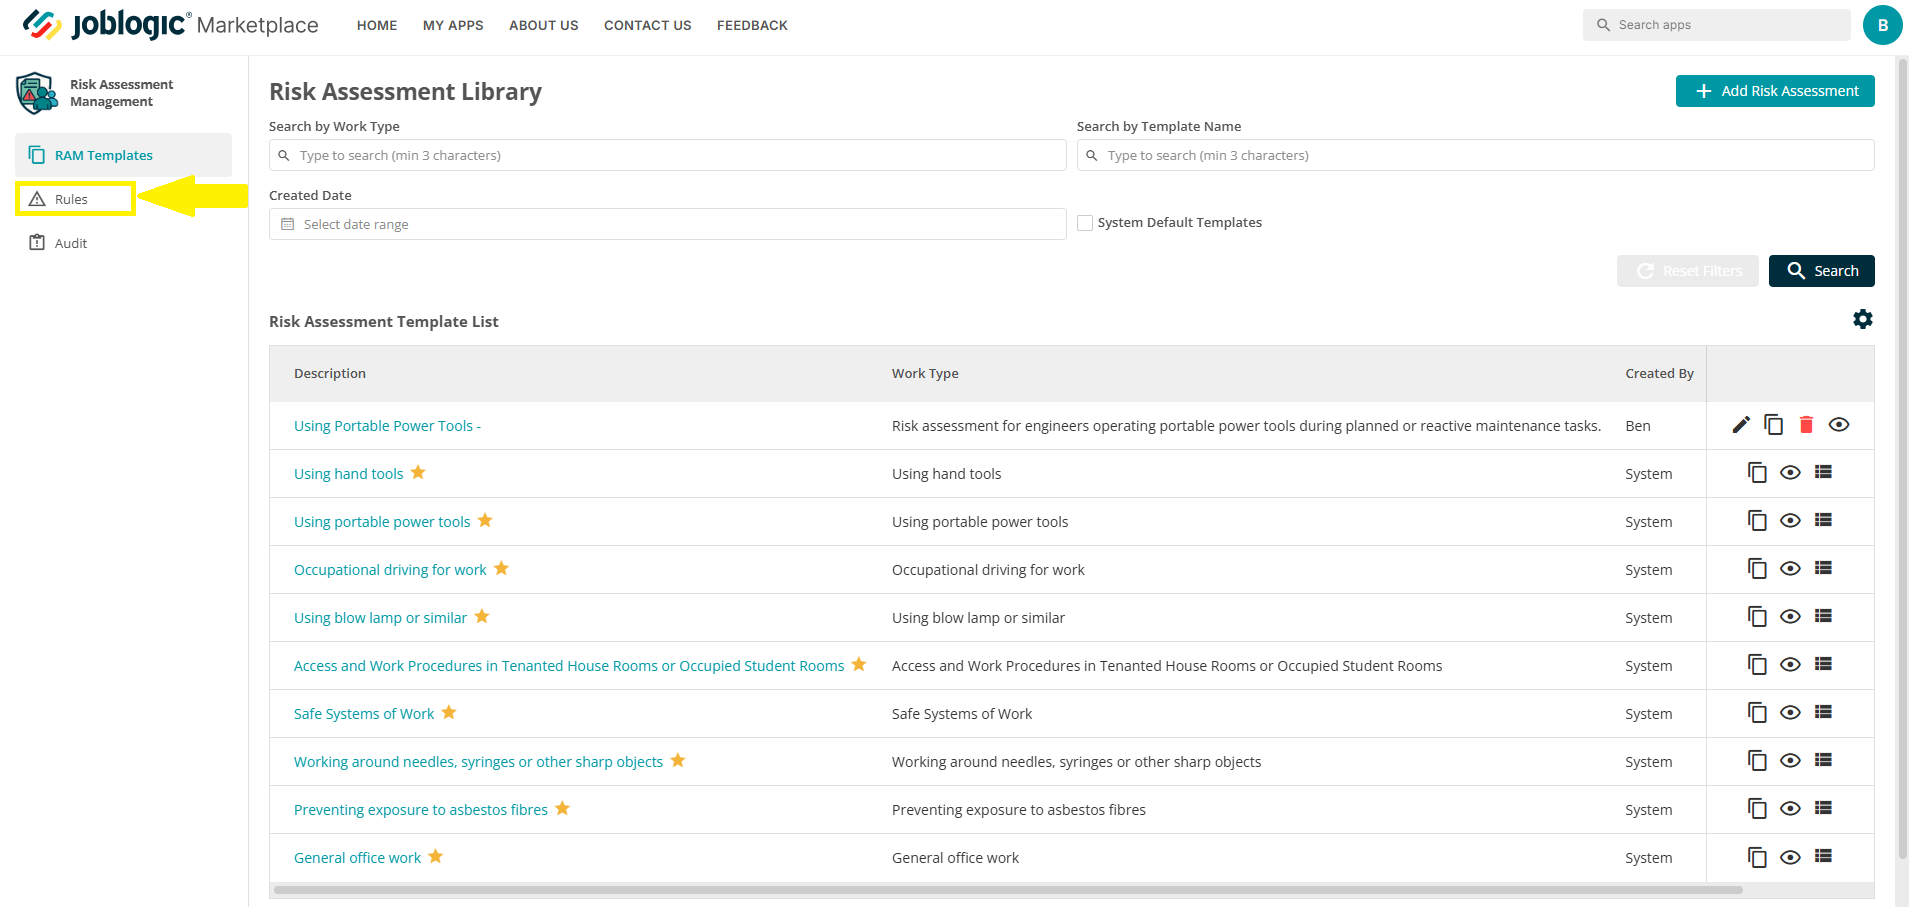
RAMs Templates
Default Templates
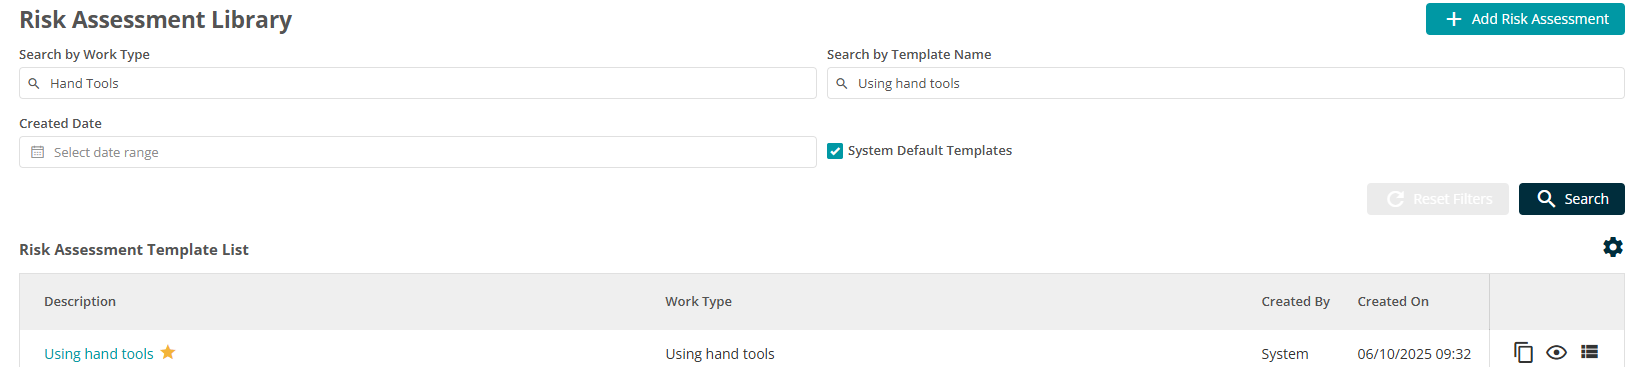
The RAMs app comes preloaded with 60+ read-only industry templates, covering a wide range of job types and risks (e.g. Working at Height, Hot Works, Confined Spaces).
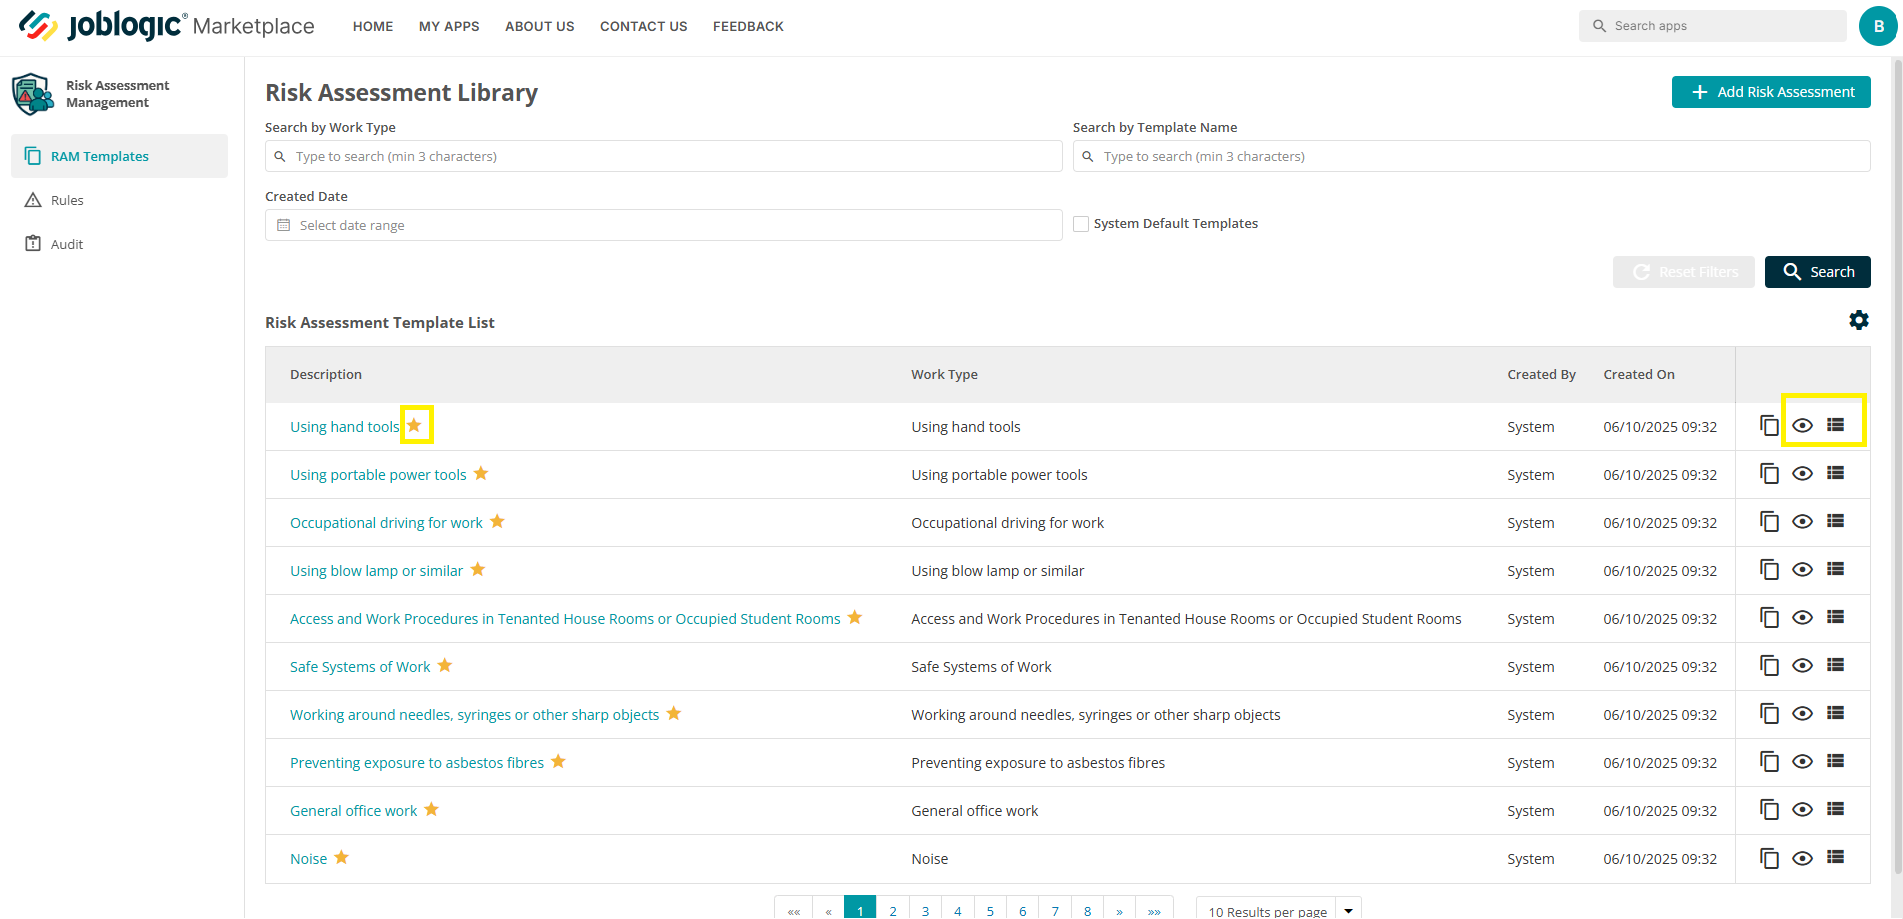
Please note that these are system default templates and cannot be edited or deleted from the system. Default templates are indicated via the ‘star’ icon. Each document’s output can be viewed by clicking it’s applicable ‘eye’ icon and it’s template set up can be viewed by selecting the respective ‘template structure view’ button.
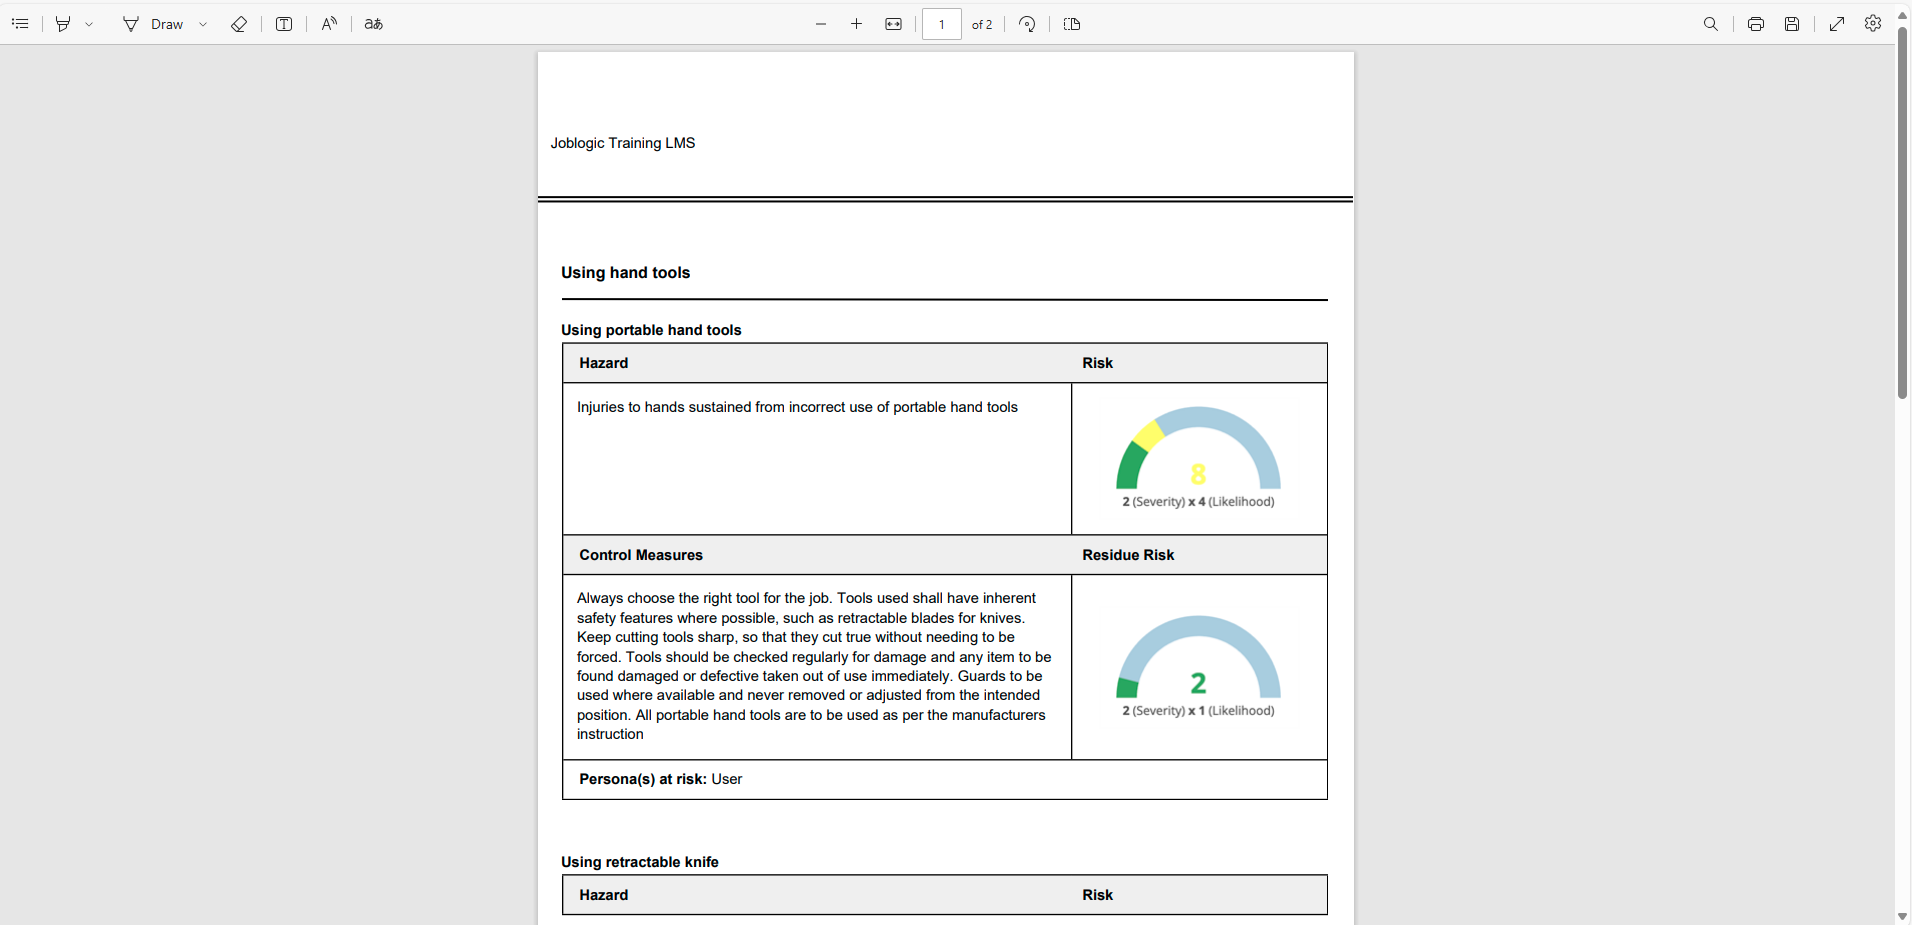
Example document output:
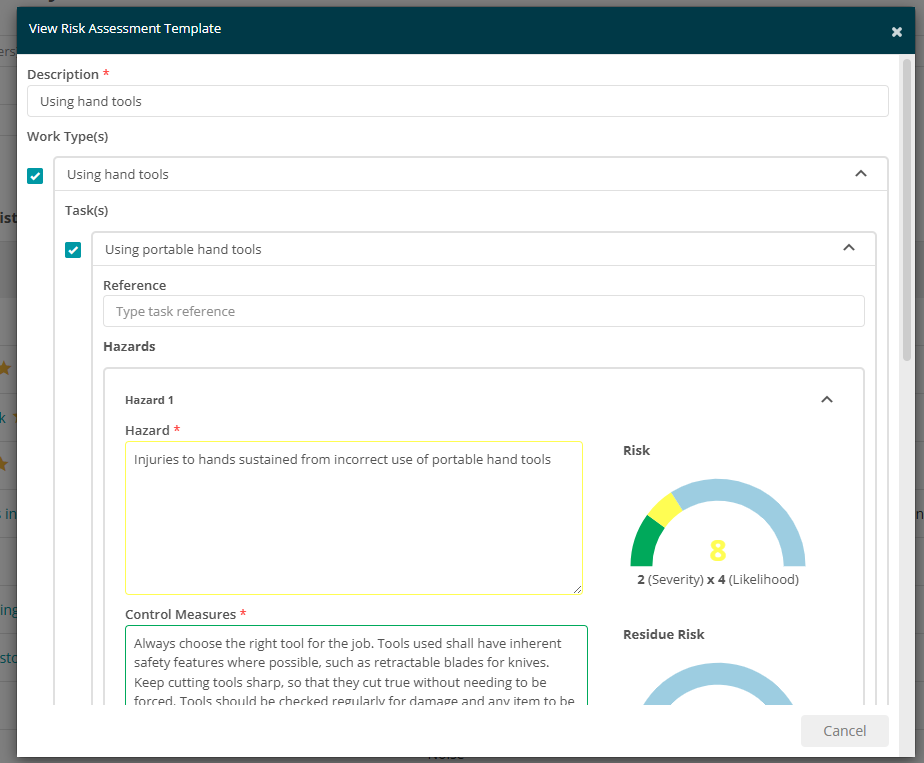
Example template structure view:
The RAMs templates area includes a filter tool which can be used to locate a certain type(s) of template and/or to only view system default templates (allowing you to review what is available).
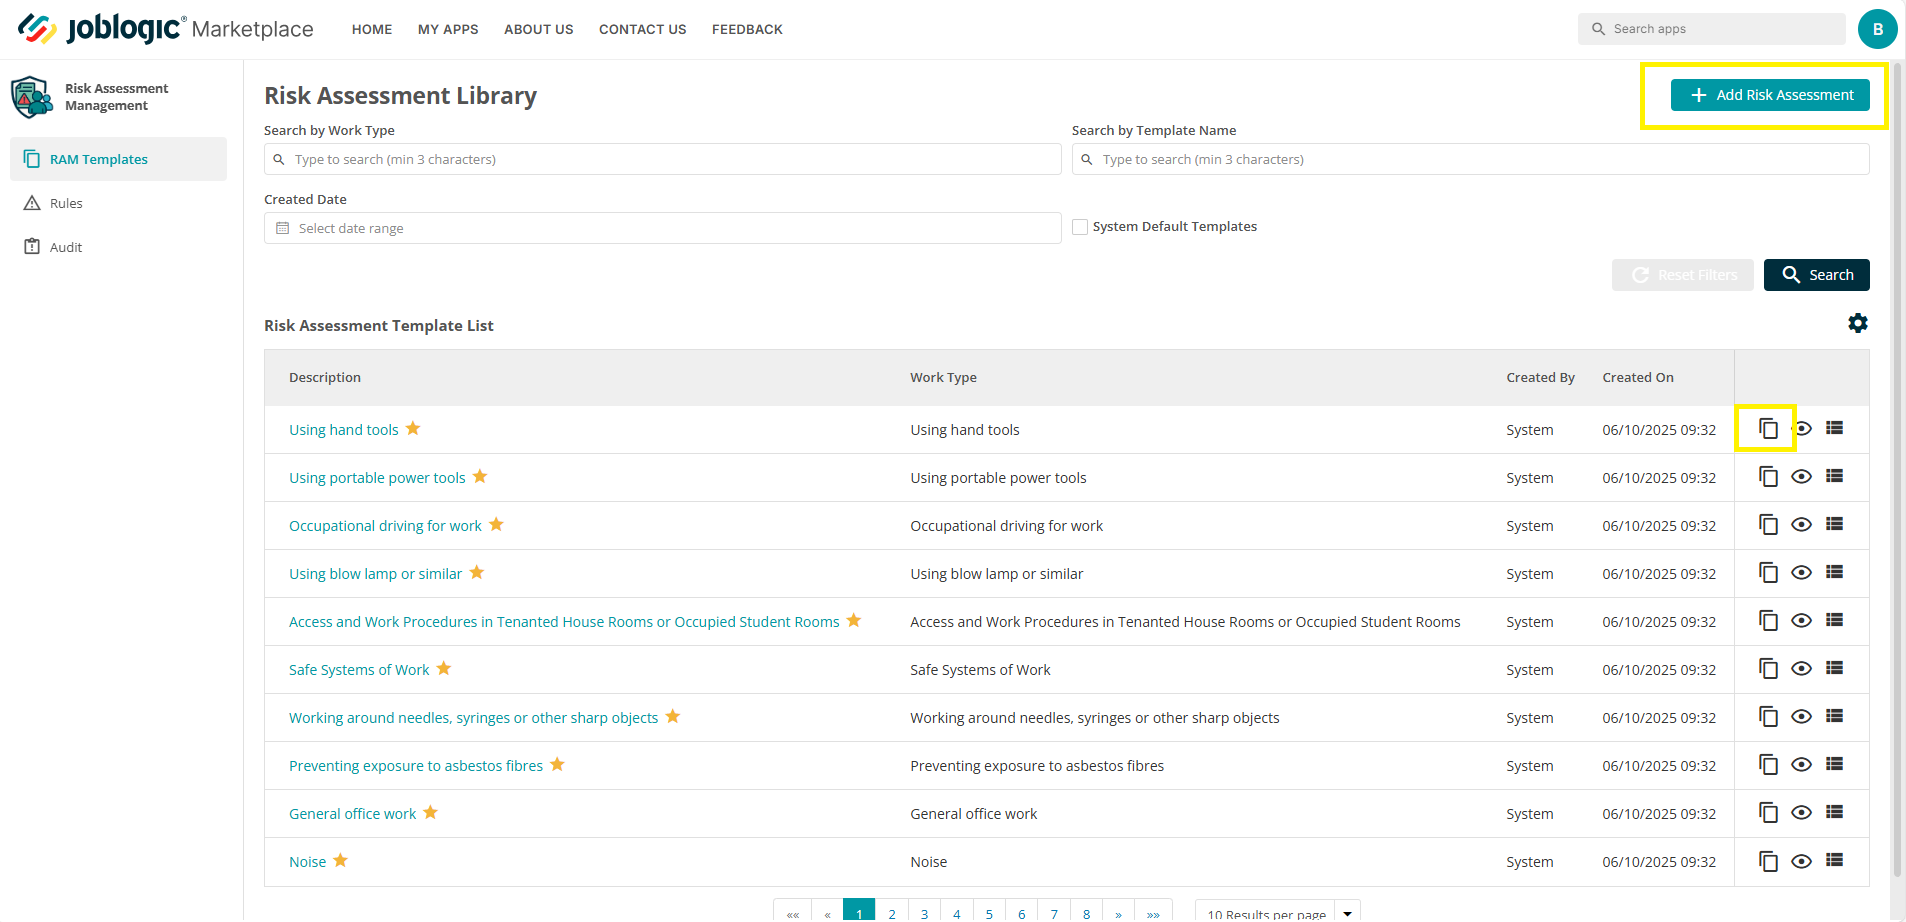
Creating your own templates
Users can also create their own templates and duplicate existing ones to use as to starting point then making edits.
To create your own template, select the ‘Add Risk Assessment’ icon. To duplicate an existing template and then make edits, select the template’s applicable ‘clone’ icon.
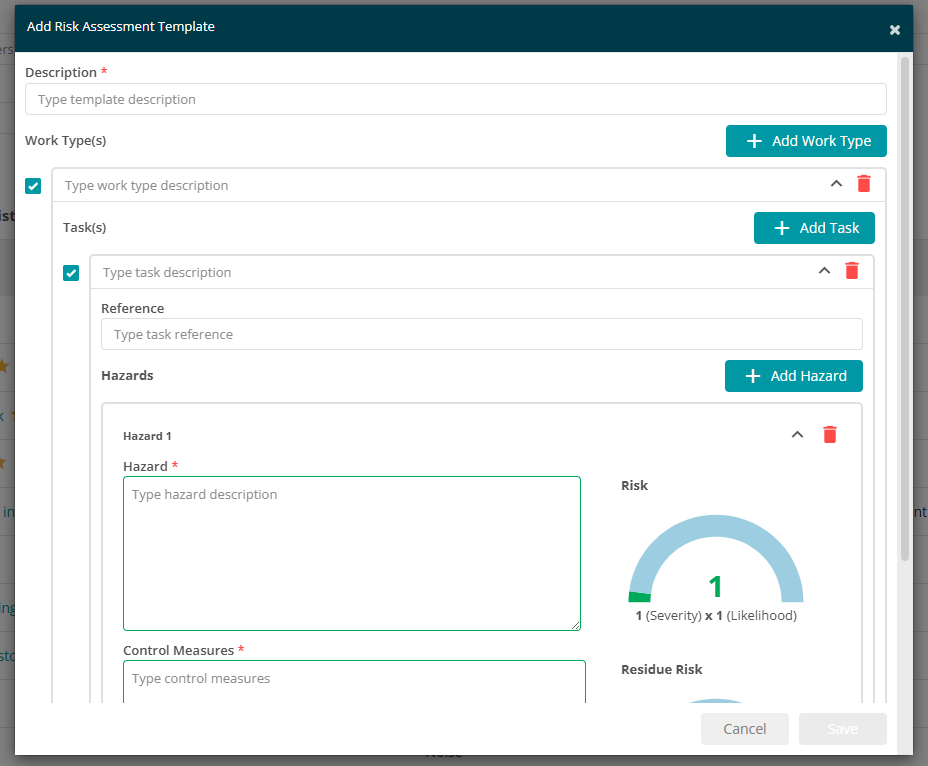
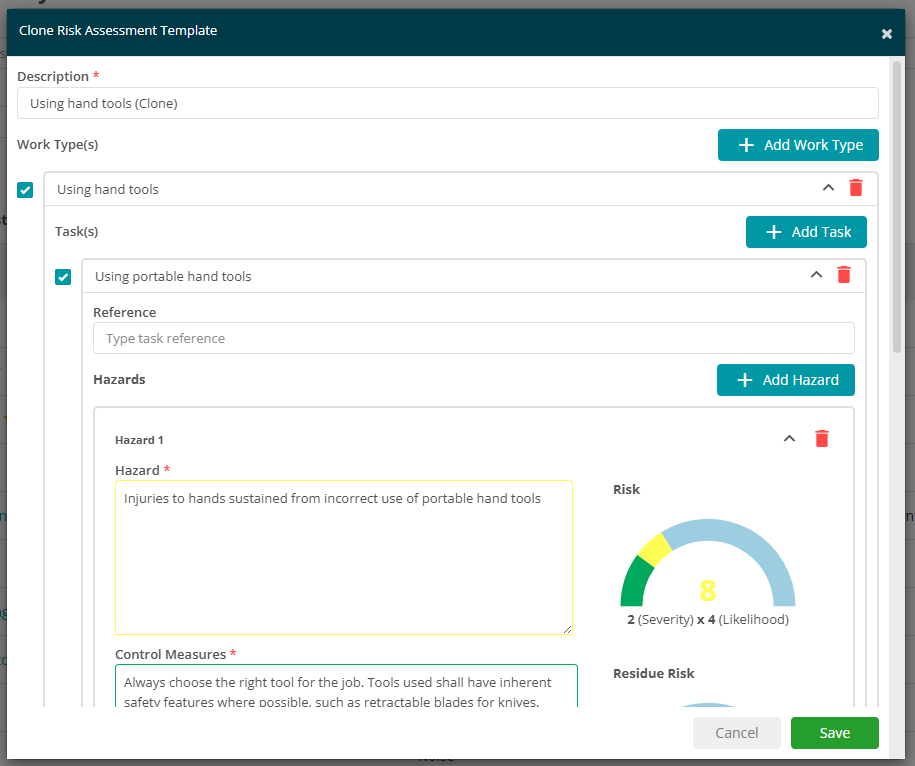
Selecting either will open the RAMs template builder, which will either be blank (if adding a new template) or be prepopulated with the corresponding template’s information (if cloning a template).
New template:
Cloned template:
Fill out the details of the template builder (or edit as applicable if creating from a cloned RAMs template). Many fields are free type fields allowing you to fully detail the RAM template. These include:
-
A description of the RAM
-
Work Type(s)
-
Task(s)
-
Reference
-
Hazards
-
Control Measures
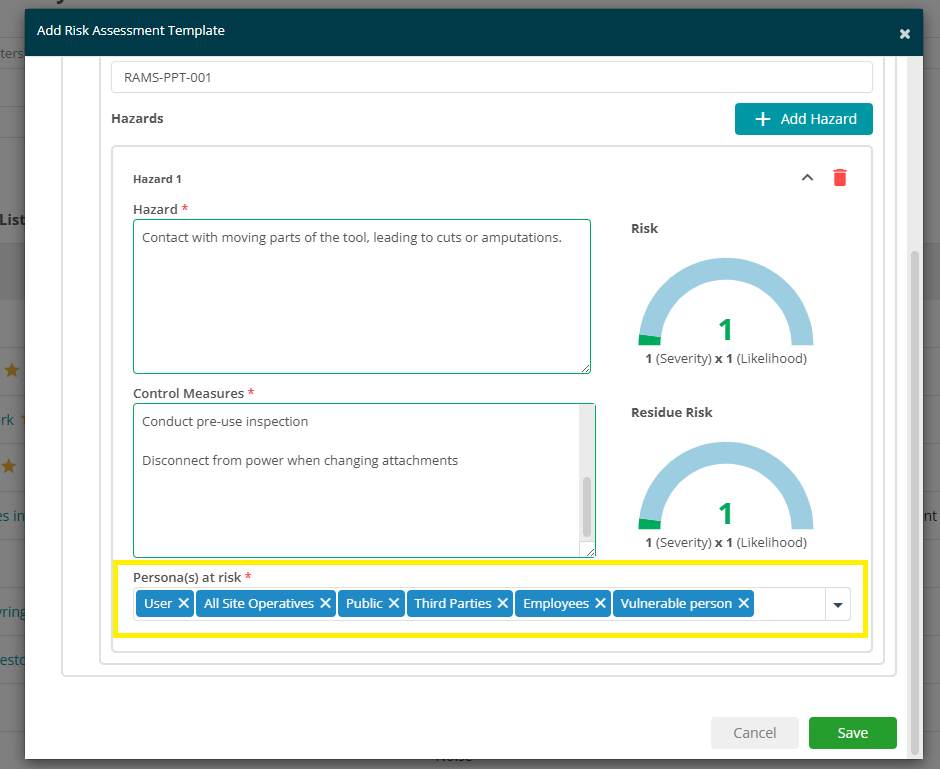
You can add multiple work types, tasks and hazards to a single template by using the applicable “Add” button and select the person(s) at risk via the dropdown menu.
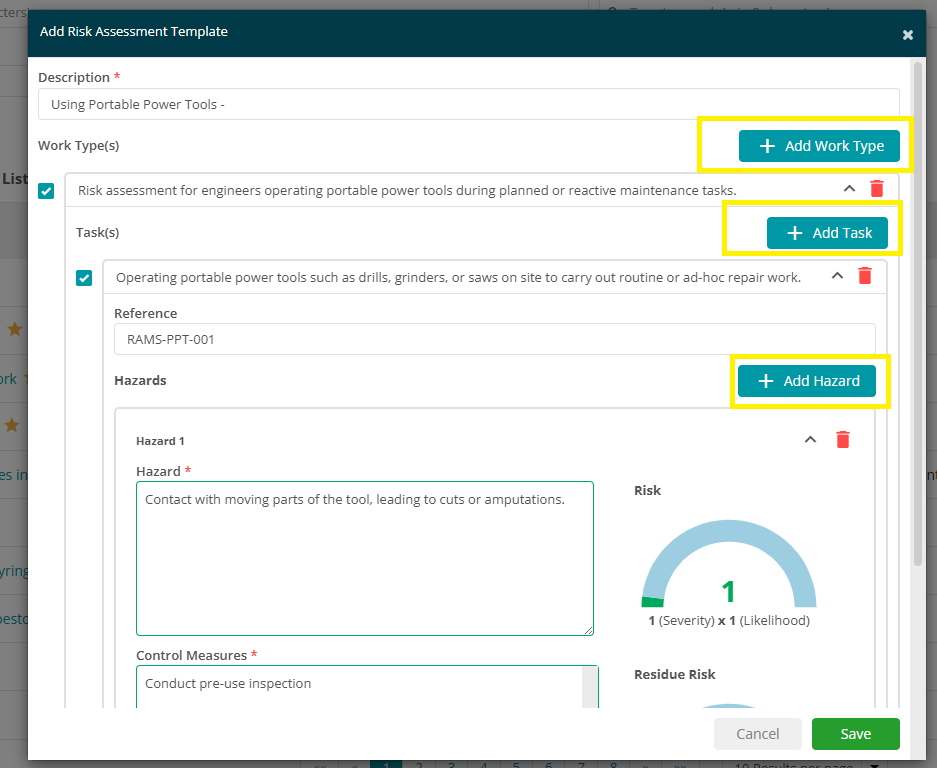
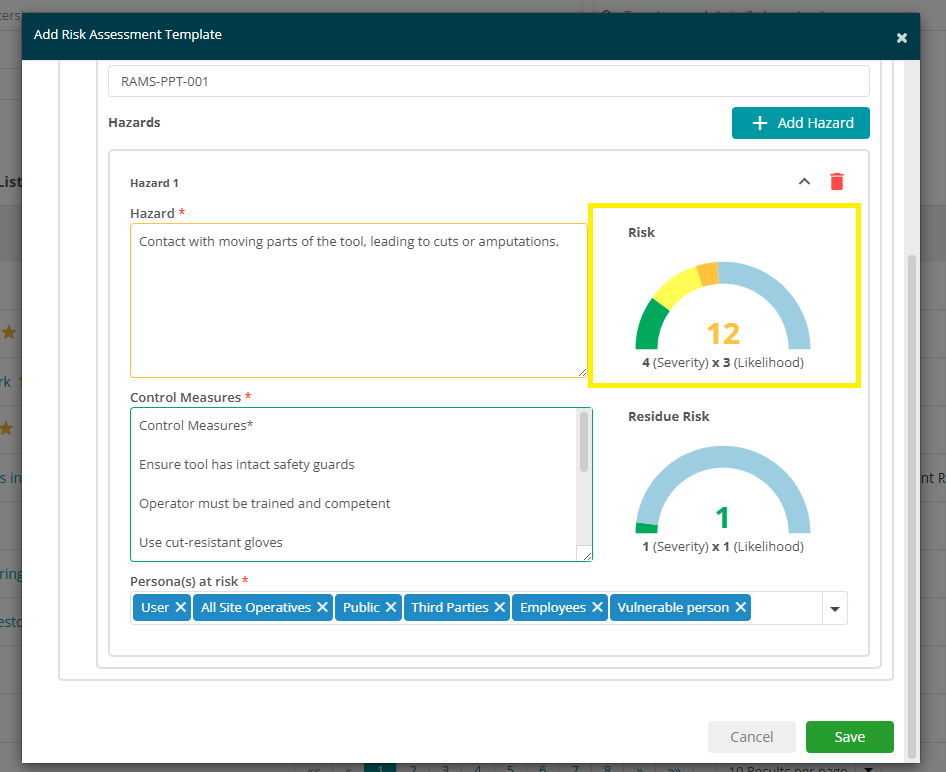
A key feature with RAMs is it’s risk and residual risk ratings function. Each hazard added to a RAMS template requires you to assign both a ‘Risk’ and ‘Residual Risk’ rating. These ratings are based on a combination of:
-
Severity – How serious the potential harm could be
-
Likelihood – How probable it is that the harm could occur
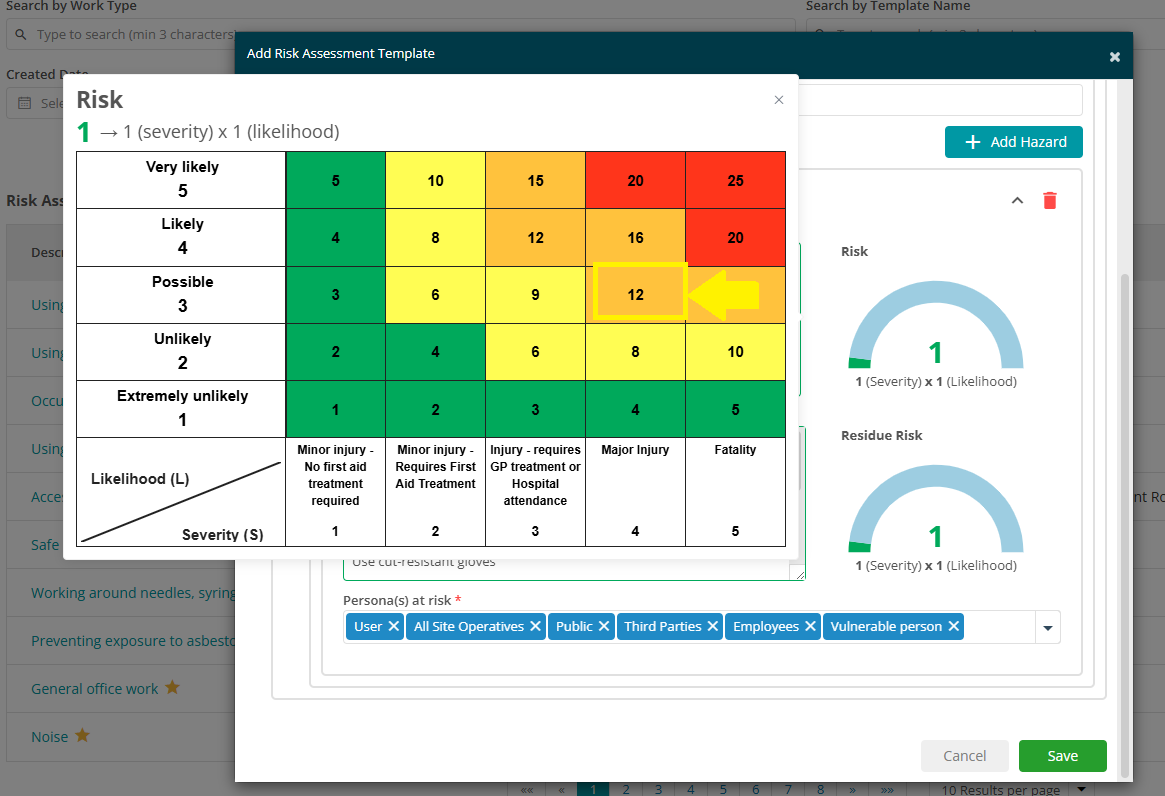
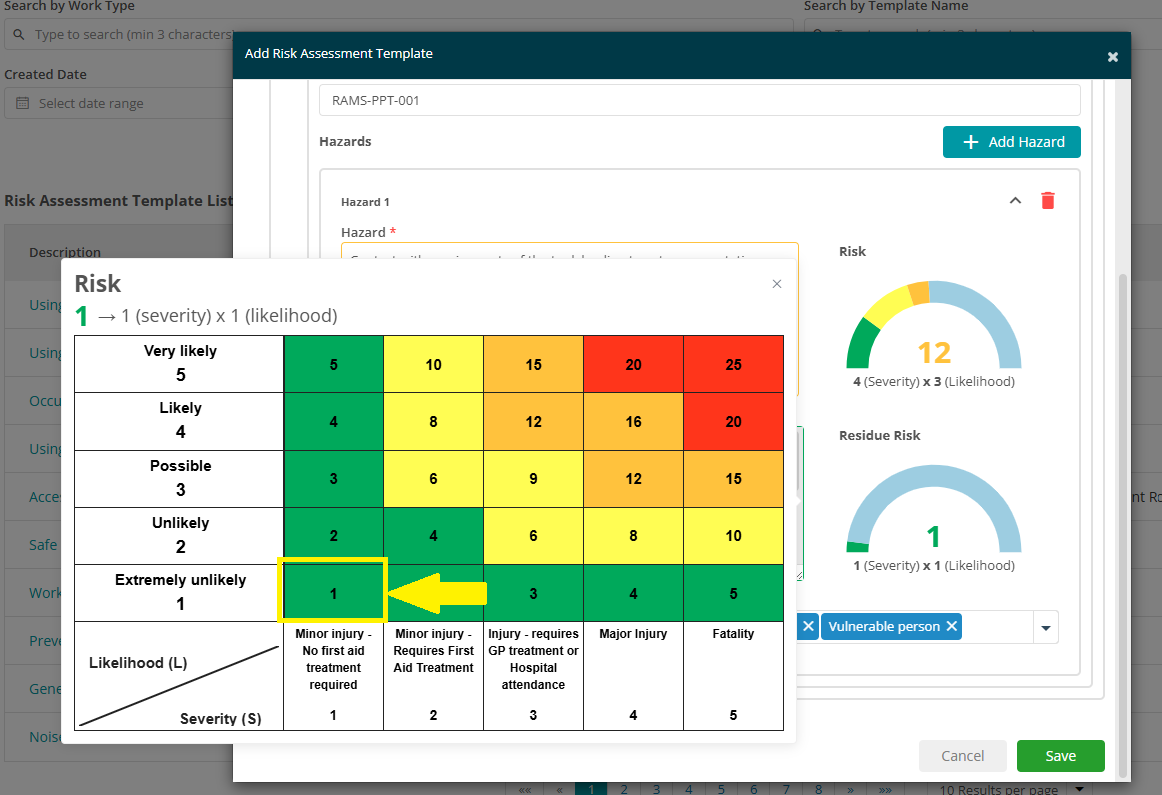
Both ratings are calculated using a colour-coded risk matrix, which appears when you click into the respective risk or residual risk section.
Example for RAM when using power tools; hazard: "Contact with moving parts of the tool, leading to cuts or amputations".
The Risk rating might be set as:
Severity: 4 (Major injury)
Likelihood: 3 (Possible)
This results in a total Risk Score of 12, which falls into the amber (medium risk) category.
Once control measures have been added, for example:
-
Ensure tool has intact safety guards
-
Operator must be trained and competent
-
Use cut-resistant gloves
-
Conduct pre-use inspection
-
Disconnect from power when changing attachments
You can then reassess the risk by applying the Residual Risk rating. For example:
Severity: 1 (Minor injury – no first aid required)
Likelihood: 1 (Extremely unlikely)
This results in a Residual Risk Score of 1, which falls into the green (low risk) category.
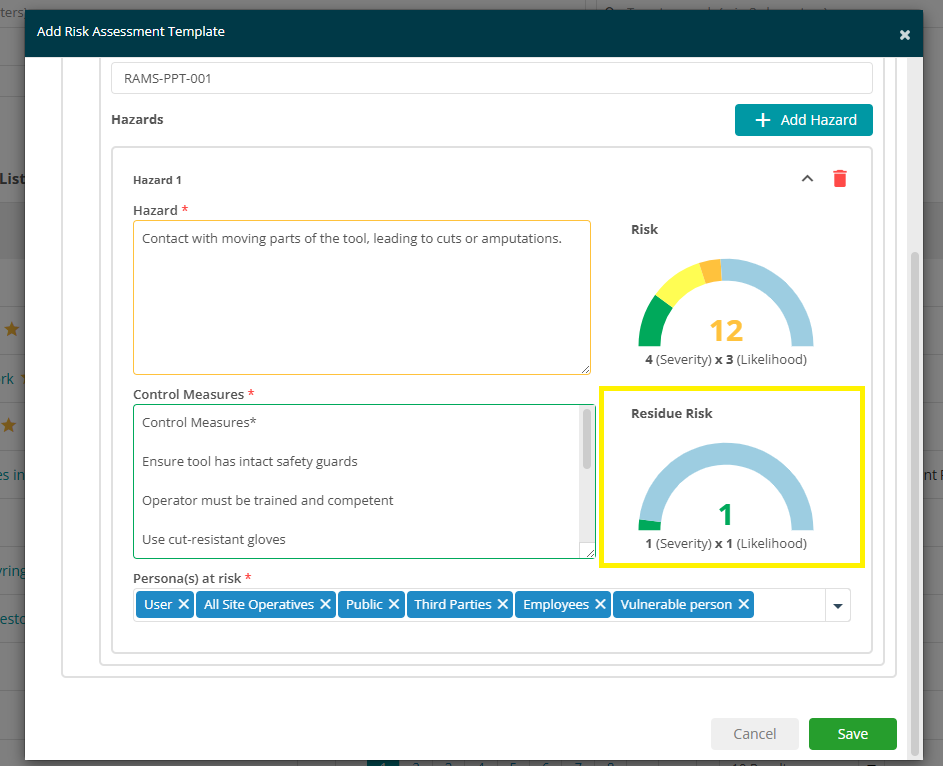
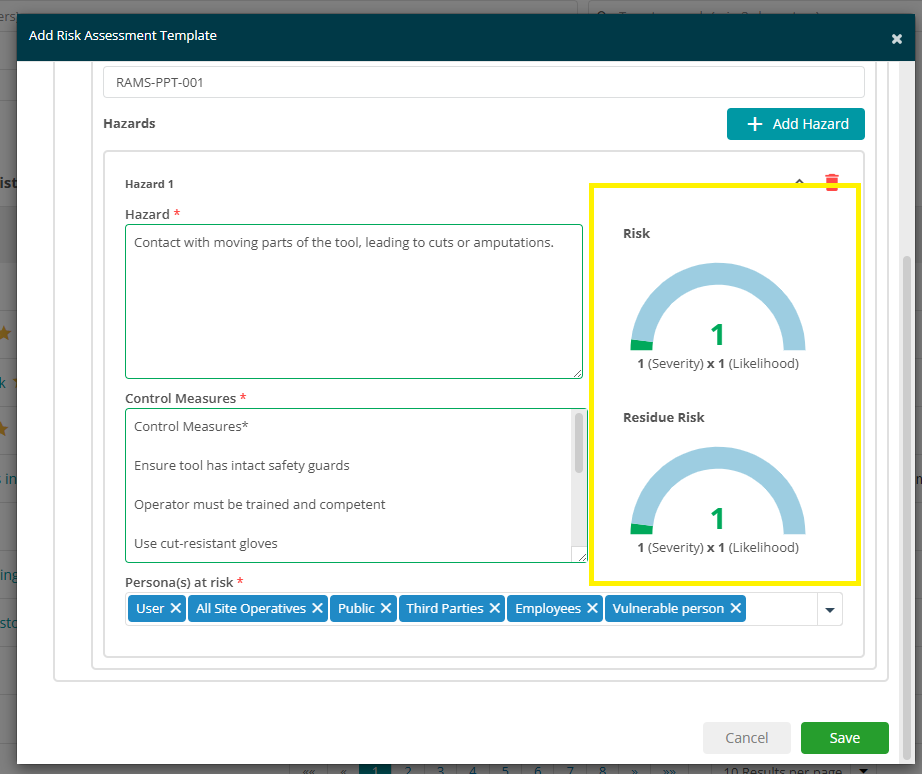
These scores are shown visually within the RAMS template as numerical values and coloured indicators. The system will also show the scoring formula:
Severity × Likelihood = Risk Score
Tip: Refer to the matrix descriptions when choosing your values. A severity of ‘5’ means ‘Fatality’, while a likelihood of ‘1’ means ‘Extremely Unlikely’.
Once your template is complete, click ‘Save’. Your new template will now appear in the ‘Risk assessment Templates List’ and can be deployed via rules.
RAM Template Rules
Once your RAMs templates are created, you can configure rules to automate how and when these documents are deployed to jobs.
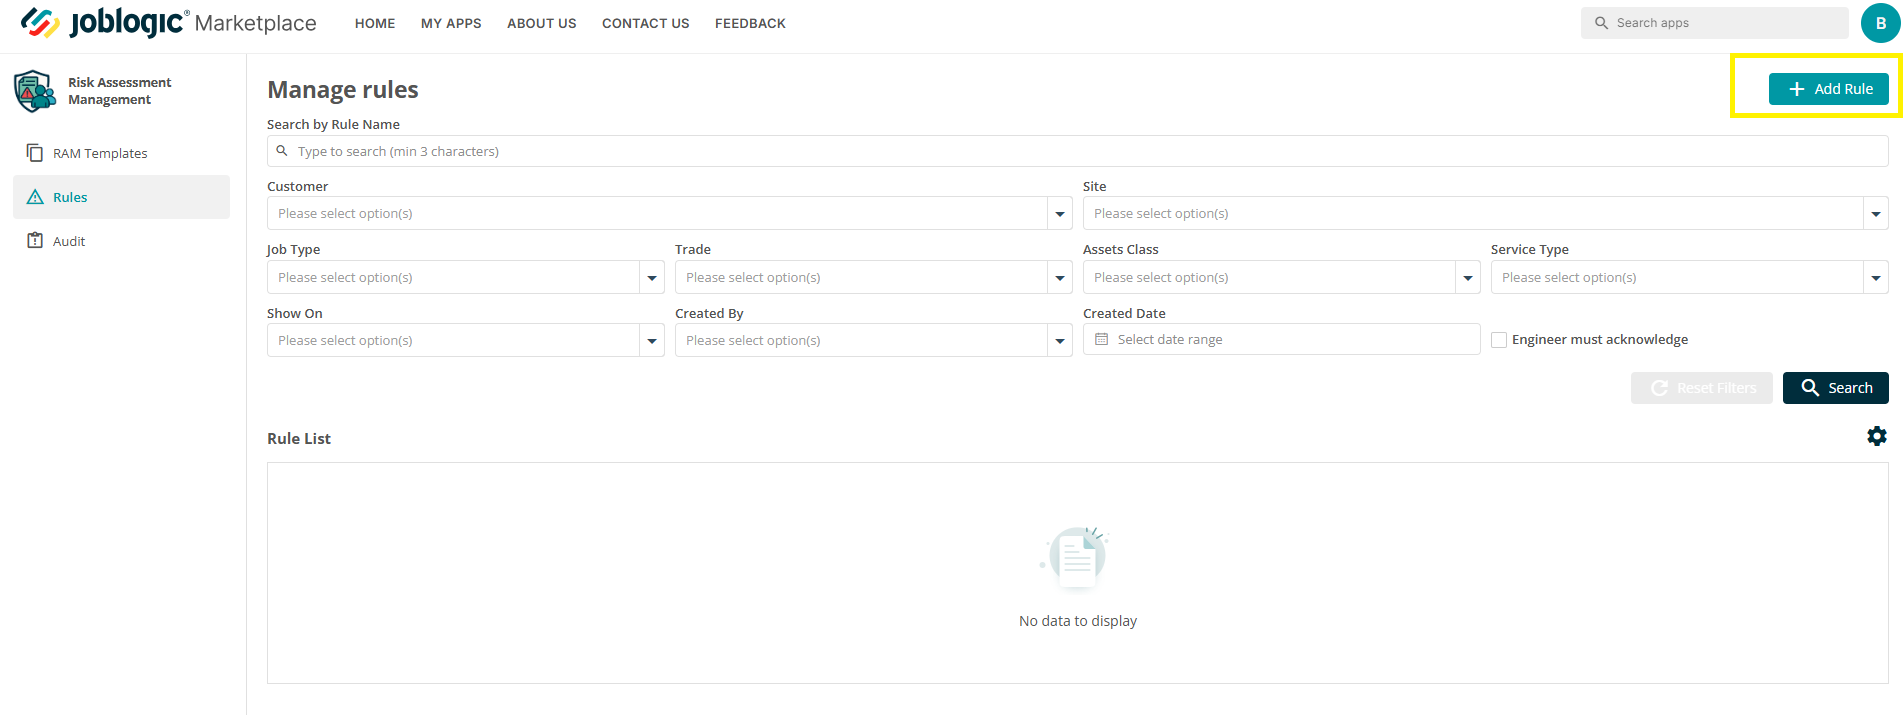
To get started, click on the ‘Rules’ tab in the left-hand menu.
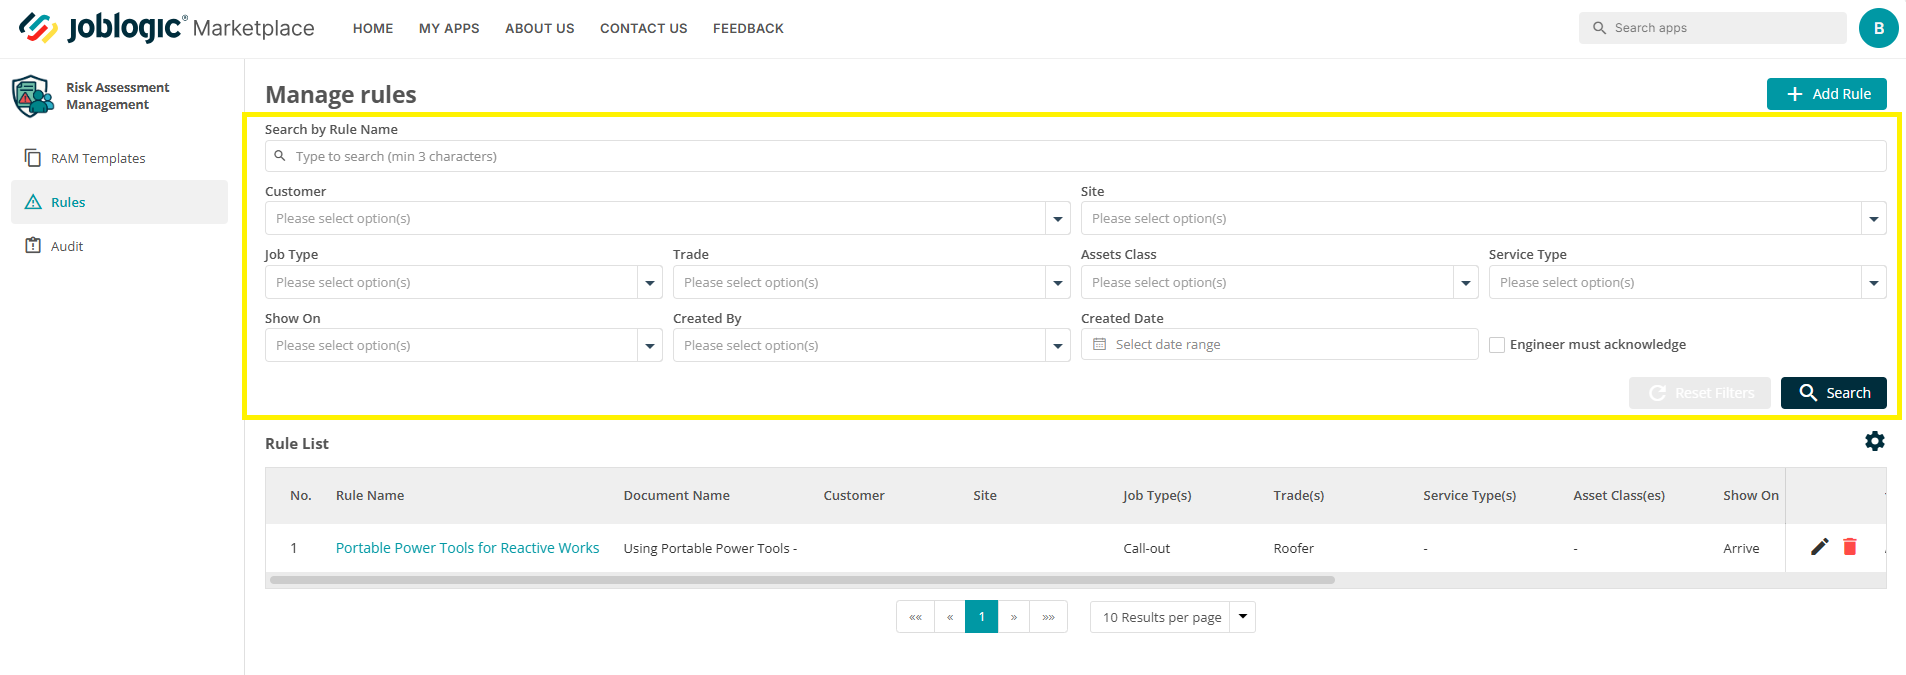
This opens the ‘Manage Rules’ area, where any existing rules will be listed. Click the ‘Add Rule’ button in the top right-hand corner to create a new rule.
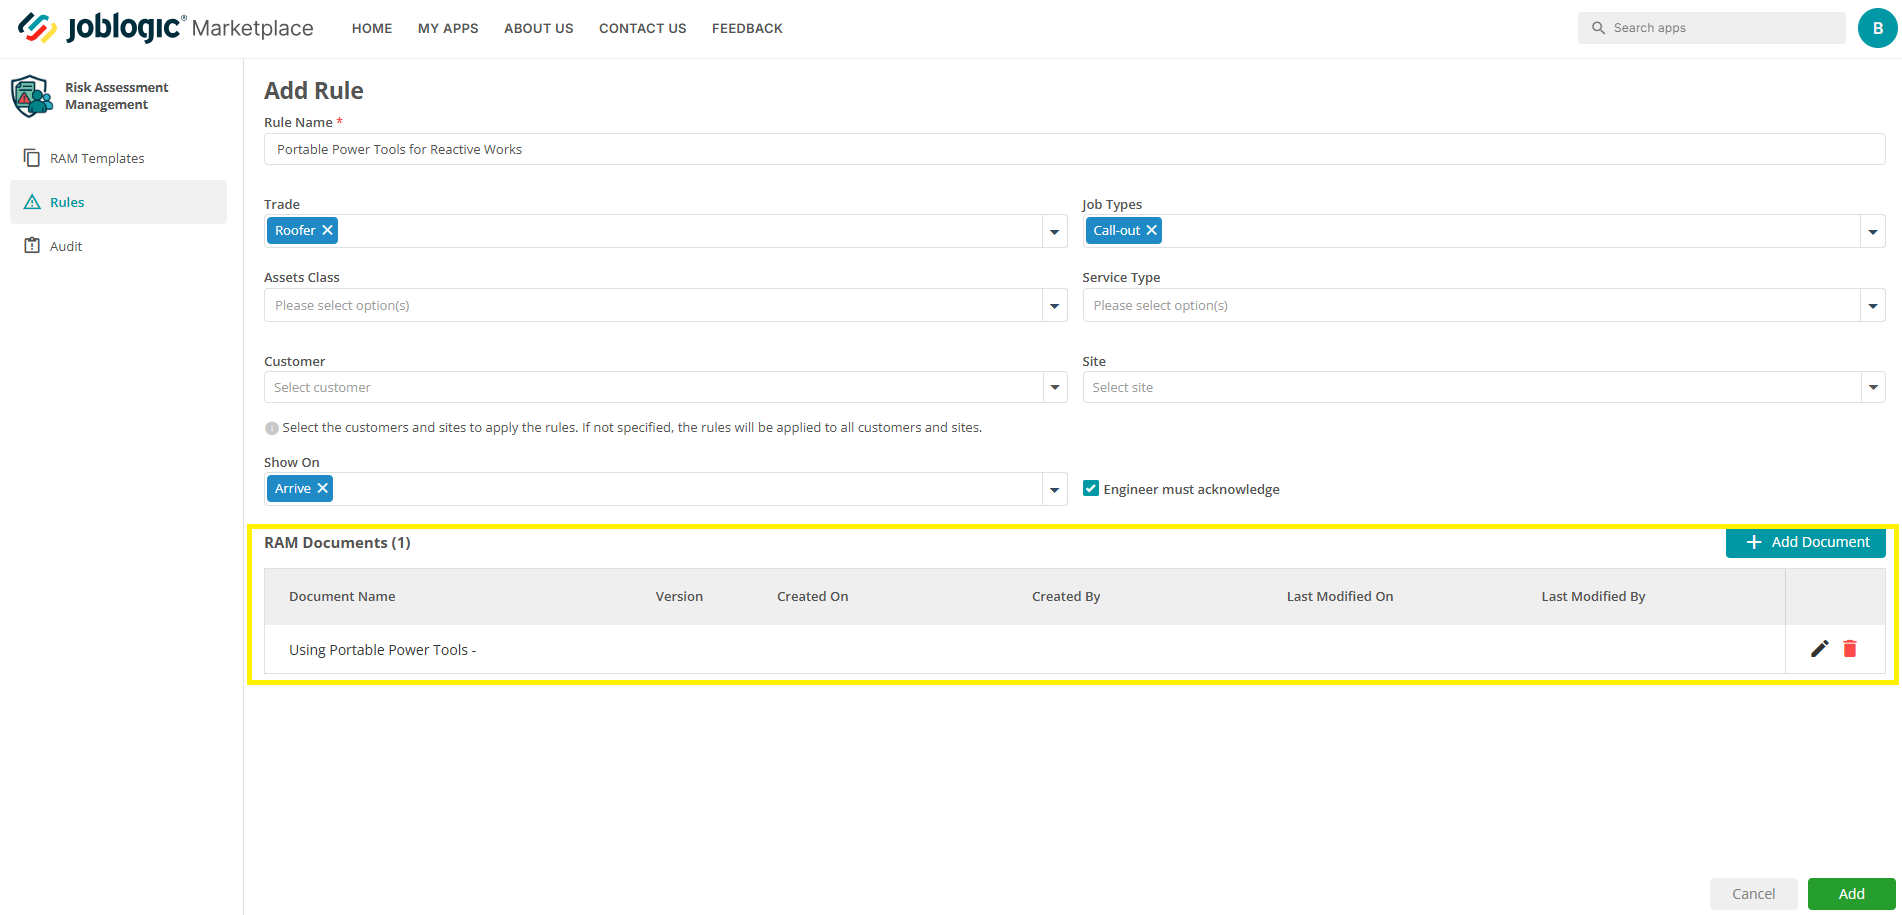
You will be directed to the ‘Add Rule’ screen, where you can define the conditions that determine when the RAMs documents are shown.
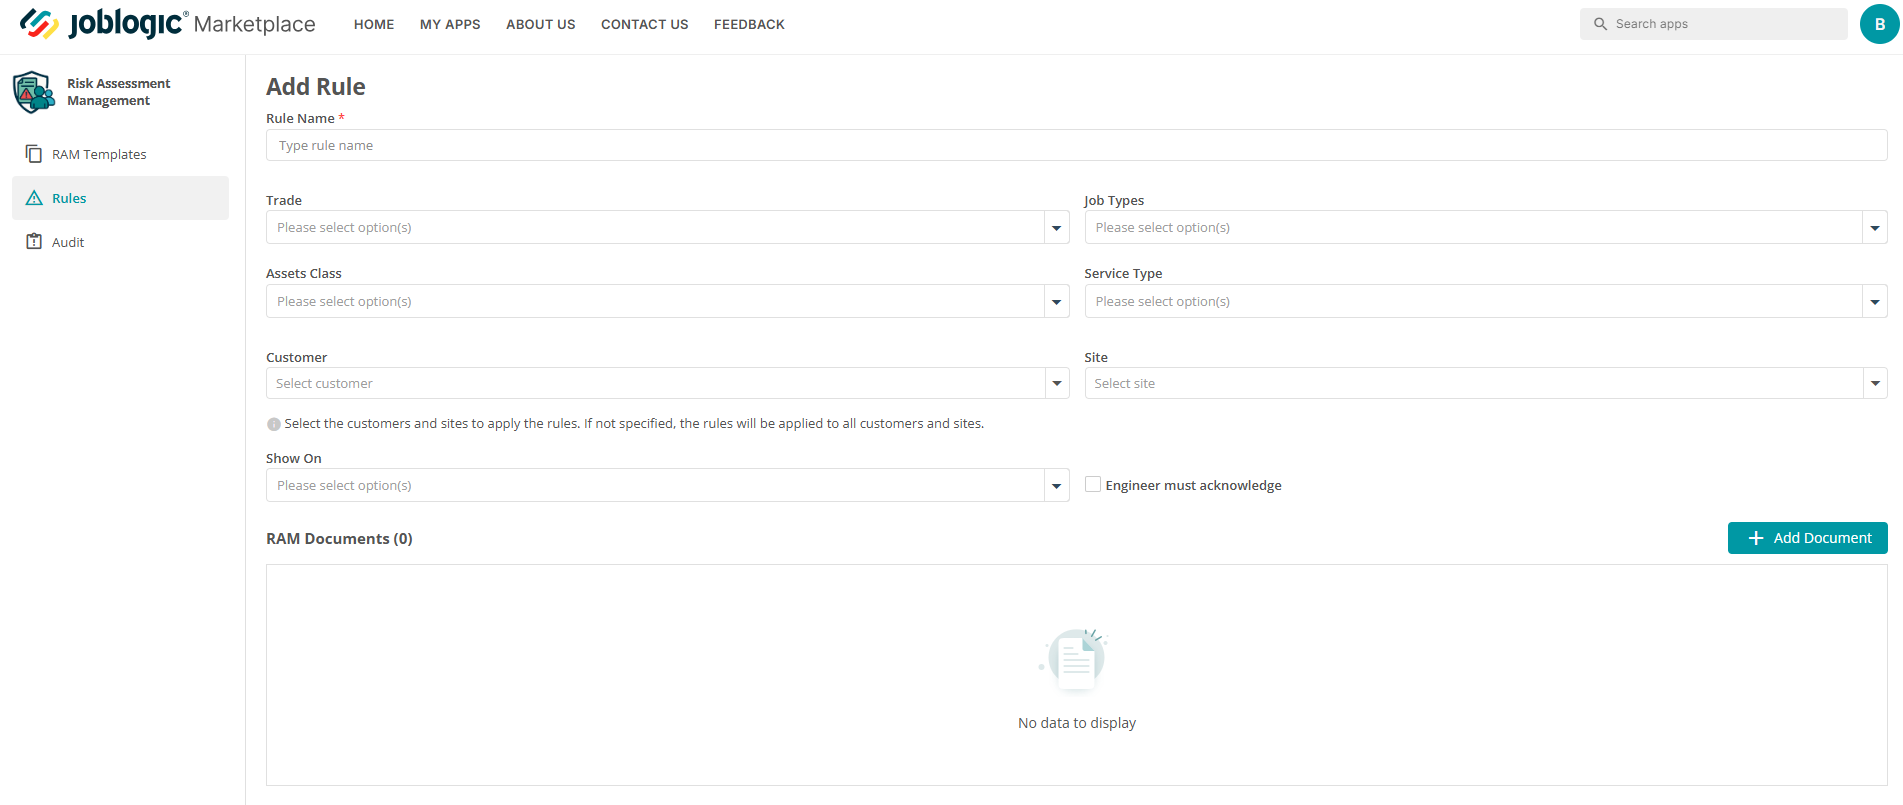
Fill out the fields as required:
-
Rule Name – Give the rule a clear and descriptive name
-
Trade – Select the applicable trade(s)
-
Job Types – Select the job types the RAMs should apply to
-
Asset Class – Apply any rule to specific asset classes, if needed
-
Service Type – Apply to a service type, if needed
-
Customer/Site – Target rules to a specific customer or site (leave blank to apply to all)
-
Show On – Choose when the RAMs document should be shown (e.g. arrival)
-
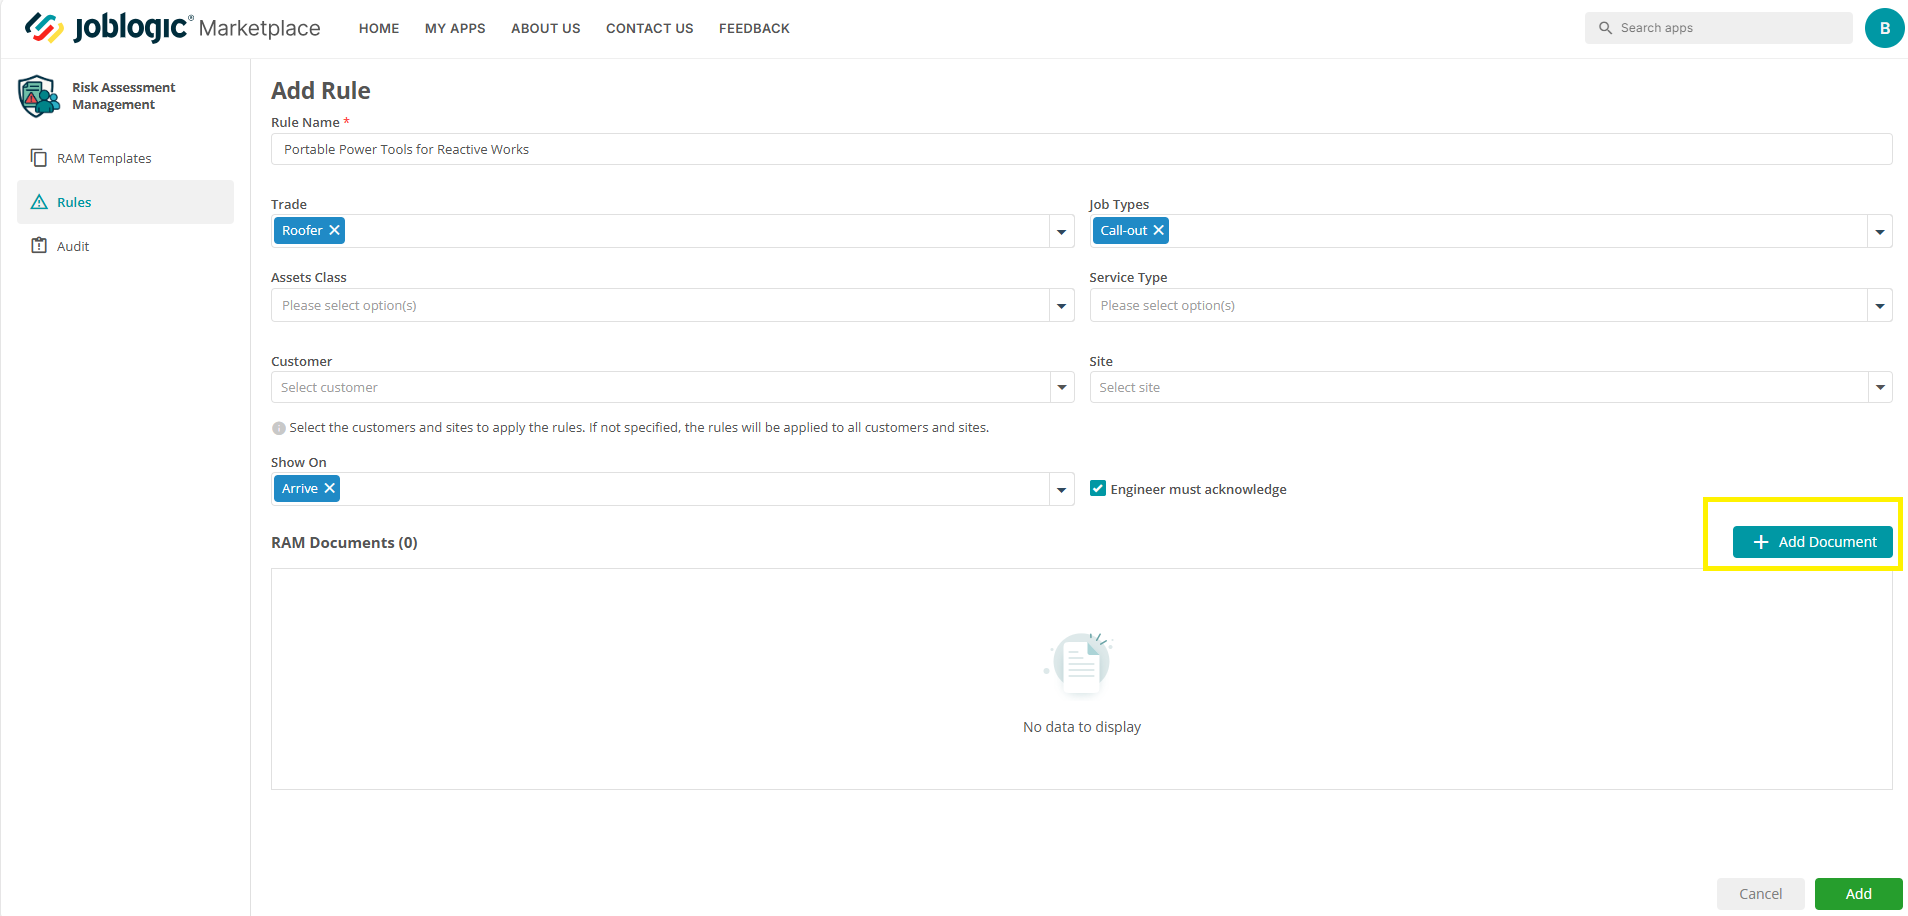
Engineer Must Acknowledge – Tick this box to require engineers to acknowledge the document before continuing with the job visit
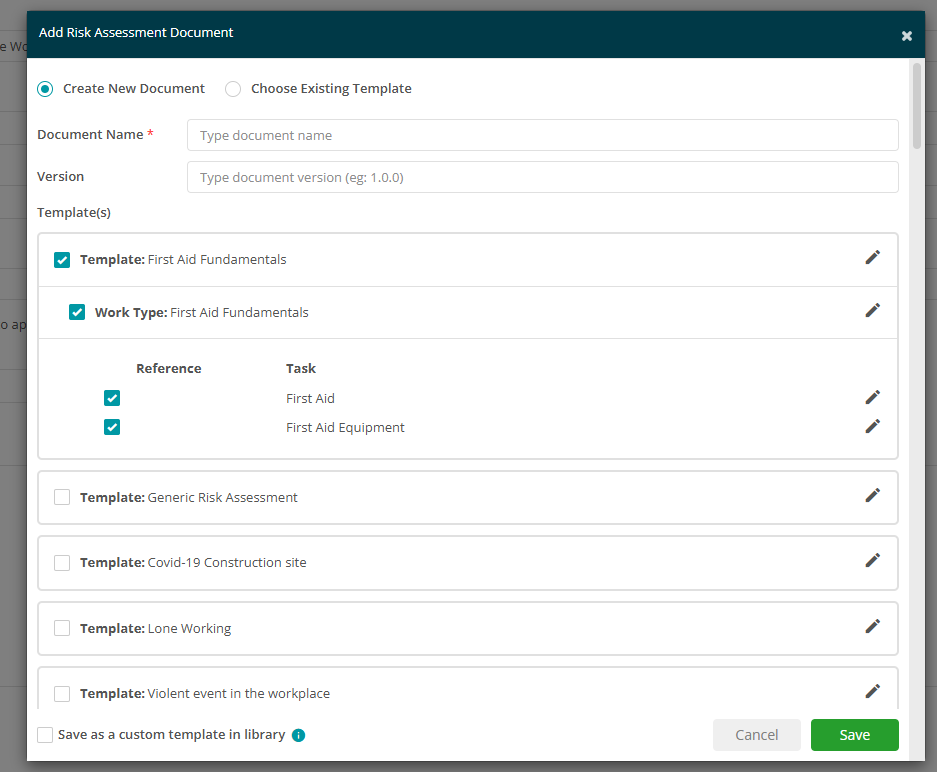
At the bottom of the page, click the ‘Add Document’ button to link one or more RAM templates to the rule.
This page provides the option to ‘Create a new document’ (RAMs template) if not already done so or to select your existing template. The ‘Create a new document’ area follows the same format and function as previously detailed above. See the ‘Creating your own templates’ section of this guide for more details.
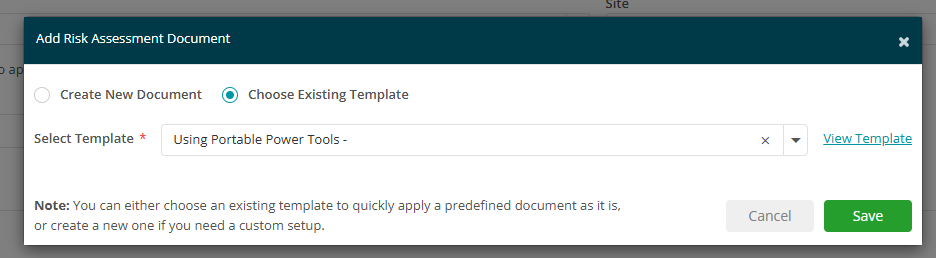
To assign your template, select the ‘Choose Existing Template’ toggle option and select your template from the dropdown. There is a ‘View Template’ option allowing you to preview the document to help you confirm the selection. Click ‘Save’ and the template will be applied to the rule being created.
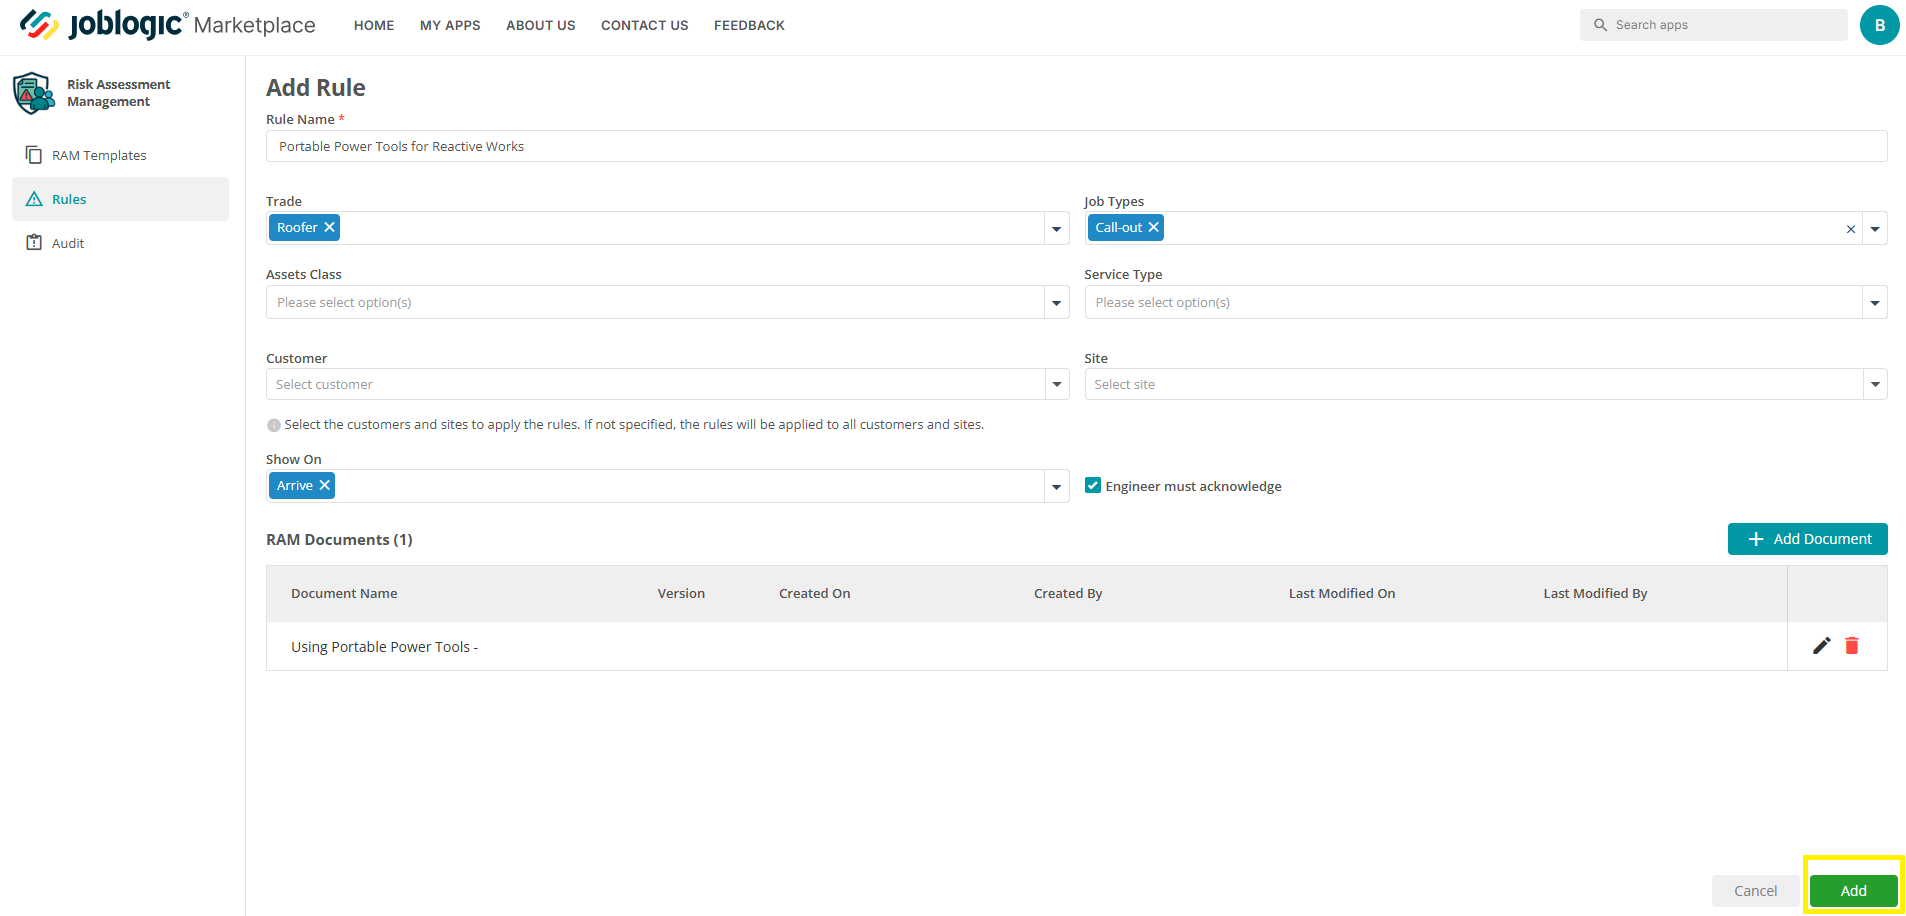
Once complete, click ‘Add’ to save your rule. Your rule will now be active and visible in the ‘Rules List’.
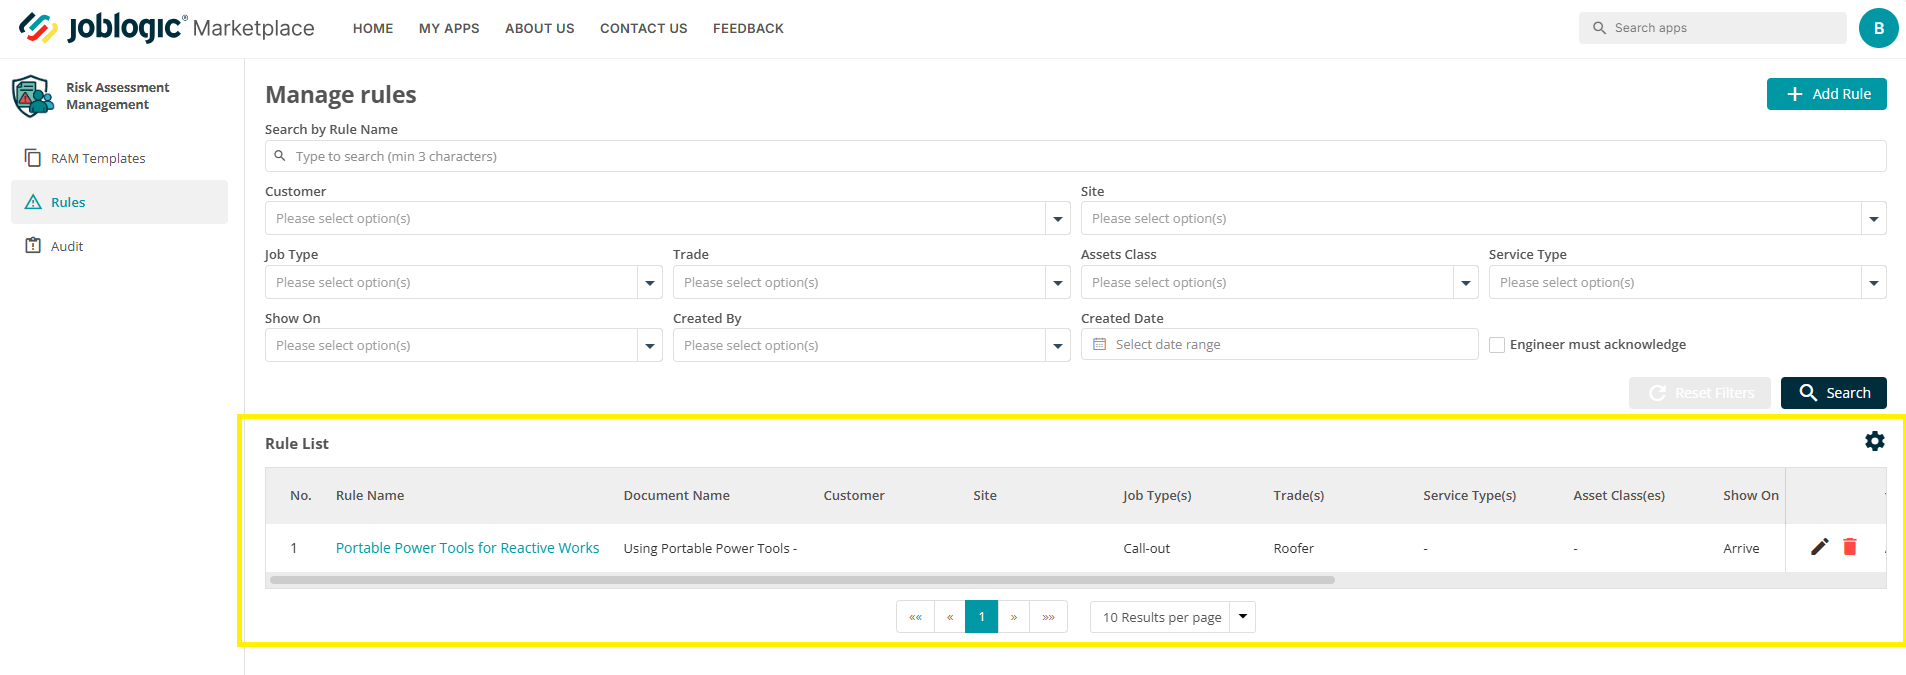
Note: as you add more rules to your system, they can be searched and filtered via the filtering tool towards the top of the page.
The RAMs Audit Page
The Audit section provides a full log of user activity within the RAMs app, helping system administrators track who has viewed, acknowledged, created, edited or deleted any RAMS templates and rules amongst many more actions.
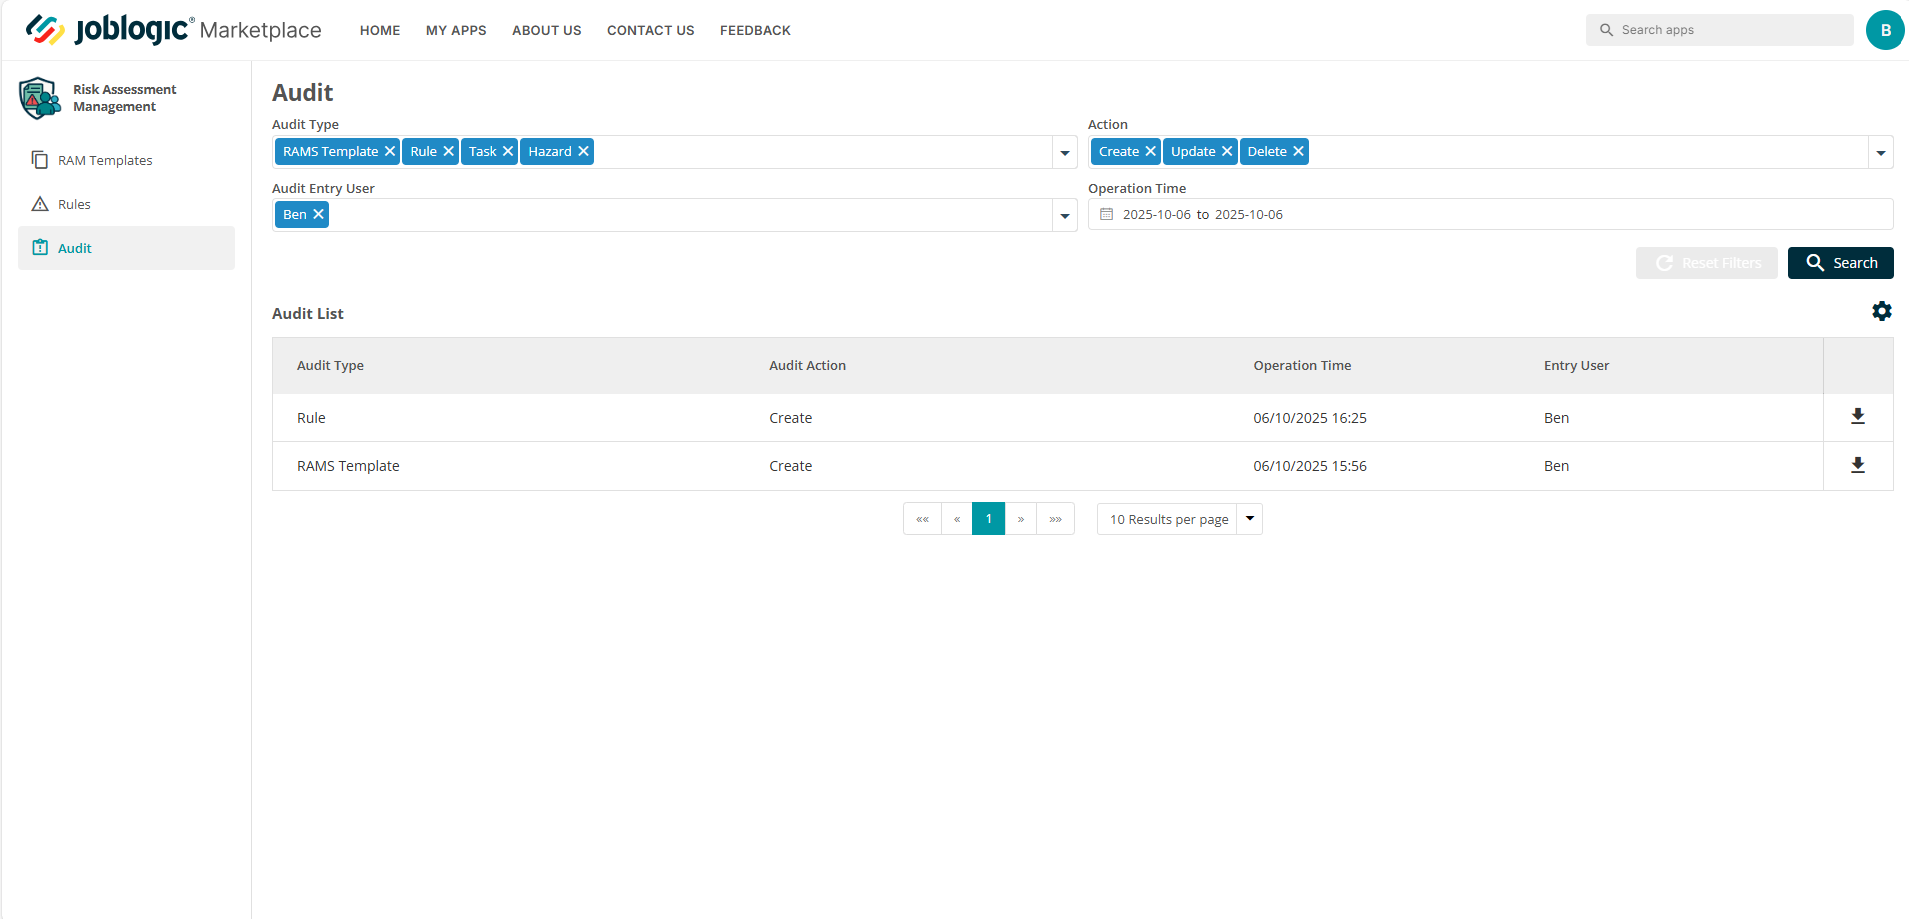
To access this area, click on the Audit tab in the left-hand menu.
Here, you’ll find an ‘Audit List’ table showing:
Audit Type – The category of the action (e.g. Rule, RAMS Template, Task or Hazard)
Audit Action – What was done (e.g. Create, Update, Delete, Ackowledge)
Operation Time – The date and time the action was carried out
Entry User – The name of the user within the system who performed the action
You can also apply filters at the top of the page to search results as more and more users start using the tool.
Each audit record can be downloaded individually by clicking it’s download icon.
These functions provide clear visibility and traceability of who made changes in the system and when, helping to support compliance and internal governance.
Tracking Engineer Acknowledgements: Please note that all engineer RAMs document acknowledgements are:
-
Timestamped
-
Logged against the user
-
Also visible within the job record (JL Web back-office)
This creates a full audit trail showing:
-
Which RAMS were issued
-
Which engineer acknowledged them
-
When acknowledgement occurred
RAMs and Back-office Jobs
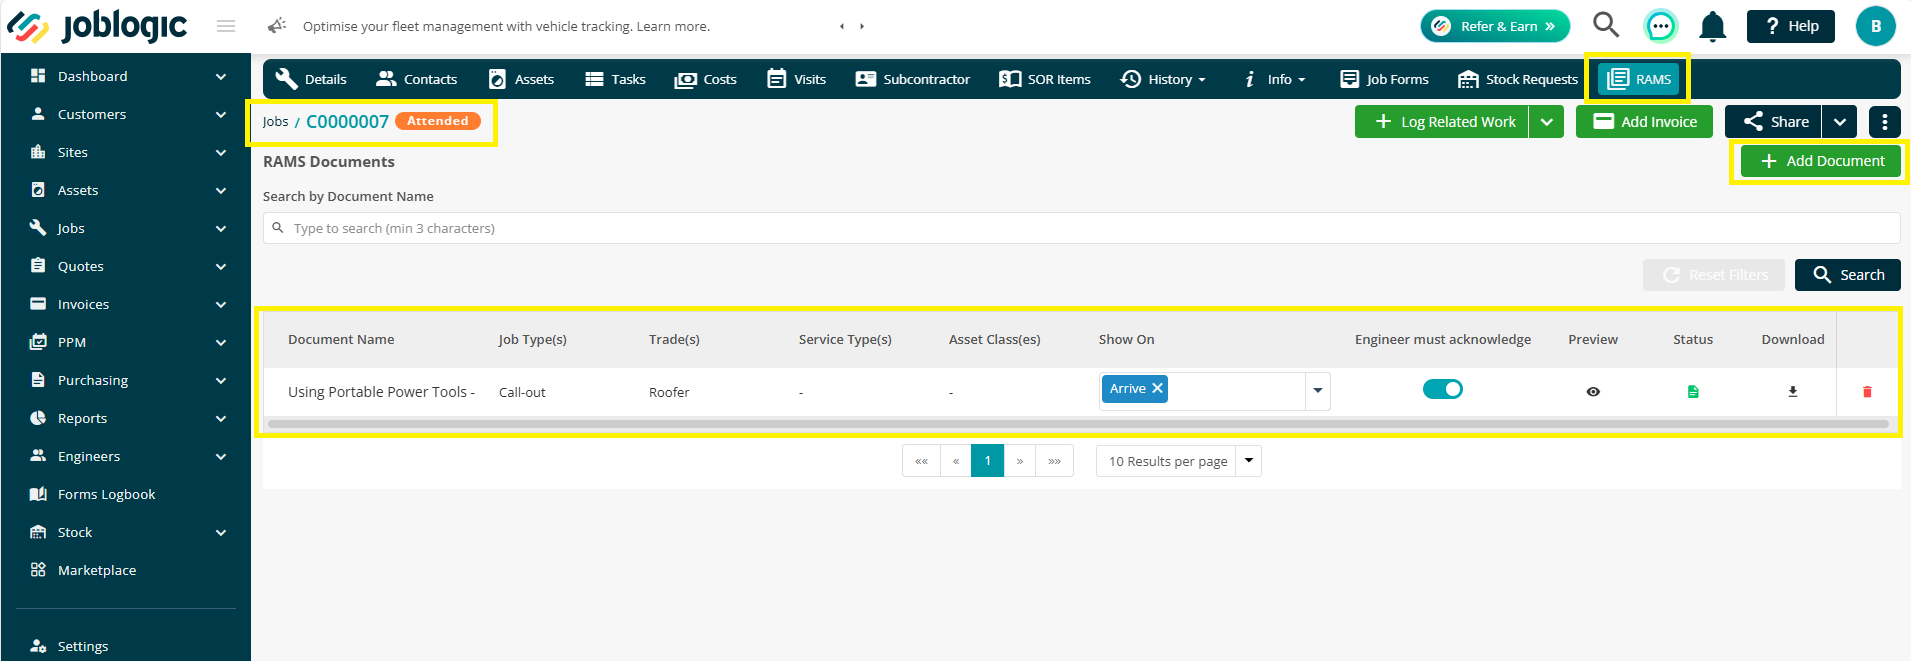
The RAMs module is only present within the JL Web back-office system via a ‘RAMs’ tab present against every job.
Once a RAMs rule has been triggered by the job setup, the RAMs tab will populate as applicable with details of the respective RAMs document.
This tab provides visibility and management of any RAMs documents at job level.
Key elements of this tab include:
-
Document Name – The title of the attached RAMs document
-
Any Job Types, Trades, Service Types and Asset Classes – The rule conditions that caused the RAMs document to apply
-
A ‘Show On’ field, allowing you to customise the presentation point of the document to any applicable mobile users
-
An ‘Engineer Must Acknowledge, meaning that if toggled on, the engineer must acknowledge the RAMS before proceeding past the selected presentation point
-
A ‘Preview’ icon, providing a quick view option to check the document’s contents
-
A ‘Status’ field, informing the back-office user whether the RAMs document has been acknowledged by the mobile user or is still pending
-
A ‘Download’ option, used to download the document for offline use, archiving or viewing
The RAMs document can be removed from the job via the ‘dustbin’ icon and any additional RAMs documents can be manually added at job level using the ‘Add Document’ button. This ‘Add Document’ area follows the same format and function as doing so via the app within the marketplace webpage. See the ‘Creating your own templates’ section of this guide for more details.
Further Support
For further information or assistance with the above, contact our Support Team on 0800 326 5561 or email support@joblogic.com. Alternatively, our Customer Success Management team can be reached by emailing customersuccess@joblogic.com
Publishing Details
This document was written and produced by Joblogic’s Technical Writing team and was last updated on the date stated above. Be aware that the information provided may be subject to change following further updates on the matter becoming available or new releases within the system. Additionally, details within the guide may vary depending on your Joblogic account’s user permissions and settings or the electronic device being used.