Introduction
The Refcom Module allows field engineers to record their Refcom actions, transactions and cylinder data via the mobile application (app). This user guide details how the Refcom module within the Joblogic mobile app can be used.
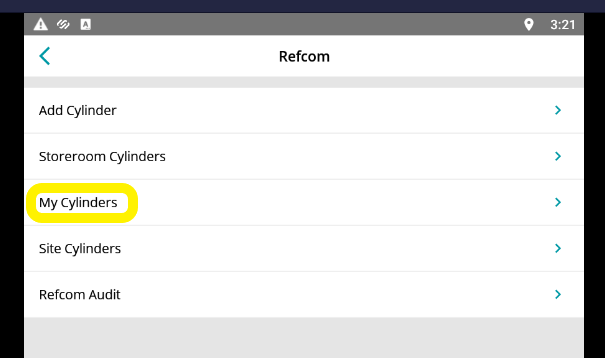
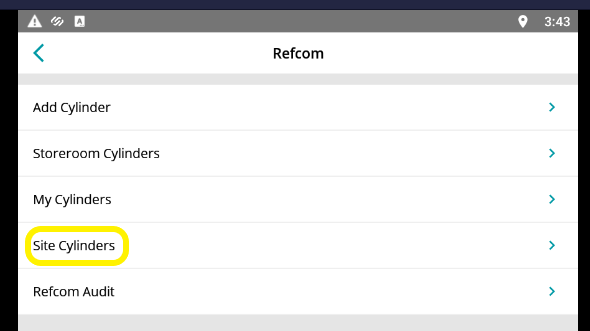
The Refcom Area
Once the Refcom Module is enabled via the back office, a new ‘Refcom’ section will be added to the ‘Menu’ page of the mobile app. See here for a user guide on enabling the Refcom module via the back office.
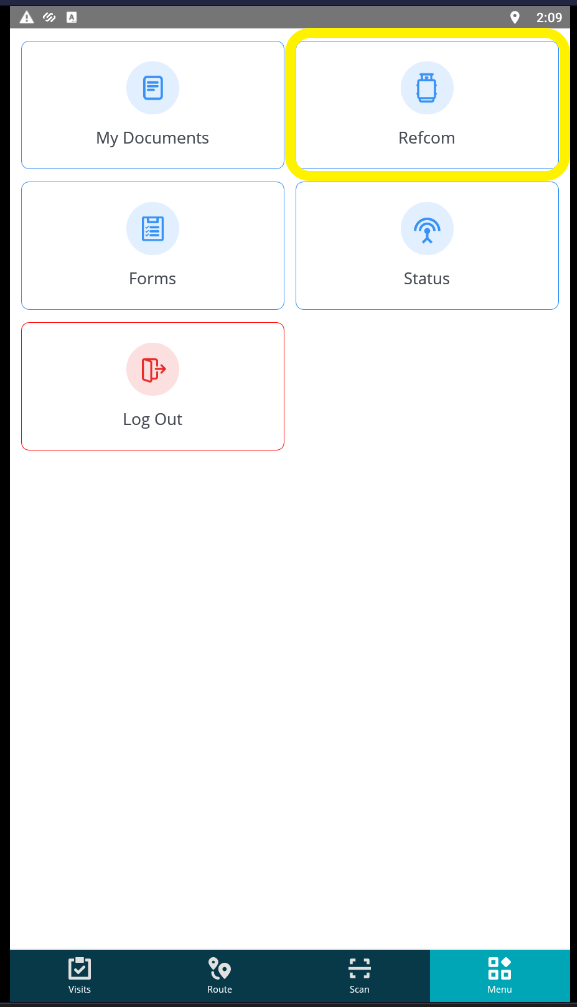
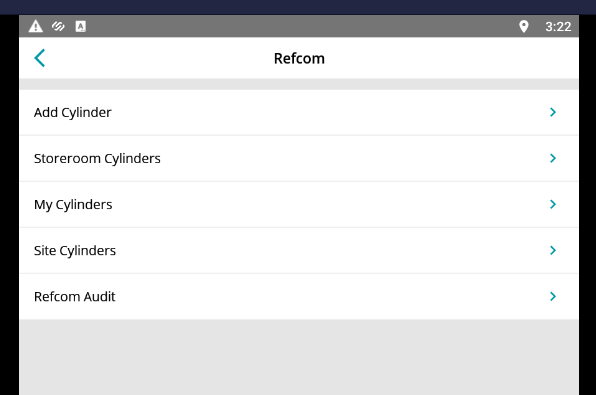
By selecting the Refcom option, the field engineer can
-
Add New cylinders
-
View their cylinders
-
View storeroom cylinders
-
View site cylinders
-
View a fully inclusive Refcom Audit for the dataset
-
Return and transfer cylinders
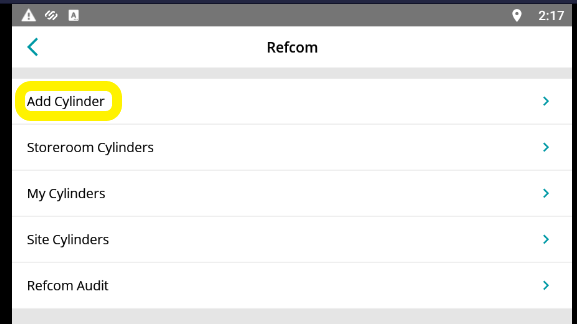
How to add a new Gas Cylinder
In order to add a new gas cylinder, select the ‘Refcom’ section and select ‘Add Cylinder’.
Fill in the cylinder’s details such as the ‘Cylinder Type’, ‘Weight’ (the cylinders maximum capacity) and the cylinders ‘Current Weight’ (the amount of gas currently within the cylinder).
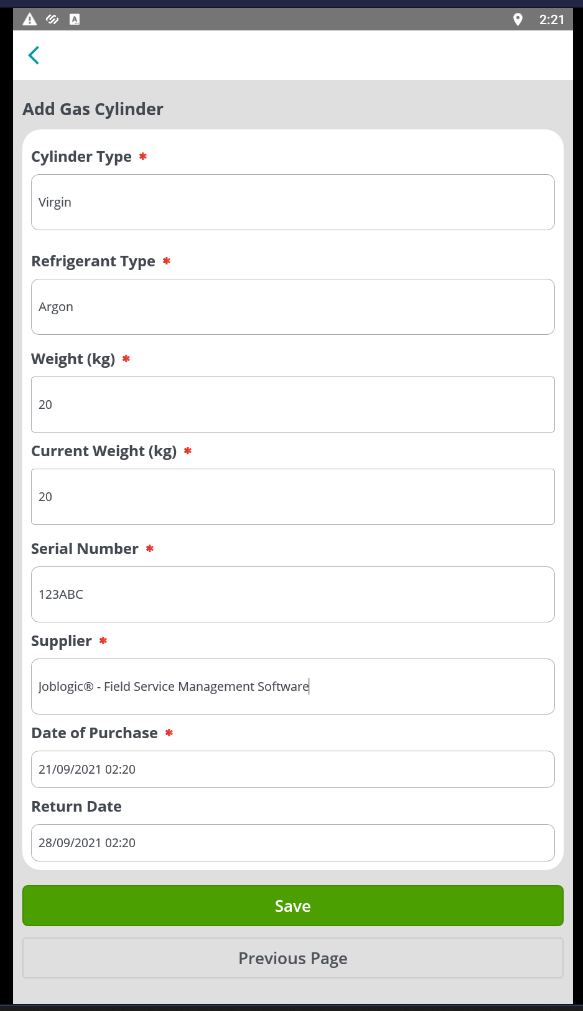
Once the required information is filled in, select the ‘Save’ button to complete the addition of the new cylinder.
The cylinder will now be logged under the ‘My Cylinders’ area and in the back office Refcom module.
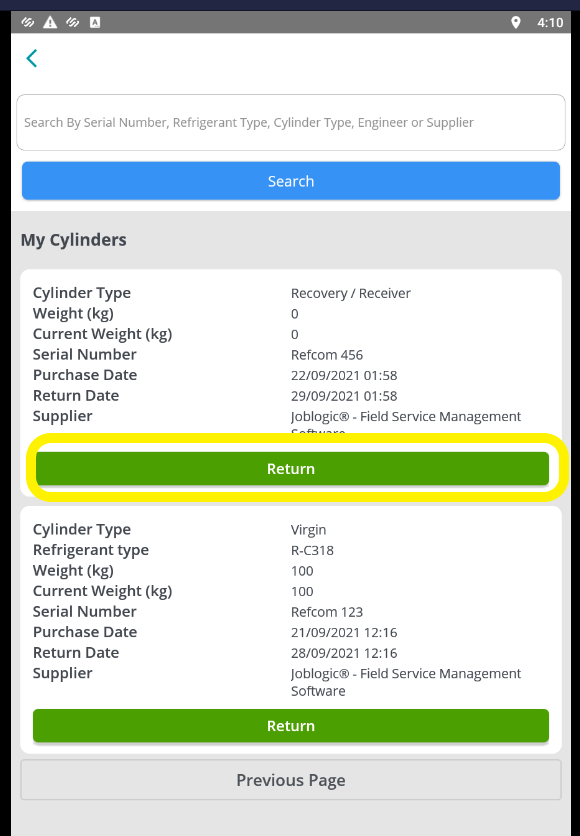
My Cylinders
The ‘My Cylinders’ area provides a record of any cylinders which are currently in possession of the engineer whose mobile app account is being used. In order to access the ‘My Cylinders’ area, select the ‘Refcom’ section and select ‘My Cylinders’.
The search filter towards the top of the page can be used to refine the presented list and identify a particular cylinder(s).
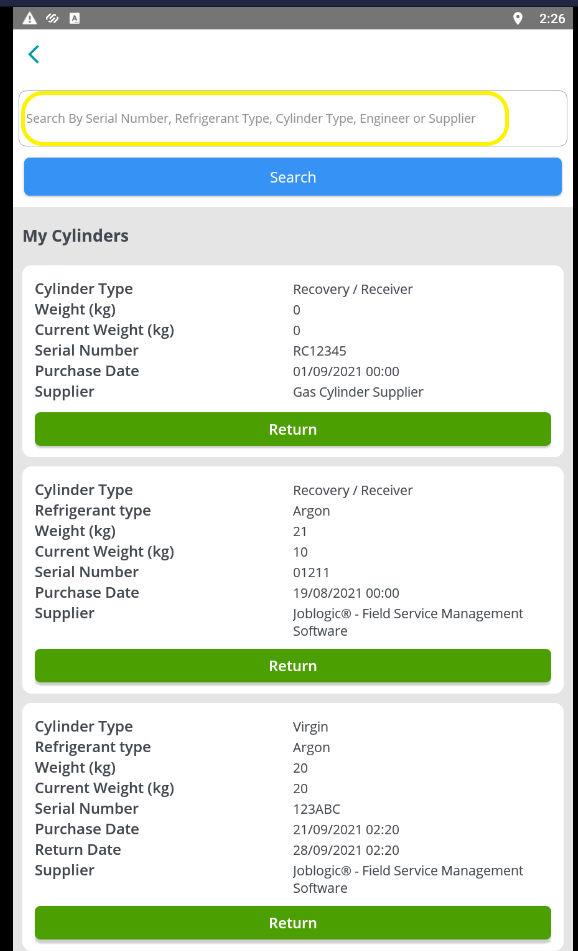
Selecting the ‘Return’ button will allow the user to return the applicable cylinder to the storeroom or supplier, mark that cylinder as in possession of another engineer or as being stored at a customer site.
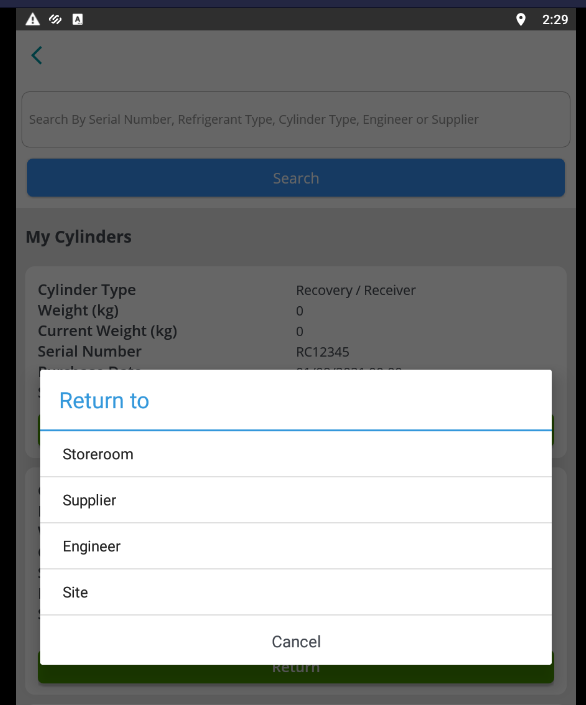
In order to return to the storeroom, select ‘Storeroom’ and the cylinder will become logged there, accessible via the ‘Storeroom Cylinders’ area.
In order to return to the supplier, select ‘Supplier’ and fill in the 'Waste Receiver' field. The engineer returning the cylinder and a waste receiver representative will need to provide their signature.
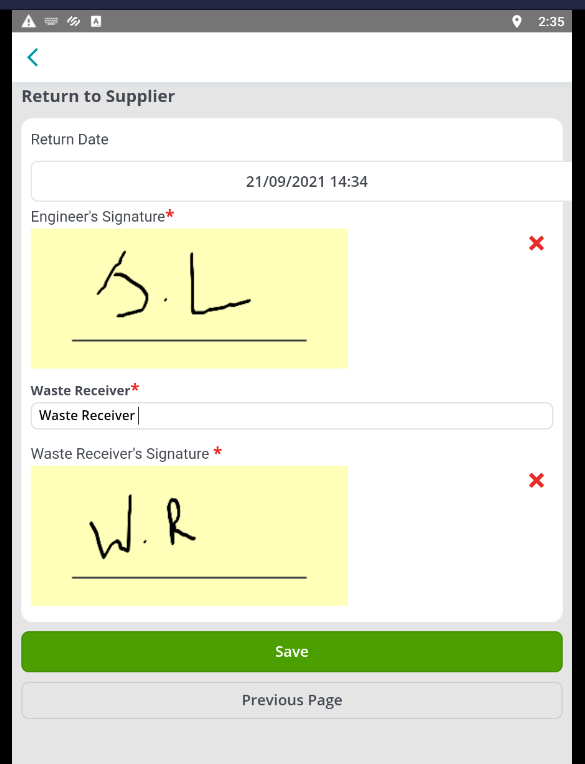
Select ‘Save’ and the cylinder will be logged as returned to the supplier.
In order to mark that cylinder as in possession of another engineer, select ‘Engineer’ and choose the applicable engineer from the dropdown list.
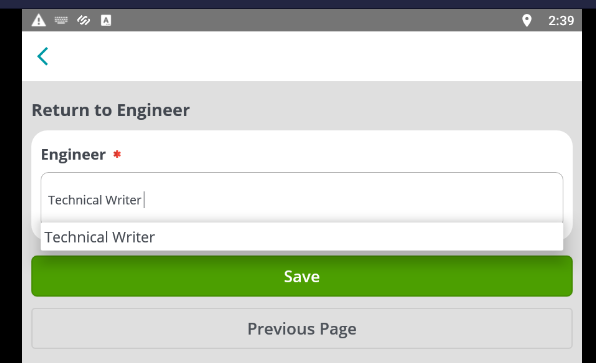
Select ‘Save’ and the cylinder will be logged as in possession of that engineer, under their ‘My Cylinders’ area.
In order to record a cylinder as being stored at a customer site, select ‘Site’ and choose the applicable site from the available list.

Select ‘Save’ and the cylinder will be logged as being stored on that site, accessible via the ‘Site Cylinders’ area.
Storeroom Cylinders
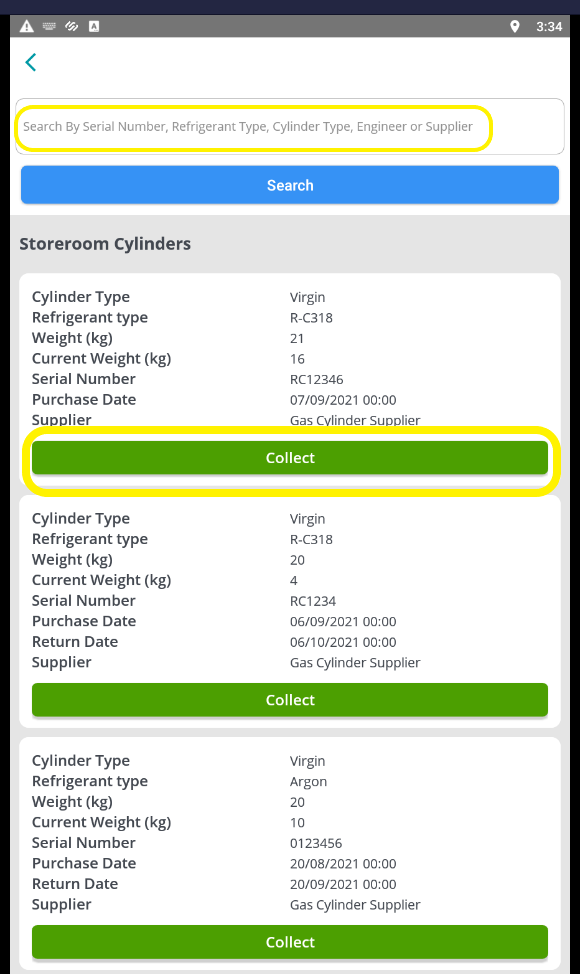
The ‘Storeroom Cylinders’ area presents a list of cylinders which have been recorded as being stored in the storeroom location and allows mobile users to mark them as collected for use.
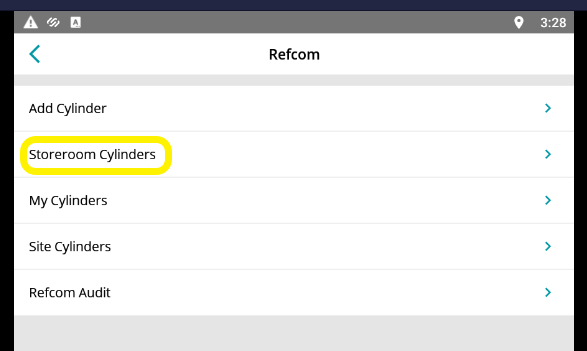
Navigate to the main ‘Menu’ page of the mobile app and select the ‘Refcom’ section.
Upon opening the Refcom page, select the ‘Storeroom Cylinders’ option to view the list of cylinders that are recorded as being stored here.
The search filter towards the top of the page can be used to refine the presented list and identify a particular cylinder(s).
To mark a cylinder as having been collected, select the green ‘Collect’ button and the collected cylinder will be automatically moved to the ‘My Cylinders’ section.
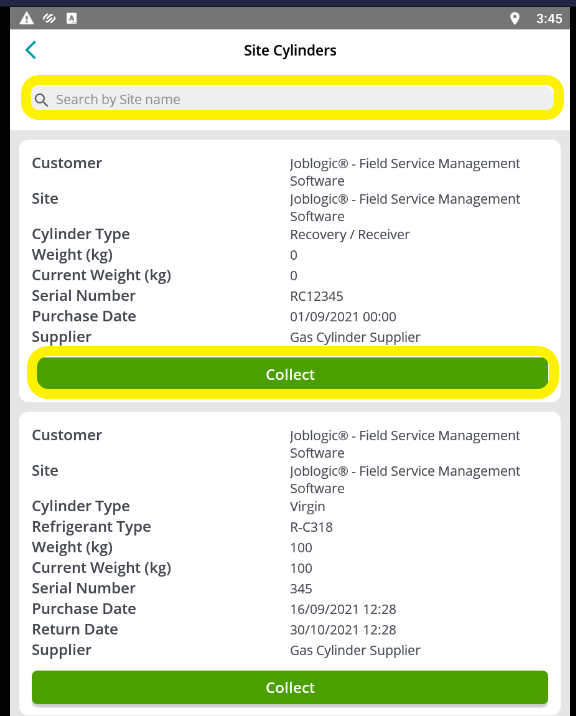
Site Cylinders
The ‘Site Cylinders’ area presents a list of cylinders which have been recorded as being stored at a customer site and allows mobile users to mark them as collected for use.
Navigate to the main ‘Menu’ page of the mobile app and select the ‘Refcom’ section.
Upon opening the Refcom page, select the ‘Site Cylinders’ option to view the list of cylinders that are recorded as being stored here.
The search filter towards the top of the page can be used to refine the presented list and identify a particular cylinder(s).
To mark a cylinder as having been collected, select the green ‘Collect’ button and the collected cylinder will automatically be moved to the ‘My Cylinders’ section.
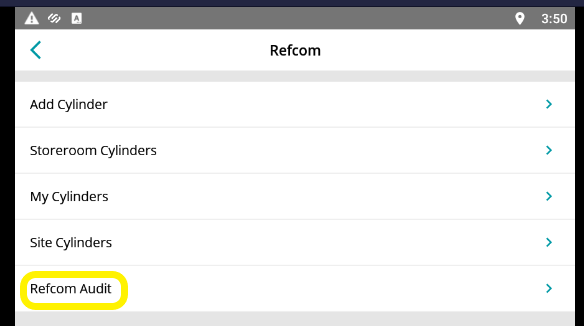
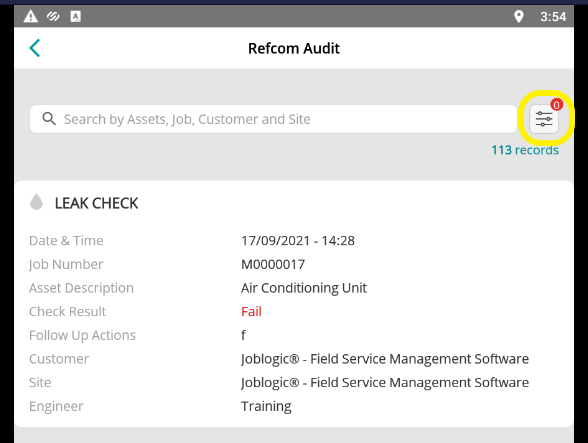
Refcom Audit
The Refcom audit area presents the engineer with the dataset's overall Refcom audit, showing the actions and transactions made by themselves in addition to those made by other engineers and colleagues. It can be accessed by navigating to the main ‘Menu’ page of the mobile app and selecting the ‘Refcom’ section.
Upon opening the Refcom page, select the ‘Refcom Audit’ option.
The presented details can be filtered and refined by job, site, asset and customer via the quick search tool towards the top of the page.
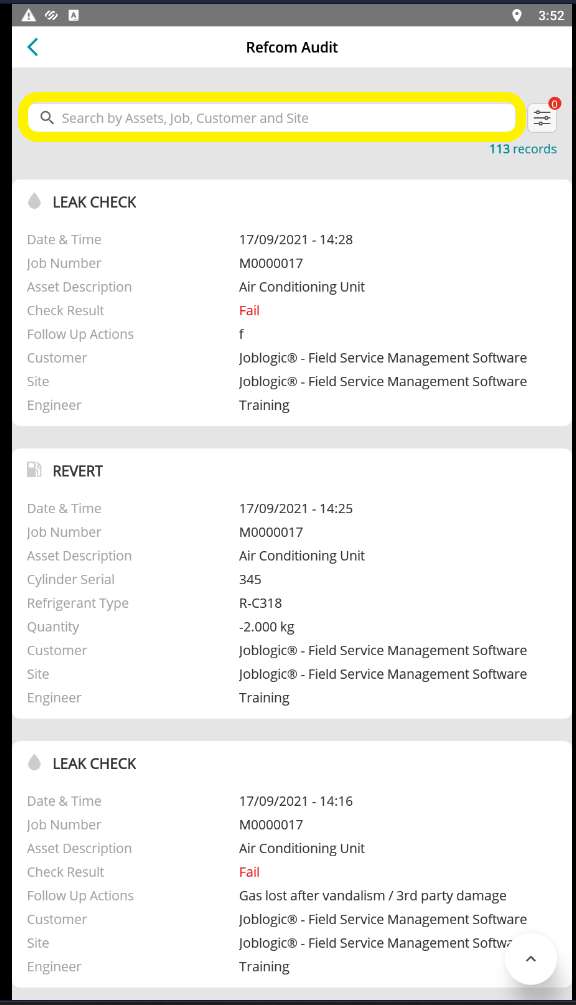
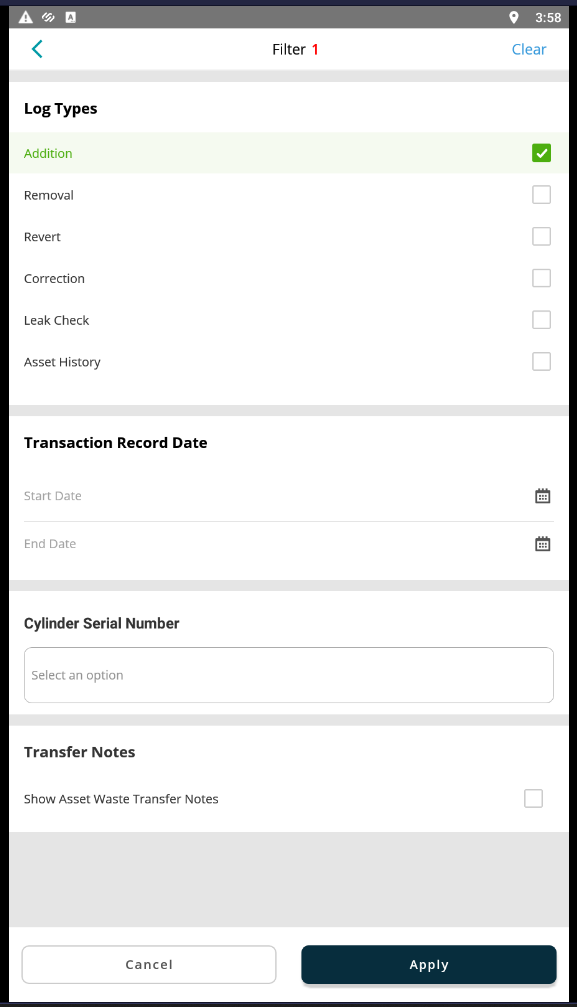
Additionally, the advanced search tool can also be used in order to locate specific actions and transactions. For example, to only view any ‘addition’ transactions made.
Assets, actions and F-gas transactions
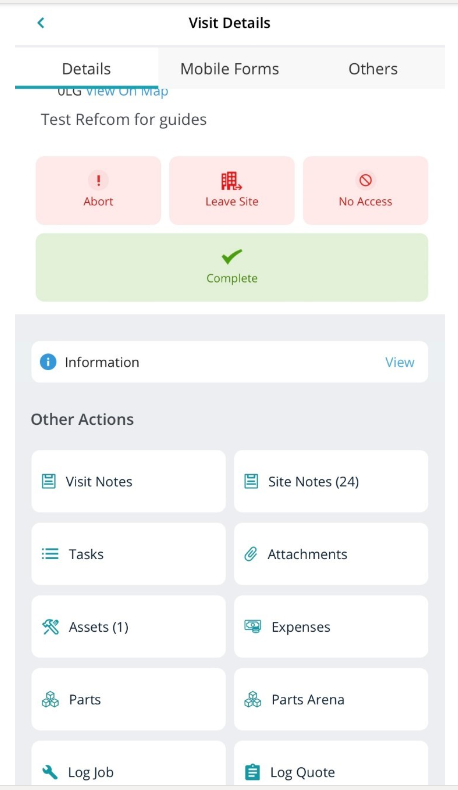
The following functions require the mobile user to be marked as onsite for the applicable visit. To do this, select the relevant visit from the Visits screen and choose Accept > Travel > Onsite statuses and you will then be presented with the visit’s onsite actions page.
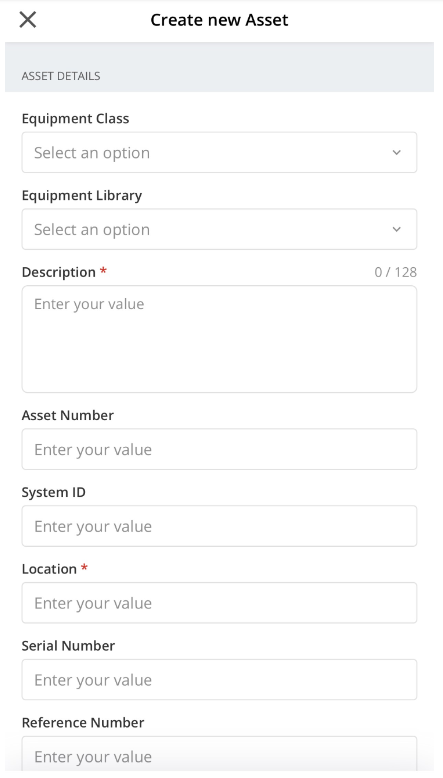
Creating New Assets with or without refrigerant.
-
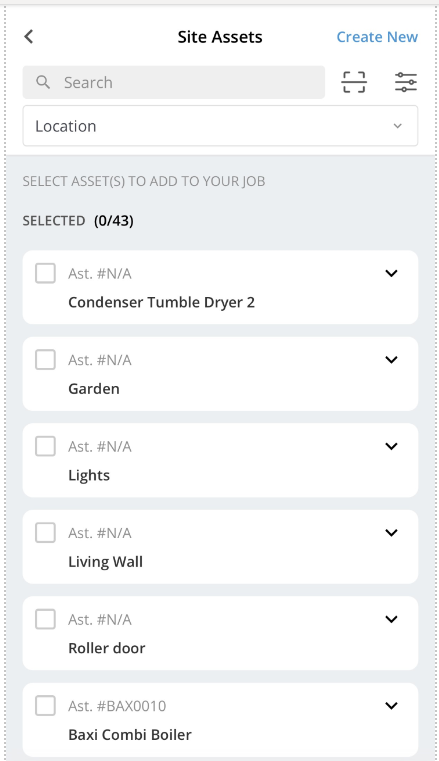
Select the Assets option
-
Select Site Assets option
-
Select Create New option
Fill in the asset’s details and use the slider option to add refrigerant details if required.
The refrigerant option allows you to add
-
The Base charge
-
The Trim Charge
-
Gas Type ( you can search for a particular Gas type by typing the first letters or digits of its name in the dropdown field)
How to record a Refcom action on an asset
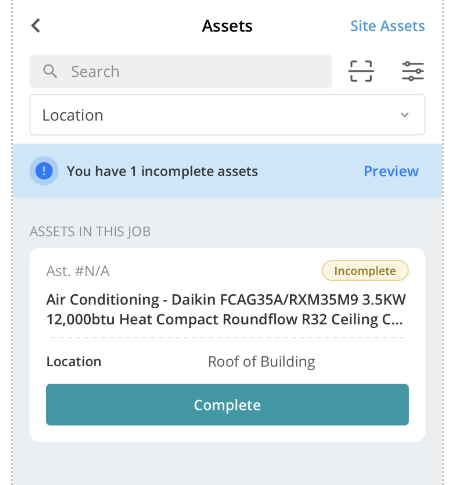
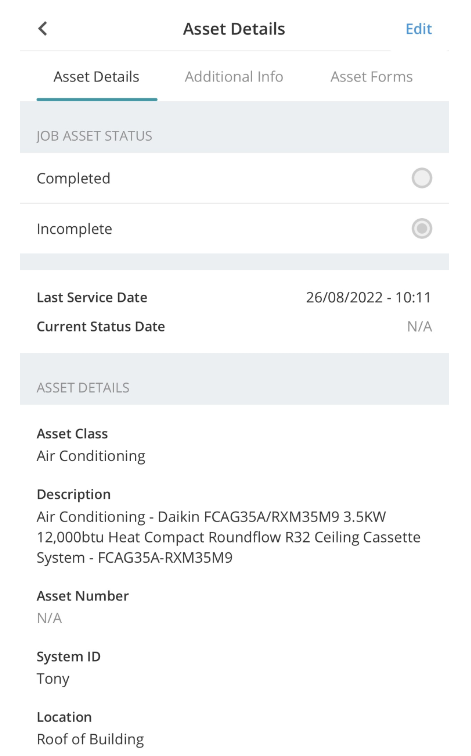
From the visits onsite details page, select the Assets tab to view a list of Assets associated with the job you are on, and select the asset you wish to work on.
Then select the Additional Info Tab > and then the Refcom Tab – (here you will be presented with the Total Charge and the Gas type).
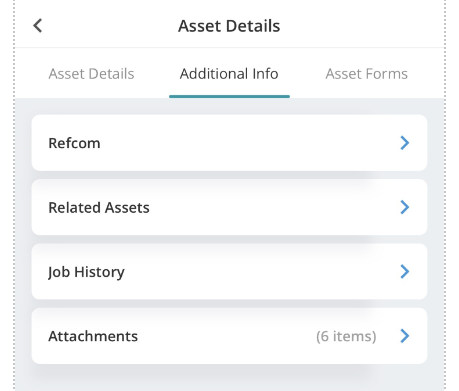
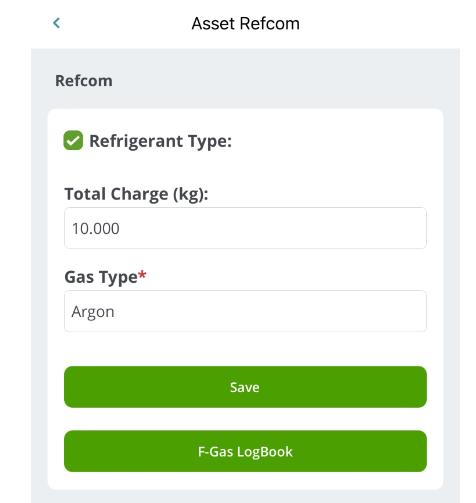
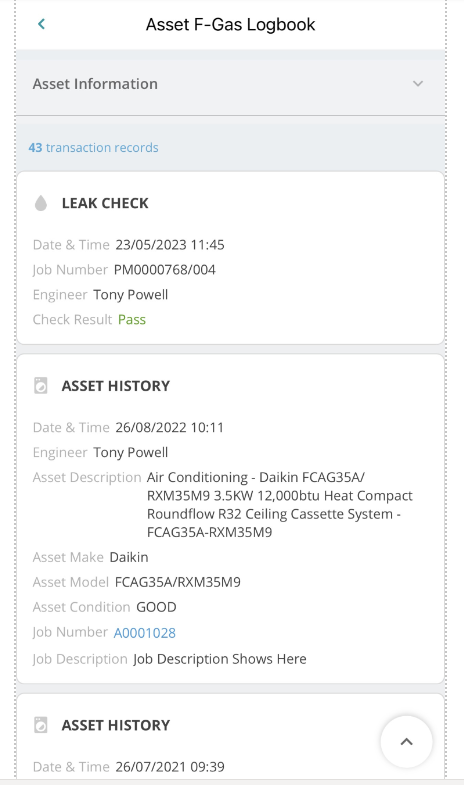
Then select the F-Gas Logbook Tab – (here you will be presented with a list of transactions that have already been done in the past on this asset).
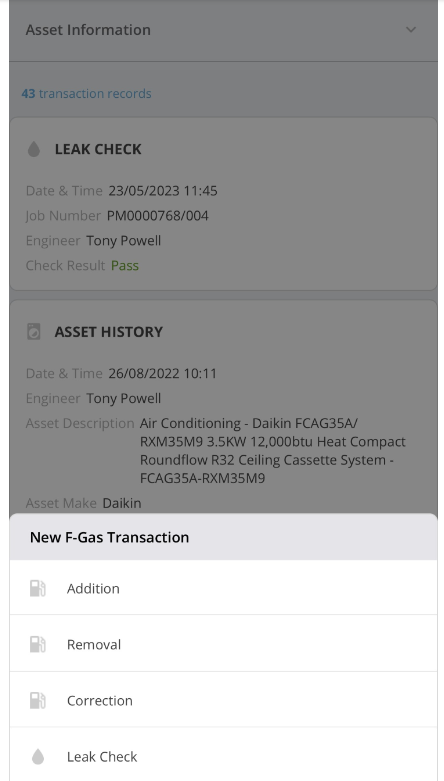
Select the Blue + symbol to add a new transaction.
Now you can record one of the following:
-
Addition
-
Removal
-
Correction
-
Leak Check
The Addition, Removal and Correction options, allows you to record which Gas Cylinder (you need to have a relevant cylinder in your My Cylinders Section, as shown previously)
-
Quantity used
-
Transaction Date
-
Reason why – (note that there are set reasons you can choose from or you can choose other and add your own reason in).
The Leak Check option, allows you to record
-
The date and time of the leak check
-
Pass or Fail
-
Add any follow up actions
Further Support
For further information or assistance with the above, contact our Support Team on 0800 326 5561 or email support@joblogic.com. Alternatively, our Customer Success Management team can be reached by emailing customersuccess@joblogic.com
## Publishing Details
##
This document was written and produced by Joblogic’s Technical Writing team and was last updated on the date specified above. Be aware that the information provided may be subject to change following further updates on the matter becoming available. Additionally, details within the guide may vary depending on your Joblogic account’s user permissions and whether you are using the mobile app via an Android or IOS device.