Introduction
Within the Joblogic system, there is an option to link assets to each other which is called “Related Assets”. This feature is handy when there is one main asset and a secondary asset(s), and a relation is required between these two.
For example, you may have an indoor air conditioner and an outdoor unit. With Joblogic, the indoor air conditioner can easily be linked to its outdoor unit through the related assets feature, making it simple to keep track and report on.
It is worth mentioning that both the master/main and the child/linked assets will appear as two individual assets in the system but will have a connection with each other that will help in differentiating.
Permissions
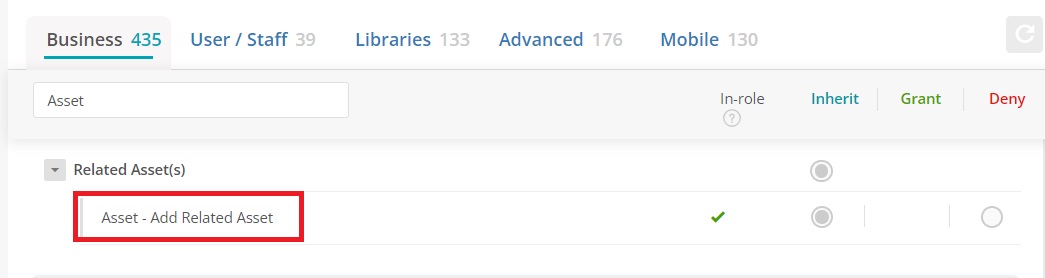
There is a permission available to restrict users from adding related assets. For this, navigate to Settings > Staff > click staff name.
Under the Business tab search for Related Asset to find the relevant permission.
Click edit and amend if needed, before clicking Save.
How To Add A Related Asset/Link An Asset
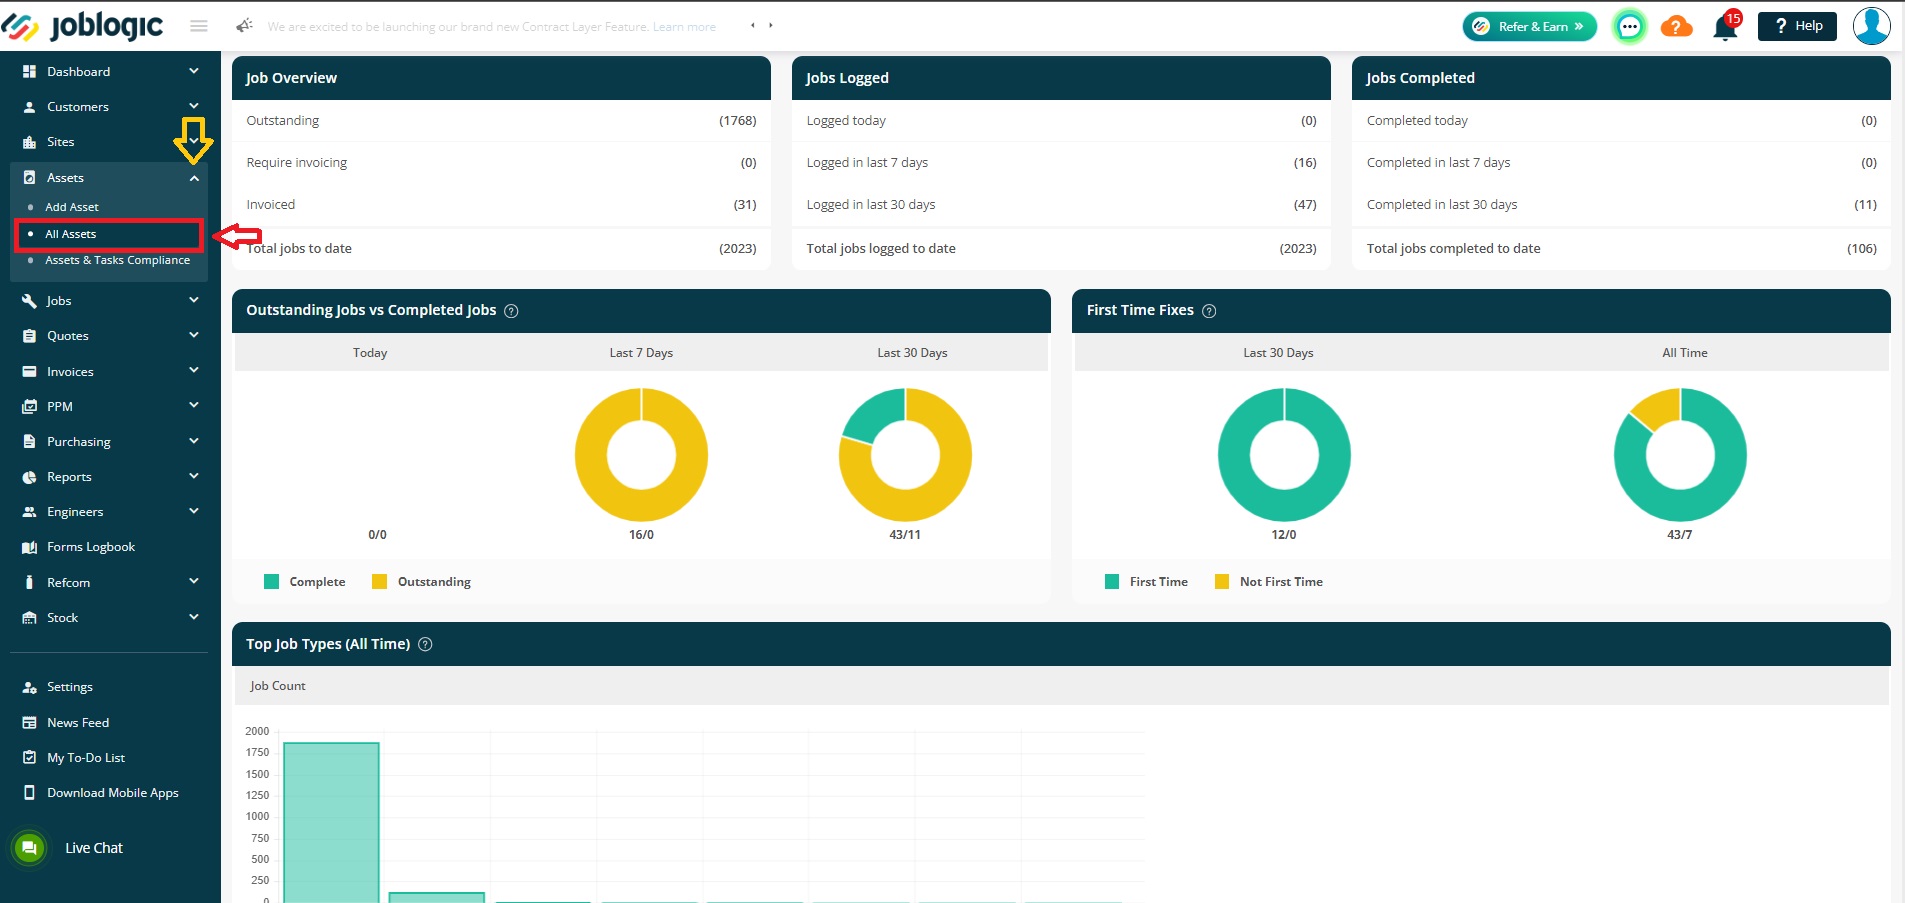
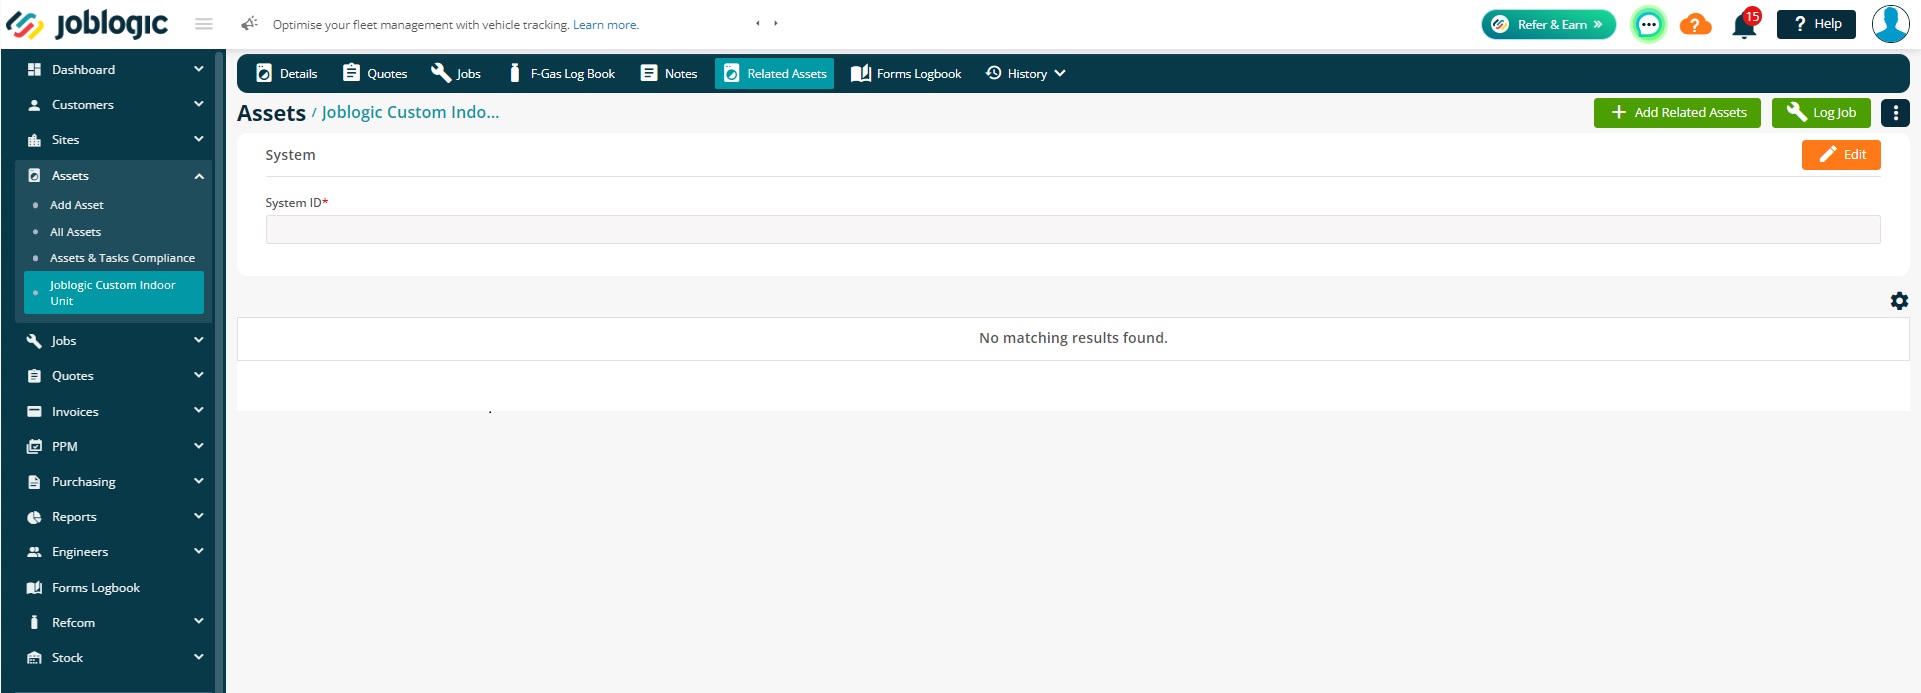
Firstly, navigate to Assets > All Assets
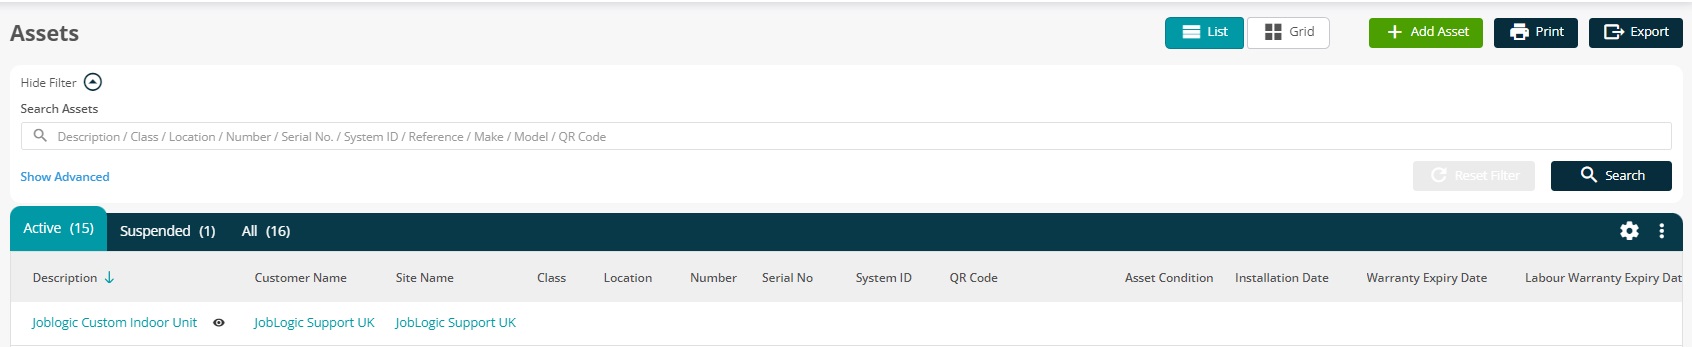
Next, select your Asset by clicking on the relevant Asset Description.
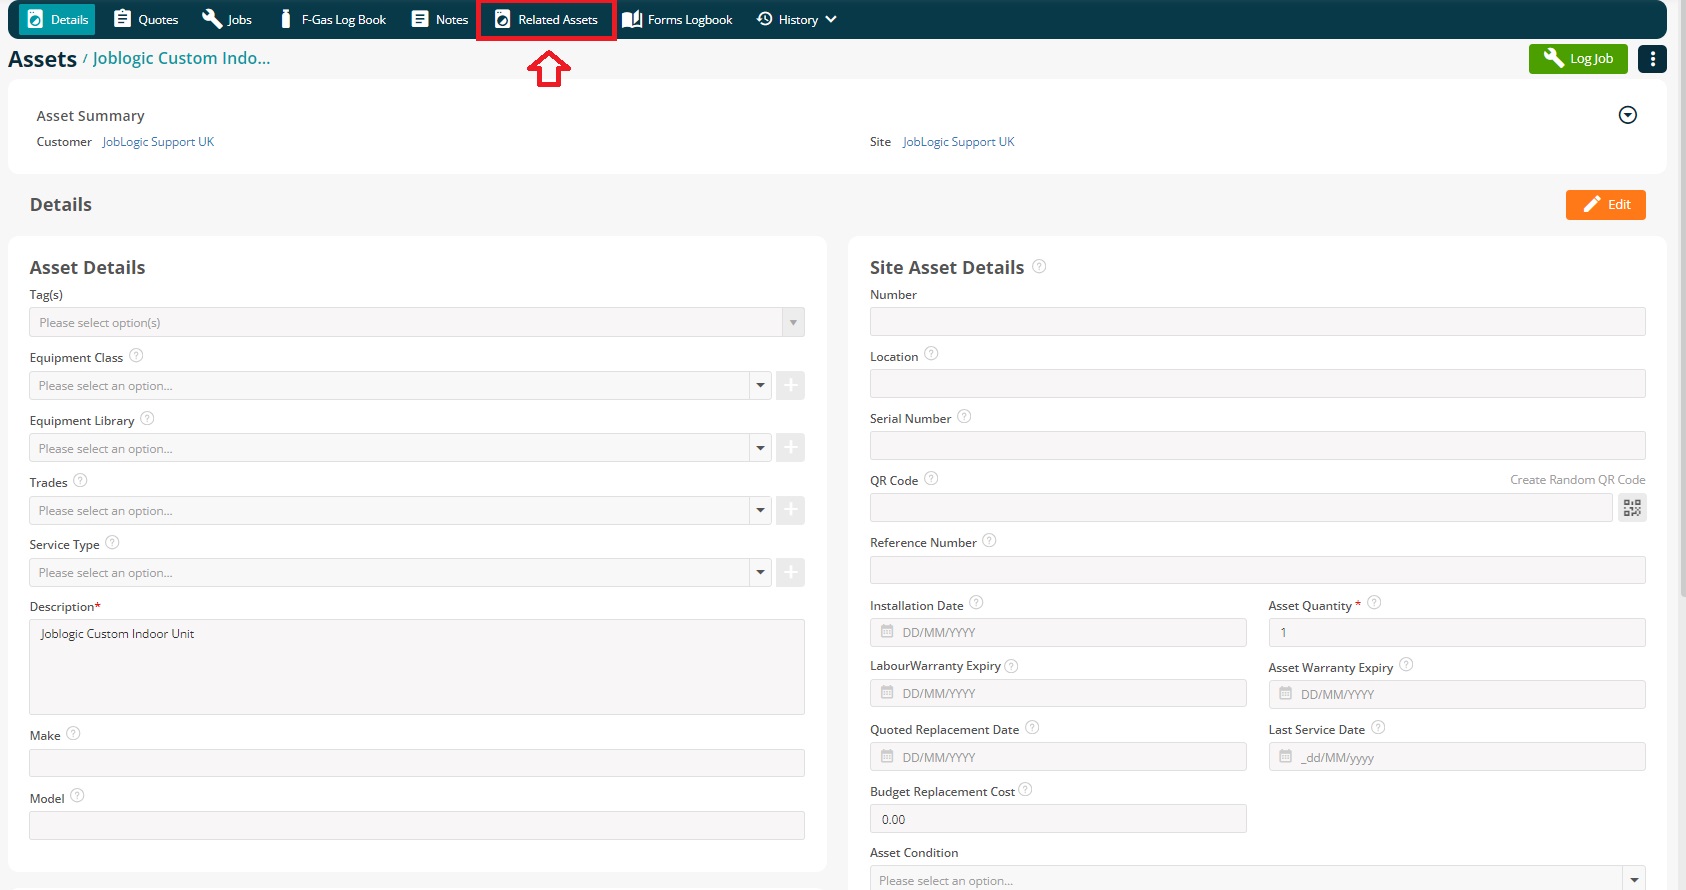
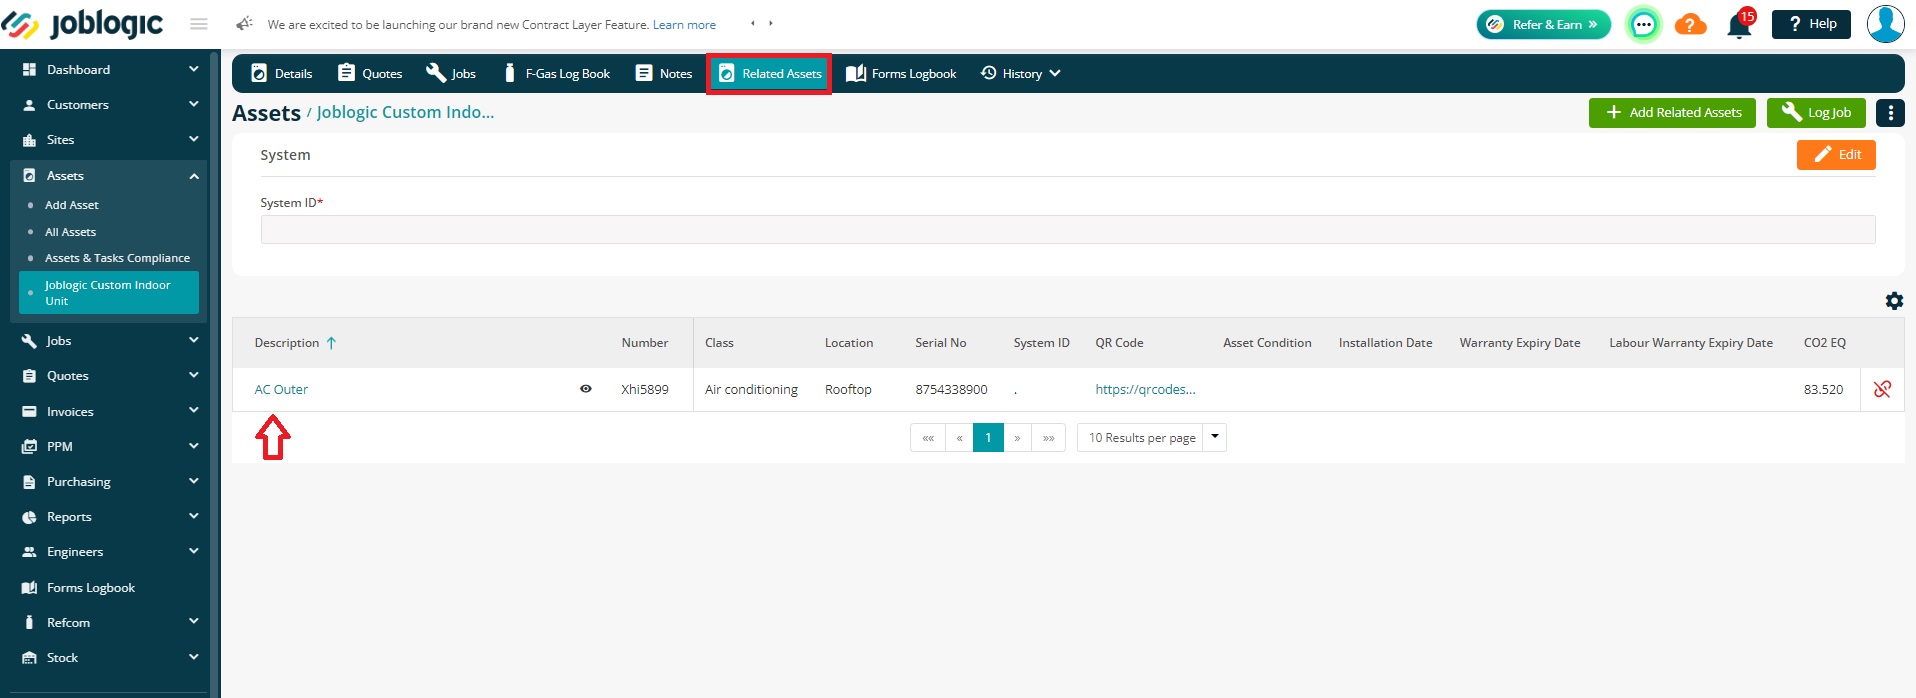
Navigate to the “Related Assets” tab so a related asset can be added.
Click the “+ Add Related Assets” button in the top right. You will then see a list of all current assets in your Asset Library.
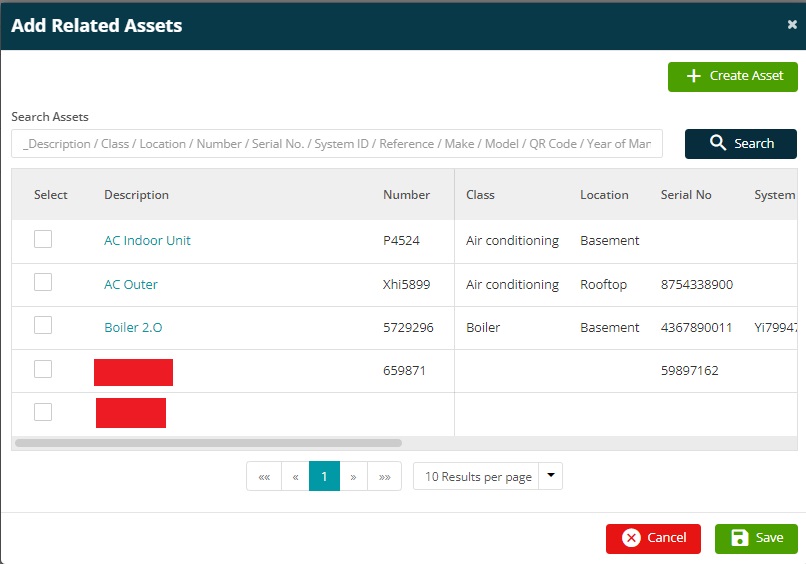
While showing the available assets, it also shows the relevant information of those assets like “Number”, “Location”, etc. By moving the scroller to the right, further information of the assets can be viewed.

You may have a large number of assets set up here, so you can utilise the Search Assets box at the top to filter down your results and find the specific asset you’d like to link.
There are plenty of options to search for the asset like “Description”, “Location”, “Serial No.”, and more.

Alternatively, you can add an entirely new asset on this screen too, and then link this one.
To create a new asset, click the “+ Create Asset” button.
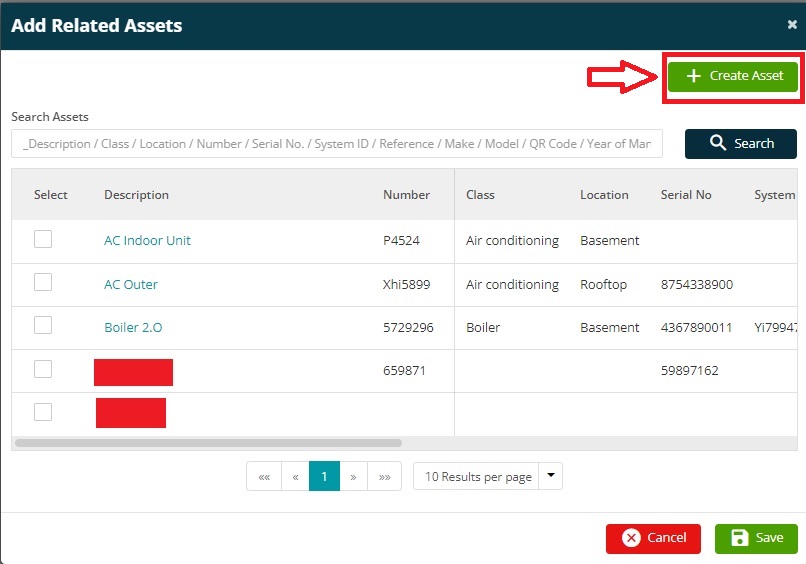

There is a separate guide covering all the sections on how a new asset is created, that can be accessed by clicking here.
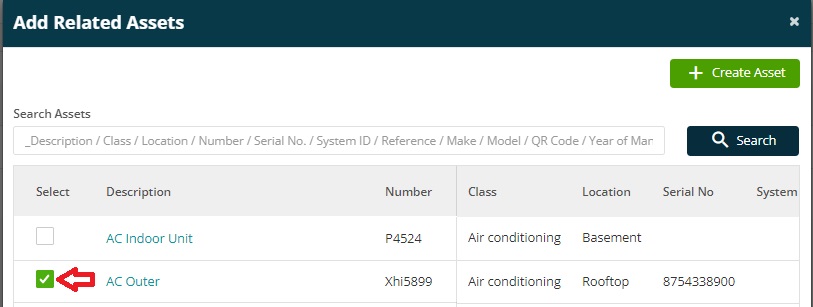
Tick the relevant asset(s) you’d like to link and then click Save.
Multiple assets can be selected/ticked during the linking process.
Once saved, you’ll land back on the Related Assets page, and your linked assets will now be visible in the table, with all relevant asset information.
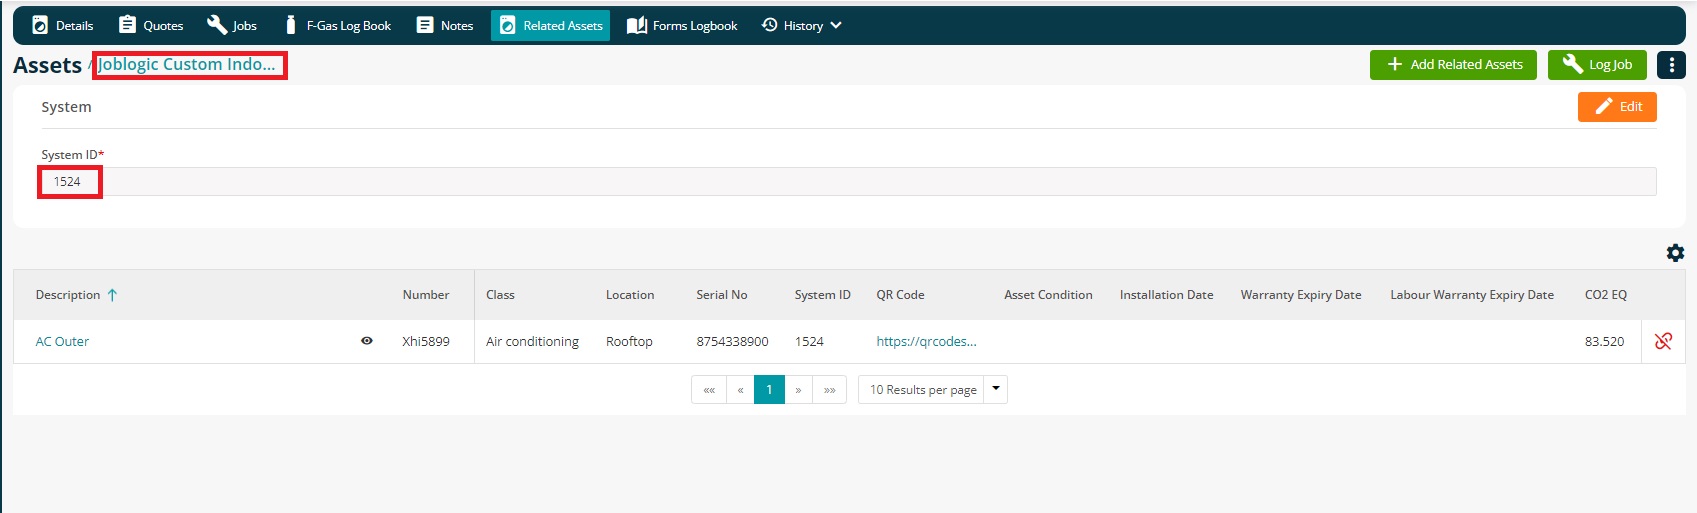
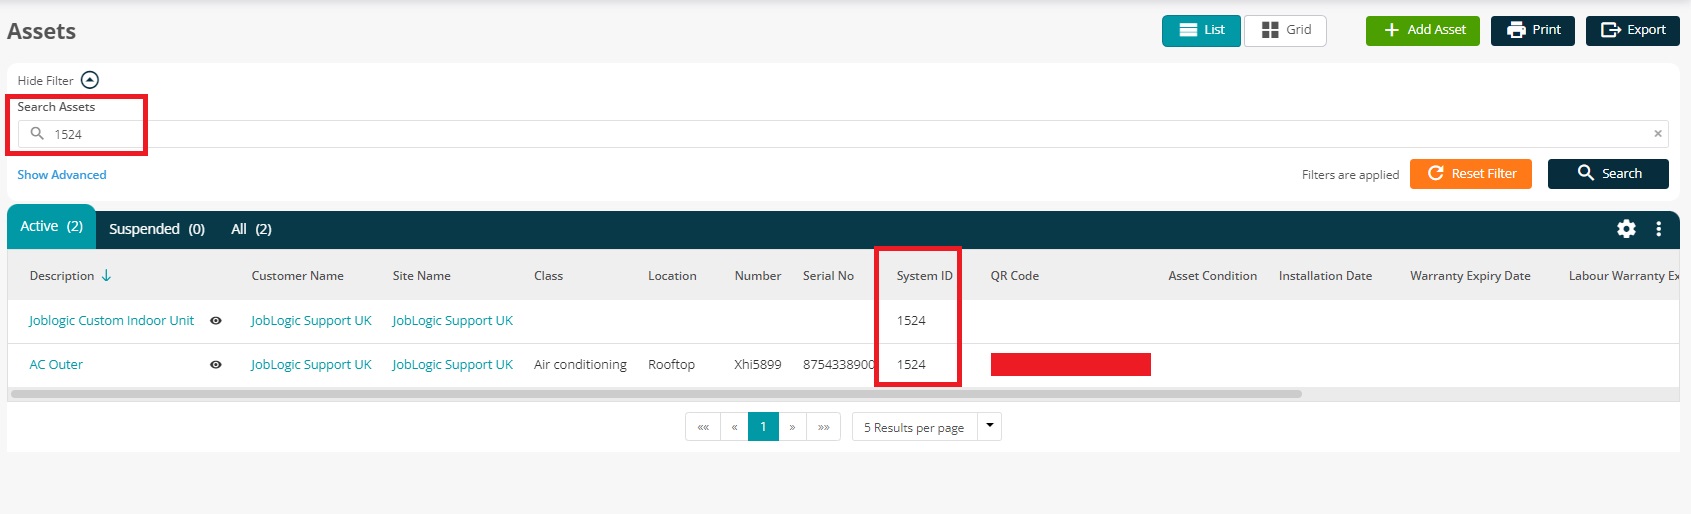
There is a field at the top of the Related Assets page called “System ID”.
It acts as a unique ID for the master and related assets, to link them together for your reporting.

So, if you need to search both the master and related assets altogether, the system ID can be used in the “All Assets” screen filters.
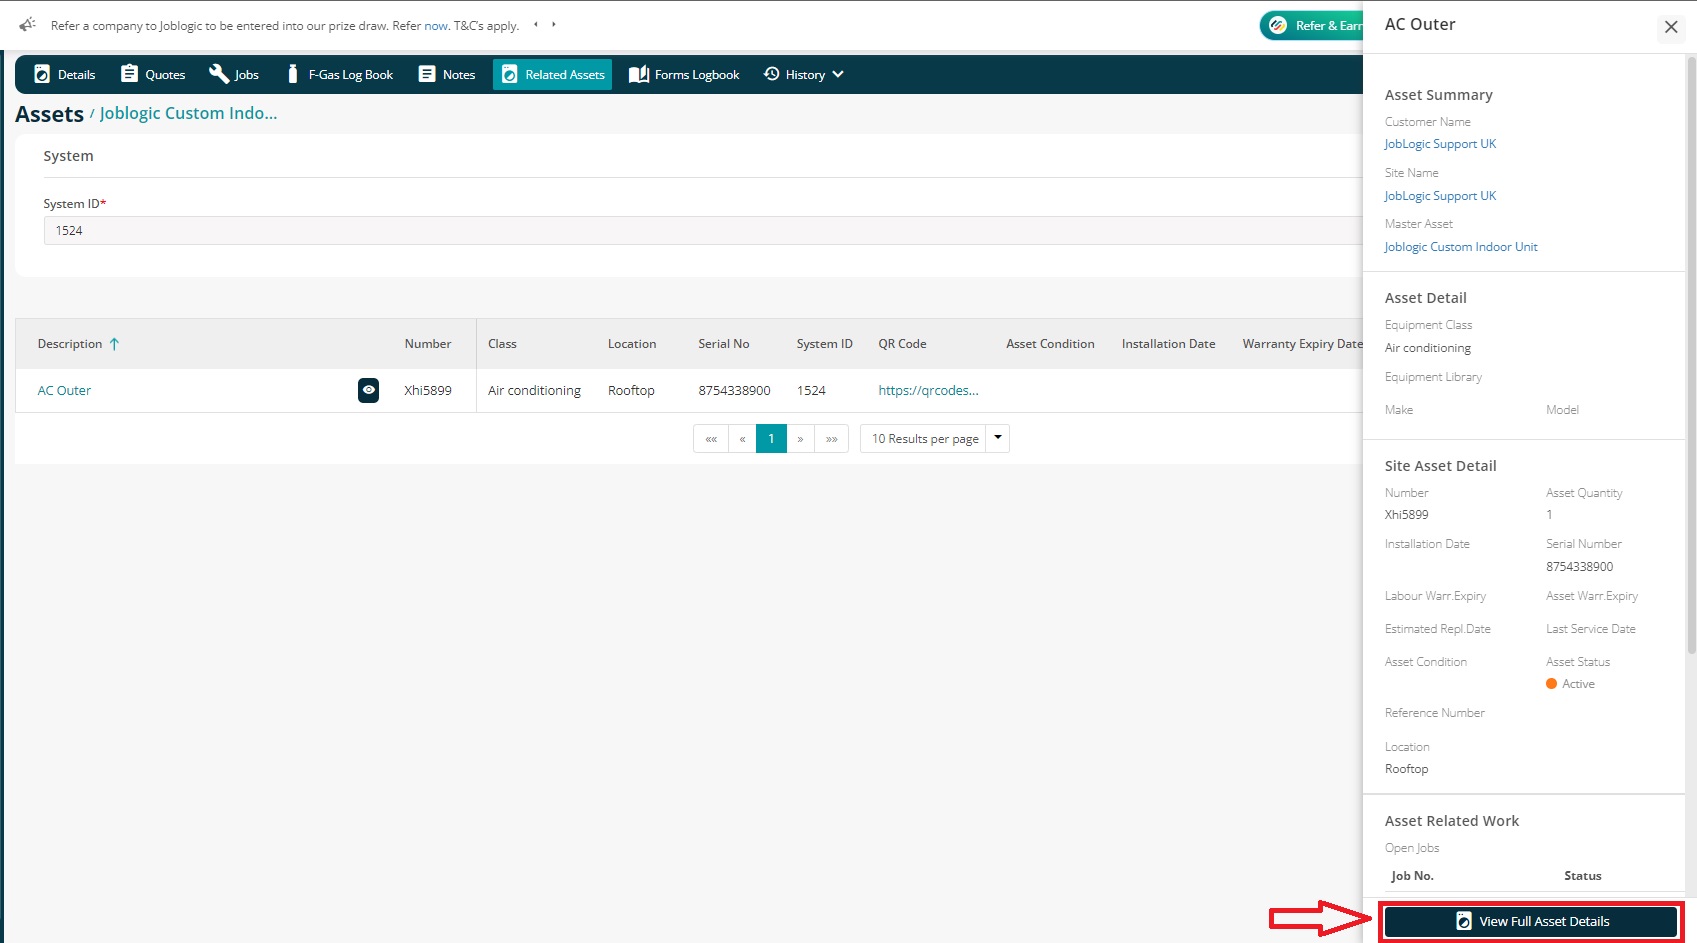
There is an eye icon on the right side of the description of the related asset that once clicked, populates a box on the right-hand side of the screen showing a quick view of some key details of that asset.
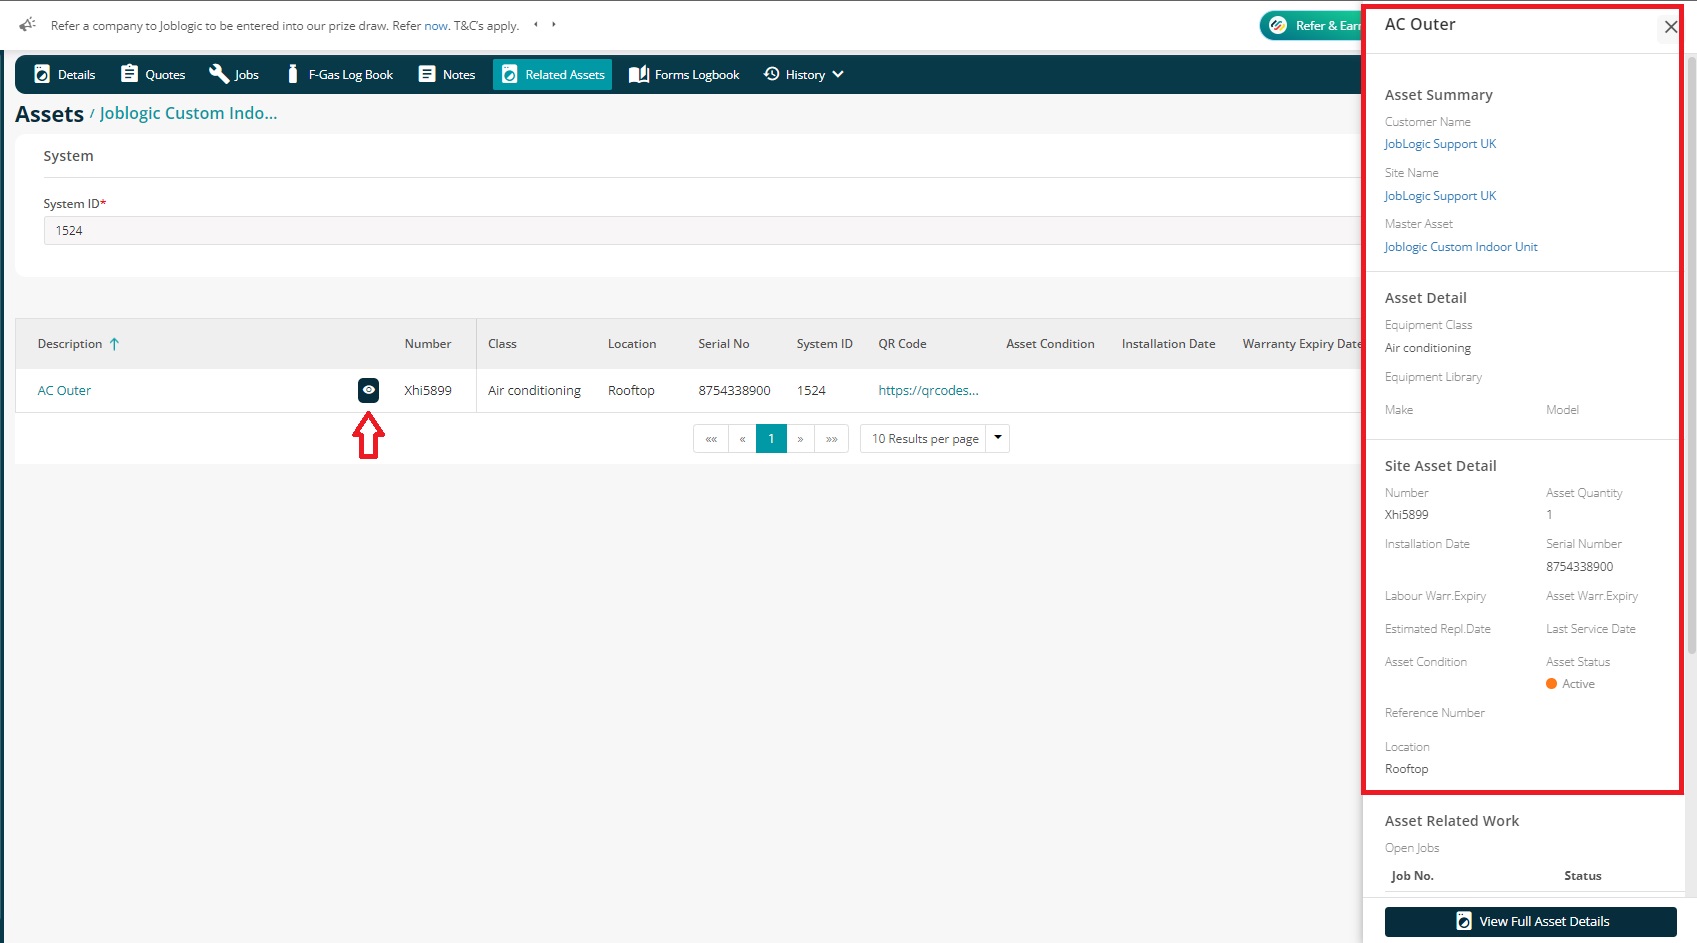
Full details of that related asset can be pulled by hitting “View Full Asset Details” button at the bottom of that box.
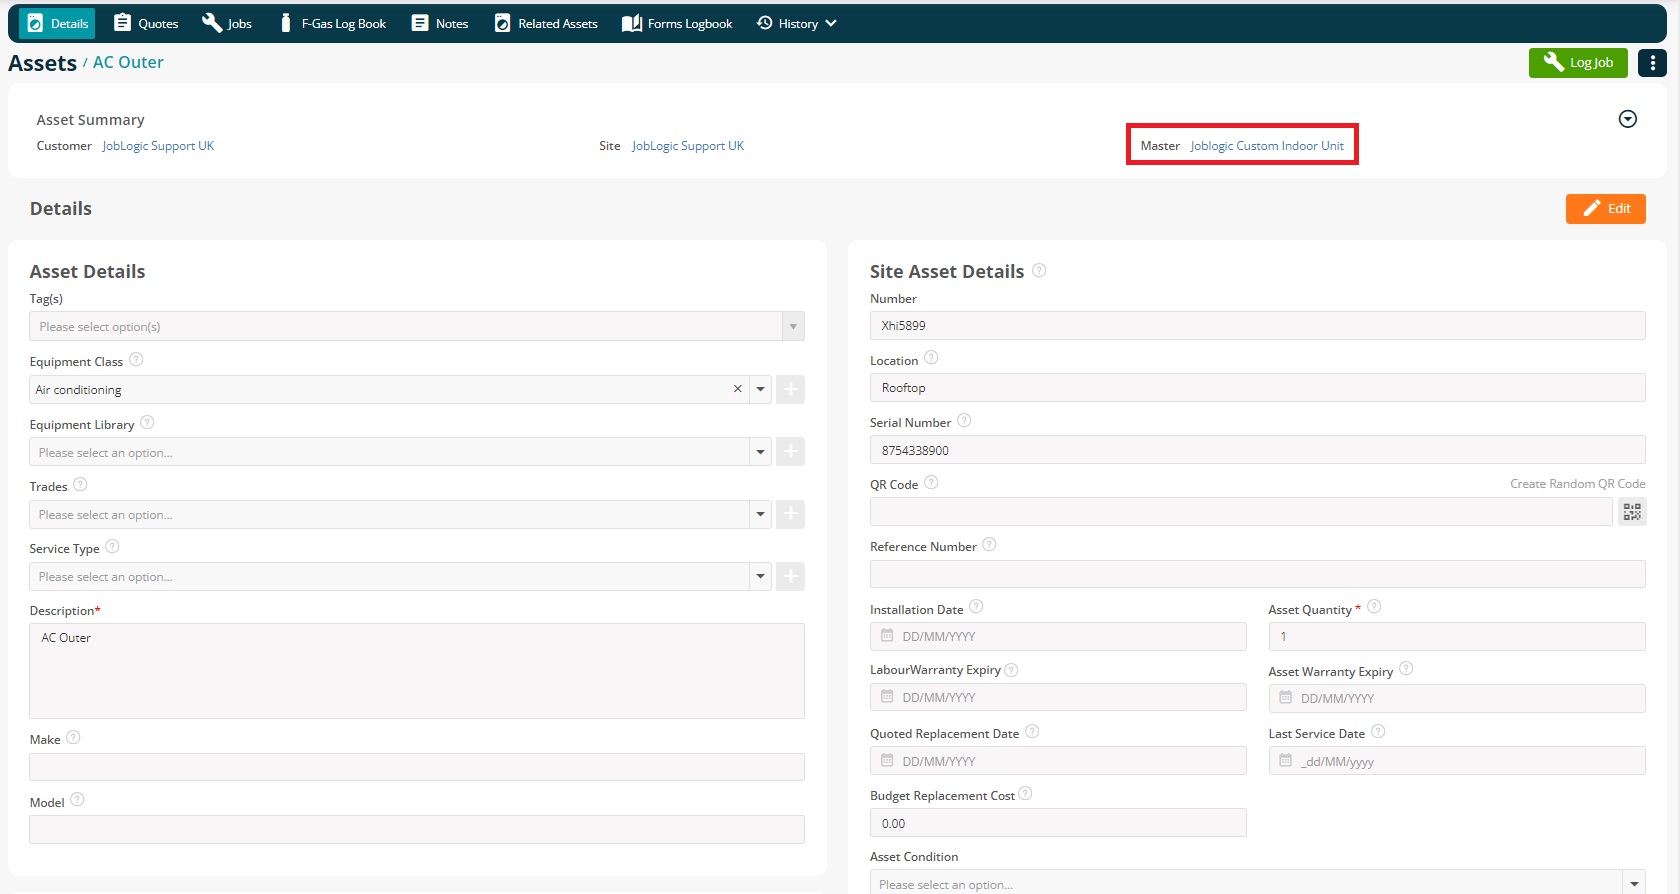
If you click on “View Full Asset Details” button, the related/linked asset is opened. That asset also shows the “Master” asset on the main screen.
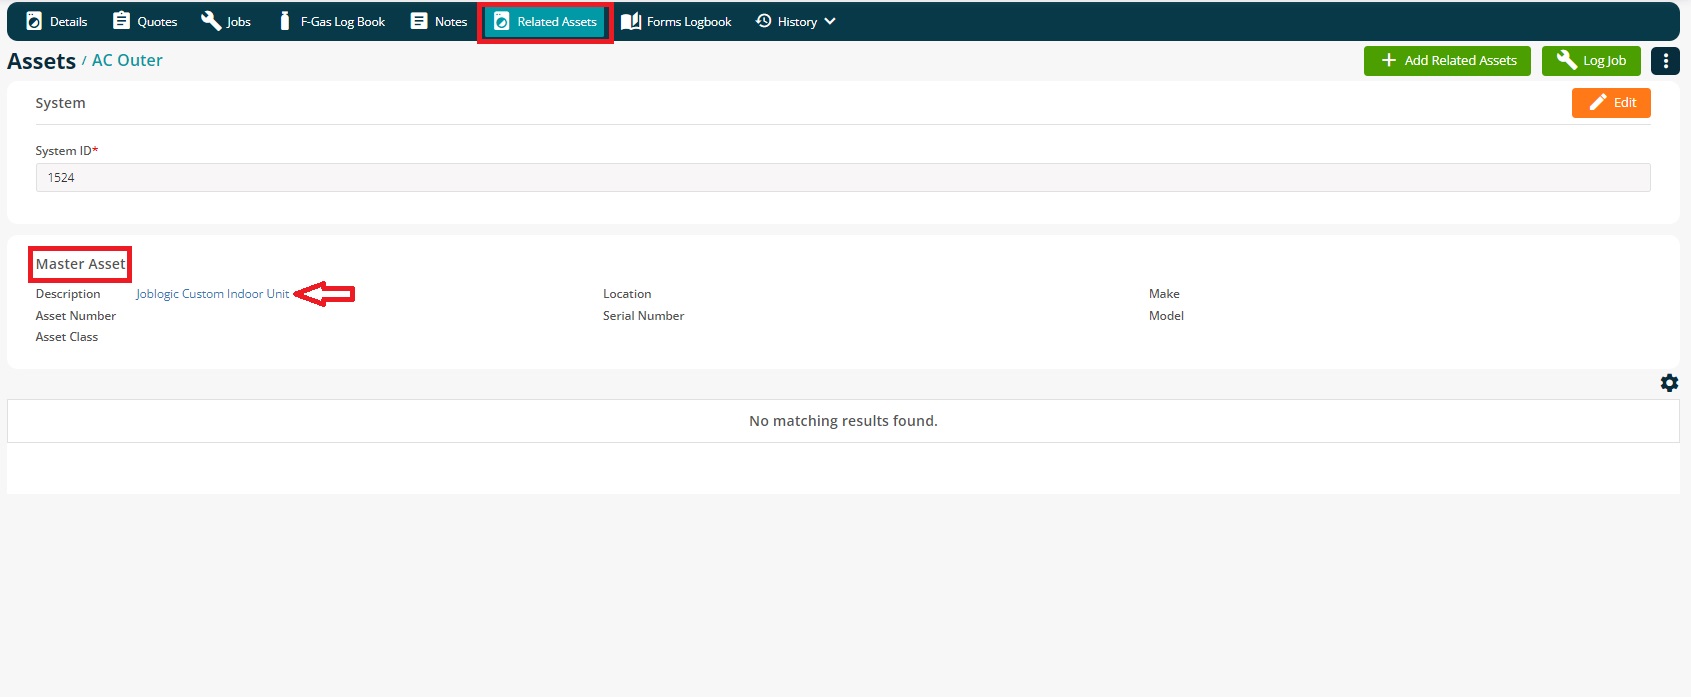
If you navigate to the “Related Assets” section of the linked/child asset, it will show the master asset it is linked to.
Clicking on the “Description” of the master asset will open the master asset’s details screen in a new tab.
How To Remove/Unlink A Related Asset
If it comes to a point where unlinking the related asset is required, it can be achieved by clicking the “Unrelate Asset” button.
Navigate back to Assets > All Assets > click the relevant Asset Description > Related Assets tab
Click the red unlink icon on the right.
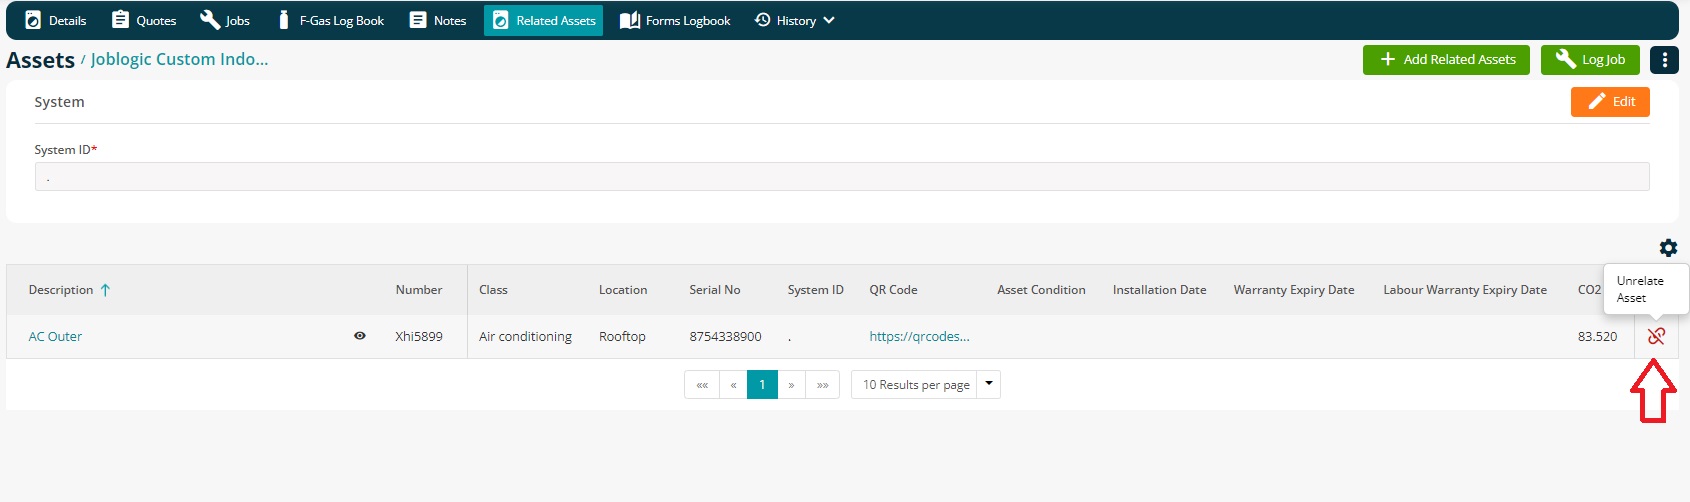
It will give you a prompt to confirm you are sure you want to unrelate the selected asset from the master asset.

Once you click “Confirm”, it will simply unlink the asset and will remove it from the “Related Assets” section.
Further Support
For further information or assistance on the above, contact our Support Team on 0800 326 5561 or email support@joblogic.com. Alternatively, our Customer Success Management team can be reached by emailing customersuccess@joblogic.com.
Publishing Details
This document was written and produced by Joblogic’s Technical Writing team and was last updated on the date specified above. Be aware that the information provided may be subject to change following further updates on the matter becoming available. Additionally, details within the guide may vary depending on your Joblogic account’s user permissions.