Introduction
The Sage 50 integration allows you to sync financial data between Joblogic and Sage 50, helping to keep your records up to date across both systems.
This user guide explains how to connect Sage 50 to Joblogic and configure your sync options, including which data to import or export and how often to run the sync.
Connecting to Sage 50 in Joblogic
Before connecting, make sure Sage 50 is installed on your machine.
Navigate to Settings > Account Integration and click Connect to Sage50c.

A new screen will appear with instructions for connecting Sage 50 to Joblogic.
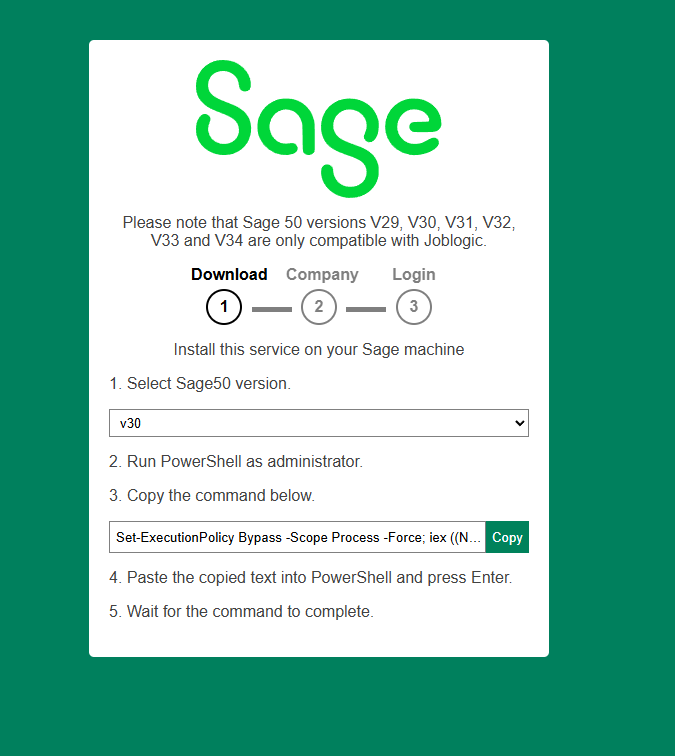
Running PowerShell as an administrator
To run PowerShell as an administrator, search for PowerShell on your machine.
Right-click PowerShell and select Run as administrator.
Enter your administrator credentials or ask someone with the necessary permissions to do this for you.

Copy the link provided on the Sage Connection screen in Joblogic, paste it into the PowerShell window and press Enter on your keyboard.
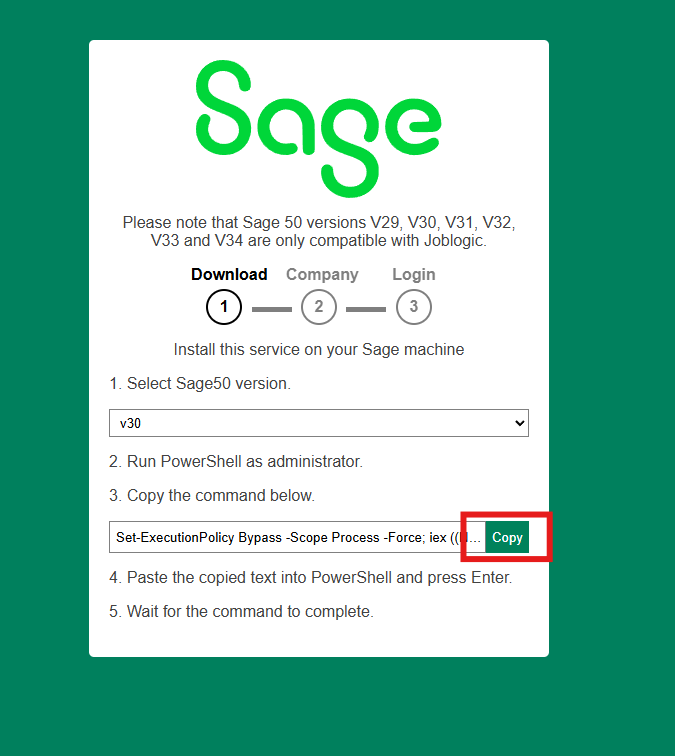

Wait for the process to complete. Your screen should look similar to the following:

Selecting your Sage 50 account
Once the process has completed, the Sage Connection screen should move to step 2. Select the Sage 50 account you want to sync with Joblogic.

You will then be prompted to log in to Sage 50 to complete the connection.
Use your Sage 50 desktop credentials. The Sage 50 user account you sign in with will be connected to Joblogic.
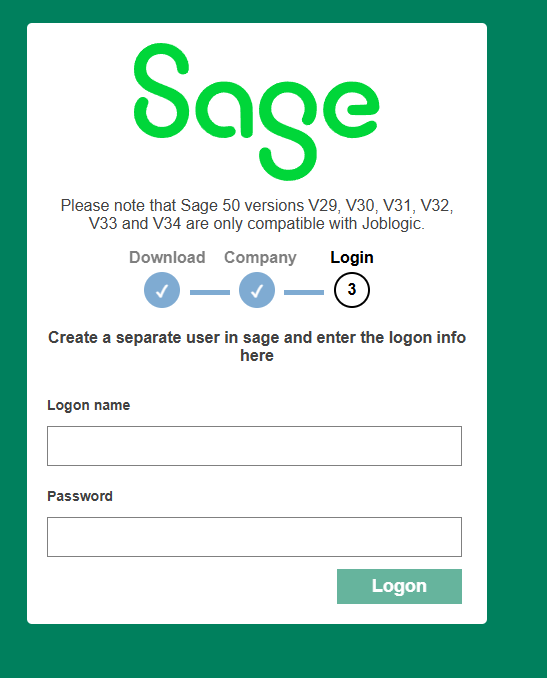

Once the connection is complete, you will be redirected back to Joblogic, where you can run a sync or configure your sync options.
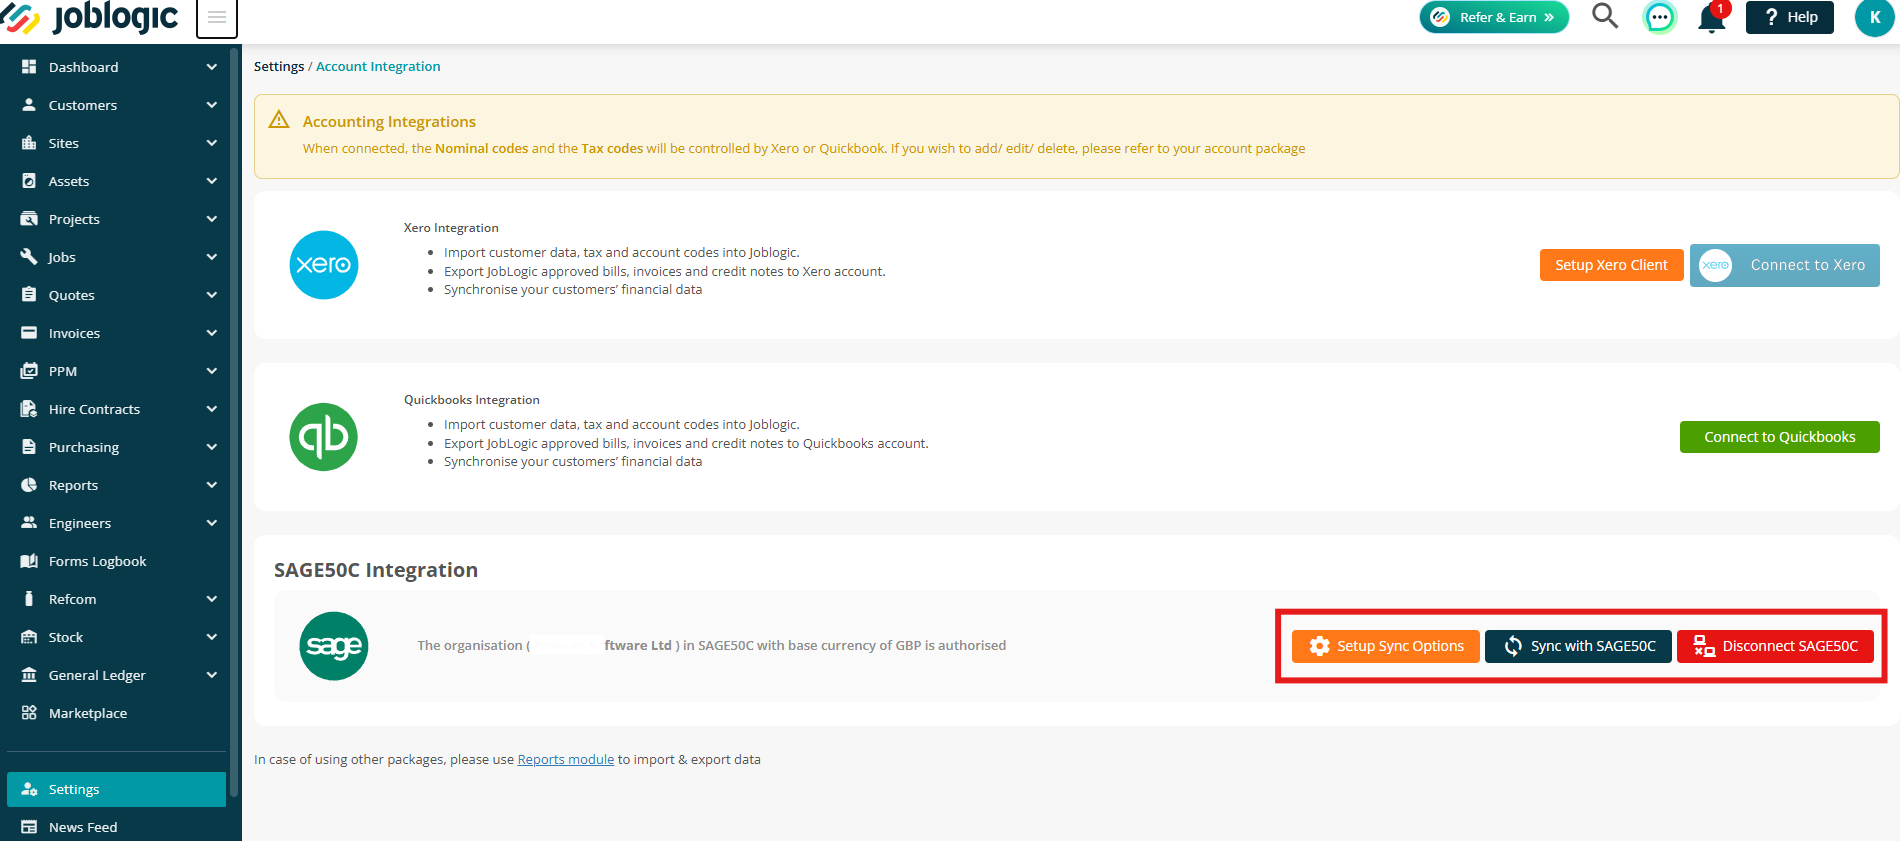
Setting Up Sync Options
To configure which data is synced and how often, click Setup Sync Options.
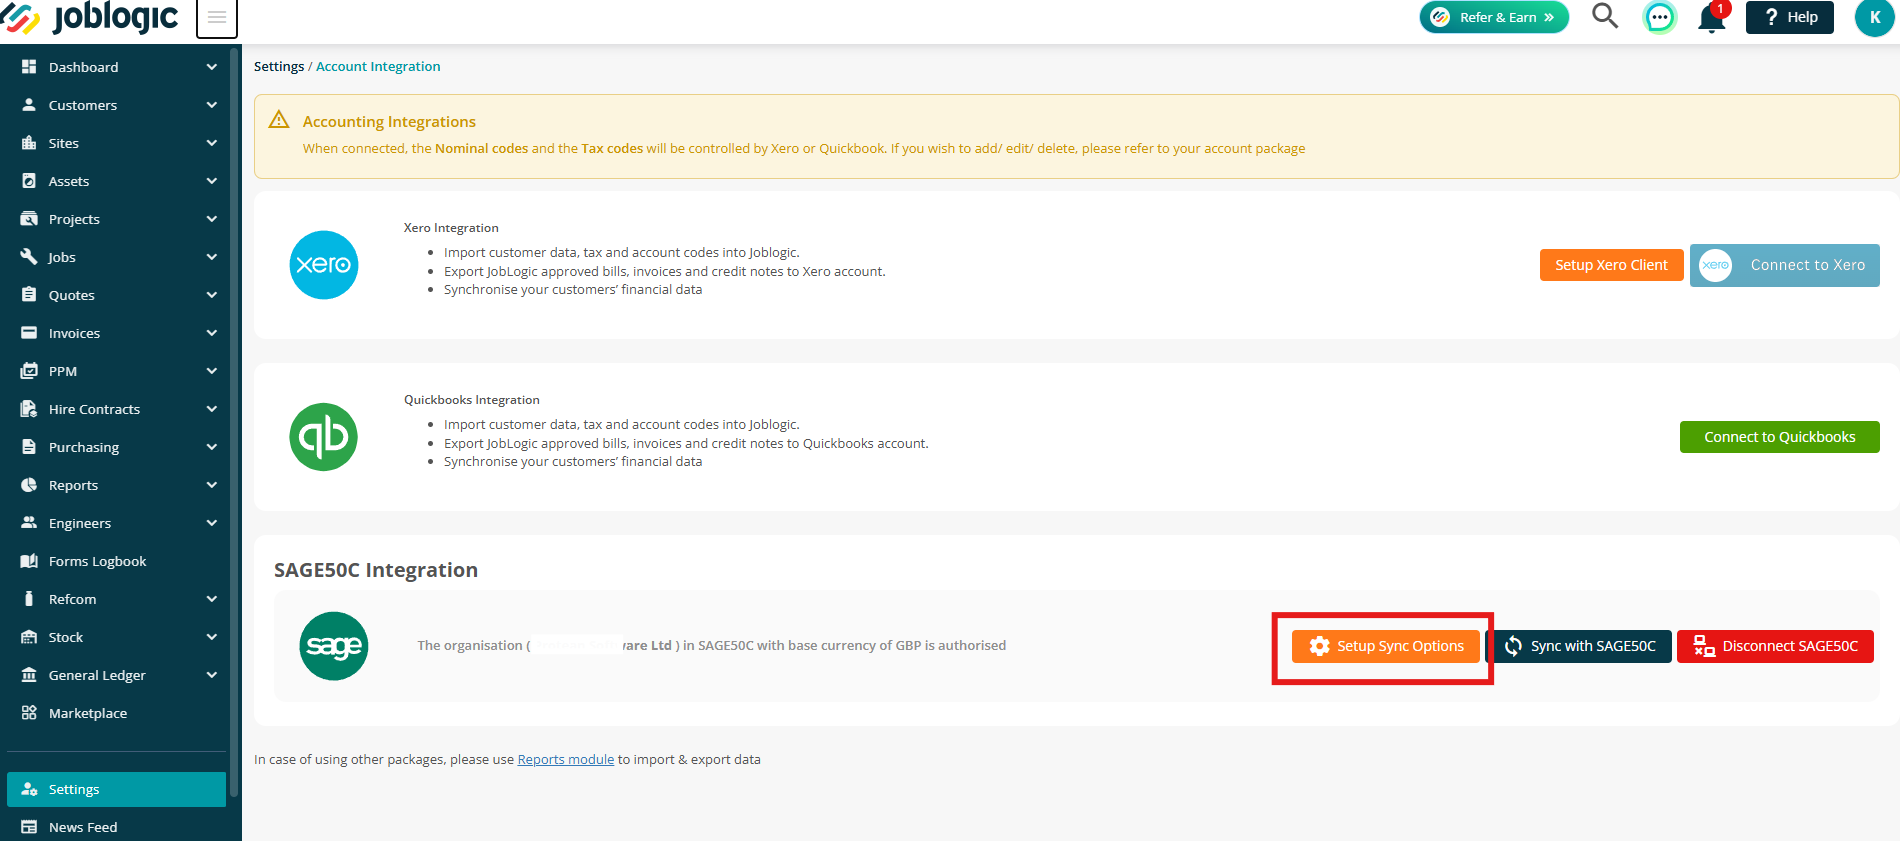
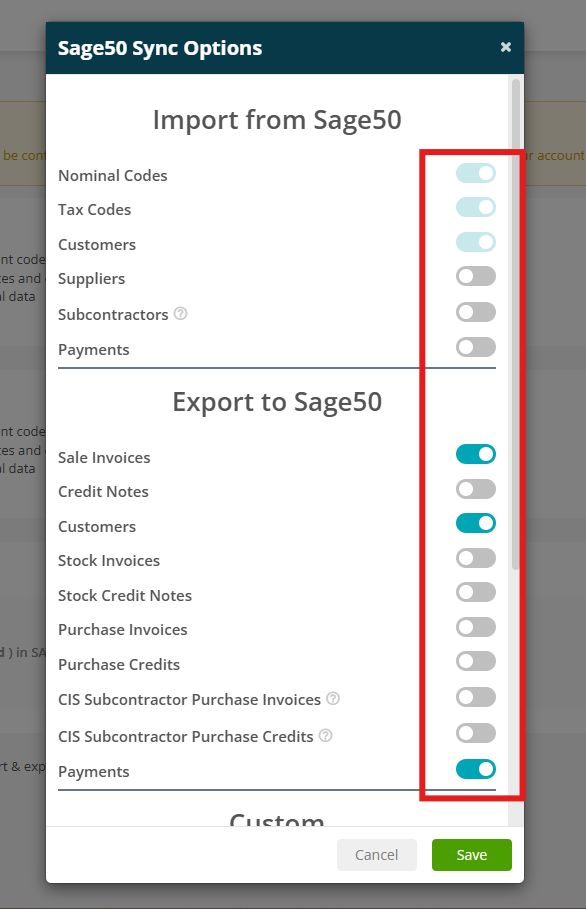
Here, you can enable or disable the data types you want to import or export.
Import from Sage 50 into Joblogic:
- Nominal Codes
- Tax Codes
- Customers
- Suppliers
- Subcontractors
- Payments
Export from Joblogic to Sage 50:
- Sale Invoices
- Credit Notes
- Customers
- Stock Invoices
- Stock Credit Notes
- Purchase Invoices
- Purchase Credits
- CIS Subcontractor Purchase Invoices
- CIS Subcontractor Purchase Credits
- Payments
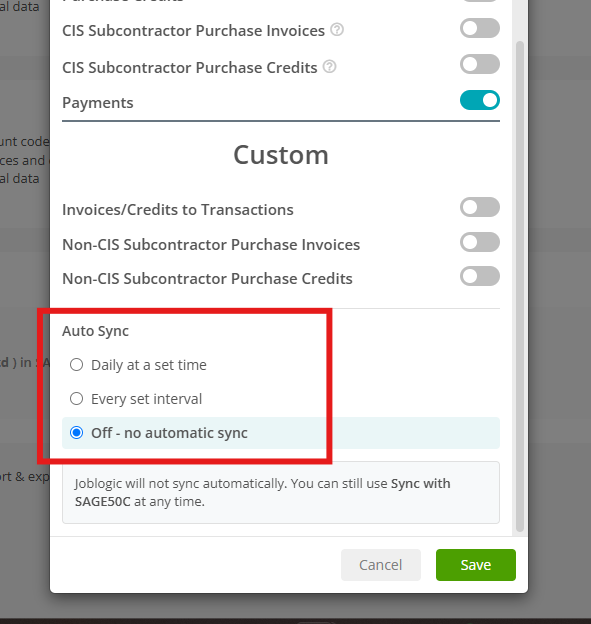
You can also configure automatic syncing to control how often Joblogic syncs data with Sage 50.
Choose one of the following options:
- Daily at a set time: Runs the sync once a day at your chosen time.
- Every set interval: Runs the sync at your chosen interval. You can set an interval from 10 minutes to 24 hours.
- Off: Disables automatic syncing.
Note: Existing daily sync schedules remain unchanged unless you select the Every set interval option.
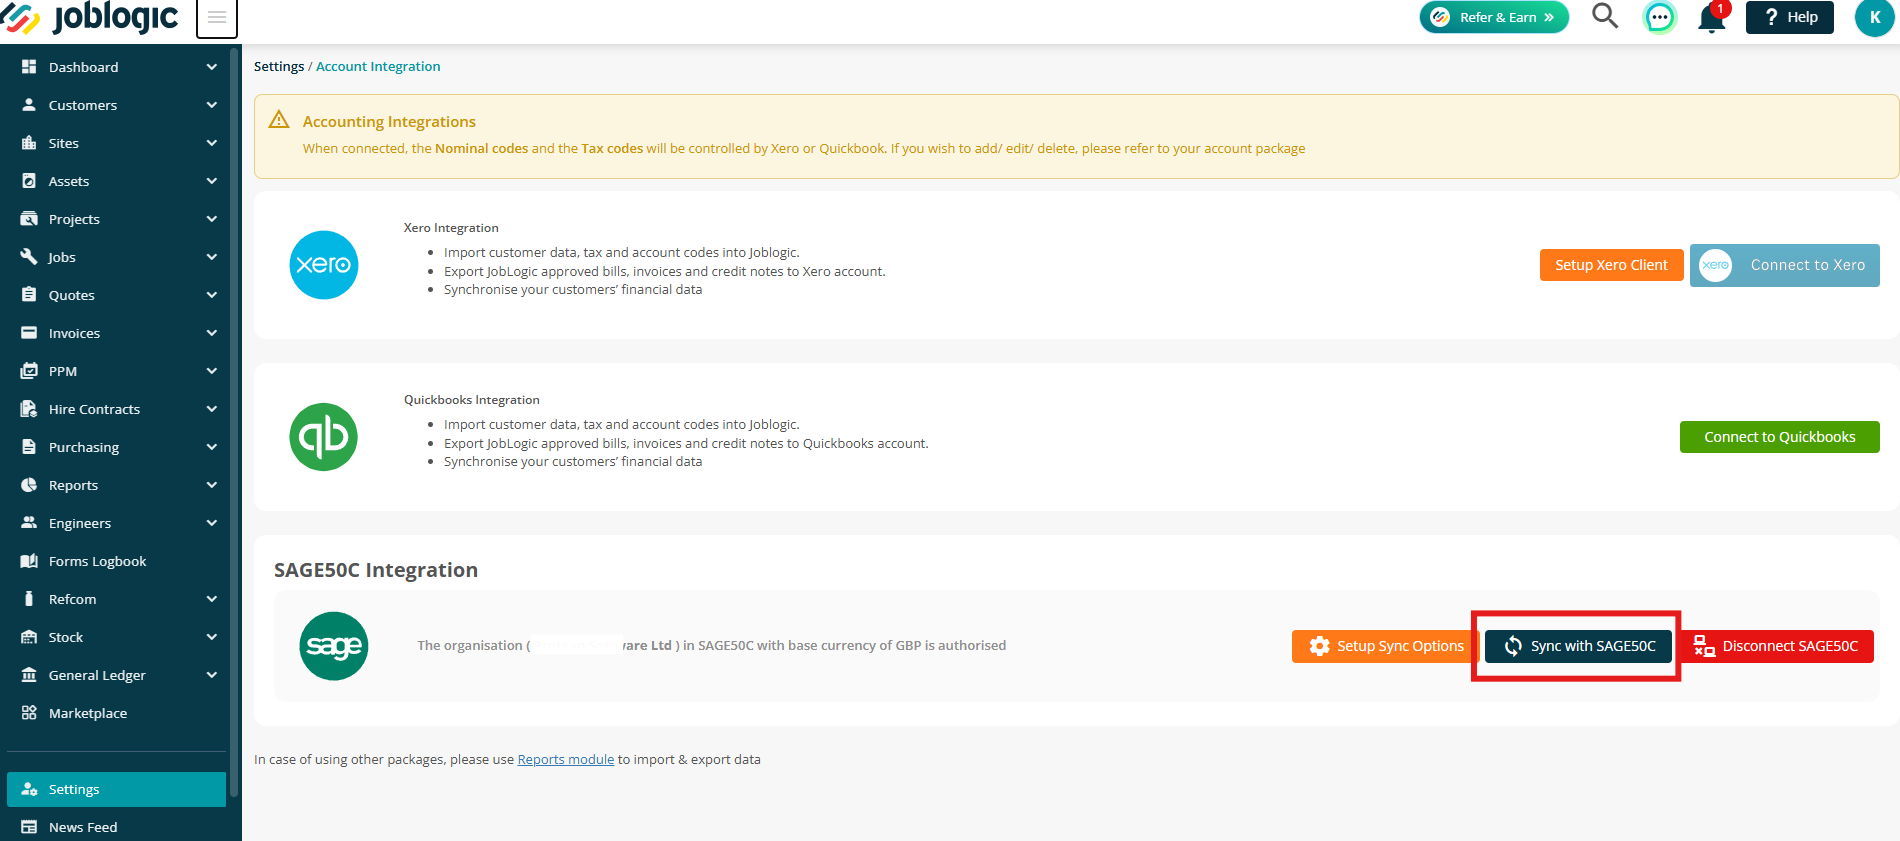
Syncing your data
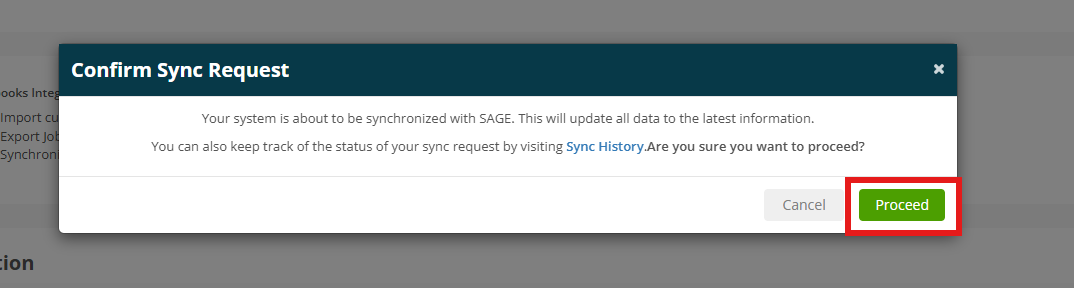
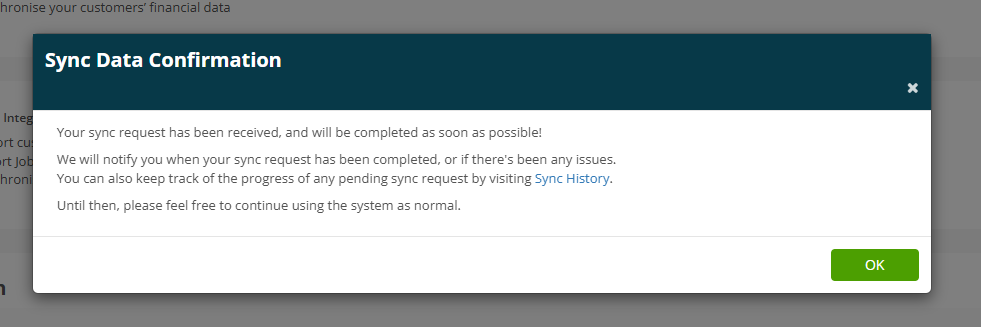
To sync the data manually, click Sync with SAGE50C
Click Proceed to confirm.
Importing Customer Details and Status from Sage 50
When the Customers import option is enabled, the following customer information is brought into Joblogic from Sage 50 during each sync:
- Payment Due (days): This is imported from Sage 50 without changing the customer’s existing Method of Payment.
- Sage Account Status: This is recorded in the customer’s private notes. When the status changes in Sage 50, a new entry is added, creating a history of changes.
- Company Reg. Number: This is imported from Sage 50.
- Trading Terms: This is imported from Sage 50. A Trading Terms invoice tag is available, allowing you to display the imported information on your invoices.
Customers marked as Inactive in Sage 50 are automatically suspended in Joblogic when the sync runs.
Customer Credit Control
Customer credit control allows you to manage whether new work can be created for a customer based on their credit status. You can place customers on hold to restrict new work or enable credit limit checks to prevent new work when a customer exceeds their credit limit. These checks operate independently of each other.
Credit Control Settings
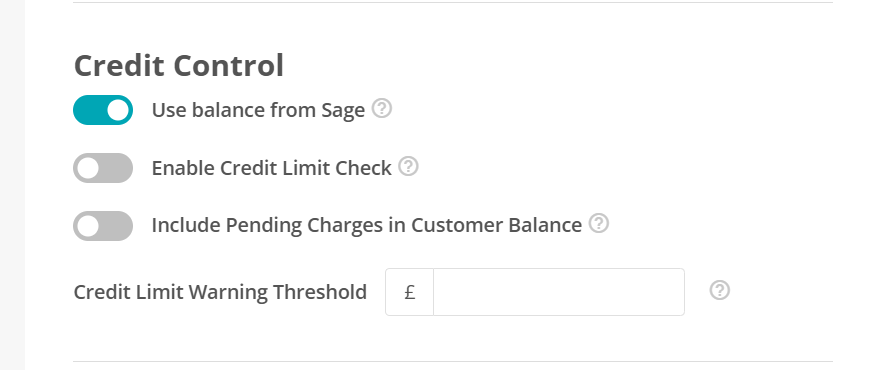
Navigate to Settings > System Setup and locate the Credit Control section.
Configure the following settings as required:
-
Use balance from Sage
When enabled, the customer's Total Receivable Balance is taken from the last Sage 50 sync. When disabled, Joblogic calculates the balance using its own invoice records.- Include Pending Charges in Customer Balance
This option is only available when Use Balance from Sage is enabled. When enabled, the customer's balance includes the amount synced from Sage 50 plus any unpaid invoices that have not yet been sent to Sage 50.
- Include Pending Charges in Customer Balance
-
Enable Credit Limit Check
When enabled, prevents new jobs, PPM contracts and hire contracts from being created for customers who have exceeded their credit limit. -
Credit Limit Warning Threshold
Sets when a warning is displayed as the customer's balance approaches their credit limit. For example, if the credit limit is £10,000 and the warning threshold is £500, a warning will appear when the balance reaches £9,500.
Placing a customer on hold
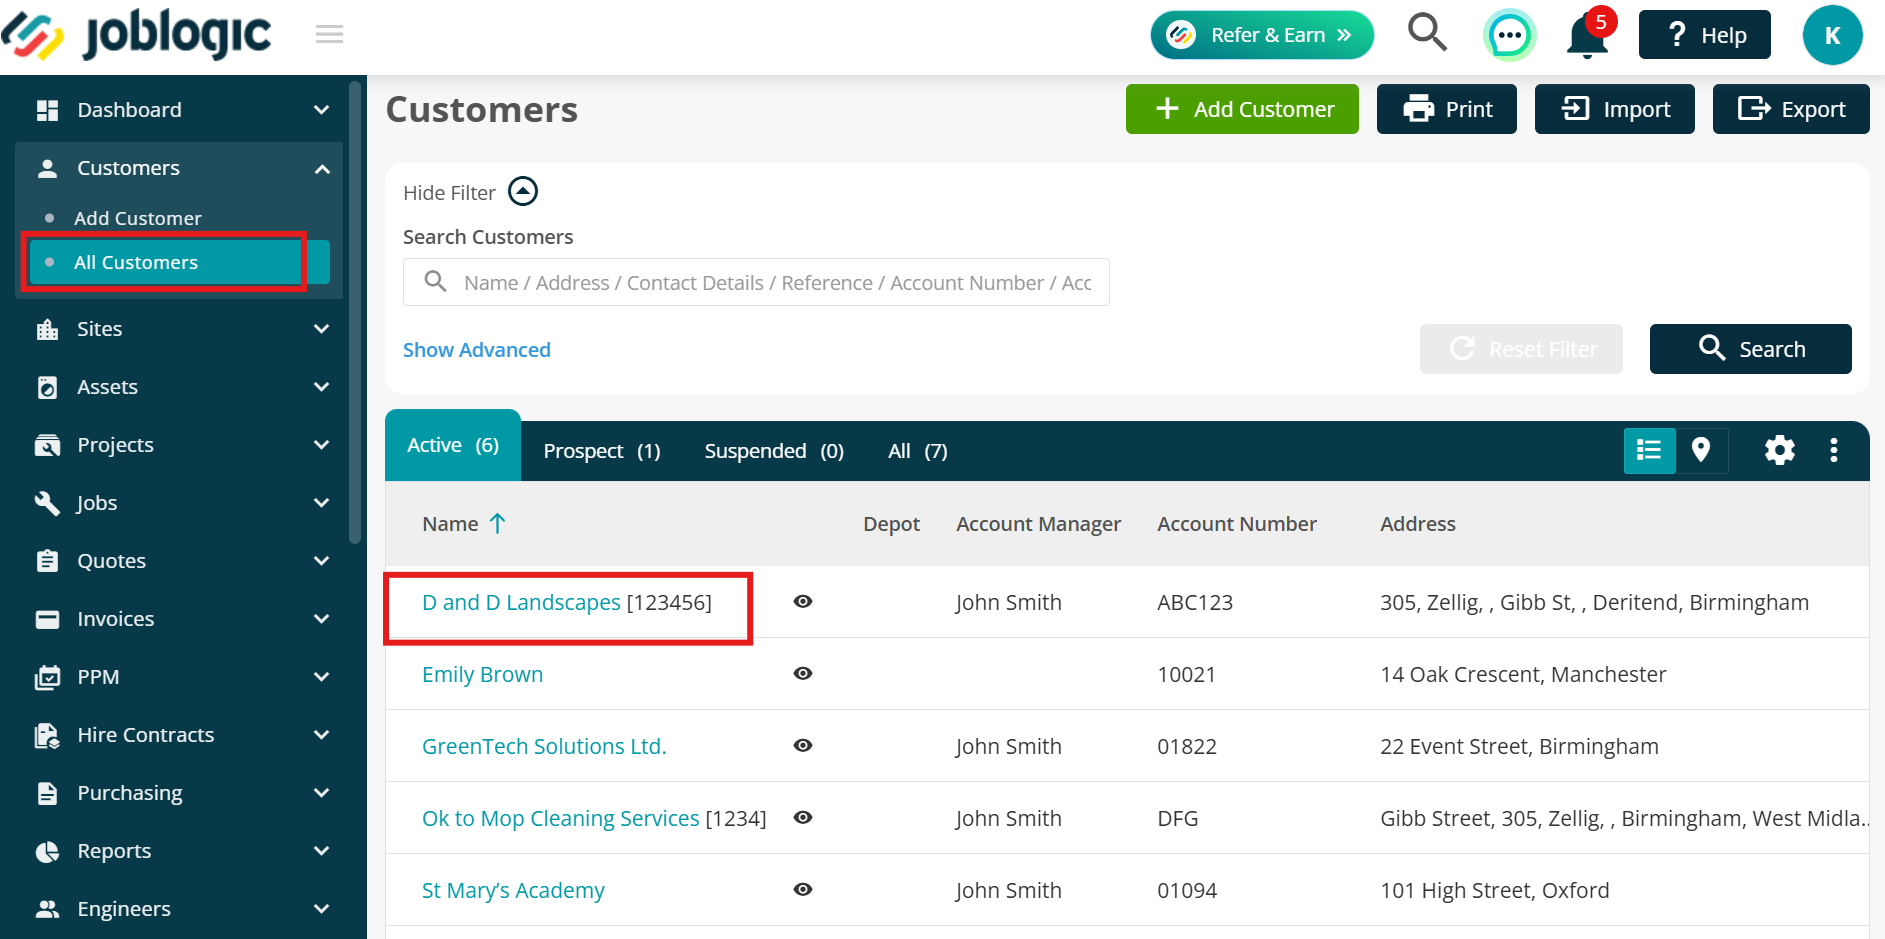
To place a customer on hold, navigate to Customers > All Customers and open the relevant customer record.
Under Base Configuration, locate the Credit Control section. In the On Hold area, select one or more of the following checkboxes:
- Block new Jobs
- Block new Hire Contracts
- Block new PPM Contracts
All checkboxes are unchecked by default.
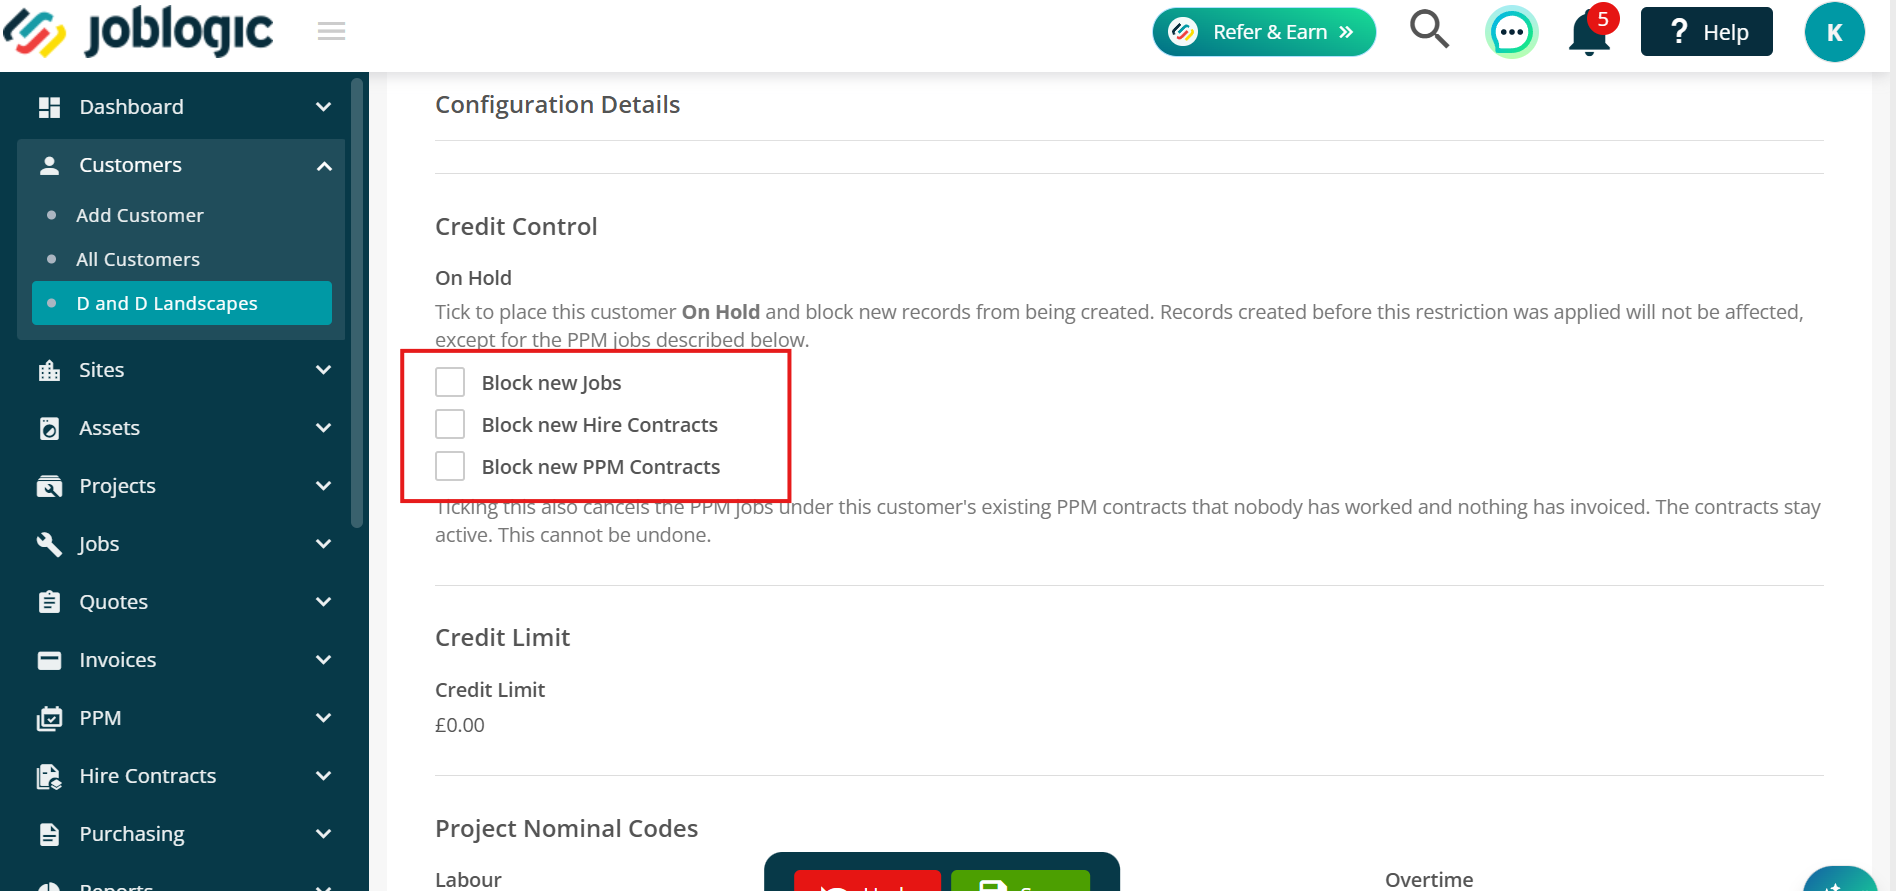
When a checkbox is selected, users cannot create that type of record for the customer.
When Block new PPM Contracts is selected, any jobs under the customer’s PPM contracts that have never had their status changed and have no draft invoice are marked as Cancelled. These jobs remain cancelled if the hold is later removed.
Jobs, hire contracts and PPM records created before the customer was placed on hold are not affected. They remain available for editing and completion.
Logging quotes for customers on hold
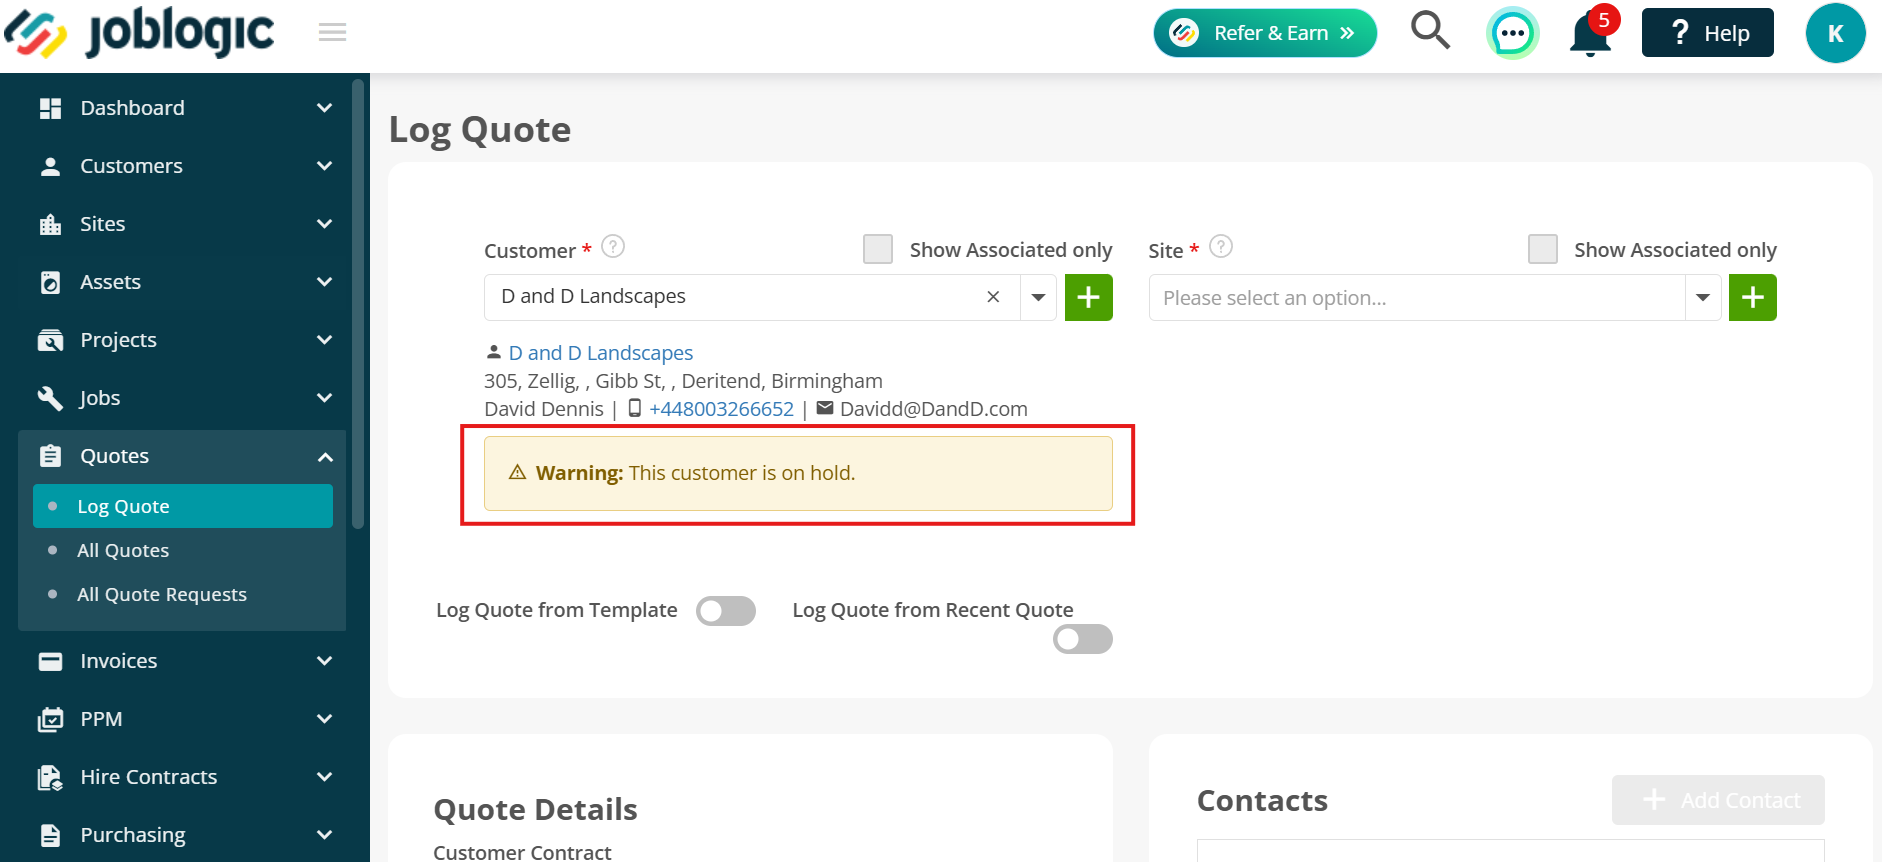
You can still log Job Quotes, PPM Quotes and Hire Quotes for a customer who is on hold. The warning “This customer is on hold.” is displayed. Work cannot be created from the quote until the hold is removed or overridden.
Overriding a customer hold
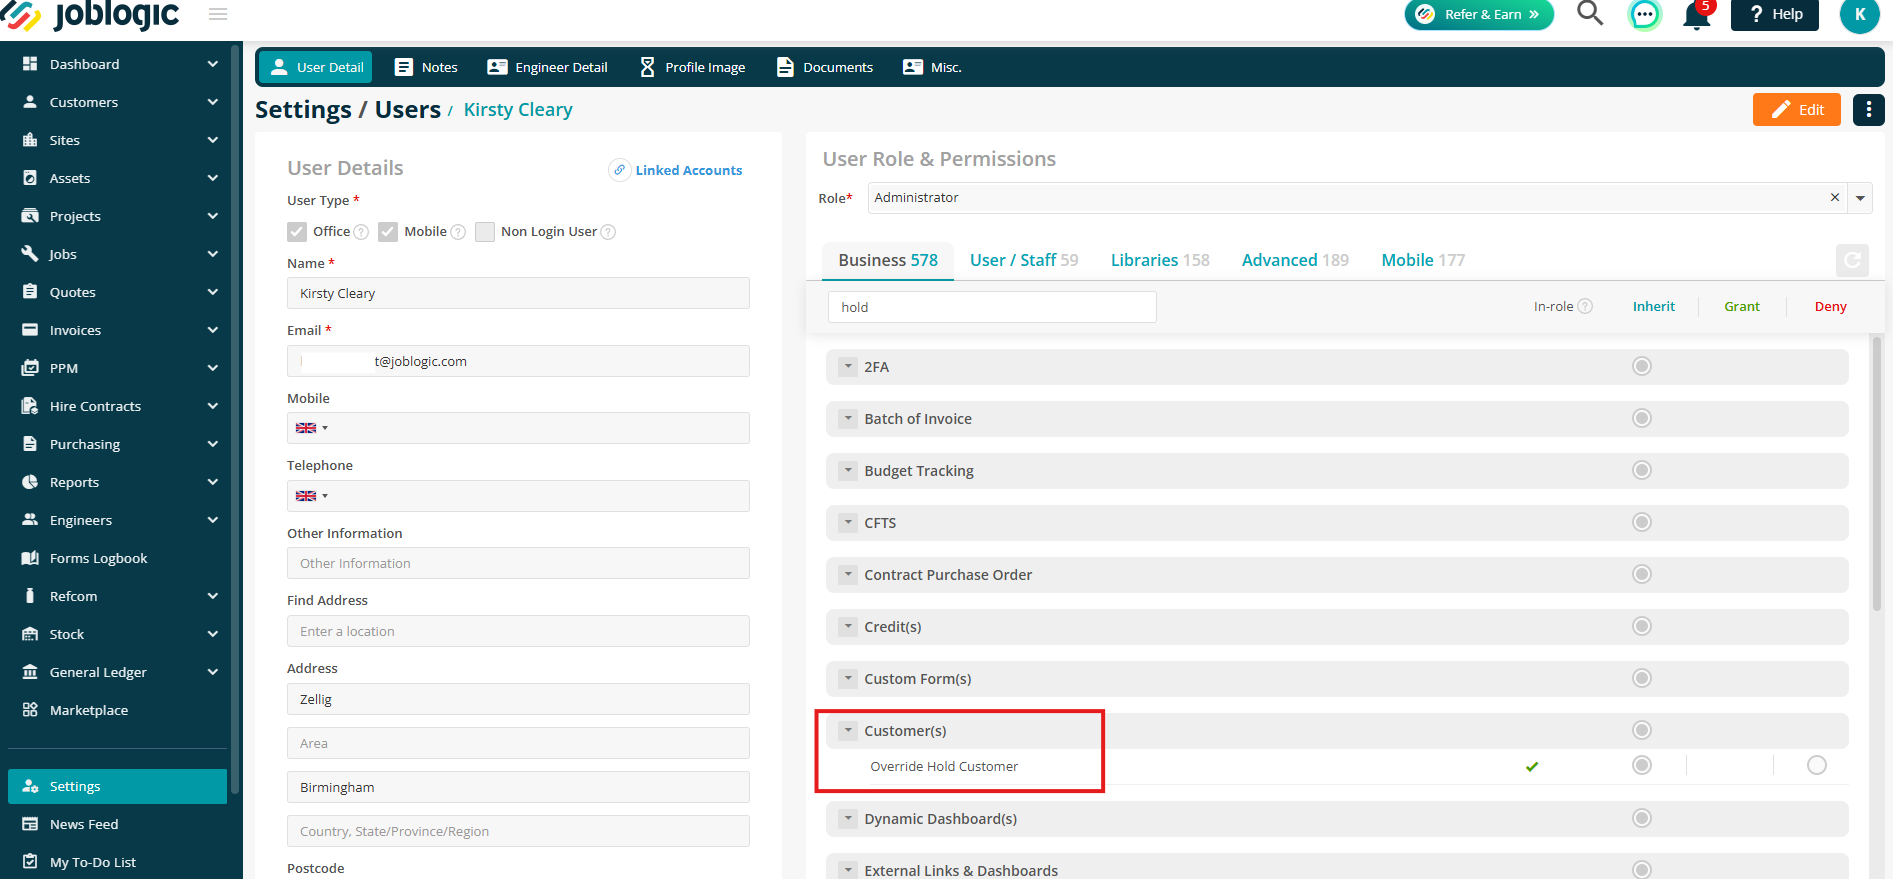
The Override Hold Customer permission allows users to create records for customers who are on hold. By default, this permission is granted to administrator users only.
The permission applies to all enabled customer holds, so separate permissions are not required for Jobs, Hire Contracts and PPM Contracts.
The customer hold is checked when a user clicks Save.
-
User without permission: The following message is displayed, and the record is not saved:
“This customer’s account is currently on hold. Please reach out to your administrator for assistance.” -
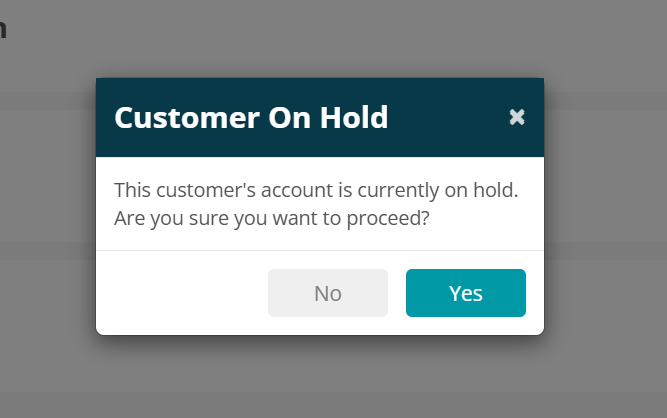
User with permission: A confirmation message is displayed:
“This customer’s account is currently on hold. Are you sure you want to proceed?”
Select Yes to save the record or No to cancel the save and remain on the current screen.
Customer Audit Notes for Sage 50 Changes
Changes made to a customer through a Sage 50 sync are recorded in the customer’s audit history, with Sage 50 shown as the author. Each audit entry shows the previous value and the updated value, making it easier to track changes to customer information.
Further Support
For further information or assistance with the above, contact our Support Team on 0800 326 5561 or email support@joblogic.com. Alternatively, our Customer Success Management team can be reached by emailing customersuccess@joblogic.com.
Publishing Details
This document was written and produced by Joblogic’s Technical Writing team and was last updated on the date specified above. Be aware that the information provided may be subject to change following further updates on the matter becoming available or new releases within the system. Additionally, details within the guide may vary depending on your Joblogic account’s user permissions and settings or the electronic device being used.