- 10 Dec 2024
- 2 Minutes to read
- Print
- PDF
Serialised Stock
- Updated on 10 Dec 2024
- 2 Minutes to read
- Print
- PDF
Introduction
The Serialised Stock App makes managing inventory simple by letting you easily track and manage individual parts with unique serial numbers. This not only boosts inventory accuracy and cuts down on errors but also helps you stay compliant with industry standards.
With tools for importing and auto-generating serial numbers, the app streamlines your workflow, saving you both time and effort. Plus, it gives you full visibility, so you can trace each part back to its source and maintain complete control over your stock.
In this guide, we'll show you how to activate and manage serial numbers to simplify your inventory management.
Activating Serial Numbers
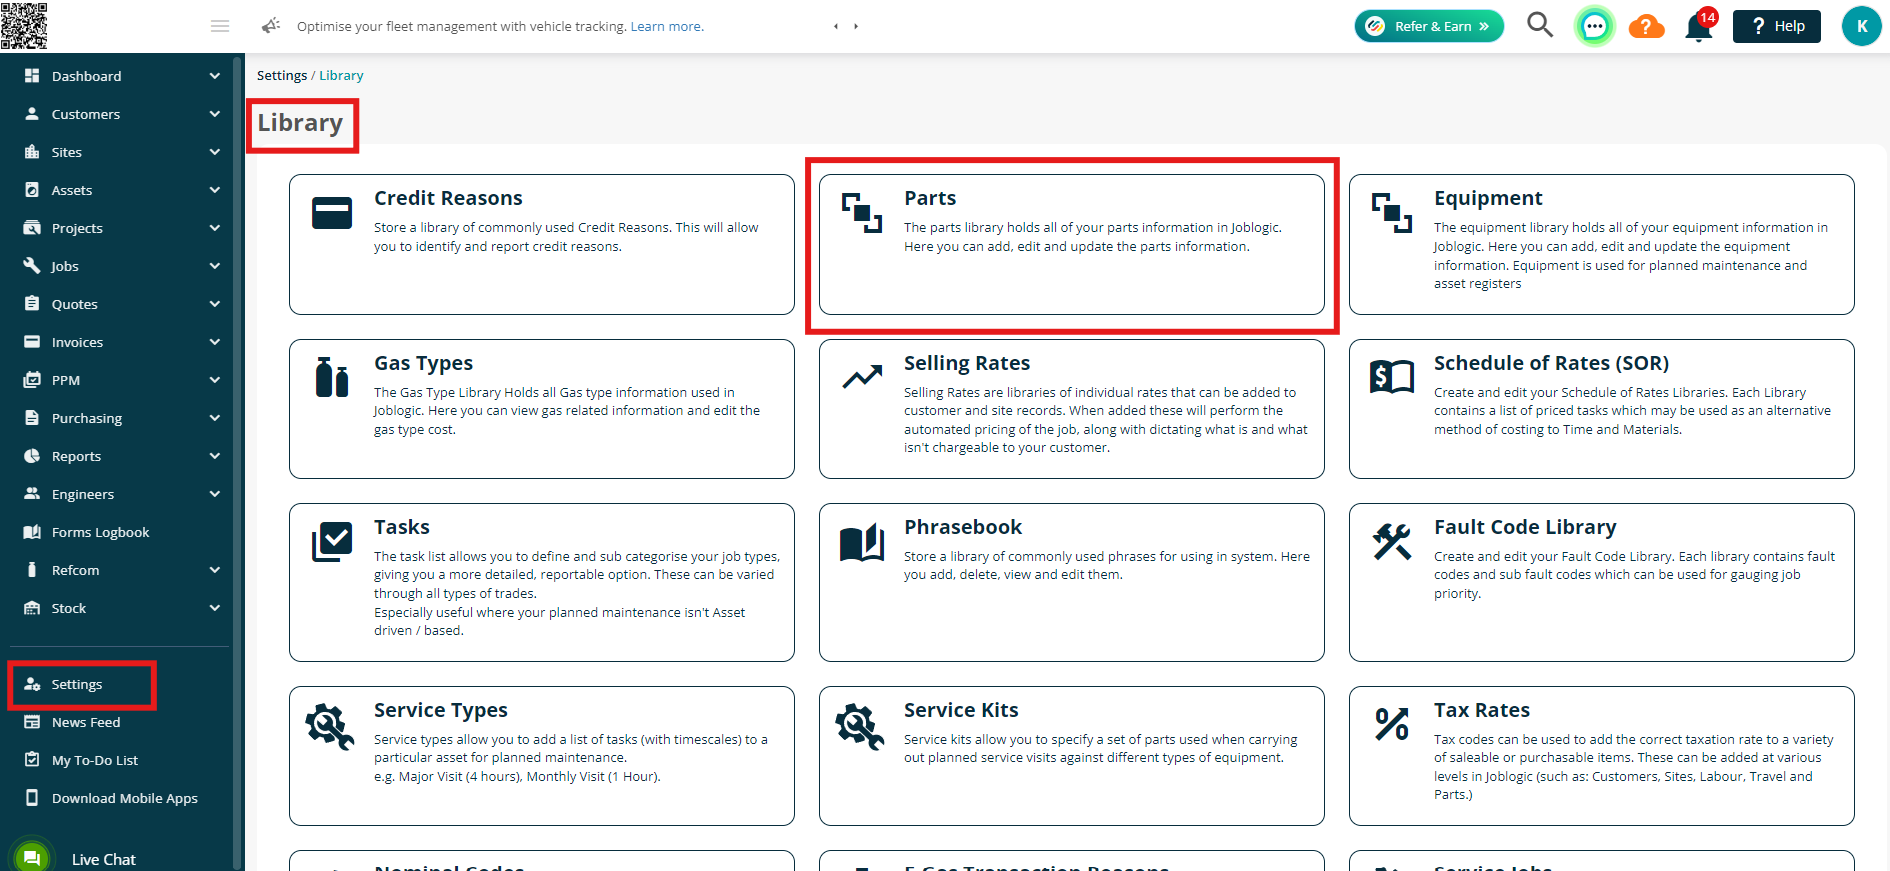
To get started, click Settings > Library > Parts
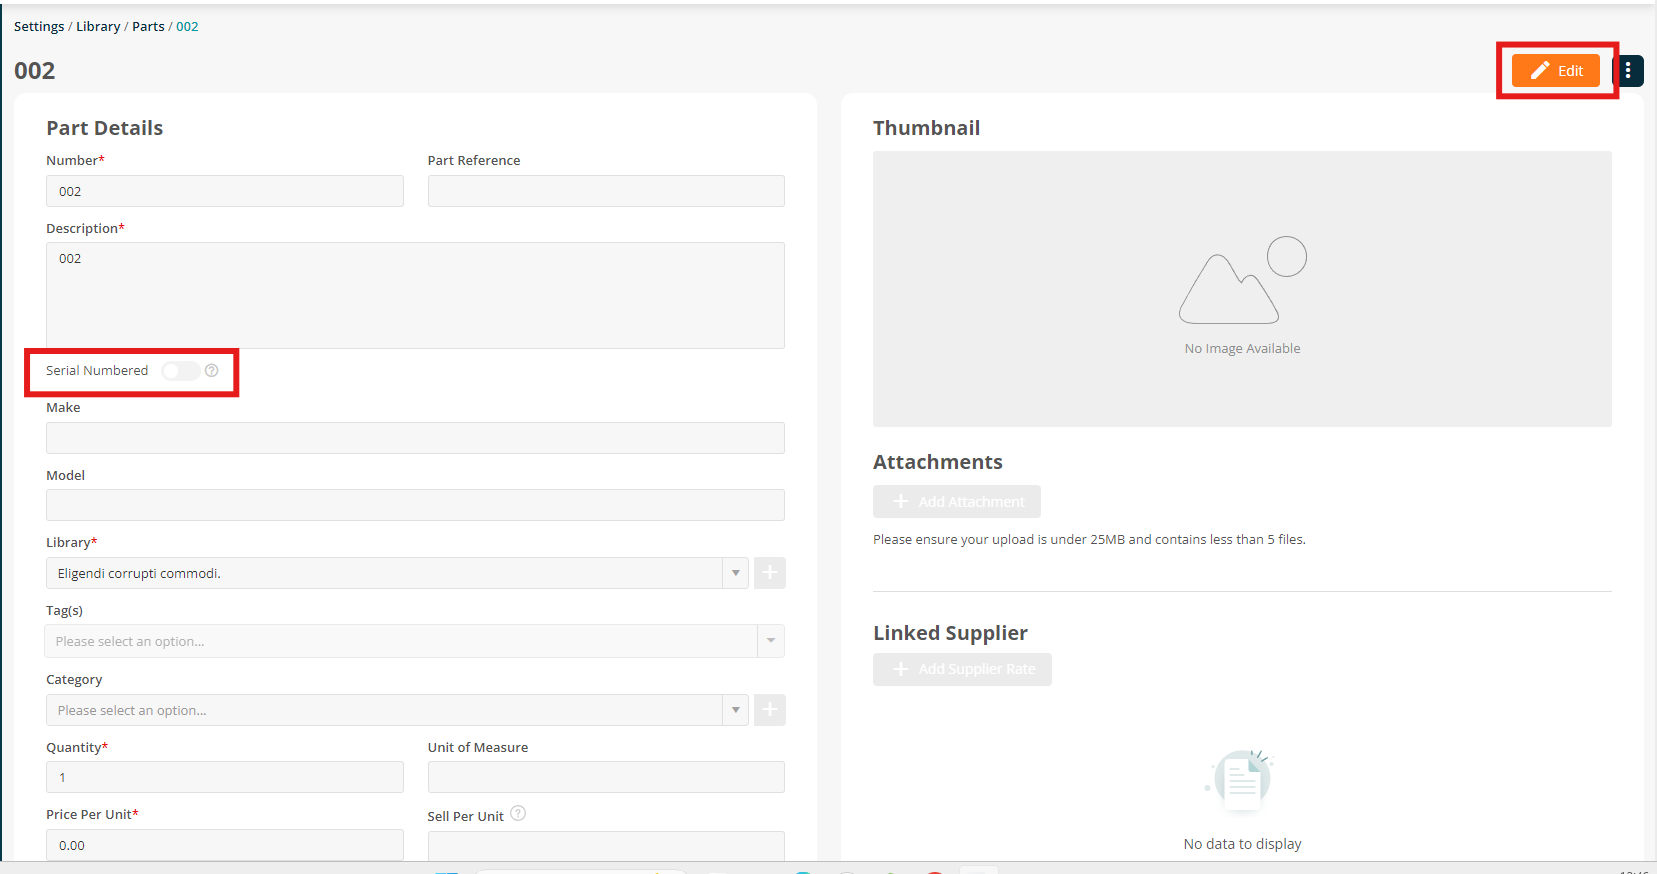
Click into a Part, and then click Edit.
Keep in mind, you will not be able to enable the Serial Number feature if the part is already assigned to stock.
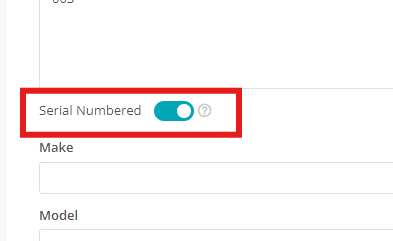
Toggle the enable Serial Numbered option
Setting up the Serial Numbers
When you create a stock record and choose a part that has been enabled for Serial Numbers, you’ll need to give each stock item a number.
Click into Stock > All Stock Records > Add Stock Record
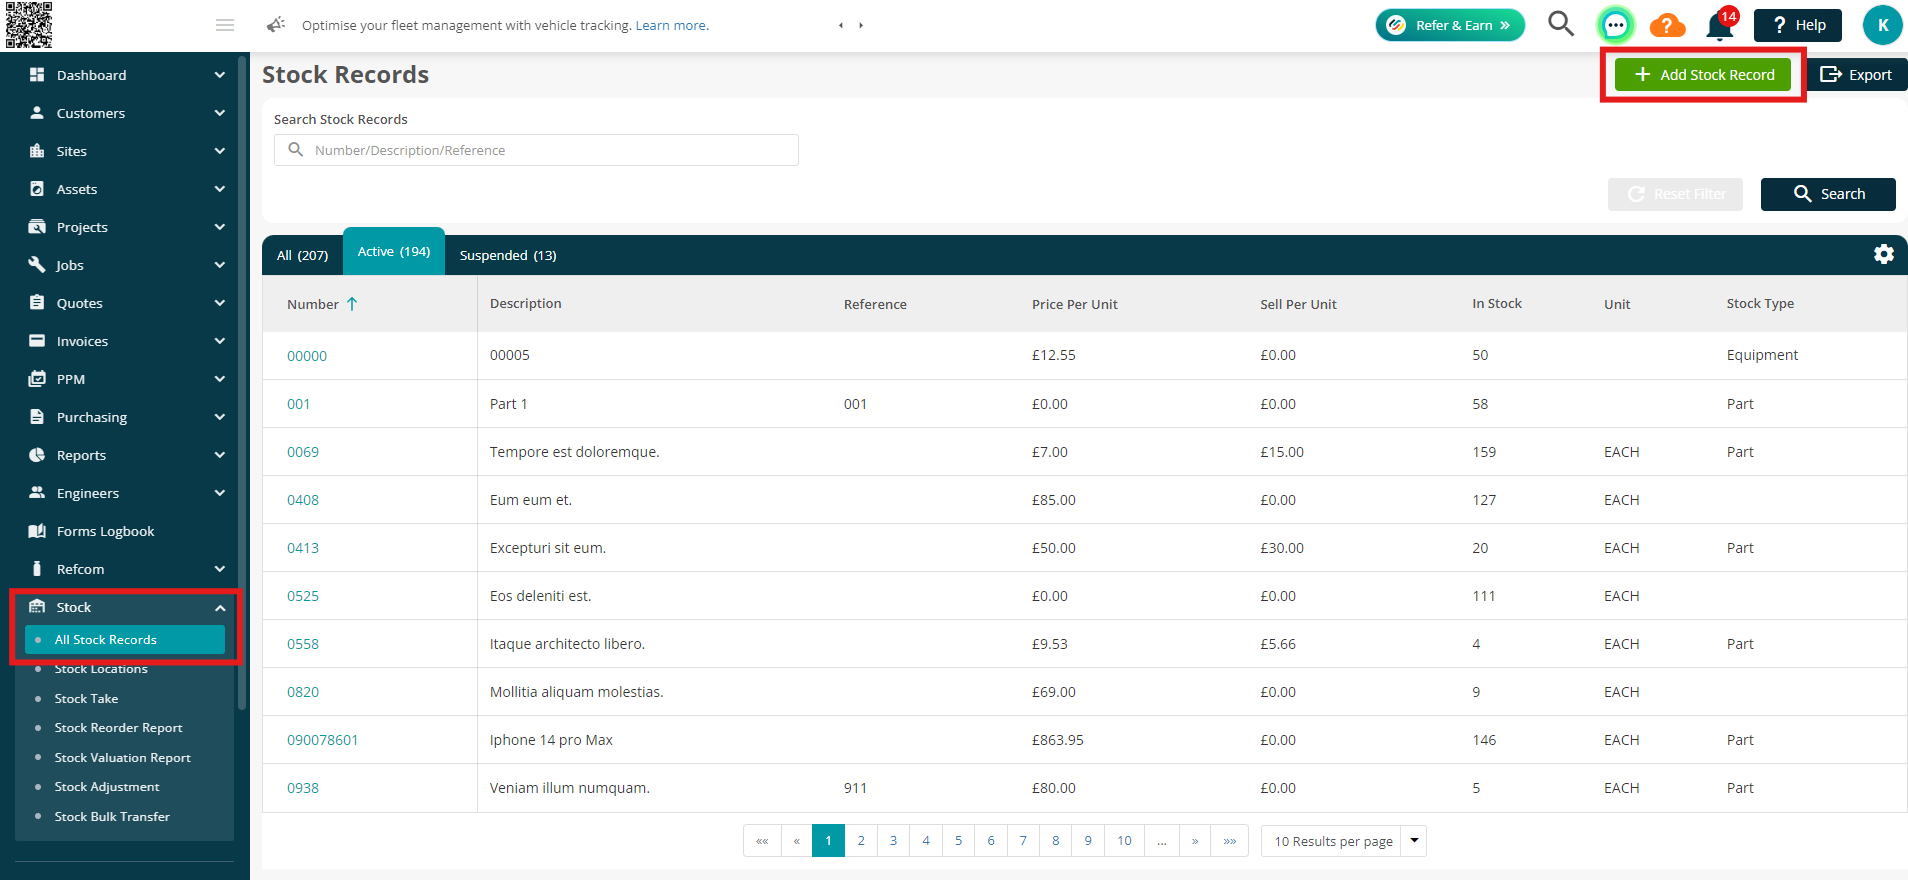
Choose your Part from the dropdown, fill in your quantity, and enter any other details as needed.
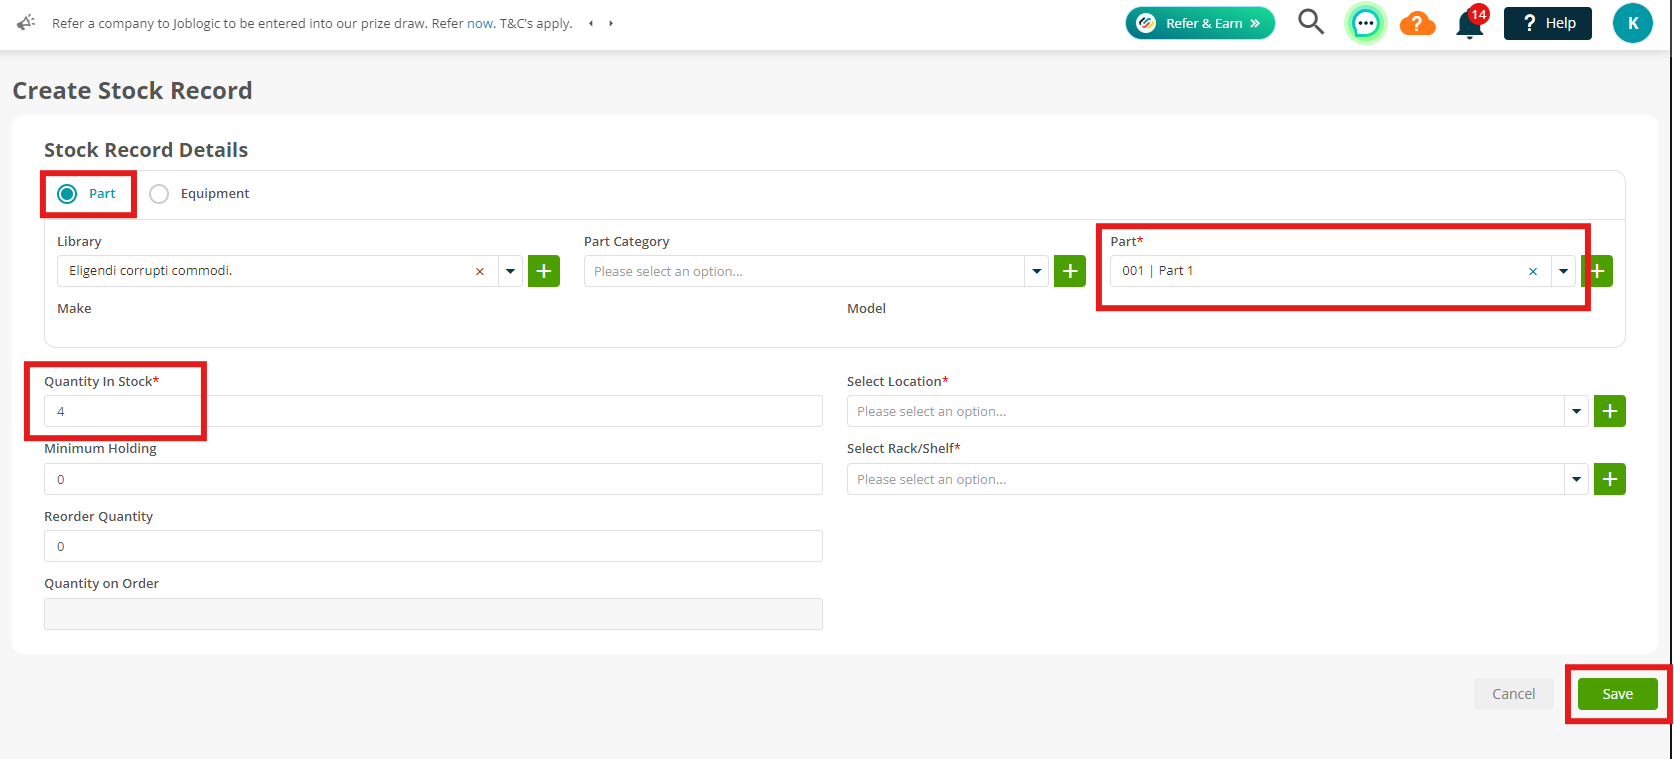
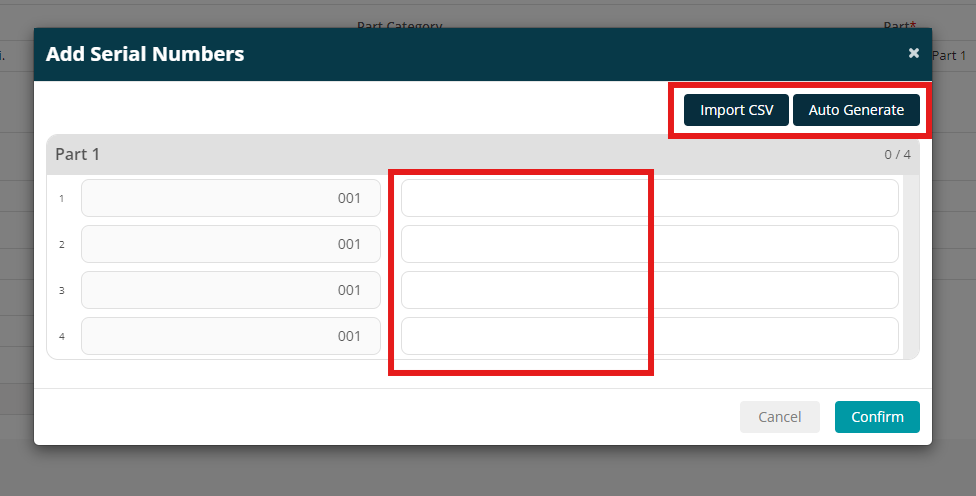
When you click Save a new window will pop up
Here you can manually type in your serial numbers or choose to import or auto generate them.
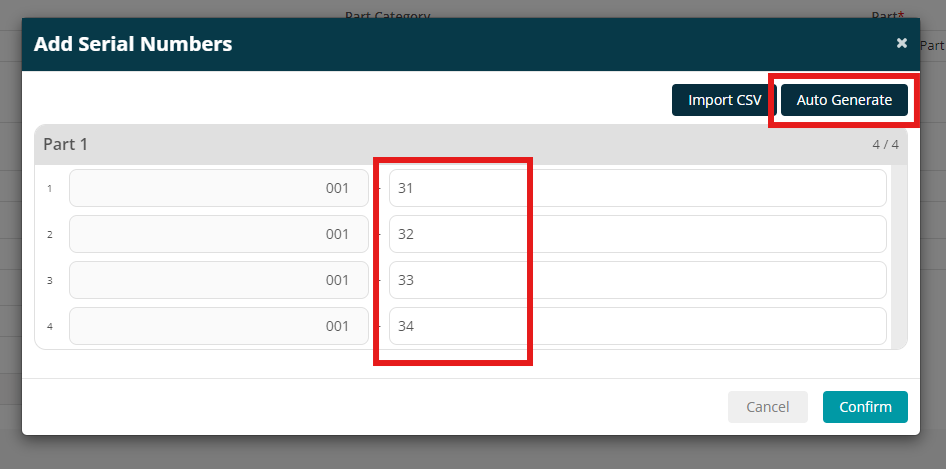
Auto generating them will simply find the next available numbers from active stock items for this part.
Click Confirm if you are happy with the new serial numbers
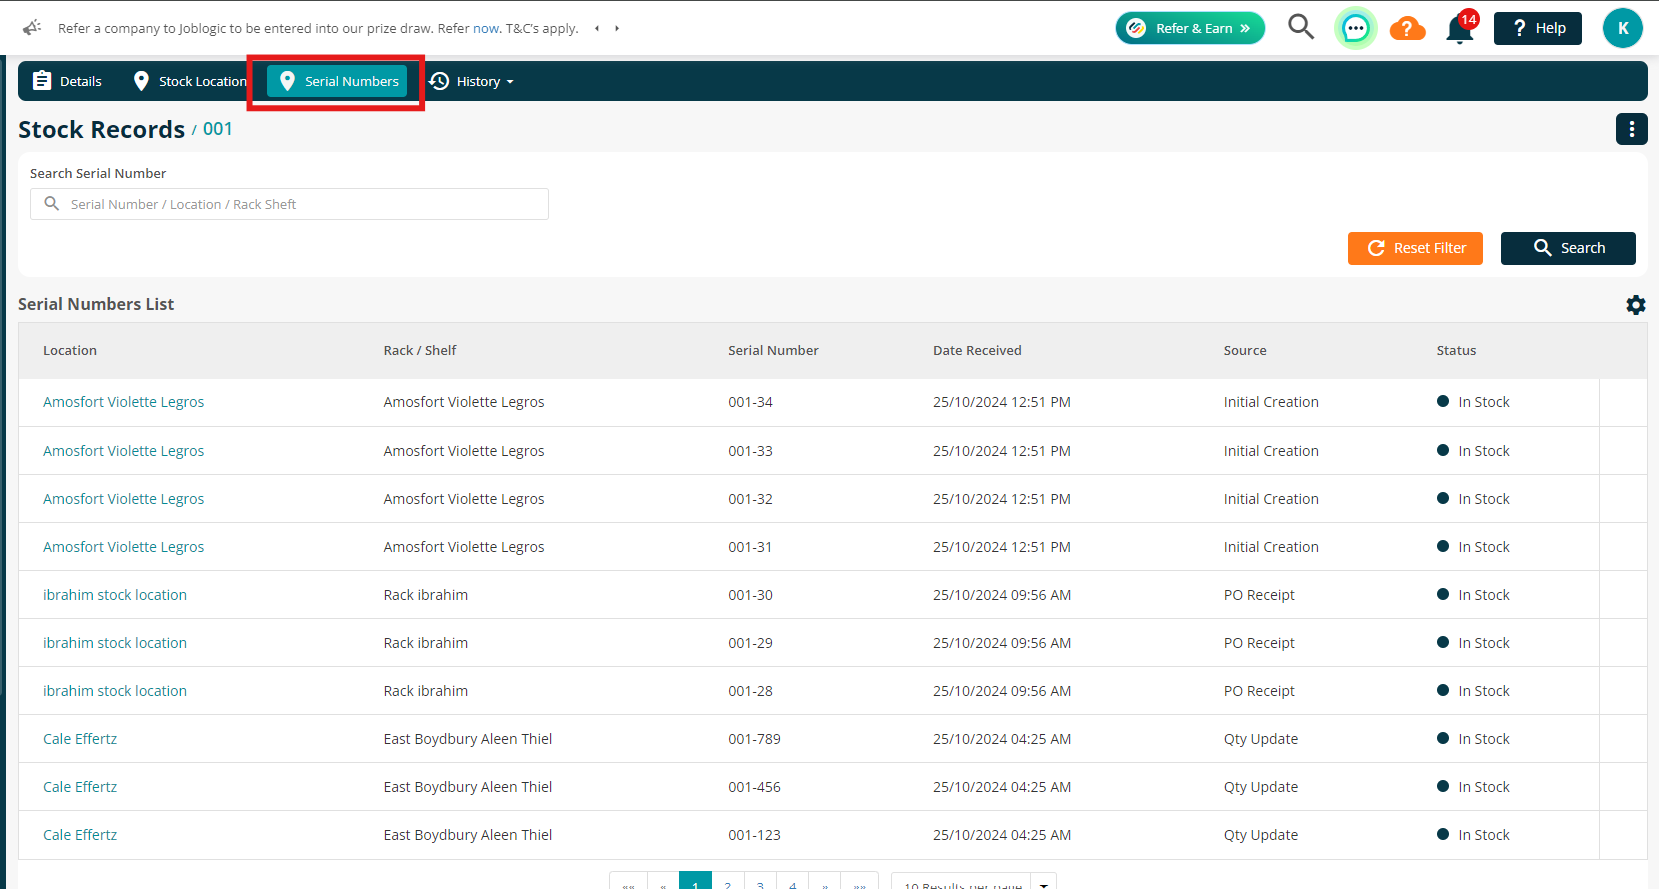
A tab is available within your Stock Record, titled Serial Numbers, which provides a table view of your stock locations and serial numbers.
Create stock PO
Similarly, when creating Stock Purchase Orders, you’ll be able to enter serial numbers for your new stock items here too, if it’s associated with a relevant part.
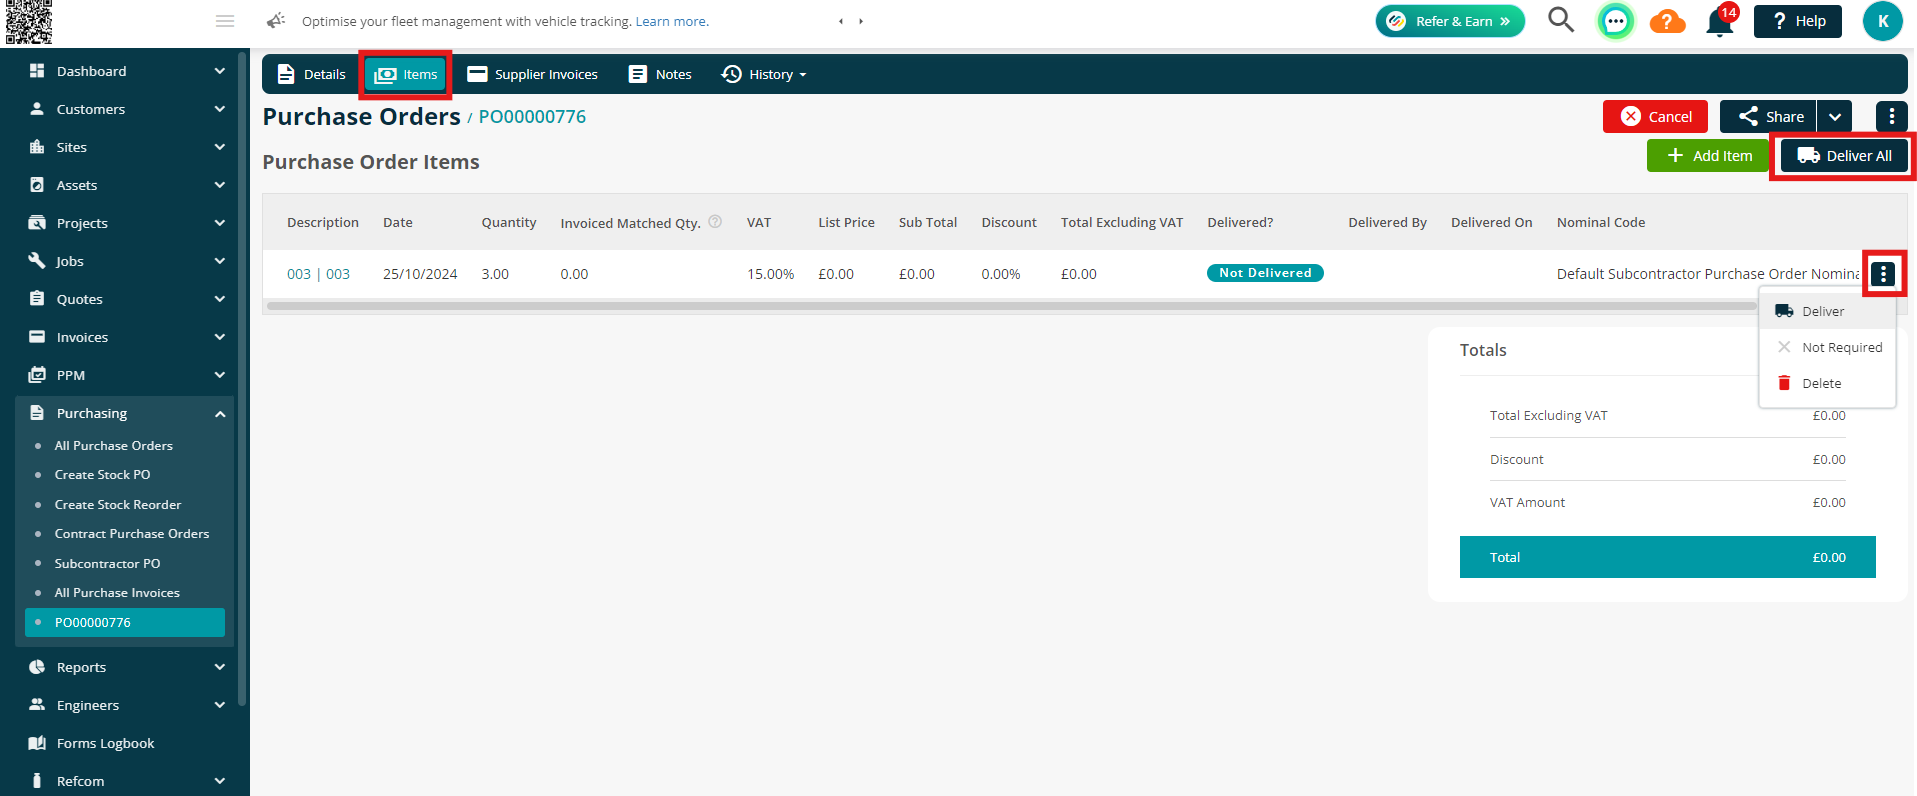
Once you’ve added your Stock PO, click into the Items tab.
To read more about setting up your Purchase Orders, please click here.
Click the three dots against an item, to Deliver, or simply click Deliver All at the top of the page.
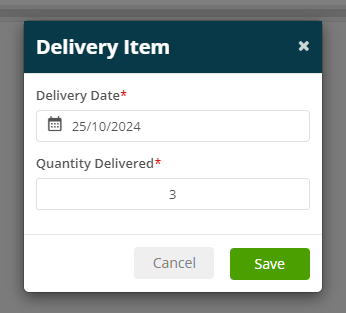
Confirm the details and click Save.
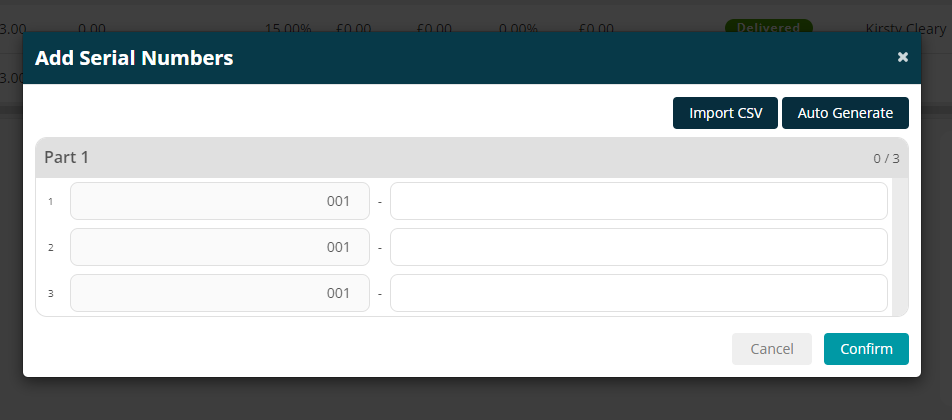
Next, you’ll see a pop up to add Serial Number for the new parts you are ordering.
Again, you can import or auto-generate to save time manually entering numbers, if you prefer.
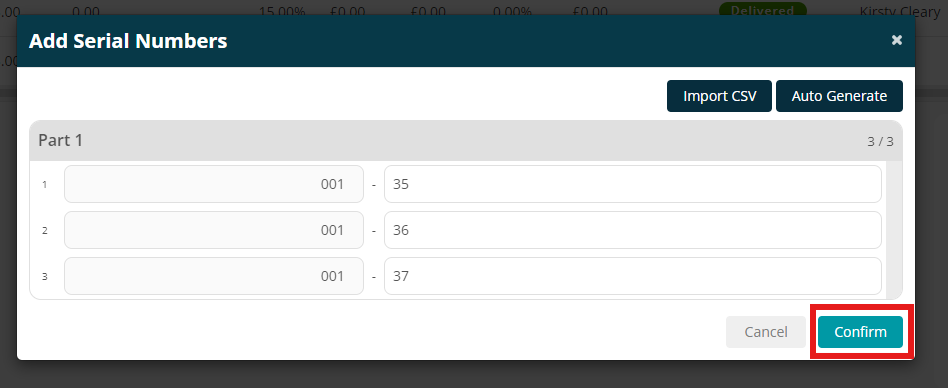
Click Confirm to complete the process.
Add Material to Job
You can issue out specific stock items easily, helping you keep track of what is where.
To do this, click through to your Job, via Job > All Jobs > find job > Cost tab
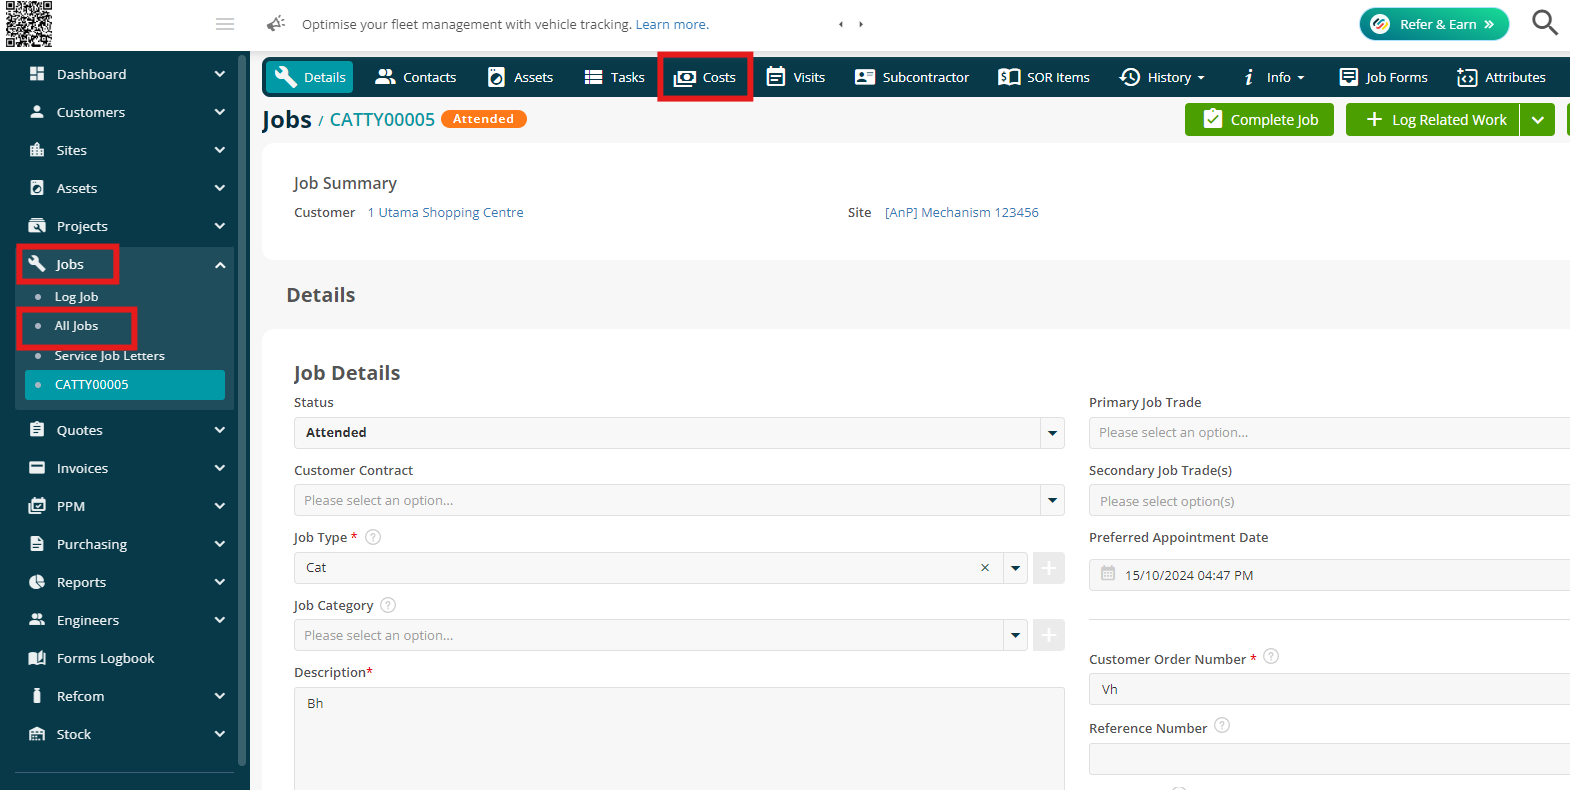
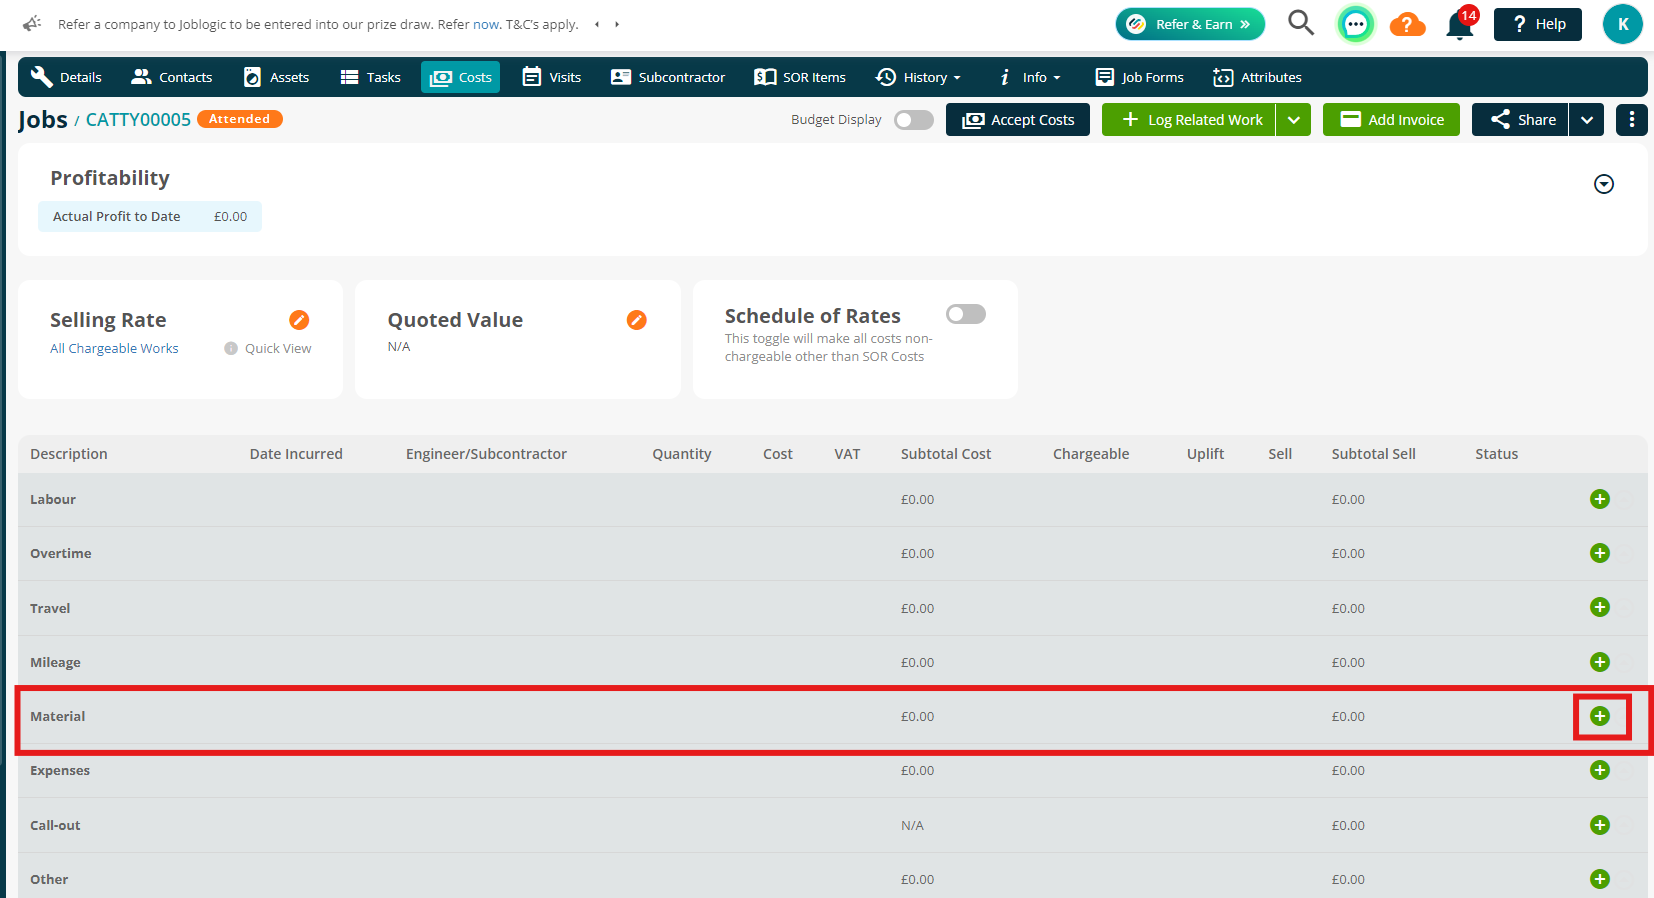
Click to add a Material line
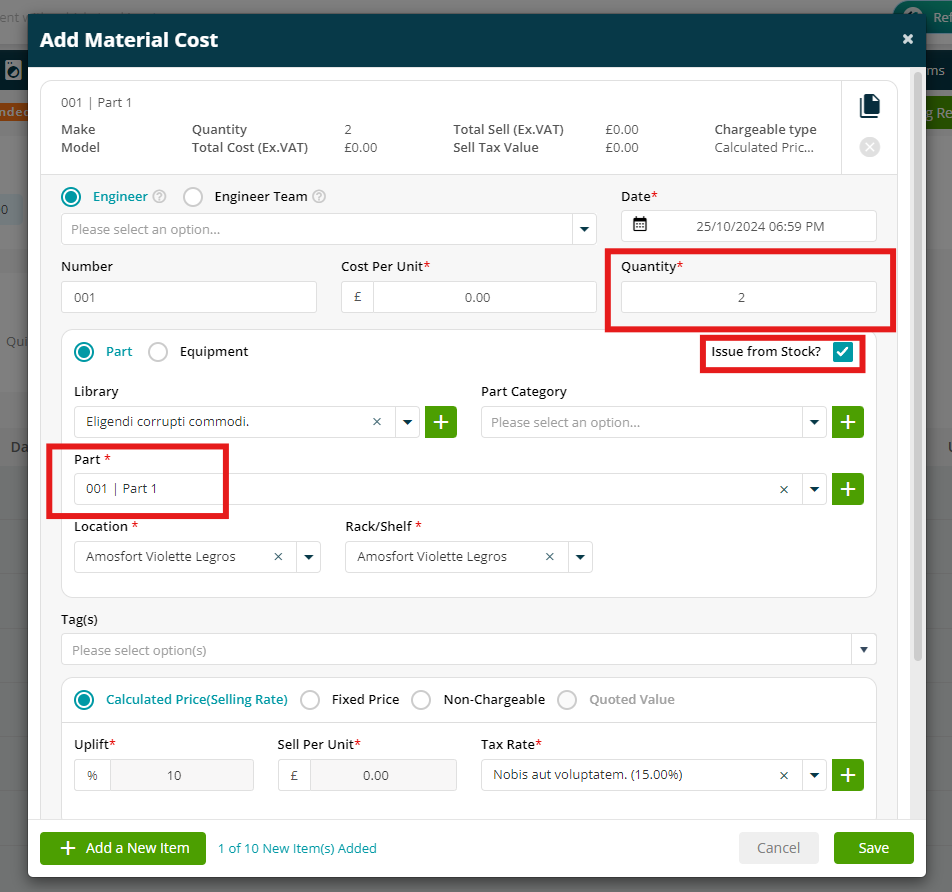
Choose a relevant part, add a quantity and tick ‘Issue from Stock’ before clicking Save.
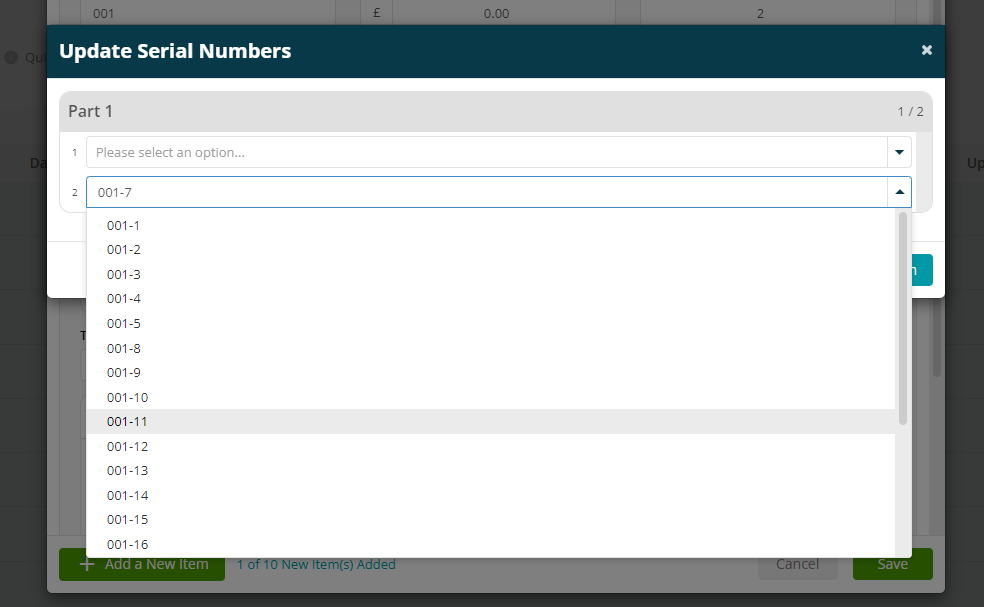
A new pop up will appear where you can ‘Update Serial Numbers’
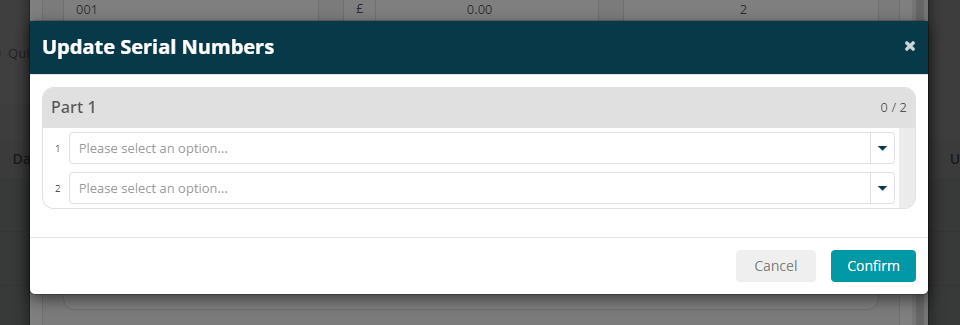
Here, you can choose which serial numbered stock items to issue to this job.
Click Confirm when you are happy with the selections.
Further Support
For further information or assistance with the above, contact our Support Team on 0800 326 5561 or email support@joblogic.com. Alternatively, our Customer Success Management team can be reached by emailing customersuccess@joblogic.com
Publishing Details
This document was written and produced by Joblogic’s Technical Writing team and was last updated on the date specified above. Be aware that the information provided may be subject to change following further updates on the matter becoming available. Additionally, details within the guide may vary depending on your Joblogic account’s user permissions.

