Introduction
Service Kits allows you to put together a set of parts to be used when carrying out services against different assets or pieces of equipment.
This guide will help you set the kits up and assign them to their appropriate equipment.
Setting up a Service Kit
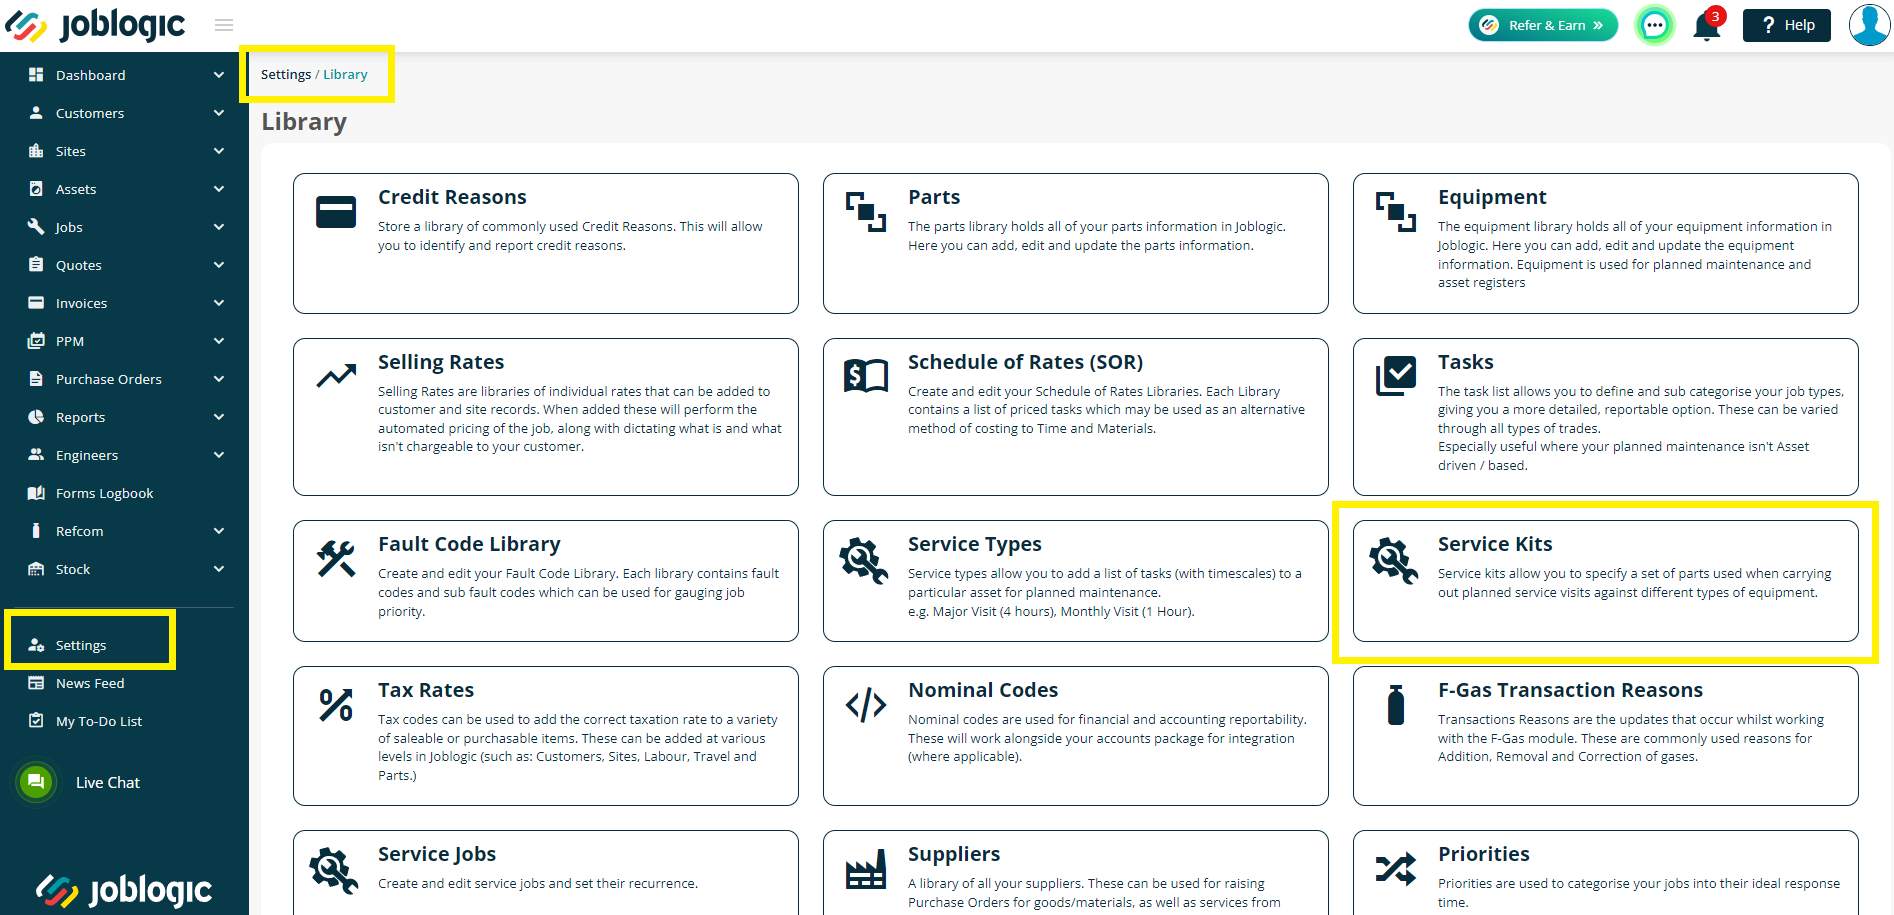
To set up your kits, go to Settings > Library > Service Kits.
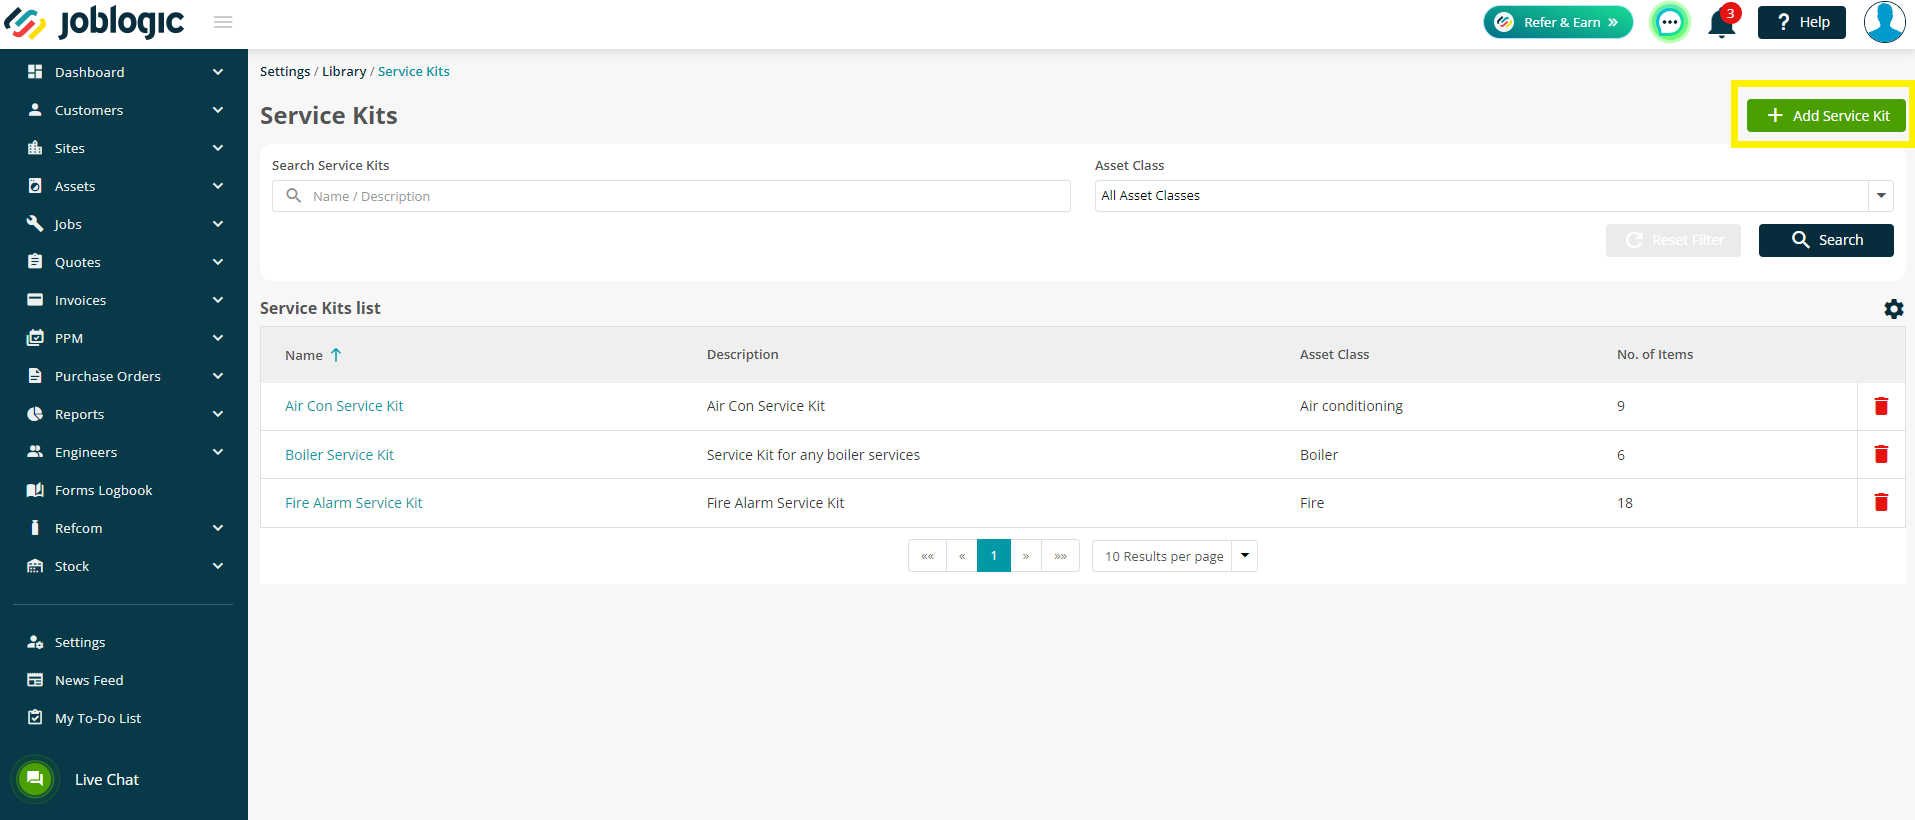
From here, you can then click Add Service Kit to start making your first kit.
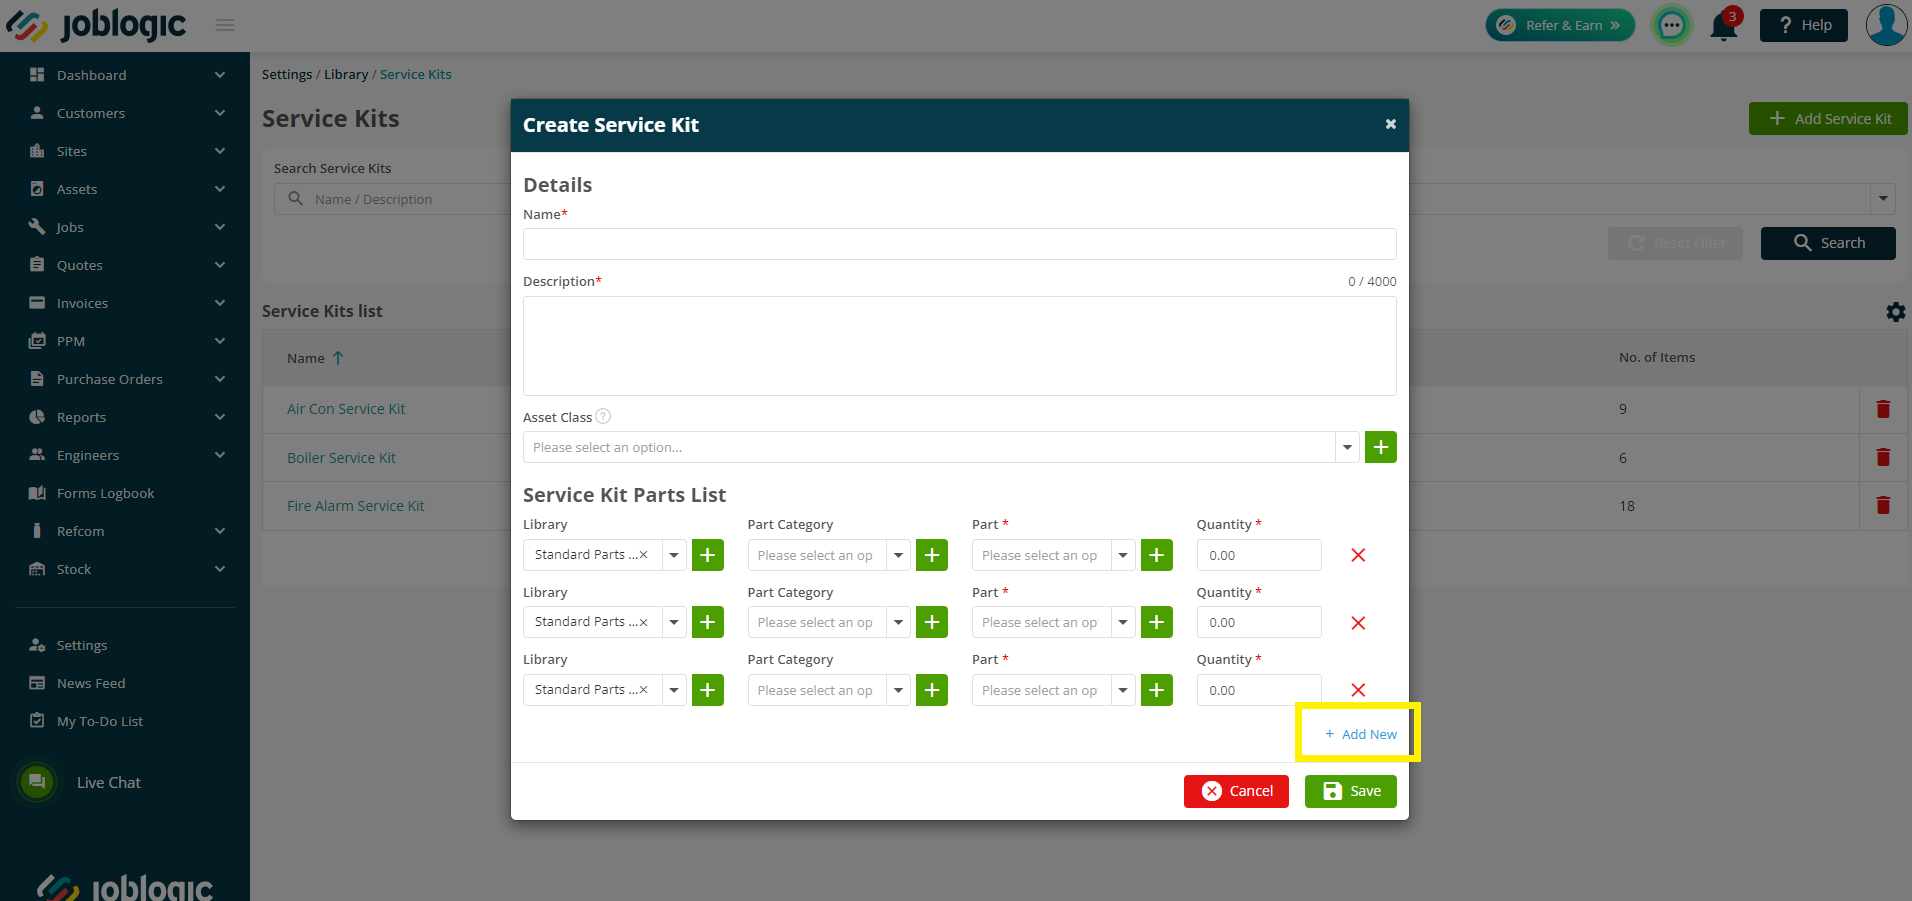
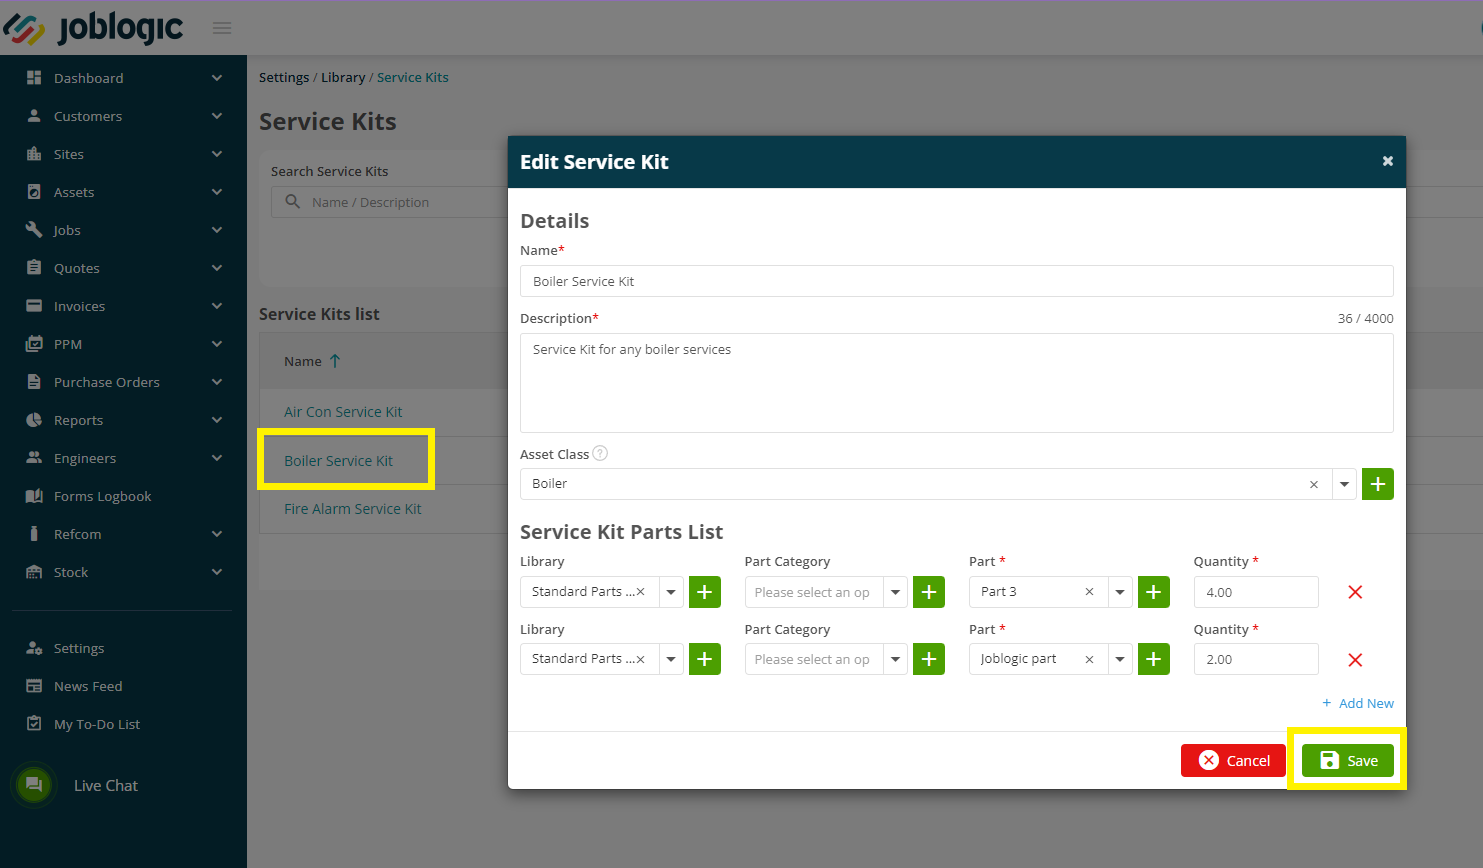
You will need to enter a name and description for your kit as these are mandatory fields.
You can then select an Asset Class, if you wish, and finally move onto adding your parts.
Click ‘Add New’ to add multiple items to your kit.
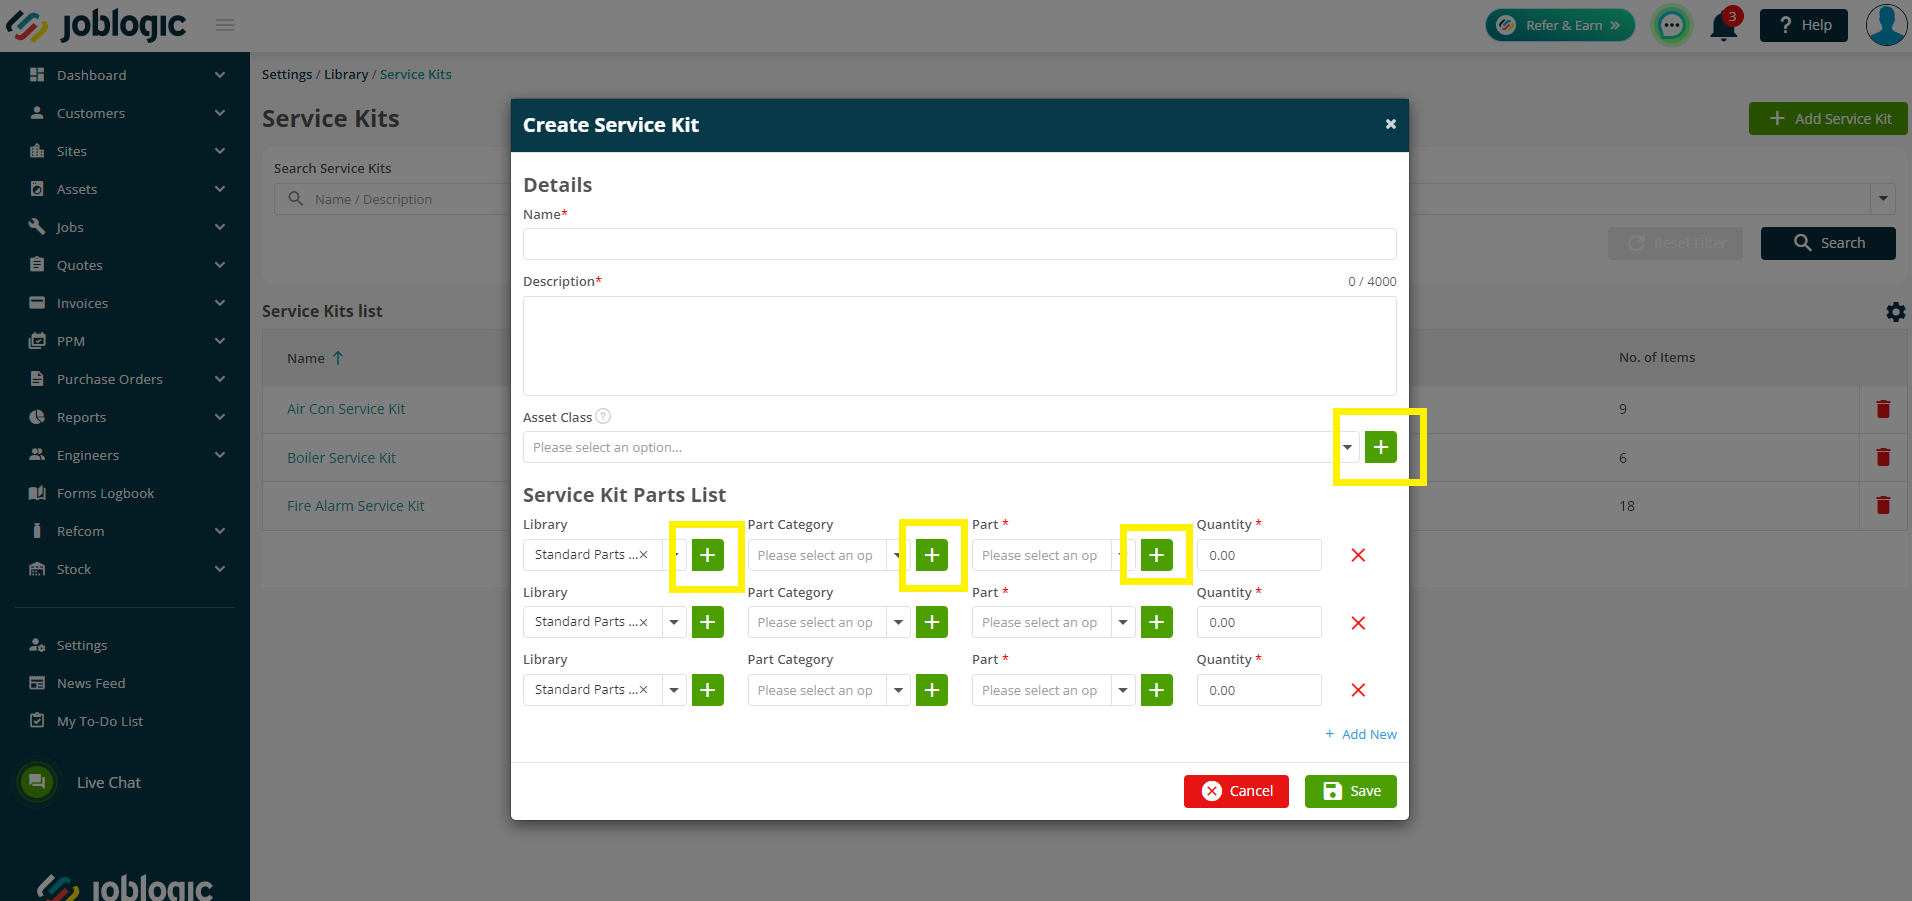
If the part you want to add does not yet exist in your library, you can also add brand new parts by clicking the green plus button.
This is the same for the Asset Class, Part Library and Category.
Click Save and your Service Kit is now available in the main list.
Clicking the name allows you to view and edit the details as required.
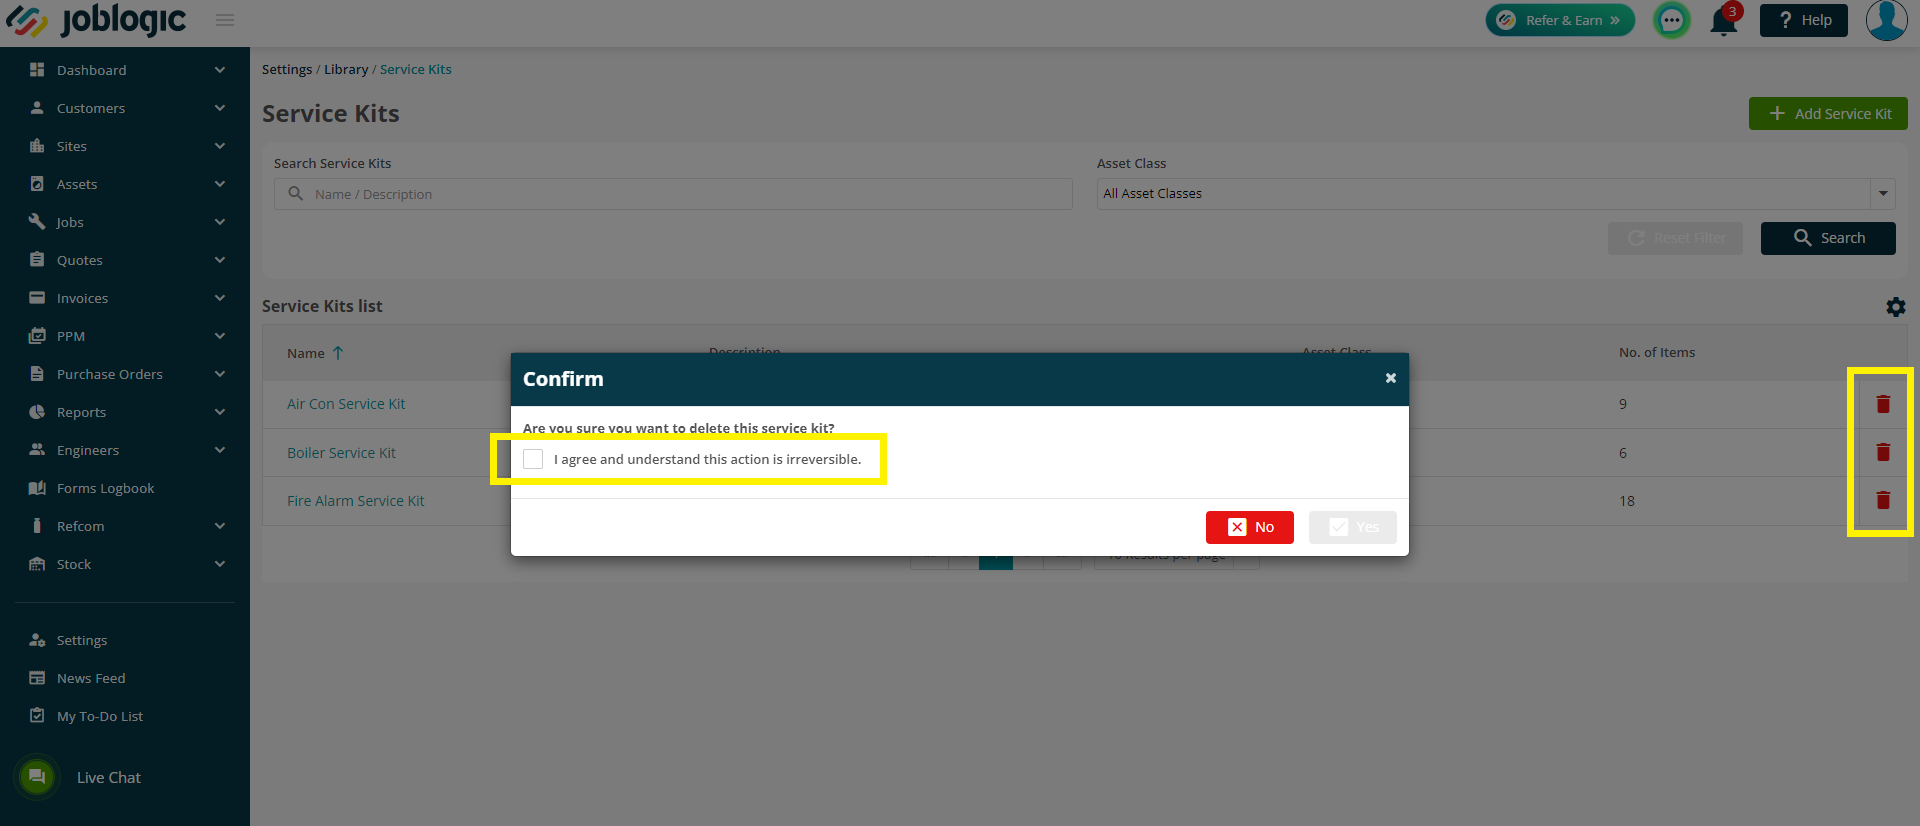
If you wish to delete a service kit, click the red icon on the right-hand side, confirm you are happy to delete the item and then click Yes.
Assigning Service Kits to Assets or Equipment
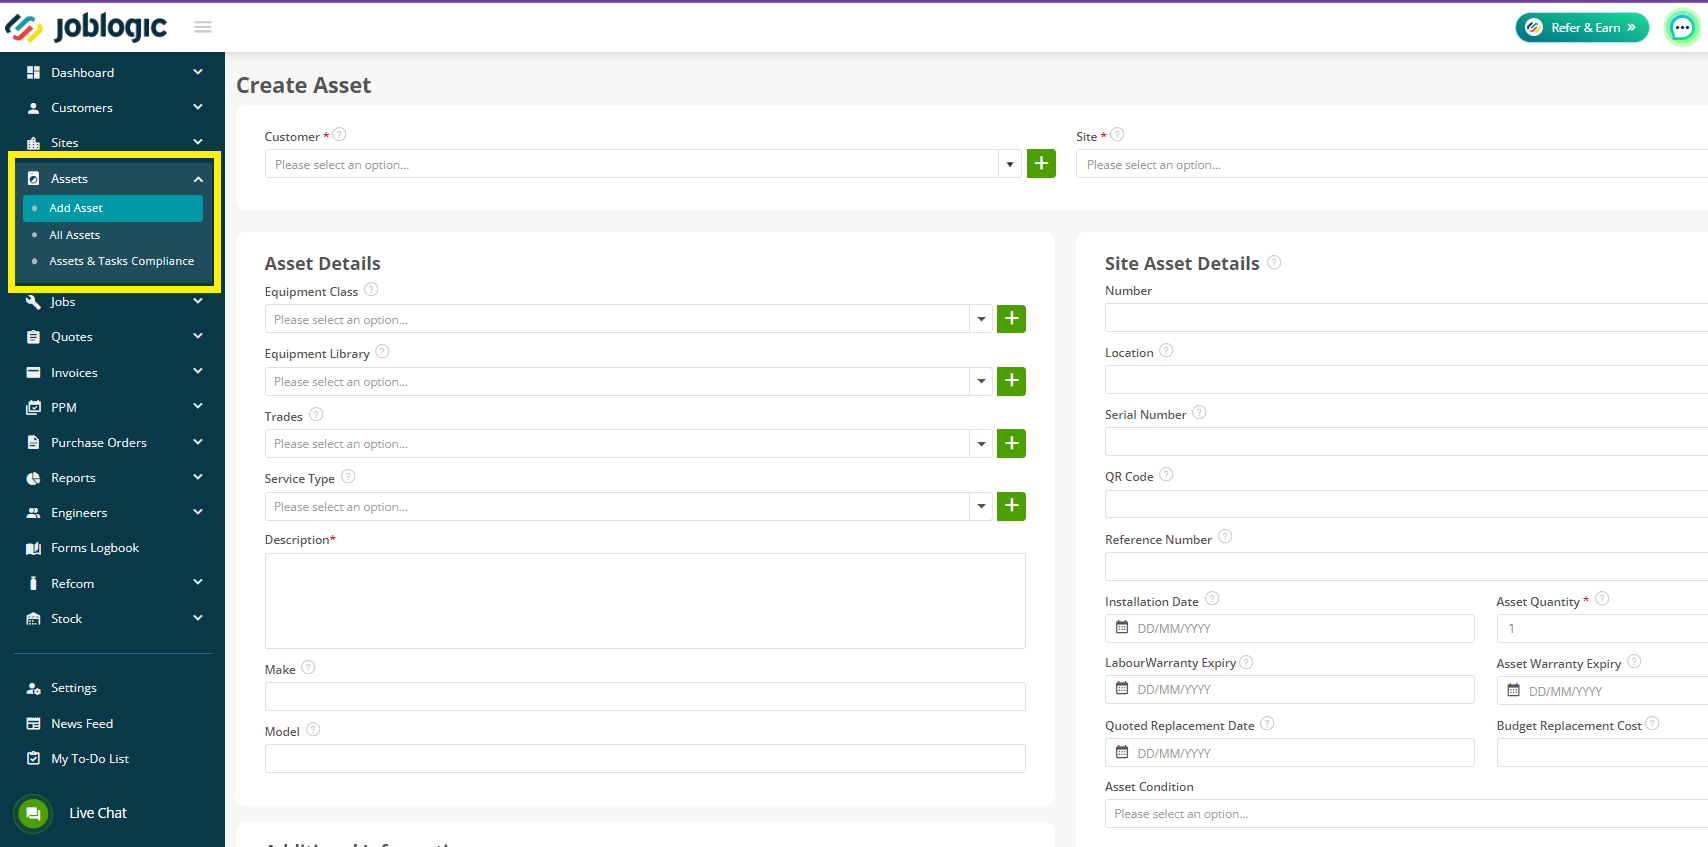
You can add a Service Kit to a new Asset/Equipment or to an existing Asset/Equipment.
Firstly, navigate to Assets > All Assets to edit a current item, or Add Asset to create a new item.
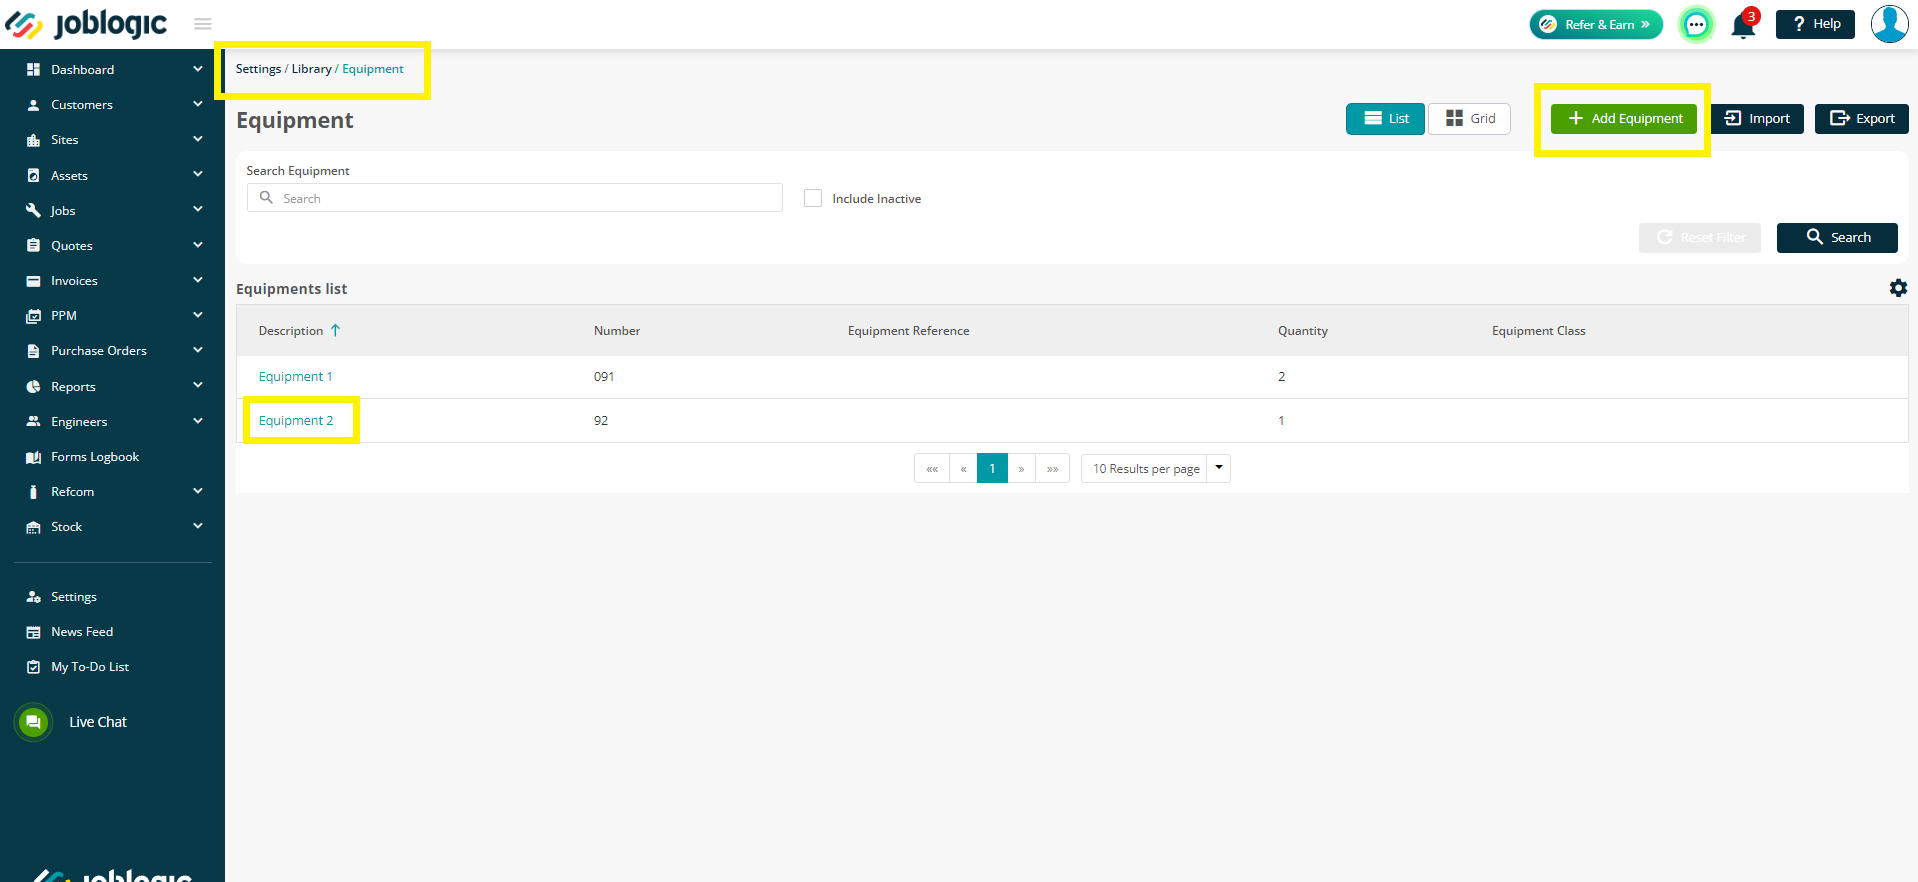
Or navigate to Settings > Library > Equipment > to edit or add a piece of Equipment.
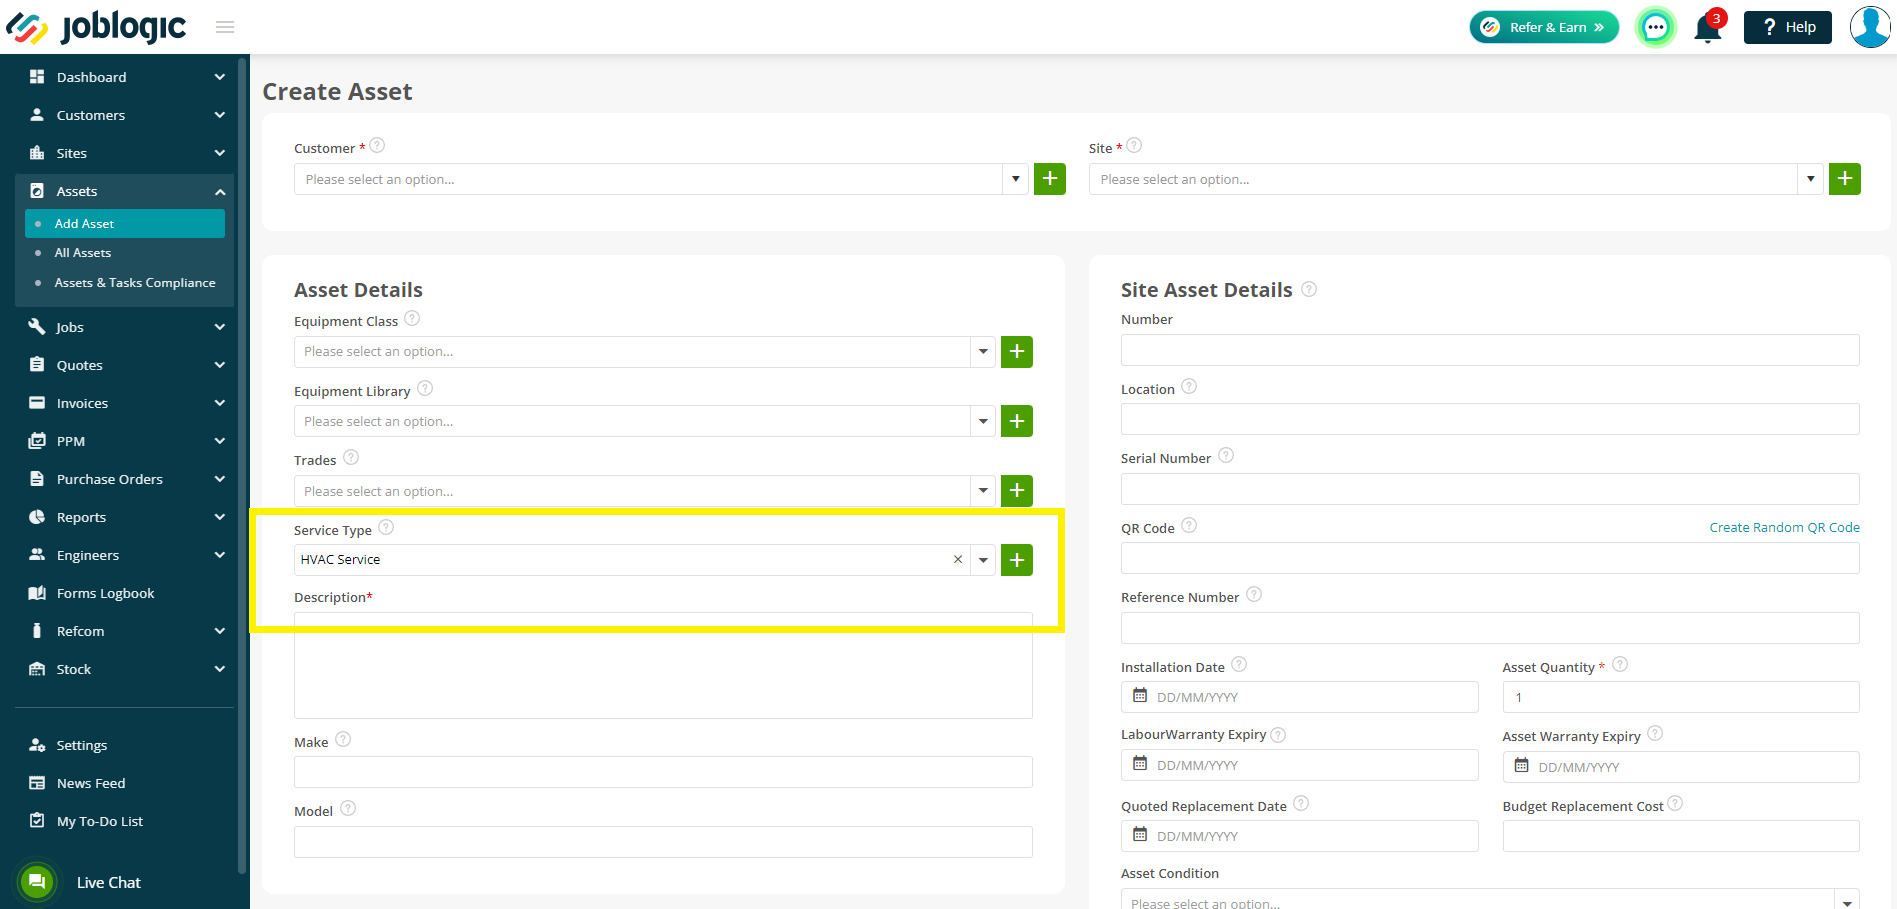
The Service Kits option will only appear once you have selected a Service Type. To look further at Service Types and how to set them up, click here.
The Service Kits are based on the task list and frequencies against the Service Type, so if there are no tasks, you will not be able to add a Service Kit.
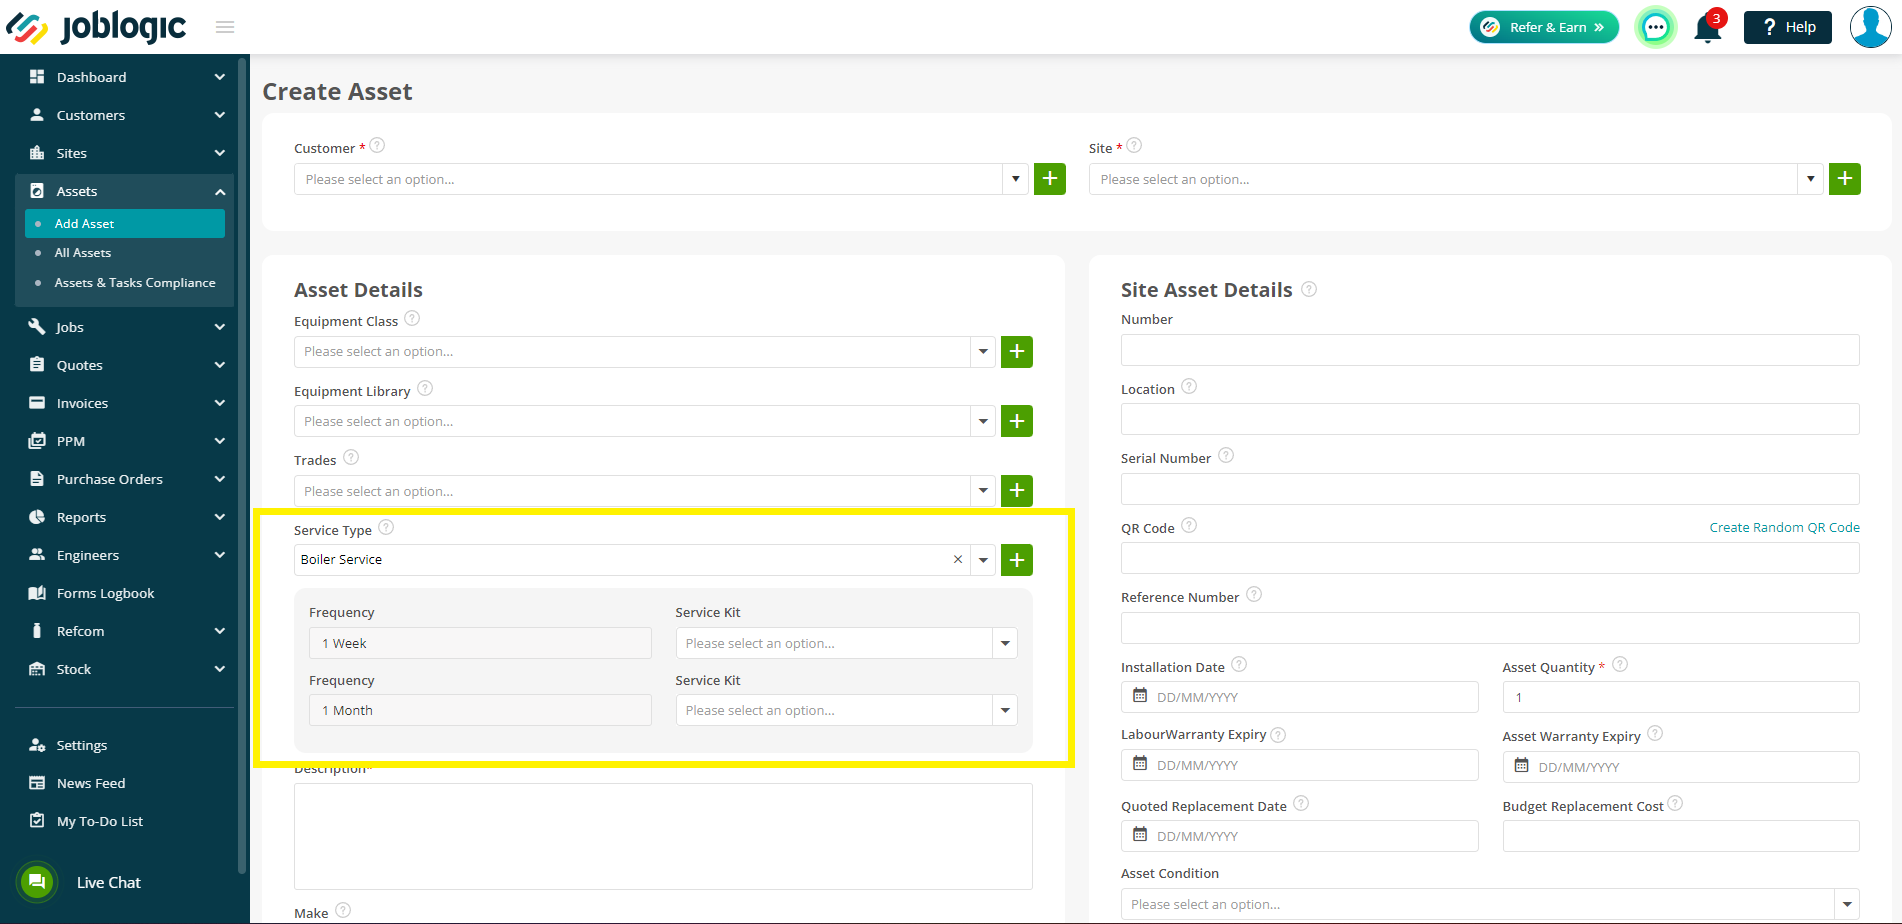
If you have multiple tasks, but with different frequencies, you will be able to add multiple Service Kits.
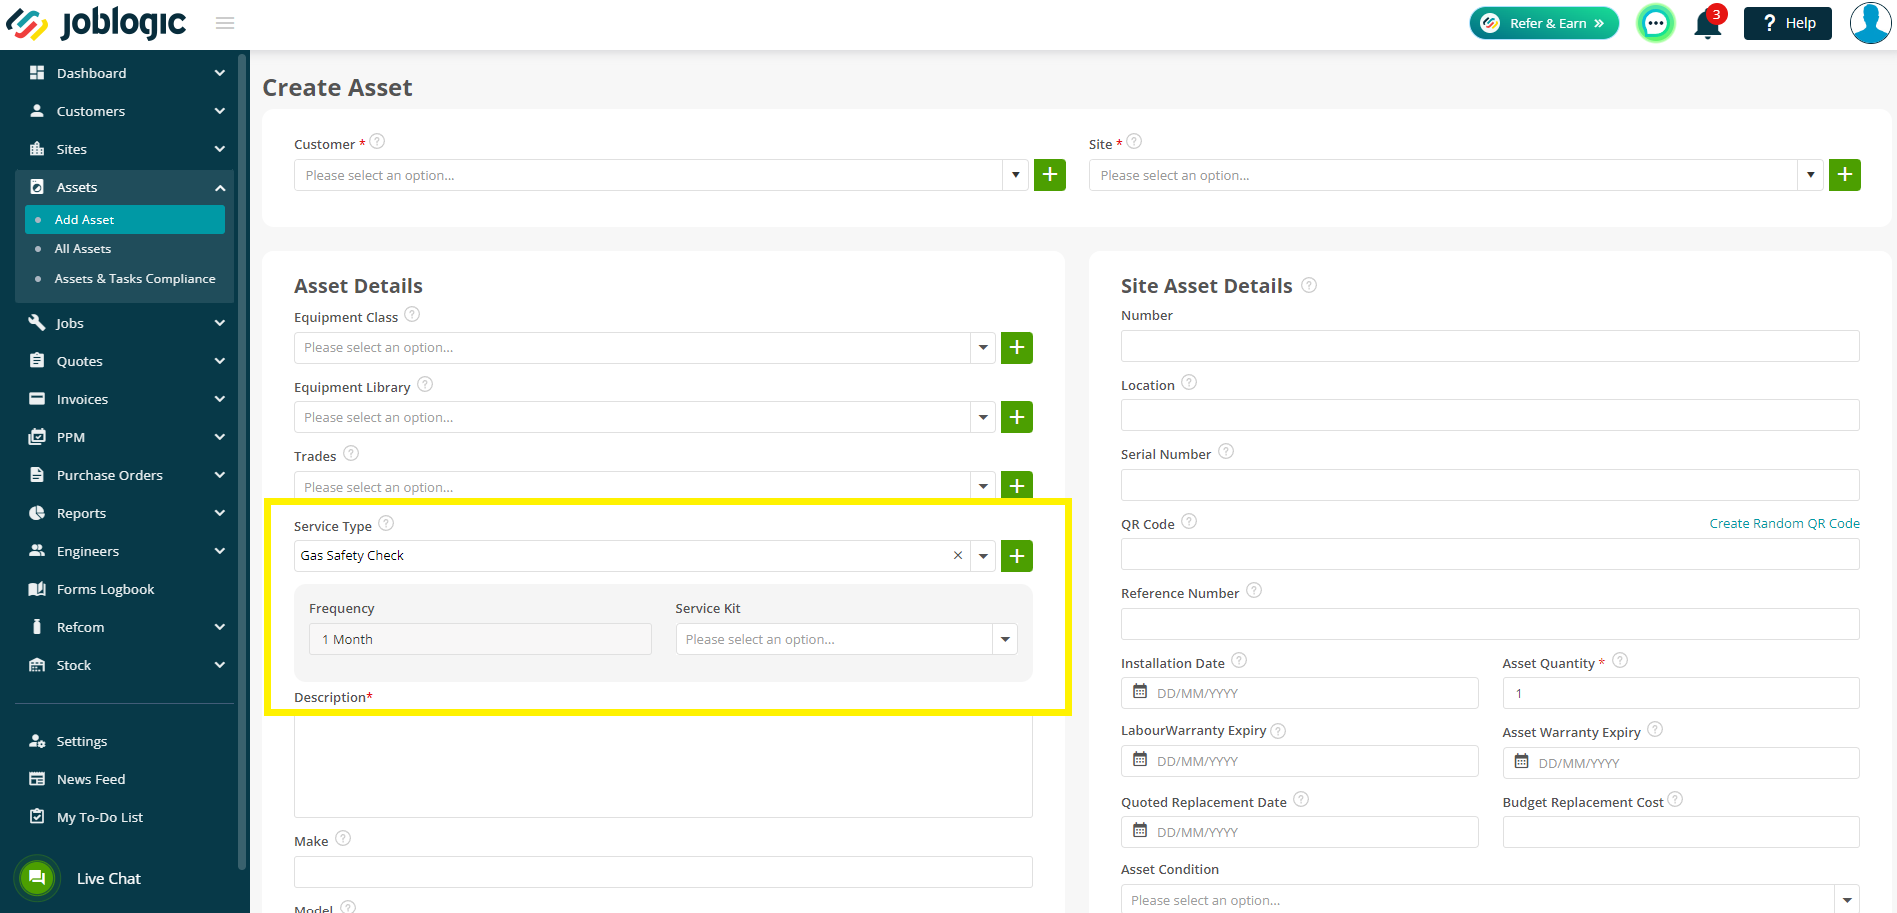
If there is only one task or more than one task, but they have the same frequency, only one Service Kit can be chosen.
Assigning Service Kits to PPM visit Assets
Add your PPM contract as normal. To view more on this, click here.
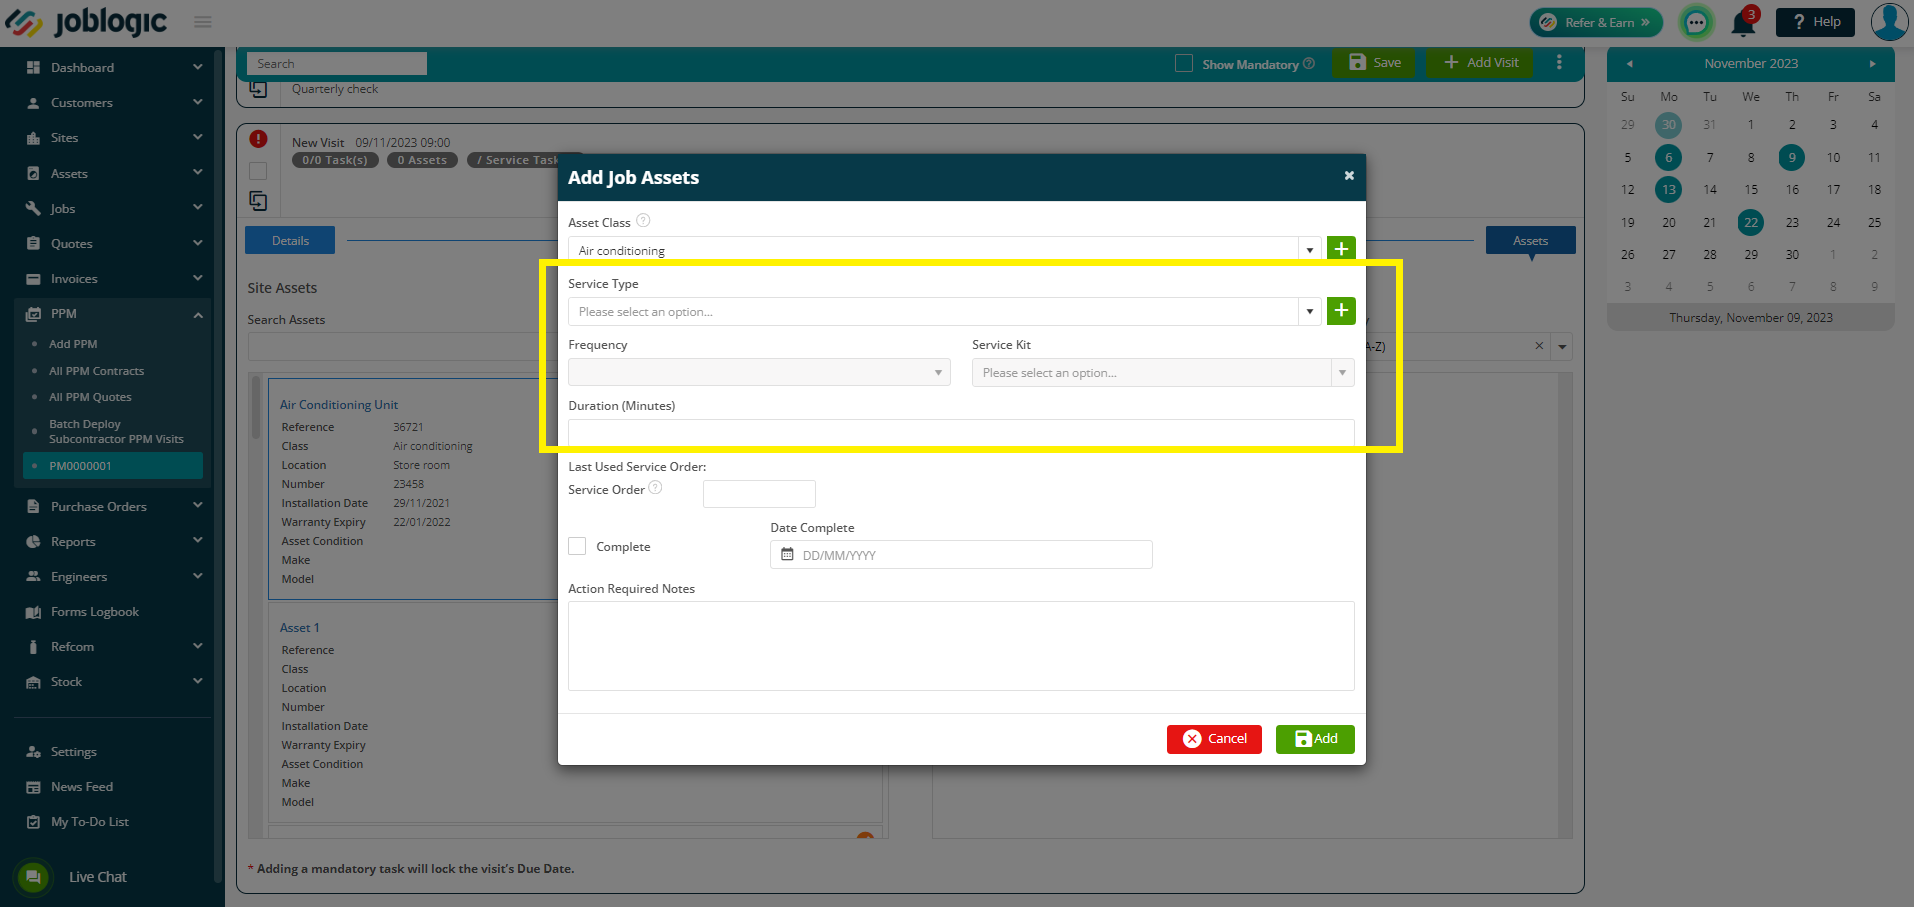
Next, click into the Visits tab, click Add Visit and then Assets.
Choose the asset you want to bring across to the job, and then click the arrow as normal.
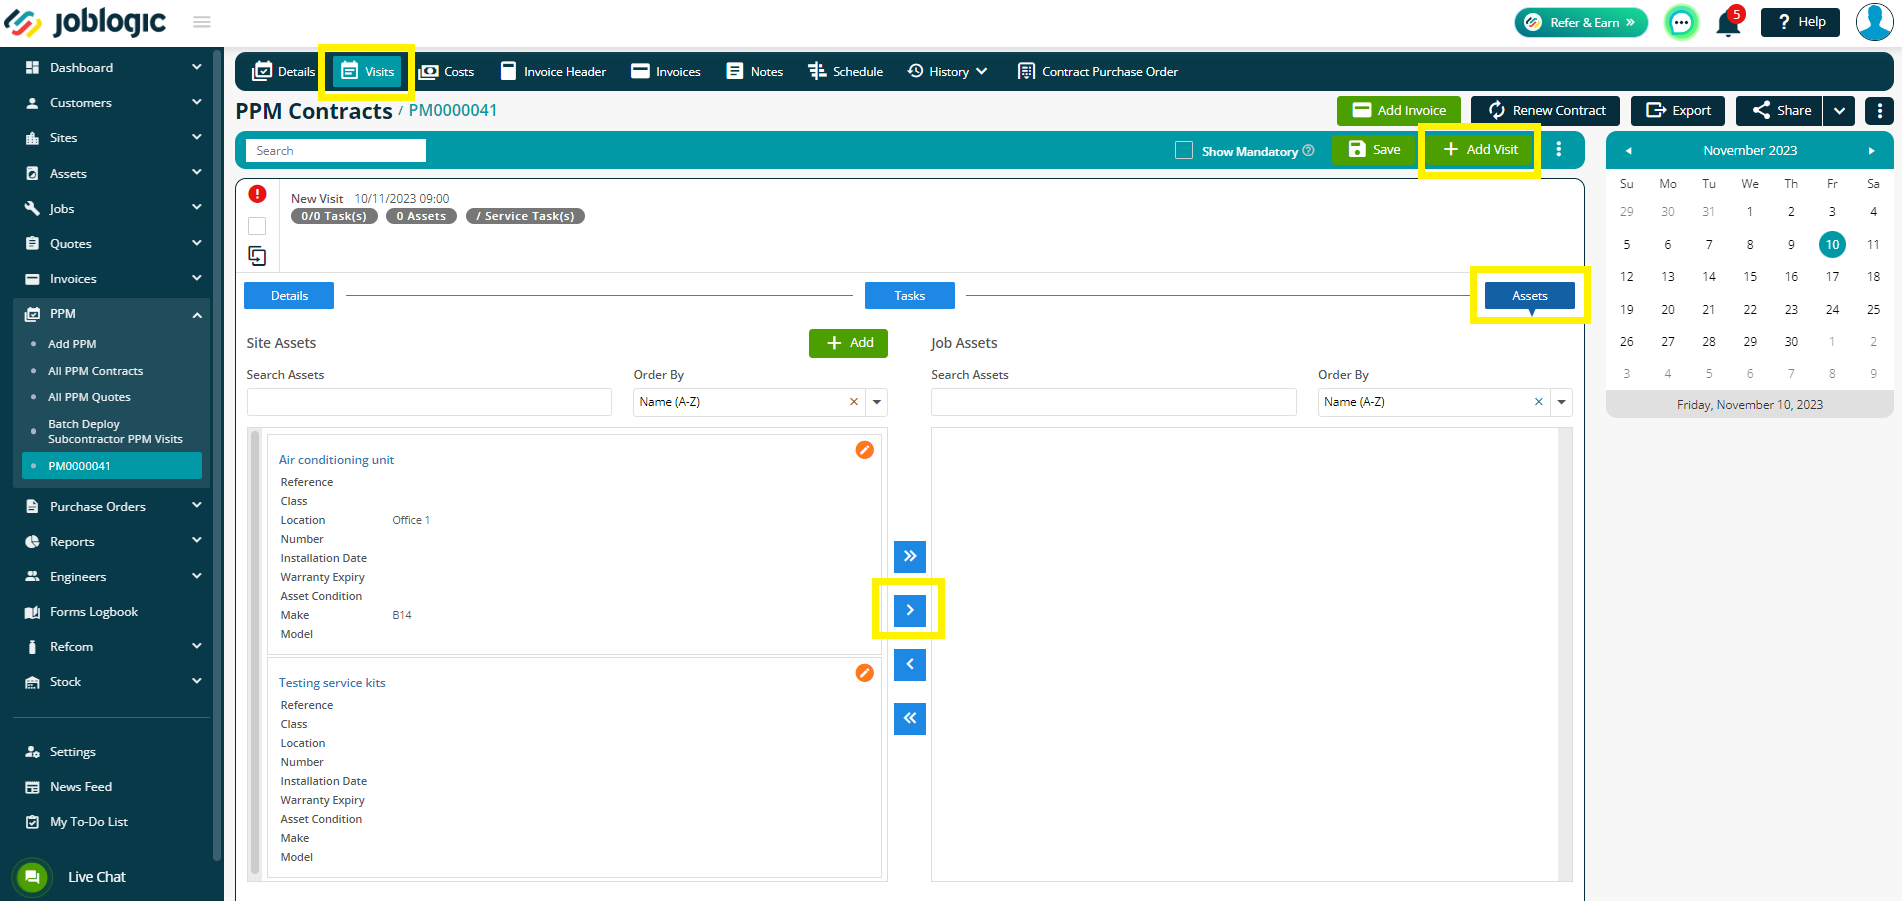
If you have already set up your Service Kits against the asset, the data will auto populate.
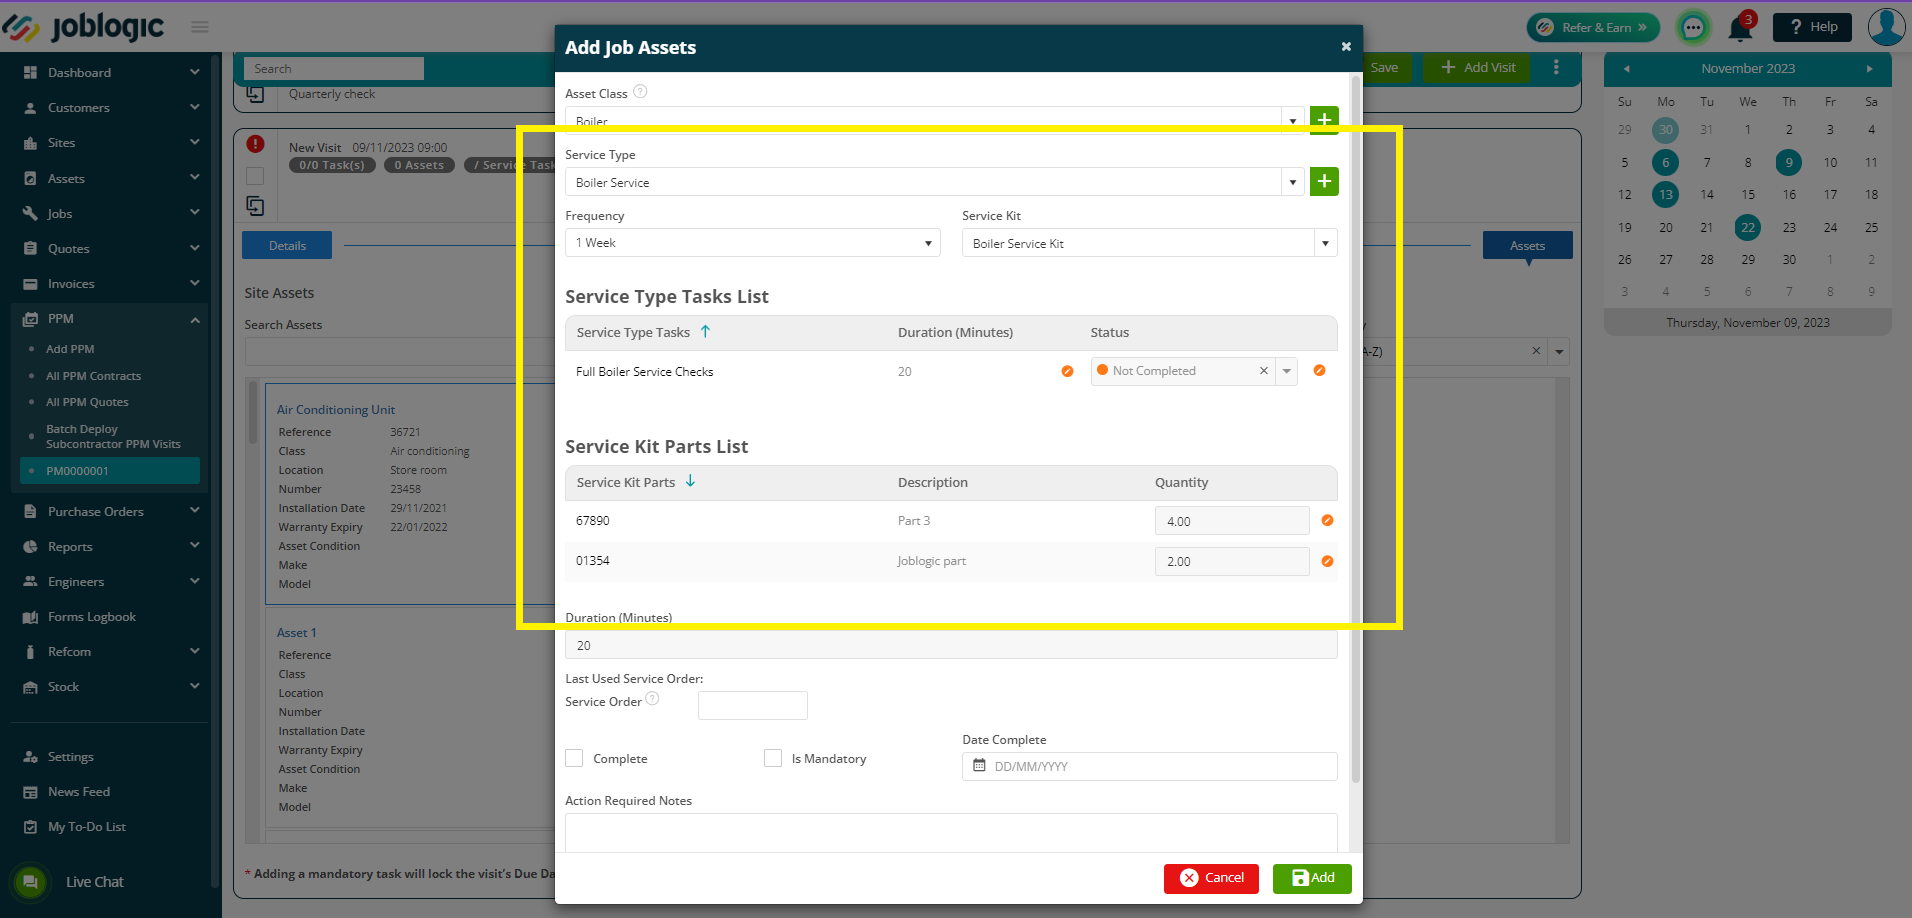
Alternatively, you can select your Service Type and then the relevant Service Kit(s) manually.
The quantity of the parts in the kits can also be edited in this screen by clicking the orange edit icons
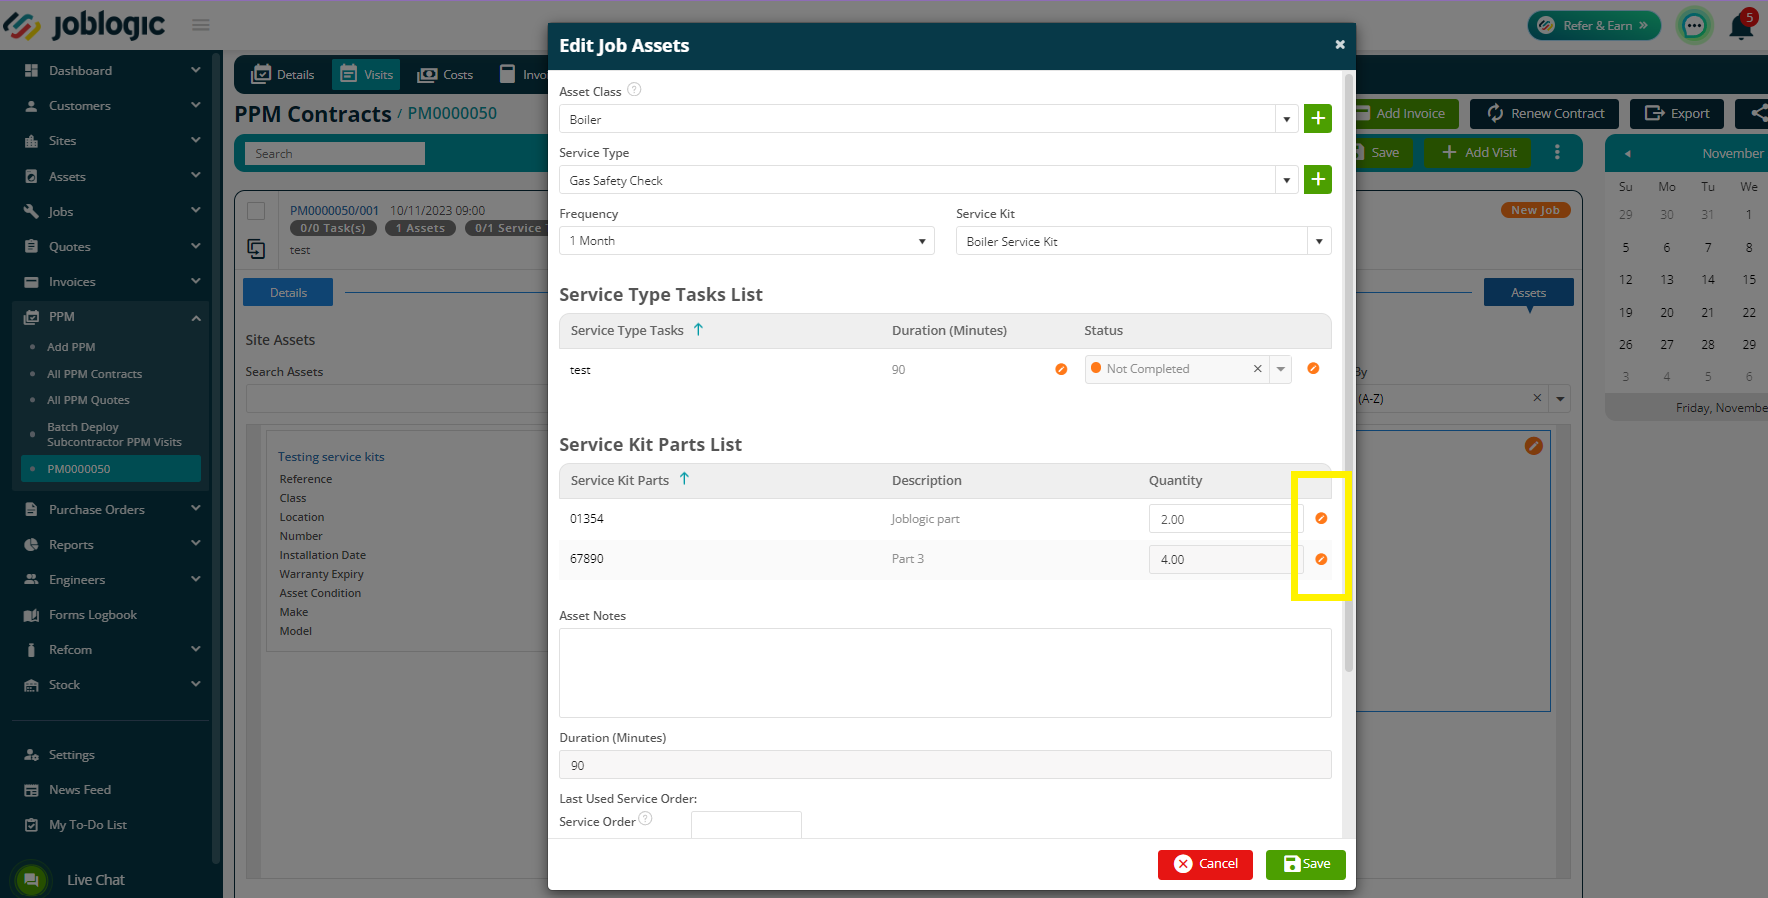
Once you are happy with all details, click Add and then Save.

The assets and service Kits can be edited against the Visit on the PPM contract, as well as against the job details via Jobs > All Jobs > job number > Assets tab. This can only be done on PPM job visits.

Further Support
For further information or assistance with the above, contact our Support Team on 0800 326 5561 or email support@joblogic.com. Alternatively, our Customer Success Management team can be reached by emailing customersuccess@joblogic.com
Publishing Details
This document was written and produced by Joblogic’s Technical Writing team and was last updated on the date specified above. Be aware that the information provided may be subject to change following further updates on the matter becoming available. Additionally, details within the guide may vary depending on your Joblogic account’s user permissions.