Introduction
In Joblogic you can set up several priorities to allow you to better schedule your works, based on importance and urgency.
The priorities can also be assigned at a customer or site level, again to determine importance, or to capture service level agreements.
This guide will walk you through setting up the priorities, the option of grouping and assigning them, and how to use them against a job or quote.
Setting up a Priority
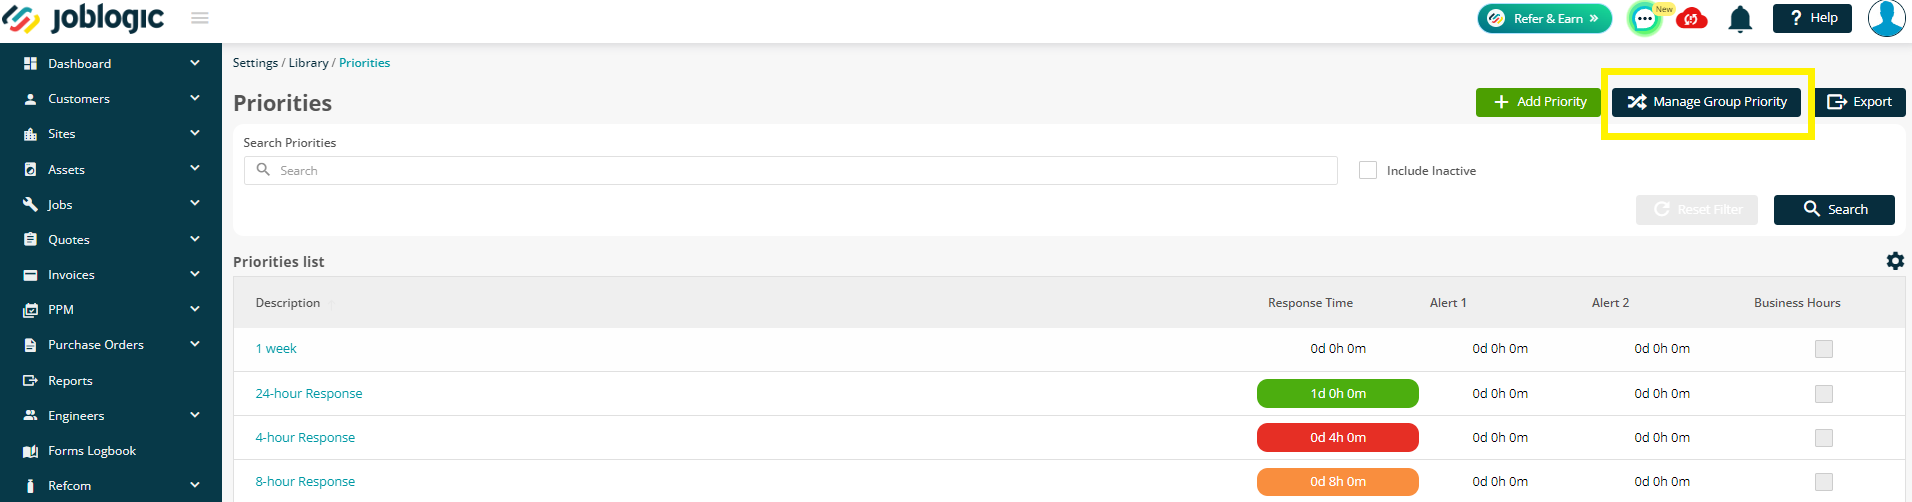
To set up your initial list of priorities, firstly go to Settings > Library > Priorities

Next, you can click ‘Add Priority’ in the top right
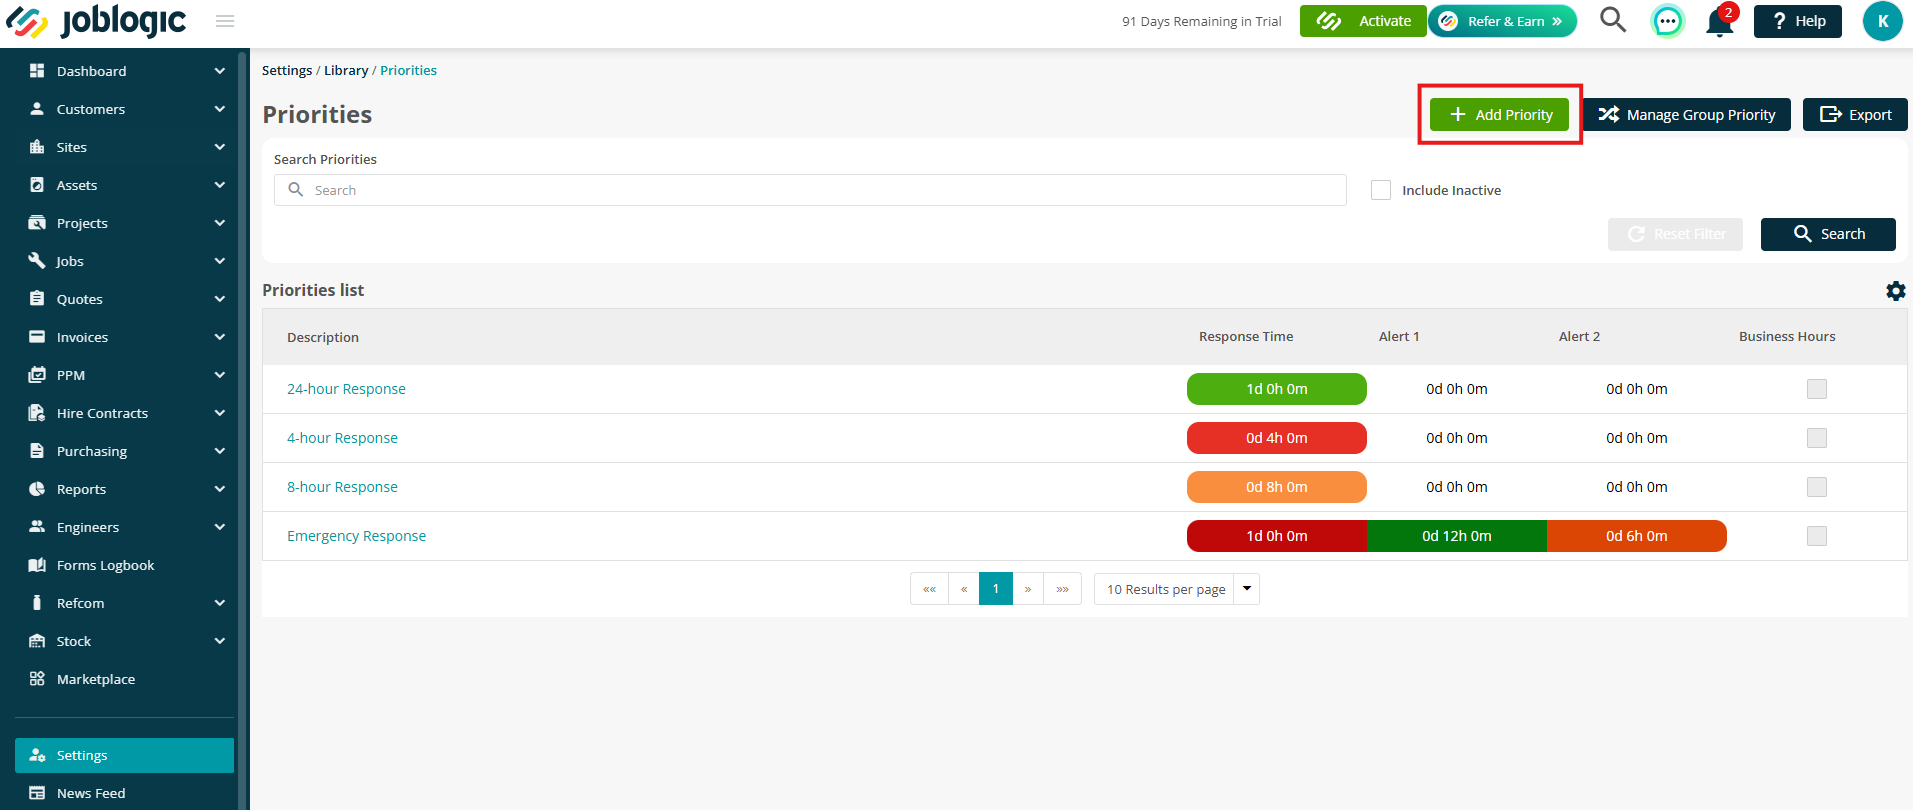
There are two sections to a priority
- Response time based on attendance, i.e., a job needs to be attended within 24 hours
- Completion time based on completion, i.e., a job needs to be completed within 24 hours
You can use one or both, depending on how you monitor your KPI’s
Response time based on attendance
To set your Response Time, you can add a Description for your new priority and then choose your Warning colour and time.
If we use the ‘traffic light’ system as an example, you may want to enter a ‘’24-Hour Response’’ description and then enter ‘1’ Day in the ‘’if the job is not attended after’’ section, picking the colour* red to mark the missed appointment
*The colour will be highlighted on the job in a couple of places, but this will be shown and explained further on in this guide
Your next two options are Alerts, to warn you of a job getting close to breaching its response time
So for example, ‘’when the remaining time is less than’’ 12 hours, the job will show green, and ‘’when the remaining time is less than’’ 6 hours, the job will show amber
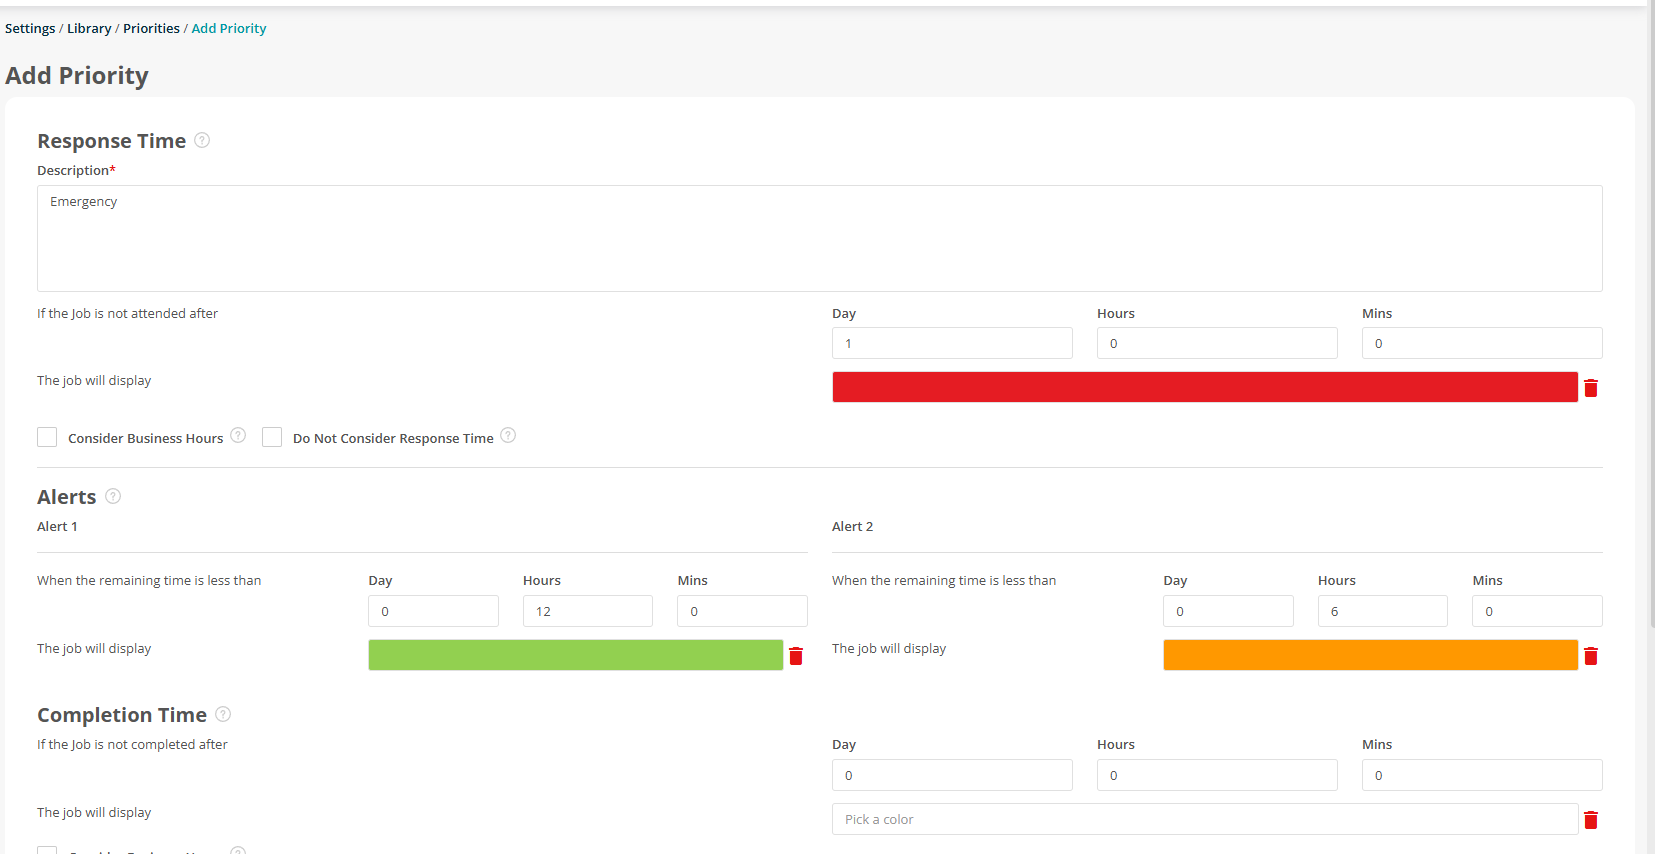
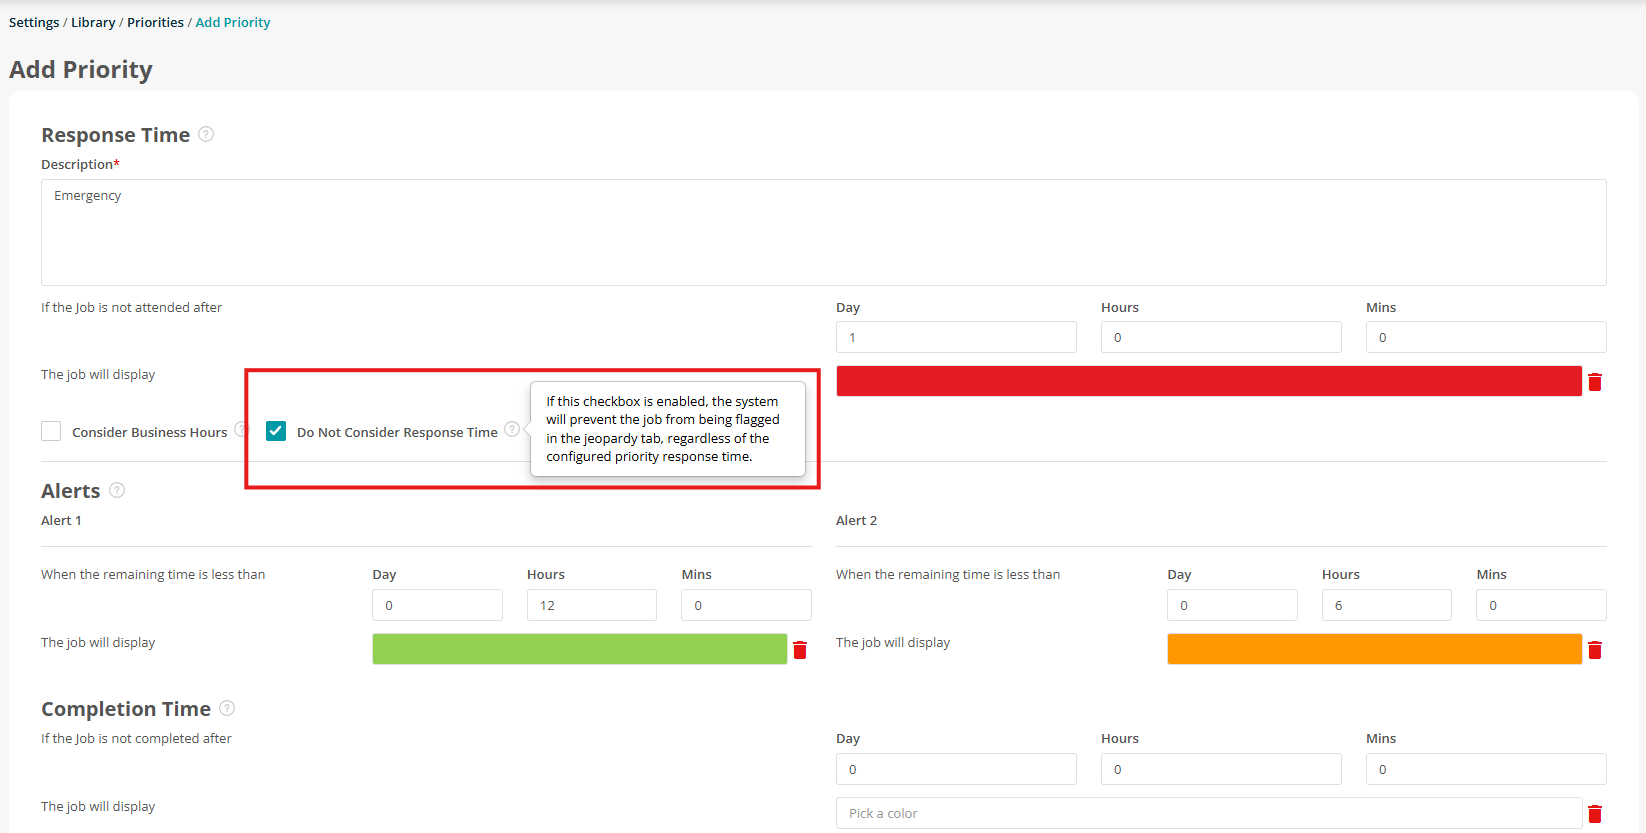
If response time isn’t a priority for certain jobs, you can tick ‘Do Not Consider Response Time’ to prevent them from appearing in the Jeopardy tab.
Completion time based on completion
In a similar set up to the attendance response time, you can set up your colours and alerts for the completion time of a job.
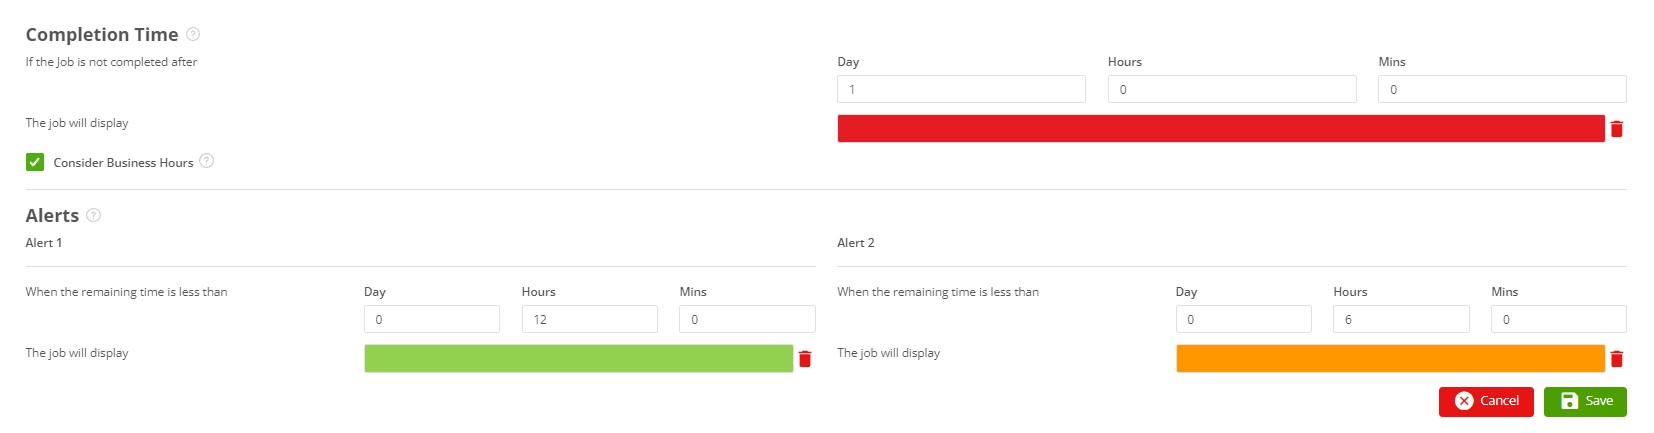
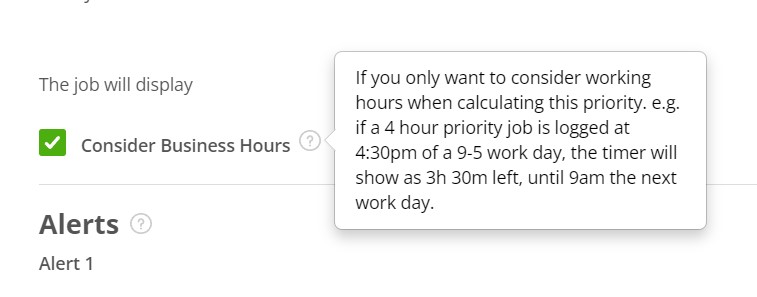
Consider Business Hours
You can also ‘’Consider Business Hours’’ should you wish to only have the response time / completion time countdown during the working hours you have set up in your Company Setup
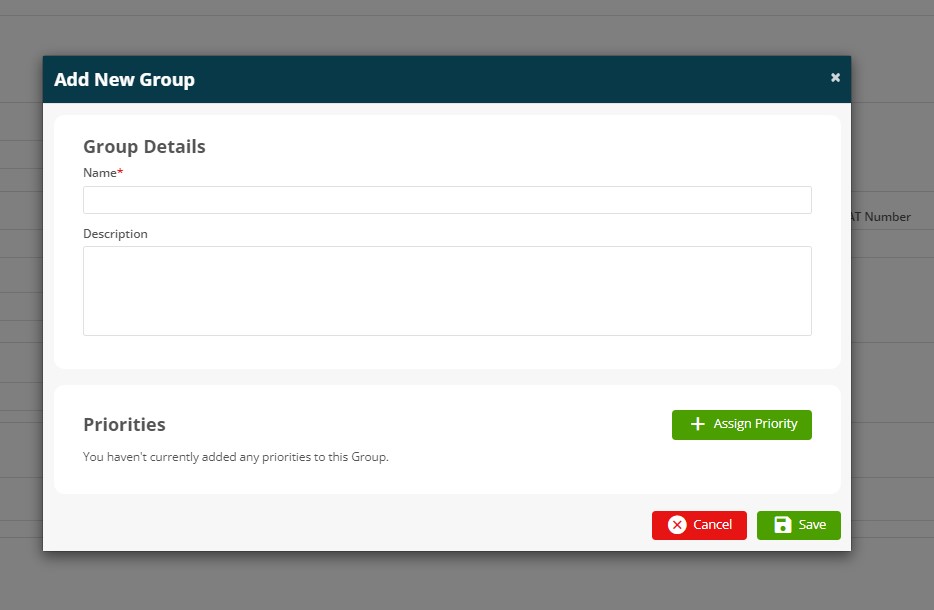
Adding a Group Priority
To create a Group Priority, click the ‘Manage Group Priority’ in the top right
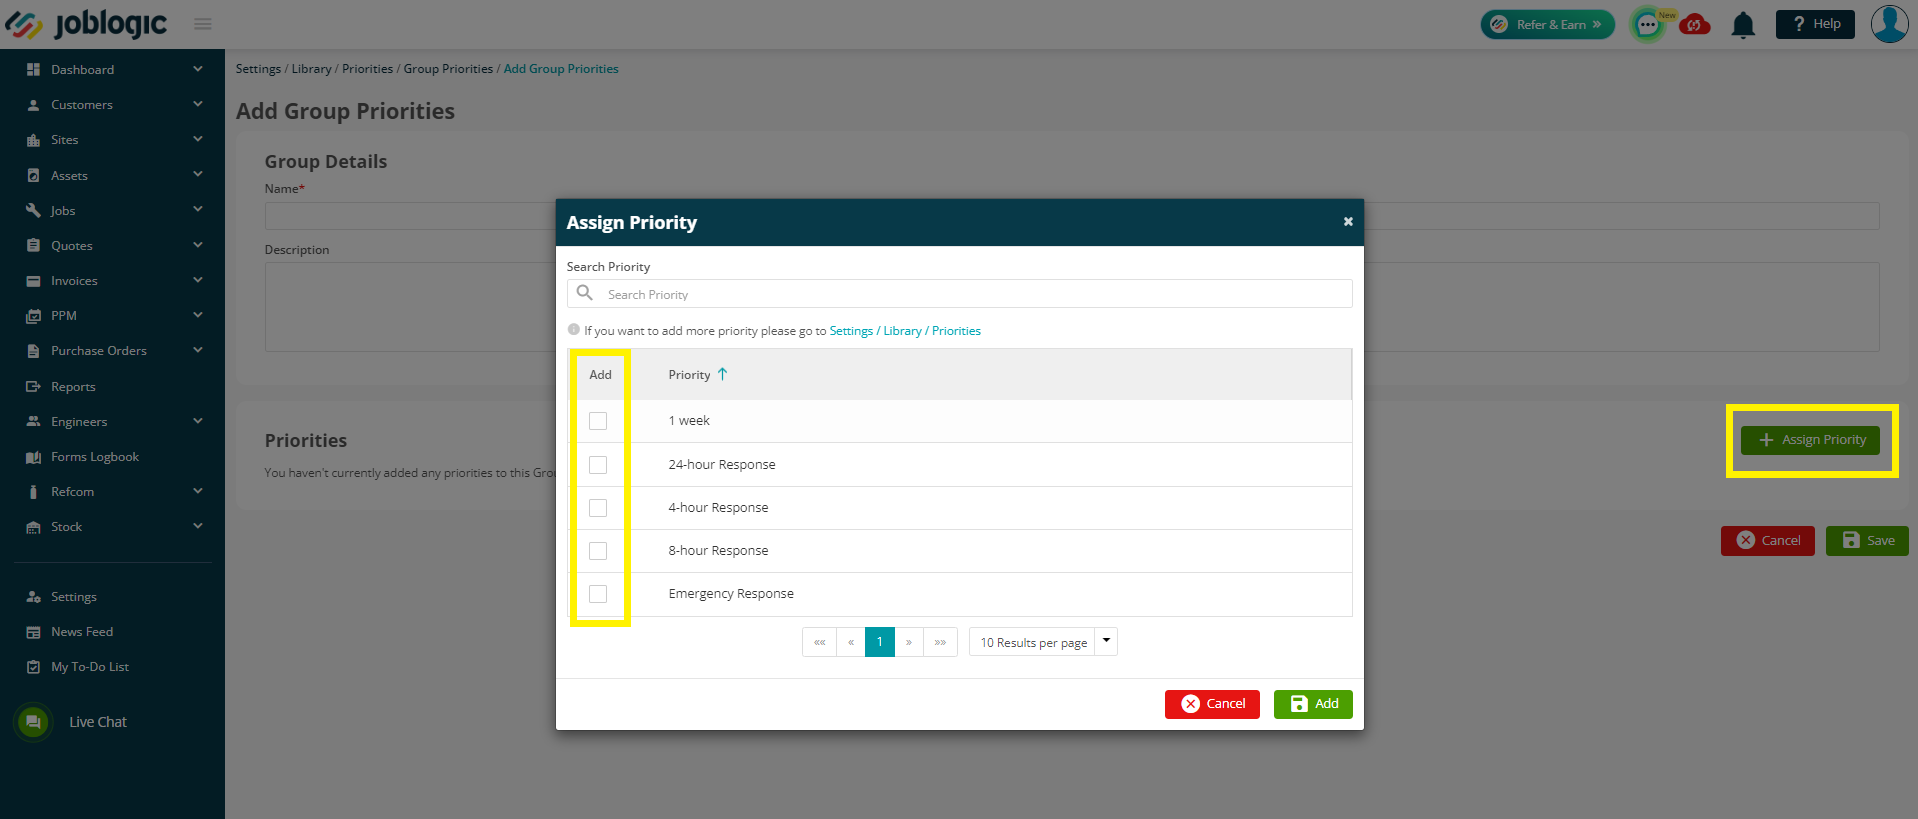
Here, you will be able to click ‘Add Group’ , and then enter a Name and a description for this group, if required.
Next, you can Assign the relevant priorities to this group.
This can become useful if you have different customers with different sets of priorities and timescales as you can then assign a group and default priority to said customer
Configuring your Customer & Site records
To set up a default group and/or priority against your customer, firstly navigate to Customers > All Customers > select your chosen customer > Configuration tab
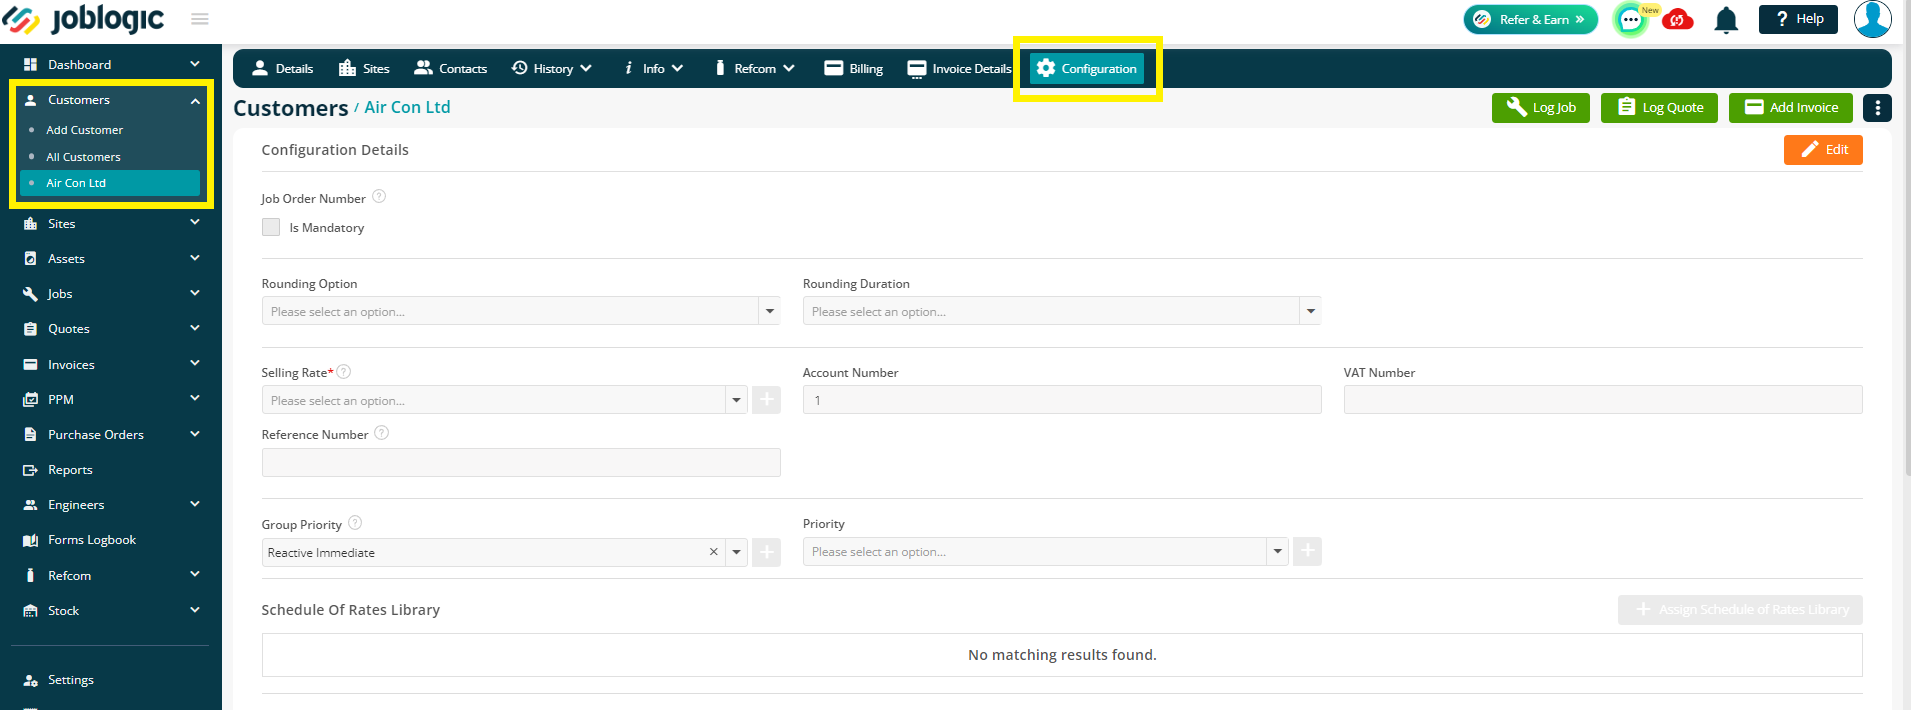
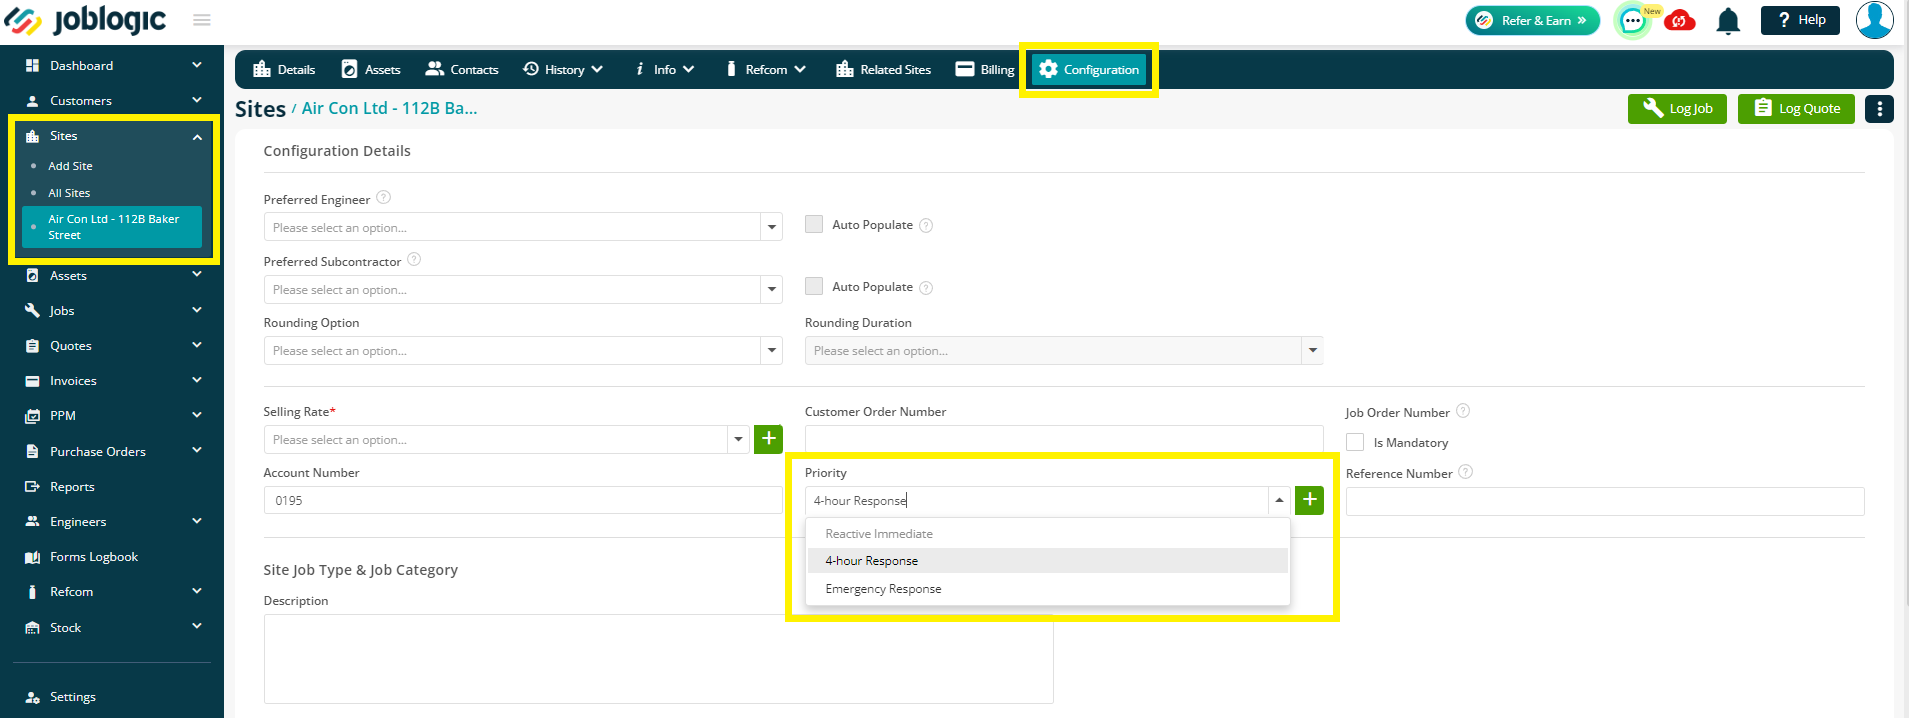
From here you can choose a Group Priority, and then a priority from that list
This will mean any job or quote that you log for this customer, will use this as a default
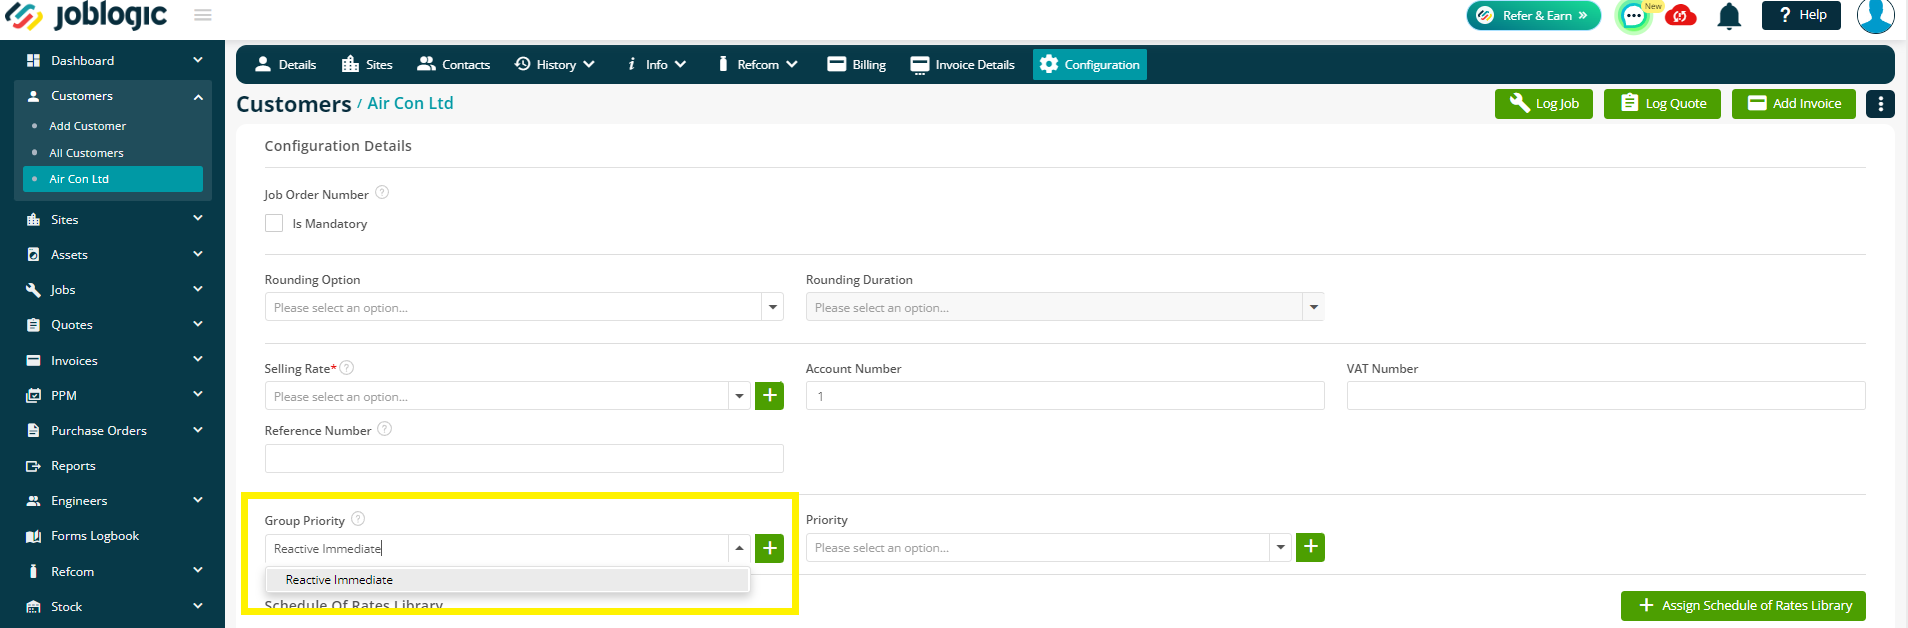
You’ll notice that once you have chosen your group, the priority list will only show the relevant priorities from that group

As with many other areas of the system, if you wish to add a new Group or new priority at this stage, you can do so by clicking the green plus button
You can set up a different priority per site too, if required.
Similar to the Customer set up, you would navigate to Sites > All Sites > select your chosen site > Configuration tab to set this up.
Logging a job
To read a more in depth guide regarding KPI's on your jobs and how they are affected, click here.
When logging a job , the Job KPI’s section will auto fill based on your site default in the first instance. If there is no configuration for the site, joblogic will look at your customer configuration.
If you have set up a group default within the customer configuration, you will only see the priorities relating to this
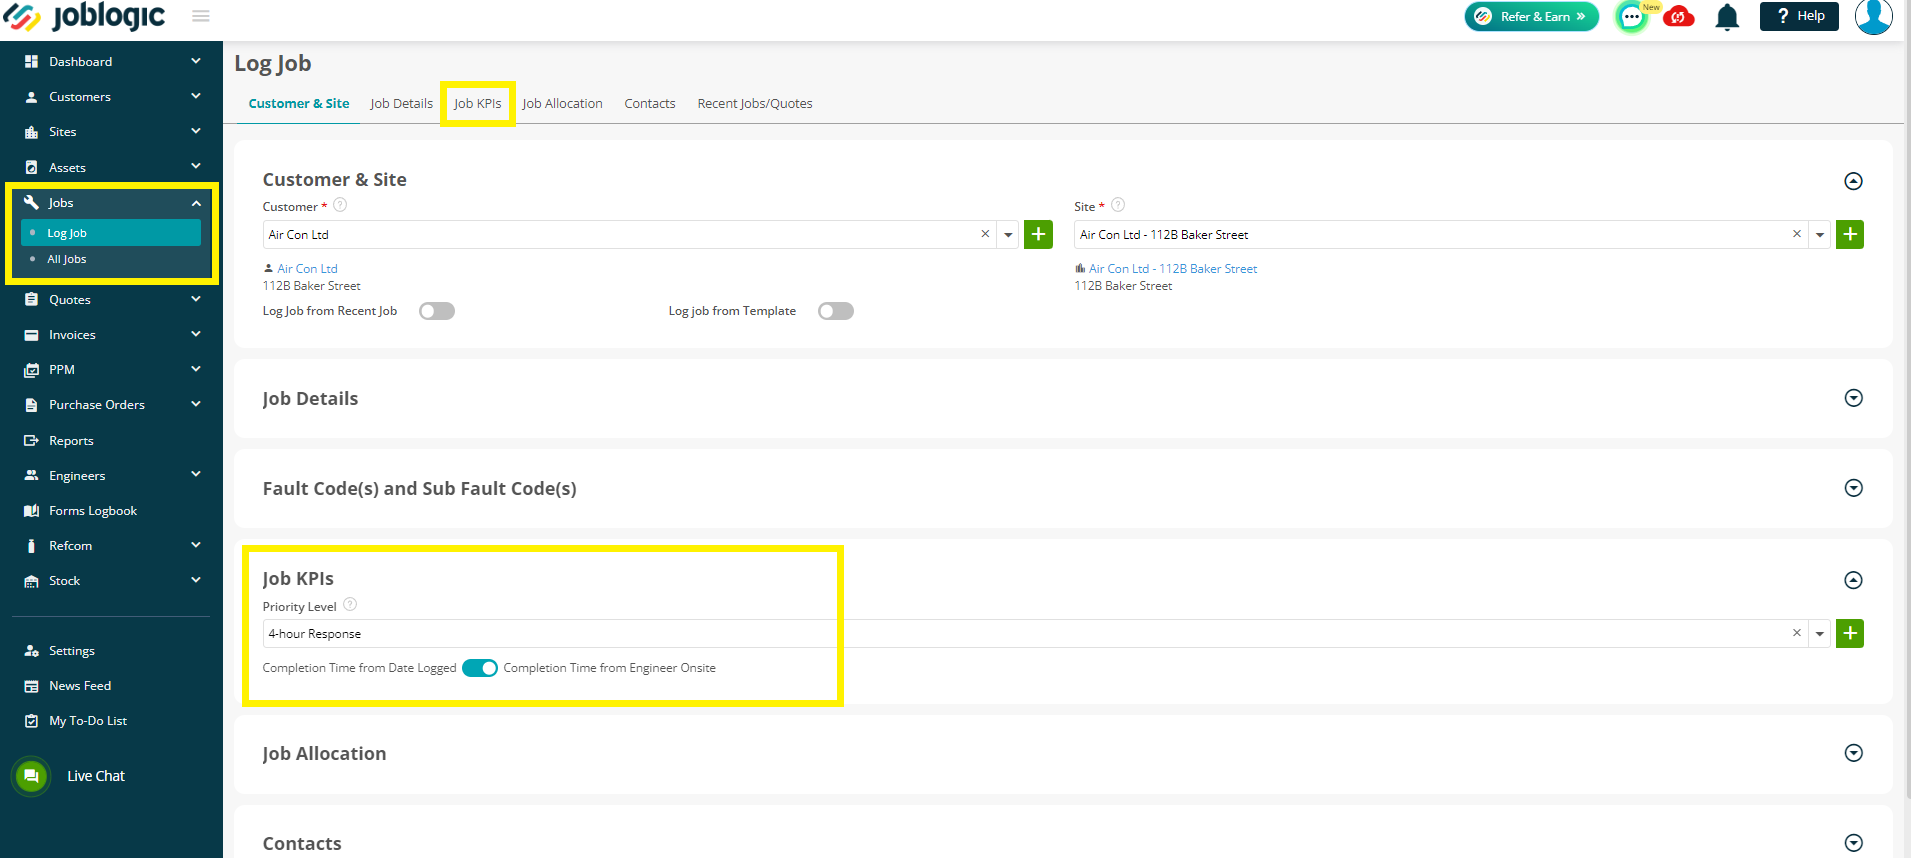
You can add a new priority by clicking the green plus button if required .
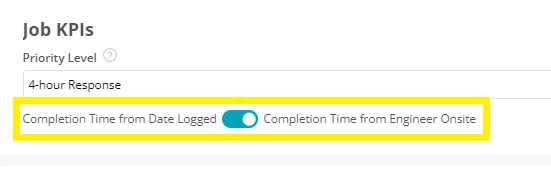
If you have set up the Completion section within your priority, here, you can choose whether you want the completion time to take affect from the Date Logged or from when the Engineer marks themselves as ‘onsite’
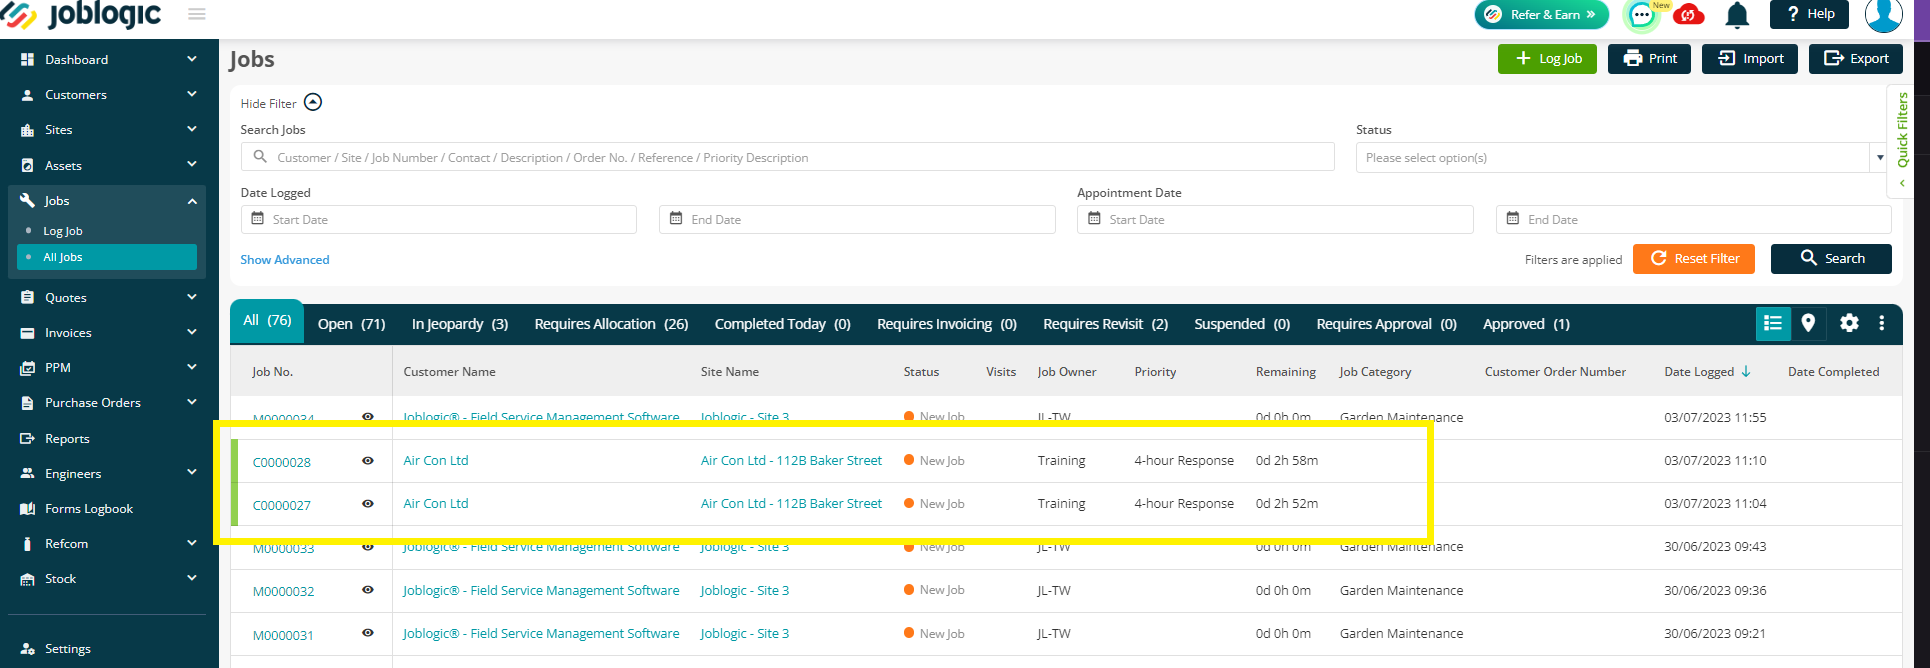
The colour we set up earlier for the response time and alerts will show in a couple of places, for your reference and easy visibility.
Jobs > All Jobs screen
This screen shows the colour on the left, the priority set against it, and the remaining time until you're breaching the KPI.
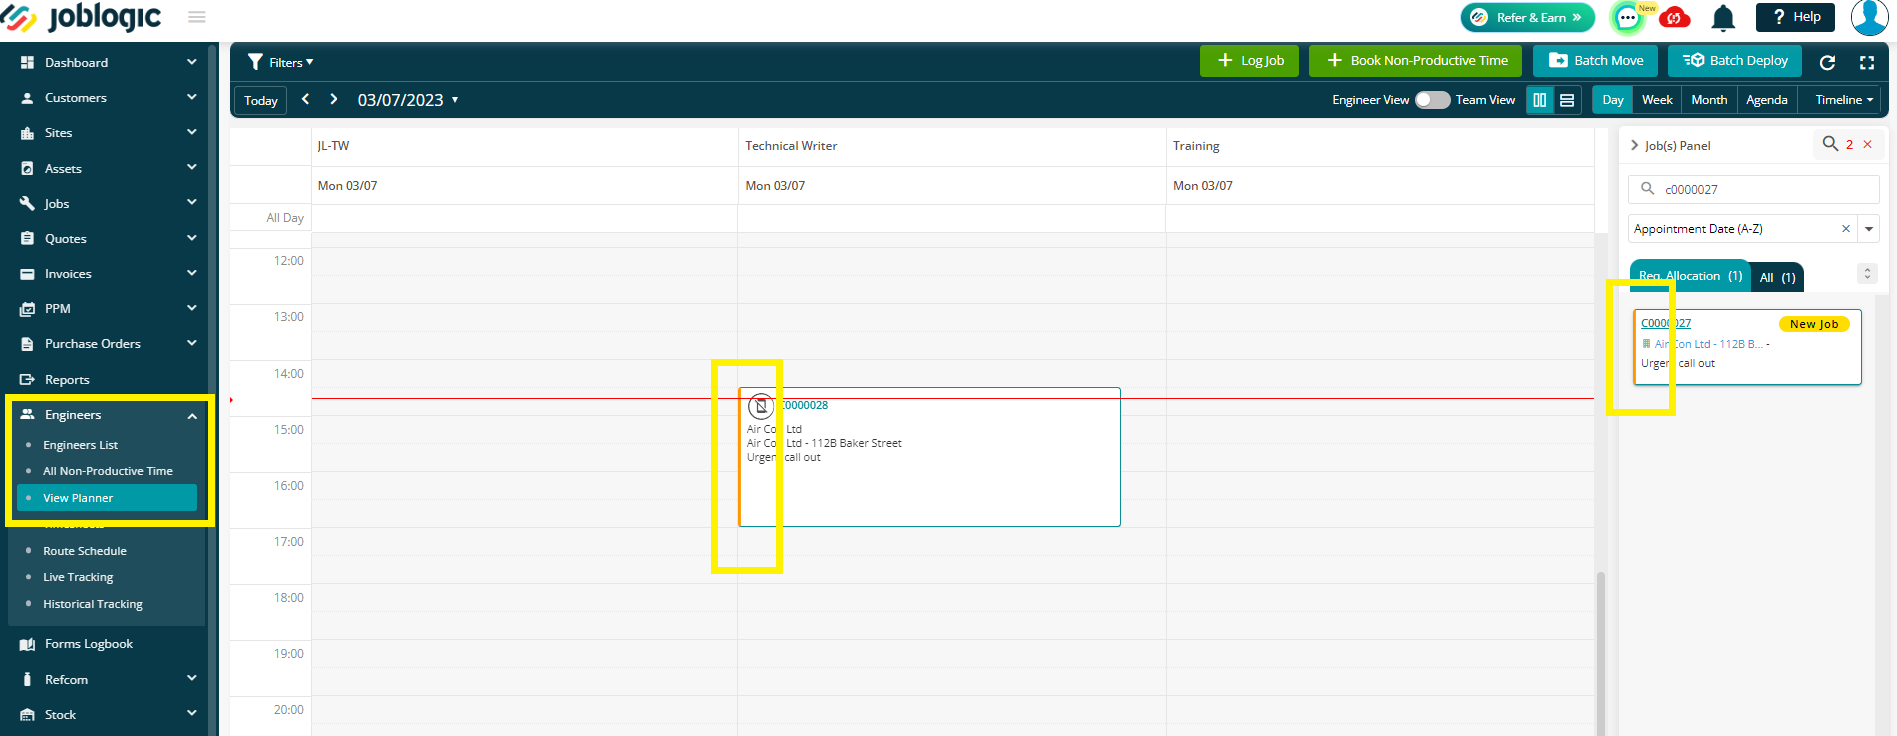
Engineers > Planner
This screen will show the colour on the left, on the jobs already allocated in the planner, as well as the jobs awaiting allocation in the Jobs Panel.
Further Support
For further information or assistance with the above, contact our Support Team on 0800 326 5561 or email support@joblogic.com. Alternatively, our Customer Success Management team can be reached by emailing customersuccess@joblogic.com
Publishing Details
This document was written and produced by Joblogic’s Technical Writing team and was last updated on the date specified above. Be aware that the information provided may be subject to change following further updates on the matter becoming available or new releases within the system. Additionally, details within the guide may vary depending on your Joblogic account’s user permissions and settings.