Stock Module Summary
The Joblogic Stock Module provides you with the following functionality:
● Stock Records - Allowing the recording of ‘in stock’ parts & equipment records.
● Locations - locations that stock can be held within, these include static locations and mobile locations (by adding vehicles via the settings menu).
● Vehicles - Recording of vehicles providing the ability to link mobile stock locations to engineers (providing the ability to record and track ‘van stock’).
● Stock Transfer - Allowing the movement of stock from one stock location to another.
● Stock Purchase Orders - Raising of Purchase Orders to receive stock into stock locations for use on jobs.
● Issuing Stock to Jobs - Allowing the issue of stock to jobs either through the back office or on the engineer mobile app.
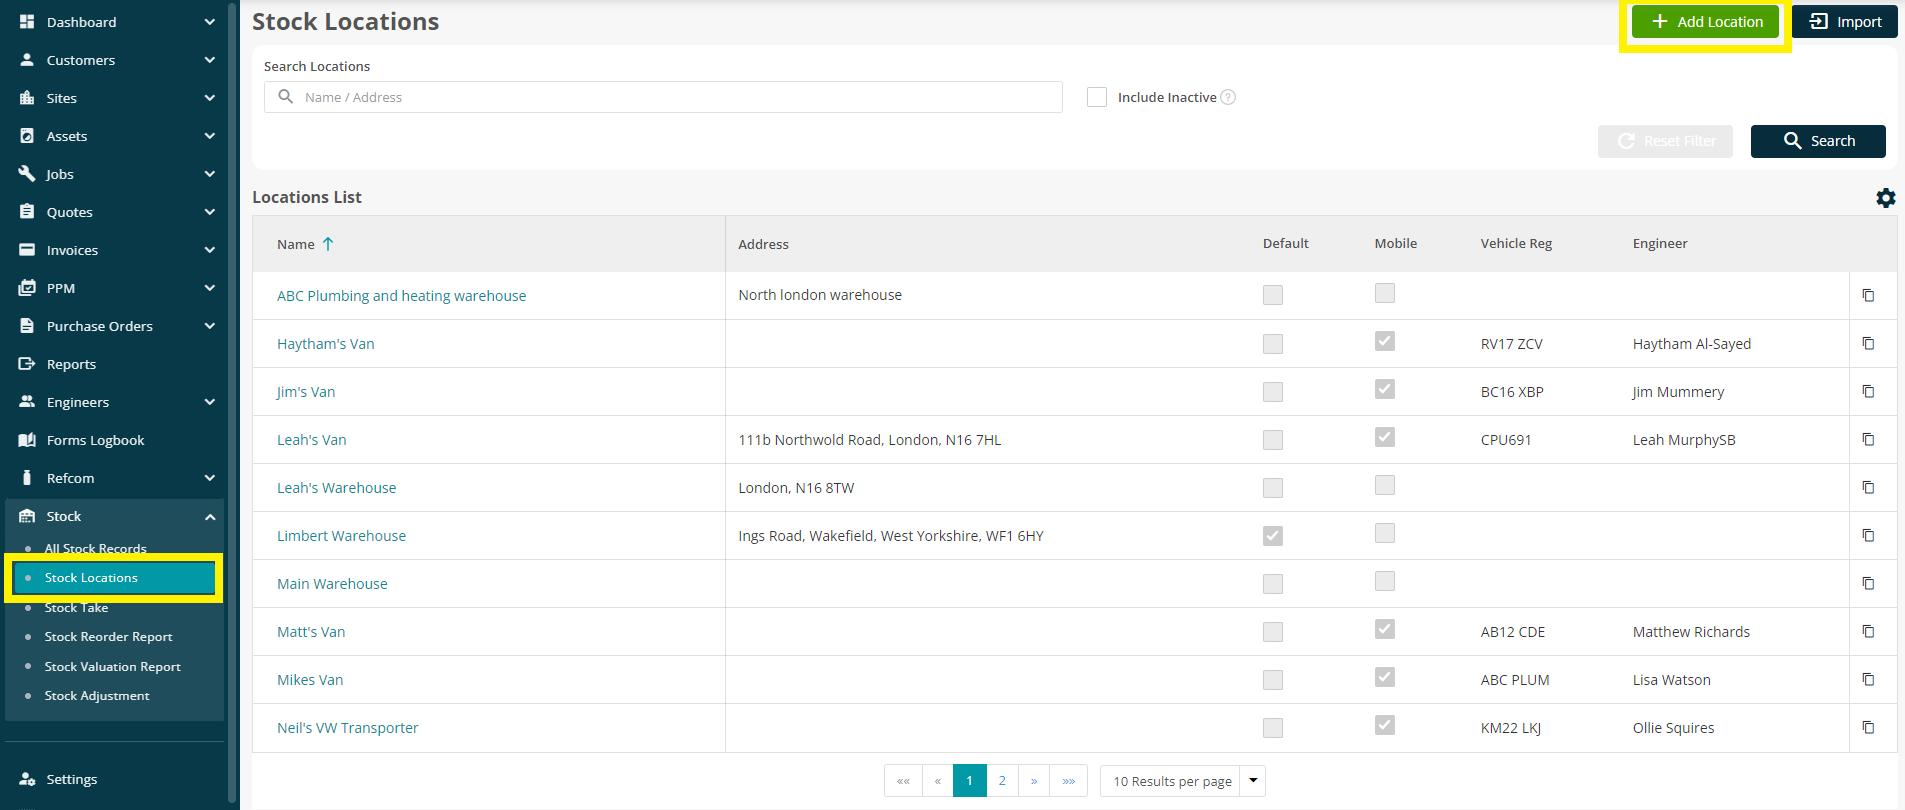
Stock Locations
To access Stoke Locations, select Stock > Stock Locations. Within the “Locations” screen you can view and edit existing stock location records and add new stock locations. To add a new stock location, click the “Add Location” action button located in the top right of this screen.
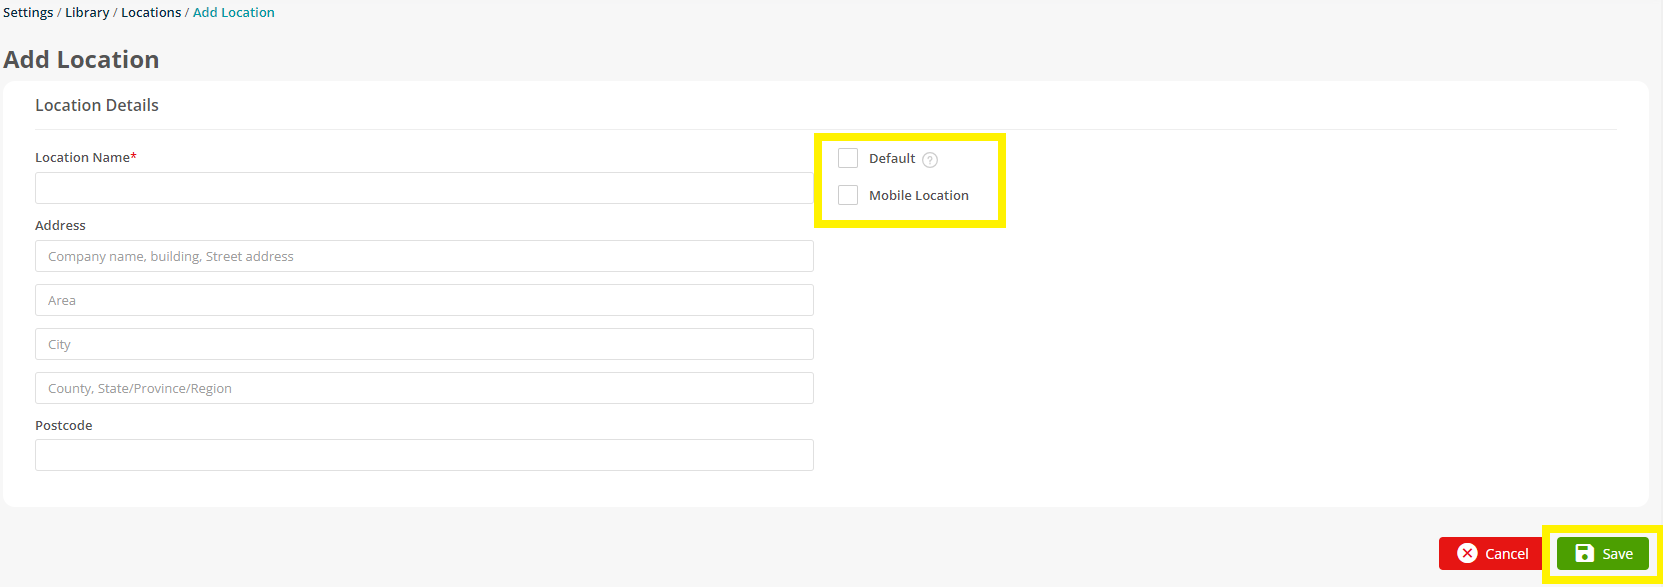
Populate the ‘Location Name’ and ‘Address’ fields in the ‘Add Location’ screen. You can set the Stock Location to be a mobile location (i.e., for ‘Van Stock’) by selecting the ‘Mobile Location checkbox. (See mobile stock locations section below for more information.
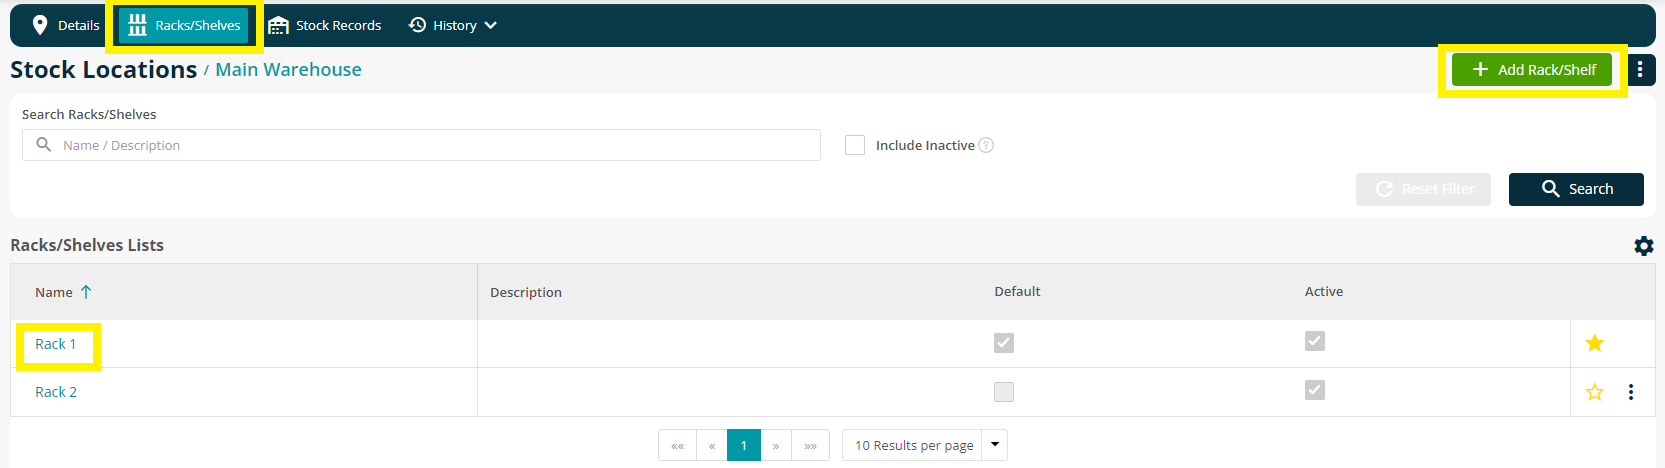
Once the location record has been saved you will be able to add racks or shelves for the location by selecting the ‘Racks/Shelves’ tab.
NOTE: A default rack/shelf is created automatically when saving a stock location record.
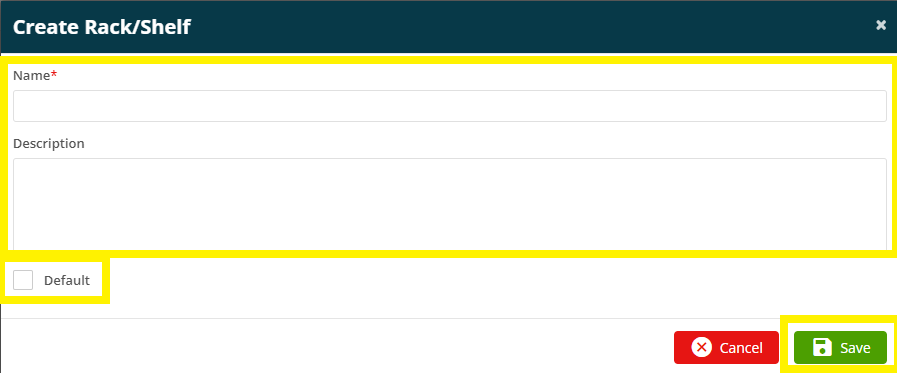
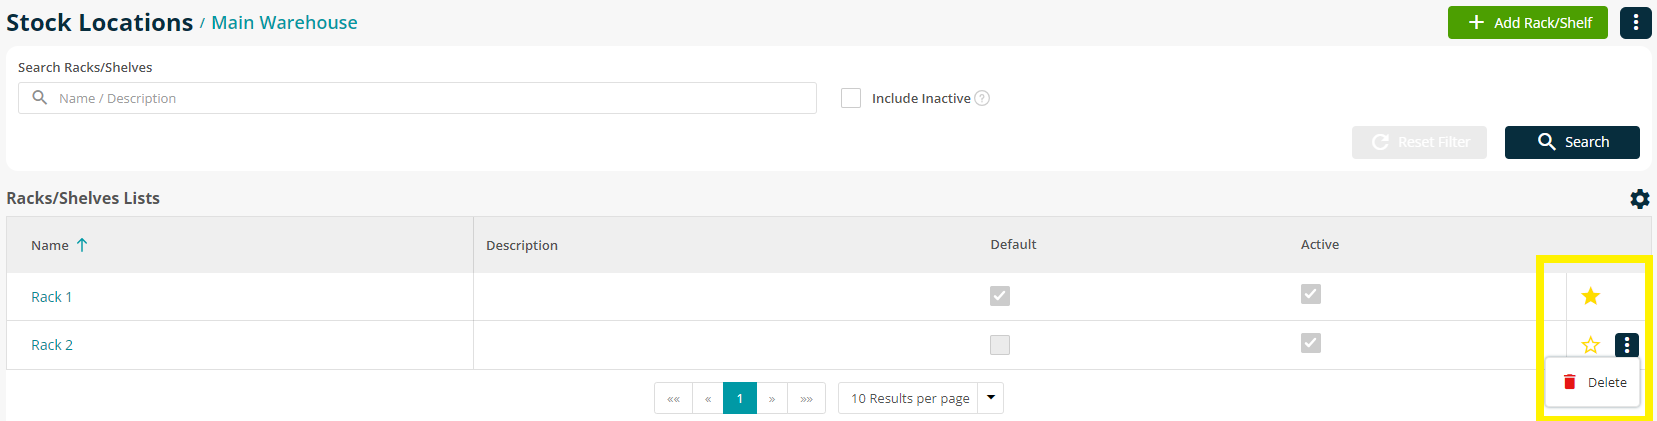
To edit an existing rack/shelf record, click on its name. To add an additional rack/shelf to the location, click the green ‘Add Rack/Shelf’ button located at the top right of the screen.
Complete the ‘Name’ field, and the description if required. Select the ‘Default’ checkbox if you require this rack/shelf record to be set as the default for this stock location.
To delete a rack/shelf record ensure it isn’t currently selected as a default (the filled in yellow star icon indicates the default record) and select the 3 dots icon to the far right of the rack/shelf record. The Delete button will appear and click confirm.
Mobile Stock Locations
When the “Mobile Location” checkbox is selected in the “Add Location” screen the “Vehicle Registration” dropdown will appear.
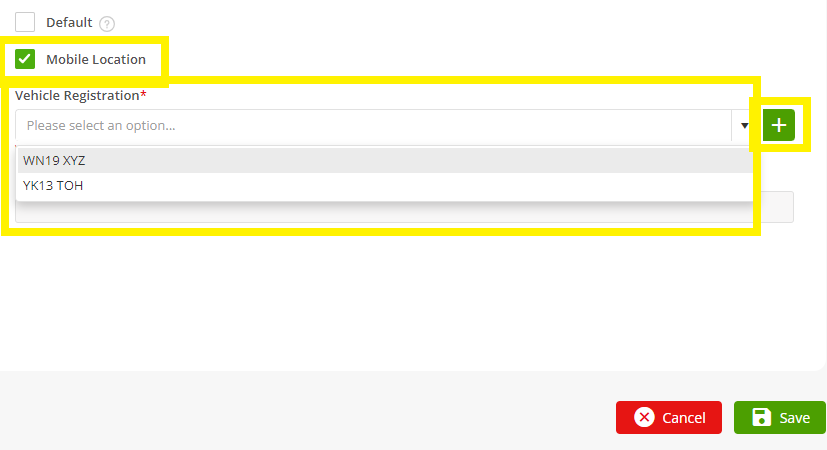
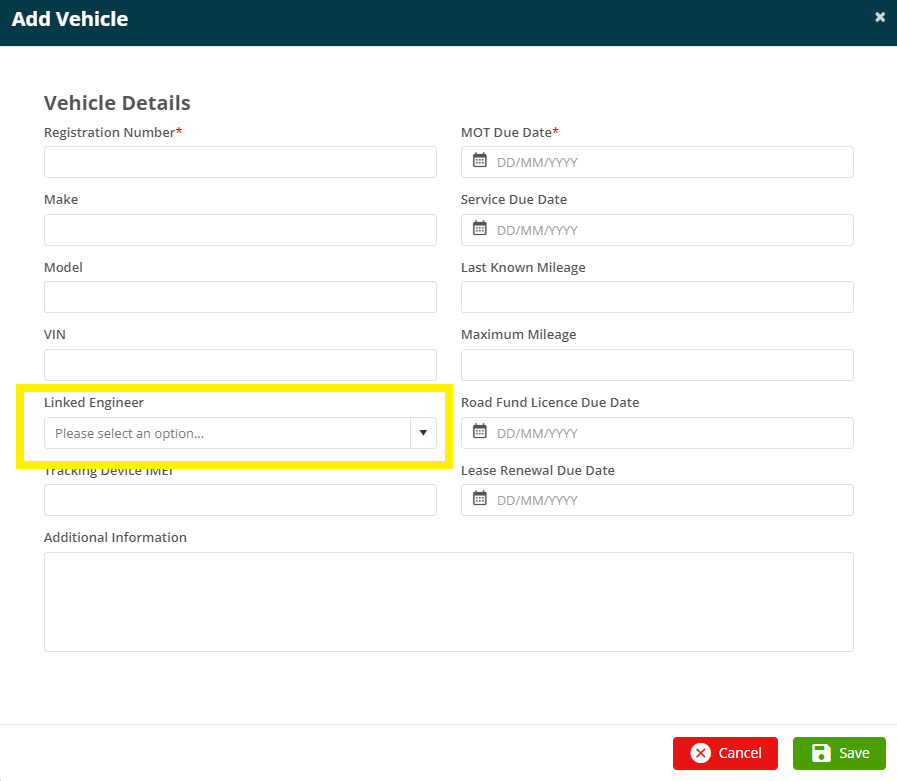
Within this screen you can add vehicle details if not previously added by selecting the add button located at the right hand side of the “Vehicle Registration” dropdown field. To link the vehicle to an existing engineer record use the “Linked Engineer” dropdown field to select the required engineer record:
Once saved the “Racks/Shelves” tab appears allowing you to configure racks/shelves for the mobile stock location if required (see section above for details regarding working with rack/shelf records).
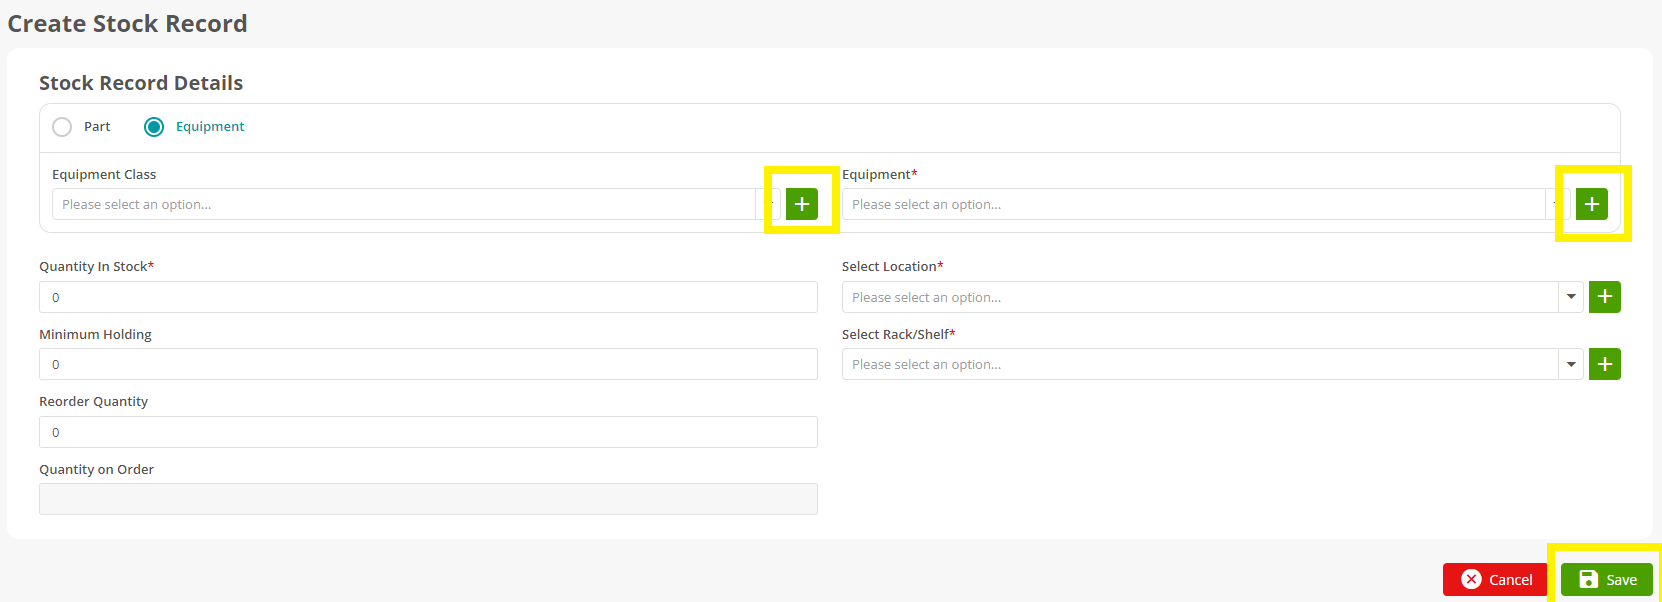
Adding a Stock Record
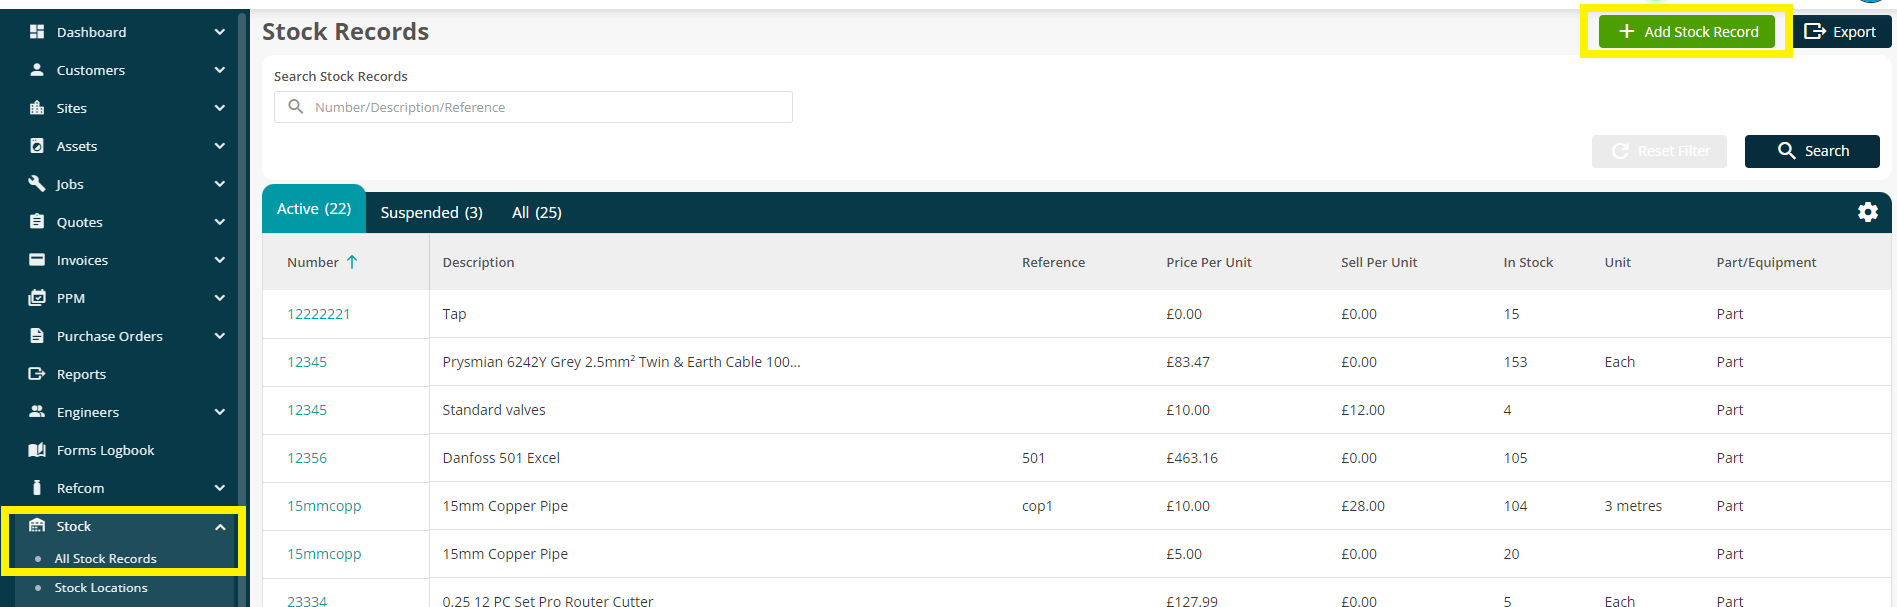
To access the “Stock Records” screen select Stock > All Stock Records. Within the “Stock Records” screen you can search for existing active or suspended stock records, you can edit existing stock records and are able to add stock records by clicking the “Add Stock” action button located in the top right corner of this screen. You can also create a CSV export file of the records by clicking the “Export” action button located in the top right corner of this screen.
To add a new stock record, select the green ‘Add Stock Record’ button on the right hand corner of the All Stock Records screen.
The “Create Stock Record” screen will be displayed. Fill in all the relevant information, and click ‘Save’.
NOTE
New parts or equipment library records can also be added whilst within this screen by clicking the button to the right of the dropdown field (please refer to other training resources for details on adding parts/equipment library records to your Joblogic system).
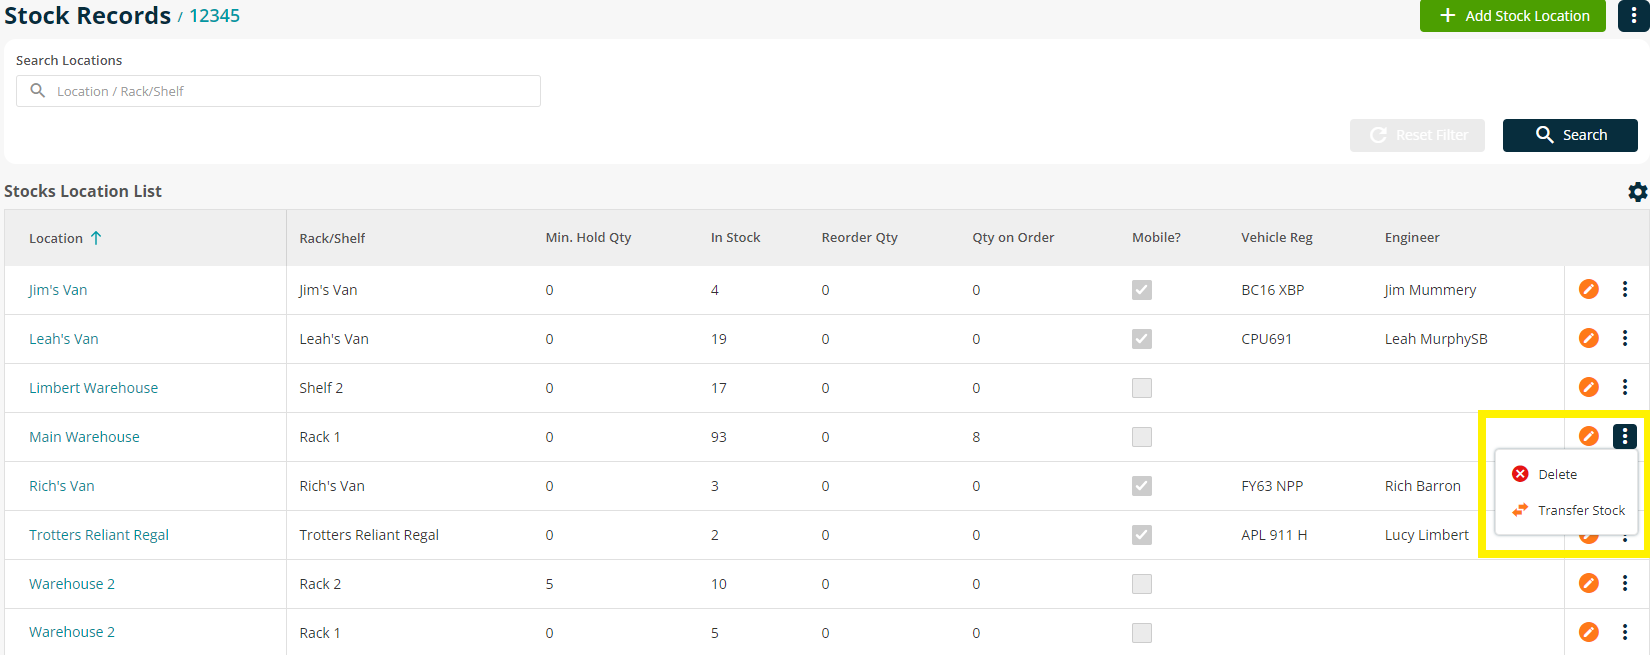
To view details of the stock records in their stock locations select the “Stock Location” tab. From here stock can also be transferred between locations. This is useful if an engineer is low in stock for their van, and has picked some up from another stock location, like a warehouse. To Transfer stock between locations, click the three dots next to the stock you want to transfer and select ‘Transfer Stock’.
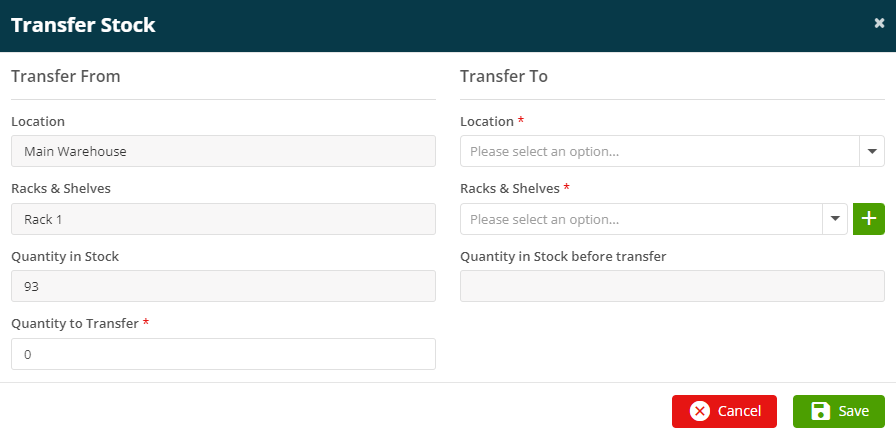
The “Transfer Stock” screen opens, allowing you to enter in the location and Racks & Shelves the stock is to be transferred to. Once saved, the stock levels will be adjusted based on the “Quantity to Transfer” information populated.
Stock Purchase Orders
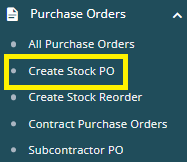
To add a stock purchase order either select Purchase Orders > Create Stock PO from the left hand menu or click the “Create Stock PO” action button located in the top right hand corner of the “Purchase Orders” screen:

In the “Add Stock Purchase Order” screen select the required stock location in the “Stock Delivery Location” dropdown field and the required supplier in the “Supplier” dropdown field:
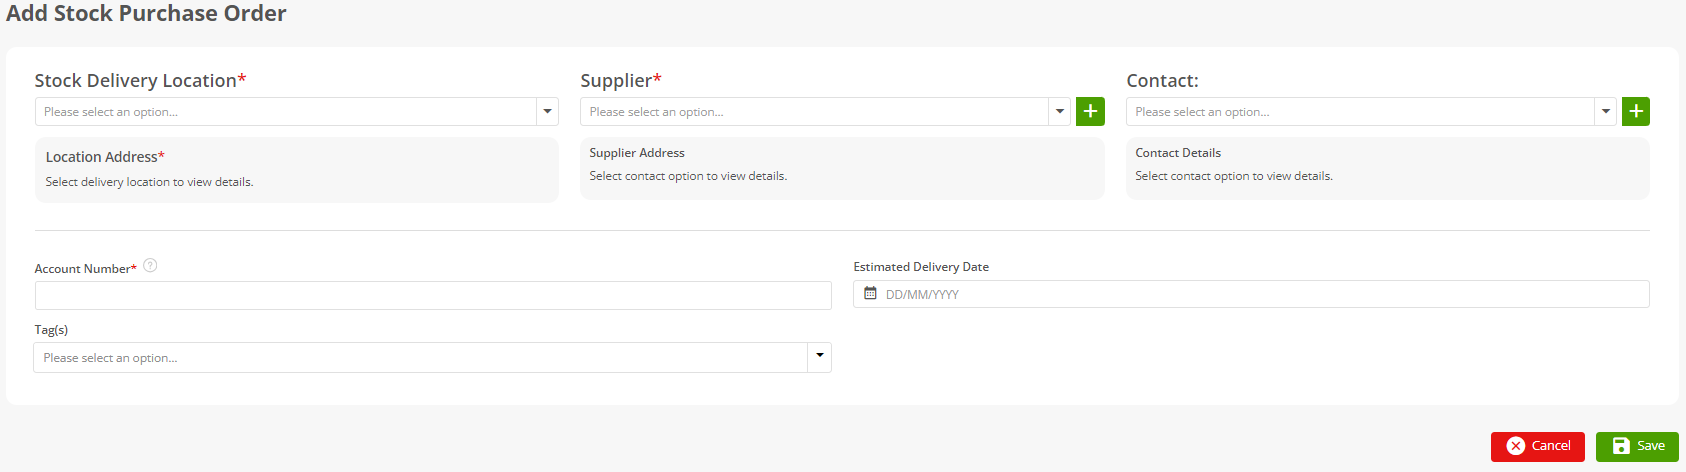
The stock location address will populate in the “Location Address” section of the screen once the stock location has been selected in the “Stock Delivery Location” dropdown field. To edit the stock location address, click the orange edit button to the right of the “Location Address” label.
NOTE
Modifying the address here is updating the address held against the stock location, it is not editing the delivery address for just this purchase order record.
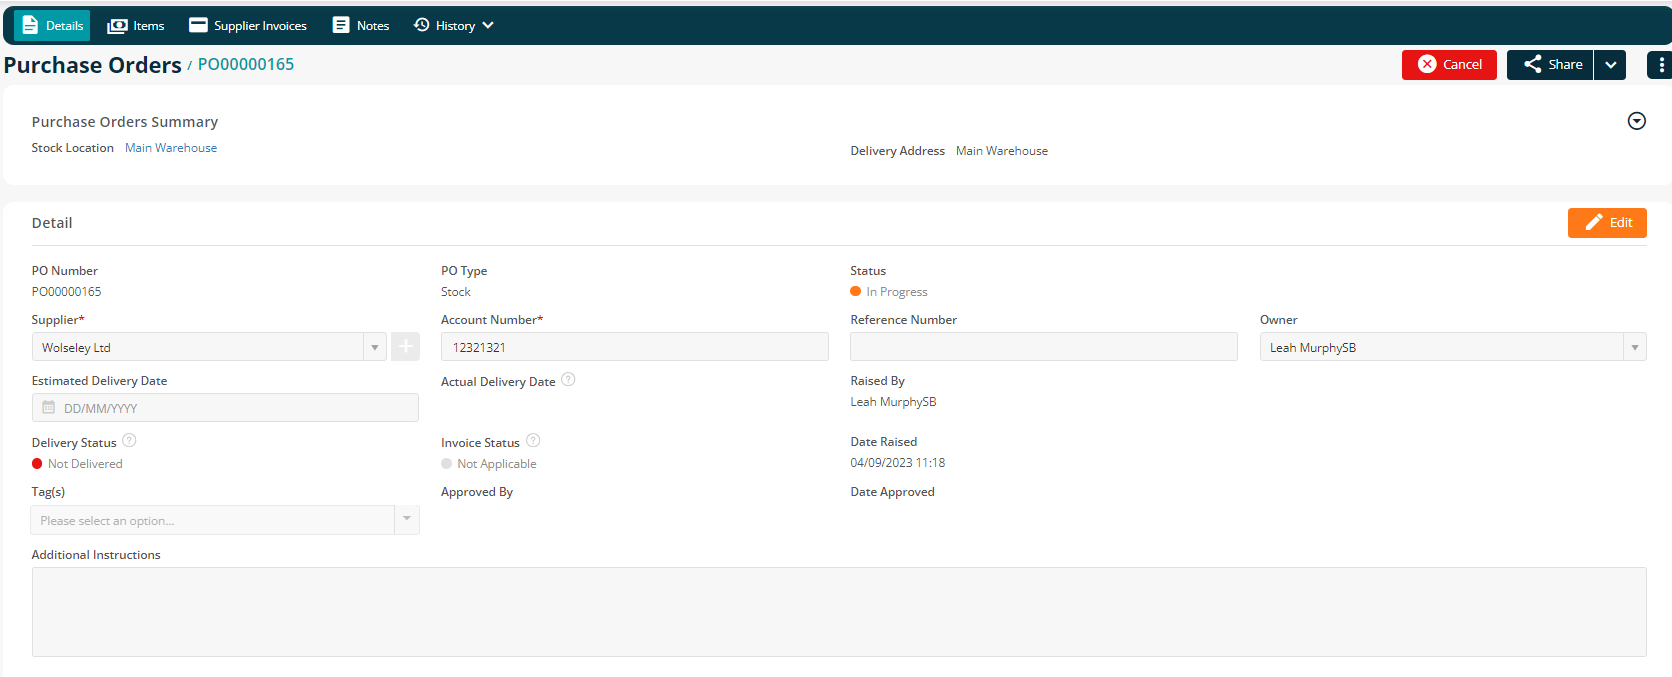
Once saved, the “Items”, “Supplier Invoices” and “Notes” tabs become available (the same as are available in a non-Stock PO record). Select the “Items” tab to add the required items you wish to order for the selected stock location (Please see additional training resources for working with Purchase Orders if you are unsure of how to use the Purchase Order module).
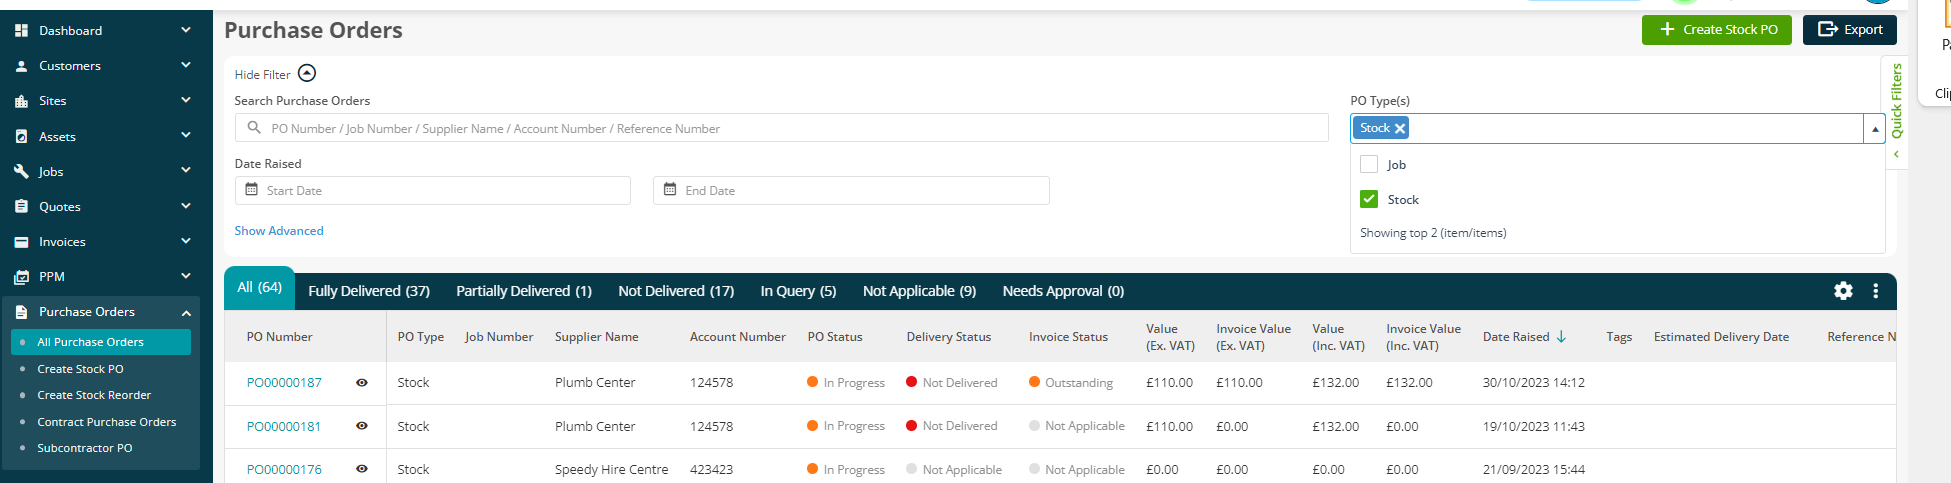
Accessing existing Stock Purchase Orders
To find existing Stock Purchase Orders select Purchase Orders > All Purchase Orders from the left hand panel:
Click on the PO Number to open the required purchase order record to edit details, deliver line items or enter Supplier Invoices for the PO.
Once Stock PO item lines have been delivered you can view the updated quantities in Stock > All Stock Records. The quantity in stock is displayed in the “In Stock” column within the table view in this screen:
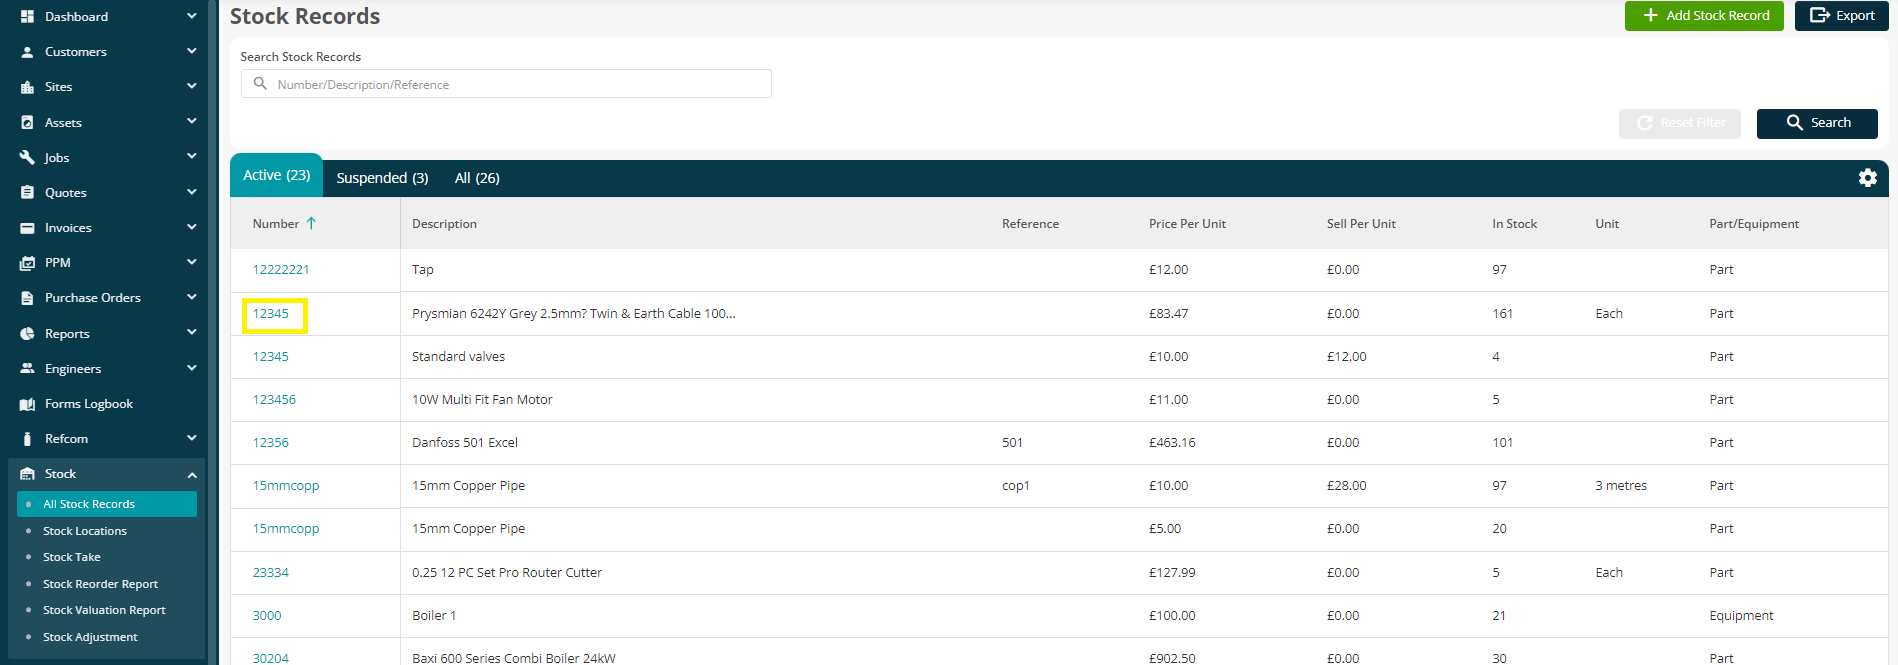
Click the “Stock Location” tab to view details of the stock record levels in specific stock locations:
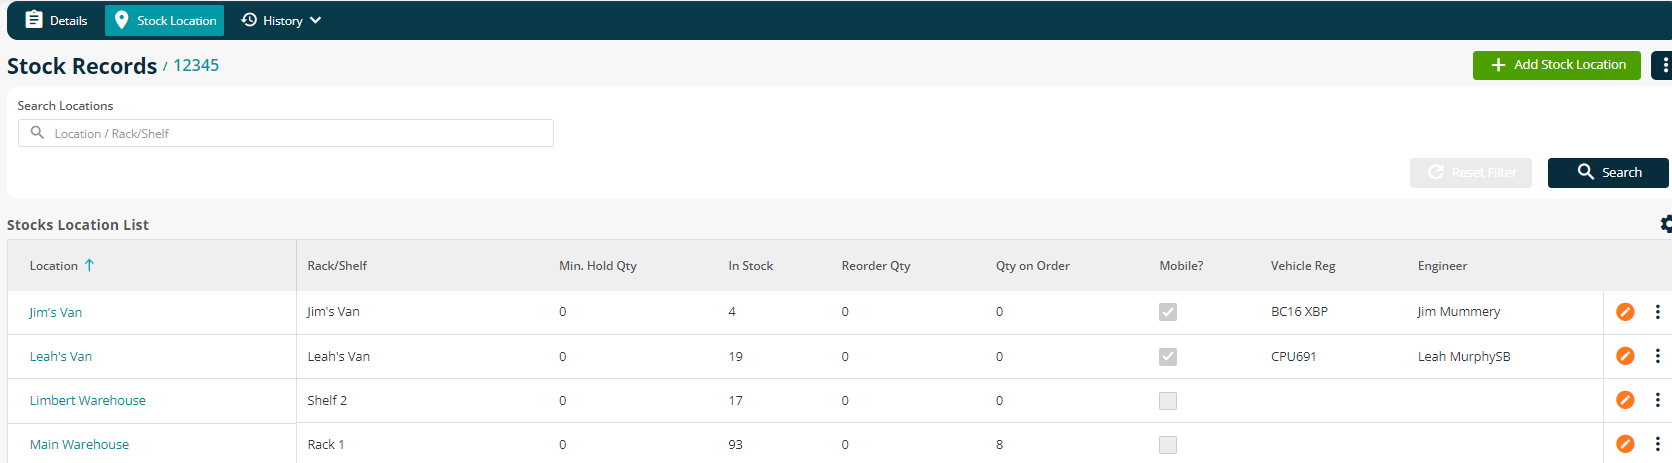
For more details regarding the options available in this screen please refer to the “Stock Records” section above.
Click the “Audits” tab to view details of both stock transactions for the selected stock record, and changes to the location of this stock record.

For more details regarding the options available in this screen please refer to the “Stock Records” section above.
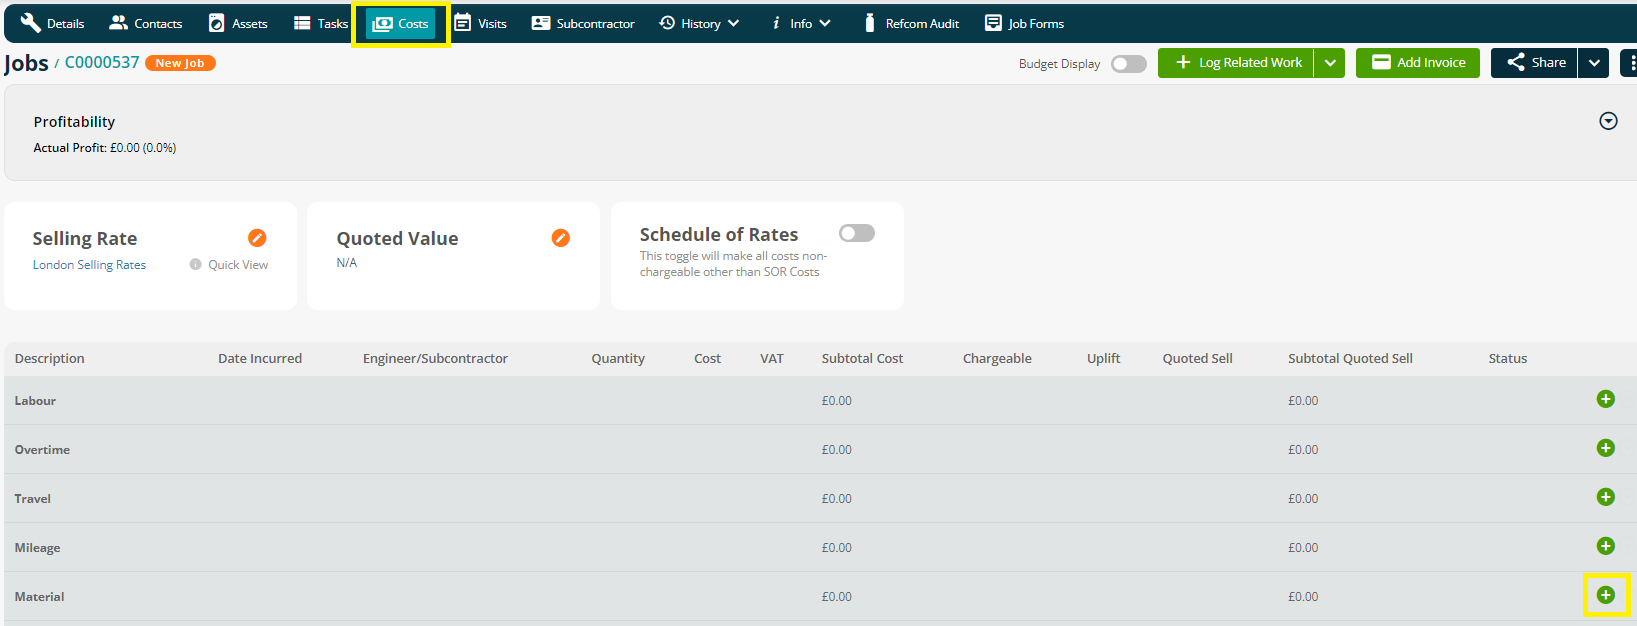
Issuing Stock to Jobs
To issue stock to a job open the required job record and click on the “Costs” tab, click the “Add Material” button:
The “Add Material Costs” window appears. Click the “Issue from Stock?” checkbox to enable additional fields below the “Part Category” and “Part” dropdown fields.
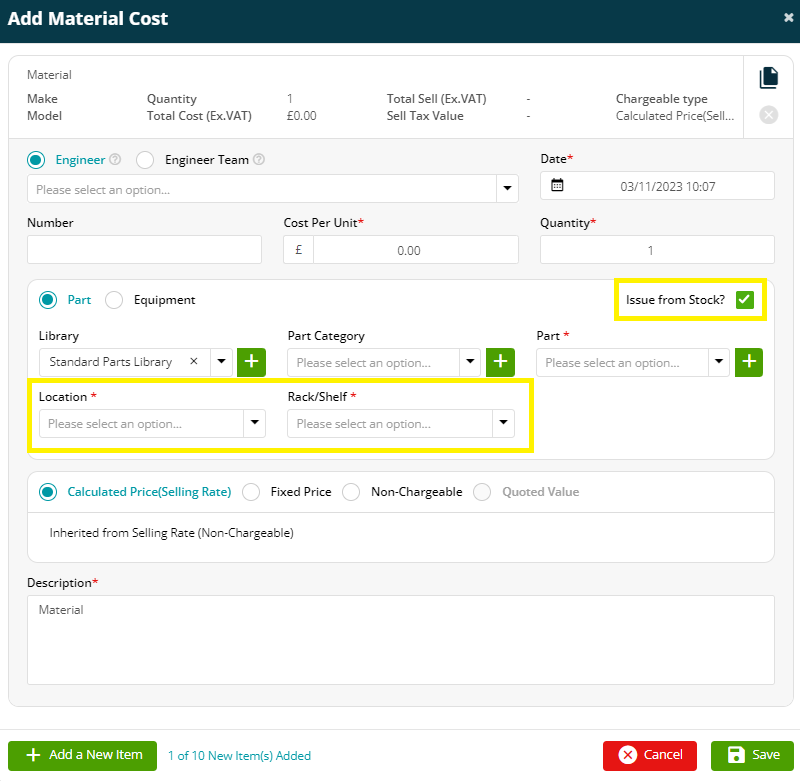
This results in the “Part”, “Location” and “Rack/Shelf” fields being set to mandatory. Select the required options in the dropdown fields and update other fields within the material costs window as required.
Click “Save” to complete the job stock issue process.
The job stock issue transaction is visible in the Stock Record “Audits” tab (Stock > All Stock Records) we saw above.
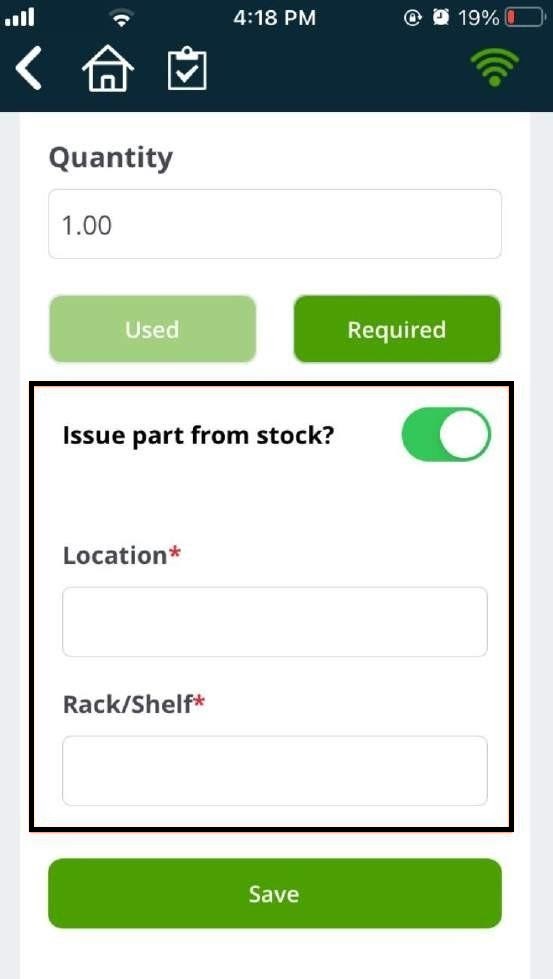
The issue part from stock option is also available to the engineer when using the joblogic mobile app:
Reversing a job stock issue
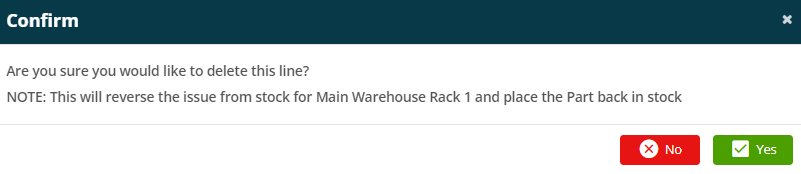
To reverse the stock issued to a job, click on the three dots to the right hand side of the material you want to reverse:

Select Delete. A confirmation window appears to let you know this stock will be place the part back in Stock. Click “Yes”.
Further Support
For further information or assistance with the above, contact our Support Team on 0800 326 5561 or email support@joblogic.com. Alternatively, our Customer Success Management team can be reached by emailing customersuccess@joblogic.com
## Publishing Details
This document was written and produced by Joblogic’s Technical Writing team and was last updated on the date specified above. Be aware that the information provided may be subject to change following further updates on the matter becoming available. Additionally, details within the guide may vary depending on your Joblogic account’s user permissions.