- 06 Jun 2024
- 1 Minute to read
- Print
- PDF
Stock Take
- Updated on 06 Jun 2024
- 1 Minute to read
- Print
- PDF
Introduction
The Stock Take feature within Joblogic allows users to conduct, record and update inventory level checks.
This guide will detail the stock take process within Joblogic’s back-office system.
Accessing the Stock Take Function
The Stock Take function is accessible via the Stock menu in Joblogic. Select "Stock Take" from the options available to begin managing inventory.
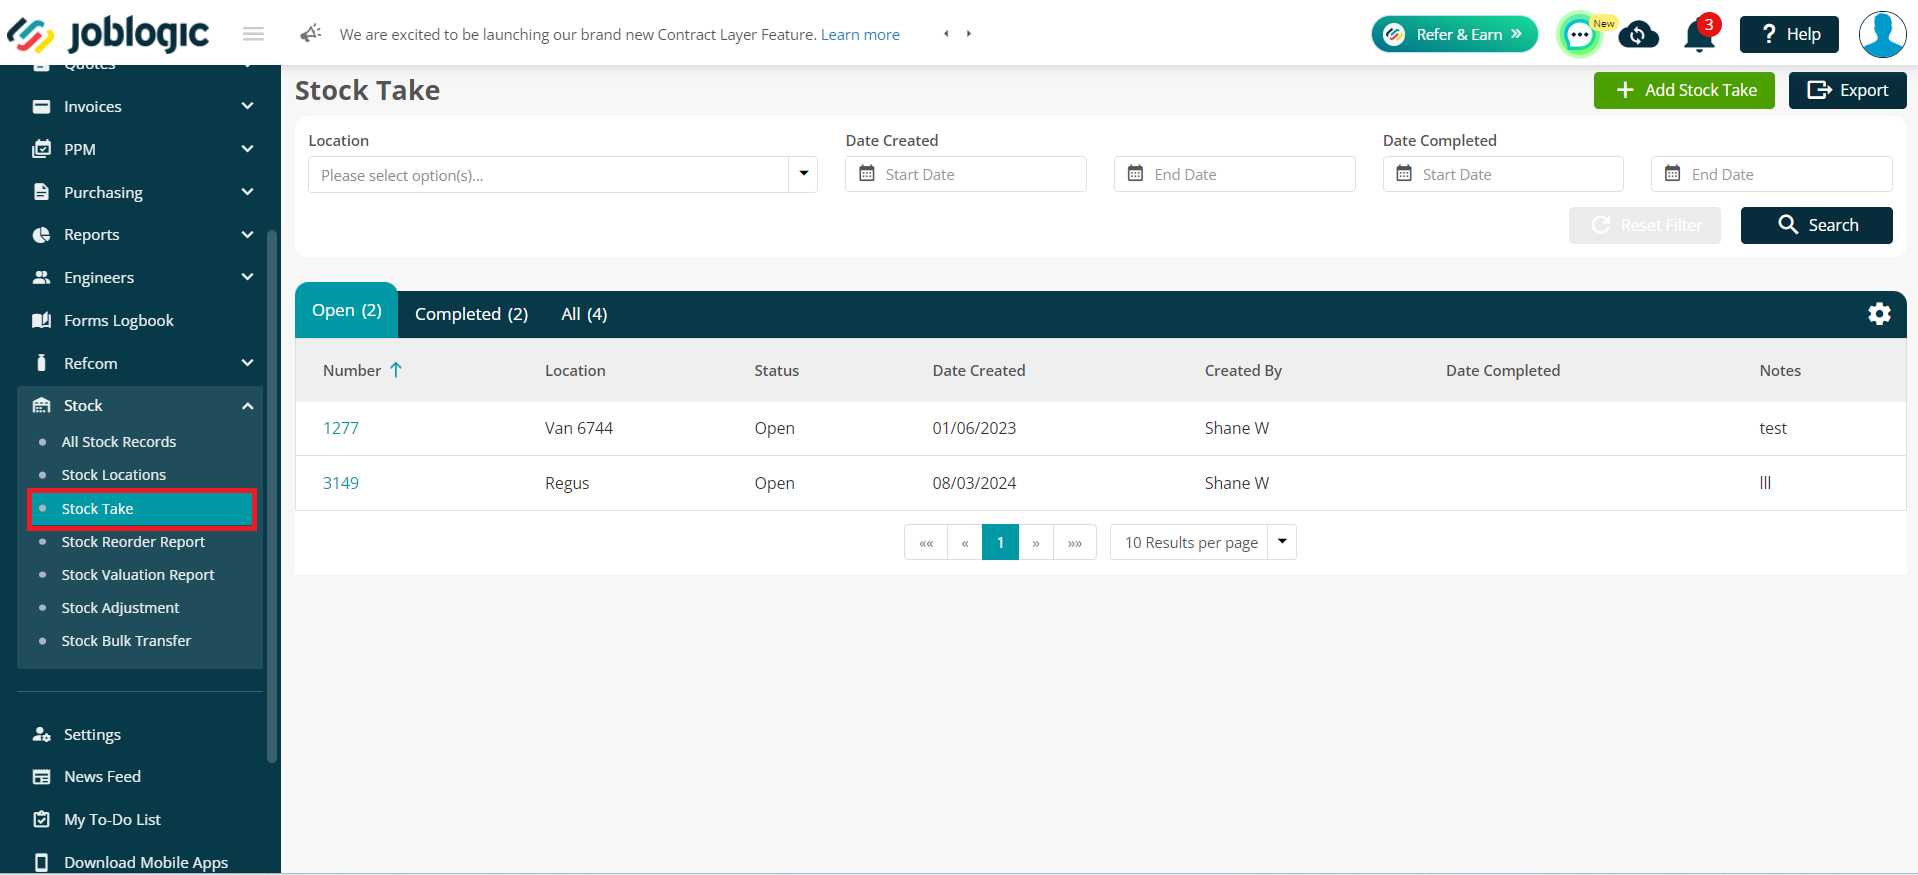
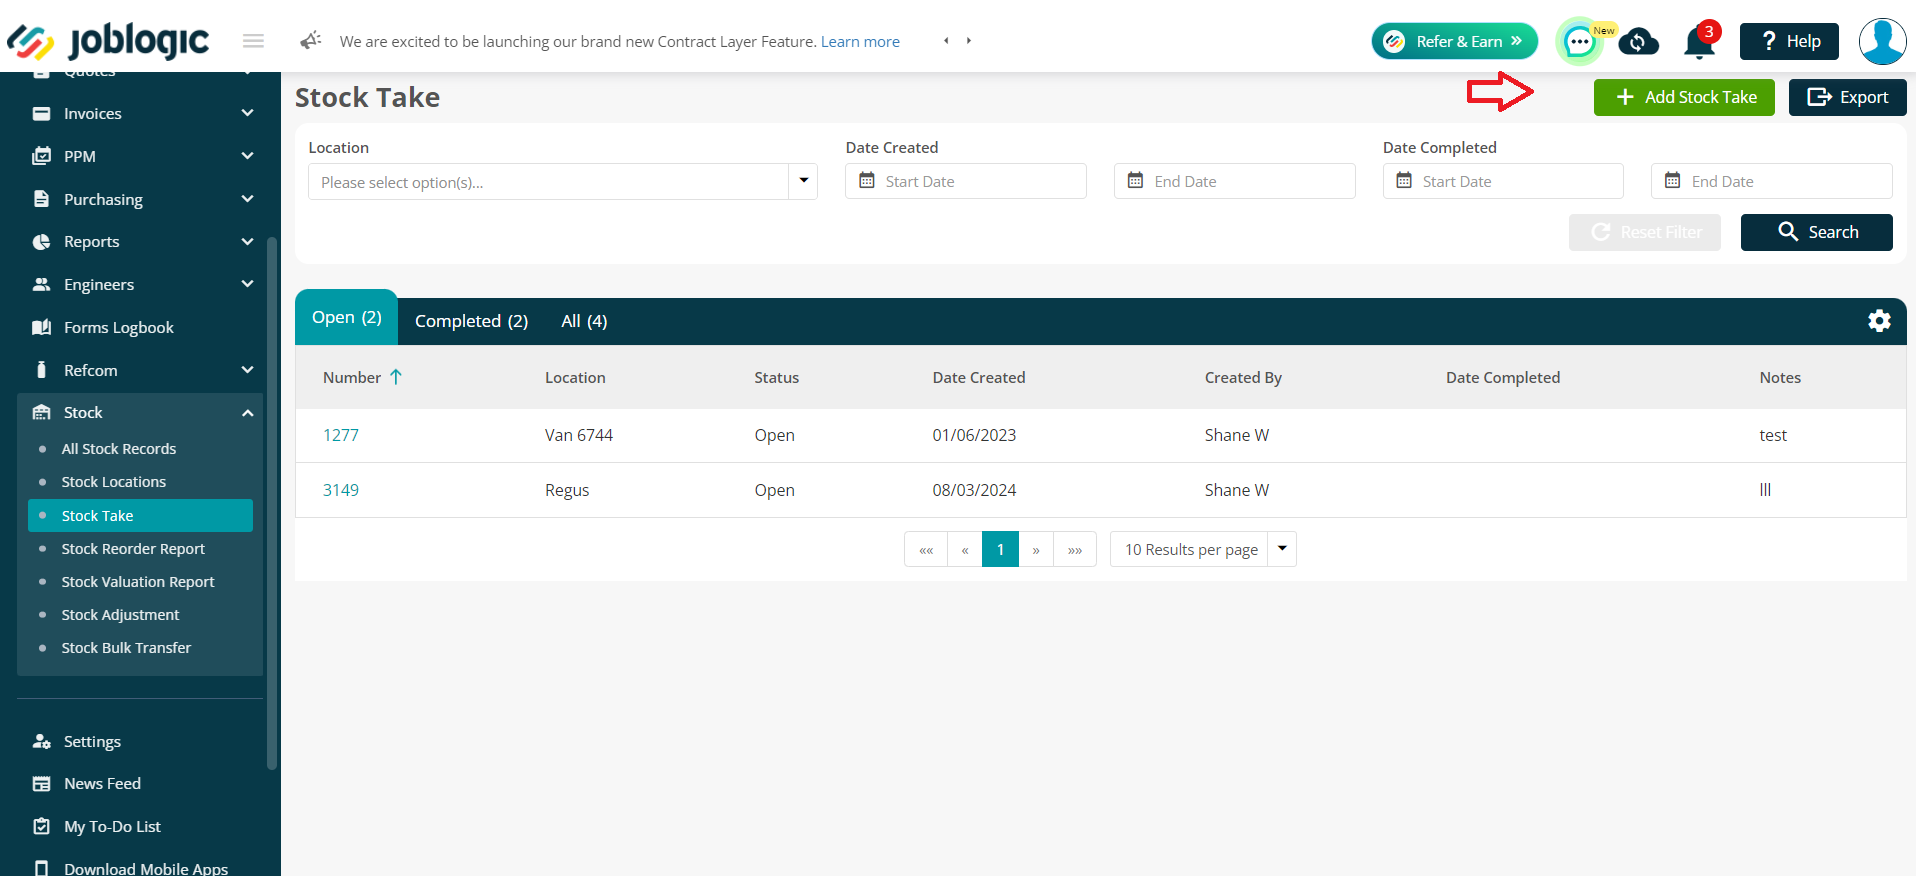
To start a new stock take, choose the option “Add Stock Take” within the Stock Take section.
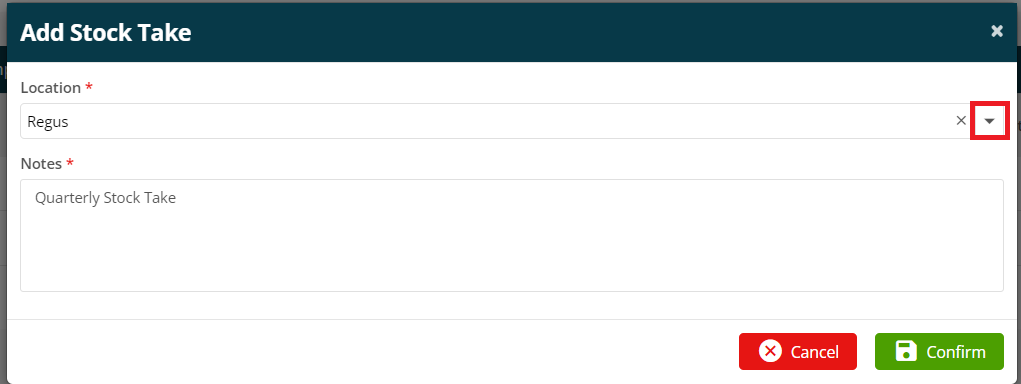
Each stock take must be associated with a specific location, as inventory checks are conducted on a location-by-location basis within the system. Add a note which details the purpose or specific focus of the stock take. Press the “Confirm” button once the location & note have been added.
Performing a Stock Take
Once a stock take record is open, you will be prompted to perform the stock check at the specified location. This is where the actual/physical count of stock items takes place.
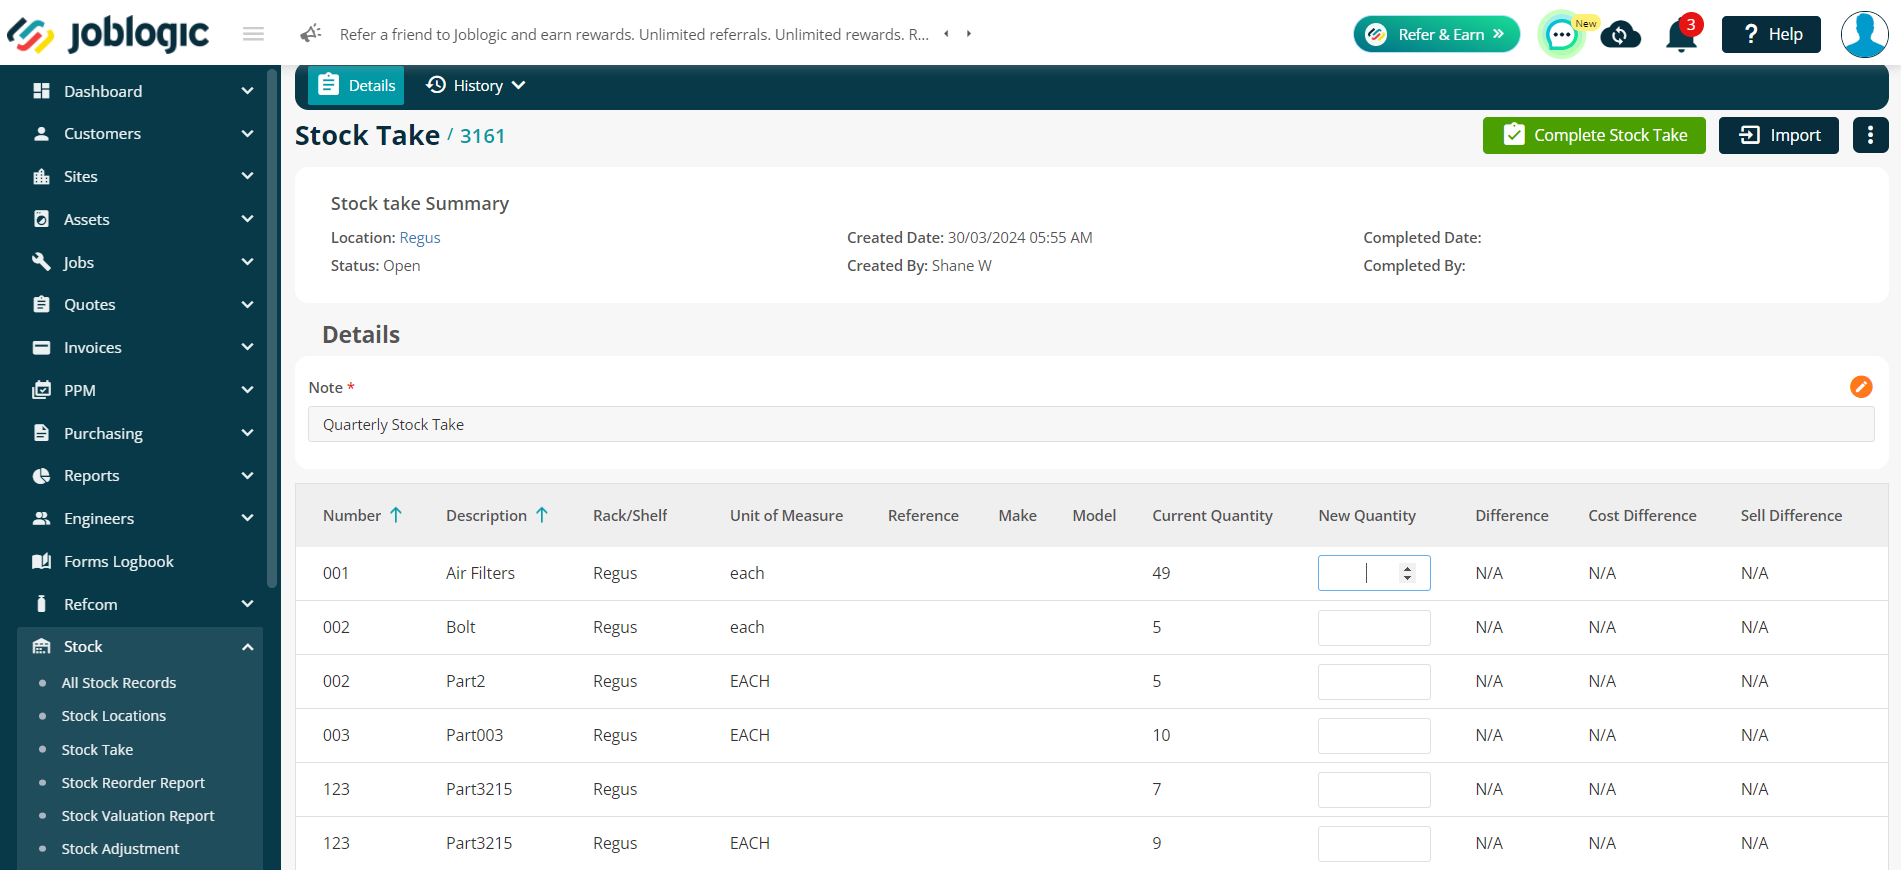
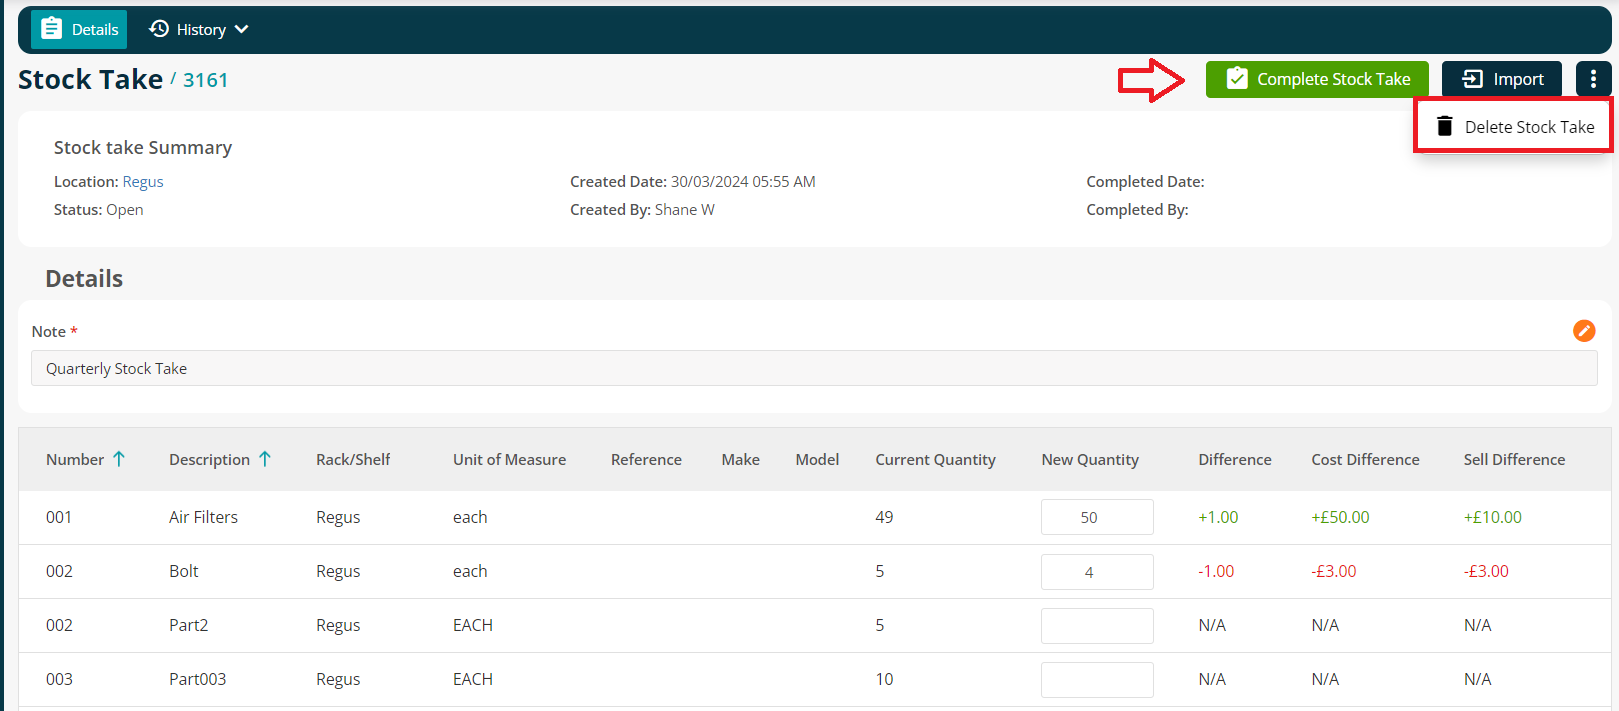
The table shows all the existing stock items against the selected location along with stock Name, Description, Rack/Shelf, Unit of Measure, Make, Model etc.

During the stock take, compare the actual quantities of items with the records currently in the system. You can confirm the existing quantities or update them as necessary to reflect the actual stock levels accurately.
Adding a new quantity will automatically update the following columns Difference, Cost Difference and Sell Difference.

After verifying and adjusting stock quantities, complete the stock take process by pressing the “Complete Stock Take” button. Completing a stock take will update the stock records to match your confirmed counts and update any related audit details accordingly.
The stock take record can also be deleted using the 3 dots button, if required.
Further Support
For further information or assistance with the above, contact our Support Team on 0800 326 5561 or email support@joblogic.com. Alternatively, our Customer Success Management team can be reached by emailing customersuccess@joblogic.com
Publishing Details
This document was written and produced by Joblogic’s Technical Writing team and was last updated on the date specified above. Be aware that the information provided may be subject to change following further updates on the matter becoming available or new releases within the system. Additionally, details within the guide may vary depending on your Joblogic account’s user permissions and settings or the electronic device being used.

